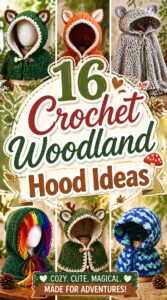
Woodland crochet hoods can take very different forms. Some use recognizable animal details such as fox points, bear ears, or long rabbit ears, while others create the forest mood through a pixie point, earthy patchwork, deep cowl, fringed edge, or storybook cape. The shape matters just as much as the color because it determines how the hood frames the face, covers the neck, and works with coats or other layers.
This collection mixes exact animal-hood tutorials with useful hood constructions that can be adapted to a woodland palette. The projects vary in fit, opening, scarf length, ear shape, texture, shoulder coverage, and closure. Compare the underlying silhouette first, then decide whether your woodland version needs animal features, forest colors, surface texture, or simply a strong fairytale shape.
Quick List
- Crochet Braided Fox Woodland Hood
- Crochet Rounded-Ear Bear Woodland Hood
- Crochet Long-Ear Rabbit Woodland Balaclava Hood
- Crochet Laced-Back Woodland Animal Hood
- Crochet Granny Square Forest Balaclava Hood
- Crochet Smooth-Back Striped Woodland Hooded Scarf
- Crochet Deep-Cowl Woodland Hood
- Crochet Shadow-Stitch Bark Scoodie Hood
- Crochet Storybook Woodland Hooded Cape
- Crochet Fringe-Edge Woodland Hooded Poncho
- Crochet Double-Wrap Trail Hooded Scarf
- Crochet Ripple-Texture Forest Hooded Cowl
- Crochet Pocketed Woodland Hooded Wrap
- Crochet Pointed Pixie Woodland Bonnet Hood
- Crochet Built-In Scarf Woodland Hood
- Crochet Fringe-Tie Forest Hood
Choose the Hood Shape Before Adding Woodland Details
Start by deciding how much of the head, neck, and shoulders the finished piece should cover. A balaclava stays relatively close to the face, while a hooded scarf adds long fabric that can be wrapped around the neck. A cowl keeps the lower section compact, and a cape or poncho extends the concept into a larger wearable layer. Pixie bonnets create their character mostly through the crown shape rather than through added animal pieces.
That distinction matters when adapting a tutorial. Heavy ears may pull on a very soft hood, while long scarf tails can already provide plenty of visual movement without fringe or extra decorations. For everyday wear, prioritize a hood that sits comfortably before adding woodland accents. For costume or festival styling, a more exaggerated point, ear shape, or cape silhouette can carry much more of the theme.
Yarn Drape and Structure Can Change the Woodland Silhouette
A hood needs enough flexibility to sit around the head without behaving like a rigid basket, but some woodland details need more structure than others. Long rabbit ears and sharp fox points need clearer definition than a plain rounded cowl. A very loose, fluid fabric may make them droop, while an overly stiff fabric can make the hood stand away from the face.
Texture changes the result too. Granny clusters, raised stitches, ribbing, and shadow-style patterns already create strong visual interest. If the fabric is busy, keep added woodland motifs restrained. A smoother hood gives you more room for contrasting ears or appliqués. When substituting yarn, make a fabric sample and compare its drape with the tutorial’s finished result rather than assuming that matching yarn weight alone will preserve the same fit and shape.
Plan Ears, Points, Closures, and Scarf Ends as Functional Parts
Woodland embellishments should not be treated as last-minute decorations. Pin ears temporarily to the completed hood and look at them while the hood is actually being worn. An ear position that seems centered on a flat table can sit too far backward once the fabric curves around the head.
The same principle applies to ties, fringe, buttons, and long scarf sections. Check whether the hood stays where you want it before adding more weight. If the project is for a young child, reconsider unnecessary long cords or loosely attached decorative pieces around the neck and face. For adult fantasy styling, long ties and fringe can be intentional parts of the silhouette, but they should still suit the way the piece will be worn. A successful woodland adaptation begins with a functional base and adds character without fighting that base.
1. Crochet Braided Fox Woodland Hood
 SAVE
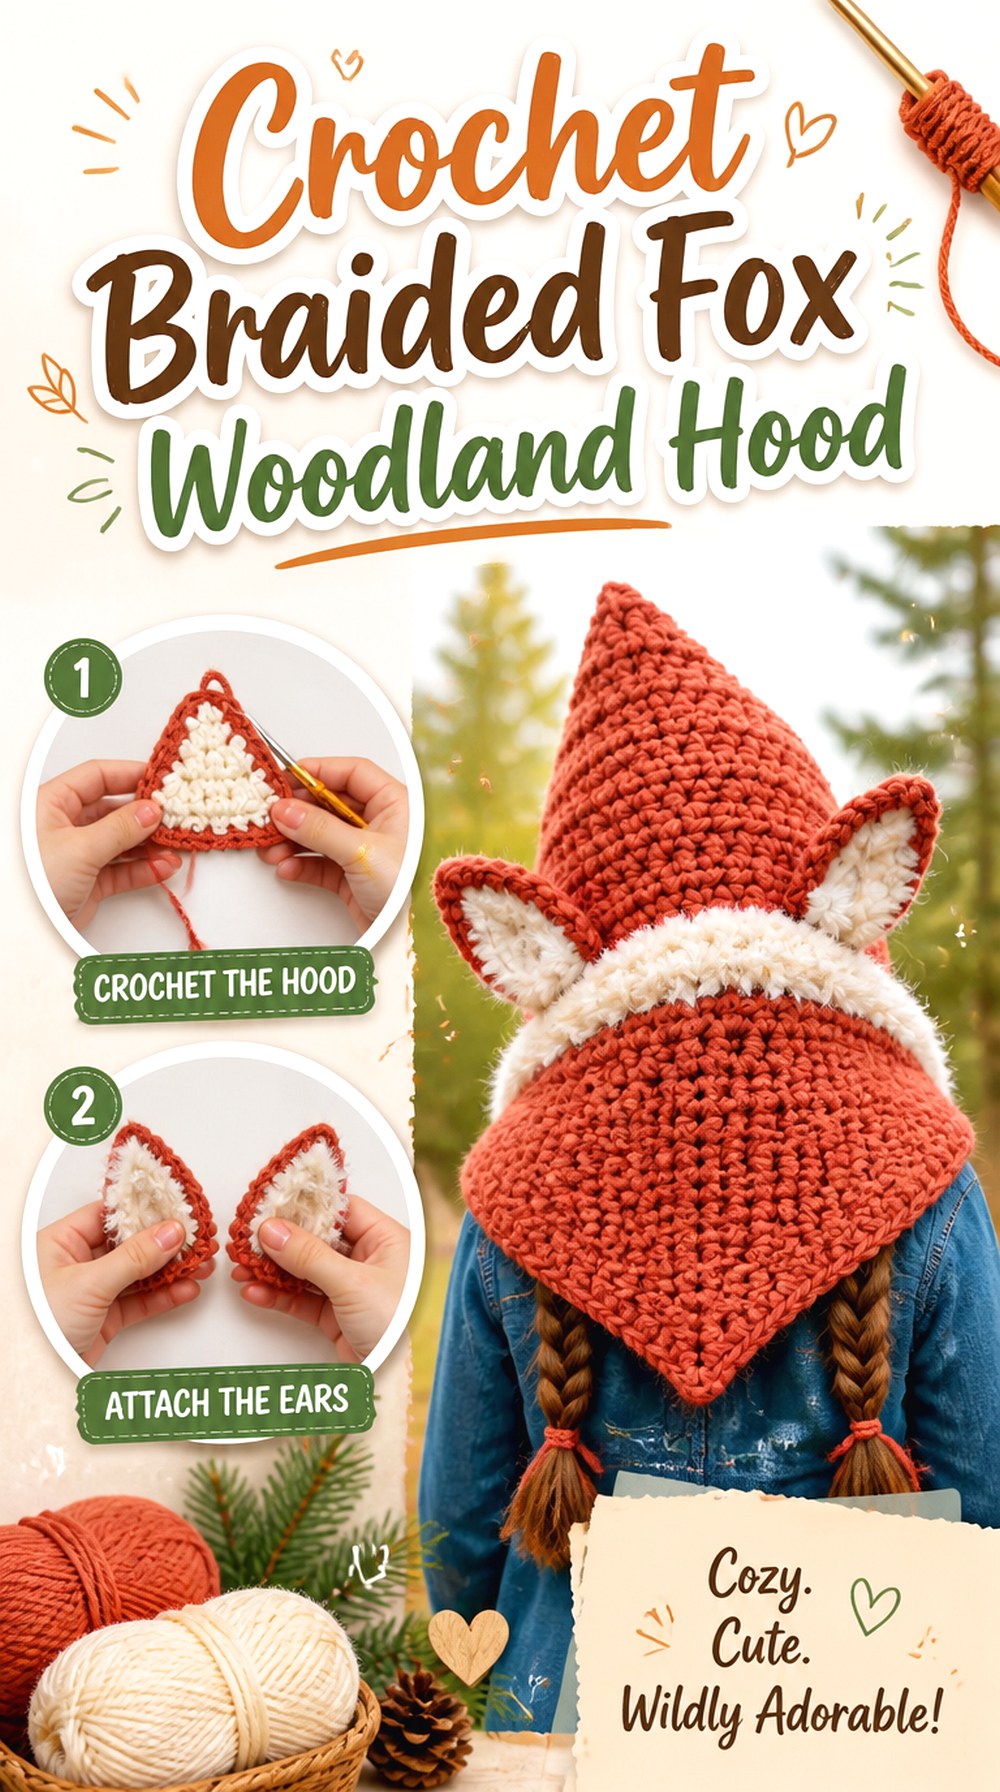
A fox hood is one of the clearest woodland directions because its identity comes from silhouette rather than color alone. This version combines a fitted hood shape with pointed fox ears and long braids, giving the lower edge visual weight while keeping the animal detail concentrated around the head. Crochet with illJay’s tutorial is specifically for a fox hood with braids, so it provides a much closer source match than adapting an ordinary hood after the fact.
The design suits a storybook or costume-focused woodland look, but a more subdued rust, brown, gray, or cream combination could make the same basic shape less theatrical.
Keep the Fox Points Visible Without Overloading the Crown
Pointed ears need enough definition to remain readable from the front and side. If you change the original yarn, check how well a small sample holds an edge before committing to the ear pieces. A very soft substitution can turn sharp fox ears into rounded folds.
The hood already has strong animal character, so additional facial appliqués are optional rather than necessary. Keeping the crown relatively uncluttered also prevents several small details from competing for attention.
Braids Make the Lower Edge Part of the Design
The braids are more than an embellishment because they visually extend the hood below the face. Think about their role before adding other long details such as tassels or extra fringe. Too many hanging elements can make a compact fox hood feel disproportionately busy.
If you want a quieter woodland version, let the ears and color blocking remain the main identifiers and reduce other decorative additions rather than changing the underlying fox shape.
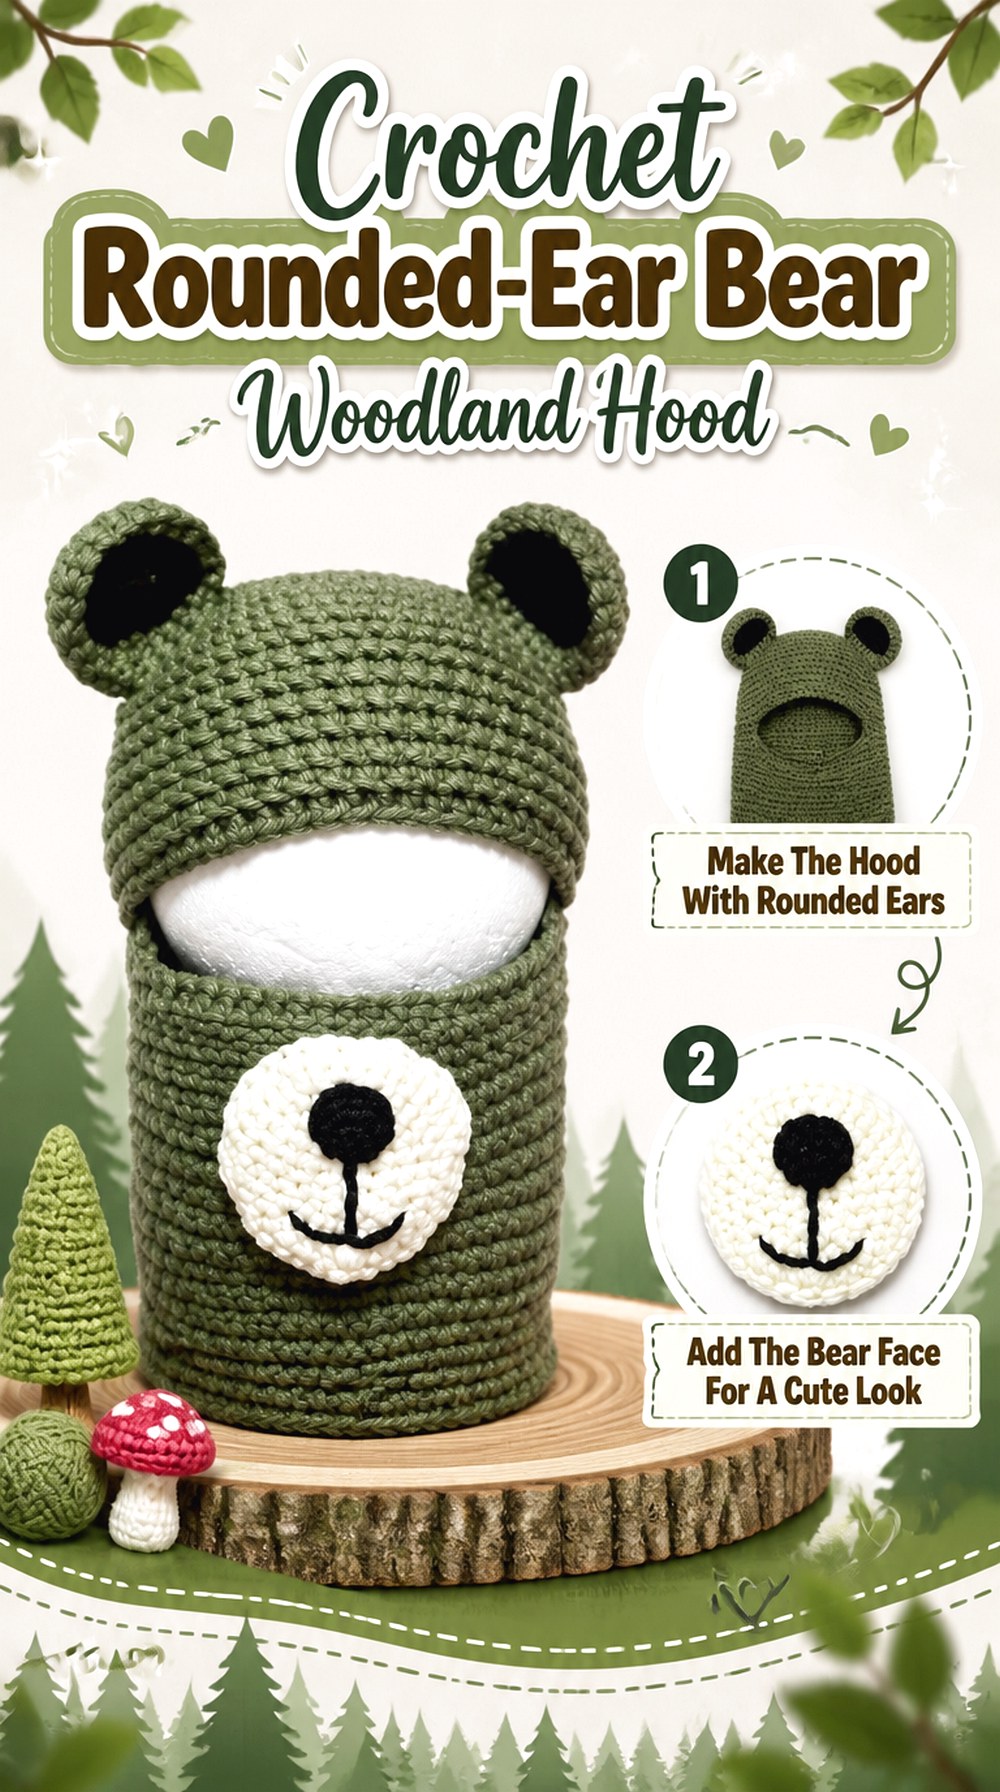
2. Crochet Rounded Ear Bear Woodland Hood
 SAVE
Rounded ears create a softer woodland silhouette than the sharp fox hood. Juanita SJ’s tutorial shows an actual crochet bear hood rather than a generic hood with an unrelated animal idea added later. That makes this project useful for readers who want the animal identity to remain simple and immediately recognizable.
A brown, mushroom, oatmeal, charcoal, or honey-colored version could lean naturally into forest styling. Because the ears are compact, this idea also avoids the extra visual and physical length of rabbit ears or long scarf tails. The main planning question is how the hood frames the face once the rounded ears are in place.
Rounded Ears Need Balanced Placement
Small bear ears can disappear if they sit too far behind the crown. Before permanently attaching or adapting any ear placement, put the hood on and mark positions that remain visible from the front.
Also compare the ear scale with the hood itself. Making them substantially larger may shift the design away from a quiet bear look and put extra weight on the crown.
Let a Simple Face Opening Keep the Bear Shape Wearable
A bear hood does not need numerous raised facial pieces to communicate the animal. Rounded ears plus a suitable woodland palette may be enough, especially if the hood is intended for ordinary cold-weather layering rather than costume use.
Keeping the face opening relatively uncluttered also makes it easier to judge comfort, peripheral visibility, and how the hood works with a coat collar.
Original Tutorial and Creator Credit
Creator: Juanita SJ
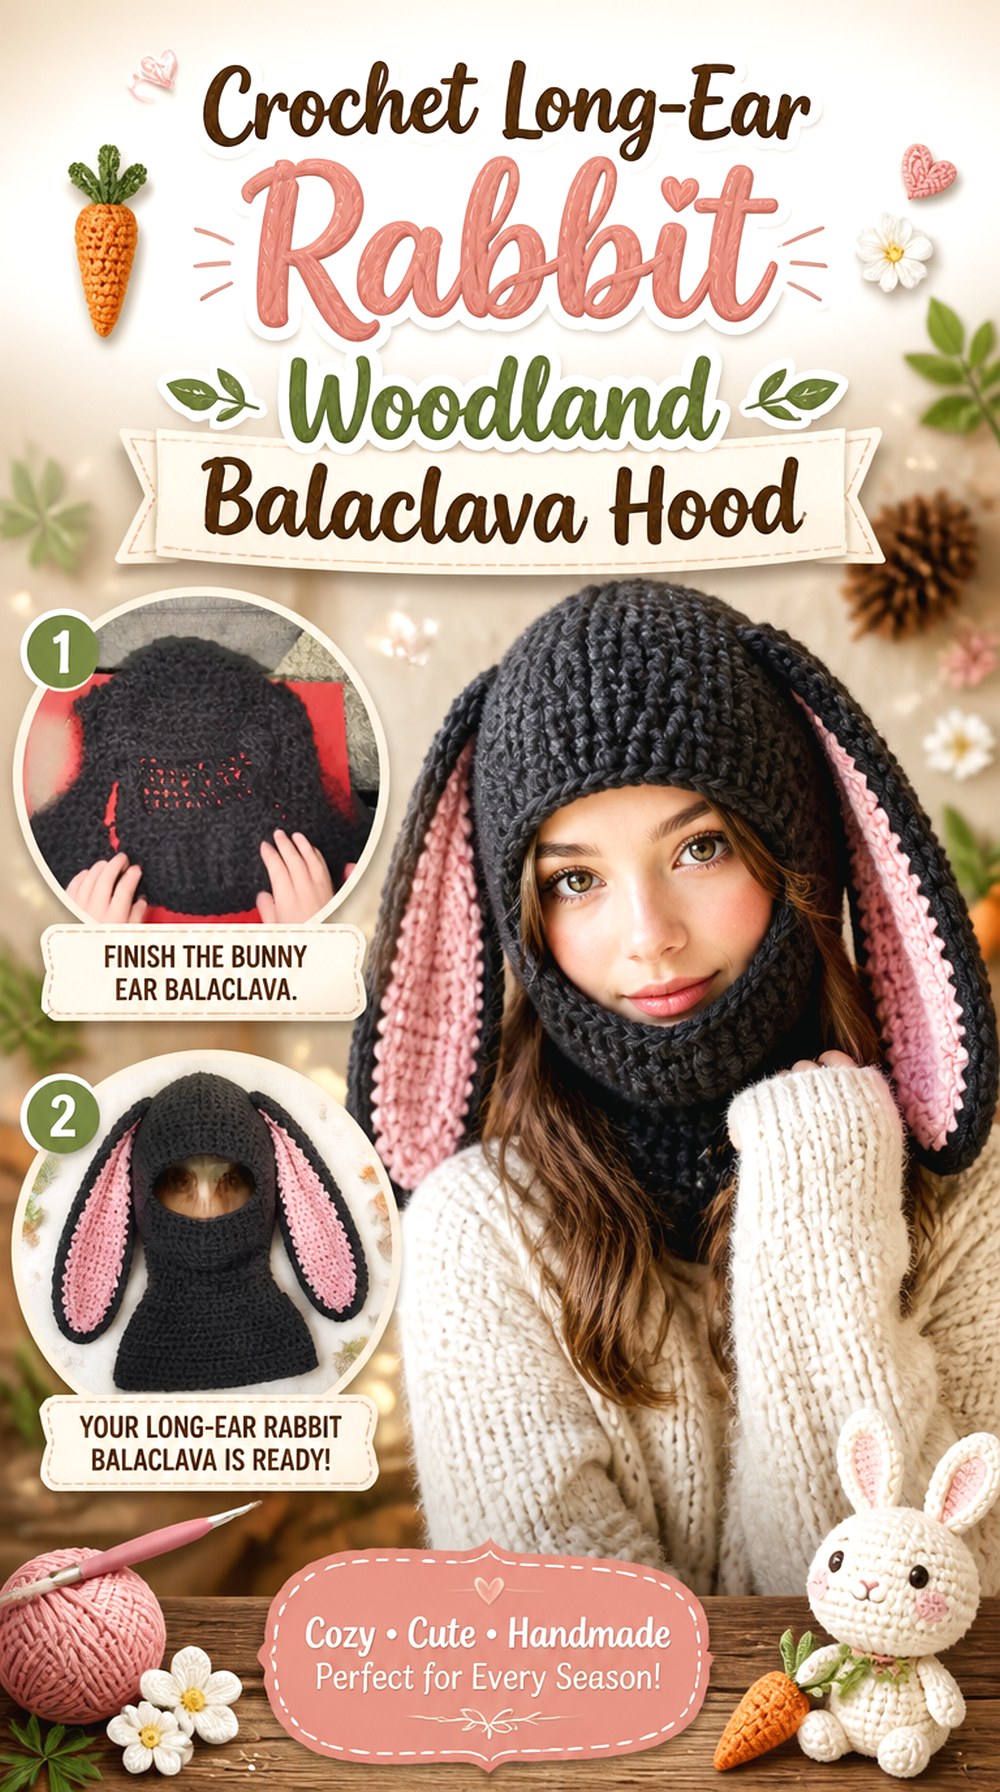
3. Crochet Long Ear Rabbit Woodland Balaclava Hood
 SAVE
Long rabbit ears produce a completely different profile from compact fox or bear ears. Faith.Wisest’s tutorial demonstrates a full bunny-ear crochet balaclava rather than only an ear attachment, making it a strong source for this close-fitting woodland direction.
The balaclava base keeps the fabric closer around the head and neck while the long ears add height and movement above it. That contrast works well for a forest-rabbit interpretation. Natural gray, warm beige, brown, or cream could create a woodland palette, but the biggest decision is structural: whether you actually want long ears moving with the wearer.
Long Ears Put More Demand on the Hood Base
Long crochet ears have more leverage than small bear ears. If you substitute a heavier yarn or add dense embellishment, notice whether the crown begins to pull backward.
Finish the basic hood first and assess how securely it sits before making the animal details more substantial. If the base already feels loose, extra ear weight is unlikely to improve it.
A Close Face Opening Changes How the Piece Is Worn
A balaclava-style hood provides a different experience from a loose scarf hood. Check the finished opening shown in the tutorial and decide whether that degree of coverage suits the intended wearer.
If you adapt the fit, preserve enough room for comfortable movement rather than concentrating only on the rabbit silhouette.
Original Tutorial and Creator Credit
Creator: Faith.Wisest
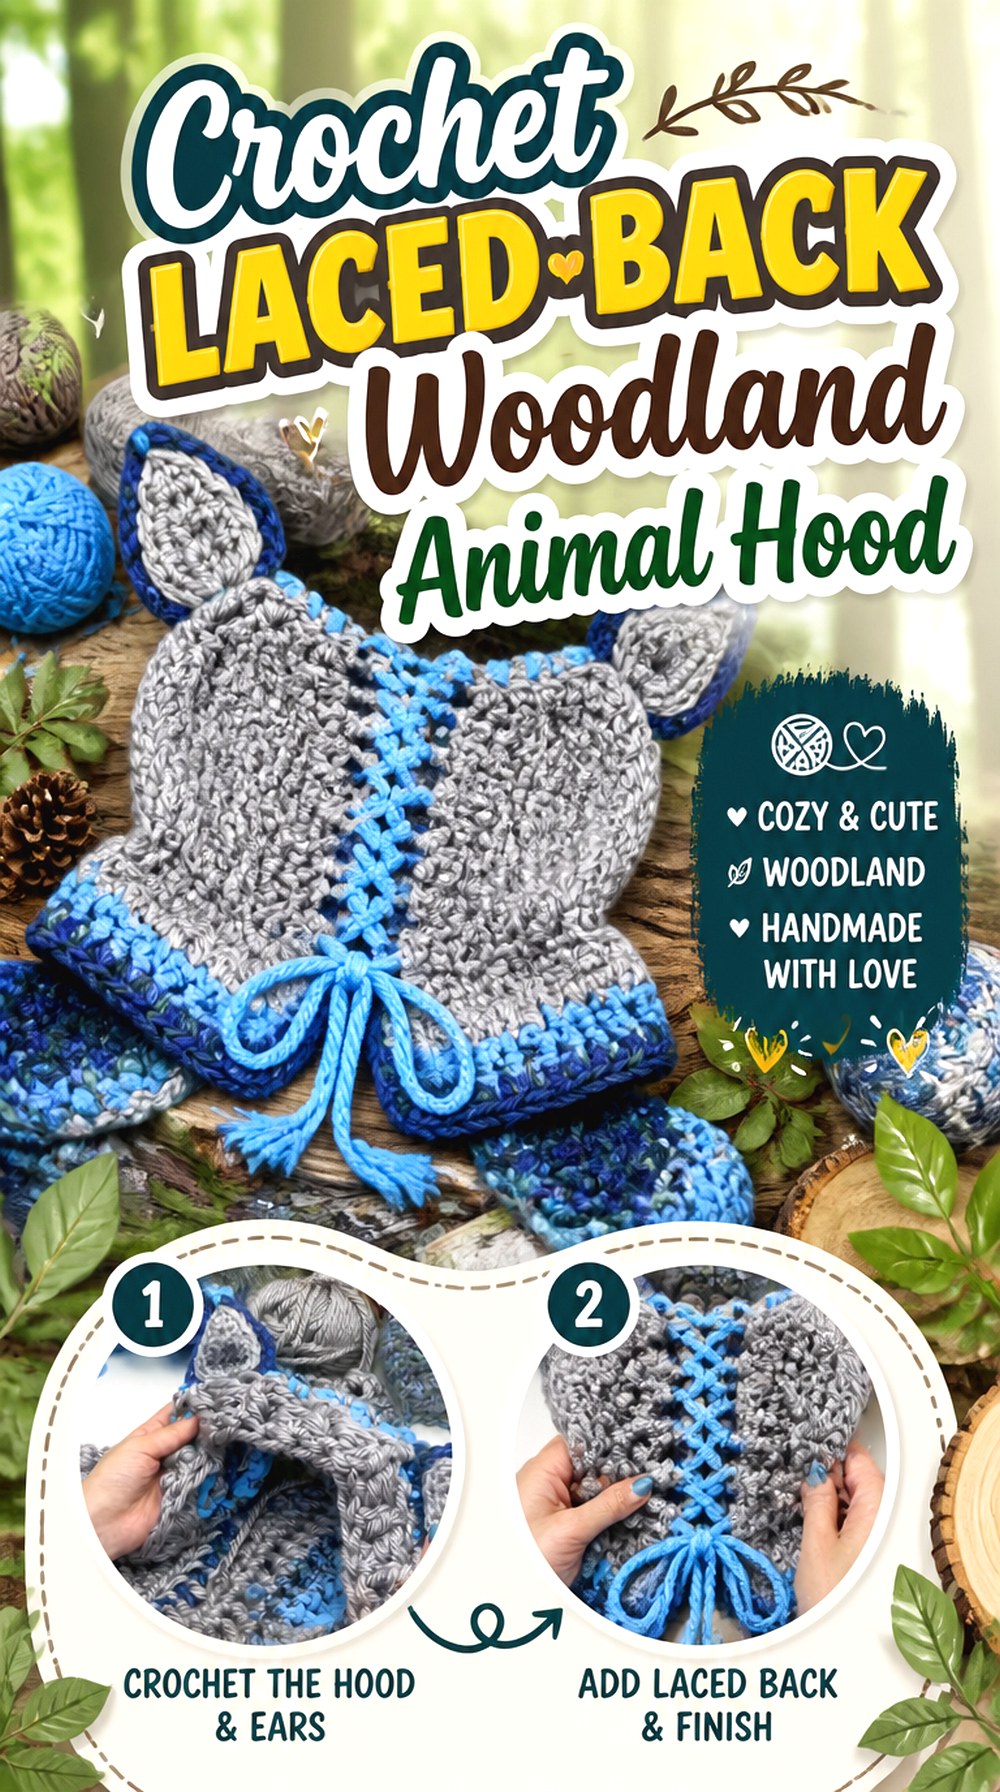
4. Crochet Laced Back Woodland Animal Hood
 SAVE
This option is useful when you want an animal hood without committing to one species before the base is finished. YARNutopia’s Cheshire Cat Hoodie combines a substantial hood with ears, front braids, and a distinctive laced-back treatment. The creator also notes that the animal concept can be changed by omitting or replacing the ears, including with bear or fox-style ears.
For a woodland interpretation, the lacing can become part of a rustic forest aesthetic while the ears determine whether the result reads more like a fox, bear, wildcat, or fantasy creature.
Back Lacing Changes Fit and Visual Interest at the Same Time
A laced back naturally attracts attention, so it can carry part of the decorative load that might otherwise go to surface appliqués. Before planning additional motifs, look at the hood from the back and decide whether the lacing already provides enough detail.
Because the back treatment also affects how the hood closes around the head, treat it as functional shaping rather than a purely ornamental strip.
Choose the Animal Ear Before Selecting the Final Trim
Fox points, rounded bear ears, and catlike triangles have different visual proportions. Decide which direction you want before adding heavy face edging, extra fringe, or other trim.
Temporarily position the intended ears while the hood is worn. That gives a more reliable view of spacing and angle than attaching them based only on the flat fabric.
Keep the Forest Palette Secondary to the Shape
Changing a purple fantasy hood to brown or moss green does not automatically make it woodland. The stronger adaptation comes from choosing an appropriate ear shape, simplifying the trim, and deciding how the laced back contributes to the forest character.
Use color as support for those structural decisions rather than as the only change.
Original Tutorial and Creator Credit
Creator: Fuad Azmat / YARNutopia by Nadia
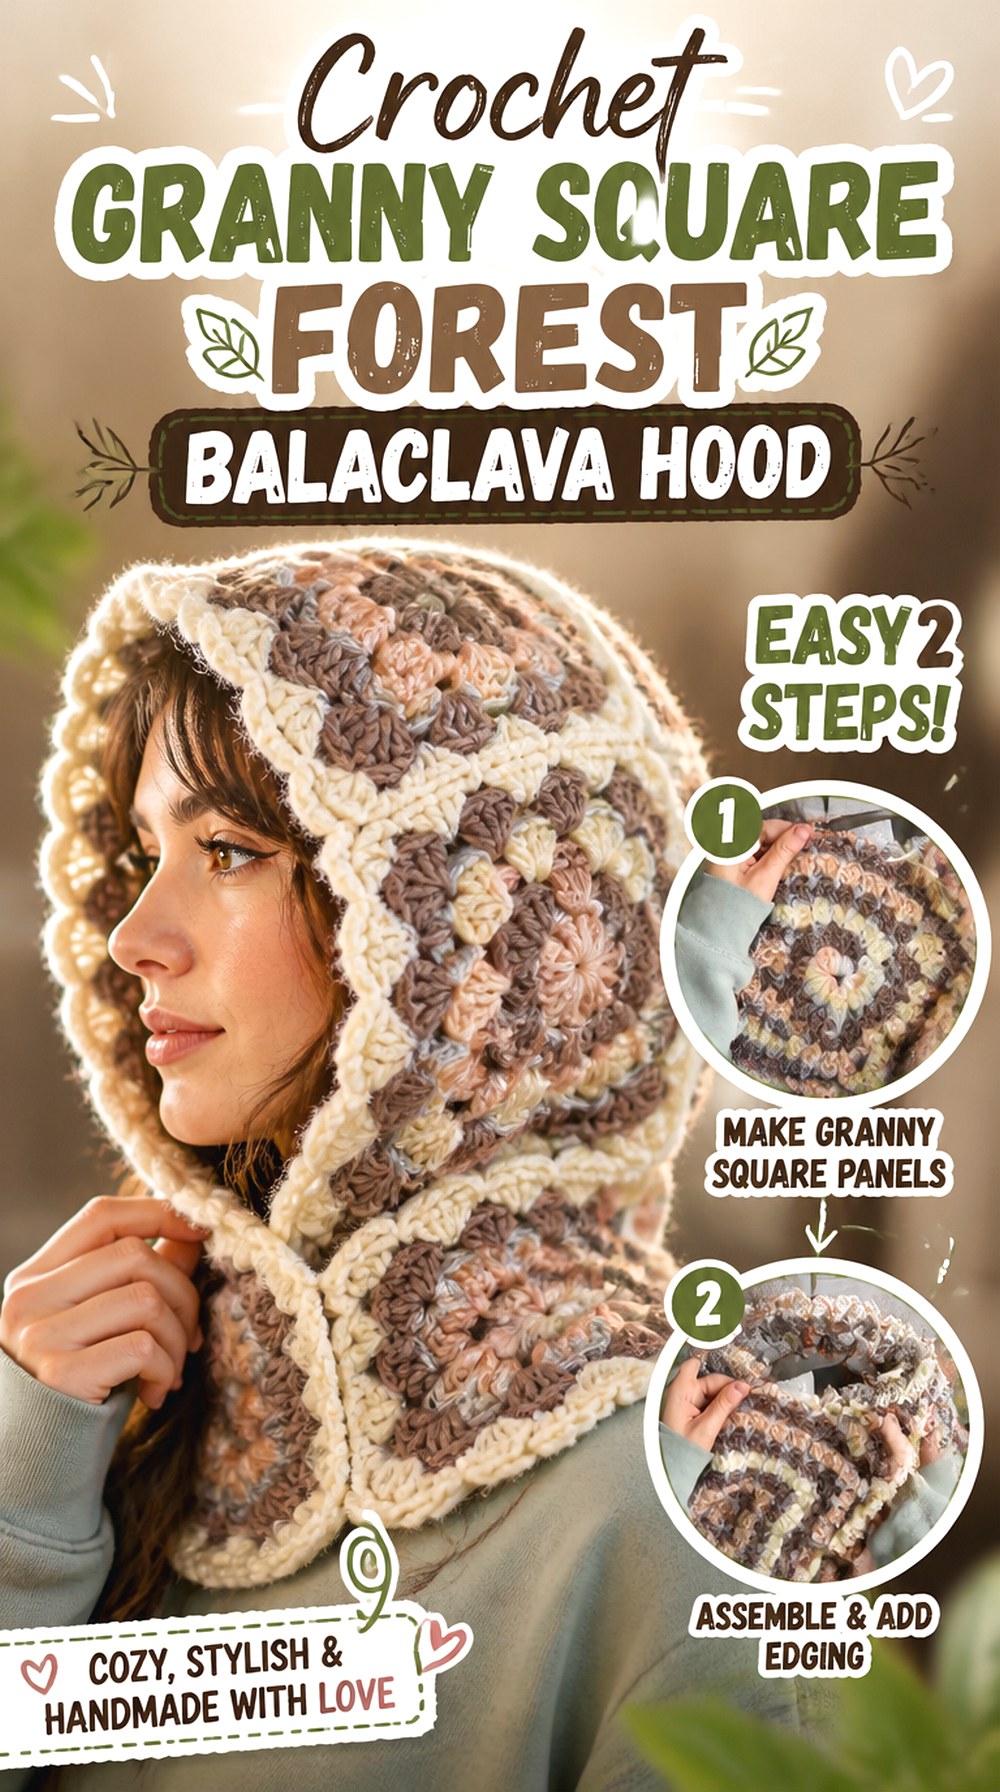
5. Crochet Granny Square Forest Balaclava Hood
 SAVE
Granny squares give a woodland hood a patchwork character without requiring animal ears at all. Rose – Fiber Art’s tutorial demonstrates a granny-square crochet hood balaclava, creating a motif-built alternative to the solid and row-based hoods elsewhere in this collection.
That construction opens several forest-inspired possibilities: mushroom browns, moss and lichen greens, muted autumn colors, or controlled scraps can each occupy separate motif areas. The real planning issue is not simply choosing colors. The squares must work together at a consistent scale so the assembled hood does not become uneven around the face or crown.
Match Motif Dimensions Before Committing to the Layout
Block or otherwise settle your sample motifs before judging how many fit comfortably around the hood. Two squares made from different yarns or tension can look nearly identical until they are placed edge to edge.
If you introduce a different woodland motif into the project, compare its finished dimensions with the original square instead of assuming that the same number of rounds creates the same size.
Use the Joining Lines as Part of the Forest Design
A granny-square hood naturally shows divisions between motifs. Those joins can be visually quiet, or they can become deliberate outlines that make each square read like a small patch in a woodland mosaic.
Lay out all colors before joining. Avoid accidentally concentrating every dark square around the face or every light square at the crown unless that contrast is intentional.
Keep Bulky Surface Details Away From Critical Joins
Mushrooms, leaves, or other appliqués can turn a patchwork hood into a very literal forest piece, but attachment points also add thickness. Avoid stacking bulky decoration directly over already prominent motif joins.
A few accents placed on flatter square centers can communicate the theme more clearly than covering every motif.
Original Tutorial and Creator Credit
Creator: Rose – Fiber Art
6. Crochet Smooth Back Striped Woodland Hooded Scarf
 SAVE
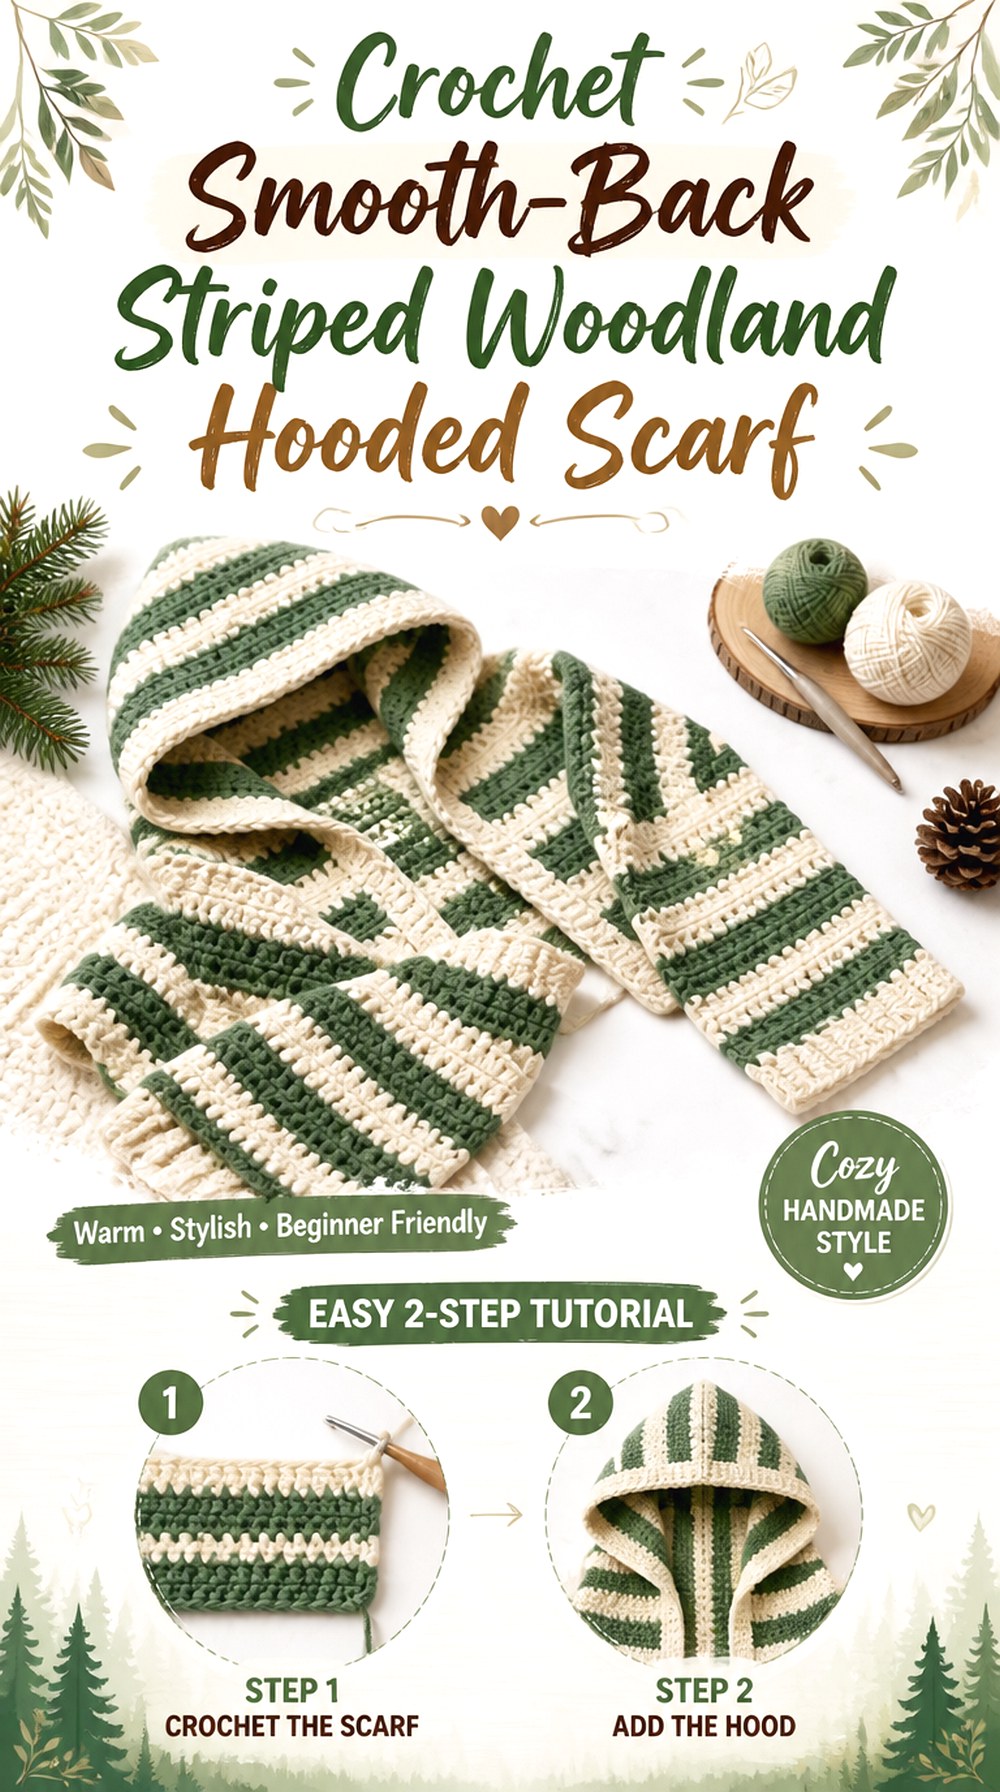
VivCrochets’ hooded scarf combines a scarf and hood while deliberately avoiding the pointed back that many simple folded hoods create. The tutorial also demonstrates a striped version and describes the construction as no-sew. Those features make it a useful foundation for a more streamlined woodland accessory.
Instead of animal ears, the forest character can come through controlled striping: think bark and cream, fern and olive, rust and oatmeal, or several muted seasonal tones. Because the scarf tails already add strong vertical lines, this idea needs much less embellishment than a compact plain hood.
A Rounded Back Gives a Different Woodland Mood Than a Pixie Point
A pointed crown instantly pushes a hood toward fairy or elf styling. This smoother back does the opposite, keeping the silhouette more contemporary.
Choose this option when you want woodland colors and texture without making the piece read as a costume. It can sit naturally with an everyday coat while still carrying a forest-inspired palette.
Plan the Stripe Sequence Across Both Hood and Scarf
Stripes become more noticeable when the scarf is wrapped and folded, so assess more than the flat finished piece. A high-contrast sequence may look balanced when extended but visually busy once several sections overlap around the neck.
Make a small color-order plan before starting if you want intentional transitions rather than random bands.
Let the Long Scarf Ends Replace Extra Decorative Weight
This design already has movement below the face. Adding braids, thick fringe, tassels, and appliqués simultaneously may obscure the clean hood-and-scarf shape.
For woodland styling, consider one secondary detail—perhaps narrow fringe or a subtle edge—rather than attaching every possible forest embellishment.
Original Tutorial and Creator Credit
Creator: VivCrochets
7. Crochet Deep Cowl Woodland Hood
 SAVE
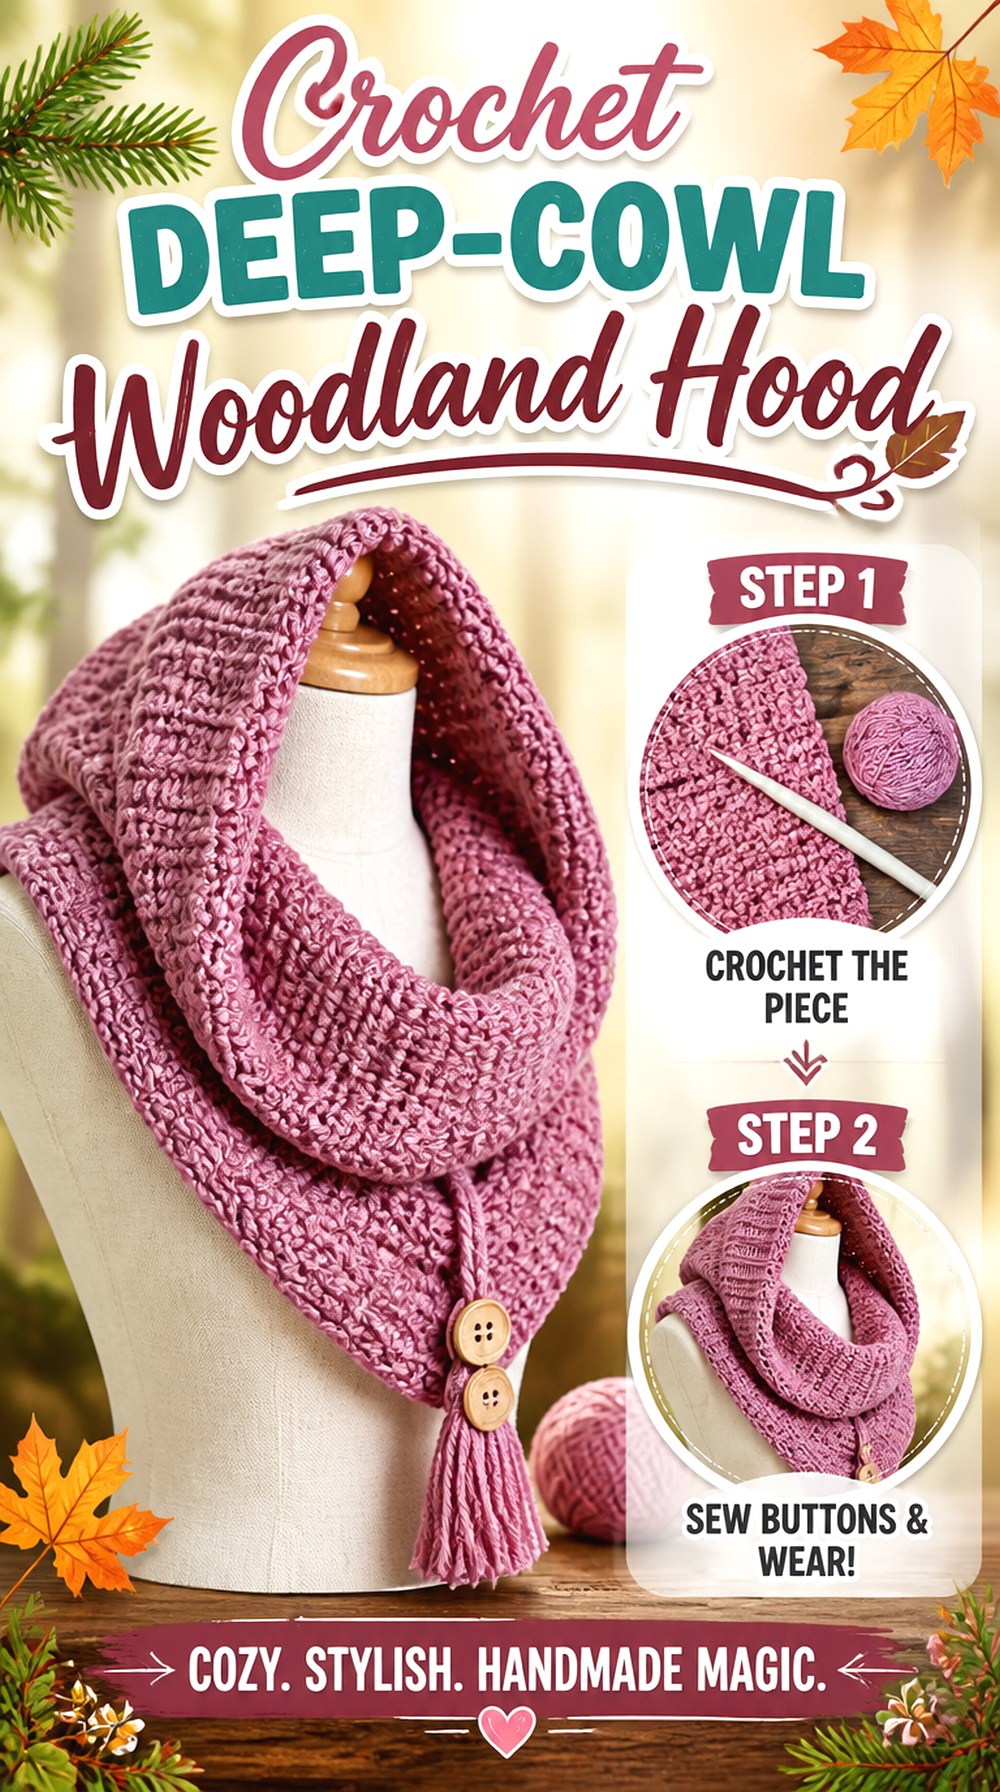
A hooded cowl removes the long scarf tails and concentrates all the fabric around the head and neck. Kiri Kiri’s tutorial presents a hooded cowl and specifically discusses making it in different sizes, which makes the finished form a useful reference when you prefer compact coverage.
This is a strong woodland choice for someone who likes the visual depth of a hood but does not want animal ears, hanging pockets, or floor-skimming fantasy details. Forest character can come from texture and restrained colors instead. A deep pine, bark brown, mushroom gray, or lichen-inspired neutral can give the piece a natural mood without altering the basic cowl silhouette.
Cowl Depth Determines How the Fabric Sits at the Neck
A generous cowl can bunch attractively below the hood, but more fabric is not automatically better. Think about the coat or sweater that will sit underneath it.
If the outerwear already has a high collar, an extremely bulky lower section may feel crowded. Compare the finished source shape with the layers you expect to wear before increasing depth.
Use Texture Where Animal Details Would Normally Go
Without ears or a point, the fabric itself becomes the dominant design element. A clearly defined stitch can create the woodland character through shadow and surface rather than appliqués.
If you change yarn, make sure the stitch definition is strong enough to show whatever texture you want to emphasize. Highly fuzzy fibers can soften details dramatically.
Check the Hood in Both Up and Down Positions
A cowl hood should still make sense when it is not covering the head. Before adding decorative trim around the face opening, lower the hood and see where that trim lands.
A heavy border that looks attractive around the face may become an awkward ridge when the piece is worn only as a neck cowl.
Original Tutorial and Creator Credit
Creator: Kiri Kiri
8. Crochet Shadow Stitch Bark Scoodie Hood
 SAVE
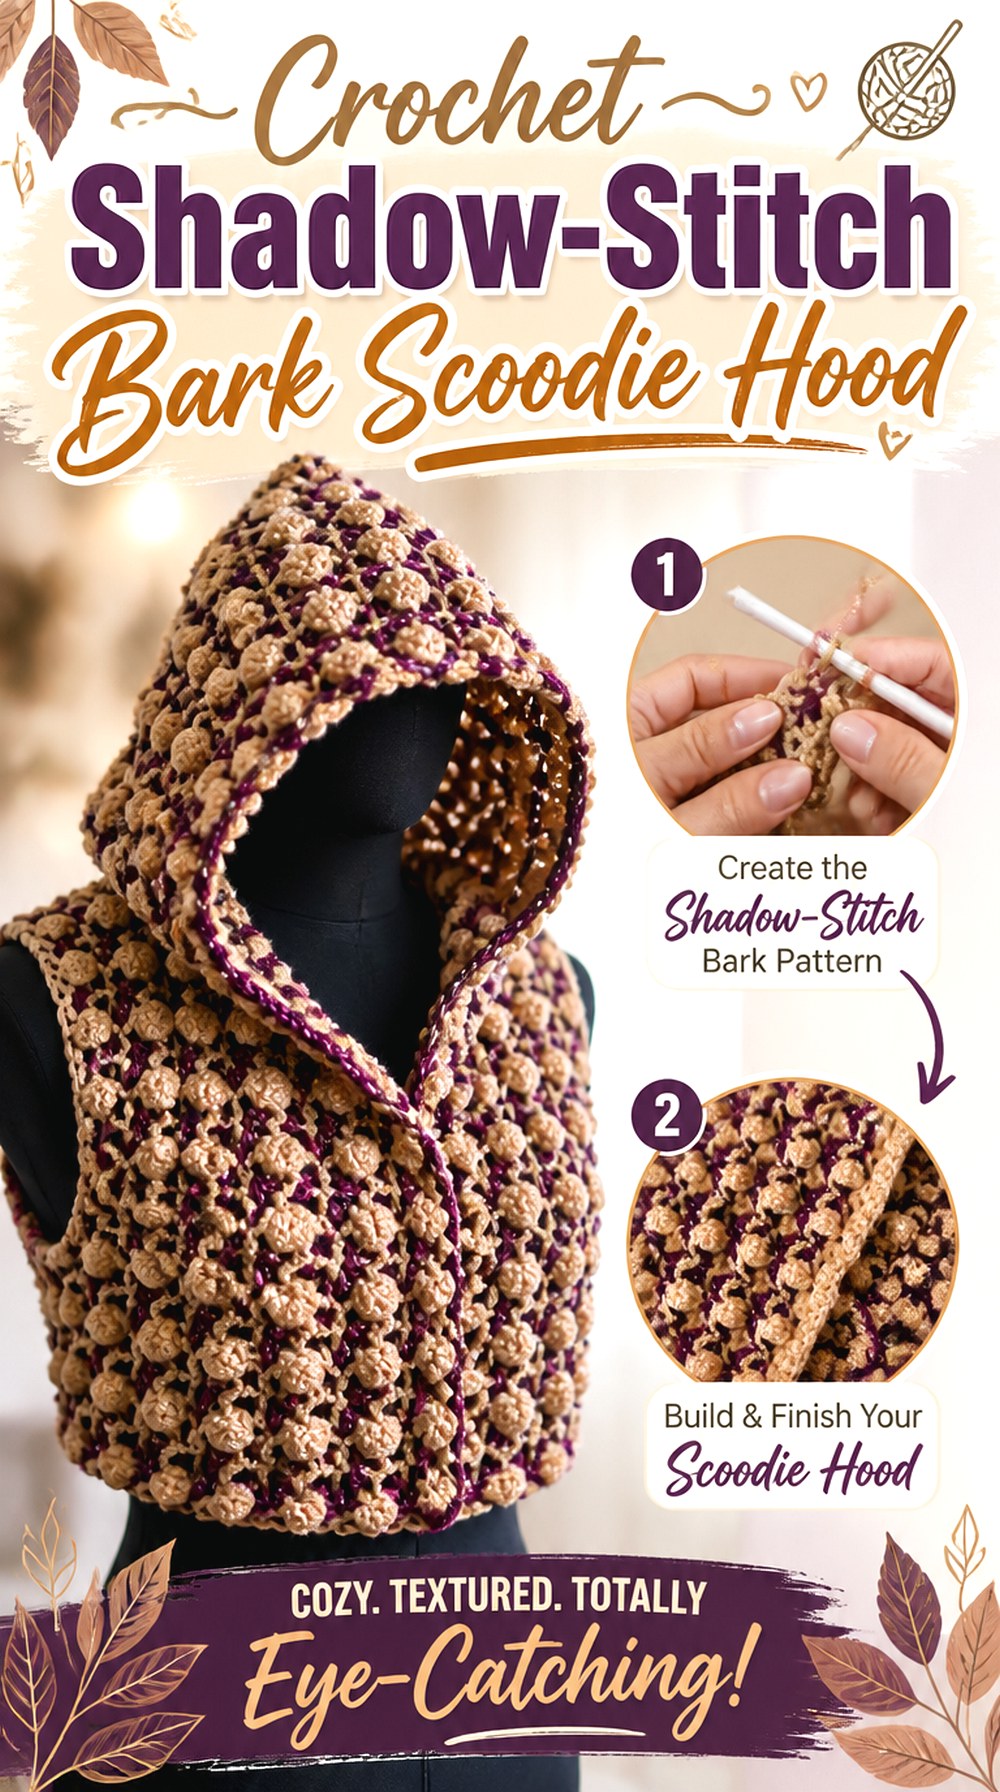
Meladora’s Creations for Crochet uses a two-color shadow stitch for this scoodie, creating a textured mesh effect that distinguishes it immediately from smooth hooded scarves. That surface makes an especially useful starting point for bark-inspired woodland styling because depth and contrast are already built into the fabric.
Rather than adding literal tree appliqués, use the texture as the woodland feature. A darker shadow color behind a lighter earthy foreground can suggest layered bark, moss over stone, or forest floor tones. Because the design also includes scarf sections, the textured repeat has enough length to remain visible beyond the hood itself.
Two Colors Need Enough Contrast to Reveal the Shadow Effect
If the two chosen yarn colors are nearly identical, much of the textured visual structure can disappear. That does not mean they must be bright opposites; a dark bark brown behind camel or charcoal behind moss can still create useful separation.
Swatch the actual pair together rather than judging skeins side by side, because the crocheted overlap changes how the colors interact.
Mesh Texture Trades Density for Visual Depth
The creator describes the stitch as textured but mesh-like. That makes the project visually interesting, but readers looking for a very dense wind-blocking hood should pay attention to the openness of the finished fabric.
Choose this idea because you like the surface and layering effect, not simply because it belongs to the same broad hood category as denser cowls.
Fringe Should Reinforce the Scoodie Instead of Hiding It
This source includes fringe at the scarf edge. Because the shadow stitch is already a major feature, woodland customization does not need oversized tassels, leaves, and several other finishes together.
If you alter the fringe, keep enough contrast between it and the body that the textured scarf remains the main attraction.
Original Tutorial and Creator Credit
Creator: Meladora’s Creations for Crochet
9. Crochet Storybook Woodland Hooded Cape
 SAVE
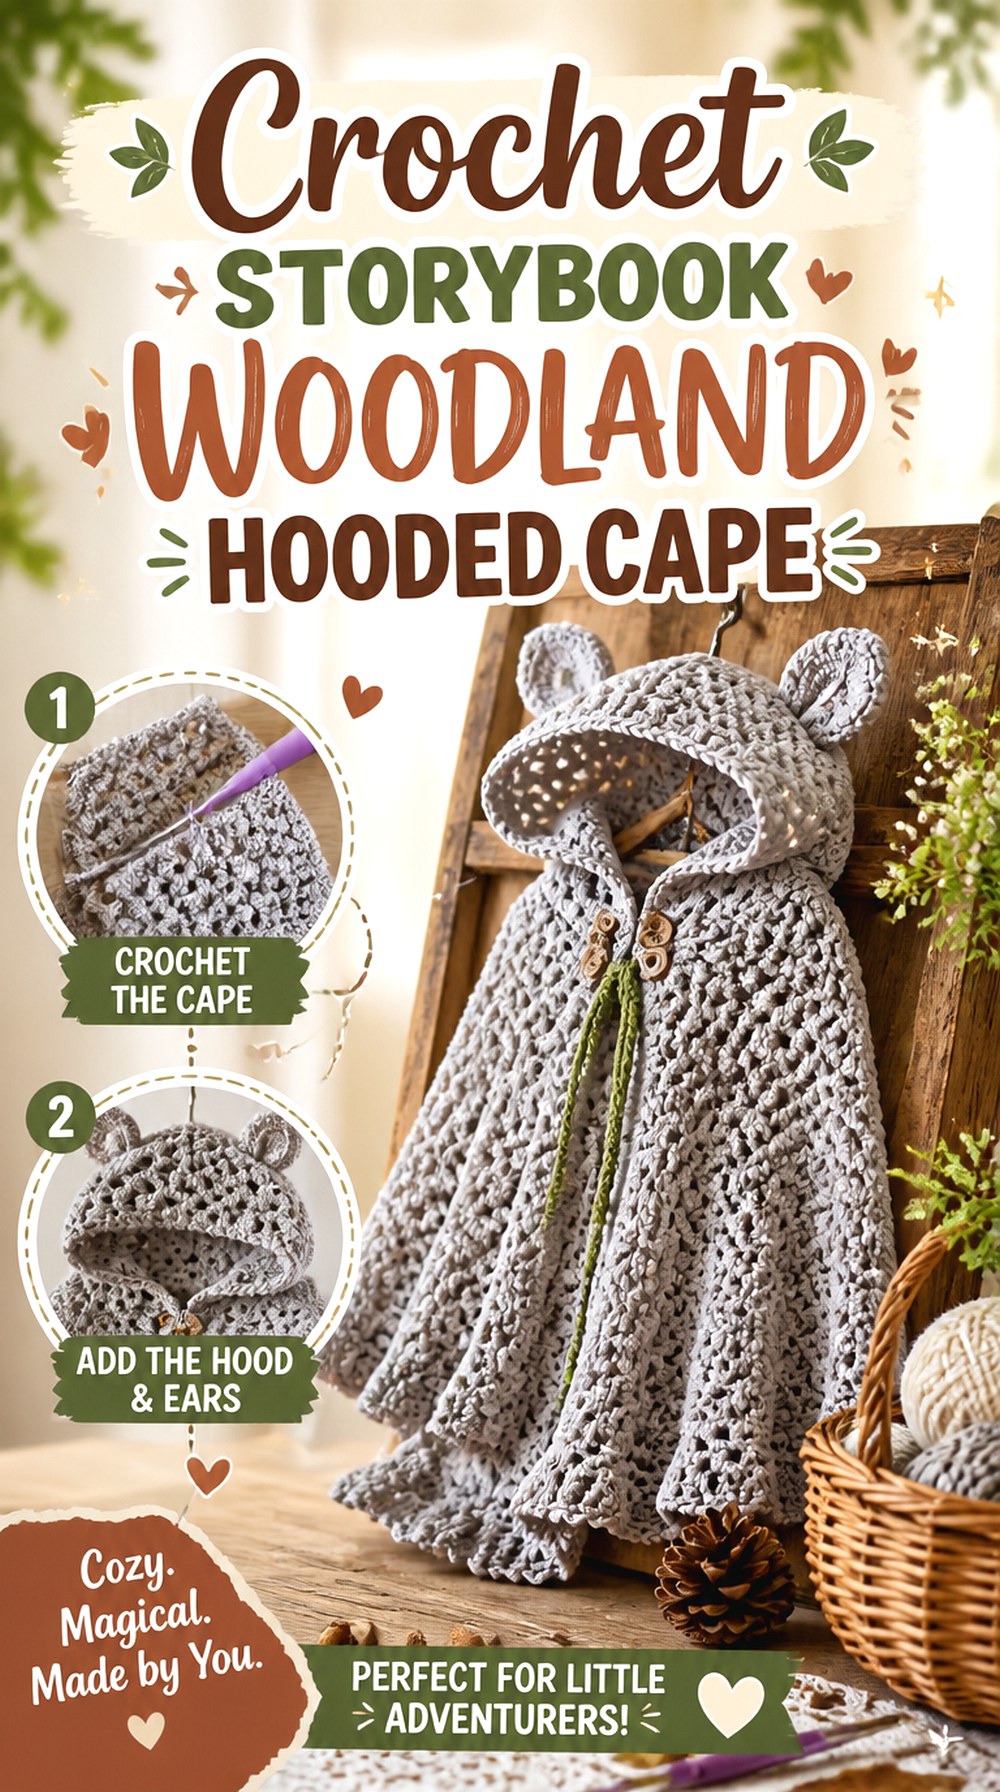
A cape changes the project from headwear into a larger layering piece. Mariie Crochet’s tutorial demonstrates a crochet hooded cape, giving this idea significantly more shoulder and upper-body coverage than the cowls, bonnets, and balaclavas in the collection.
For woodland styling, that larger surface can carry a muted gradient, a mossy border, or simple forest-colored sections without requiring ears at all. The silhouette already has a storybook quality. This makes it a useful choice for readers who want their woodland project to feel more like outerwear or fantasy layering than an animal hat.
Shoulder Coverage Changes the Yarn-Weight Decision
A fiber that feels pleasantly substantial in a small hood can become much heavier when extended across a cape. If you substitute materials, consider the total fabric area and how much the completed garment may stretch under its own weight.
A drapier yarn can create softer movement, while a firm fabric makes the cape feel more structured. Neither is automatically preferable; they produce different woodland silhouettes.
Keep Hood Decoration in Proportion With the Larger Body
Tiny ears that suit a close balaclava can look visually lost above a broad cape, while very large ears may turn an otherwise elegant layer into a costume.
Decide first whether the cape shape or the hood detail should dominate. A simple pointed or rounded hood with forest colors may be more balanced than adding several animal features.
Test the Neckline Before Adding a Decorative Fastening
Cape closures and hood weight interact around the neckline. If you plan to replace or embellish the front fastening, put the finished or nearly finished cape on and observe where the fabric naturally wants to sit.
A decorative button, toggle, or tie should support that position rather than pulling the neckline into a new shape merely for appearance.
Original Tutorial and Creator Credit
Creator: Mariie Crochet
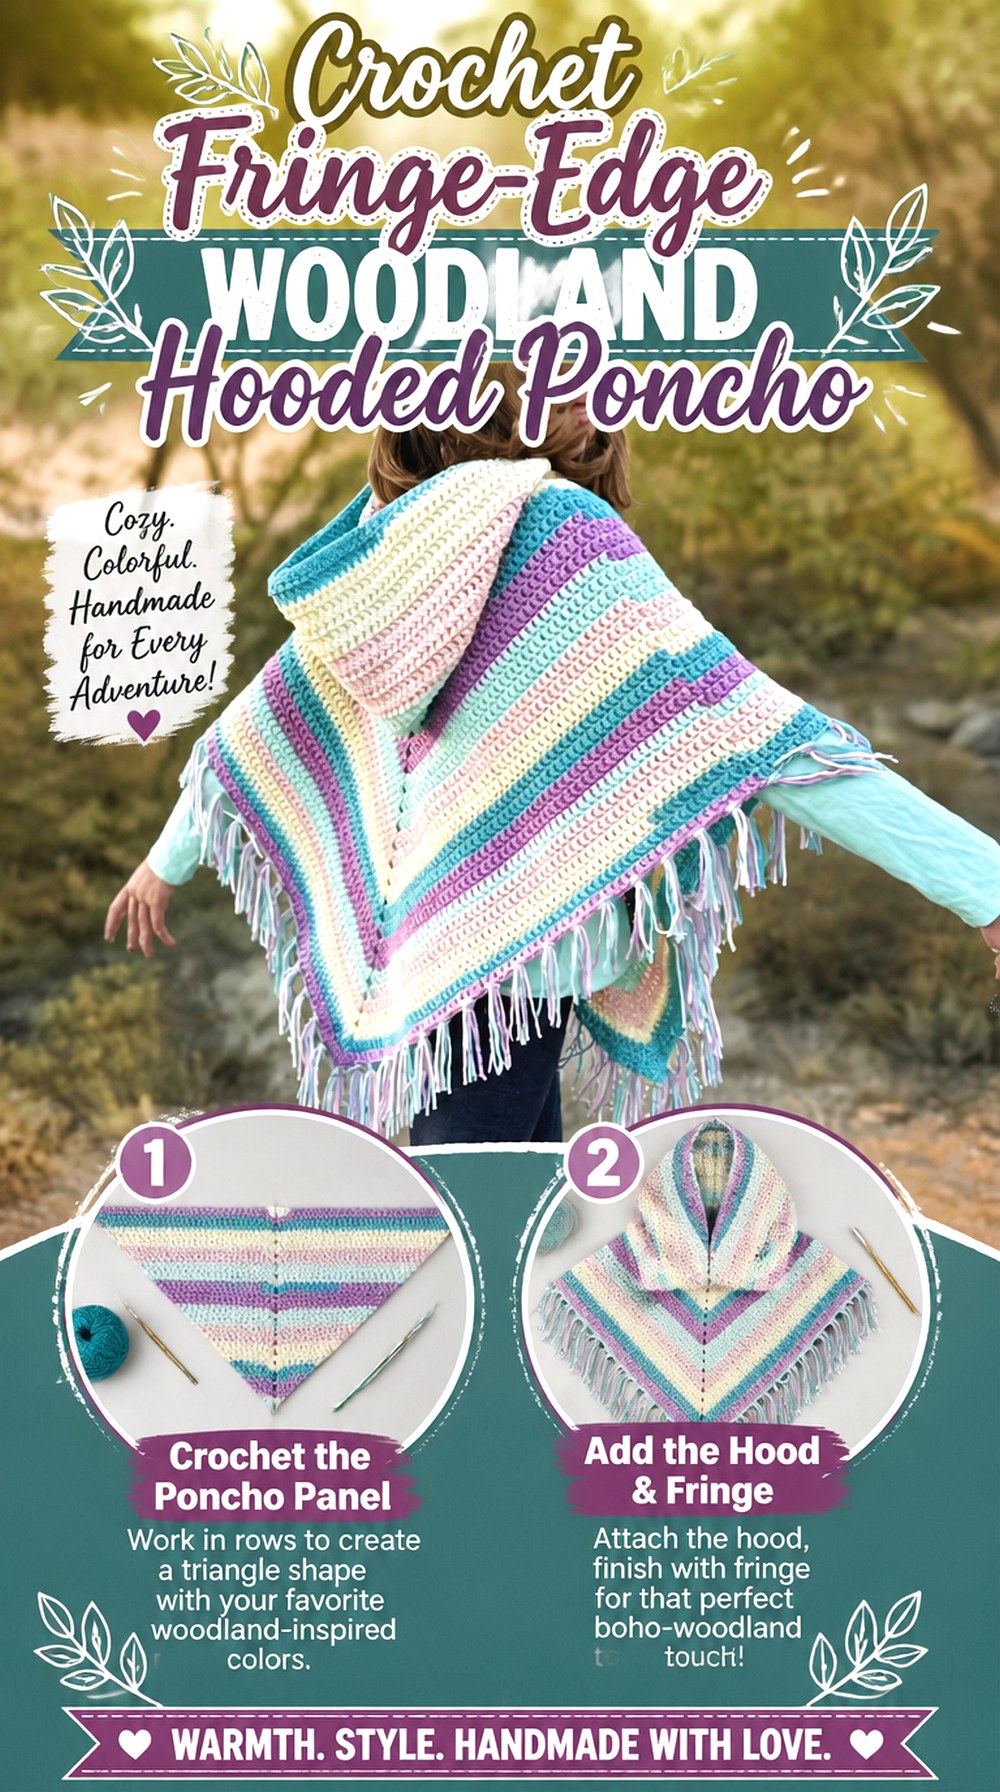
10. Crochet Fringe Edge Woodland Hooded Poncho
 SAVE
A hooded poncho offers even more torso coverage than a short hood or cowl, but it still has a loose, easy-to-layer silhouette. Hooked on Homemade Happiness demonstrates a hooded poncho with versions referenced for both kids and adults, and the tutorial includes a fringed finish.
For a woodland interpretation, think of the broad body as the quiet background and the hood as the place where stronger character appears. A fawn-inspired palette, soft rounded ears, or a pale face edge could work, but the base also stands well on its own as forest-colored outerwear. The fringe already adds movement, so additional hanging trim should be planned carefully.
A Broad Poncho Gives Woodland Markings Room to Breathe
Unlike a small hood, a poncho can support widely spaced color accents or a few larger motifs without crowding the neckline.
If you want fawn spots, leaves, or other surface details, mark their positions before attaching anything. Concentrating every motif near the top can make the shoulders visually heavy while leaving the lower body disconnected.
Decide Whether the Fringe or the Hood Is the Main Statement
Fringe creates movement around a wide hem, while animal ears or a decorative hood draw attention upward. Both can work, but making each one extremely dramatic risks dividing the design into competing focal points.
For a subtle woodland poncho, keep the hood simple and let the fringe move. For a stronger animal theme, reduce extra hem decoration and emphasize the crown instead.
Check Overall Drape Before Adding More Weight
Poncho fabric already hangs from the shoulders. Additional dense appliqués, heavy tassels, or elaborate hood pieces increase that load.
Wear or hang the almost-finished poncho long enough for the fabric to settle before deciding whether it genuinely needs more decoration. The final drape is a better guide than the flat work-in-progress.
Original Tutorial and Creator Credit
Creator: Hooked on Homemade Happiness
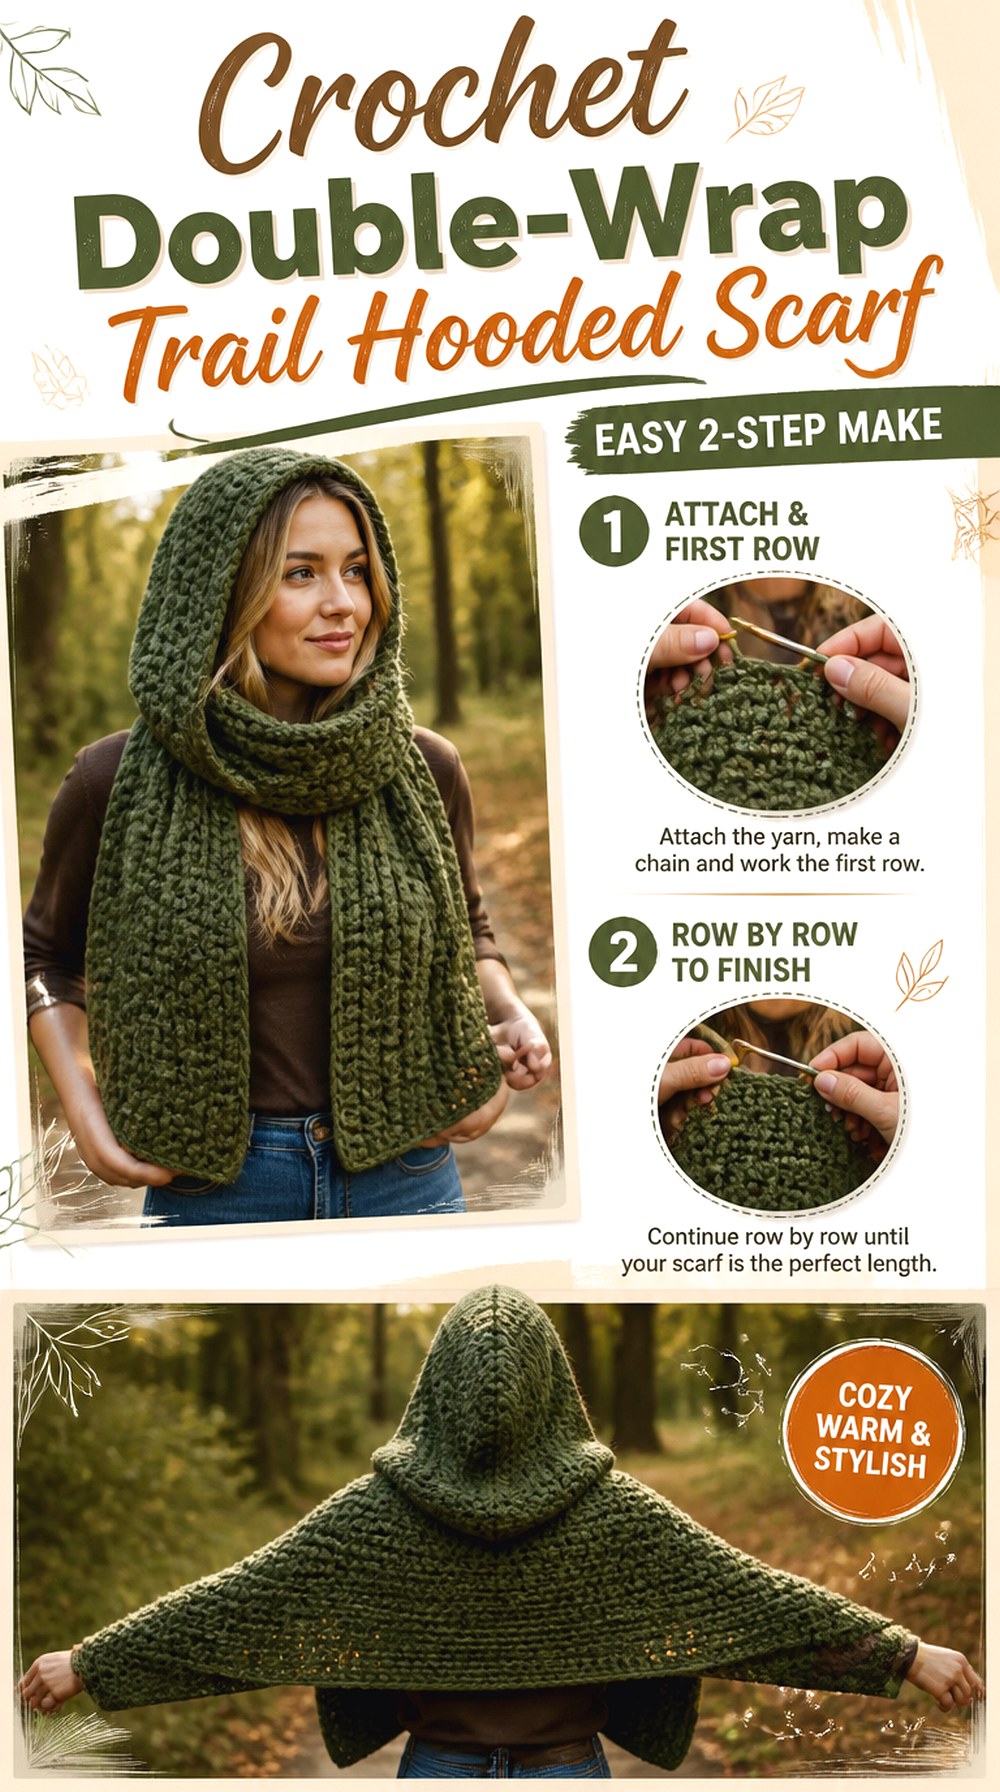
11. Crochet Double Wrap Trail Hooded Scarf
 SAVE
Kay Krochets’ Trailhead design combines an attached hood with a scarf intended to wrap around the neck, giving the lower section more containment than a pair of loose straight scarf tails. The creator describes it as a double-wrapped infinity-style scarf with an attached hood.
That makes it a good woodland option for active trail-inspired styling. The forest effect can remain restrained: heathered brown, stone gray, pine, oatmeal, or muted rust can do enough without animal ears. Compared with a pocket scarf, the main feature here is how the scarf loops and stays closer to the body.
The Wrap Changes the Amount of Bulk at the Neck
A scarf that circles the neck more than once creates concentrated warmth and fabric volume. Before using a significantly thicker yarn than the source, consider how several layers will stack under the chin and around a coat collar.
If you want a softer forest drape, prioritize flexibility over creating the stiffest possible fabric.
Keep Woodland Motifs Away From Repeated Fold Points
Large leaves, mushrooms, or raised appliqués may look attractive on a flat scarf but become uncomfortable or invisible once the same section is wrapped around the neck.
Mark the areas that stay exposed in your preferred wearing position before adding decorative pieces. Surface motifs are most effective when they remain visible rather than disappearing between layers.
An Infinity Shape Reduces the Need for Long Tassels
Because the scarf already creates looping movement, very long fringe may add more visual length than the design needs. A clean edge can emphasize the practical trail-inspired shape.
If you want tassels, use them deliberately in an area that will remain free rather than burying them inside the wrapped section.
Original Tutorial and Creator Credit
Creator: Kay Krochets
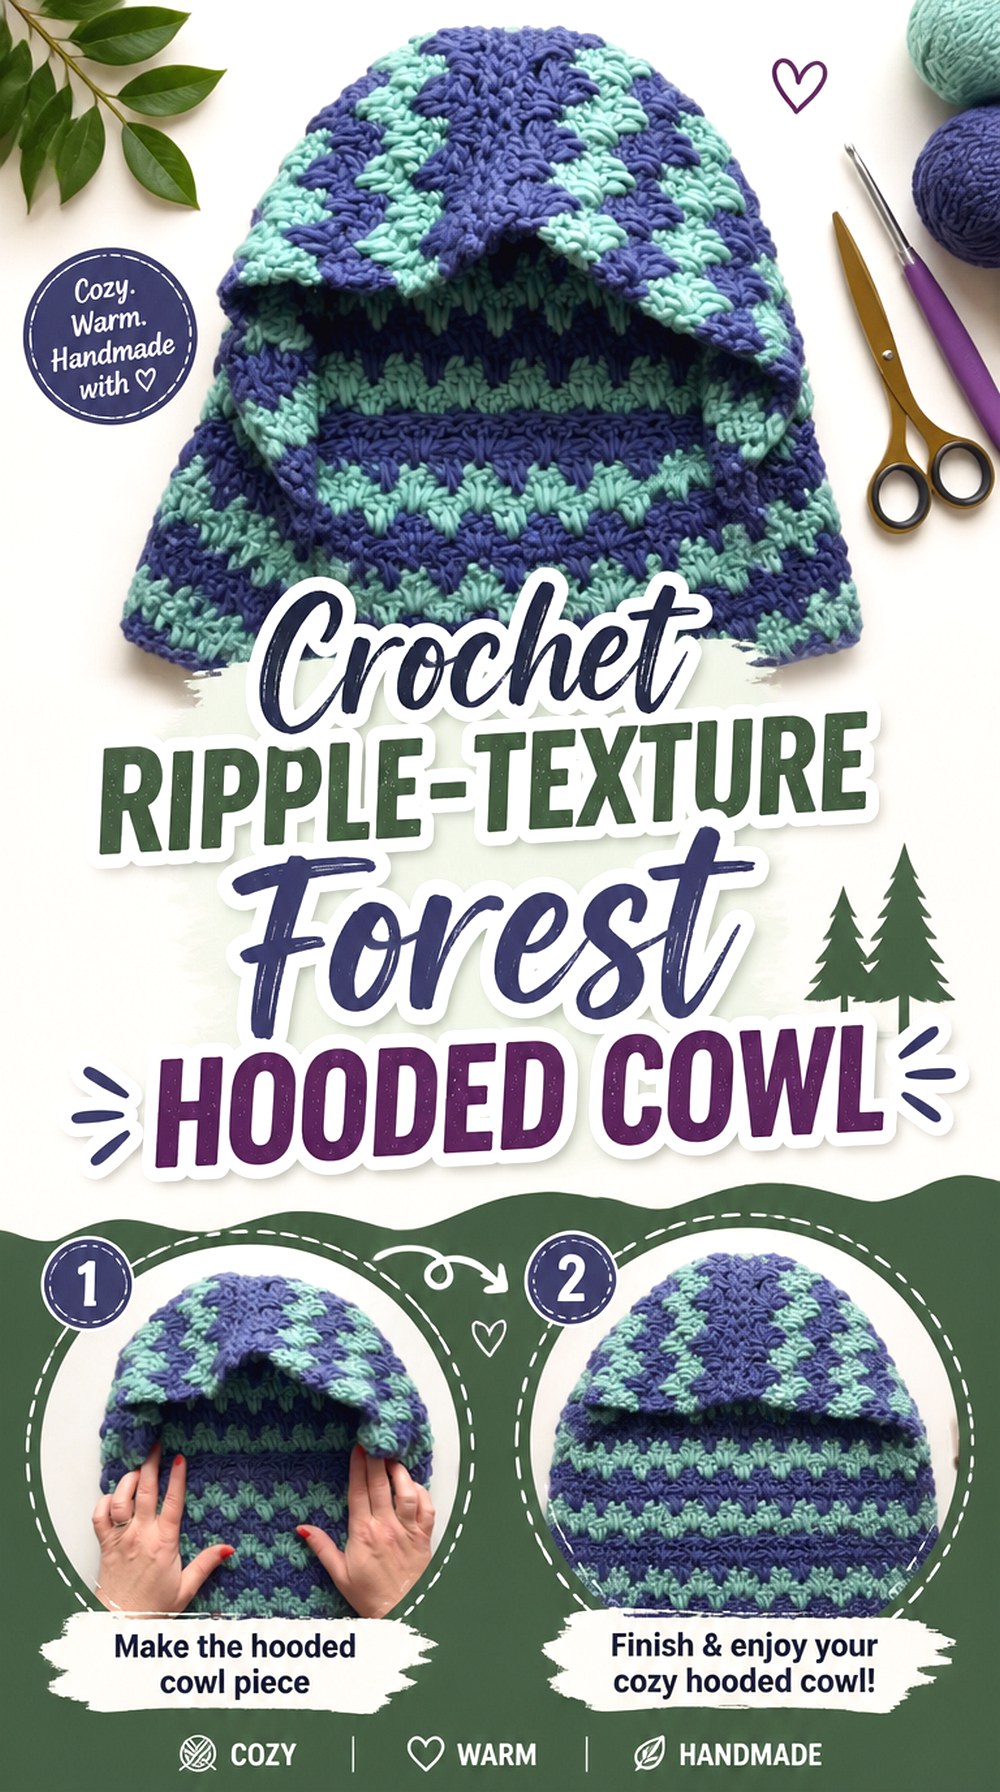
12. Crochet Ripple Texture Forest Hooded Cowl
 SAVE
Blue Star Crochet’s Leo Cowl combines hood and neck coverage with a pronounced granny spike ripple texture. The source works the cowl and hood as one coordinated accessory, making the surface pattern central to the finished appearance.
This texture suits a woodland interpretation because contrasting earthy shades can create depth without adding literal forest appliqués. Think of layers such as dark soil and moss, bark and cream, or muted foliage tones. Compared with a plain cowl, the main question is whether you want the stitch pattern to be the focal point or merely a background for additional details.
Ripple Texture Benefits From Deliberate Color Contrast
A textured pattern that depends on raised or dropped visual lines can become difficult to read when every color has nearly the same value.
Before committing to a woodland combination, photograph a small sample in grayscale. If the shades merge completely, the texture may appear quieter than expected even though the hues look different in the skeins.
Keep the Hood Edge Quieter Than the Main Surface
When the body already contains pronounced ripple texture, an equally busy face border can overwhelm the opening.
A simple edge allows the stitch pattern to approach the face without creating a thick decorative frame. If you want an accent color, use it sparingly instead of introducing another unrelated stitch effect.
Consider the Cowl When the Hood Is Lowered
Convertible hooded cowls spend part of their time around the neck. Make sure any woodland detail added near the crown still sits attractively when the hood is down.
Raised embellishments positioned perfectly on top of the head can end up pressed awkwardly against the neck in cowl mode, which is one reason texture alone works well here.
Original Tutorial and Creator Credit
Creator: Blue Star Crochet | Veronika Cromwell
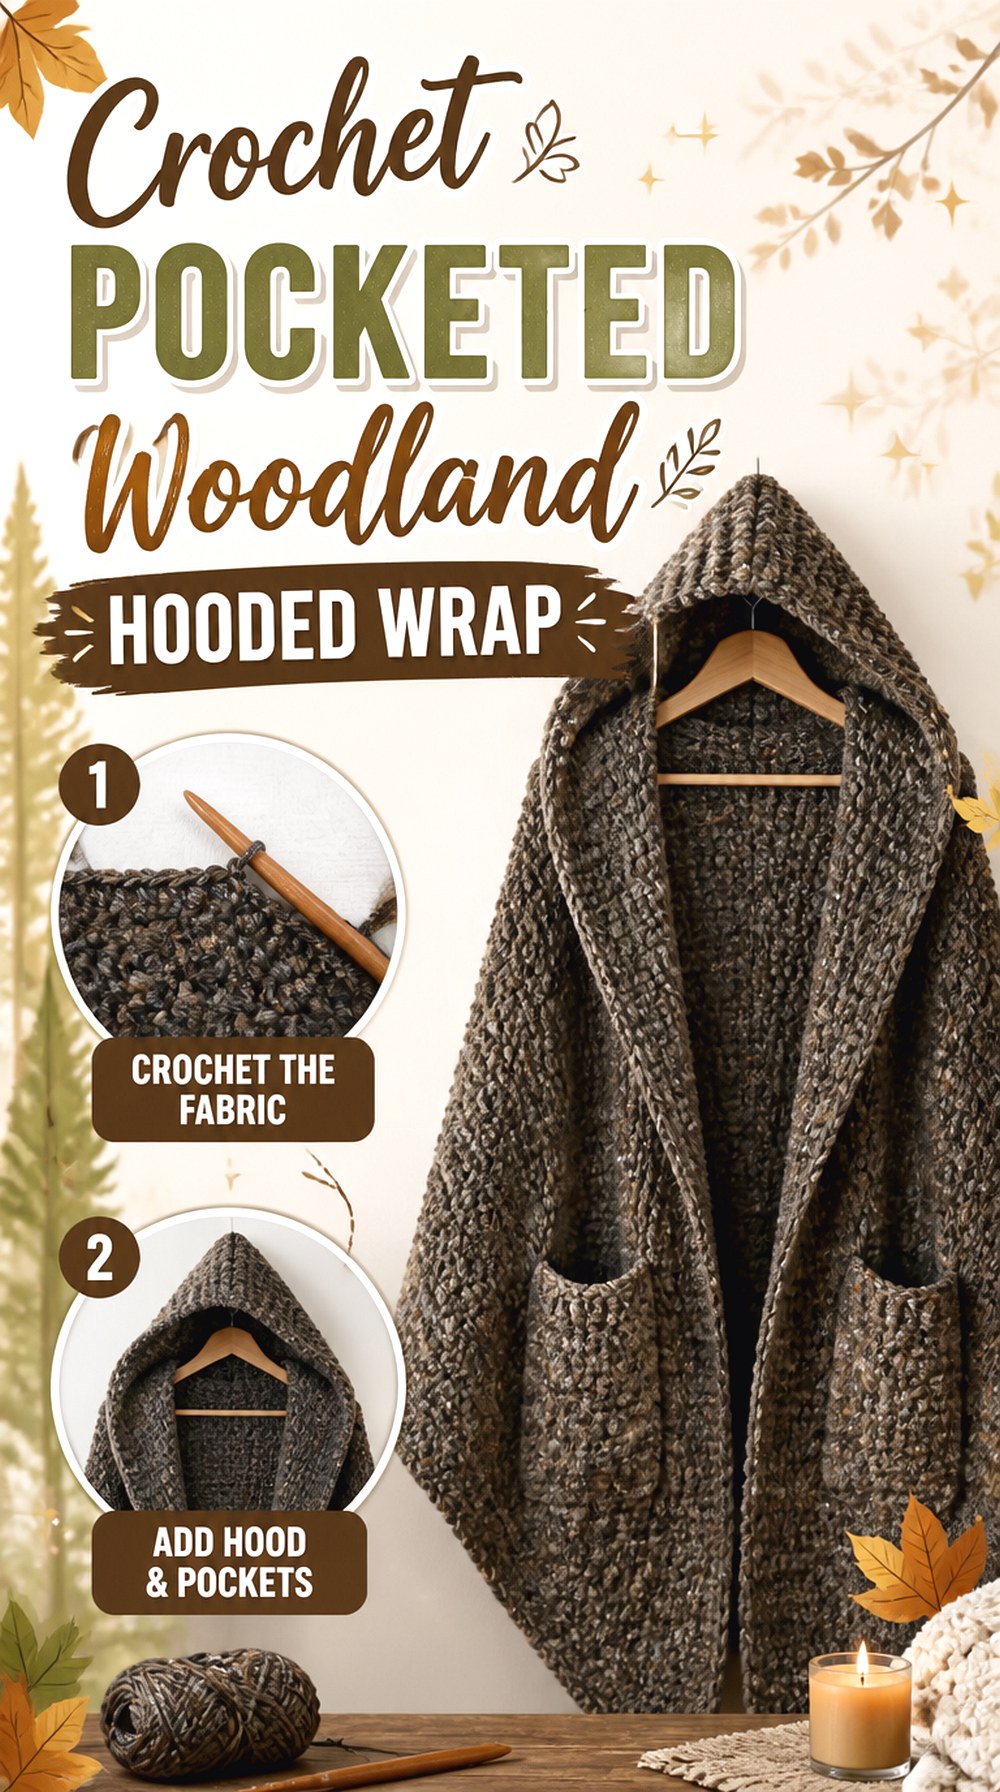
13. Crochet Pocketed Woodland Hooded Wrap
 SAVE
Bag-O-Day Crochet’s hooded scarf combines a hood, wide scarf or wrap-like sections, and pockets, giving it more function below the shoulders than the simple scoodies in this collection. The pockets can make the lower ends visually substantial, so this is a strong option when you want the woodland hood to feel like a complete cold-weather accessory rather than just headwear.
A quiet forest palette works especially well because the silhouette already contains several features. Moss, bark, oatmeal, rust, or muted mushroom colors can create the mood while the hood and pockets remain the practical focal points.
Pocket Placement Should Follow the Wearer, Not Just the Flat Scarf
Pocket usefulness depends on where the scarf ends actually fall once the hood is on. If you change the length substantially, check that the hands still reach the pockets comfortably before permanently finishing them.
This is particularly important when adapting between wearers of different heights. A visually balanced scarf end is not automatically an ergonomically useful pocket position.
Wide Scarf Ends Can Carry Larger Woodland Accents
The broader lower sections provide more space than a narrow scarf for a leaf, mushroom, or geometric forest motif. Use that space selectively.
One strong accent near each pocket can be easier to read than many small appliqués scattered across both hood and scarf. It also keeps extra seams away from the face.
Reinforce the Theme Without Obstructing the Pocket Opening
Decorations near the hands encounter more movement and abrasion than motifs on the crown. Keep raised pieces away from the actual opening so they do not repeatedly catch when the wearer reaches inside.
If the pocket fabric is already textured, color contrast may be a more practical woodland detail than additional three-dimensional pieces.
Original Tutorial and Creator Credit
Creator: Bag-O-Day Crochet
14. Crochet Pointed Pixie Woodland Bonnet Hood
 SAVE
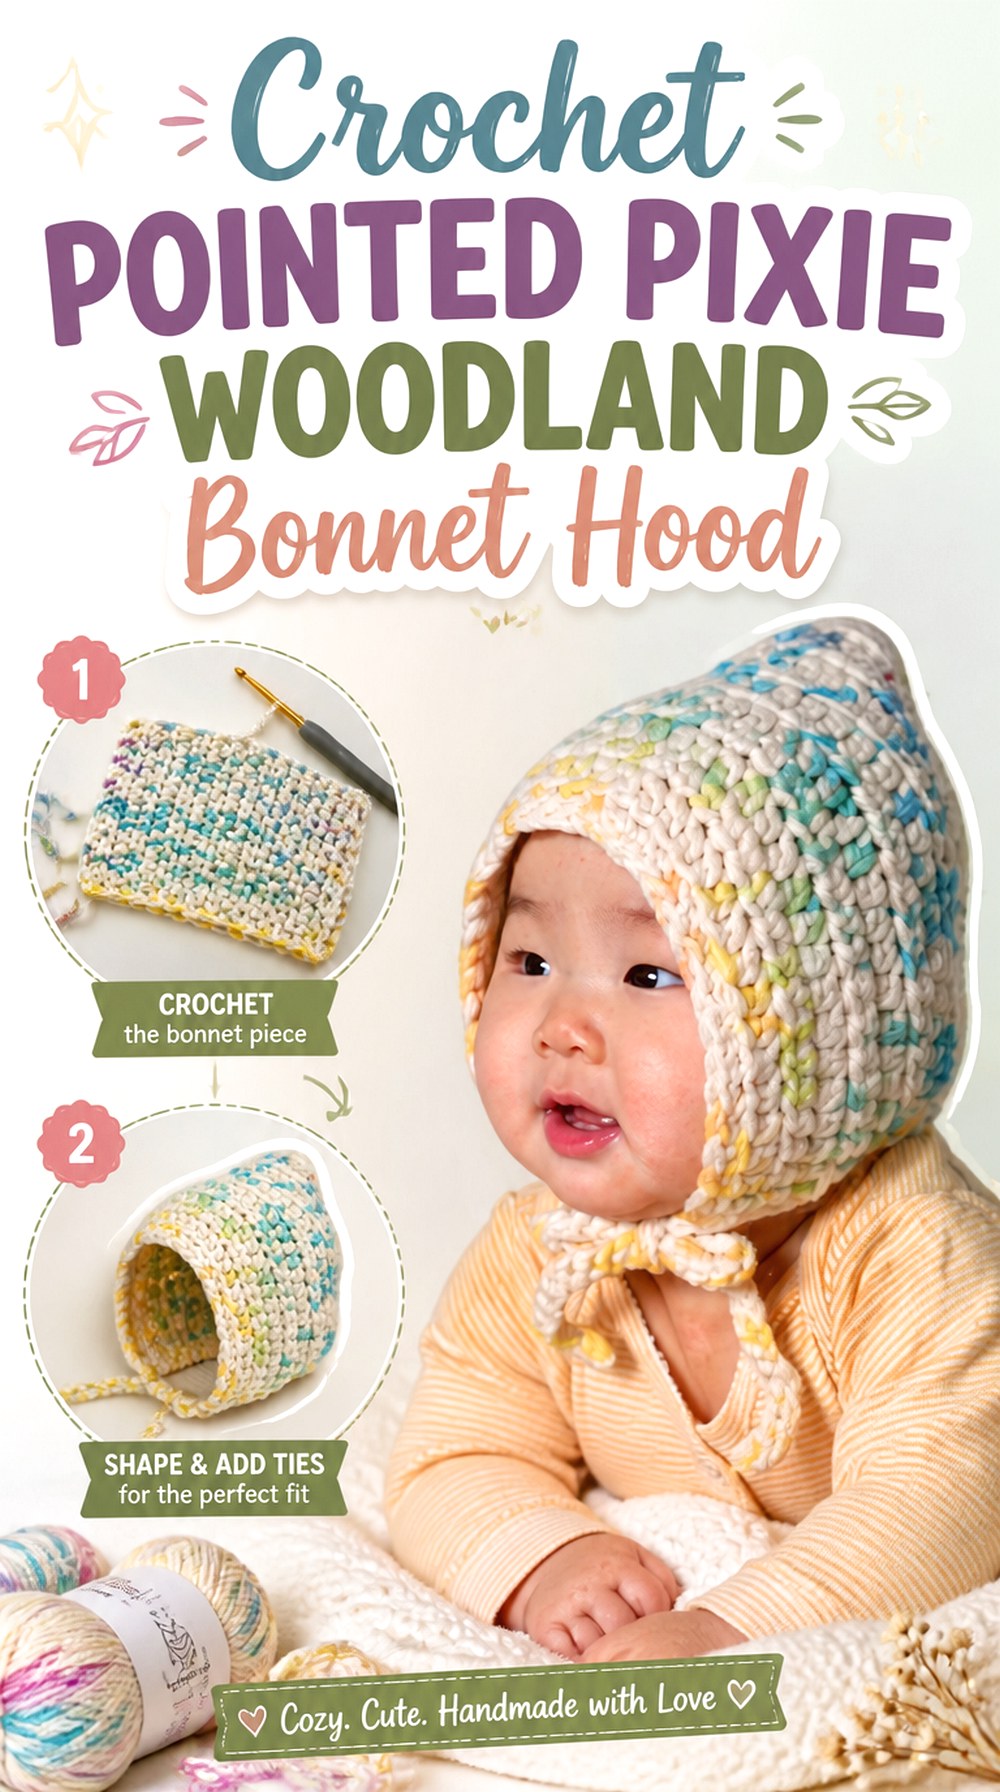
A pixie bonnet creates woodland character through one clean construction feature: the point at the back. Sweet Softies demonstrates how a crochet rectangle can become a pointed pixie bonnet and explicitly describes the finished style as having a fairytale and woodland feel.
This option is much smaller and more contained than a cape, poncho, or long hooded scarf. It can work in subtle natural colors without any animal features, making it useful for readers who want forest styling rather than a literal fox or rabbit. Because the point supplies the identity, the rest of the bonnet can remain relatively restrained.
The Point Needs to Stay Proportional to the Head
A longer or wider rectangle changes more than the overall size—it can also alter how prominent the back point appears.
When adjusting a bonnet, compare the finished point with the head size rather than enlarging every dimension automatically. A dramatic adult pixie shape and a softly pointed child bonnet do not need identical proportions.
Keep Ties Appropriate to the Intended Wearer
Bonnet ties influence both fit and styling. For adults or supervised costume wear, they can enhance the storybook silhouette. For very young children, avoid casually lengthening ties merely for a more dramatic photograph.
The most useful adaptation is one that preserves secure, comfortable wear rather than adding unnecessary dangling length.
Original Tutorial and Creator Credit
Creator: Sweet Softies
15. Crochet Built In Scarf Woodland Hood
 SAVE
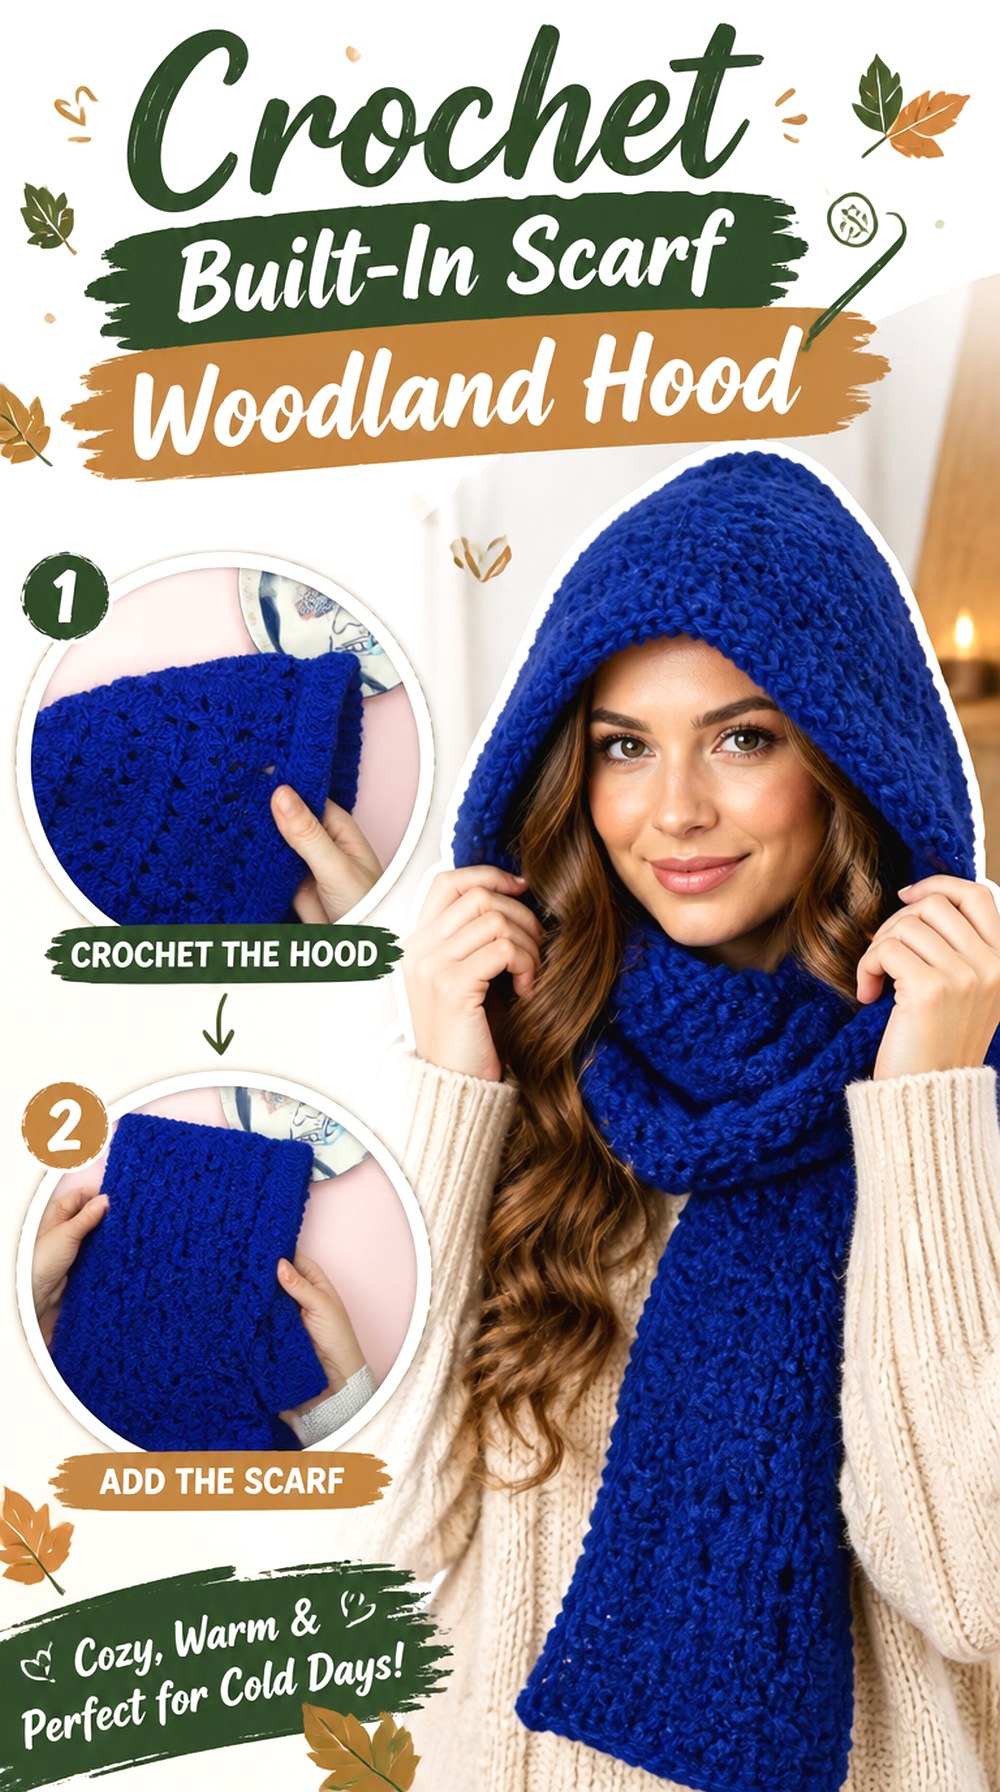
Doblecroché’s project combines a hood with an integrated scarf, creating a straightforward two-in-one cold-weather shape. It lacks the strong animal identity of the fox, bear, and rabbit options, which can actually be an advantage for a more mature woodland interpretation.
Use texture, natural colors, or subtle striping to establish the forest mood while allowing the hood-and-scarf construction to remain visible. This is especially useful for readers who like the idea of a woodland hood but do not want ears, pockets, cape coverage, or a pronounced pixie point.
Integrated Scarf Sections Need Balanced Length
When scarf fabric grows directly from a hood design, the two parts should still feel visually related. Extremely long ends can overpower the head section, while very short ends may lose the practical wrapping function.
If adapting the dimensions, consider the wearer’s preferred scarf style before changing the length solely for appearance.
A Plain Base Leaves Room for One Strong Forest Detail
Because this design is structurally simple, you can choose one feature to carry the woodland idea: a bark-like border, restrained stripes, embroidered leaves, or earthy tonal changes.
Avoid adding unrelated ears, fringe, pockets, and appliqués simultaneously. A clear single theme usually reads more intentionally against a simple hood.
Watch the Transition Between Hood and Scarf
The point where the head covering becomes the scarf receives visual attention whenever the ends are wrapped. If you change colors, consider whether the transition should blend quietly or form a deliberate contrast band.
Making that choice early helps the finished woodland palette look planned rather than interrupted.
Original Tutorial and Creator Credit
Creator: Doblecroché
16. Crochet Fringe Tie Forest Hood
 SAVE
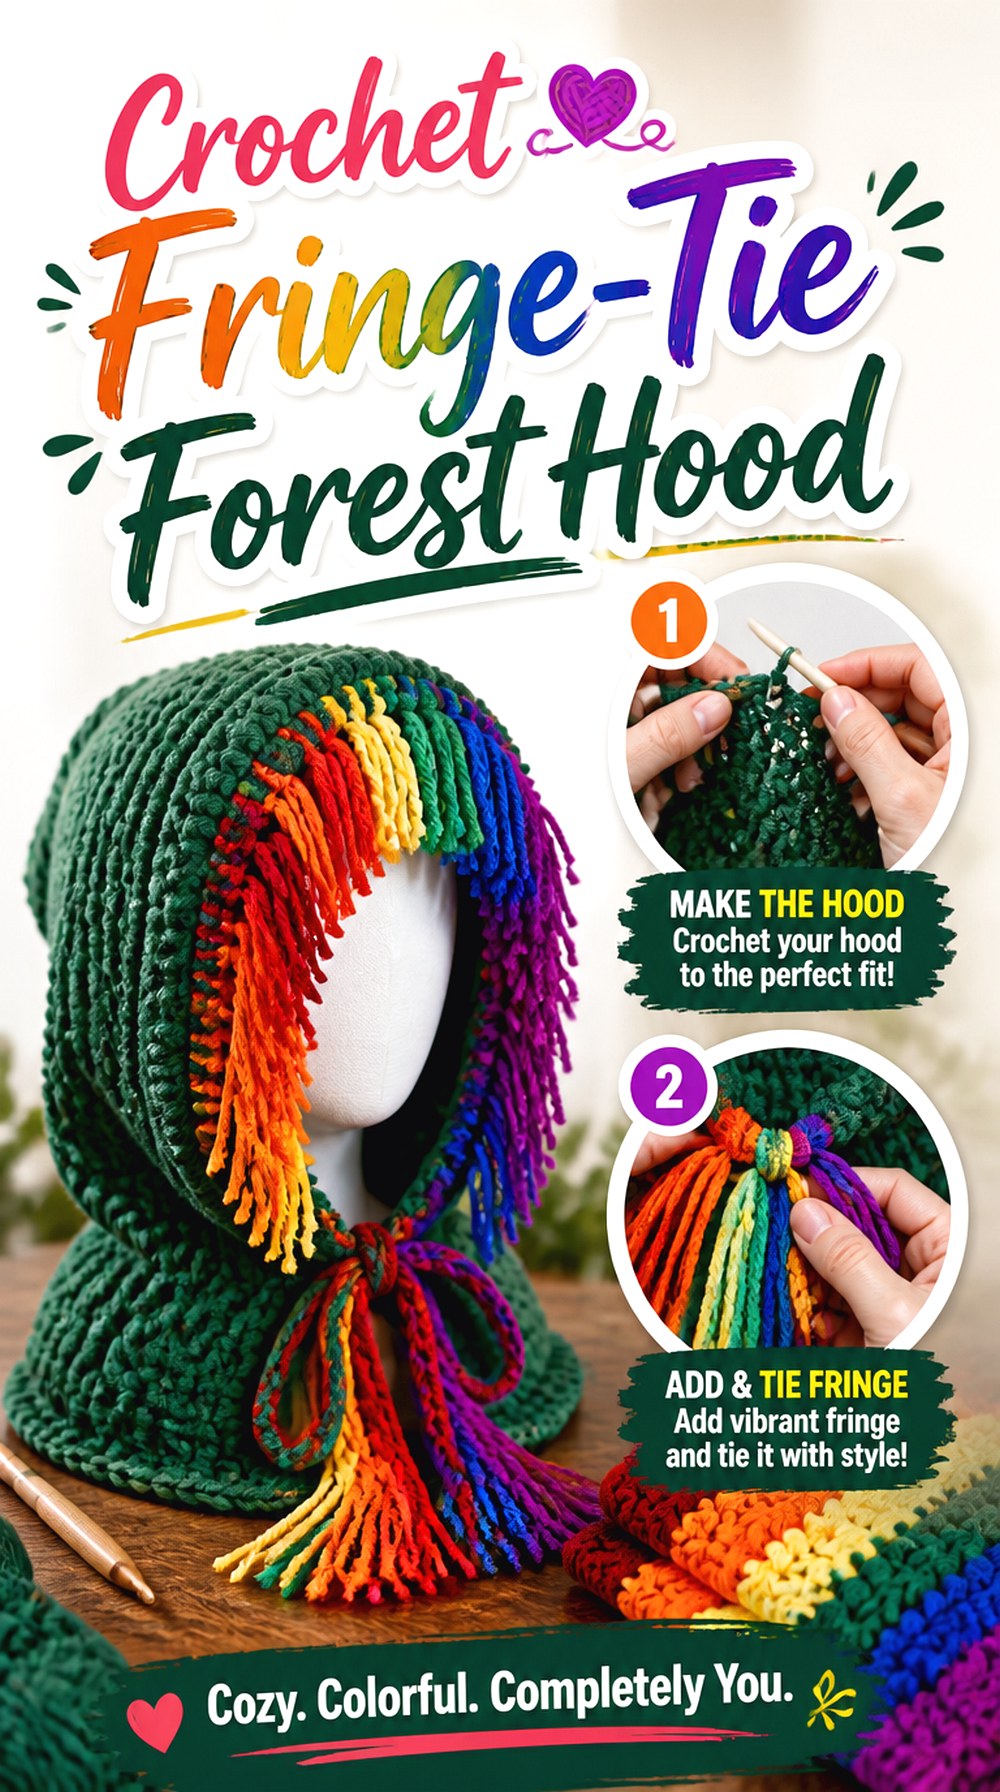
Jennetic Crafts’ tutorial demonstrates a standalone crochet hood finished with fringe, giving the collection a final option that does not depend on long scarf panels, granny motifs, ears, or shoulder coverage. The fringe supplies movement near the lower edge while the hood itself remains the clear center of the piece.
That makes it a good foundation for a rustic forest version. Deep green, earthy brown, charcoal, or autumn tones can keep the mood natural, while the fringe can echo roots, grasses, or rough woodland texture without requiring literal motifs.
Fringe Length Changes the Hood’s Visual Proportion
A short fringe reads as edging; a much longer fringe becomes a major part of the silhouette. Decide which role you want before cutting or adding more decorative material.
If the woodland concept already includes a bold color transition or textured crown, a restrained fringe can finish the hood without competing with it.
Keep Lower-Edge Movement Clear of Added Appliqués
Fringe naturally shifts while the hood is worn. Dense leaves, mushrooms, beads, or other raised elements attached in the same area can catch or overlap with that movement.
If you want a forest motif as well, place it higher on the hood where it can remain visible and relatively undisturbed.
Which Crochet Woodland Hood Shape Should You Choose?
| Woodland Hood Direction | Ideas to Compare | Main Advantage | Main Check Before Starting |
|---|---|---|---|
| Animal hood | 1, 2, 3, 4 | Strong woodland identity through ear shape | Check ear weight, visibility, and hood stability |
| Motif or textured hood | 5, 8, 12 | Forest character can come from surface design | Make sure motifs or texture remain clear after shaping |
| Compact hood or cowl | 7, 14, 16 | Less fabric than a full scarf or cape | Compare face opening, crown shape, and lower-edge finish |
| Hooded scarf | 6, 11, 13, 15 | Head and neck coverage in one accessory | Check scarf length, wrapping bulk, and pocket placement |
| Cape or poncho | 9, 10 | Strong storybook silhouette and more body coverage | Consider total garment weight and shoulder drape |
If animal character is the priority, start with the fox, bear, rabbit, or adaptable laced-back hood. For a less literal woodland look, the granny-square, shadow-stitch, or ripple cowl ideas make texture the defining feature. The pixie bonnet and fringed standalone hood sit between everyday accessory and fantasy styling, while the cape and poncho create the most dramatic silhouette.
Conclusion
The most useful way to choose among these 16 Crochet Woodland Hood Ideas is to start with the finished shape you actually want to wear. Pick the fox, bear, or rabbit options when animal identity matters; choose the granny-square or textured cowls when surface design should carry the forest theme; and consider the pixie bonnet, cape, or poncho when a storybook silhouette is more important than literal motifs.
For practical cold-weather layering, the hooded scarves and compact cowls keep the concept easier to combine with everyday clothing. Once the base shape is settled, add only the woodland details that support its fit and structure. Use the original creator tutorials for exact construction details rather than treating these adaptation notes as substitute patterns.
Frequently Asked Questions
What makes a crochet hood look woodland instead of just changing it to green or brown?
Shape and detail matter more than color alone. Fox points, rounded bear ears, rabbit ears, pixie crowns, bark-like texture, earthy granny motifs, fringe, or a cape silhouette can each create a stronger woodland reference. Start with one recognizable structural idea, then use forest colors to support it. A plain standard hood in green is still a plain hood; a carefully shaped pixie point or animal ear gives the design a clearer identity.
Which woodland hood style works without animal ears?
The granny-square balaclava, shadow-stitch scoodie, deep hooded cowl, ripple-texture cowl, pixie bonnet, hooded scarf, cape, and poncho can all work without ears. In those projects, the forest mood can come from texture, natural color relationships, a pointed silhouette, or the overall drape. This approach is useful when you want woodland styling that feels less costume-focused and easier to combine with ordinary winter clothing.
How can I tell whether a yarn will hold fox or bear ears properly?
Make a small fabric sample with the yarn and hook combination you intend to use, then observe how readily the fabric folds under its own weight. Sharp fox ears generally need clearer structure than small rounded bear ears. If the fabric collapses very easily, the ear may need a different construction choice or material than you first planned. Do not assume that two yarns in the same labeled weight will create identical stiffness or drape.
Can I add woodland appliqués to a granny-square or textured hood?
Yes, but consider what the fabric already contributes. Granny joins, shadow stitches, and ripple textures are visually active surfaces, so numerous leaves, mushrooms, or flowers may hide the feature that made the hood interesting in the first place. Try temporary placement before attaching anything. A few motifs centered on quieter areas often read more clearly than an appliqué placed over every square, join, ridge, or stripe.
Should I make the hood before deciding where animal ears go?
Usually, that is the more reliable planning method. A flat hood does not curve around the head in the same way it does when worn, so ear positions that appear perfectly symmetrical on a table can sit too far backward or outward on the wearer. Finish or mock up the hood, put it on, and temporarily pin or mark possible ear positions. Check the front, side, and back views before making the attachment permanent.
Which woodland hood ideas are most practical under a winter coat?
Compact balaclava and cowl shapes generally create less loose fabric than a poncho, cape, or very wide hooded wrap, but the right choice also depends on the coat’s collar and existing hood. Compare how much fabric gathers at the neck and whether the woodland hood needs to sit inside or outside the coat. If easy layering is the priority, avoid adding unnecessary bulky appliqués or extremely heavy trim around the neckline.