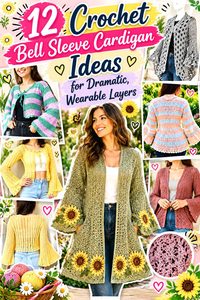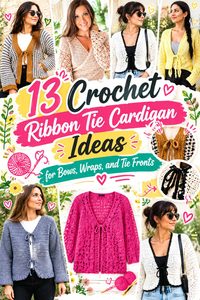
A ribbon or tie closure can completely change the character of a crochet cardigan. One small bow can give a cropped layer a delicate focal point, while several ties offer more control along the front. Wrap constructions create a different effect again, using overlap rather than a simple edge-to-edge closure. The stitch fabric matters just as much: ribbing feels different from mesh, linen stitch, granny clusters, or decorative lace.
The 13 ideas below cover that wider range rather than repeating the same cardigan in different colors. You will find single-bow designs, made-to-measure options, contrast edging, multi-tie fronts, crossover shaping, mesh, scallops, stripes, and a granny-hexagon variation. Alongside each original tutorial, the notes focus on practical choices such as fit, front-edge stability, stretch, layering, and where to check proportions before committing to a modification.
Quick List
- Crochet Ribbed Waist-Tie Cardigan
- Crochet Ribbon-Bow Front Cardigan
- Crochet Made-to-Measure Soft Bow Cardigan
- Crochet Lacy V-Neck Tie-Front Cardigan
- Crochet Contrast-Trim Tie Cardigan
- Crochet Button-Accented Front-Tie Cardigan
- Crochet Scallop-Edged Bow Cardigan
- Crochet Ocean Mesh Tie Cardigan
- Crochet Triple-Tie Drop-Shoulder Cardigan
- Crochet Crossover Lace-Sleeve Wrap Cardigan
- Crochet Striped Linen-Stitch Bow Cardigan
- Crochet Cropped Granny-Hexagon Tie Cardigan
- Crochet Lace-Edged Vintage Tie Cardigan
Choose the Closure Before the Stitch Pattern
A single center bow, several spaced ties, and a crossover wrap solve different fit and styling problems. A one-point bow leaves more of the front open and makes the closure itself a visual feature. Multiple ties distribute the closure along a larger section of the torso. A crossover cardigan needs enough front-panel overlap before its ties are tightened, so it should not be treated exactly like an edge-to-edge cardigan.
Whichever style you choose, avoid relying on the tie to pull an undersized garment into place. The cardigan body should already sit reasonably where intended before the bow is tightened. Otherwise the front edges may angle inward, the neckline can distort, or an open stitch pattern may spread around the closure. When adapting a tutorial, check the garment on the intended wearer or against a well-fitting layer before deciding where the final tie should sit.
Check Fit at the Front Edge, Armhole, and Tie Height
Tie-front cardigans make small fit differences particularly visible because the eye is drawn toward the center opening. Compare the planned cardigan width with the amount of ease you actually want, then check that the armhole and sleeve allow the type of layer you expect to wear underneath. A cardigan intended over a fitted camisole can behave differently from one worn over a shirt or dress.
Tie height also changes the silhouette. A high closure emphasizes the neckline and leaves more of the lower front open; a lower bow can visually lengthen the upper body while exposing more of the layer beneath. On made-to-measure designs, keep the two front sides symmetrical as you establish that point. For fixed-size tutorials, use the designer’s finished measurements and sizing guidance rather than assuming your usual ready-to-wear size will translate directly.
Plan for Drape, Stretch, and Edge Stability
A cardigan can fit correctly off the hook and still change once its fabric relaxes. Ribbed crochet may stretch noticeably across the body, while mesh and other open fabrics can lengthen under their own weight. Dense borders can behave differently from a lighter main fabric, and long crocheted ties may also relax after wear. These are reasons to swatch and evaluate the fabric rather than reasons to automatically choose a particular yarn weight.
Pay extra attention to the edge where a tie is attached. If that area stretches much more than the rest of the front, the bow may pull the edge out of shape. Blocking can help settle many stitch patterns, but the appropriate method depends on the fiber and construction. Follow the yarn-care information and the original designer’s guidance, particularly when substituting fibers or changing from a crocheted tie to another closure material.
1. Crochet Ribbed Waist Tie Cardigan
 SAVE
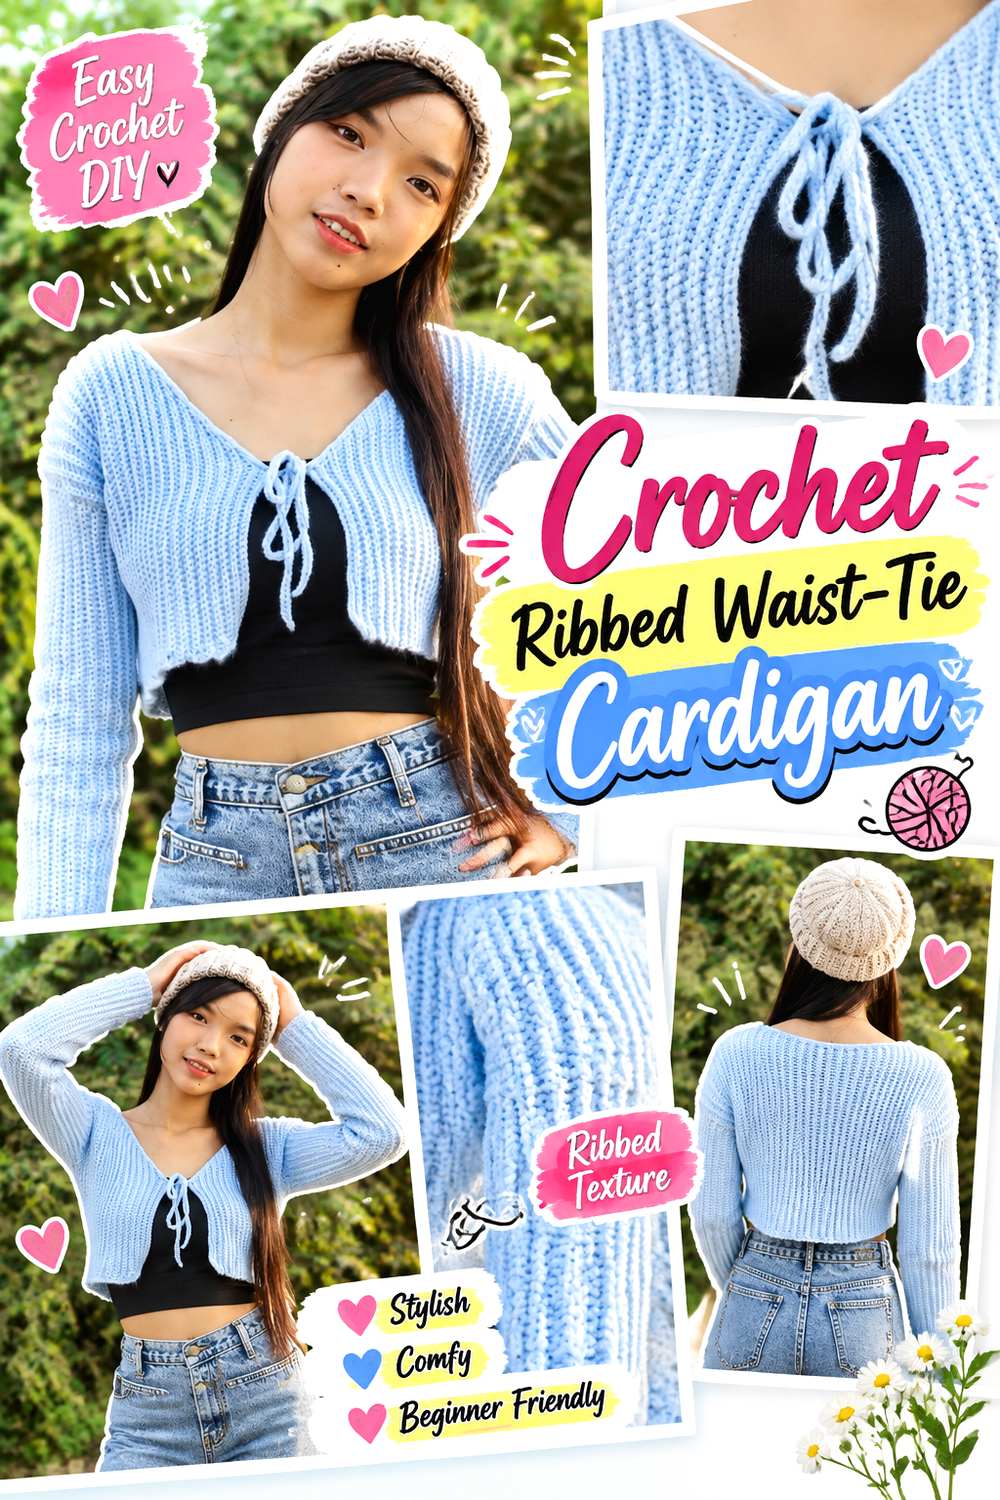
SAVEThis version makes ribbed texture the main visual element rather than treating the bow as the only detail. Chenda DIY’s tutorial is specifically presented as a ribbed front-tie cardigan, giving the finished layer a strong vertical and textural character around its simple center closure.
A ribbed cardigan works particularly well when you want a relatively clean silhouette with enough surface detail to look intentional over a plain top. The important consideration is how the ribbing behaves once worn: a textured panel that looks narrow while resting may open substantially across the body. That makes finished width and the intended amount of stretch more useful checkpoints than appearance on the worktable alone.
Read Ribbing at Its Worn Width
Ribbing is often chosen because it can flex, but that flexibility affects both appearance and sizing. Stretch a representative swatch only to the degree you expect the cardigan to experience in normal wear, then look at how much the stitch columns open. If the fabric becomes noticeably thinner or more transparent under tension, a slightly more relaxed fit may give the ribbing a cleaner appearance than depending on maximum stretch.
Let the Bow Secure the Fit, Not Create It
Before tightening the front tie, check whether the two cardigan fronts naturally approach the intended closure position. If substantial pulling is needed to make them meet, the bow can concentrate stress at one small area and exaggerate diagonal lines across the body. The closure should stabilize an already workable fit. This checkpoint becomes especially useful if you alter the cardigan width or wear it over a thicker layer than shown in the tutorial.
Original Tutorial and Creator Credit
Creator: Chenda DIY
2. Crochet Ribbon Bow Front Cardigan
 SAVE
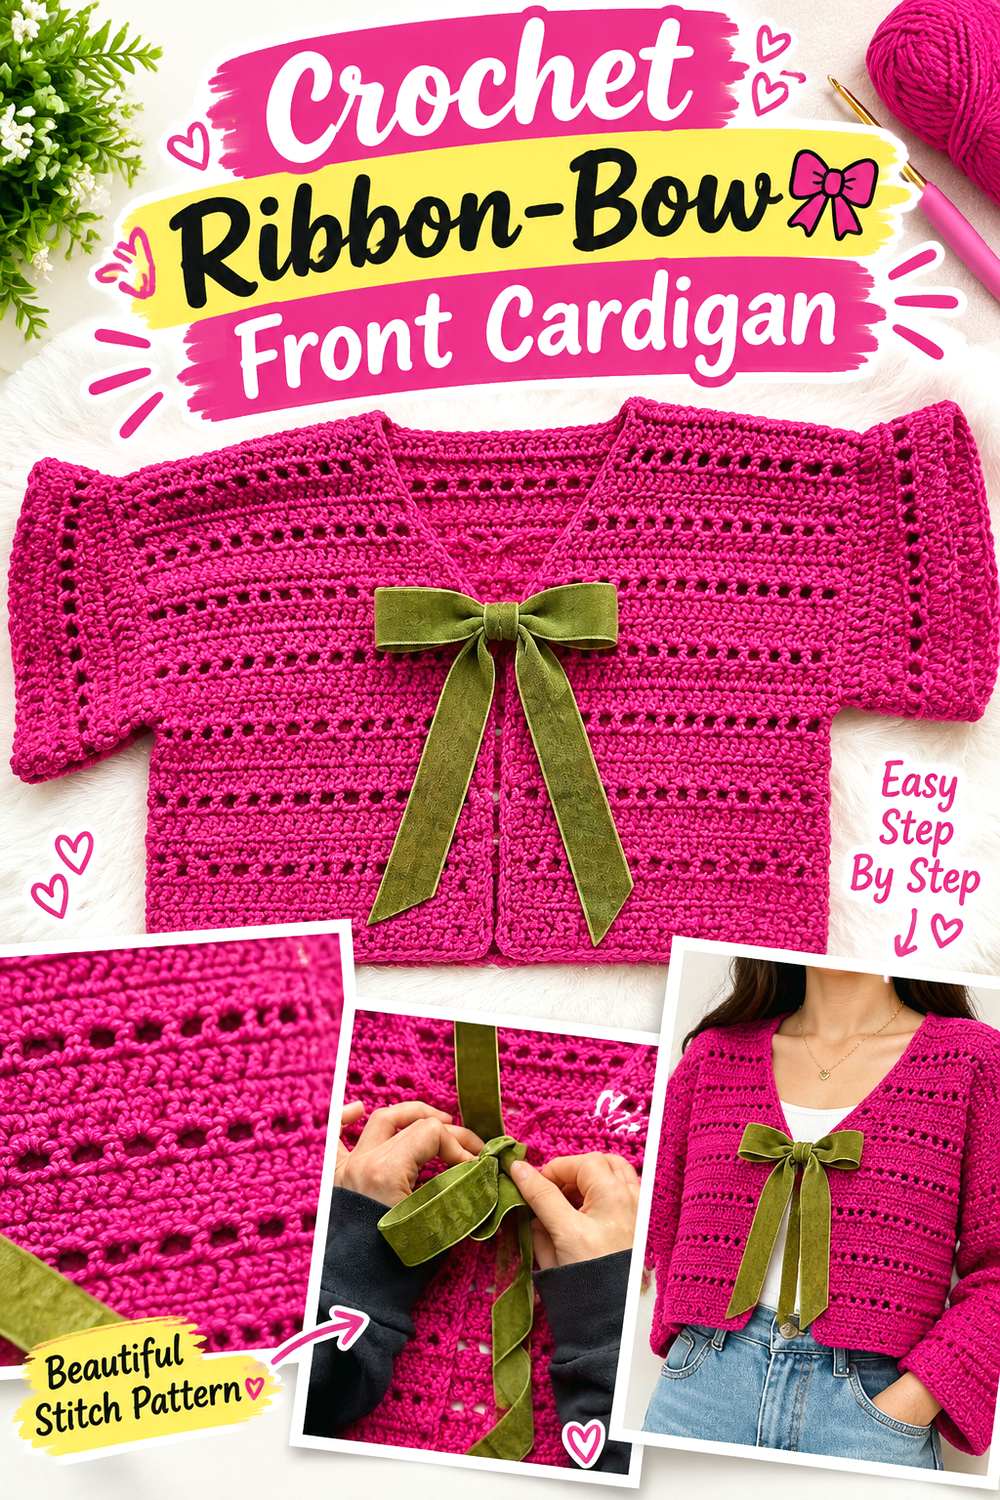
SAVEAlexa Brown’s tutorial centers specifically on a crochet ribbon tie-front cardigan, making this a strong option when the bow should read as a defining design detail rather than a purely functional fastening. The accompanying project presentation also points toward an open, decorative fabric, so the front closure remains visually light instead of competing with a dense cardigan body.
This direction suits styling where the layer beneath the cardigan is meant to remain part of the outfit. The open front and bow create negative space through the center, which means alignment is highly visible. Think about the color and neckline of the underlayer as part of the finished look, and verify the tutorial before changing the ribbon or closure construction.
Test the Closure Against the Front Edge
A central bow can look crooked even when the bow itself is neatly tied if one front edge sits higher than the other. Lay the cardigan flat first, then evaluate it worn. The shoulder position, neckline, and front lengths should settle evenly before you judge the tie. If you have altered panel dimensions, correct those structural differences rather than tightening one side of the bow more firmly to disguise them.
Keep the Ribbon Detail in Scale
The visual weight of a bow should make sense beside the cardigan fabric. A very bulky tie can overwhelm delicate openwork, while an extremely narrow closure may disappear against a highly textured edge. If you want to modify the original look, compare the proposed tie width and length against the completed front rather than choosing them in isolation. Any switch to non-crocheted ribbon should also account for attachment security and care compatibility.
Original Tutorial and Creator Credit
Creator: Alexa Brown
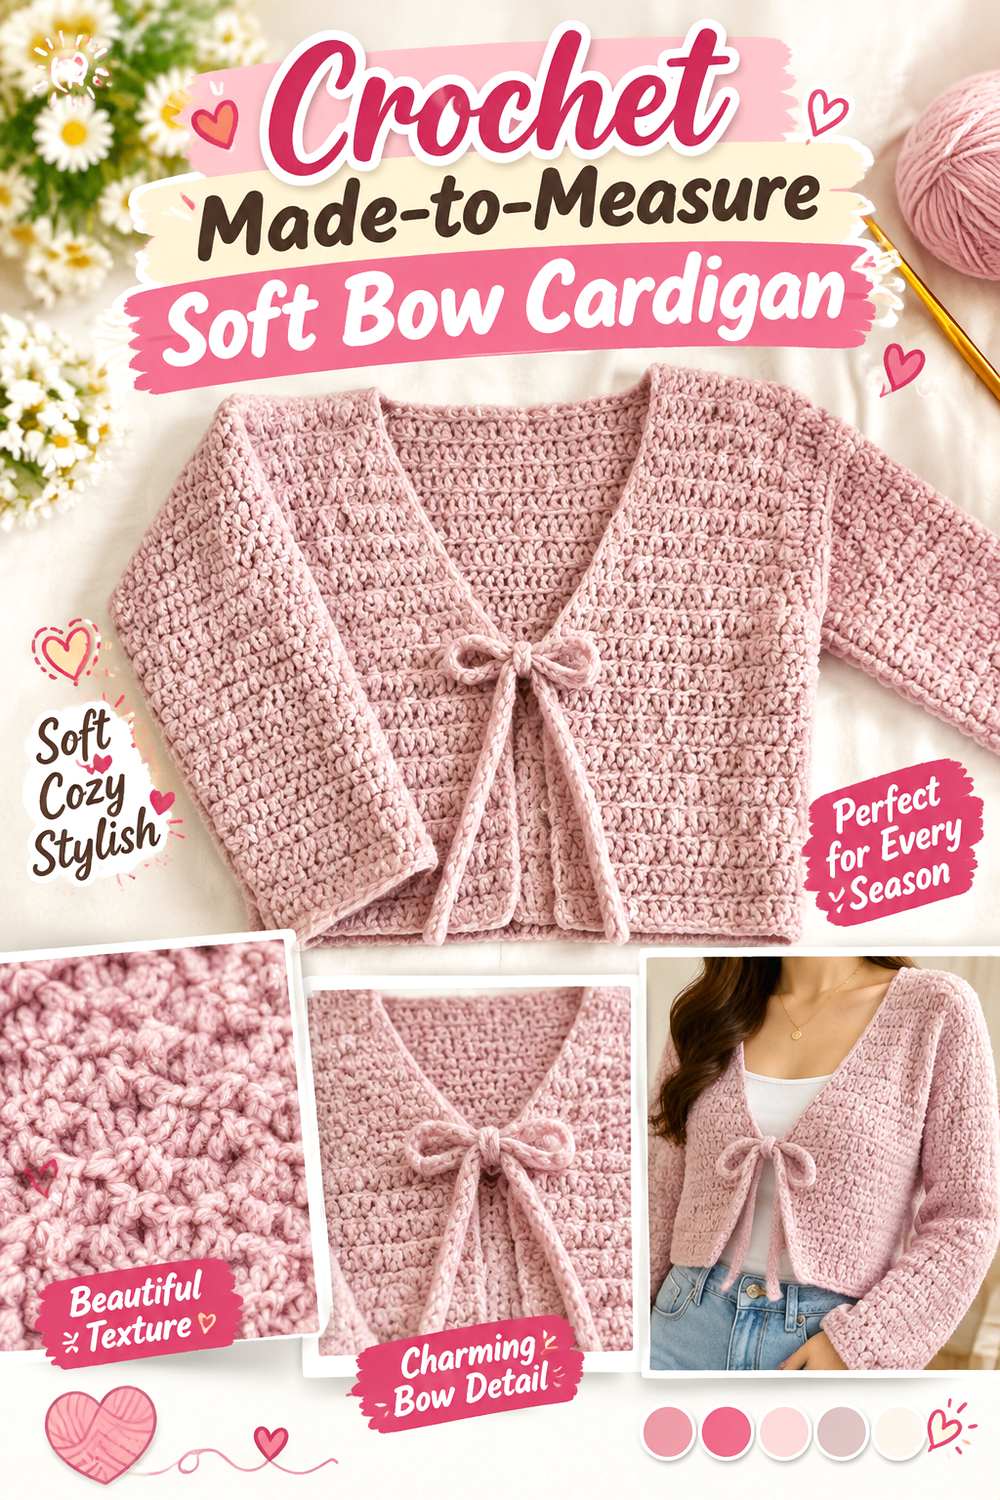
3. Crochet Made To Measure Soft Bow Cardigan
 SAVE
SAVEMahum’s cardigan tutorial is presented as made-to-measure and includes a front-tie bow, with the designer explaining that the approach can be adjusted toward a fitted, loose, or oversized result. Her accompanying project information also emphasizes its customizable construction rather than a single fixed silhouette.
That flexibility makes this idea useful for anyone whose main priority is controlling proportions. Instead of thinking only about bust width, decide how you want the cardigan to sit at the shoulders, how much room the sleeve needs over your usual base layer, and where you want the bow in relation to the waist. Made-to-measure does not remove the need for planning; it simply gives you more points at which to make deliberate choices.
Choose Ease Before You Measure Panels
Decide whether the cardigan is meant to skim the body, sit loosely, or layer over thicker clothing before finalizing panel dimensions. Using body measurements without an ease decision can produce a garment that technically matches the wearer but does not behave as expected. Compare the developing piece with a cardigan you like wearing, or hold it against the intended wearer, while still following the tutorial’s construction logic.
Keep Both Front Sides Visually Balanced
A made-to-measure front rewards frequent comparison between its two sides. Small differences in tension or row placement can become more noticeable once a bow draws attention to the center. Check corresponding edges before assembly and again during finishing. The objective is not artificial mathematical perfection; it is to prevent one front from hanging noticeably lower or reaching farther toward the center than the other.
Recheck Bow Length After the Body Fits
Treat tie length as a finishing decision rather than assuming it should be finalized early. The same tie can look very different on a fitted cardigan and an oversized one because the surrounding proportions change. Once the cardigan body sits correctly, assess how large a bow you want and whether the ends hang comfortably without overwhelming the front. Follow the original tutorial where its tie construction is specific.
Original Tutorial and Creator Credit
Creator: mahum 🎀
4. Crochet Lacy V Neck Tie Front Cardigan
 SAVE
SAVEThe kiksandjackcrochet tutorial combines a tie front with a lacy stitch pattern, neckline shaping, and a ribbed neckline finish. Those features give this cardigan a more defined V-shaped opening than a straight-edged bow cardigan while keeping the body visually airy.
The shaped neckline makes this option especially interesting for layering over camisoles, dresses, or fitted tops where the neckline of the base layer can remain visible. At the same time, lace can change appearance when stretched, so the closure should not be used to force the V narrower than the underlying fit allows. Compare neckline depth and front width with how you actually intend to style the finished piece.
Protect the V-Neck From Tie Distortion
A V-neck already contains diagonal edges, and excessive tie tension can make those diagonals sharper or pull the neckline away from its intended shape. Try the cardigan with the tie only lightly secured first. If the neckline sits well that way but distorts when the bow is tightened, the problem is probably closure tension rather than the basic fit.
Match the Base Layer to the Openwork
Open crochet makes the clothing underneath visually significant. Before choosing yarn color or adjusting the neckline, consider whether you want high contrast, close tonal matching, or obvious layering. The same cardigan can appear much more graphic over a contrasting top. For practical coverage, inspect the openwork while the garment is worn, because stitches may spread differently than they do when the cardigan lies flat.
Original Tutorial and Creator Credit
Creator: kiksandjackcrochet
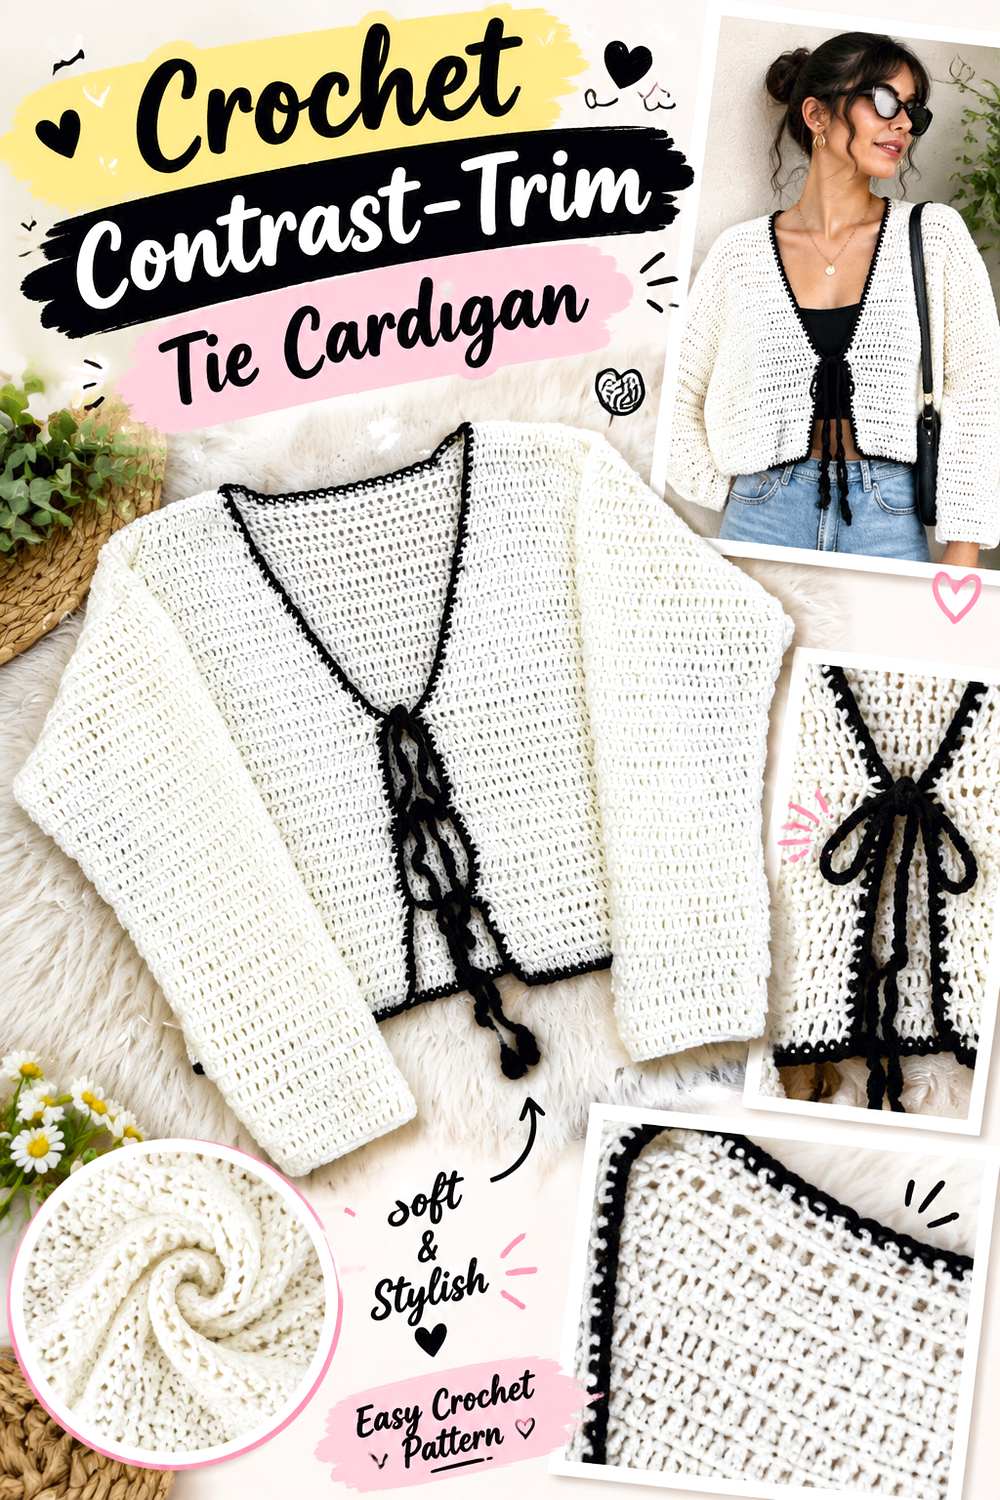
5. Crochet Contrast Trim Tie Cardigan
 SAVE
SAVEKenikse Crochet’s front-tie cardigan tutorial uses a main yarn color together with an accent color and includes border-and-tie finishing, making contrast placement a real part of the project’s design rather than an afterthought.
That creates an opportunity to emphasize the cardigan’s outline: the eye naturally follows the contrasting edge toward the tie. It is a useful approach when you like a simple cardigan silhouette but want more definition around the front opening. The key is restraint. Contrast can highlight uneven edging just as easily as it highlights neat finishing, so evaluate border tension and front symmetry before deciding that a stronger color difference will improve the garment.
Watch Border Tension in the Accent Color
An edging worked tighter than the main fabric can draw the cardigan fronts inward, while a loose border may ripple. Because contrast makes the edge more visible, either problem becomes easier to notice. Spread the cardigan in its natural shape as you work the finishing section and periodically check that the front edge remains flat. If you substitute yarn for the accent, compare its thickness and behavior with the main fabric first.
Use Contrast to Emphasize the Silhouette
Think about which lines deserve emphasis. A strong accent along the front and tie leads the eye directly toward the closure, whereas a lower-contrast pairing produces a quieter result. If you alter the designer’s palette, test the two yarns together in the actual stitch texture rather than relying only on skeins placed side by side. Surface texture can change how strongly two colors appear to contrast.
Original Tutorial and Creator Credit
Creator: Kenikse Crochet
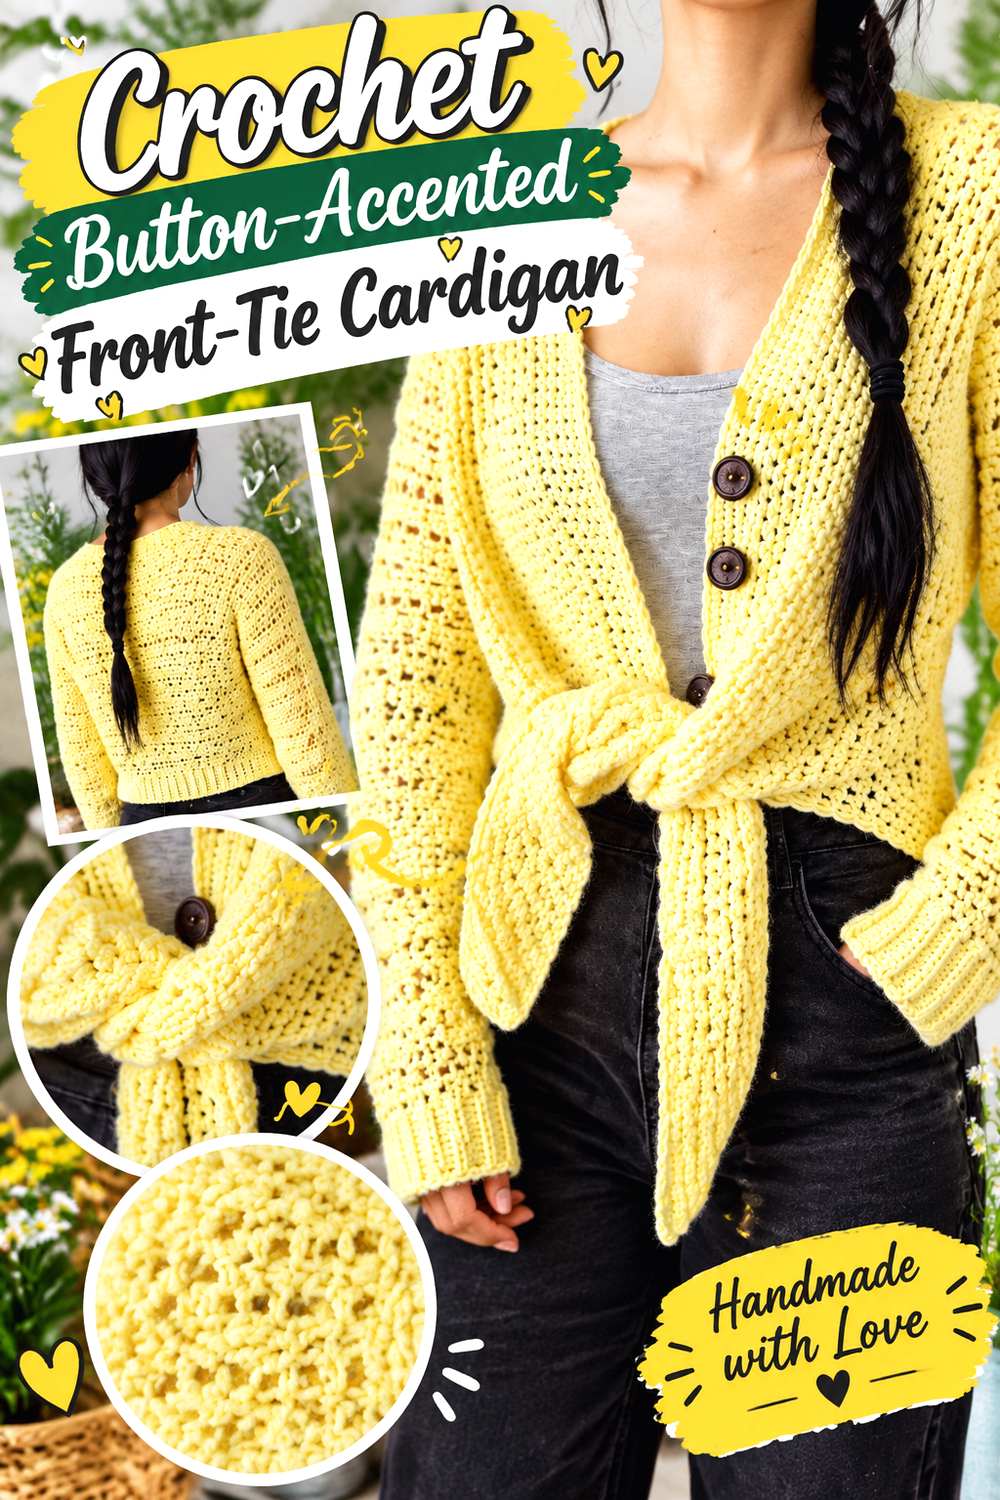
6. Crochet Button Accented Front Tie Cardigan
 SAVE
SAVETCDDIY’s front-tie cardigan tutorial includes outer-edge finishing and button detailing in addition to the tie-front concept. That combination gives this idea a more embellished front than a cardigan relying on one bow alone.
This is a useful direction when you like the softness of a tie closure but also want small hardware details to punctuate the edge. Before adapting it, determine which element is structural and which is mainly decorative in the original tutorial. Adding extra fastening points without considering the intended front overlap can change the way the cardigan hangs. Buttons also introduce different weight and care considerations from yarn-only finishing.
Decide Which Closure Does the Work
When a design includes more than one front detail, identify what actually controls the garment’s fit. If the tie is intended as the primary fastening, do not assume decorative buttons should be repositioned to pull the fronts together more firmly. Conversely, if you adapt the closure, make sure the changed arrangement still allows the neckline and lower front to fall naturally rather than creating a series of tension points.
Keep Added Hardware From Weighing Down the Edge
Any added button contributes a small amount of concentrated weight. On a soft crochet edge, that can matter more than it would on woven fabric. If you substitute button size or material, hold the proposed button against the completed edge and see whether it causes the fabric to droop. Also check the yarn label and button material when deciding how the finished cardigan should be washed or dried.
Original Tutorial and Creator Credit
Creator: TCDDIY
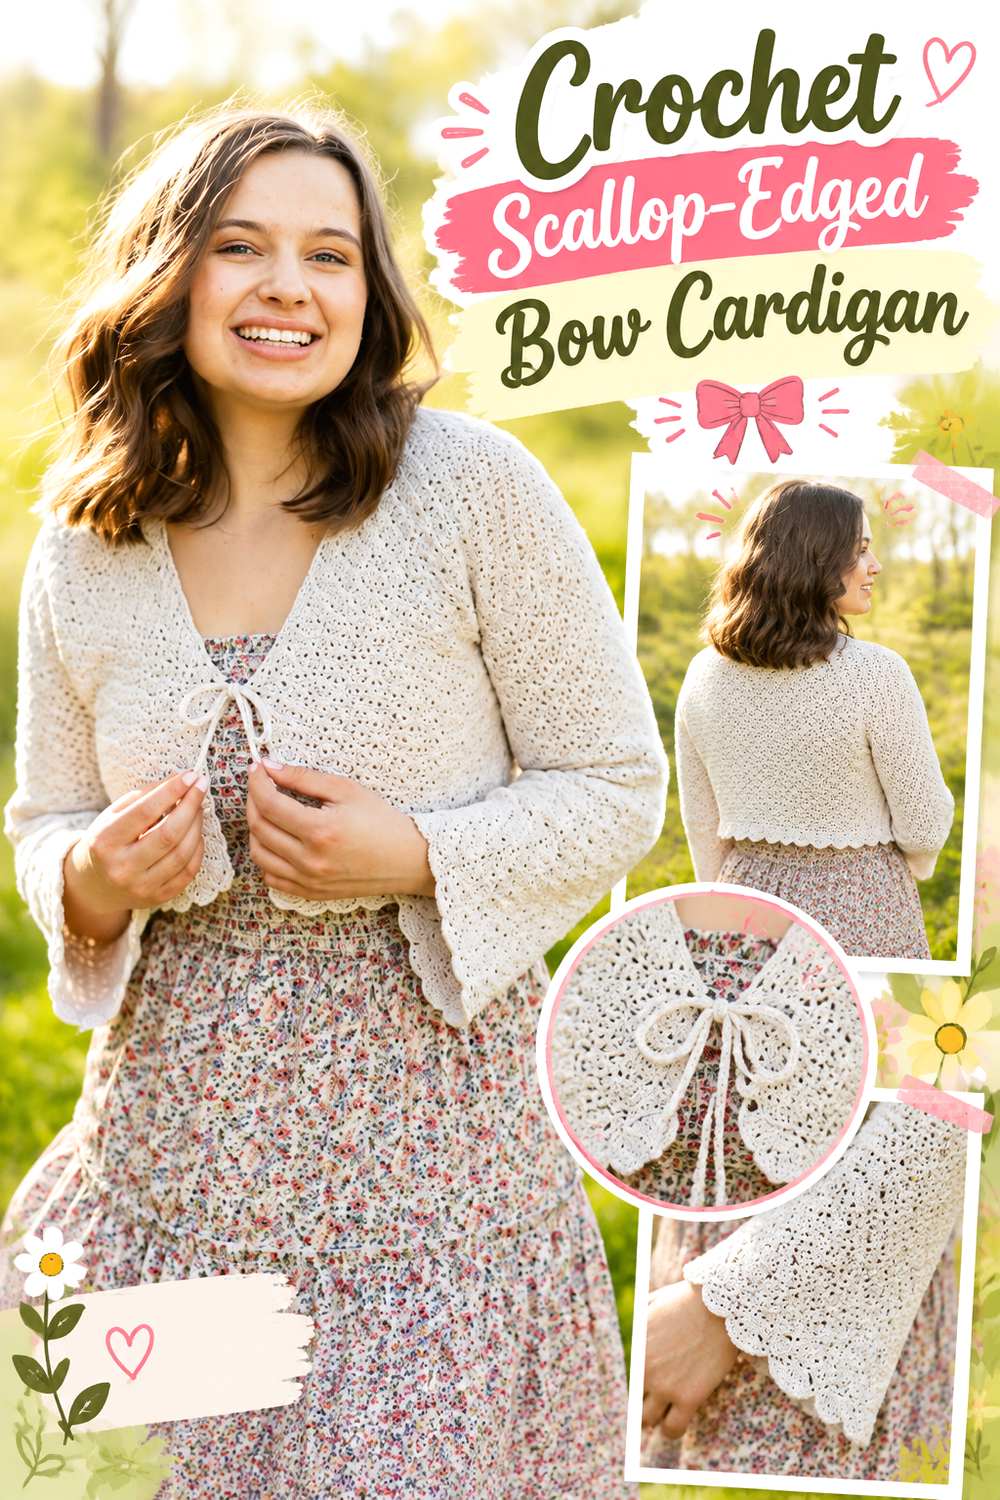
7. Crochet Scallop Edged Bow Cardigan
 SAVE
SAVEStitchberry’s Lilith cardigan is built from five flat-worked panels and combines a bow-tie front with decorative stitch texture and a scalloped lower edge. The original pattern also discusses adjustable length, giving the hem treatment extra importance because changing body length changes where that scalloped finish lands.
This idea stands apart from cleaner tie-front cardigans because the bottom edge contributes almost as much personality as the bow. The result can work well when you want a cardigan to feel detailed even in a single color. Before modifying the length, think about the complete silhouette rather than merely adding fabric above the decorative edge.
Treat the Scalloped Hem as Part of the Fit
A decorative hem has visual depth of its own. If you lengthen or shorten the cardigan, evaluate where the lowest points of the scallops will fall, not just where the main body stops. This is particularly relevant over high-waisted garments because a small vertical shift can change the relationship between the bow, waistline, and hem. Make body adjustments within the tutorial’s construction framework rather than guessing at the finishing.
Match Panel Lengths Before Seaming
Separate panels give you useful checkpoints before assembly. Place corresponding pieces together without stretching them and look for obvious length differences. If one panel needs to be pulled to match another, investigate tension or row differences before seaming. A scalloped finish can visually amplify an uneven base edge, so establishing a balanced body first will usually produce a cleaner final line.
Place the Bow After a Try-On
A bow can make the cardigan look higher-waisted or lower-waisted depending on where it sits. If you are adapting the original proportions, temporarily position the closure and try the cardigan over the type of garment you expect to wear underneath. This simple visual check is more useful than choosing tie placement only from body measurements because shoulder position and garment ease also influence where the front settles.
Original Tutorial and Creator Credit
Creator/Site: Stitchberry
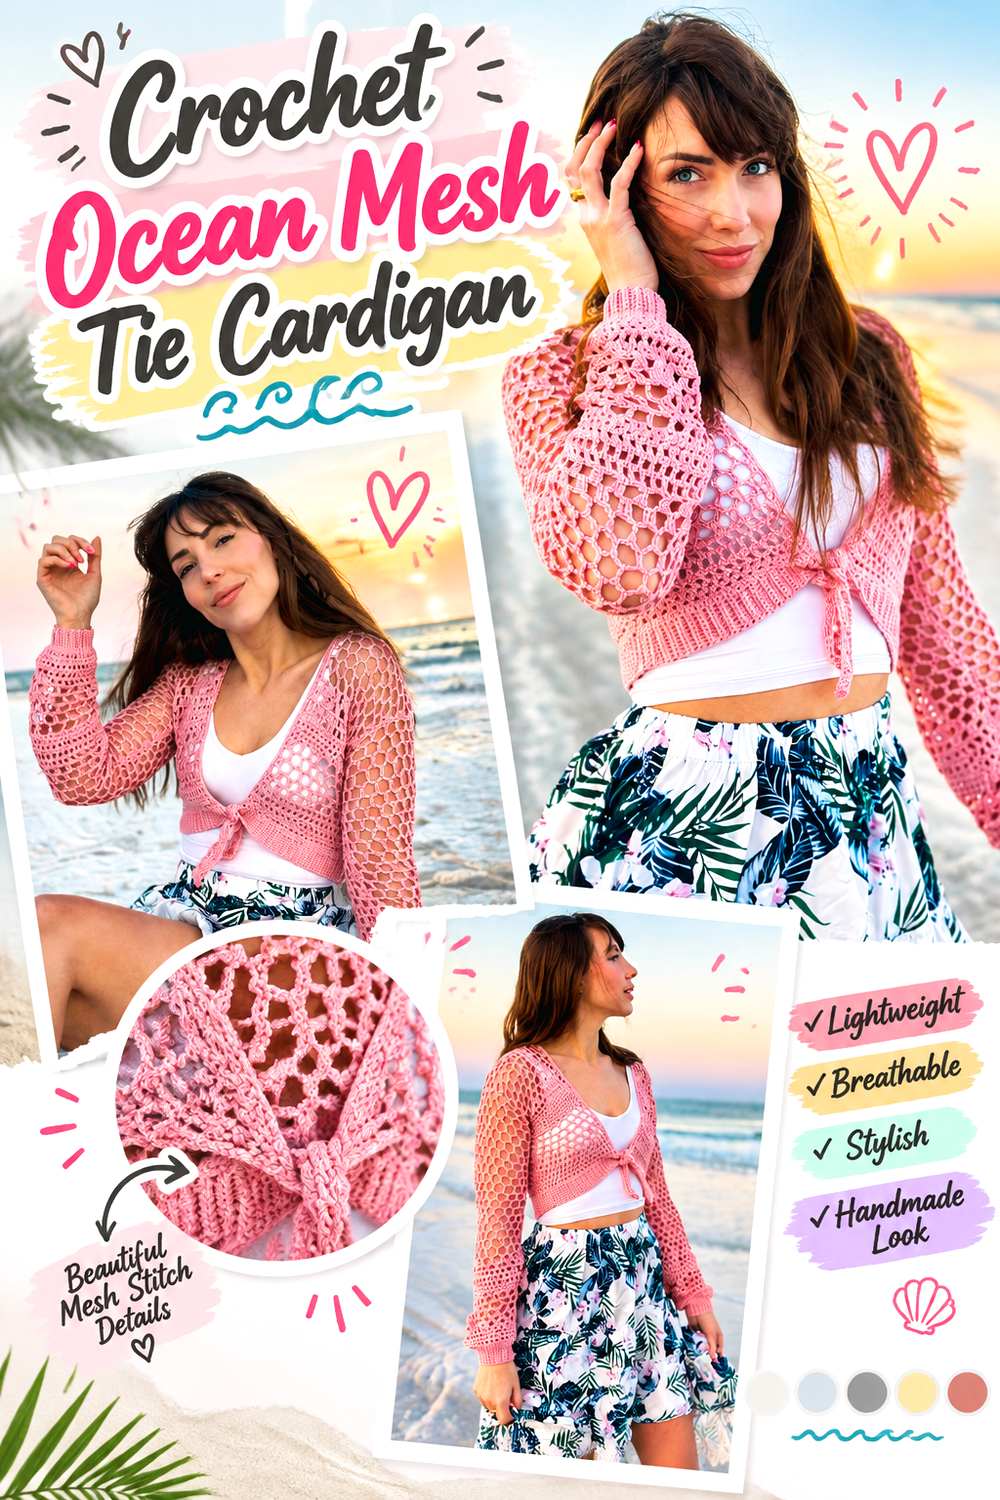
8. Crochet Ocean Mesh Tie Cardigan
 SAVE
SAVEEvelyn And Peter Crochet’s Ocean Tied Cardi is an airy, mesh-focused cardigan with multiple open stitch textures and an optional front tie. The original design is cropped and constructed from separate panels, giving it a distinctly lighter appearance than ribbed or densely textured options in this list.
Because the fabric itself is intentionally open, this cardigan works best when you think of the underlayer as part of the styling. Mesh also deserves special attention during fitting: an open fabric may relax vertically or spread differently once worn. If you are considering yarn substitution or extra length, evaluate the weight you are adding rather than assuming the original proportions will behave identically.
Judge Mesh After It Has Relaxed
A mesh swatch can change more noticeably than a compact stitch fabric when it is handled, blocked, or allowed to hang. Before making major length alterations, give your swatch the treatment appropriate for the chosen yarn and observe both width and length. The goal is not to predict the finished garment with perfect precision, but to avoid making decisions from freshly worked fabric that has not yet settled.
Reinforce the Tie Area Visually and Structurally
The closure creates a point of tension against an otherwise open fabric. Follow the designer’s finishing method around that area rather than attaching a replacement tie casually to a single vulnerable loop. If you modify the tie, inspect the edge while the cardigan is worn and lightly fastened. Any spreading or distortion near the attachment point is a sign that the adaptation deserves reconsideration.
Plan the Cardigan Around What Shows Beneath
Mesh makes color, straps, and necklines underneath the cardigan part of the finished composition. Try possible base layers behind a swatch or the developing cardigan before deciding that the yarn color looks different from what you expected. A tonal layer can soften the openwork effect; stronger contrast can make individual stitch shapes much more prominent.
Original Tutorial and Creator Credit
Creator/Site: Evelyn And Peter Crochet
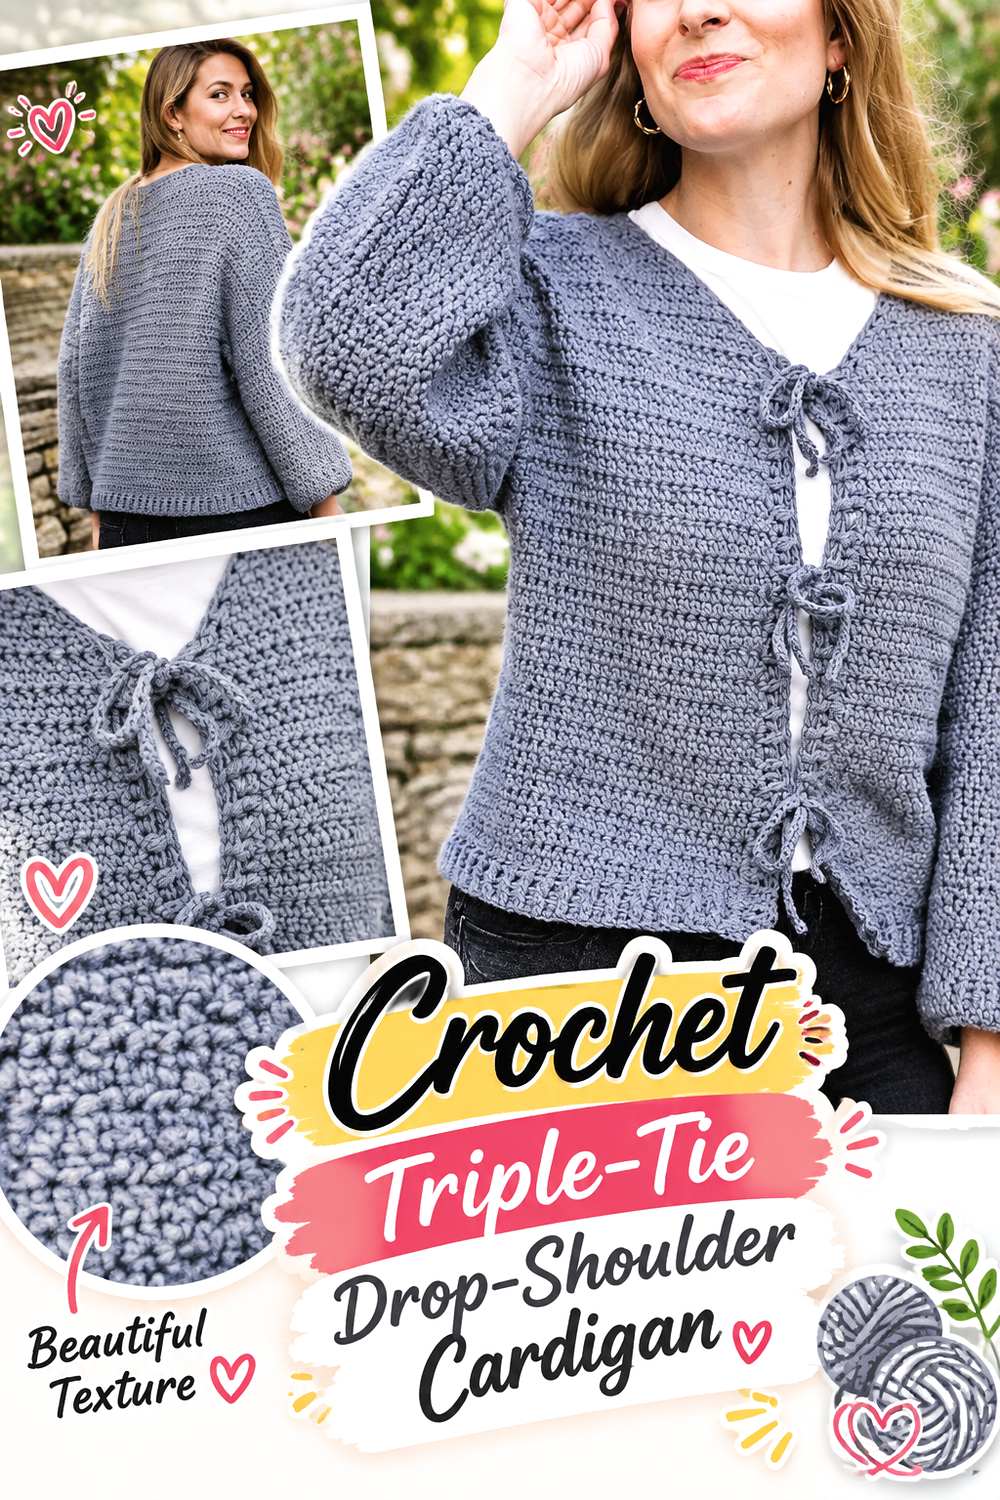
9. Crochet Triple Tie Drop Shoulder Cardigan
 SAVE
SAVECozy Nooks Designs’ Triple Tie Cardi uses three removable tie closures and a drop-shoulder shape. The original construction works the main body as one piece before the shoulder finishing, while the multiple front ties distinguish it clearly from single-bow cardigans.
Three ties offer a different visual rhythm and potentially more distributed control along the front opening. They also require more alignment: a single bow can sit slightly off center without affecting the rest of an edge, while three closure points make differences in spacing easier to see. The relaxed shoulder construction adds another fit variable, so judge sleeve and body volume separately rather than treating the ties as the only adjustable feature.
Align All Three Closure Points
Before permanently deciding where several ties belong, lay the cardigan flat with the front edges in their natural position. Corresponding tie points should relate cleanly across both sides. Then check the garment worn, because gravity can shift the vertical spacing. If one tie appears to pull much harder than the others, investigate front-edge alignment or fit rather than simply tightening every bow to the same degree.
Use Removable Ties for Styling Flexibility
The source specifically presents removable ties, which makes the closure system more adaptable than a permanently fixed bow. When styling or modifying the cardigan, consider whether all three ties need to be used at once or whether the designer’s original arrangement should remain intact for the look you want. If changing the configuration, make sure unused attachment areas do not distort or snag during wear.
Check Drop-Shoulder Volume Separately
A drop shoulder intentionally places the sleeve transition away from the anatomical shoulder point, so standard shoulder-seam expectations do not apply in quite the same way. Evaluate whether the sleeve has the amount of room and length you want before judging the torso. Making the body smaller purely to reduce sleeve volume can unintentionally alter the front closure spacing, which is why each fit area deserves its own check.
Original Tutorial and Creator Credit
Creator/Site: Cozy Nooks Designs
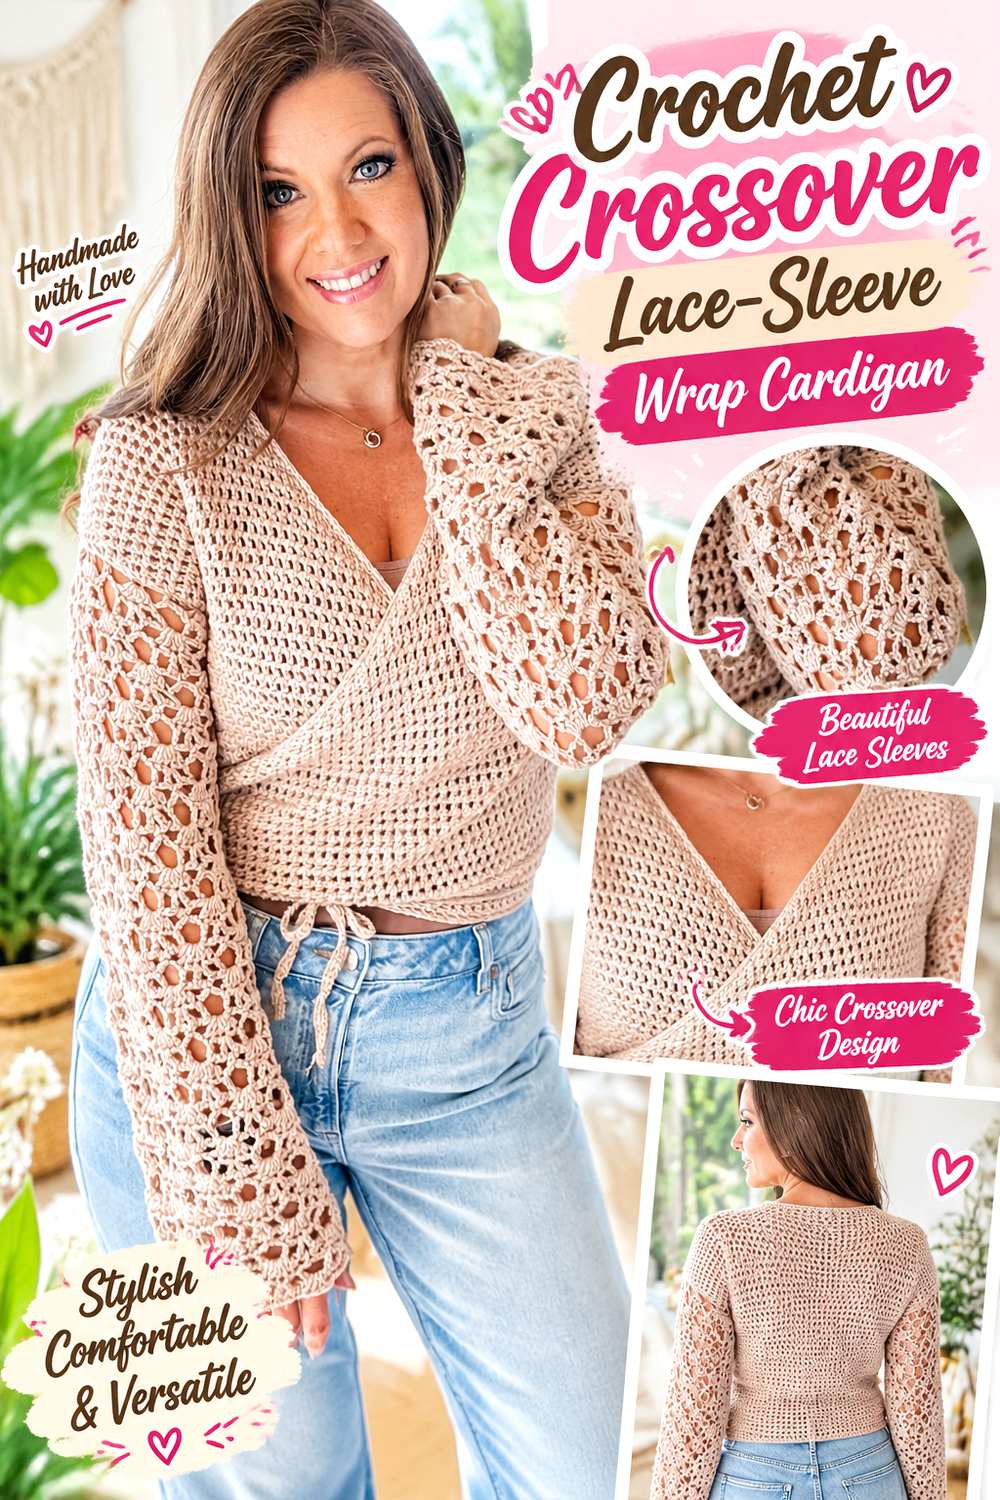
10. Crochet Crossover Lace Sleeve Wrap Cardigan
 SAVE
SAVEMJ’s Off The Hook Designs takes the tie-front idea in a different direction with a true crossover cardigan. The body is worked as a connected piece from the back toward the fronts, while triangular front sections overlap and ties secure the wrapped shape. Decorative lace or shell-like sleeve texture adds contrast to the simpler body fabric.
Unlike a cardigan whose two fronts simply approach one another, a wrap needs sufficient overlap to create its intended silhouette. That makes front width especially important. The overlapping area can also feel warmer or bulkier than the sleeves, so this choice suits readers who specifically like the asymmetry and coverage of a wrapped front rather than merely wanting a bow.
Confirm Overlap Before Tightening the Back Ties
Put the cardigan into its intended wrapped position before deciding that a tie needs to be shortened. The front sections should provide the overlap the design expects without excessive pulling across the side or back. If you alter body width, the crossover geometry changes with it. A tie can secure an appropriate overlap, but it cannot compensate cleanly for fronts that are fundamentally too narrow.
Let the Lace Sleeves Move Differently From the Body
A textured or lace sleeve may have different stretch and drape from a simpler torso fabric. Check arm movement independently from the wrap fit, especially if you substitute yarn. The body may feel comfortable while the sleeve behaves more firmly, or the reverse. Swatching both relevant textures is more informative than testing only the main body stitch.
Evaluate Double-Layer Bulk at the Front
Crossover cardigans naturally place two fabric layers over part of the torso. That is an advantage if you want more coverage, but it can make a heavier yarn feel more substantial than expected. When substituting material, consider both the fabric itself and the doubled area. A yarn that creates a pleasing single layer may produce a noticeably thicker wrapped front.
Original Tutorial and Creator Credit
Creator/Site: MJ’s Off The Hook Designs
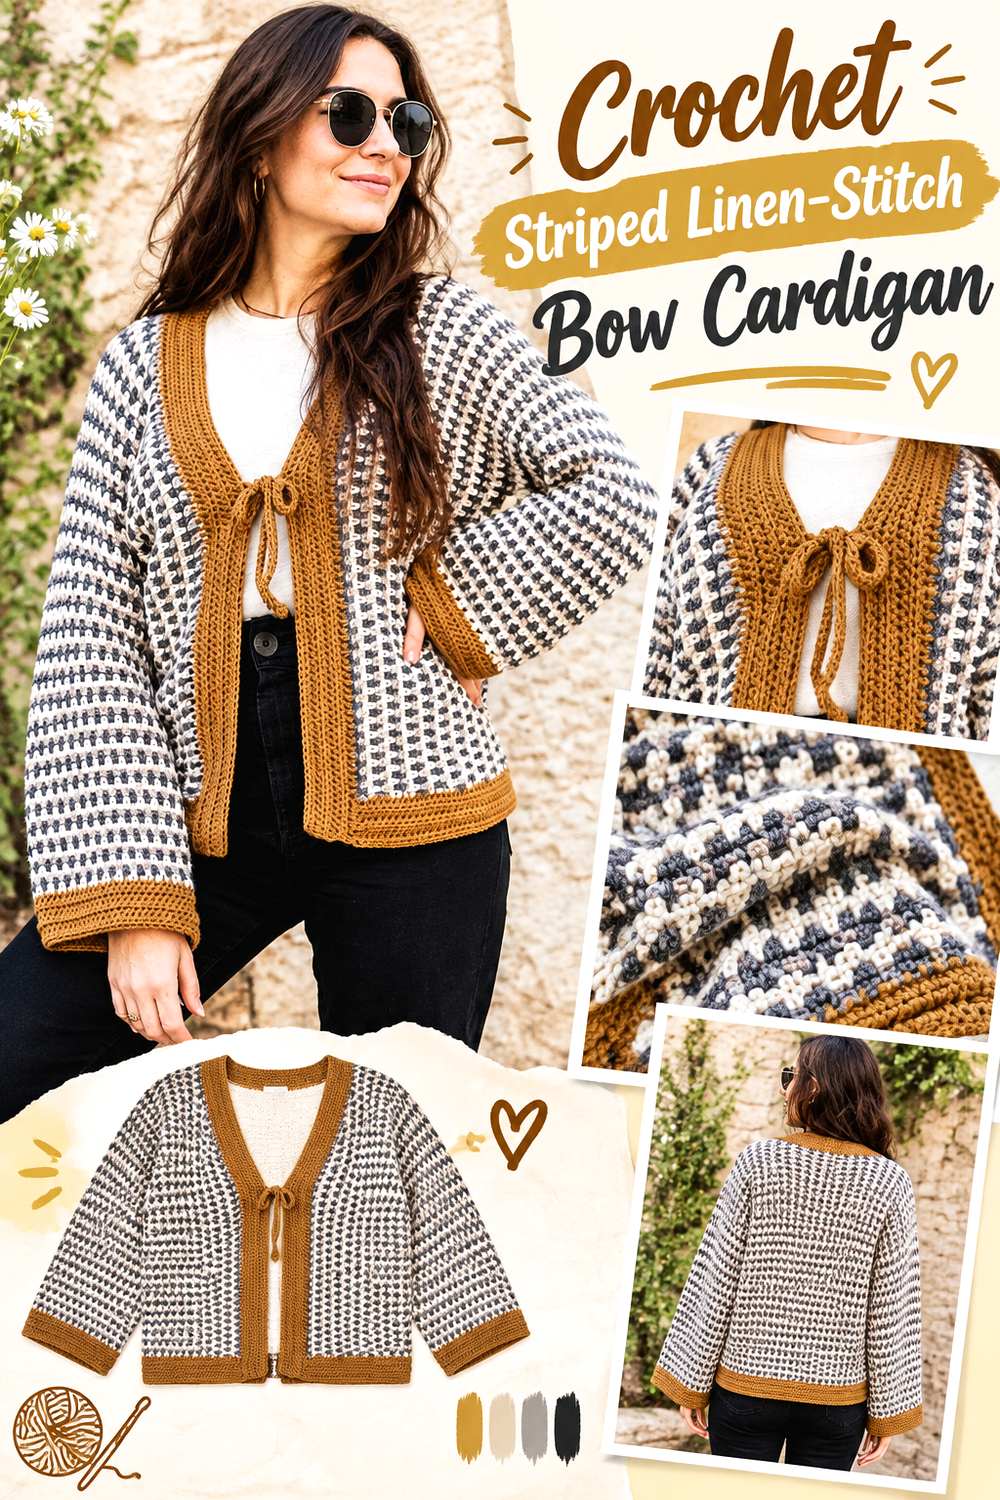
11. Crochet Striped Linen Stitch Bow Cardigan
 SAVE
SAVETwo of Wands’ Emerick Cardigan combines a tie front with linen stitch, a three-color striped body, and contrasting edging. The original design is worked flat in a side-to-side direction from cuff to cuff, making both its construction and color movement notably different from vertically built panel cardigans.
This is a strong choice when the bow is only one part of a broader graphic design. Stripes control the eye across the body, while the contrasting bands and ties frame the outer edges. Because the construction runs sideways, changes in stitch gauge can affect body length and sleeve span in ways that deserve attention before you begin substituting yarn or adjusting proportions.
Plan Color Rhythm Around the Center Bow
Striping and a central bow create two competing focal systems: horizontal or directional color movement and the centered closure. Lay your chosen colors together in sequence and consider which one you want near the front bands and ties. If you customize the palette, keeping one repeated color around the closure can help the front look intentional rather than making every design feature demand equal attention.
Account for Lengthwise Stretch
Side-to-side construction changes which direction the crochet rows travel across the body. That matters when evaluating stretch because the fabric’s most flexible direction may not correspond to a conventional bottom-up cardigan. Make a representative swatch in the actual linen-stitch fabric and handle it as it will be worn. Use the designer’s gauge and sizing information rather than assuming a substitution will affect all dimensions equally.
Keep Contrasting Bands From Flaring
A strong border color makes the outline easy to see, so wavy or flared bands become more conspicuous. As you finish the front, avoid forcing too many stitches into an edge simply to make the band lie longer. Follow the original pickup or finishing guidance and periodically place the fabric flat without stretching it. A neat band should frame the cardigan rather than alter its silhouette.
Original Tutorial and Creator Credit
Creator/Site: Two of Wands
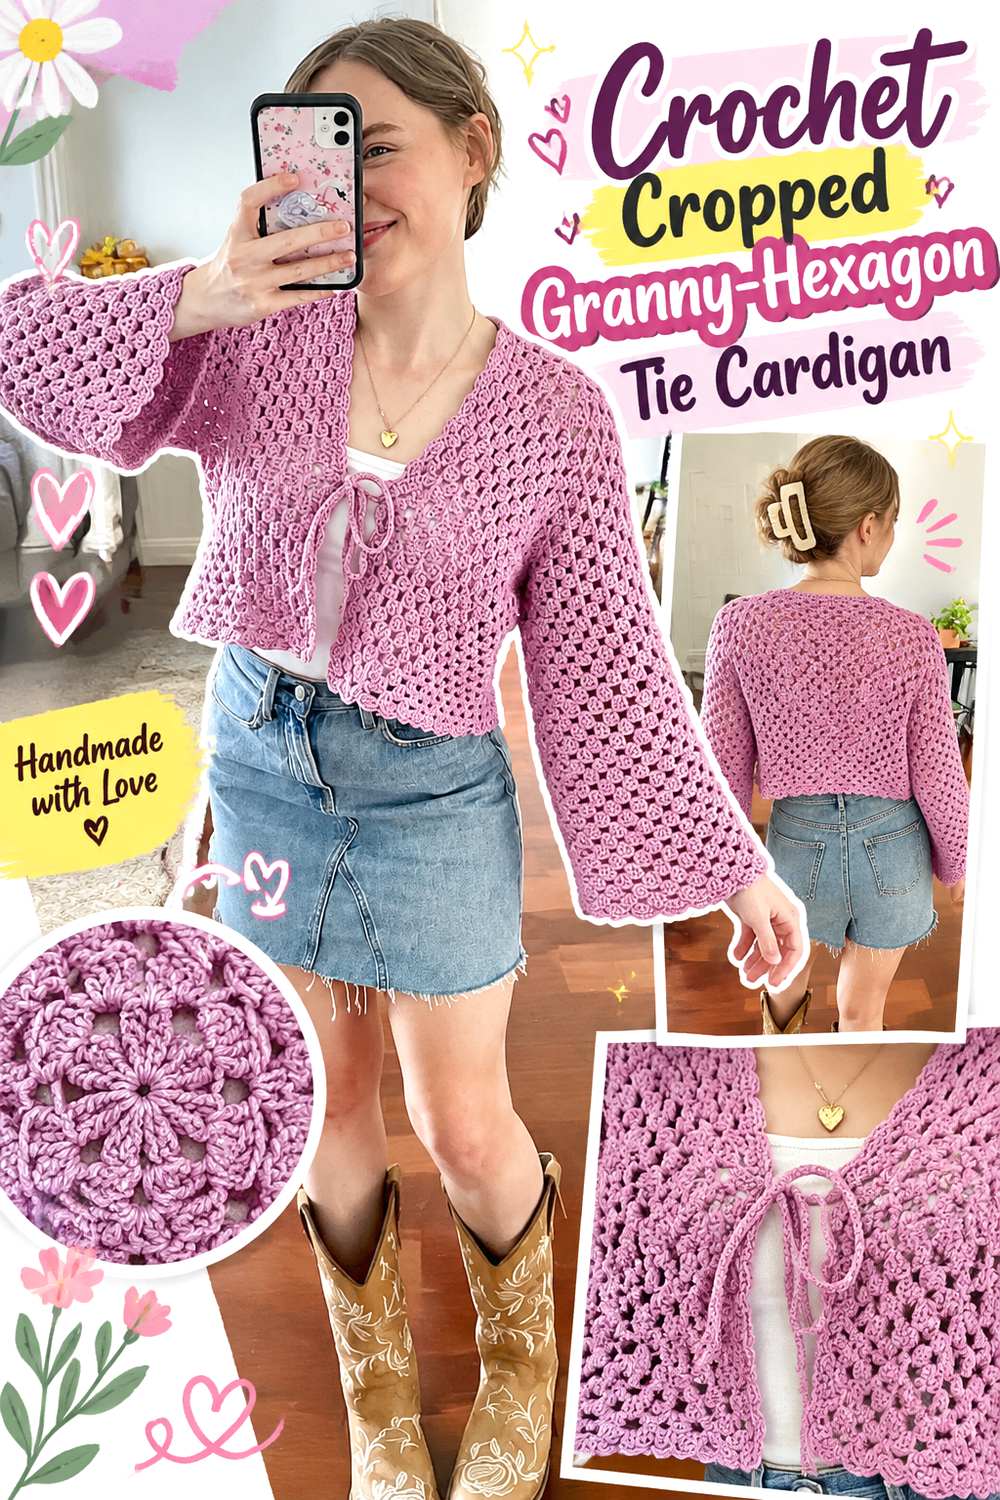
12. Crochet Cropped Granny Hexagon Tie Cardigan
 SAVE
SAVEHayHay Crochet’s classic cropped granny hexagon cardigan offers optional front ties, bringing the bow-front look into a construction based on folded crochet hexagons rather than conventional rectangular panels. The original tutorial also explains that length and width can be adjusted and includes an optional scalloped treatment.
That makes this one of the most structurally distinctive ideas in the roundup. Granny clusters give the cardigan obvious texture and openness, while the hexagon method shapes much of the sleeve and body together. If you add or reposition ties, make those decisions after the two sides are sitting correctly; the closure should complement the folded geometry rather than pulling it into a different shape.
Fold and Try the Hexagons Before Committing
A crochet hexagon can look surprisingly abstract until it is folded into cardigan form. Pause at the fitting checkpoints in the original tutorial and assess sleeve depth, body width, and front opening together. Continuing to enlarge a hexagon changes more than one dimension, so do not assume extra rounds affect only the area you want. Follow the designer’s adjustment guidance when more targeted width or length is needed.
Add Front Width Without Losing the Crop
If the cardigan feels open across the front, tightening the ties more firmly is not necessarily the right fix. The underlying body width should first suit the intended fit. At the same time, adding length everywhere may destroy the cropped proportion you chose the design for. Separate those goals and use the original tutorial’s construction options to address the dimension that actually needs adjustment.
Keep Optional Ties Proportional to Granny Texture
Granny clusters create a bold repeating surface, so very delicate ties can feel visually disconnected while oversized bows may compete with the stitch pattern. Once the cardigan is assembled, compare the tie against the scale of the clusters and edging. If you modify the closure, make sure its attachment does not distort an open cluster or place unnecessary tension on a small section of fabric.
Original Tutorial and Creator Credit
Creator/Site: HayHay Crochet
13. Crochet Lace Edged Vintage Tie Cardigan
 SAVE
SAVEInterunet’s tie-front cardigan tutorial presents a pink, openwork cardigan with decorative edging and a small front tie, producing a more ornate look than the clean ribbed or linen-stitch examples above. The page includes project-specific construction guidance and finished views of the cardigan, including its lace-oriented body and edge treatment.
This style works well when you want the tie to complete a detailed silhouette rather than dominate it. The decorative fabric, sleeves, and borders already create substantial visual movement, so a restrained closure keeps the center from becoming overly busy. If you alter yarn or edge depth, evaluate the entire garment hanging vertically because lace and decorative borders can respond noticeably to added weight.
Give Decorative Edges Room to Hang
Detailed crochet edging usually looks best when it can settle without being pulled sideways by the closure. Fasten the cardigan lightly and inspect the borders near the tie. If the decorative edge bunches or angles sharply toward the center, the closure may be under more tension than the fabric wants. Adjust fit first rather than trying to flatten the edge through aggressive blocking.
Check Sleeve and Body Openwork Together
When several lace textures appear in one cardigan, yarn substitution can affect each area differently. A fiber that makes the body pleasantly fluid might make a sleeve opening feel too loose, while a firmer substitution can reduce drape throughout. Swatch the most structurally different stitch areas when practical and use the designer’s stated gauge and construction information as your baseline.
Keep a Small Tie From Carrying Excess Tension
A delicate tie looks appropriate beside ornate edging only when the cardigan already fits comfortably. If the fronts spring apart as soon as the bow is released, the tie may be doing too much structural work. Check body width and front placement before changing the closure itself. A small bow should read as a controlled finishing element, not as the only thing preventing the garment from pulling open.
Original Tutorial and Creator Credit
Creator/Site: interunet
How These Crochet Ribbon Tie Cardigan Styles Compare
| Style | What distinguishes it | Main decision to check |
|---|---|---|
| Ribbed single tie | Strong texture with a simple focal bow | How much the ribbing opens when worn |
| Ribbon-style openwork | Light front with a prominent bow | Front-edge alignment and underlayer choice |
| Made-to-measure bow | Flexible overall proportions | Desired ease before establishing dimensions |
| Mesh or lace tie front | Airy fabric with visible layering | Relaxation, stretch, and coverage |
| Triple-tie cardigan | Several closure points down the front | Even spacing and balanced tension |
| Crossover wrap | Overlapping front panels | Adequate overlap without excessive pulling |
| Striped linen stitch | Graphic color plus a centered tie | Gauge direction and border behavior |
| Granny hexagon | Folded modular construction | Width and length changes during enlargement |
| Scalloped or lace-edged | Decorative hem and border focus | Keeping ornamented edges from distorting |
The most important distinction is whether the tie is simply closing two correctly fitted fronts or participating in a true wrap. From there, choose according to the fabric you want to wear. Ribbing provides a more substantial textured look, mesh emphasizes layering, multiple ties create repeated front detail, and scallops or lace make the finishing itself a major design feature.
Conclusion
Crochet ribbon tie cardigans can range from one understated waist bow to three removable closures or a fully overlapping wrap. If you want a clean everyday silhouette, a ribbed or made-to-measure version keeps the focus on fit. Mesh and lace options make the layer underneath more visible, while granny hexagons, scalloped borders, stripes, and contrast trim put more emphasis on construction and surface detail.
Whichever style you choose, establish the cardigan’s fit before asking the ties to hold it in place, and consider how your yarn affects drape and edge stability. Use the linked original tutorials for the designers’ exact construction, sizing, materials, and finishing details rather than trying to infer them from the inspiration photos alone.
Frequently Asked Questions
Can I replace crocheted ties with fabric ribbon?
Sometimes, but it should be treated as a design modification rather than an automatic substitution. Fabric ribbon can have very different stretch, thickness, slipperiness, and care requirements from crochet. Check how the original tie is attached and whether that area can safely support the alternative without distorting the edge. If the tutorial’s closure is structurally important, keeping its intended construction is usually the safer approach.
How can I reduce gaping on a tie-front crochet cardigan?
First determine whether the cardigan body has enough width. A tighter bow cannot reliably correct fronts that are too narrow. Then check whether the tie height suits your body and whether the front edges are stretching around the attachment point. The base layer also affects what looks like gaping: an open-front cardigan may intentionally expose more of the garment underneath than a conventional buttoned cardigan.
Can I use a different yarn from the original cardigan tutorial?
A substitution may work, but compare more than the yarn-weight label. Fiber, twist, elasticity, and the resulting crochet fabric can change gauge, drape, stretch, and garment weight. Make a swatch in the relevant stitch pattern and compare it with the designer’s gauge information where provided. For openwork, also inspect how much the holes spread when the fabric hangs or is lightly stretched.
Where should the bow sit on a tie-front cardigan?
There is no single placement that suits every construction. A higher bow changes the neckline and leaves more of the lower front open; a lower closure shifts attention toward the waist. Start with the position specified by the tutorial. If you are making a customizable design, temporarily mark the proposed point and try on the cardigan over the intended base layer before permanently attaching or finishing the ties.
Should crochet cardigan pieces be blocked before assembly?
That depends on the yarn, stitch pattern, and designer’s instructions. Blocking can make dimensions and openwork easier to evaluate, but different fibers require different handling, and some projects are intended to be blocked after assembly. Follow the yarn label and original tutorial first. If you are substituting materials, test the proposed treatment on a swatch so you can see whether it changes size or texture unexpectedly.
Which ribbon-tie cardigan style offers the most fit flexibility?
Made-to-measure designs provide the greatest opportunity to establish dimensions around the wearer, while wrap and multi-tie styles can offer some adjustment in how the front is secured. That does not make the closure a substitute for correct sizing. A crossover still needs sufficient overlap, and several ties cannot compensate for a body that is much too small. Choose the construction whose adjustment method matches the area you actually need to customize.