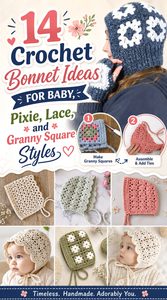
Crochet bonnets cover much more territory than the traditional close-fitting baby hat. A bonnet can be pieced from granny squares, shaped around a round crown, folded from a rectangle into a pixie point, framed with ruffles, or extended into a roomy hood. Texture also changes the effect considerably: shell stitches look lighter than dense ribbing, while puff details and raised stitches give a bonnet more visual weight.
These 14 crochet bonnet ideas are arranged to make those differences easier to compare. Along with the overall look, pay attention to construction, face opening, tie placement, yarn thickness, edging, and the age or size actually demonstrated by each creator. The linked original tutorials provide the exact construction details; the guidance here focuses on choosing a style, planning adaptations, and avoiding fit or finishing problems.
Quick List
- Crochet Join-As-You-Go Granny Square Bonnet
- Crochet Ruffle-Edge Tie Bonnet
- Crochet Flower-Crown Bonnet
- Crochet Shell-Stitch Baby Bonnet
- Crochet Vintage Puff-and-Lace Bonnet
- Crochet Rectangle Pixie Bonnet
- Crochet Custom-Fit Hood Bonnet
- Crochet Simple Round-Crown Baby Bonnet
- Crochet Cupcake-Frill Bonnet
- Crochet Openwork Lace Baby Bonnet
- Crochet Fine-Yarn V-Shell Baby Bonnet
- Crochet Alpine-Texture Shell-Edge Bonnet
- Crochet Seamed Newborn Bonnet Hat
- Crochet Ribbed Granny Square Bonnet
Choose the Bonnet Construction Before the Decoration
The fastest way to narrow this list is to decide what silhouette you want. A round-crown bonnet follows the back of the head smoothly and gives a familiar baby-bonnet profile. Rectangle-based pixie designs create a more angular back and can produce a visible point. Granny-square bonnets make the joins and motif layout part of the design, while hood-style versions usually offer more room around the head and neck.
Construction affects adaptation too. Changing a decorative border on an otherwise well-fitting bonnet is usually simpler than trying to resize an entire motif layout. Before switching yarn, adding ruffles, or changing ties, identify which part of the tutorial establishes the head circumference, crown depth, and face opening. Those are the dimensions that protect the intended shape when you customize.
Fit the Face Opening as Carefully as the Head
A crochet bonnet can match head circumference and still feel wrong if the front edge sits too far forward, pulls behind the ears, or crowds the jaw. Check the creator’s stated size whenever one is provided, and compare it with the intended wearer’s current measurements rather than relying entirely on age labels.
Ties are also functional components, not just decoration. Their attachment point affects how the lower edge sits when fastened, so assess placement before assuming longer ties will solve a loose bonnet. For baby projects, keep headwear for appropriate awake use and remove hats or hoods indoors when overheating is a concern. Babies should not sleep in hats or other head coverings; current safer-sleep guidance emphasizes keeping the head uncovered.
Yarn Changes Drape, Bulk, and Stitch Definition
A yarn substitution can alter a bonnet much more than its color. Fine yarn tends to preserve delicate lace, small shells, and light ruffles. Thicker yarn makes raised texture more pronounced but can also add bulk around the cheeks, neckline, or ties. Fibers with more body can make a pixie point or ribbed frame look defined, while softer yarn may let the same construction collapse into a relaxed hood.
If you want to substitute yarn, compare the finished fabric rather than matching the printed weight category alone. Crochet a small sample in the main texture, then check whether it bends comfortably, whether openwork gaps have become too large, and whether the edge springs back or stretches. For baby bonnets especially, softness should not come at the expense of a predictable fit.
1. Crochet Join As You Go Granny Square Bonnet
 SAVE
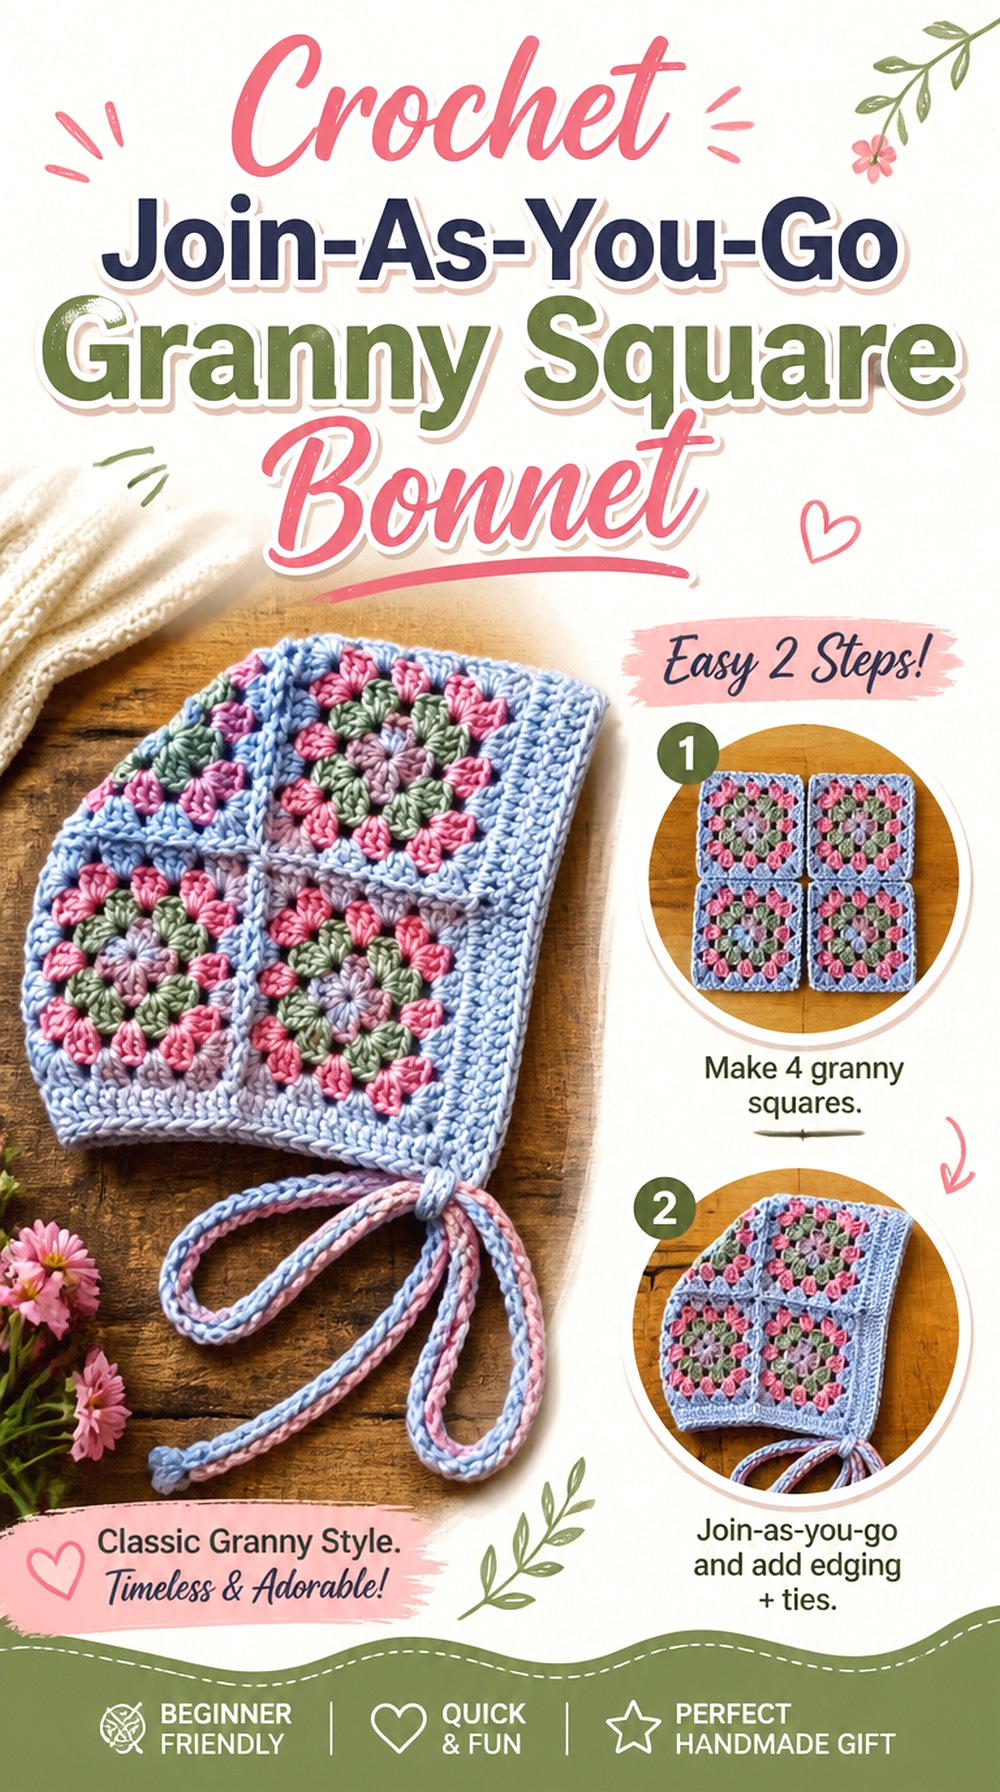
SAVEThis bonnet turns recognizable granny squares into the actual headwear structure rather than using them as a small decoration. The finished piece has a patchwork appearance, ties at the lower edge, and visible joins that contribute to the design. Triple Capricorn’s tutorial specifically demonstrates a join-as-you-go approach, so it suits readers interested in building the bonnet from separate motifs while reducing the amount of later seaming.
Compared with round-crown bonnets in this list, this version has more geometric lines. It is particularly useful when color placement and motif arrangement matter as much as the bonnet silhouette.
Joining Is Part of the Surface Design
A motif bonnet exposes its joining method much more clearly than a solid-color crown. Before committing to the complete layout, join a small pair of squares and look at the connection from both sides. A join that feels unobtrusive in one yarn may become a strong contrasting line in another.
If the join is meant to disappear, keep color and tension consistent. If you want patchwork definition, the connection itself can become part of the visual rhythm instead.
Block the Motifs Before Judging the Opening
Granny squares that appear equal straight from the hook can settle into slightly different dimensions after blocking. That matters when several edges combine to form the face opening and neckline.
Check the blocked width of the motifs before final assembly. If one square is noticeably smaller, correct that mismatch before joining rather than expecting the edging to disguise it. A bonnet assembled from uneven squares can twist or pull toward the smaller motifs even when the individual squares look fine on their own.
Color Placement Can Clarify the Patchwork Shape
Because the bonnet is assembled from repeated motifs, color distribution can make the construction look either deliberate or visually busy. Before joining, lay the squares in their intended positions and photograph the arrangement.
This gives you an easier way to spot an accidental cluster of dark centers or repeated colors. For a calmer result, repeat a border color around multiple motifs. For a bolder patchwork effect, keep the centers varied while using the joining line to visually connect the whole bonnet.
Original Tutorial and Creator Credit
Creator: Triple Capricorn
2. Crochet Ruffle Edge Tie Bonnet
 SAVE
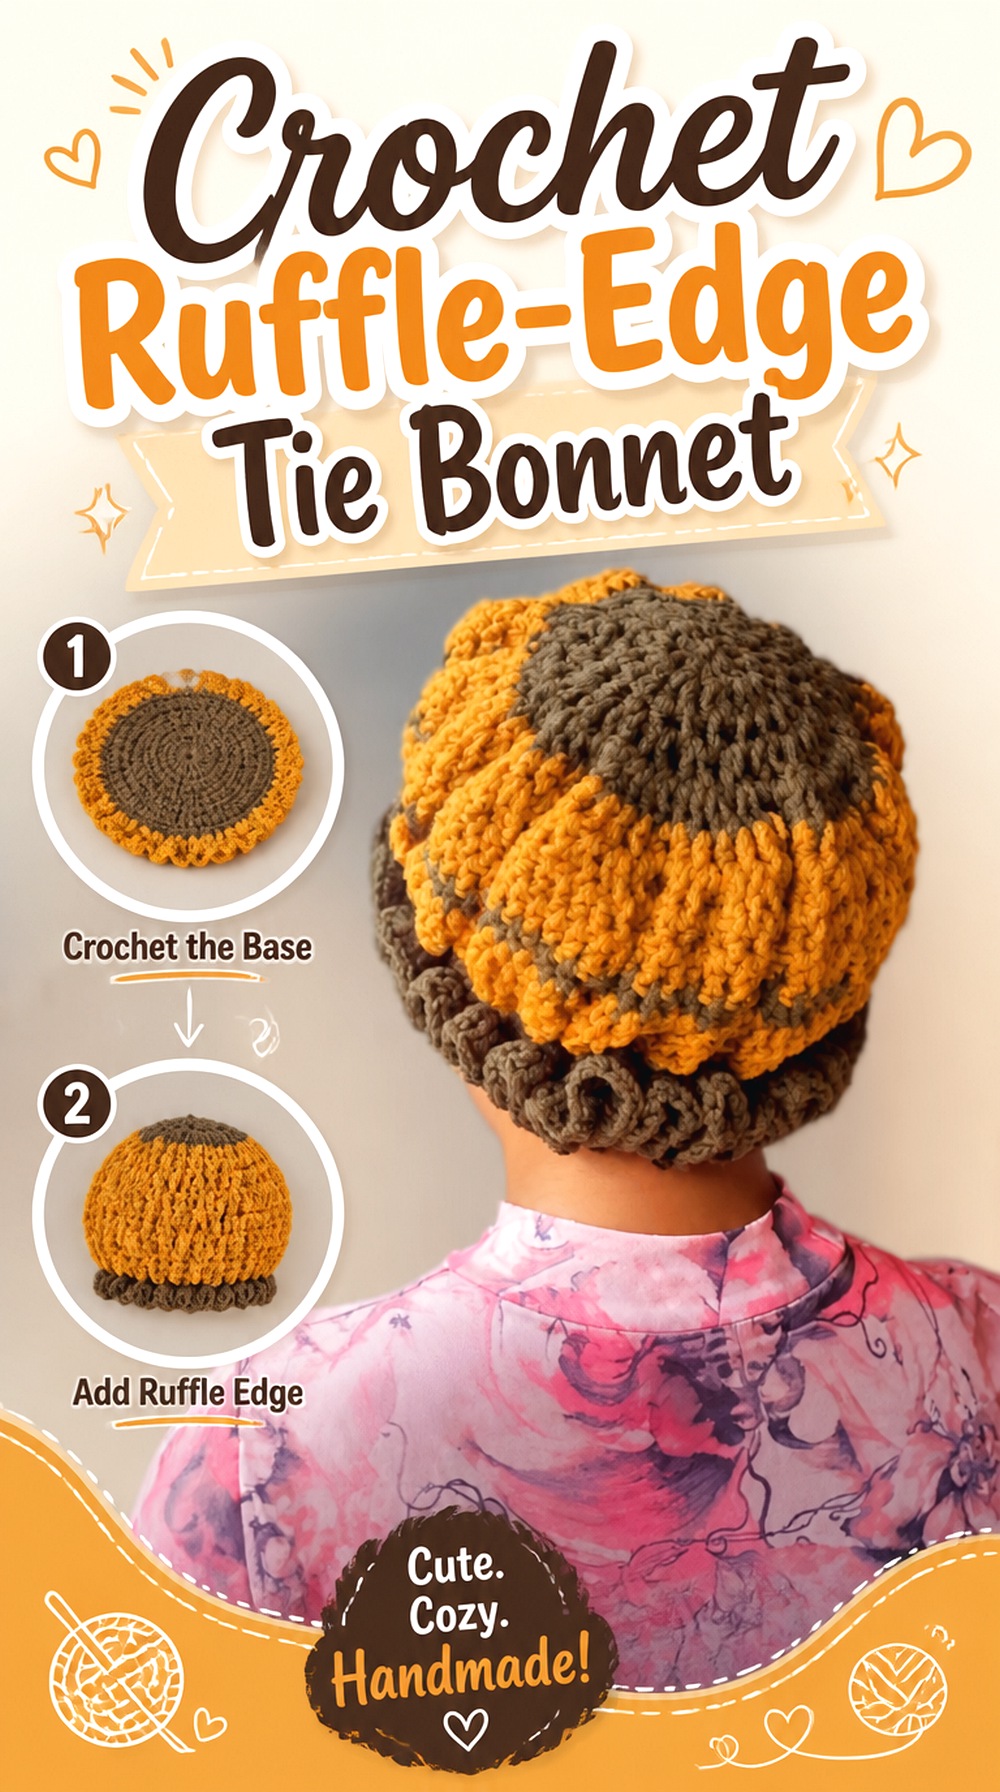
SAVEA ruffle changes the entire outline of a bonnet without requiring a complicated motif layout. This version keeps the main bonnet relatively straightforward, then lets the gathered-looking edge become the focal point around the face. Princess handmade’s tutorial shows a finished crochet ruffle bonnet with ties and a clearly emphasized decorative border.
This is a different choice from the lace bonnets later in the list. Lace creates interest inside the fabric, while a ruffle concentrates volume at the perimeter. That distinction matters when styling the bonnet with collars, scarves, or other textured clothing.
The Edge Volume Controls the Silhouette
A ruffle that projects noticeably from the main fabric creates a much fuller profile than a narrow decorative trim. Think about the intended effect before changing yarn weight or adding extra fullness.
A soft yarn may let the ruffle fall against the bonnet, while a firmer fabric can make the edge stand away from the face. Neither is automatically better. Compare the finished sample with the look you want and avoid assuming that a larger ruffle will always make the bonnet more decorative.
Check the Ruffle Around the Jawline
The front edge may look balanced when the bonnet is flat but behave differently once the ties are fastened. Before fully finishing the ends, put the bonnet on the intended wearer or an appropriately sized form and check how the lower ruffle sits near the jaw.
If the edge folds inward, the issue may be excess fullness or a tight underlying edge rather than the ties themselves. Correct the foundation of the ruffle before adding more decoration.
Original Tutorial and Creator Credit
Creator: Princess handmade
3. Crochet Flower Crown Bonnet
 SAVE
SAVEInstead of putting the strongest detail at the face edge, this bonnet makes the back of the head the main viewing angle. Shirokuro Crochet’s finished design uses a flower-like center that radiates outward, creating a distinct crown motif while retaining ties at the lower edge. The creator also shows the completed bonnet being worn, making the relationship between the back motif and overall shape easy to see.
This idea is useful when you want a bonnet that still looks interesting from behind. It can also work well with restrained front edging because the crown already supplies a clear focal point.
The Back View Is the Main Design Feature
Before adding extra embellishment elsewhere, consider how much attention the central flower already commands. A strongly defined crown often needs less decoration around the face than a plain bonnet does.
When choosing colors, view the work from a distance rather than only up close. If adjacent shades have very similar values, individual petals or radiating sections may visually merge. Stronger contrast can make the flower easier to read, while tonal colors create a quieter effect.
Gradient Yarn Can Compete With the Flower Shape
The source tutorial demonstrates a gradient effect, but a color-changing yarn does not automatically improve every floral construction. A rapid color shift can cross the motif in unexpected places and make the structural lines harder to see.
If the flower shape is your priority, compare a solid or slow-gradient option with your intended yarn before committing. If color movement is the goal, accept that the floral geometry may become subtler. This is a design trade-off rather than a technical problem.
Test the Tie Position Before Final Finishing
A decorated crown naturally draws the eye backward, so the bonnet should still sit securely enough that the motif remains centered. Test the lower corners and ties before weaving in every end.
If fastening the bonnet shifts the flower noticeably to one side, first check the overall opening and lower-edge symmetry. Lengthening one tie will not correct an uneven body. The crown should sit where intended before the closure is used to refine the fit.
Original Tutorial and Creator Credit
Creator: シロクロクロシェ(Shirokuro Crochet)
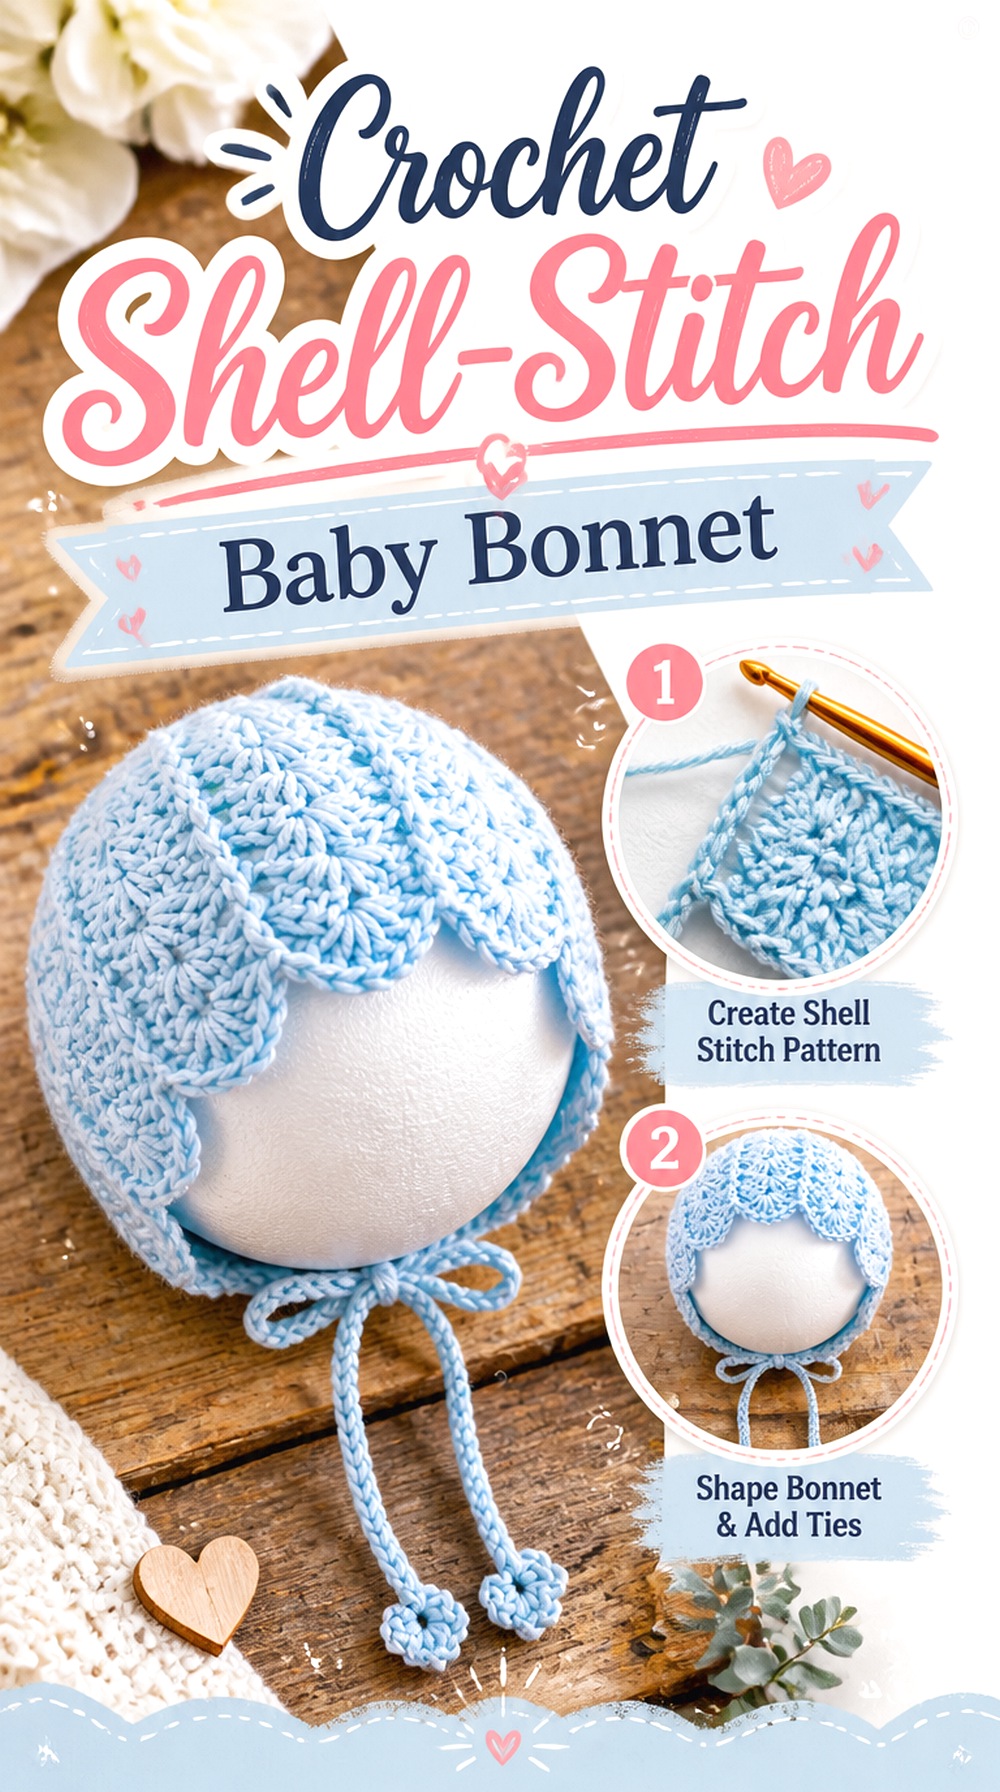
4. Crochet Shell Stitch Baby Bonnet
 SAVE
SAVEShell stitches give this baby bonnet a scalloped, traditional appearance without relying on attached motifs. Maisie and Ruth’s tutorial demonstrates a bonnet for the 0–3 month size and identifies the shell and fan-style stitch details that create the finished texture. The creator also publishes specific finished measurements for the demonstrated version, which makes this a particularly useful option when you want a concrete sizing reference rather than a vague age label.
Visually, the shell texture is fuller than simple open lace but lighter-looking than dense ribbing. That makes the project a useful middle ground between decorative and classic.
Shell Texture Adds Space and Definition
Shell formations spread several stitches across a visible repeat, so the yarn needs enough definition for those shapes to remain distinct. Very fuzzy yarn can soften the edges until the shells read as general texture rather than individual motifs.
If you substitute yarn, make a small section first and look at it from several feet away. The repeat should still be recognizable without needing to stretch the fabric open. This check is more useful than choosing fiber based only on softness.
Baby Sizing Should Follow the Demonstrated Measurements
The video specifically demonstrates one baby size and publishes its finished dimensions. If you need a different size, do not simply add arbitrary rows to the face edge.
Compare head circumference, crown depth, and the creator’s additional sizing information before adapting. Increasing depth without adjusting the crown can push the front edge too far toward the face, while enlarging only the crown may leave the bonnet too shallow.
Keep the Decorative Edge Clear of the Eyes
A shell border can look charming in a flat photograph but needs to sit comfortably once worn. Check the front corners as well as the center forehead area.
If the edge falls forward, determine whether the bonnet is too deep before trying to stiffen the border. The problem may come from fit rather than the shell stitch itself. For baby headwear, a clean, stable face opening is more useful than maximizing the amount of decorative edging.
Original Tutorial and Creator Credit
Creator: Maisie and Ruth
5. Crochet Vintage Puff and Lace Bonnet
 SAVE
SAVEPuff stitches and lacy spaces create a noticeably different surface from the flatter shell and granny-square designs. YARNutopia by Nadia’s vintage-style baby bonnet combines raised puff texture with more open areas and finishes the look with ribbon. The creator describes the bonnet as a vintage design with lacy features, so the tutorial is a useful reference when you want texture without turning the whole bonnet into dense fabric.
The result suits a decorative, heirloom-inspired direction more than a minimal everyday bonnet. Because several design elements compete for attention, color and finishing choices matter more here.
Puff Texture Adds Weight to a Delicate Shape
Raised stitches use more yarn in concentrated areas and can make a lightweight-looking bonnet feel more substantial than the open spaces suggest. That contrast is part of the appeal, but it means substitutions should be handled carefully.
A heavier yarn may exaggerate the puffs enough to overpower the lace. A very fine yarn may make them less distinct. Aim for a fabric where both the raised and open elements remain visible instead of optimizing one at the expense of the other.
Ribbon Ties Change Both Finish and Care
Ribbon creates a different look from crocheted cords because it introduces another fiber, sheen, and level of stiffness. Before using it, consider how the bonnet will be cleaned and whether the ribbon behaves similarly to the crocheted fabric.
Check that the attachment is secure and inspect the ribbon after washing according to the materials’ care requirements. If you prefer a single-material project, look at the finished lower edge and decide whether a crocheted alternative can suit your intended appearance without copying the creator’s construction.
Contrast Color Can Define the Vintage Detail
Two closely related shades can make the texture feel soft and subtle, while a stronger contrast highlights each decorative section. Decide which effect matters before purchasing yarn.
Use the crown and face edge as separate visual zones when planning color. If every raised detail receives a contrasting shade, the bonnet may become busier than expected. Concentrating contrast in one area can preserve the vintage character without making every stitch compete for attention.
Original Tutorial and Creator Credit
Creator: Fuad Azmat / YARNutopia by Nadia
6. Crochet Rectangle Pixie Bonnet
 SAVE
SAVEThis pixie-style bonnet begins from a fundamentally different geometry: a rectangle becomes the bonnet through the finishing and back seam. ChristaCoDesign’s Bella Bonnet tutorial demonstrates that rectangle-based approach and provides baby-through-adult sizing in the accompanying design information, along with more than one closure option.
The squared construction creates a more obvious point at the back than a round-crown bonnet. That makes it a good option when the pixie silhouette is the reason you want a bonnet in the first place, rather than simply wanting a close-fitting hat with ties.
A Back Seam Creates the Pointed Profile
The character of a rectangle bonnet depends heavily on the finished seam. If that seam is bulky, uneven, or stretched, the point can twist instead of sitting cleanly behind the head.
Before finishing, align the two sides carefully and check that the rows correspond. A neat seam should support the geometry without becoming the dominant feature. This is one of the projects where finishing quality can change the silhouette as much as the crochet texture itself.
Choose the Closure Before Finishing the Lower Edge
The source design includes different closure possibilities, so decide how you want the bonnet to fasten before treating the lower edge as complete.
A tie closure gives a traditional bonnet appearance, while a button-style option changes both the look and how the lower corners overlap. Do not assume the same edge length will behave identically with every closure. Try the bonnet on or use a suitable form and evaluate the lower corners before securing the final closure.
Rectangle Depth Determines Where the Point Sits
A pointed bonnet can technically fit around the head while still having an awkwardly shallow or exaggerated back. When adapting a rectangle design, monitor depth as well as width.
The back point should land intentionally rather than being treated as leftover fabric. If you change yarn or gauge, compare the rectangle’s proportions with the creator’s sizing information instead of scaling only one dimension. Preserving the relationship between width and depth keeps the pixie shape recognizable.
Original Tutorial and Creator Credit
Creator: ChristaCoDesign
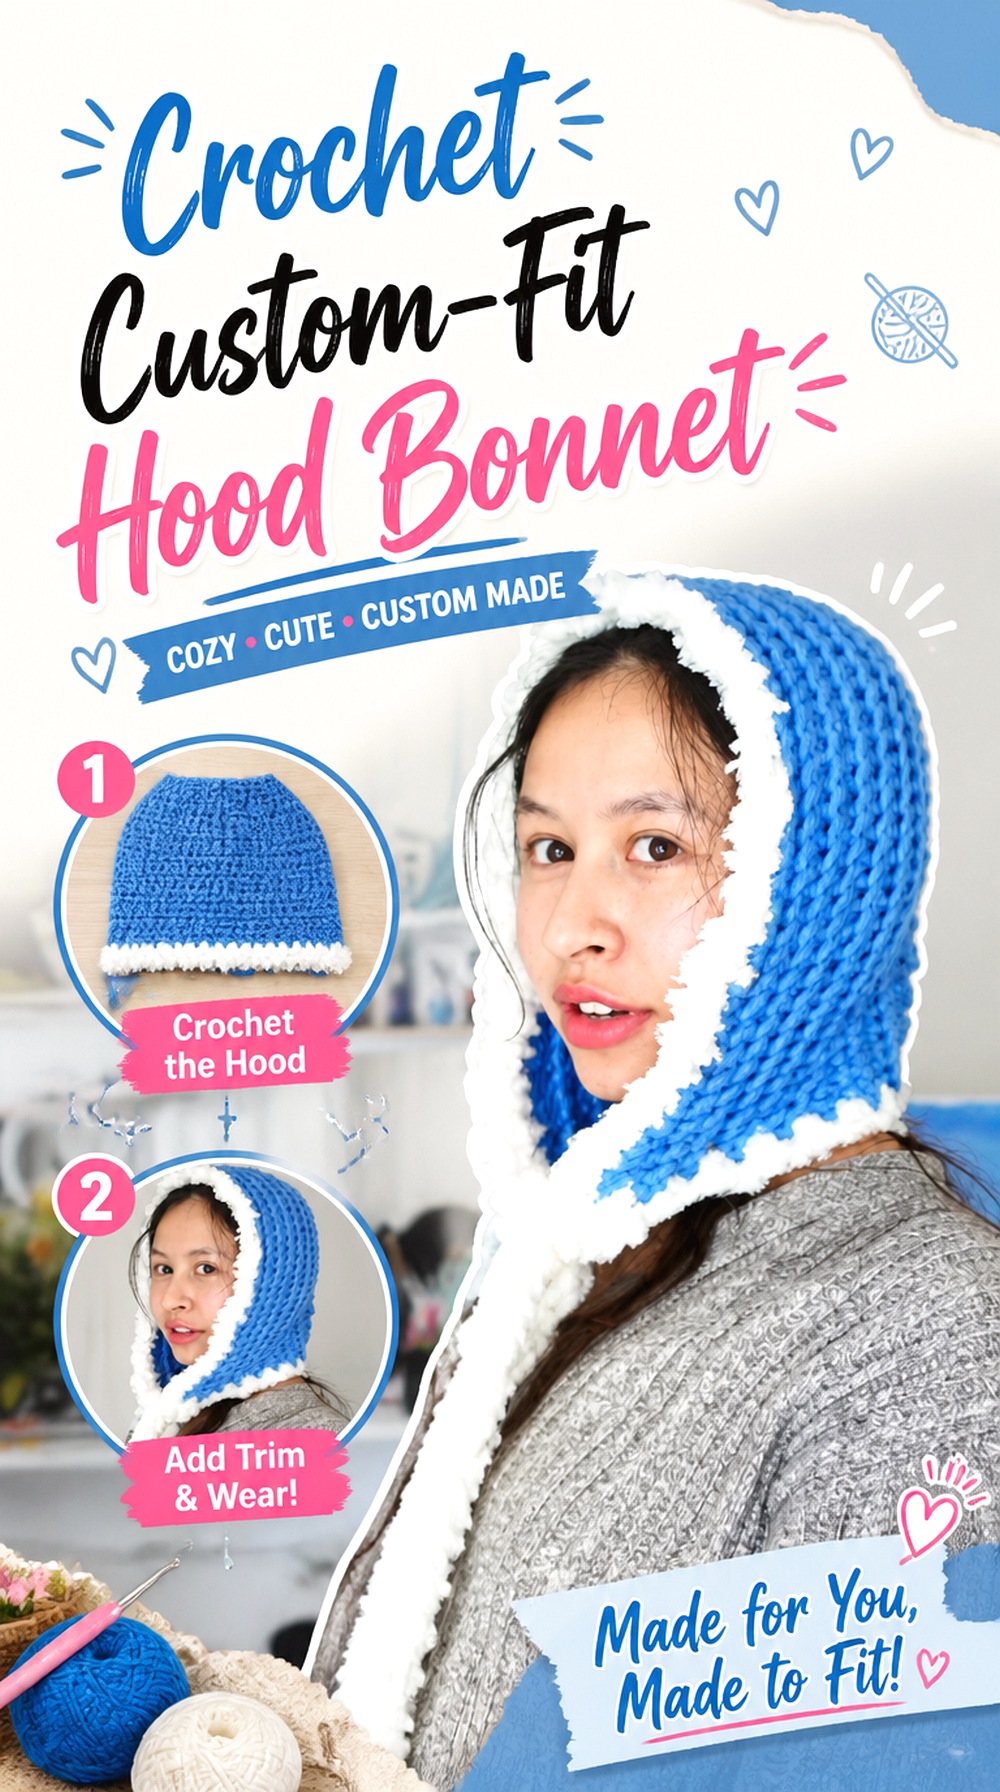
7. Crochet Custom Fit Hood Bonnet
 SAVE
SAVEYarn and Stix approaches the bonnet more like a customizable hood than a tightly defined baby accessory. The tutorial is presented as a bonnet/hood and focuses on explaining how the shape can be customized, making it especially relevant for teens or adults who want more room around the head.
This style is useful for layering over hair or pairing with outerwear because the silhouette can be looser than the close-fitting round-crown options. It also offers a different aesthetic from the pointed pixie bonnet: the goal is soft coverage rather than a deliberately sharp back corner.
Treat It as a Hood, Not a Close Baby Bonnet
A hood-style bonnet can tolerate more space around the crown and sides because the relaxed shape is part of the design. That means the fitting questions are different from those of a baby bonnet.
Instead of asking only whether the head circumference matches, check how much room you want around the hair and whether the lower edge needs to sit inside or outside a coat collar. A little extra ease may improve layering, while too much can let the hood slide backward.
Customization Starts With the Face Opening
When a tutorial encourages customization, the face opening is one of the most useful checkpoints. Try the developing piece in its intended position before adding finishing that could make the edge harder to change.
For an adult hood, decide whether you want the front edge to frame the forehead closely or sit farther back like a soft winter hood. That preference changes how the bonnet looks far more than a small difference in overall length.
Bulky Yarn Can Turn Drape Into Structure
If you choose thicker or firmer yarn than the tutorial demonstrates, expect the hood to stand away from the head more strongly. That can be useful for a sculpted look but less suitable if you want a fluid, relaxed drape.
Test a section large enough to bend naturally. Pinch it into a fold and see whether it falls back into place or remains stiff. That simple fabric check can prevent a loose hood design from becoming unexpectedly helmet-like.
Original Tutorial and Creator Credit
Creator: Yarn and Stix
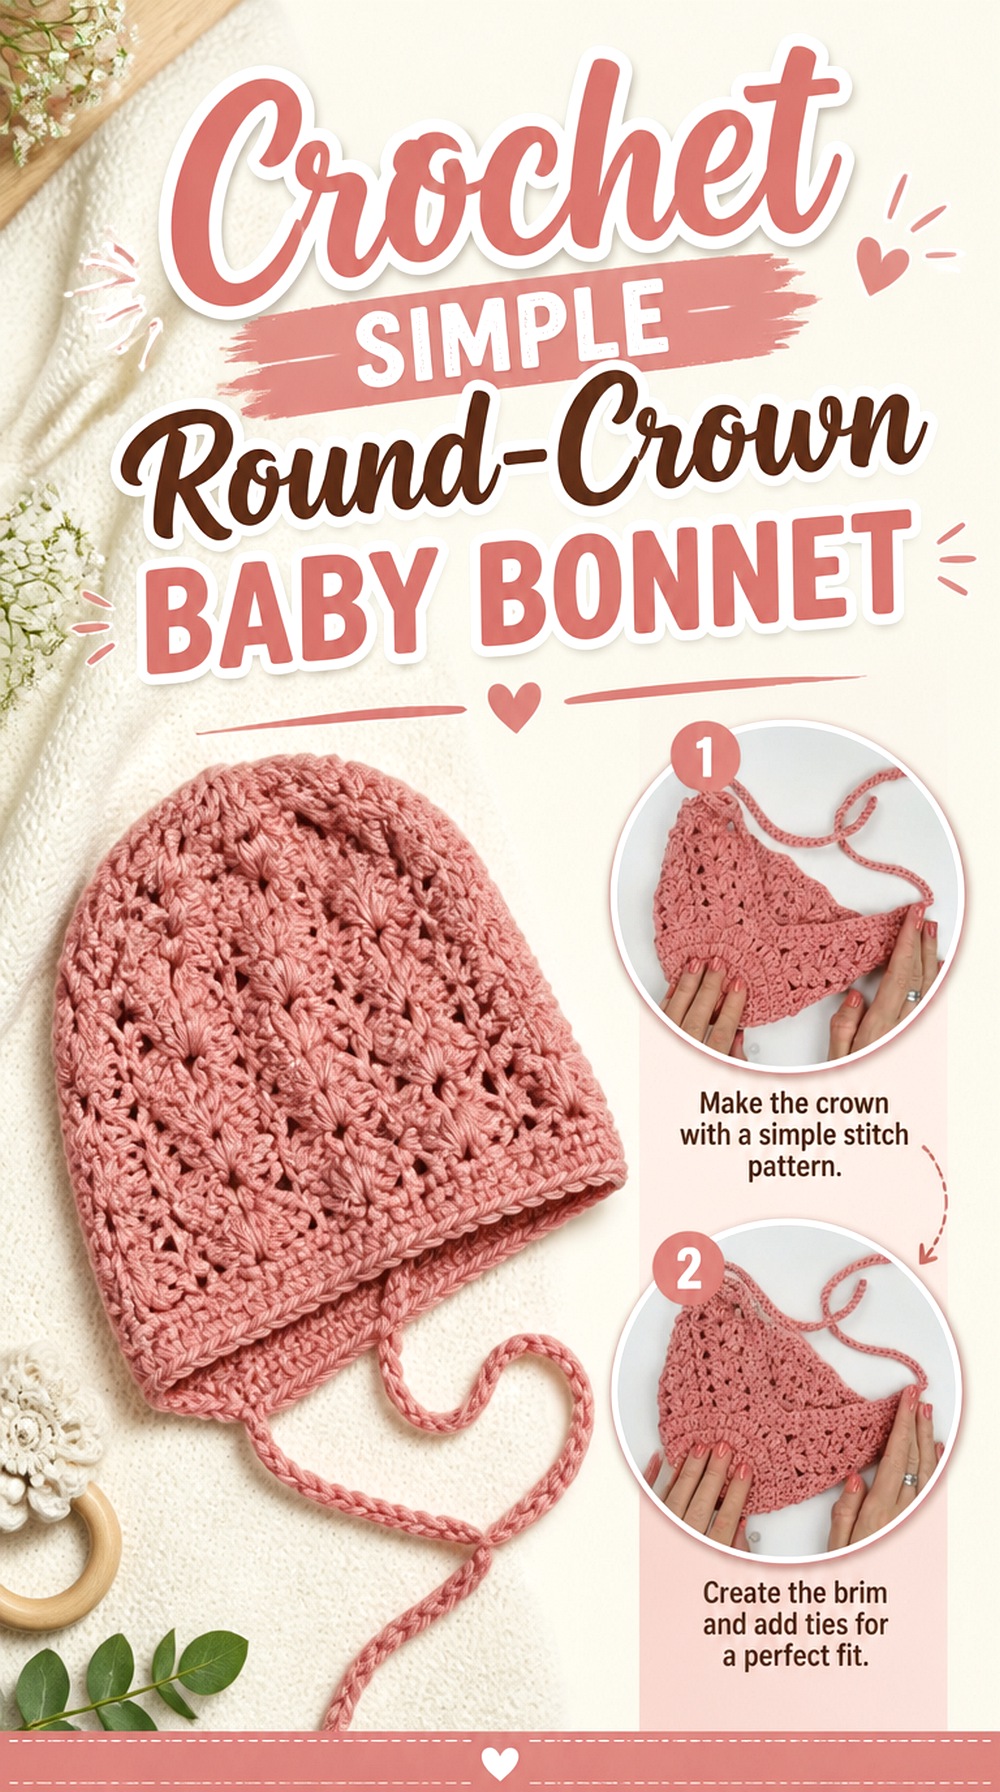
8. Crochet Simple Round Crown Baby Bonnet
 SAVE
SAVECroby Patterns’ tutorial represents the classic round-crown route: establish the back of the head first, then extend the bonnet toward the face and lower opening. The finished result is cleaner and less angular than a pixie rectangle, making it a useful foundation when you want the traditional baby-bonnet silhouette without a large decorative motif. The tutorial is presented as a straightforward baby bonnet and is paired with additional written design information from the creator.
Because the body is visually simple, proportion and finishing become more noticeable. This is a good design to study if fit matters more to you than embellishment.
The Crown Controls Depth Before the Face Edge Begins
On a round-crown bonnet, the rear circle or shaped crown establishes how the bonnet cups the back of the head. If that section is wrong, adding length to the front cannot fully correct the fit.
When adapting, compare the crown diameter and intended head size before extending the sides. A crown that is too small may pull the bonnet backward; one that is too large can produce excess fabric at the rear. Treat the crown as the structural anchor.
A Plain Body Makes Fiber Choice More Visible
Simple crochet fabric has fewer decorative elements to distract from uneven stitch definition, fuzz, or color pooling. That can be an advantage: a softly heathered or marled yarn becomes part of the design without competing with lace.
At the same time, very thick texture can make an otherwise clean bonnet look bulky. If you want a minimalist result, prioritize even fabric and a tidy edge. The simplicity of the shape rewards careful yarn selection and finishing.
Original Tutorial and Creator Credit
Creator: Croby Patterns
9. Crochet Cupcake Frill Bonnet
 SAVE
SAVEHumble Hus’ pink cupcake bonnet puts a fine, decorative edge around a bonnet that the creator demonstrates with an adaptable sizing approach. The source identifies the project as suitable across sizes from newborn through adult and uses a fine yarn, which helps explain why the decorative silhouette stays relatively light rather than becoming heavily padded.
This is a useful choice if you like the romance of a ruffle but want a more delicate outline than the fuller ruffle project earlier in the list. It can also transition more naturally into adult styling because the frill can remain visually narrow.
Fine Yarn Keeps the Frill Light
A decorative edge gains volume quickly when made in thicker yarn. If you replace the source yarn with something substantially heavier, the same general edging concept can become much more prominent.
Before committing, crochet enough of the border to see a complete repeat and hold it beside the face. If it feels too heavy, reducing visual bulk may require changing the yarn or edge concept rather than simply tightening tension.
Scaling Across Ages Requires Fresh Measurements
A tutorial that discusses multiple sizes is helpful, but the intended wearer still needs to be measured. Adult and baby bonnets differ not only in circumference but also in face depth and preferred coverage.
When adapting this style, use the creator’s sizing method as the reference instead of treating each age category as interchangeable. Recheck the front edge before adding the frill because decorative finishing can make later resizing less convenient.
Keep the Decorative Edge in Proportion
The cupcake effect works because the trim supports the bonnet rather than replacing its silhouette. If you add contrast colors or a larger border, compare the amount of trim with the visible area of the crown.
On smaller sizes, an oversized decorative edge can dominate quickly. On adult sizes, a narrow edge may read as a refined frame instead. The same edging idea does not need identical visual proportions across every size.
Original Tutorial and Creator Credit
Creator: Humble Hus
10. Crochet Openwork Lace Baby Bonnet
 SAVE
SAVELoopy Mabel Crochet’s Belle bonnet is distinctly lace-focused, with a lighter and more open visual texture than the alpine, puff, or ribbed bonnets elsewhere in this collection. The tutorial is specifically presented for a small baby size and uses cotton in the demonstrated project, according to the supporting source information.
This style works well when stitch pattern is the main feature and you do not want a large motif or heavy border. The openwork also makes mistakes in spacing easier to notice, so consistent tension becomes an important part of the finished appearance.
Openwork Makes Stitch Definition Easy to Read
Lace exposes the space between stitches as clearly as the stitches themselves. Uneven tension therefore changes both parts of the pattern at once.
Lay the fabric flat occasionally without stretching it and compare the openings across the bonnet. If one section is noticeably tighter, correct the tension issue while it is still accessible. Blocking can refine lace, but it should not be expected to completely repair large differences in stitch spacing.
Cotton Gives Delicate Texture a Different Hand
Cotton can produce crisp stitch definition, but it usually behaves differently from springier fibers. If you substitute another material, check how easily the front edge returns to shape after being gently stretched.
A lace bonnet that grows significantly during wear can shift backward even if it looked correct immediately after finishing. Conversely, overly firm fabric may not conform comfortably to the head. Aim for enough definition to show the lace without sacrificing the intended fit.
Keep Lace Proportionate to a Small Face
Large openwork repeats can visually overwhelm a small baby bonnet, especially when combined with a contrasting tie or border. Before adding extra decorative elements, look at the complete face frame.
If the lace already creates a strong scalloped or patterned edge, simpler ties may provide better balance. The goal is not to fill every available surface with detail; leaving a quiet area can make the openwork more noticeable.
Original Tutorial and Creator Credit
Creator: Loopy Mabel Crochet
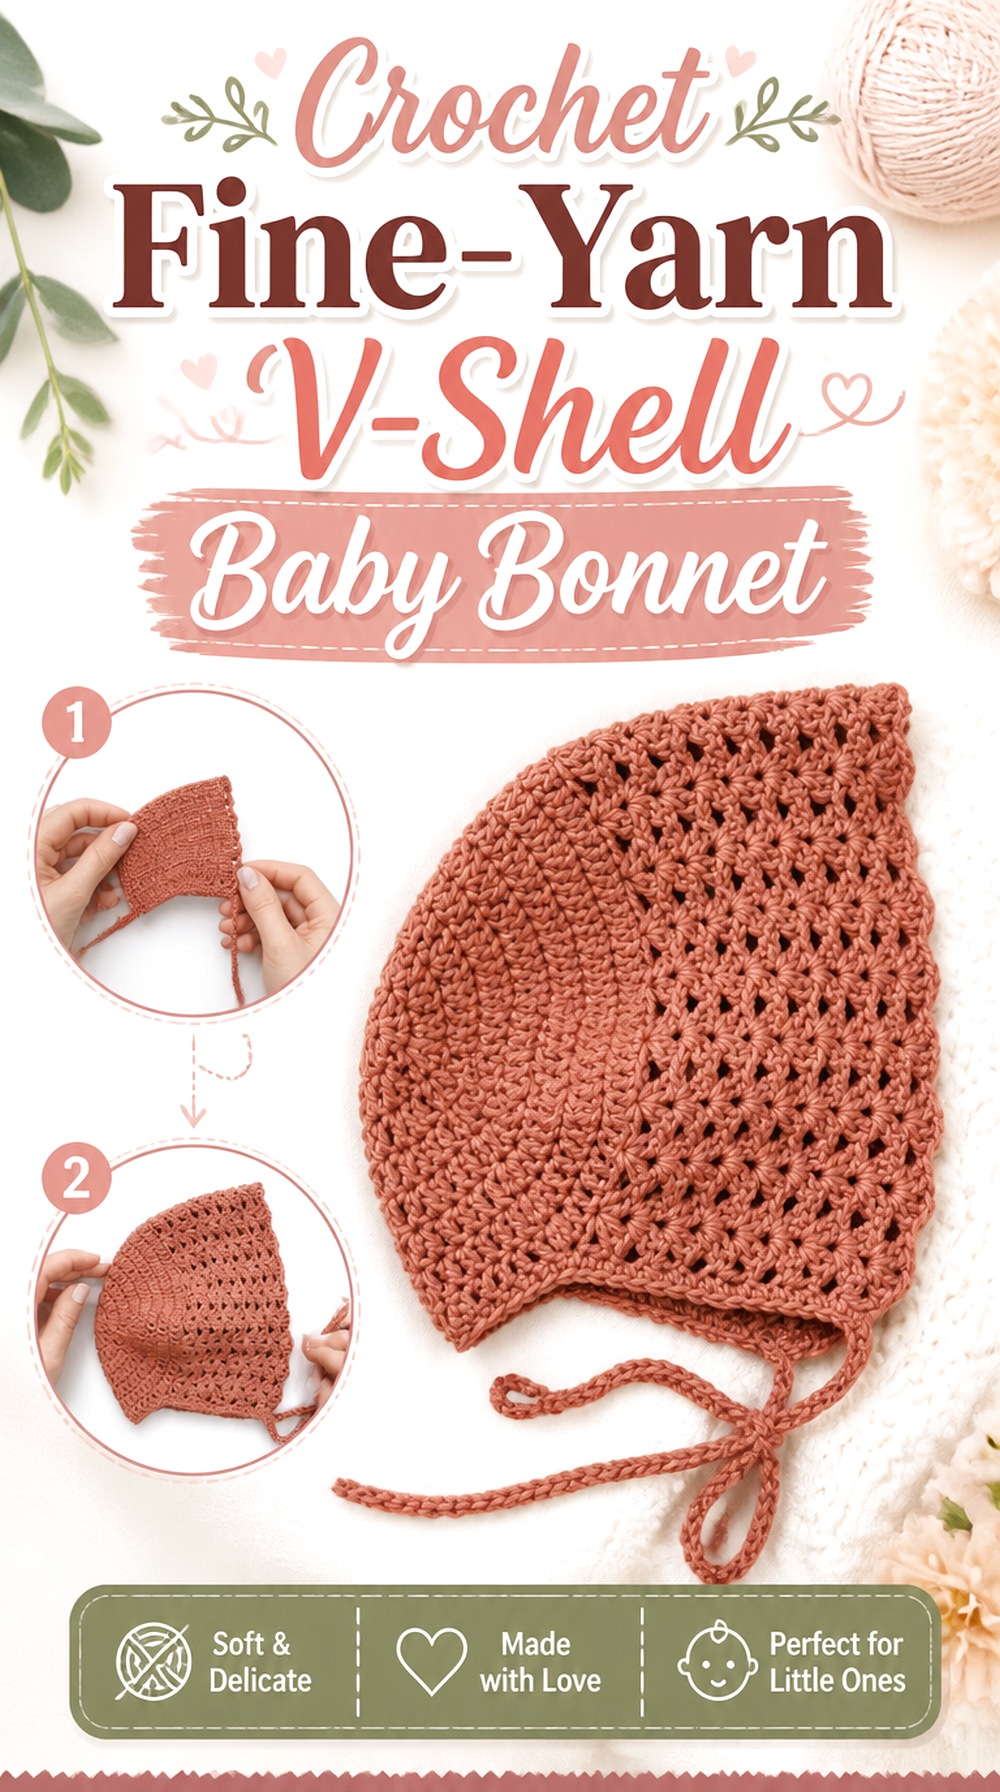
11. Crochet Fine Yarn V Shell Baby Bonnet
 SAVE
SAVEThis baby bonnet uses a more orderly V-shell appearance than the broader shell texture in Project 4. Adore Crea Crochet’s tutorial accompanies the Iris bonnet design, and the creator’s published information identifies sport-weight cotton and a defined baby size for the demonstrated project.
The finer yarn and repeating shell groups give the face section a lighter visual rhythm, while the crown remains more solid. That combination is useful when you want decoration concentrated around the sides rather than covering the entire bonnet in texture.
V-Shell Spacing Creates a Softer Face Frame
A repeated V-shell creates both vertical and horizontal movement, so the face opening can appear more delicate than a dense row of solid stitches. Watch how the fabric hangs before adding the final lower edge.
If the shell section flares unexpectedly, first confirm that your gauge and yarn match the intended fabric. Tightening the ties will not correct a front section that has become too wide. The opening should already have a balanced shape before fastening.
Sport-Weight Yarn Helps Keep the Fabric Less Bulky
The source uses a fine sport-weight cotton for the published design. That is relevant because several shell groups sit near the face.
Moving to a substantially thicker yarn may enlarge both the solid crown and the decorative openings. If you want to substitute, compare actual gauge and fabric thickness rather than assuming you can retain the same sizing merely by changing hook size.
Check the Neck Edge Before Adding the Ties
Shell sections can stretch differently from the more solid crown, so check the transition at the lower corners. Both sides should reach the neck edge evenly before the ties are treated as finished.
If one corner sits higher, find the source of the asymmetry in the bonnet body. Matching tie lengths will not disguise uneven shaping. This checkpoint is especially useful on designs that switch between solid and open textures.
Original Tutorial and Creator Credit
Creator: Adore Crea Crochet
12. Crochet Alpine Texture Shell Edge Bonnet
 SAVE
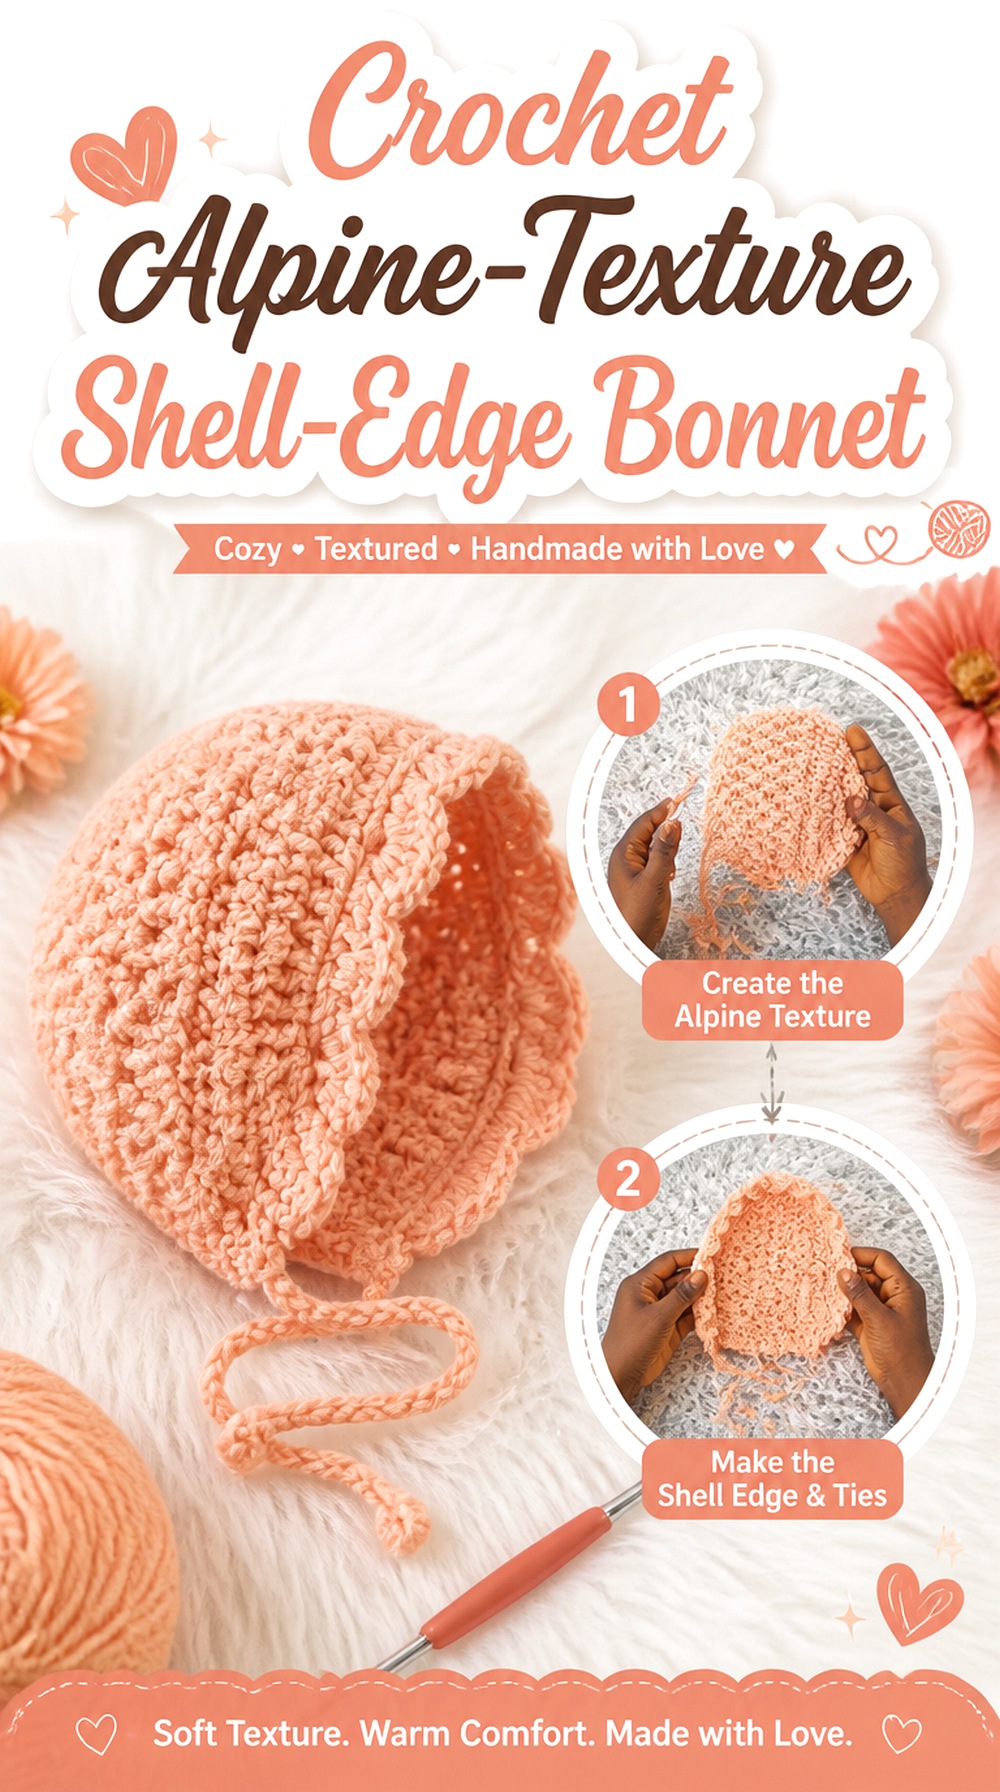
SAVEToyslab Creations’ baby bonnet introduces a noticeably raised body texture and then contrasts it with shell edging. Supporting information identifies alpine stitch, shell stitch, and post-stitch techniques as part of the design, giving this bonnet more surface depth than the smooth or openwork projects above.
This is a good option when you want the bonnet to look substantial even in a relatively simple color palette. The texture itself supplies much of the decoration, so the design does not need a flower crown, granny squares, or a large ruffle to create visual interest.
Raised Texture Makes the Body Look More Substantial
Deep texture casts small shadows across the fabric, which makes even a single-color bonnet look detailed. That effect is strongest when the yarn has enough definition for the raised stitches to remain separate.
A highly fuzzy yarn can blur the texture, while very stiff yarn may make the bonnet feel thicker than intended. Make a small swatch and view it in side lighting. If the raised pattern disappears, the yarn may not be serving the main feature of the design.
Contrast Edging Can Separate the Face Frame
Because the body already has strong texture, a contrasting shell edge can clearly define the front of the bonnet. Decide whether you want that separation before choosing colors.
A high-contrast trim makes the face opening prominent; a tonal edge keeps the focus on the alpine texture. Both approaches work, but combining bold body texture, strong color contrast, and extra embellishment can become visually crowded. Choose one or two features to dominate.
Structure Matters More Than Extra Decoration
Raised stitches add visual mass, so check the finished drape before attaching anything else. If the bonnet already holds a strong rounded shape, additional flowers, pompoms, or large ties may not improve it.
This project benefits from restrained finishing. Spend more attention on even side edges and a balanced shell border, because irregular finishing will show clearly against the organized texture of the body.
Original Tutorial and Creator Credit
Creator: Toyslab Creations
13. Crochet Seamed Newborn Bonnet Hat
 SAVE
SAVECrochet Bits’ newborn bonnet offers another useful construction contrast: the accompanying pattern information describes the design as a one-piece, seamed bonnet. The YouTube tutorial is specifically titled for a newborn baby bonnet, while related written sizing information extends beyond newborn sizing.
A seamed construction can create a clean, straightforward silhouette without building a patchwork layout or decorative crown motif. It is a practical option to compare with round-crown tutorials because the finished appearance may be similar from the front even though the way the back is formed is different.
A Back Seam Changes How the Bonnet Settles
A seam creates a fixed line in the finished fabric, and that line can affect how the bonnet folds around the back of the head. Keep it centered and avoid pulling the seam tighter than the surrounding crochet.
After seaming but before final finishing, gently shape the bonnet and check whether the back sits symmetrically. If one side twists inward, inspect seam tension before assuming the body itself was crocheted unevenly.
Newborn Fit Needs a Current Measurement
The tutorial is presented for newborn sizing, but babies do not all share identical head measurements. When possible, compare the finished dimensions or creator sizing information with the intended wearer’s current measurement.
Do not intentionally make a baby bonnet tight in the hope that crochet will stretch enough. The face opening, depth, and lower edge should all fit appropriately without depending on strong tension from the ties.
Simple Seaming Makes Finishing Quality Obvious
On a bonnet without elaborate motifs, the seam, ties, and woven-in ends become some of the most visible workmanship. Take time to make the seam flexible enough to move with the surrounding fabric.
Also inspect the inside. A smooth interior matters on headwear because bulky knots or stiff yarn tails can sit directly against the head. Good finishing should support the simple shape rather than create a ridge inside it.
Original Tutorial and Creator Credit
Creator: Crochet Bits
14. Crochet Ribbed Granny Square Bonnet
 SAVE
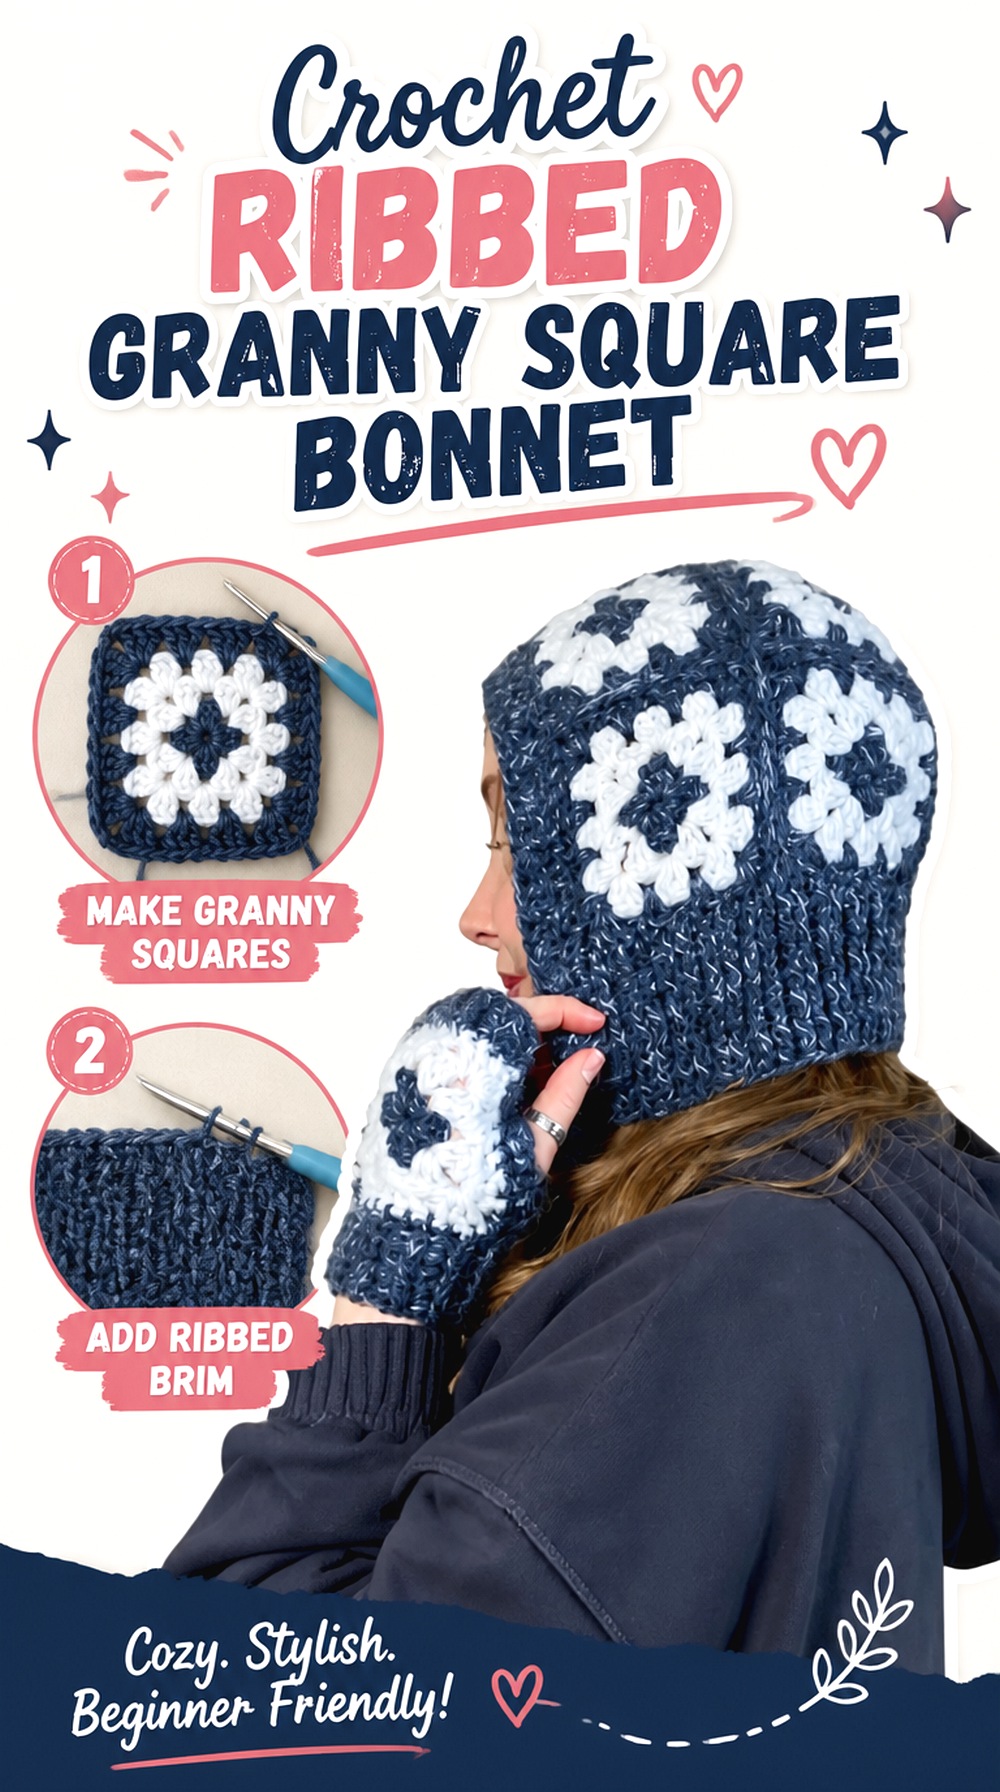
SAVEThis final option revisits granny-square construction but changes the perimeter treatment significantly. DIYGuru’s bonnet combines classic granny squares with ribbing around the lower and front edges plus adjustable ties, creating a more framed appearance than the join-as-you-go patchwork bonnet at the beginning of the list.
The ribbing visually separates the motifs from the face and neck, so the finished piece reads more like a structured bonnet built around a granny-square core. Choose this version when you like motif construction but want a tidier, more substantial edge rather than letting the squares define every outer boundary.
Ribbing Frames the Motifs Instead of Hiding Them
A plain ribbed border provides a visual resting point around colorful granny squares. If the motifs contain several shades, repeating one of those shades in the ribbing can make the finished bonnet feel more connected.
Alternatively, a neutral border can make each square stand out individually. Lay the completed motifs beside the proposed ribbing yarn before joining. A color that seems neutral in the skein may look surprisingly dominant once it surrounds the entire face opening.
The Ribbed Edge Can Pull In More Than the Square Body
Ribbing is often more elastic than a granny-square panel, so its tension deserves special attention. If worked too tightly, the border can draw the motif section inward and change the intended opening.
Check the bonnet frequently while adding the ribbed areas. The border should refine the shape without visibly puckering the squares. If the motifs begin to cup or bunch, correct the edge tension instead of relying on blocking to force them flat later.
Plan the Motif Colors Before Adding the Frame
Because the border is added after the granny-square body takes shape, it can unify a patchwork palette or emphasize contrast. Decide which job you want it to do.
For a quieter bonnet, use a repeated motif color around the entire frame. For a graphic look, choose a border that clearly separates from every square. Planning this relationship in advance is more reliable than selecting the ribbing color only after all motifs are permanently assembled.
Original Tutorial and Creator Credit
Creator: DIYGuru
Which Crochet Bonnet Style Should You Choose?
For the strongest patchwork look, start with one of the two granny-square options. The join-as-you-go bonnet leaves motif construction visually prominent, while the ribbed version gives those motifs a clearer frame. If the silhouette matters more than surface pattern, the rectangle pixie bonnet produces the sharpest point and the customizable hood creates the roomiest, most relaxed shape.
For delicate baby styles, compare the open lace, V-shell, classic shell, and vintage puff versions by fabric density rather than color. The alpine-texture bonnet sits at the more substantial end of that range. If decorative edging is your priority, the ruffle and cupcake-frill projects place most of their visual interest around the face, while the flower-crown bonnet shifts attention to the back.
Conclusion
The most useful way to choose among these crochet bonnet ideas is to start with construction, then narrow the options by texture and finishing. Pick granny squares when you want visible patchwork, a rectangle when the pixie point matters, a round or seamed crown for a more traditional baby shape, and a hood-style design when you want extra room and layering.
After that, decide whether the focal point should be lace, shells, ribbing, ruffles, raised texture, or a flower-centered crown. Fit and face-opening proportions should come before extra decoration, especially on baby sizes. Once you have chosen the silhouette that fits your purpose, use the original tutorials for the creators’ exact construction, sizing, and finishing details.
Frequently Asked Questions
How do I know which crochet bonnet construction will be easiest to resize?
Simple round-crown and customizable hood designs often give you obvious measurement checkpoints, while motif bonnets require you to account for the dimensions of several joined pieces. Rectangle pixie bonnets can also be straightforward to plan, but both rectangle dimensions affect the finished point and coverage. Whichever style you choose, use the tutorial’s sizing method rather than enlarging only one section at random.
Can I use a different yarn weight for a crochet bonnet?
Sometimes, but changing yarn weight can alter circumference, depth, drape, stitch openings, and the thickness around the face. A heavier yarn may turn delicate lace or ruffles into bulky fabric, while a finer yarn can reduce the definition of raised texture. Make a gauge sample in the main stitch pattern and compare it with the creator’s stated measurements or gauge information before treating the yarn as interchangeable.
What should I measure before making an adult crochet bonnet?
Head circumference is important, but also consider how far you want the bonnet to extend from the back of the head toward the face. Hood-style bonnets may need extra room for hair, while a close pixie bonnet usually depends more heavily on a controlled face opening. If the bonnet ties under the chin, check where the lower corners sit before deciding on the final closure length.
Are crochet bonnet ties suitable for babies?
Ties should be treated as a functional part of the garment and checked for secure attachment and appropriate fit during supervised wear. Baby headwear is not appropriate for sleep; safer-sleep guidance recommends keeping a baby’s head uncovered and removing hats or extra headwear indoors to reduce overheating concerns.
Why does my crochet bonnet fit around the head but still fall backward?
The problem may be depth or face-opening shape rather than circumference. A bonnet that extends too little toward the face can slide backward even when the crown fits. Check the relationship between the crown, side depth, lower corners, and tie placement. On motif designs, also confirm that the joined pieces are equal in size; uneven motifs can pull the entire bonnet off center.
Should granny squares be blocked before assembling a crochet bonnet?
Blocking before final joining is useful because the individual motifs need to match one another closely enough to form an even wearable shape. Compare the blocked width and height of every square rather than relying on stitch counts alone. If one motif differs noticeably, correct the mismatch before assembly. Joining uneven squares first can create pulling around the crown, face opening, or neckline that edging may not fully correct.