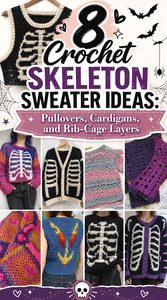
A crochet skeleton sweater can take several very different forms. Some designs build a recognizable skull into a solid pullover, while others use open mesh, granny-square motifs, oversized sleeves, or exposed rib-cage shapes. Those construction differences matter because they change the garment’s drape, coverage, layering needs, and how easily the skeleton design can be resized.
The eight ideas below include six sweater or cardigan approaches plus two sleeveless rib-cage pieces that work as skeleton-themed layers. They are included deliberately rather than being presented as full sweaters. Each option links to a different YouTube creator, and the practical notes focus on choosing a suitable silhouette, checking motif scale, planning fit, and understanding what may need to be verified before you commit to a wearable.
Quick List
- Crochet Striped Skull Graphic Pullover
- Crochet Cozy Skull Chart Pullover
- Crochet Skull Granny Square Cardigan
- Crochet Rainbow Rib-Cage Layering Top
- Crochet Bell-Sleeve Skull Sweater
- Crochet Boxy Mesh Skull Sweater
- Crochet Halloween Skull Statement Sweater
- Crochet Rib-Cage Layering Vest
Choose the Skeleton Technique Before the Silhouette
“Skeleton sweater” can describe several construction ideas that behave very differently. A chart-based skull incorporated into a front panel gives you a clear graphic focal point, but changing the panel width may also affect how the motif sits across the body. Granny-square skulls are more modular: individual motifs can be arranged before final assembly, making layout an important part of the design.
Mesh skull sweaters trade coverage for negative space, while rib-cage tops and vests use the open spaces themselves to create the anatomy. Those versions depend heavily on placement because the ribs, neckline, and arm openings need to sit in visually convincing positions. Appliqué-style decoration offers another route because the garment and motif can be planned separately.
Choose the method first, then decide how cropped, oversized, open, or fitted you want the final garment to feel.
Plan Fit Around the Motif, Not After It
A plain crochet sweater can often be lengthened or widened without disrupting its main visual feature. Skeleton garments are less forgiving because the skull, ribs, or granny-square layout may occupy a defined section of the garment.
Before changing a tutorial, compare your body measurements with the part of the garment where the design will sit. For a centered skull, check whether widening the surrounding fabric will keep the image visually centered. With granny squares, block and measure a sample motif before deciding how many belong across a panel. For rib-cage pieces, pay particular attention to shoulder position, neckline placement, and where the lowest ribs fall when the garment is worn.
Sleeve style matters too. A very wide bell sleeve creates a different balance from a straight sleeve, while a boxy body can support a large graphic without needing a close fit.
Yarn, Drape, and Stitch Definition Change the Bones
Skeleton motifs rely on recognizable edges, so yarn behavior can affect the final look as much as color contrast. A yarn that produces crisp stitch definition can make a charted skull or granny-square motif easier to read. Softer, more fluid yarn may give a beautiful drape, but a very relaxed fabric can also make geometric shapes appear less precise.
Weight matters differently in each construction. A cardigan assembled from many motifs accumulates yarn at joins, while an open mesh sweater can remain visually lighter even with long sleeves. Bell sleeves add fabric away from the torso, so consider whether the chosen yarn will make them flow or feel heavy.
Do not assume a substitute yarn will produce the same measurements simply because it has a similar label. Make a fabric sample when fit matters, and use the creator’s stated gauge or measurement guidance where one is provided.
1. Crochet Striped Skull Graphic Pullover
 SAVE
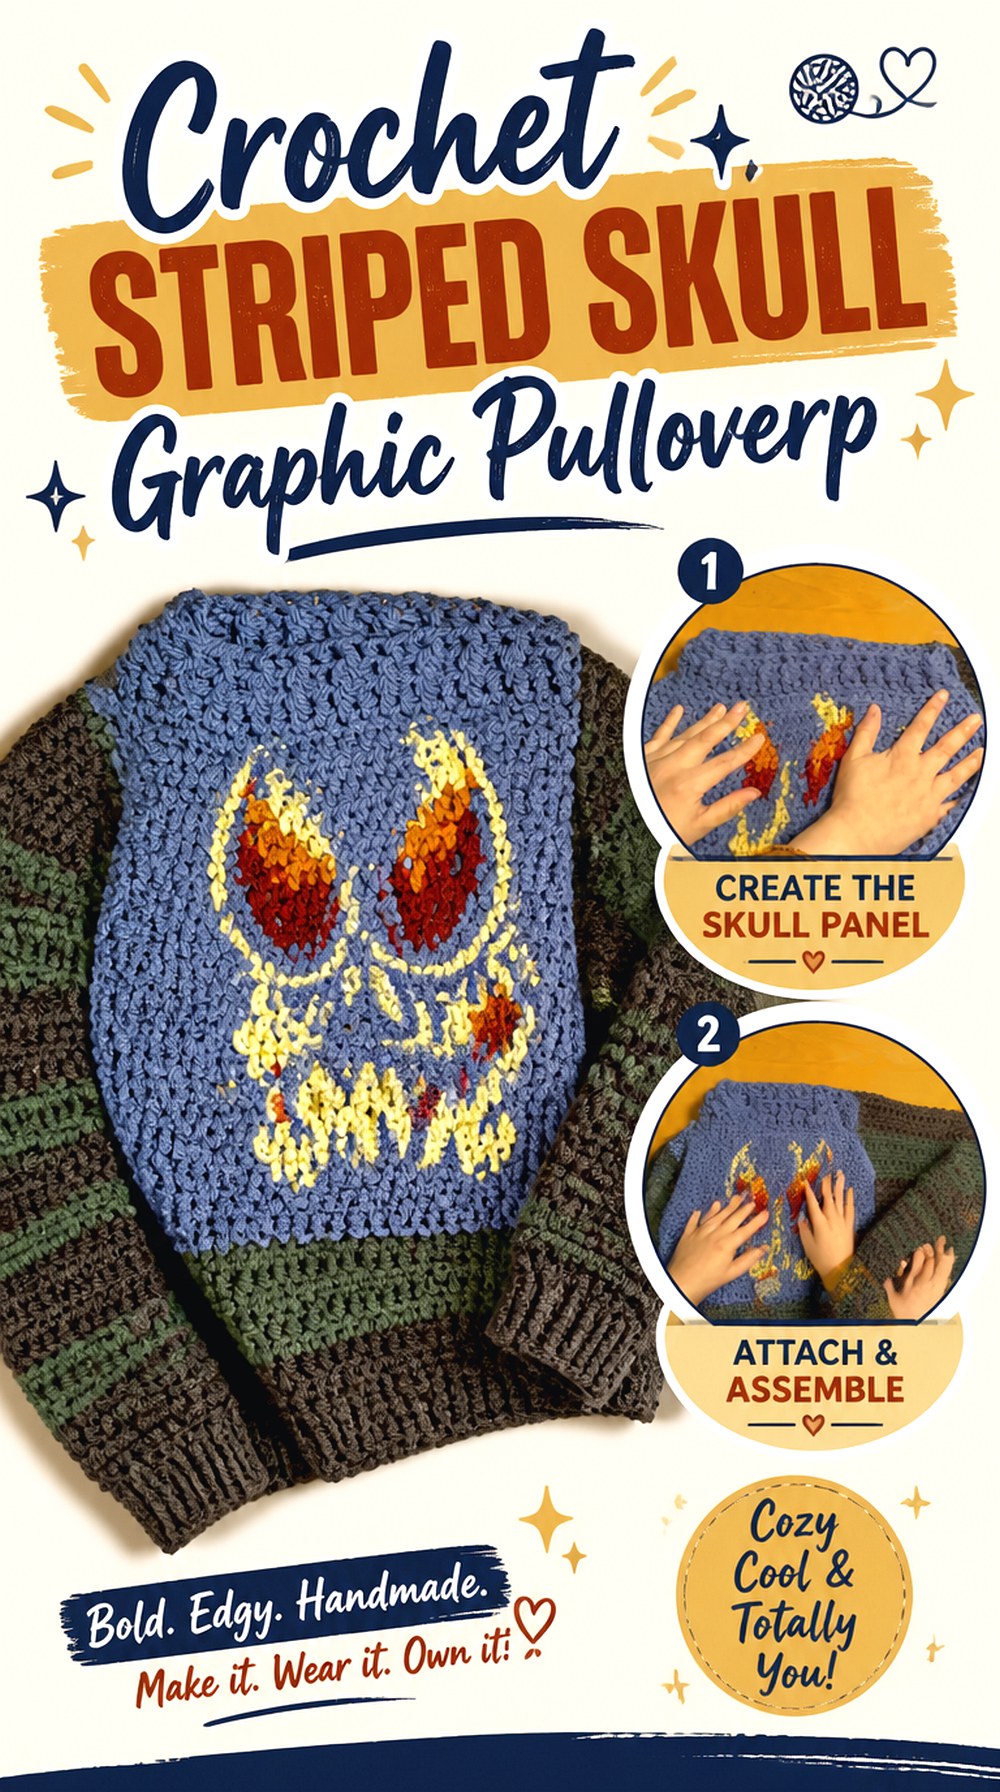
SAVEThis pullover combines a strong skull graphic with horizontal striping, so the skeleton theme is built into the main sweater rather than added afterward. The tutorial by smthcrochet includes a skull chart and notes that the chart can be copied and edited when planning a different sweater size. That makes this option especially relevant to crocheters who like visually mapping a motif instead of assembling many smaller components.
The stripes also make this project distinct from the other skull pullovers here. Their direction creates a strong horizontal rhythm around the motif, so changes to width, stripe placement, and skull scale should be considered together rather than independently.
Keep the Skull Centered When Changing Width
If you widen a graphic sweater, simply adding fabric to one side can make a centered design look off balance. Plan additional width symmetrically around the skull whenever the original construction allows it. Check the panel visually before joining or adding sleeves; laying it flat makes an unexpected shift easier to spot than waiting until the sweater is complete.
The creator provides an editable chart reference, but the finished proportions should still be checked against your intended fit rather than assuming the chart alone determines garment size.
Stripes Can Help or Compete With the Motif
Striping gives this sweater more movement than a plain-background skull design. Decide whether you want the stripes to frame the skull or be equally dominant. Strong contrast in both the stripe sequence and skull can create a busier surface, while a quieter background lets the skull read first.
Before committing to a full panel, place the chosen yarn colors next to one another. A combination that looks distinct in separate skeins can appear much closer once crocheted into adjacent stitches.
Check Sleeve and Body Proportions Together
A graphic panel often gets most of the planning attention, but the sleeves determine whether the finished sweater feels balanced. If you make the torso substantially wider or shorter, compare that change with the intended sleeve shape before final assembly.
For an oversized version, check where the shoulder line will fall instead of using chest width alone. A dramatically dropped shoulder changes both sleeve starting position and overall silhouette, even when the skull panel itself still looks correct.
2. Crochet Cozy Skull Chart Pullover
 SAVE
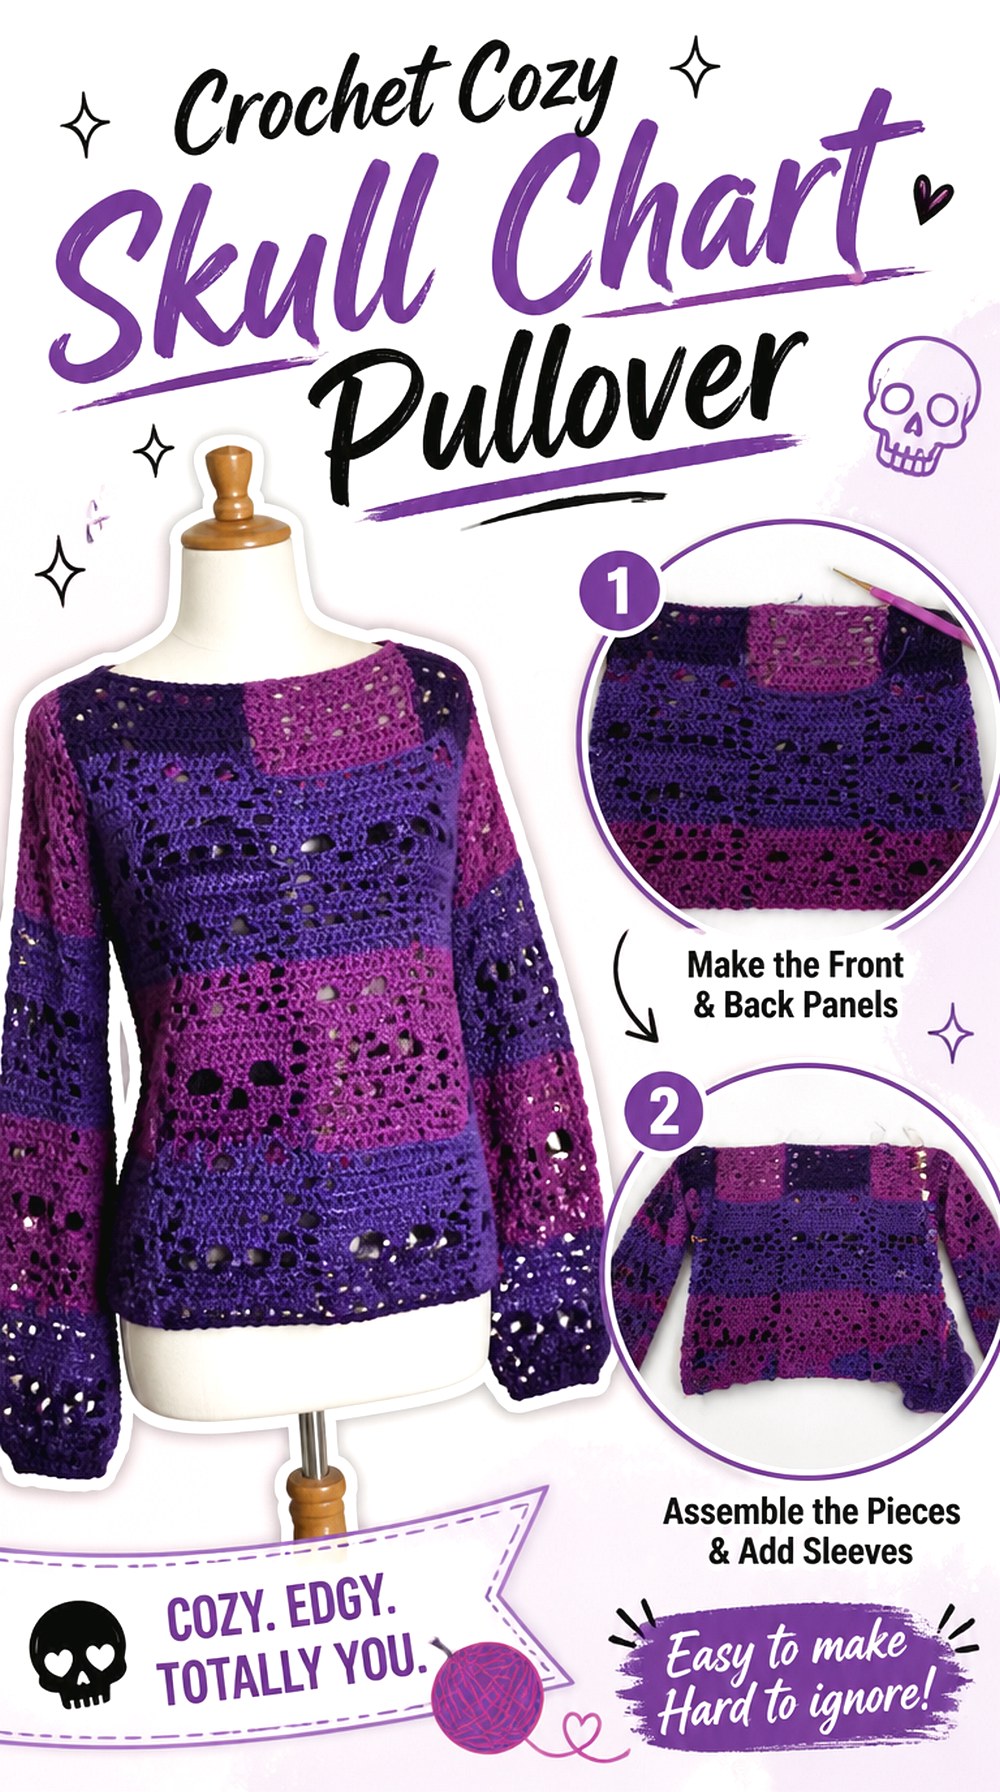
SAVEThis skull pullover offers another chart-centered approach, but its teaching format is notably different. Vintage Chemist states that the video is not a complete step-by-step tutorial; instead, it explains the beginning of the project, the overall sweater construction, how to read the skull chart, and ways to adapt the concept.
That makes it a useful choice for someone who does not need every garment action demonstrated but does want help understanding how a skull chart relates to a sweater. It is also a good contrast to the striped version above because the main decision is not stripe placement—it is whether you are comfortable turning chart and construction guidance into a finished wearable.
This Tutorial Assumes More Independent Planning
Because the creator specifically describes the video as something other than a full step-by-step tutorial, review it before buying yarn for the entire project. Confirm that you are comfortable filling in the construction decisions it leaves to the crocheter.
That format can be useful if you already understand basic sweater assembly and primarily need help interpreting the graphic. If you prefer continuous demonstrations from the first garment section through finishing, one of the more directly instructional options in this list may suit you better.
Use the Skull Chart as a Placement Tool
A chart tells you the relationship between parts of the image, but it does not automatically tell you where that image should sit on your body. Think about the visual center of the finished front panel before changing length or width.
If you want a longer sweater, for example, decide whether additional length belongs mainly below the motif, above it, or distributed around it. Each choice changes how high the skull appears when the garment is worn.
Swatching Matters When the Graphic Is Structural
When a motif is worked directly into a sweater panel, changes in stitch size can affect both garment measurements and picture proportions. A fabric that grows noticeably after washing or blocking may change how wide the skull appears relative to the torso.
Use the tutorial’s actual construction guidance where given, and treat any yarn substitution as a new fabric rather than a guaranteed equivalent. That is especially important if you are adapting the idea to a significantly different fit.
Original Tutorial and Creator Credit
Creator: Vintage Chemist
3. Crochet Skull Granny Square Cardigan
 SAVE
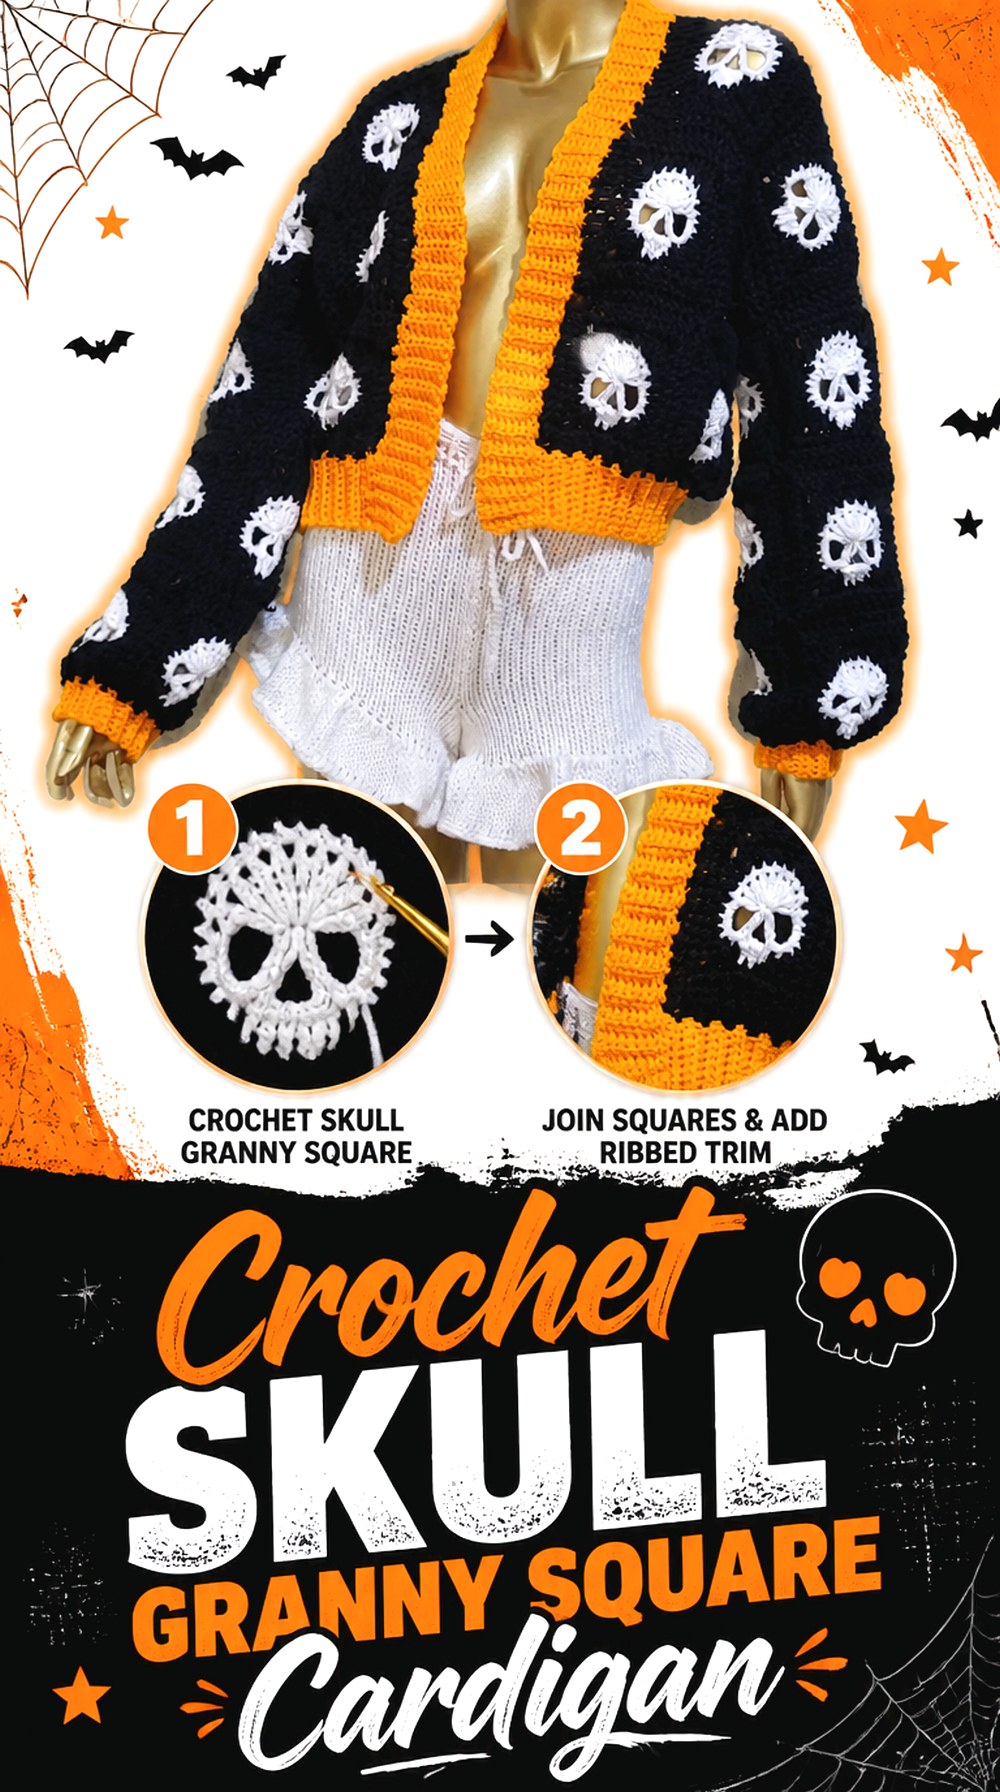
SAVEInstead of building one large skull into a solid front panel, this cardigan uses skull granny squares as repeated modules. Shyler crochets presents the project as a Halloween or “Ghostober” cardigan and credits Totally Stitch Craft for the skull granny-square technique used in the design.
The modular construction changes nearly every planning decision. Individual squares contribute to panel width, garment length, sleeve structure, and the rhythm of the skulls across the finished cardigan. This is the most obviously patchwork-style option in the collection, making it a strong choice for readers who prefer repeated motifs over managing one large chart.
Block the Skull Squares Before Final Layout
A small difference in one granny square may not look important on its own, but repeated variations can compound across an entire cardigan panel. Compare the finished dimensions of the squares before joining them.
If some motifs are noticeably different, correct the discrepancy before committing to the complete layout. This checkpoint also lets you arrange skull direction and color placement while everything can still be moved. Once the major panels are joined, changing one awkwardly placed motif becomes much more disruptive.
Skull Direction Becomes Part of the Cardigan Design
Repeated skulls can all face the same way, mirror one another, or create a deliberate pattern across the front and back. Decide on that relationship before sewing or crocheting the major sections together.
Lay out the entire back, both fronts, and any motif-based sleeve sections on a flat surface. View the arrangement from several feet away. A layout that seems balanced square by square may reveal an unintended cluster or directional imbalance once you see the garment as a whole.
Joins Add Their Own Visual Lines
With granny-square clothing, the joining method is not merely hidden assembly. Seams or joins can create a visible grid around every skull. That grid may sharpen the patchwork look or soften it depending on yarn choice and joining style.
Consider how much contrast you want between motif edges and connecting areas. Also remember that dense joins can change the feel of a panel compared with the center of an individual square, so evaluate the joined fabric rather than judging drape from one motif alone.
Original Tutorial and Creator Credit
Creator: Shyler crochets
4. Crochet Rainbow Rib Cage Layering Top
 SAVE
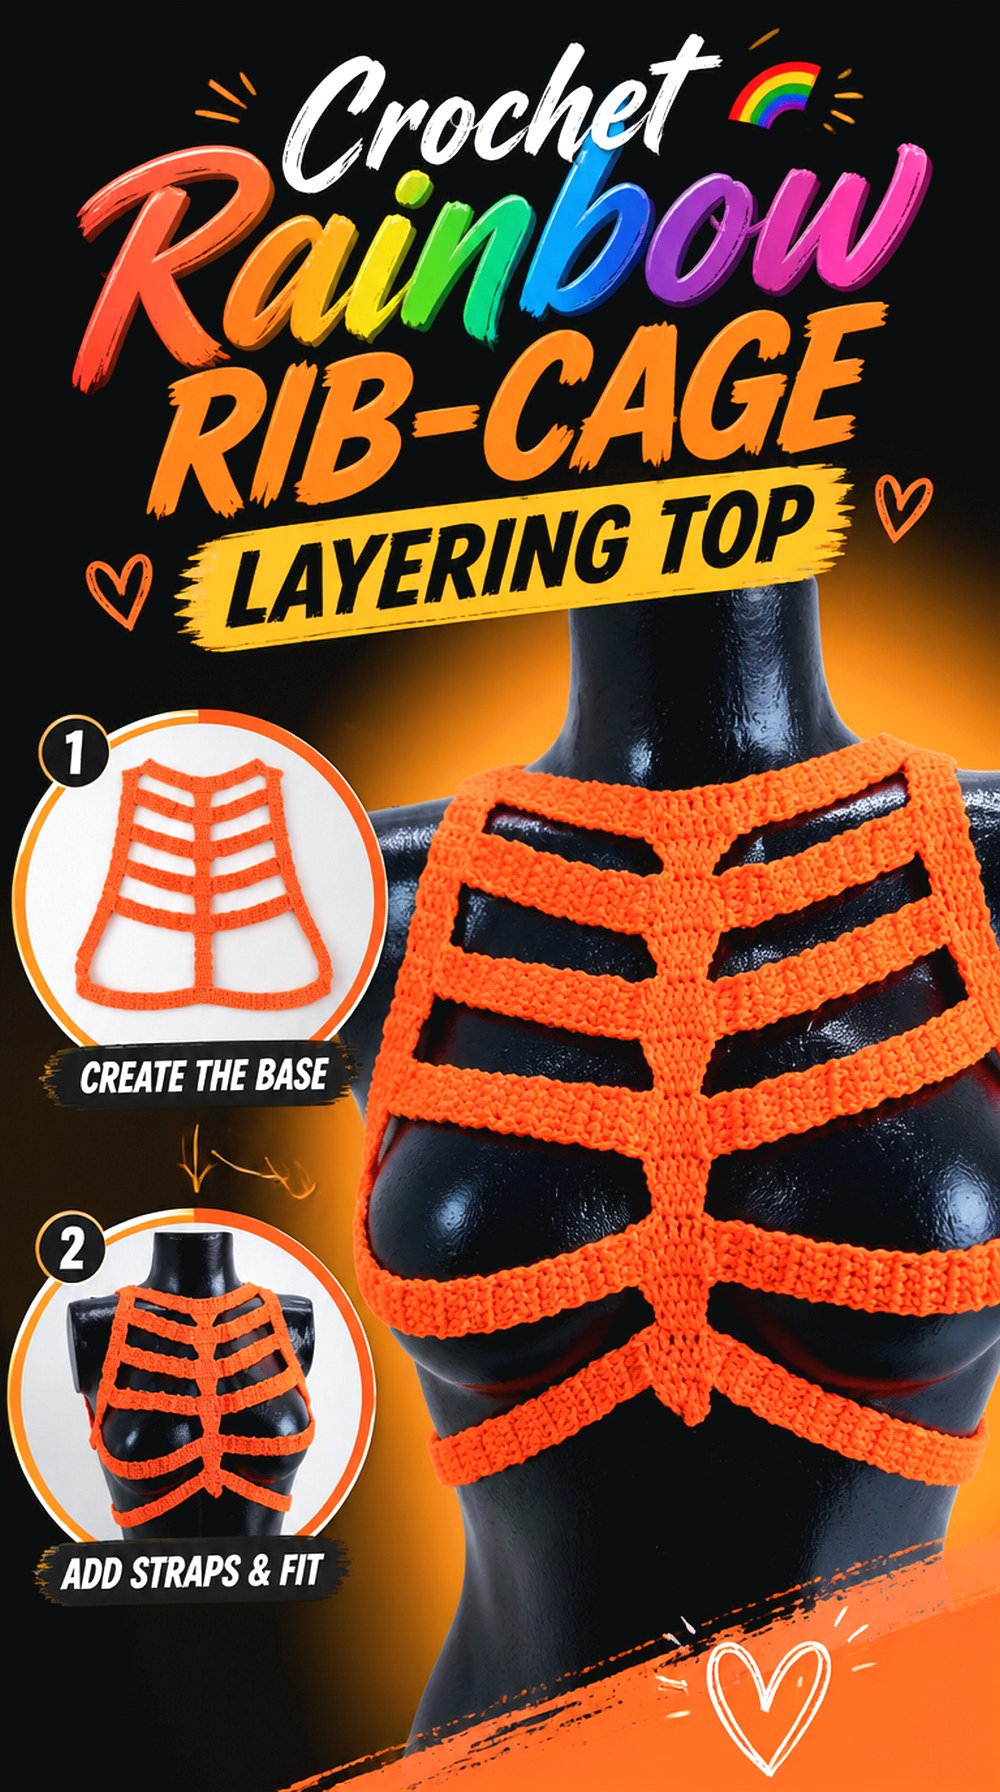
SAVENirvana Crochet’s skeleton design moves away from skull graphics completely and builds the recognizable anatomy around a rib-cage shape. The finished item is a top rather than a full sweater, which makes it especially useful as a skeleton layer over a fitted long-sleeve shirt, dress, or contrasting base garment. The Spanish-language tutorial states that the design can be worked from XS through XL and demonstrates size S.
Its open skeletal structure creates a much lighter visual effect than a solid pullover. Because empty space defines much of the design, fit depends on where the ribs and connecting sections sit on the torso rather than simply whether a sweater circumference feels comfortable.
Rib Placement Is the Main Fit Checkpoint
For a rib-cage design, try-on placement matters more than chasing a generic sweater measurement. Check where the upper structure sits near the chest, how the neckline lies, and whether the lower ribs land where you intended.
If you change the overall length, remember that stretching only one section can distort the proportions of the anatomy. Adjustments should preserve the visual relationship among the main skeletal sections rather than treating each piece as an unrelated strip of crochet.
The Base Layer Changes the Finished Look
Open skeletal crochet reveals whatever is worn underneath it. A high-contrast base can make every rib stand out clearly, while a closer tonal pairing produces a softer effect.
This also makes the piece more adaptable than a solid sweater. The same rib-cage top can read as colorful, gothic, minimal, or costume-like depending on the underlayer. When planning yarn, test it against the clothing you realistically expect to wear beneath the finished piece rather than choosing the yarn color in isolation.
Confirm Language and Measurement Details Early
The tutorial is presented in Spanish, although the visual demonstration can still be valuable to viewers who learn well by watching. Review the video before starting and confirm that you can follow the measurement and sizing information you need.
The creator’s description states a size range of XS through XL and notes acrylic or cotton as material options, but follow the video itself for the creator’s actual sizing method rather than extrapolating beyond what is shown.
Original Tutorial and Creator Credit
Creator: Nirvana Crochet
5. Crochet Bell Sleeve Skull Sweater
 SAVE
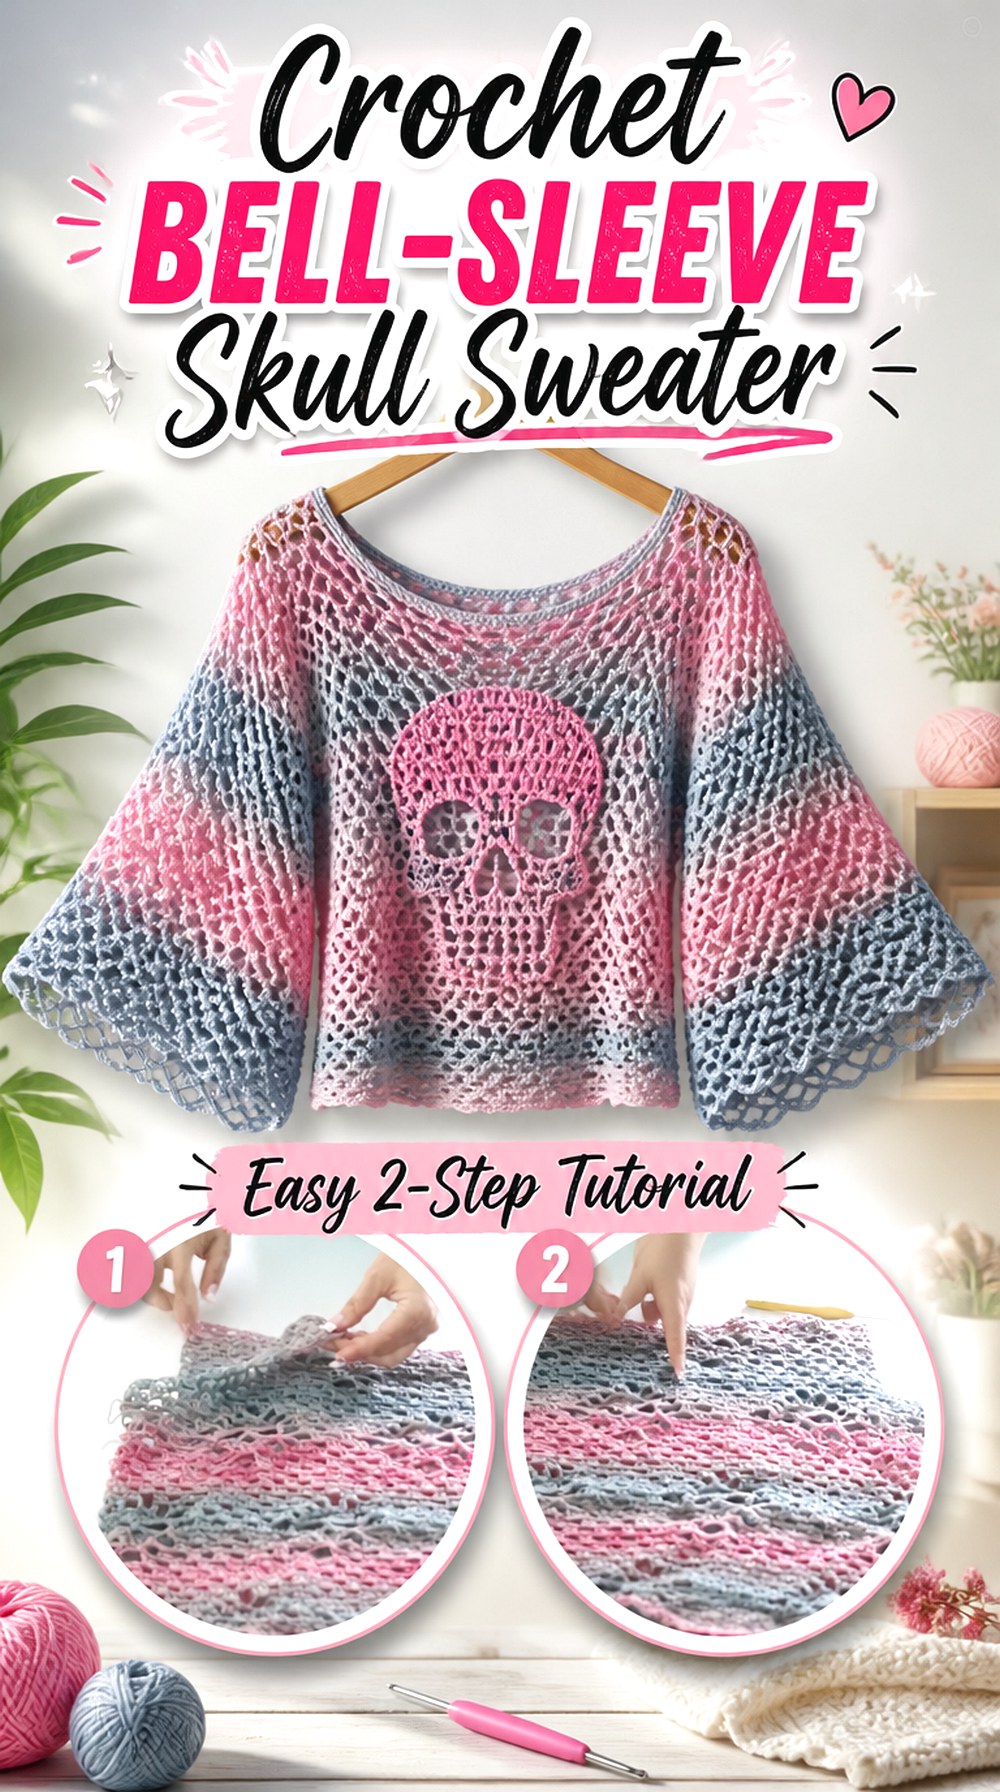
SAVEAnnoo and The Unruly Stitch takes the skull sweater in a more dramatic direction with flared bell sleeves. The tutorial is divided into parts, with the first video covering the beginning of the skull sweater and linking to the second part for assembly and sleeves. The creator also identifies lace yarn and a small hook in the original project materials.
The bell sleeves immediately distinguish this sweater from the straight-sleeved graphic pullovers. They shift visual weight outward and make sleeve drape a major design feature, so this is not simply another skull motif with a different color scheme.
Bell Sleeves Need Their Own Drape Decision
A bell sleeve depends on movement. If the fabric is very rigid, the flare can project outward rather than falling naturally. If it is extremely loose, the sleeve may lose definition.
Before making a large substitution, create enough fabric to judge how it hangs vertically. The original tutorial uses lace yarn, but any alternative should be chosen based on the finished fabric it creates rather than the fiber name alone. A different yarn can change both the skull section and the character of the sleeve flare.
Watch Both Tutorial Parts Before Assembly
Because the project continues into a second video for assembly and sleeves, review the complete sequence before deciding where to customize. A change that looks harmless in the first panel can affect a later sleeve connection or finishing choice.
Watching ahead is particularly useful if you want to alter body length or sleeve volume. You can then decide whether the modification belongs in the main garment section, the sleeve itself, or both instead of discovering a proportion problem after assembly has started.
Balance the Skull Against the Sleeve Volume
The more dramatic the sleeves become, the more important it is to consider the whole silhouette. A large central skull and wide bell sleeves create two strong focal areas.
For a cleaner result, keep the body shape relatively uncomplicated if the sleeve flare is already doing substantial visual work. If you shorten or widen the torso, try the unfinished garment on with the sleeves positioned temporarily so you can judge whether the final proportions still feel intentional.
Original Tutorial and Creator Credit
Creator: Annoo and The Unruly Stitch
6. Crochet Boxy Mesh Skull Sweater
 SAVE
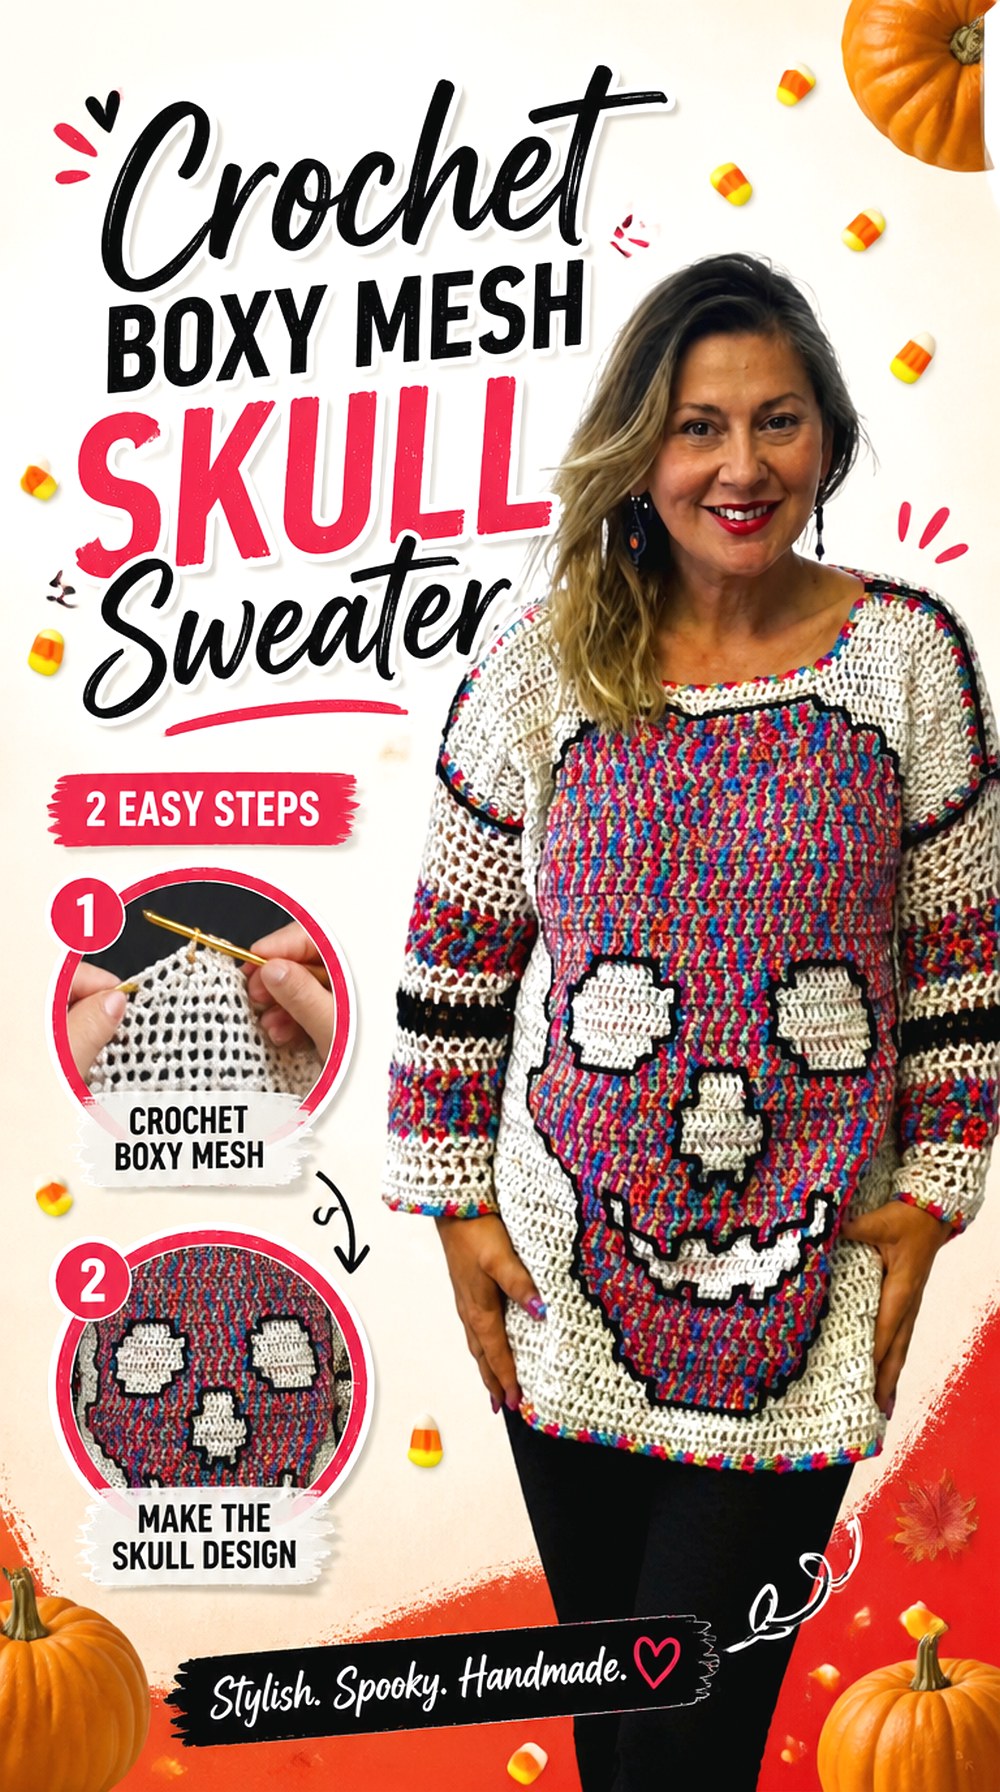
SAVEThis sweater from Indigo Handmade Design combines a boxy silhouette with mesh and a skull feature, giving it more negative space than the solid graphic pullovers. The creator describes the displayed sweater as size M and explains that the size can be changed by altering the beginning width; different hook sizes are also listed for the front panel and the remainder of the sweater.
The boxy body makes this a useful choice for layering and for readers who prefer less body-contoured shaping. Mesh also changes the practical role of the garment: the visible underlayer becomes part of the outfit, much as it does with the rib-cage pieces, but the overall form still reads as a complete sweater.
Mesh Makes the Underlayer Part of the Design
Do not evaluate this sweater only on a bare mannequin or flat surface. Open mesh changes appearance dramatically when placed over another color or texture.
If you want the skull to remain dominant, test the sweater yarn against a few likely base layers before finishing. A busy print underneath may compete with the negative-space motif, while a simple contrasting layer can sharpen it. This is one of the easiest projects in the collection to restyle simply by changing what sits beneath it.
A Boxy Fit Still Needs Shoulder Planning
“Boxy” does not mean fit can be ignored. Extra width changes where the shoulder line falls, which in turn influences sleeve position and the amount of fabric around the upper torso.
The creator discusses adjusting size at the beginning of the construction, but your own checkpoint should include shoulder placement as well as overall width. Lay the panel against a garment whose fit you already like, or compare it with your intended body measurements before moving to later assembly.
Keep the Skull Readable Through the Open Fabric
Mesh can make a sweater visually light, but the skeleton motif still needs enough definition to be recognizable. Pay attention to the contrast between solid and open areas as the front panel develops.
If your yarn produces a significantly different fabric from the creator’s example, pause early and judge the motif from normal viewing distance. A skull that looks clear from a few inches away may blend into the mesh when the sweater is worn.
Original Tutorial and Creator Credit
Creator: Indigo Handmade Design
7. Crochet Halloween Skull Statement Sweater
 SAVE
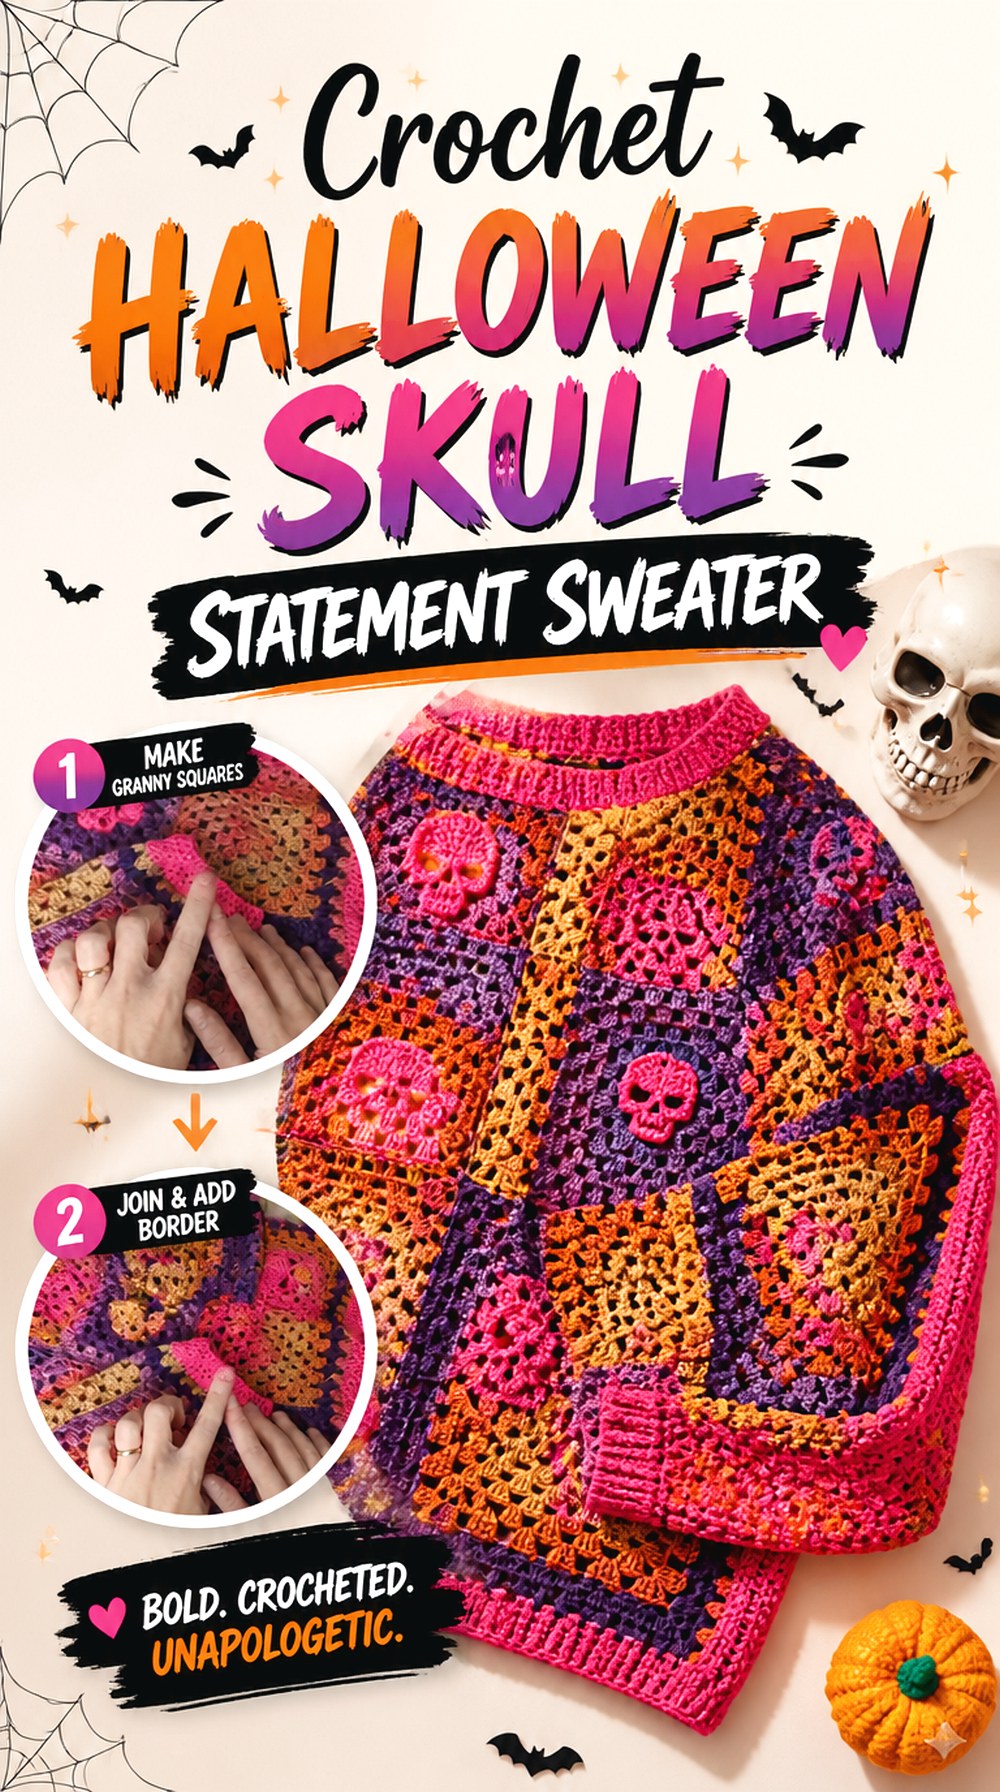
SAVEM’AMI uncinetto provides another full skull-sweater route, this time explicitly framed as a Halloween project. The public video shows a crochet skull sweater and links the yarn used in the description, but the text description provides far less construction information than some of the tutorials above.
That makes this idea most useful for readers who are drawn to the finished sweater first and are willing to review the video carefully before committing to an adaptation. It also prevents this roundup from pretending every creator teaches in the same format: some give detailed written context, while others rely much more heavily on the video demonstration itself.
Review the Full Video Before Buying a Substitute Yarn
The video description identifies the yarn through a link but does not provide extensive written material details. If you want to use something else, first watch enough of the tutorial to understand the fabric and garment proportions the creator is aiming for.
Then compare your sample fabric for stitch definition, thickness, and drape. A skull sweater depends on both garment fit and motif readability, so a substitute should be judged by the fabric it produces rather than by an approximate yarn-category label alone.
Decide How Seasonal You Want the Color Story
A skull design can be strongly Halloween-specific or work as year-round alternative clothing. Color is one of the easiest ways to shift that emphasis without changing the construction.
Traditional high-contrast combinations make the motif immediate, while a muted or tonal palette can make it less costume-like. Before starting, consider where you expect to wear the finished sweater. That decision can help you choose whether the skull should dominate from across a room or become more visible only at closer range.
Verify Finished Measurements in the Tutorial
Because the written description does not provide a detailed sizing table, do not assume the finished sweater will match your preferred fit based only on the title or thumbnail. Review the actual demonstration for any measurement or adaptation guidance the creator provides.
If a measurement you need is not stated, compare your work with a sweater you already own as you progress. That gives you a practical reference without inventing dimensions that the creator never supplied.
Original Tutorial and Creator Credit
Creator: M’AMI uncinetto
8. Crochet Rib Cage Layering Vest
 SAVE
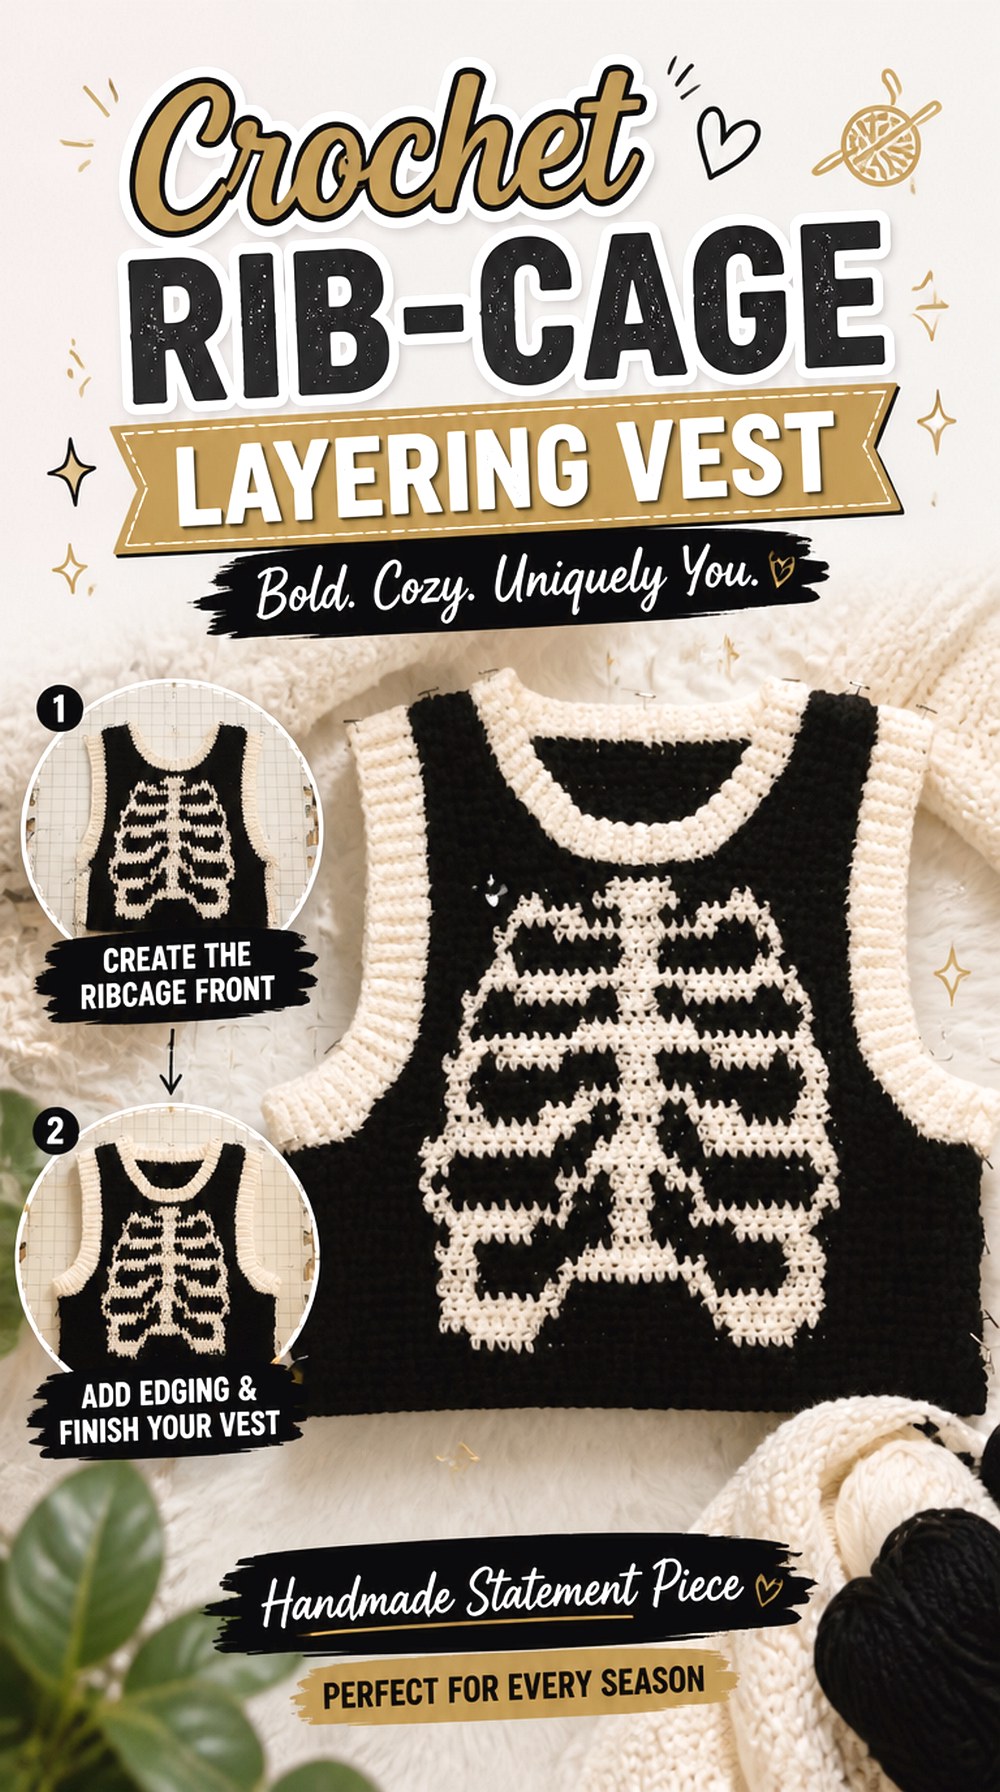
SAVEProbably Knitting’s rib-cage vest is the second sleeveless option in this collection, and it earns its place because it changes the skeleton concept more radically than another minor sweater variation would. The video is presented as a “crochet with me” project and links the rib-cage vest pattern used by the creator.
Unlike a skull graphic, the anatomical idea is created by the garment’s outline and open spaces. Worn over a fitted long-sleeve top, it can give the appearance of a skeleton sweater while remaining a separate layering piece. It is therefore useful for readers who want skeletal structure to be the focal point without committing to a full long-sleeved crochet garment.
Treat It as a Layer, Not a Conventional Sweater
The finished object is a vest, so plan the outfit underneath it from the beginning. A close-fitting base generally keeps the open rib shapes visible, while a bulky layer can push the skeletal sections away from the body and change their alignment.
Try the unfinished vest over the type of garment you actually intend to wear with it. That provides a more realistic fit check than trying it directly against the body and later adding a thick shirt underneath.
Rib-Cage Symmetry Is Easy to Check Before Finishing
Because the ribs form such a strong visual structure, small placement differences may be more noticeable than they would be on an ordinary vest. Before securing final assembly, compare the left and right sides while the piece is lying flat.
Then try it on and check again. Human bodies are not perfectly symmetrical, so the goal is not mathematical perfection; it is making sure the skeleton reads intentionally when worn. Temporary clips or markers can help you evaluate placement before committing to permanent joins.
Know What the “Crochet With Me” Format Provides
Probably Knitting’s video is framed as a project-focused “crochet with me,” and the description directs viewers to the rib-cage vest pattern. It should not be confused with a complete standalone written pattern reproduced inside the video description.
Watch the video and review the linked pattern information before starting so you know where the detailed construction guidance comes from. This is particularly important if you are hoping to resize or modify the skeletal shape rather than making the demonstrated concept as shown.
Which Crochet Skeleton Sweater Style Should You Choose?
Choose the striped graphic pullover if you like a centered chart with a strong background pattern, or the cozy chart pullover if you already have enough garment experience to work from broader construction guidance. The skull granny-square cardigan is the most modular choice and gives you the most layout decisions before assembly.
For lighter coverage, the boxy mesh sweater keeps full sleeves while introducing negative space. The bell-sleeve sweater makes the sleeve silhouette a major feature, while the Halloween skull sweater offers another full-pullover interpretation to study visually.
The rainbow rib-cage top and rib-cage vest are the most anatomical options. Neither is a conventional sweater, but both can be layered over long sleeves when you want the bones themselves—not a skull graphic—to define the look.
Conclusion
The right crochet skeleton sweater depends less on choosing a favorite skull and more on choosing the construction you want to manage. Charted pullovers concentrate the planning in one graphic panel, granny-square cardigans turn the motif into a repeatable layout, and mesh or rib-cage designs make negative space part of the finished image. Bell sleeves add another consideration because yarn drape affects the overall silhouette as much as the skull.
For a traditional sweater, start with one of the graphic, mesh, or granny-square options. For a more anatomical layered look, compare the two rib-cage projects. Use the original tutorials near the end of your planning process for the creators’ exact construction details before making fit or material changes.
Frequently Asked Questions
Are all eight tutorials full crochet skeleton sweaters?
No. Six selections are sweaters or cardigans, while Nirvana Crochet’s project is a rib-cage top and Probably Knitting’s project is a rib-cage vest. They are included as distinct skeleton layering ideas rather than being mislabeled as full sweaters. Vintage Chemist also specifically says its skull-sweater video is not a complete step-by-step tutorial, so check the teaching format before choosing it.
Is a skull chart or a skull granny square easier to resize?
They require different planning. A charted skull usually sits inside a larger garment panel, so changing panel dimensions can affect motif placement. Granny squares are modular, but changing square size changes the dimensions of the entire grid. Neither method has one universal resizing formula. Measure a sample first, then decide how the motif or motif grid will relate to your required panel width and garment ease.
What should I measure before adapting a crochet skeleton sweater?
Start with the measurements that affect the actual silhouette: chest or torso circumference, desired garment length, shoulder placement, sleeve length, and the intended amount of room for layering. Then measure the motif or completed sample separately. For rib-cage designs, also check where the upper and lower skeletal sections land on the torso. A garment can technically fit around the body while still placing the skeleton image awkwardly.
What yarn qualities help a skeleton motif stay readable?
Look at stitch definition, fabric stability, and contrast rather than relying only on fiber content. Clear stitch edges help charted skulls and granny-square motifs remain recognizable. A very fluid fabric can produce beautiful drape but may soften geometric edges, while an overly rigid fabric can make mesh or bell sleeves feel stiff. Crochet a sample using the planned colors and view it from normal wearing distance before committing to the whole garment.
Should skull granny squares be blocked before cardigan assembly?
Blocking or otherwise bringing the squares to consistent finished dimensions can make layout planning much easier, especially when many motifs must line up across a cardigan panel. Measure several squares rather than assuming the first represents all of them. If the creator gives a specific preparation or finishing method, follow that guidance first. The important checkpoint is that motifs intended to share a seam should be compatible before permanent joining begins.
Can I turn a rib-cage top or vest into a full skeleton sweater?
You can use one as inspiration for a larger adaptation, but adding sleeves is more than a cosmetic change. Sleeves introduce armhole fit, shoulder weight, additional joins, and new fabric that may pull on an open skeletal structure. Neither sleeveless project should be treated as a ready-made long-sleeve pattern unless the creator specifically provides that option. A safer planning route is to wear the rib-cage piece over a separate fitted long-sleeve layer.