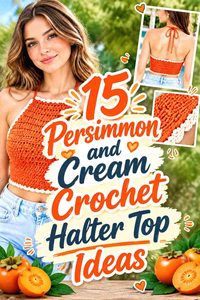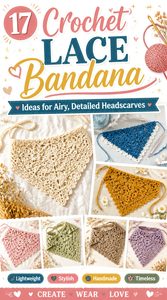
Crochet lace bandanas can share the same triangular outline yet look very different once stitch density, motifs, edging, and tie construction change. A wide mesh design leaves plenty of hair visible, while filet hearts or diamonds turn negative space into a graphic feature. Joined daisies and heart squares make the individual motifs part of the structure, and shell, cluster, granny, or picot details can create a more substantial headscarf without losing the lace effect.
The 17 ideas below cover those differences rather than treating every openwork triangle as the same project. Along the way, you can compare coverage, motif placement, triangle proportions, border behavior, tie choices, and yarn scale. Each idea also points to an original tutorial from its creator, so you can choose a design here and then use the credited source for its exact construction.
Quick List
- Crochet Diamond-Grid Lace Bandana
- Crochet Floral Multi-Wear Lace Bandana
- Crochet Intricate Openwork Triangle Bandana
- Crochet Continuous Floral Lace Bandana
- Crochet Joined Daisy Motif Bandana
- Crochet Dragonfly Openwork Bandana
- Crochet Heart-Filet Lace Bandana
- Crochet Wide-Mesh Picot Bandana
- Crochet Cluster-and-Shell Lace Bandana
- Crochet Lace-Edge Bandana with Tie Options
- Crochet Textured Picot Kerchief Bandana
- Crochet Scarf-Scale Lace Bandana
- Crochet Linked-Filet Scallop Bandana
- Crochet Fine-Yarn Granny Lace Bandana
- Crochet All-Over Shell Lace Bandana
- Crochet Joined Heart-Square Bandana
- Crochet Fine-Scale Lace Headscarf Bandana
Choose Lace Density by the Coverage You Want
“Lace” can mean anything from broad mesh to relatively close fabric interrupted by small decorative openings. Large spaces put the emphasis on hair showing through the bandana and can make the piece feel more like an accent than a covering. Filet and diamond patterns create a middle ground because the solid and open areas work together to form recognizable shapes. Granny clusters, shells, and textured sections generally put more crochet between those openings.
Look at the creator’s finished example against the wearer rather than judging density from a close-up of the stitches. Also notice where the openness occurs. A lace border around a more substantial center gives a different wearing effect from an entirely open triangle, while joined motifs introduce seams and motif boundaries that can provide their own visual structure.
Check Triangle Depth, Upper Width, and Ties Together
A bandana does not fit from one measurement alone. The long upper edge affects how far the piece extends around the head, while the triangle depth controls how much of the back of the hair is covered. Ties then secure that shape; they should not have to compensate for a body that is much too small by stretching the lace tightly.
Before adding elaborate edging or weaving in every end, place the unfinished triangle where you expect to wear it. Check where the front corners land, how low the point sits, and whether the ties can meet comfortably without pulling the openwork out of shape. Hairstyles matter too. A piece intended for loose hair may sit differently over a bun, braids, or a ponytail, so choose the finished proportions according to your preferred styling rather than relying only on a generic size description.
Match Yarn Behavior to the Lace Detail
Yarn substitution can change more than color. A thicker yarn enlarges stitch groups and openings, which can alter both the scale of the motif and the final fit. Very fuzzy fibers may soften crisp diamonds, filet cells, or small floral shapes, while smoother yarn tends to leave those boundaries easier to see. The opposite trade-off can also matter: a highly defined fabric may look graphic but feel less fluid if the yarn and tension produce a stiff result.
For an unfamiliar substitution, make enough of the lace to see a complete motif or representative section before committing to the full bandana. Let the sample hang as well as lie flat so you can judge drape. Fiber-specific washing and care requirements vary, so follow the yarn label and any care information given by the original tutorial rather than assuming every lace bandana should be treated the same way.
1. Crochet Diamond Grid Lace Bandana
 SAVE
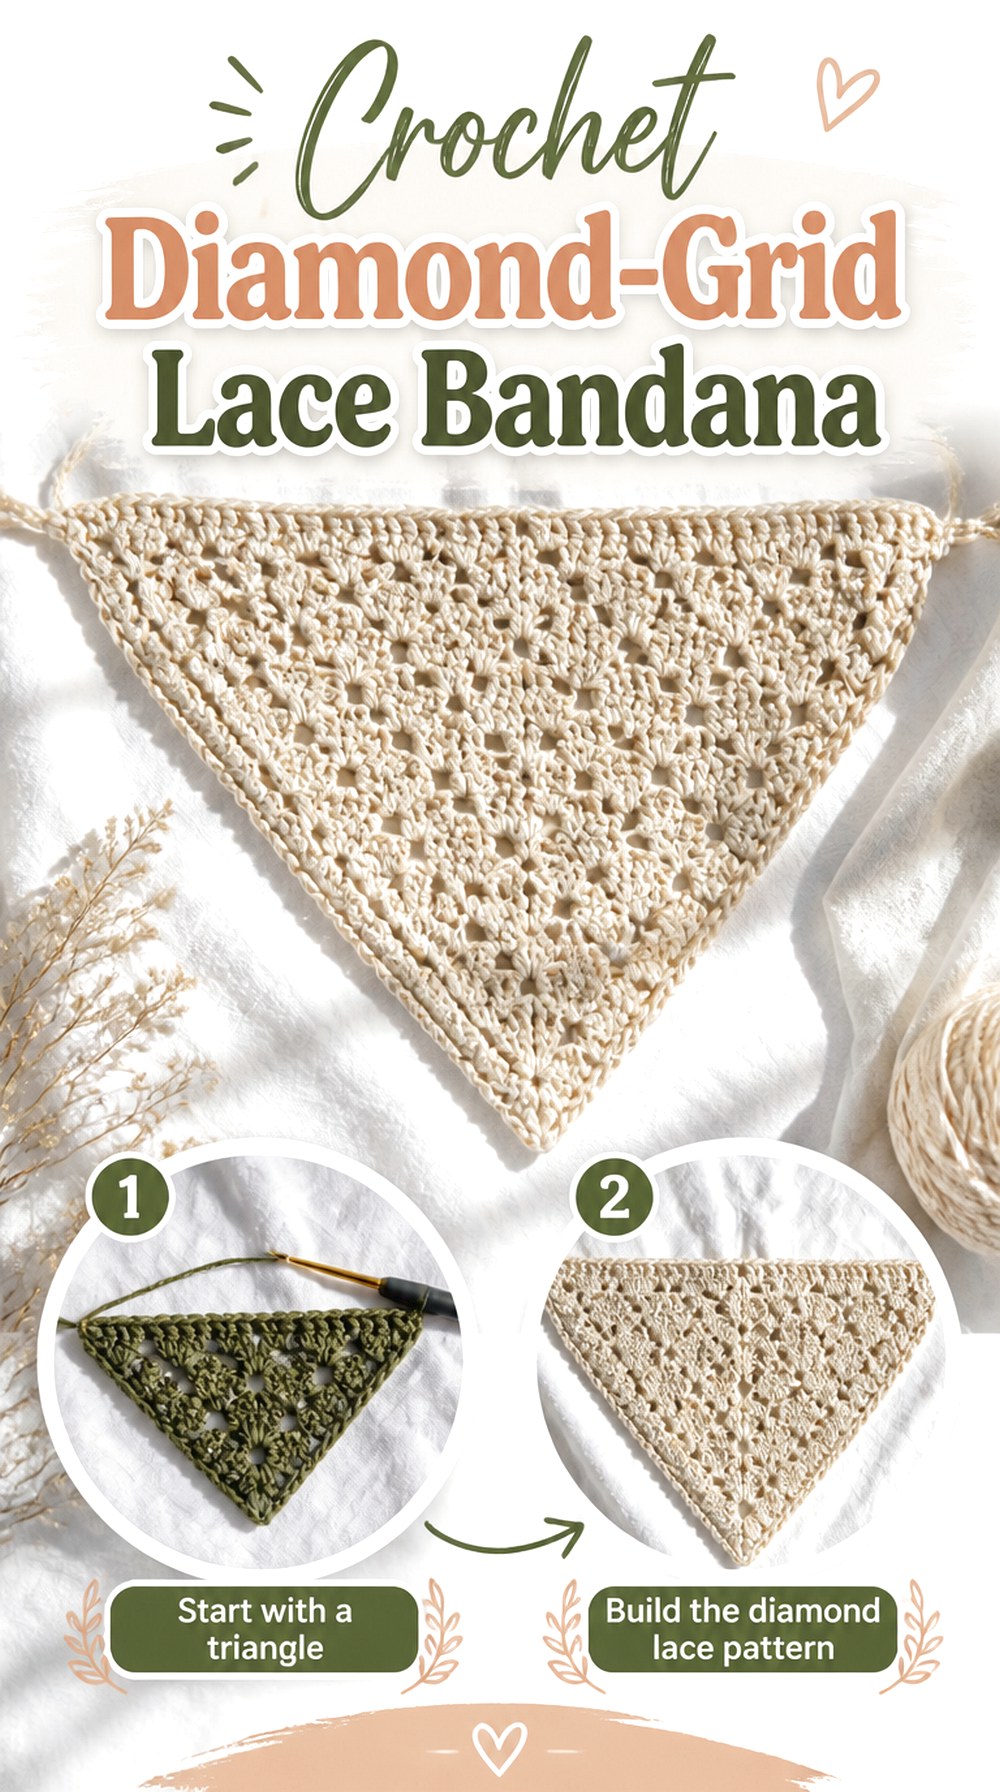
SAVEStraight-edged diamonds turn the open spaces in this bandana into the main design rather than treating them as background texture. VivCrochets demonstrates a triangular bandana built around a repeating diamond-lace effect and also discusses the finishing edge, making this a strong choice for readers who prefer geometry over floral motifs.
The appeal is visual order: the openings form lines that can be read across the whole triangle. That also means small changes in tension or shaping can become easier to notice than they might in an irregular mesh. A solid or gently tonal yarn can keep attention on that underlying grid.
Keep the Diamond Grid Legible
Geometric lace works best when the eye can distinguish the solid stitch lines from the negative space. If a yarn has a strong halo, extreme color variation, or very bulky scale, the diamonds may become less obvious even when the crochet itself is correct.
After completing enough fabric to show several openings, look at it from ordinary viewing distance. That gives a more useful impression of the finished design than inspecting individual stitches close up.
Compare Both Sloping Edges
Repeated geometry can make one-sided growth especially noticeable because the motif lines provide visual reference points. Periodically lay the work flat without stretching it and compare the two sloping sides.
A small difference does not automatically mean something is wrong, but obvious skewing is easier to address before the full triangle is finished. Check the creator’s tutorial when the motif alignment no longer resembles the demonstrated result.
Decide Whether Picots Help the Geometry
Decorative points can soften an otherwise angular design, but they also introduce another visual rhythm around the perimeter. If the diamonds are already the dominant feature, a simpler edge can keep the result crisp.
When using picots, check that their spacing looks deliberate and that the border does not pull or flare. The edging should frame the existing triangle rather than noticeably changing its outline.
Original Tutorial and Creator Credit
Creator: VivCrochets
2. Crochet Floral Multi Wear Lace Bandana
 SAVE
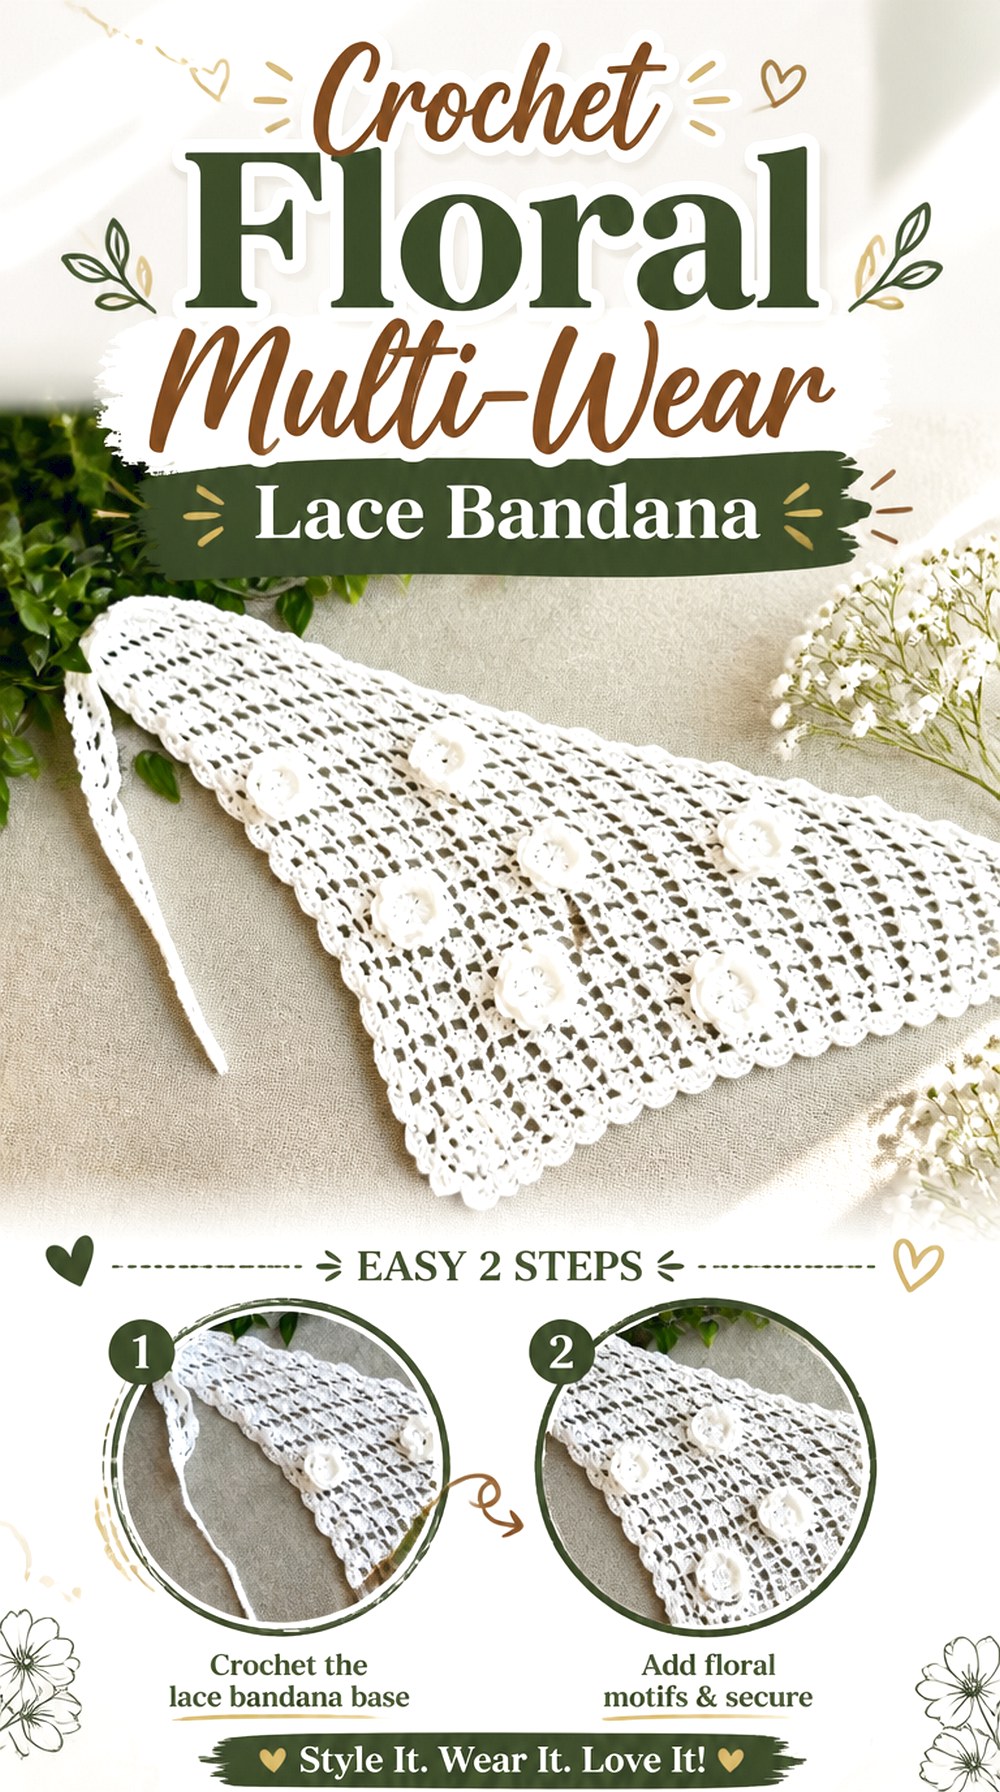
SAVEThis floral lace design takes the bandana toward small-scarf territory. The tutorial from petpetcrochets presents a triangular floral piece intended to work in more than one wearing configuration, which separates it from designs built only around a fixed head-covering position.
Its soft motif language also feels different from sharply geometric filet or diamond lace. Because styling flexibility is part of the appeal, the relationship between triangle depth, edge length, and ties deserves extra attention. A version that looks right when laid flat can behave quite differently once it is wrapped, knotted, or positioned around hair.
Choose the Main Wearing Style First
“Multi-wear” does not mean every size will perform equally well in every position. Decide which styling method matters most to you and use that as the first fit checkpoint.
If headwear is the priority, make sure the triangle gives the coverage you expect without needing to pull the fabric taut. Additional styling possibilities can then be treated as useful extras rather than forcing one set of proportions to solve every purpose.
Give Floral Details Visual Breathing Room
Small flowers depend on recognizable open spaces around their petals. Busy color changes or fuzzy yarn can make individual forms merge into a general texture.
A simple way to evaluate the effect is to place the developing fabric against hair or another contrasting background. If the flowers disappear, consider whether stronger stitch definition or a quieter color treatment would make the lace easier to read.
Watch Added Width at the Knot
Borders and ties can add more bulk near the temples or knot than the lace body suggests. That matters when the design is wrapped in different configurations.
Before finishing, hold the ties in the position you expect to use and check whether the knot feels proportionate to the lightweight body. Wider ties provide more visual presence; narrower ones usually keep the focus on the floral triangle itself.
Original Tutorial and Creator Credit
Creator: petpetcrochets
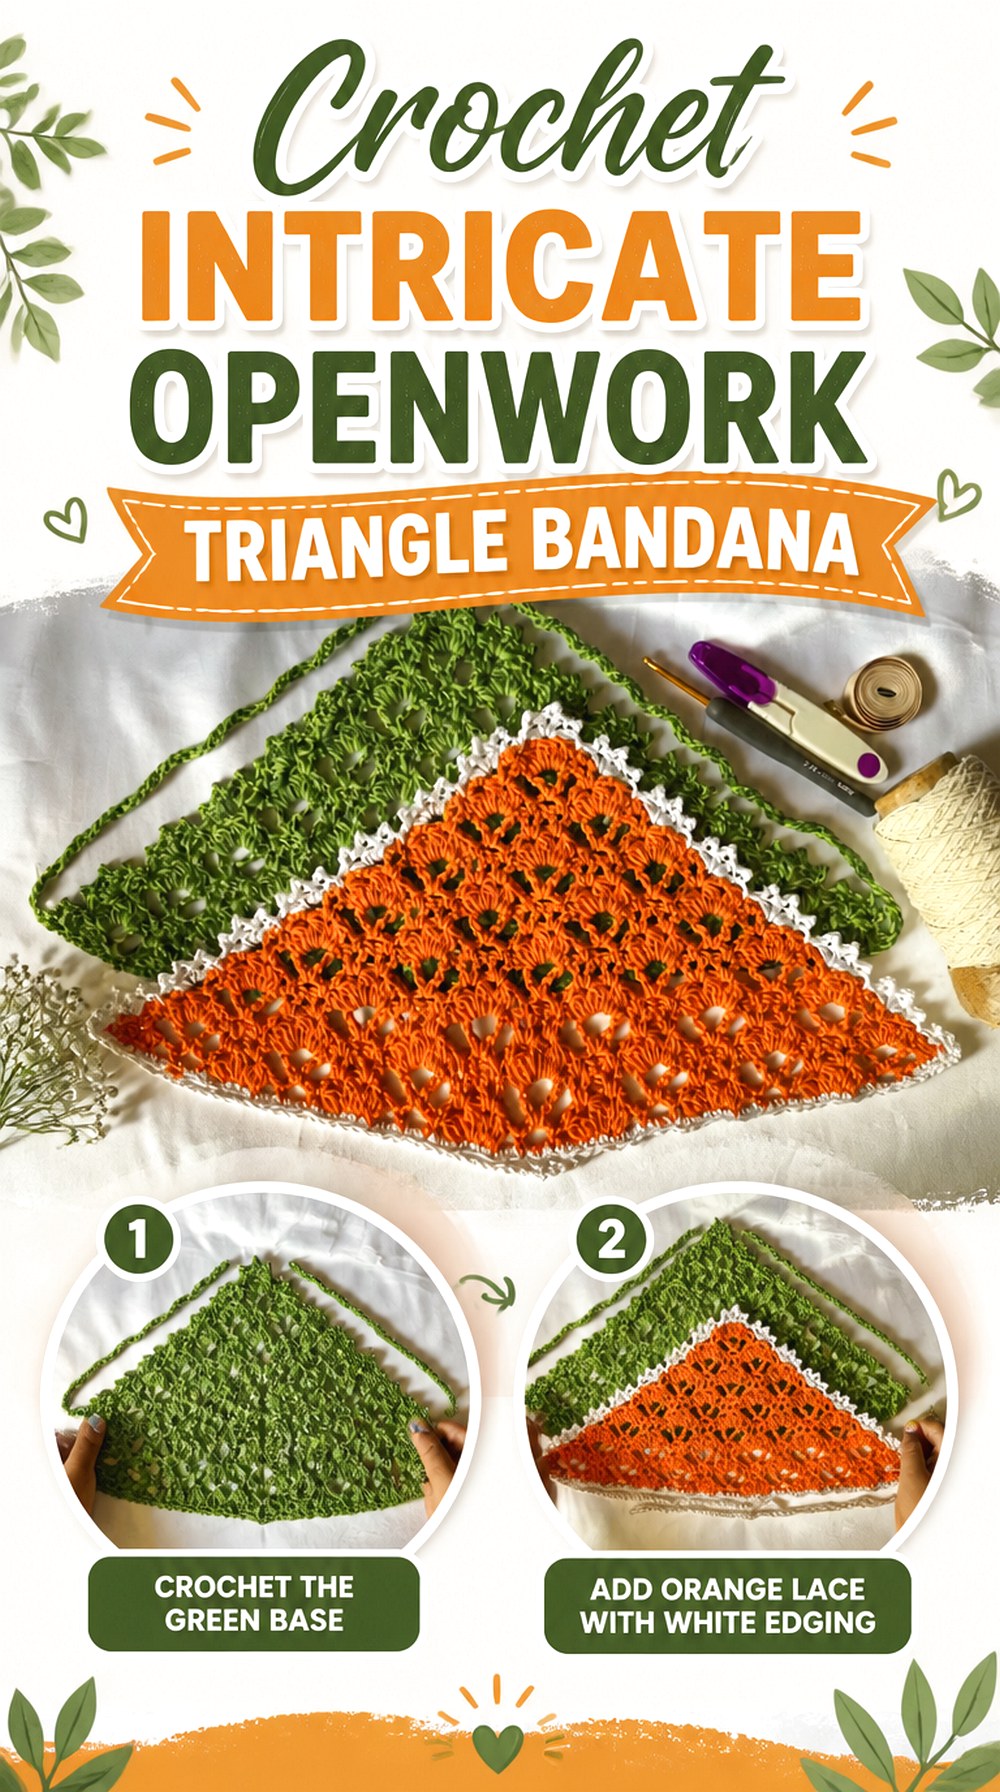
3. Crochet Intricate Openwork Triangle Bandana
 SAVE
SAVEFor readers who want the stitch pattern itself to be the main event, this openwork triangle offers considerably more visual complexity than basic netting. Crochet Corner Ph presents the project specifically as a lace bandana and identifies the tutorial as an advanced crochet lesson.
The design earns its place in this list because the lace has a layered, ornamental character rather than one obvious repeating hole shape. That makes it suited to a bandana where detail is meant to be noticed up close. It also gives you a reason to be selective about yarn and embellishment: intricate fabric can become visually crowded when too many competing elements are added.
Preview the Lace Before Committing
A detailed stitch pattern deserves a longer sample than plain mesh because a small beginning section may not reveal the finished rhythm. Work far enough to see how the open and filled areas relate to one another.
Then decide whether you like that effect at the actual scale produced by your yarn and tension. Changing yarn later may enlarge or compress the visual repeat enough to alter the character of the bandana.
Let Complex Openwork Carry the Design
An intricate lace surface already supplies texture, shadows, and repeated detail. Strong striping, numerous embellishments, or an equally elaborate border can compete with those features.
That does not mean the bandana must be plain. Instead, choose a clear focal priority. If the lace is the reason you selected the project, styling choices that leave it easy to see will usually make the construction feel more intentional.
Stop by Fit, Not by Another Repeat
Repeating lace can encourage a “one more section” mindset, but another repeat may add more width or depth than you actually need. Fit the developing triangle at natural intervals.
Watch where its upper corners land and how far the point drops. If the creator explains sizing or stopping points, use that guidance rather than extending the motif solely because the next repeat looks tempting.
Original Tutorial and Creator Credit
Creator: Crochet Corner Ph
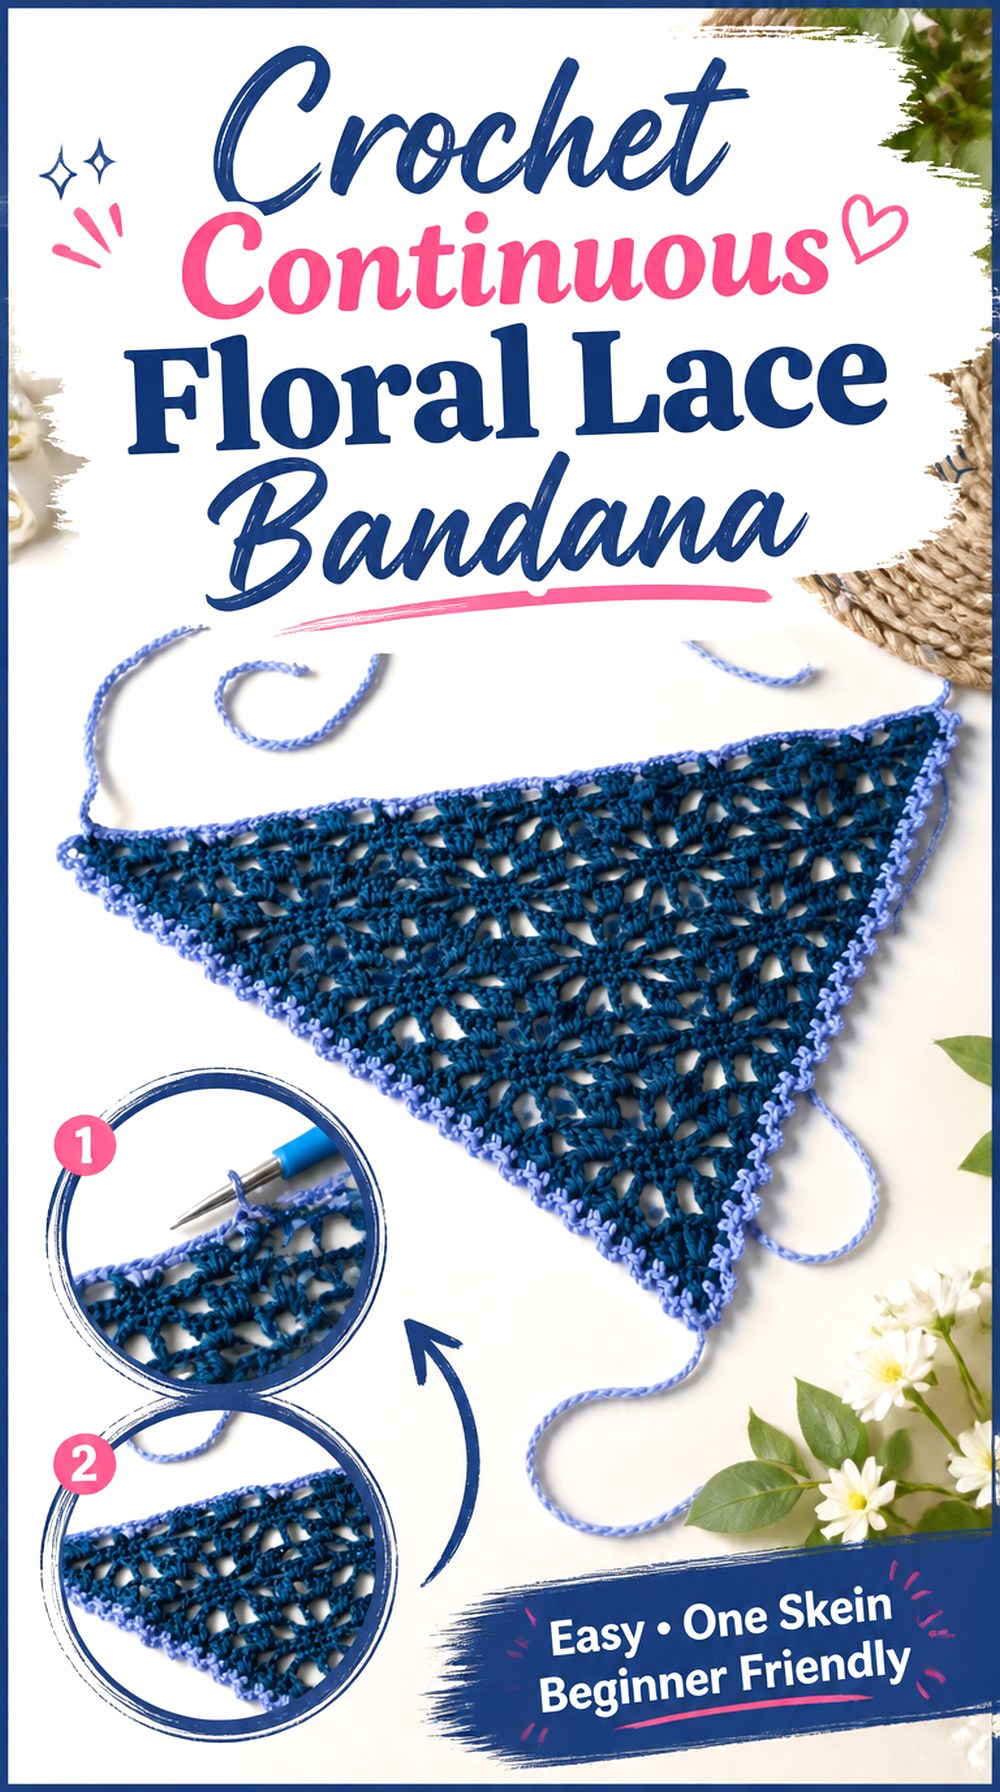
4. Crochet Continuous Floral Lace Bandana
 SAVE
SAVECarley Rose Studio’s tutorial centers on a lightweight lace bandana with a floral design worked through the body rather than assembled from separate flower squares. That continuous construction makes it distinctly different from the modular daisy option later in this collection.
The result has an all-over botanical character while retaining a clearly defined triangle and finished border. Continuous motifs reduce the number of separate pieces to arrange, but the flower shapes still depend on consistent spacing across the fabric. This approach suits readers who want recognizable florals without making motif joining the dominant construction feature.
Check Flower Shapes at Normal Viewing Distance
A flower that appears obvious while you are working can blend into the surrounding lace when viewed from several feet away. Periodically set the bandana down and look at the fabric as a whole.
If the floral character seems lost, examine stitch definition, contrast, and tension before assuming the pattern needs changing. The relationship between openings is often what makes a lace flower recognizable.
Keep the Floral Fabric Flexible
Open floral fabric can lose its airy character if crocheted so firmly that the triangle becomes stiff. On the other hand, very loose tension may make petal shapes difficult to distinguish.
The useful checkpoint is the fabric itself: it should hang in a way you like while still preserving the motif. If substituting yarn, test both appearance and drape rather than matching only the visual thickness of the strand.
Settle the Border Without Ruffling
A border runs along fabric that already has its own tension and expansion rate. If the edging is substantially tighter, the sides can draw inward; if too loose, waves can appear.
Lay the triangle flat periodically as the edge develops. The border should follow the existing line cleanly. If it begins changing that line, check the tutorial before proceeding through the entire perimeter.
Original Tutorial and Creator Credit
Creator: Carley Rose Studio
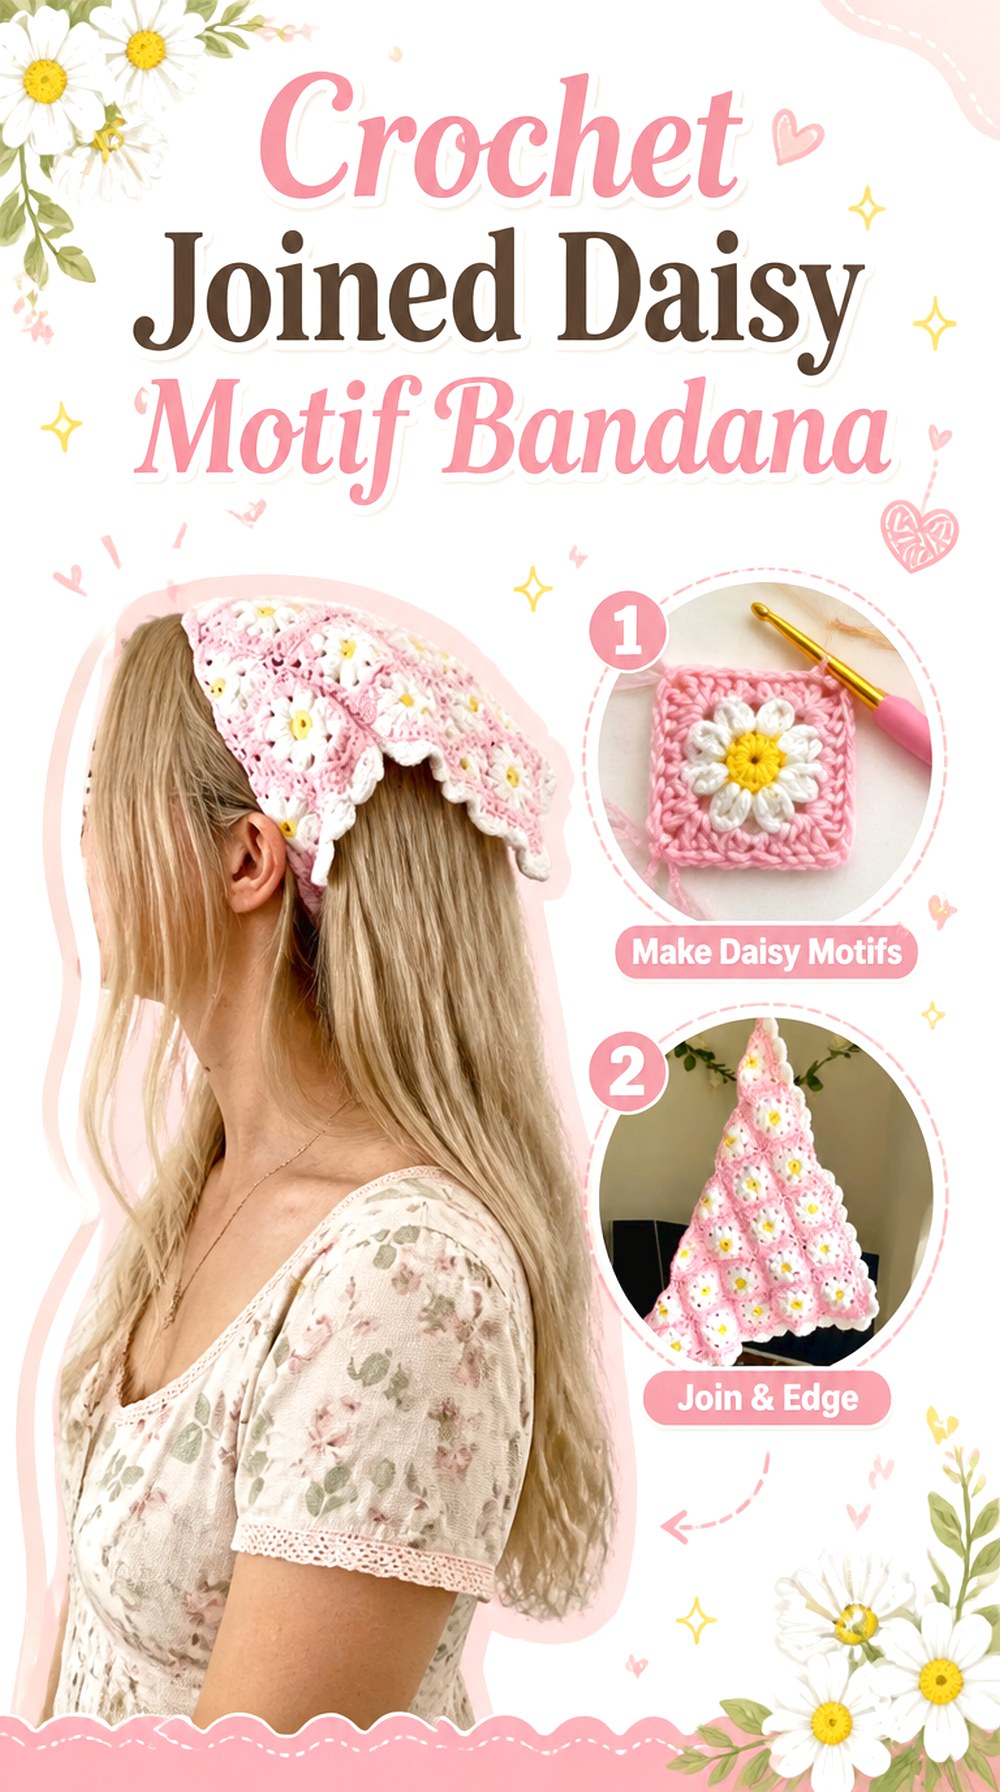
5. Crochet Joined Daisy Motif Bandana
 SAVE
SAVERather than creating flowers inside one continuous lace fabric, this design builds its look from separate daisy elements. The cosybearcrochet tutorial covers daisy squares, triangular elements, assembly, and the final bandana finishing, making the modular construction a defining feature of the project.
That structure produces strong visual boundaries between motifs and gives color placement more influence over the final appearance. It also introduces a consideration absent from one-piece lace: the motifs need to agree in size well enough to join into a balanced triangle. This is a good option when the individual flower units are as important to you as the overall headscarf silhouette.
Match Daisy Motif Size Before Assembly
Separate motifs can look consistent while being worked but reveal size differences once their edges are placed together. Compare finished units before joining a full layout.
If one is noticeably larger, first consider tension and yarn consistency rather than forcing it into position. A joined bandana should lie naturally; seams are not meant to hide substantial differences between motif sizes.
Arrange Colors Before Joining
Modular construction gives you a useful planning opportunity. Lay all completed pieces in their intended positions before committing to assembly, especially when using several colors.
Check whether one shade becomes concentrated in an unintended area and whether the center flowers read clearly. A quick layout review can change the visual balance dramatically without requiring any alteration to the underlying crochet construction.
Inspect the Partial Motifs Along the Perimeter
Triangular bandanas assembled from square-based motifs often rely on different shapes at the edges to create a clean outer silhouette. Those perimeter pieces deserve as much attention as the central squares.
Before adding the border, lay the assembled form flat and check the two slopes and lower point. If one side looks uneven, identify whether the issue comes from motif size, joining tension, or placement before covering it with edging.
Original Tutorial and Creator Credit
Creator: cosybearcrochet
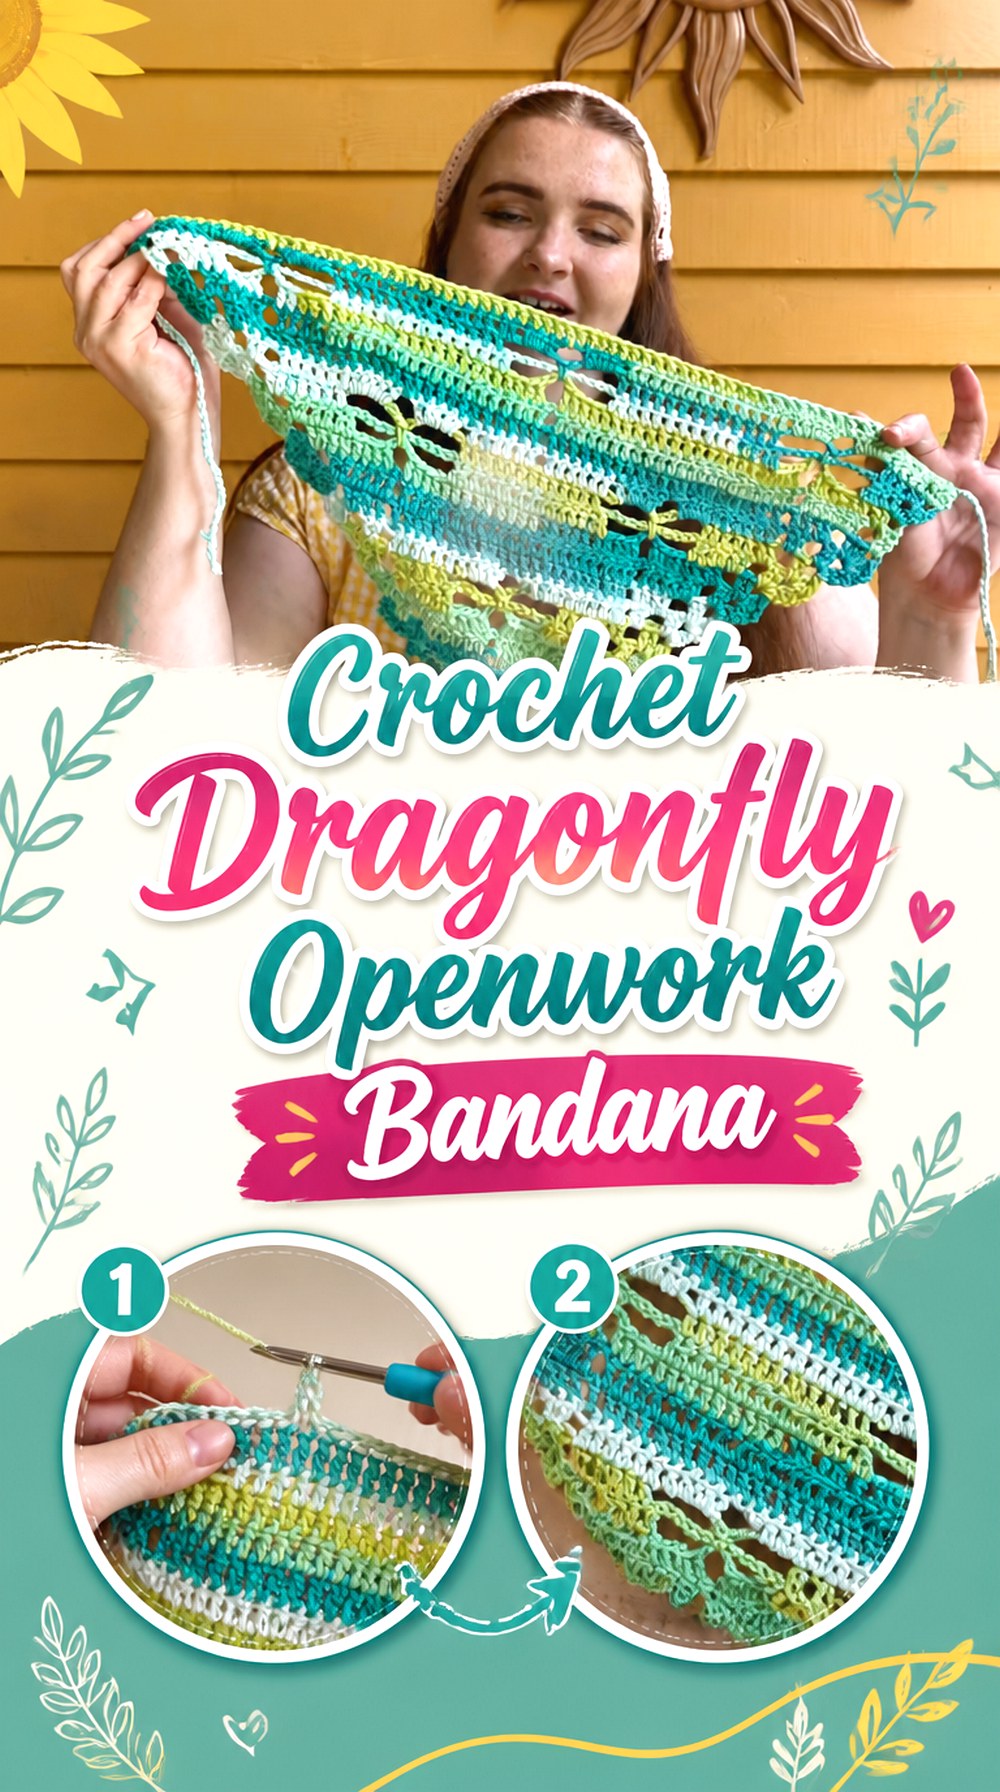
6. Crochet Dragonfly Openwork Bandana
 SAVE
SAVEA dragonfly gives openwork a figurative purpose: instead of simply repeating holes, the positive and negative spaces work together to form a recognizable image. Monica Mabry’s tutorial is specifically devoted to a crochet dragonfly bandana, giving this option a strong focal motif unlike the all-over geometric and floral patterns elsewhere in the list.
Because the viewer is meant to recognize an image, visual balance matters more than it does with random mesh. The bandana can look attractive as lace yet still lose part of its intended impact if the dragonfly is distorted or visually buried by competing colors and details.
Step Back to Read the Dragonfly
Graphic crochet motifs often look clearest while viewed against a contrasting background. As the bandana develops, place it down and move farther away than normal working distance.
You are checking the whole image rather than individual stitches. If the dragonfly becomes difficult to identify, assess whether the open spaces, yarn texture, or color treatment are obscuring its outline before adding more decorative elements.
Protect the Centerline of the Motif
A centered image draws attention to asymmetry. If one sloping side grows differently from the other, the dragonfly can appear shifted even when every individual section looks tidy.
Compare the motif with the lower point and both outside edges while the bandana lies relaxed. Catching a visible lean during construction is more useful than trying to make the final border disguise it.
Keep Extra Decoration Selective
The dragonfly already gives the bandana a subject. Heavy tassels, multiple contrasting borders, beads, and frequent color changes can all compete for the same attention.
Customization can still work well, but changing one major feature at a time makes it easier to judge the effect. Leaving some visual quiet around the motif helps its negative-space drawing remain the central detail.
Original Tutorial and Creator Credit
Creator: Monica Mabry
7. Crochet Heart Filet Lace Bandana
 SAVE
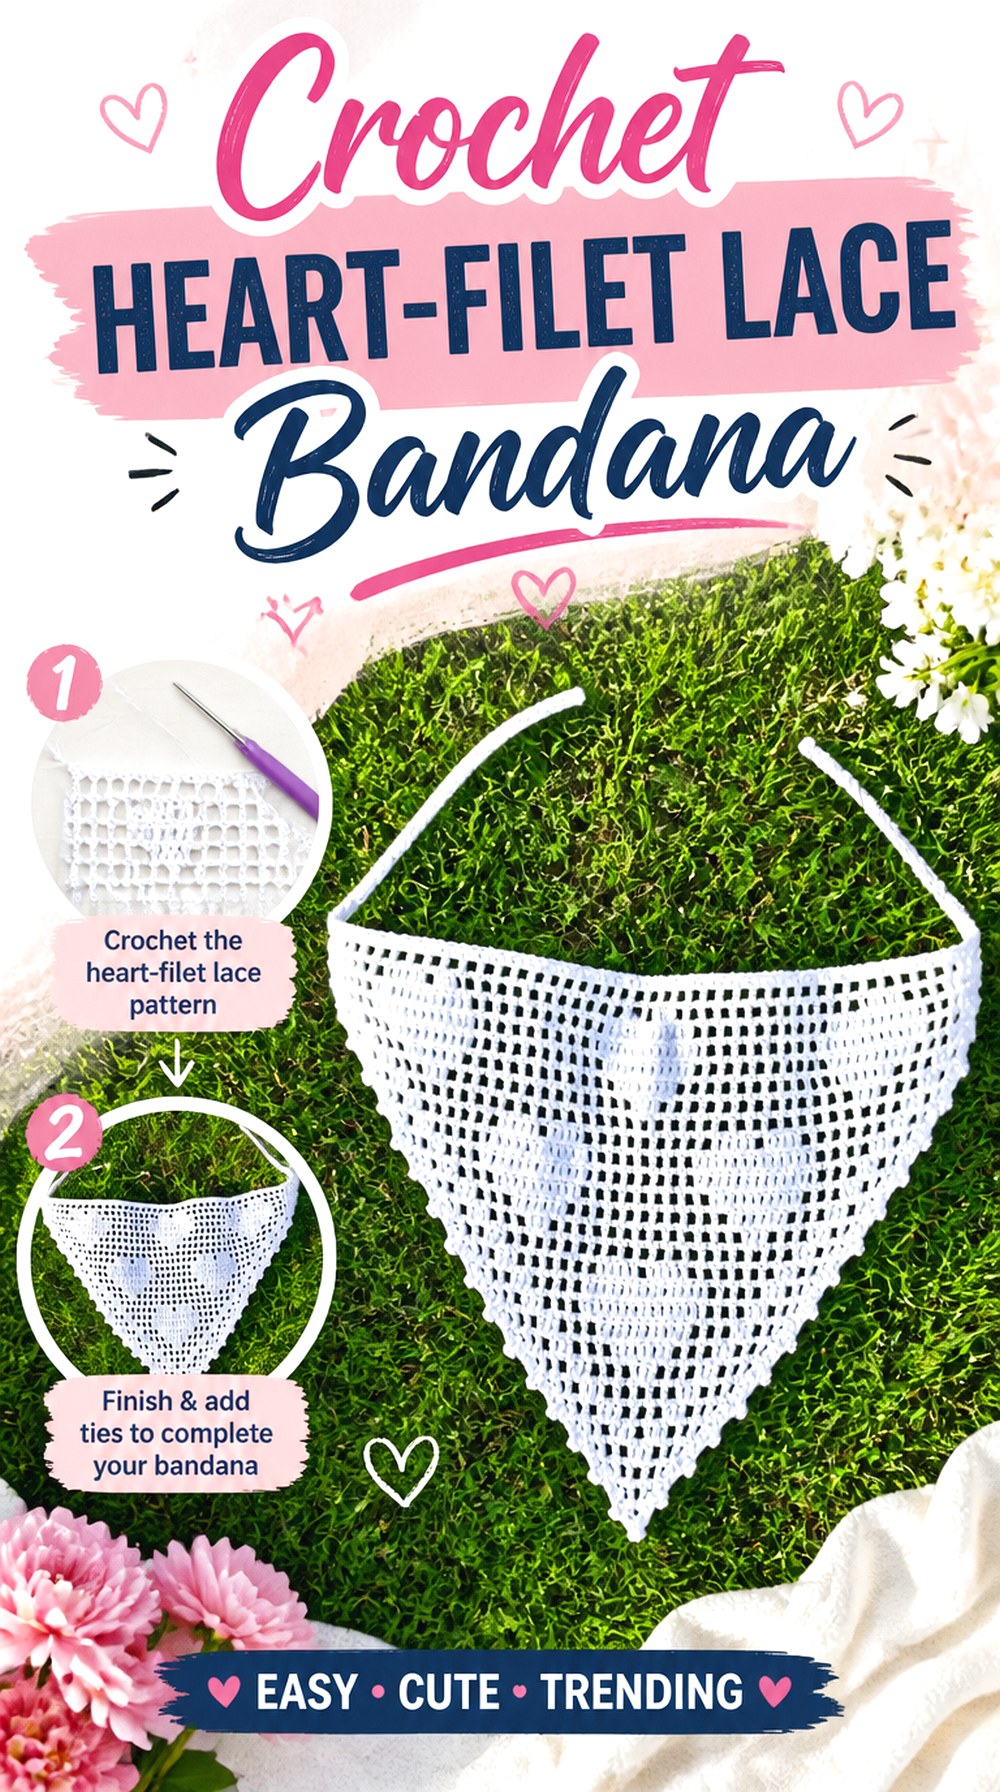
SAVEDublin Bay Crochet uses filet crochet to place heart imagery inside a triangular bandana. The original tutorial identifies the design as the Love Hearts Bandana and explains its filet construction, ties, and decorative border.
Filet works differently from floral lace because the image depends on the relationship between filled and open cells. The overall fabric can remain visually light while still carrying an unmistakable graphic theme. This is a useful choice when you want hearts without separately attached appliqués or joined granny squares, and it puts proportion and motif placement near the top of the planning list.
Keep Filet Cells Proportionate
Filet images are essentially drawings made from a crochet grid. If the cells become strongly elongated or compressed, the heart shapes can change along with them.
Rather than worrying about achieving abstract perfection, compare the developing motif with the tutorial’s finished appearance. Consistent tension across both the open and filled areas helps the image remain balanced as the triangle grows.
Check Heart Placement Before Finishing
A motif can be correctly formed yet sit differently on the head than you imagined. Before adding all finishing details, position the triangle as it will be worn and notice where the hearts land.
This is especially helpful when the imagery is a major reason for choosing the pattern. Hair color, hairstyle, and the contrast behind the openings can all affect how strongly the shapes appear.
Let the Picot Edge Stay Secondary
The source design includes a decorative picot treatment, while the hearts remain the primary visual message. That relationship is worth preserving when choosing colors or making adaptations.
A strongly contrasting border may shift attention away from the filet. If you want the hearts to dominate, keep the edge visually supportive and check that its tension follows the triangle without pulling the motif grid out of shape.
Original Tutorial and Creator Credit
Creator/Site: Dublin Bay Crochet — Leonela Cevallos
8. Crochet Wide Mesh Picot Bandana
 SAVE
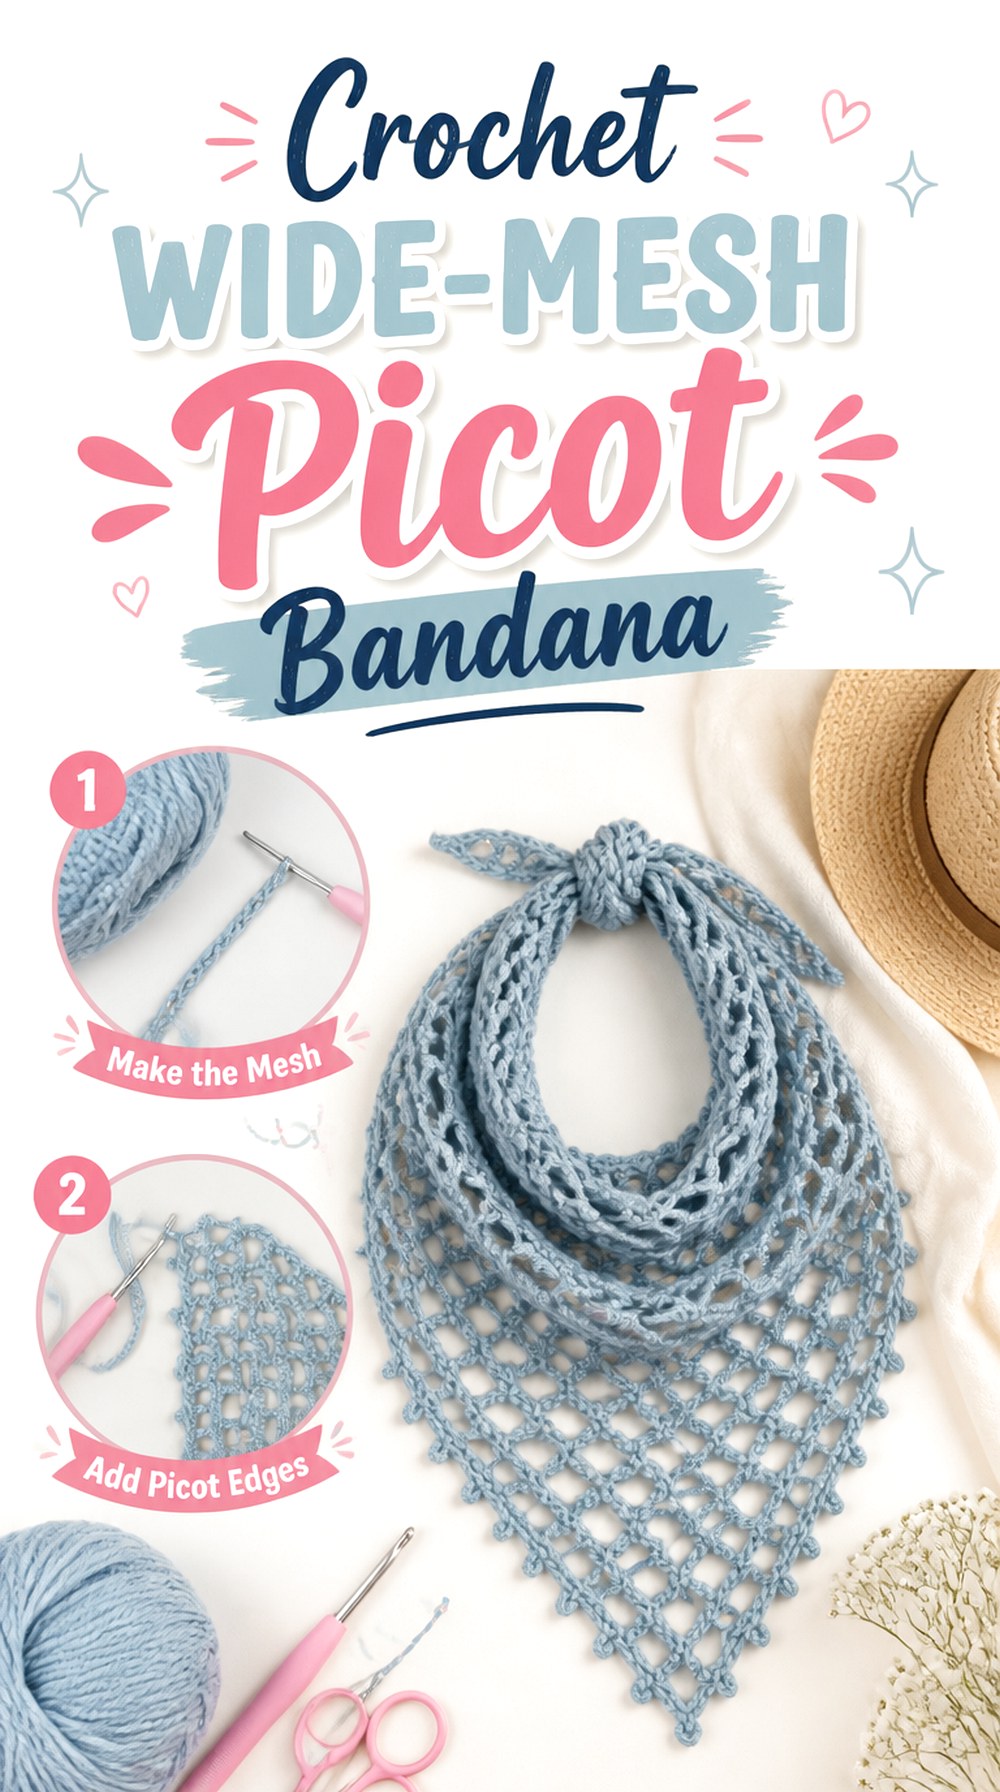
SAVEElyseCrochets takes lace openness to a more obvious extreme with a mesh bandana whose broad spaces make the hair behind the triangle an important part of the finished look. The tutorial also includes the shaping, border, and picot finishing stages.
This option is fundamentally different from small-scale filet or dense shell work. It is less about filling the triangle with decorative stitch groups and more about drawing a light framework across the head. That makes opening size and fit especially important: large mesh can appear dramatically different when stretched compared with when it hangs naturally.
Judge Mesh Against Hair, Not a Table
Mesh often looks more substantial on a flat surface because the background is close and uniform. Against hair, the openings become much more obvious.
Try the developing triangle on without stretching it. That gives you a realistic sense of transparency and helps you decide whether the amount of coverage matches what you actually wanted from a bandana.
Fit the Triangle Before Pulling the Ties
Open mesh can expand when pulled. If the bandana only reaches the intended position after being stretched tightly, the openings may become larger and the silhouette may distort.
Check the body first, then use the ties to secure it. A better-fitting triangle generally allows the lace to retain the proportions shown when it is relaxed.
Original Tutorial and Creator Credit
Creator: ElyseCrochets 💌
9. Crochet Cluster and Shell Lace Bandana
 SAVE
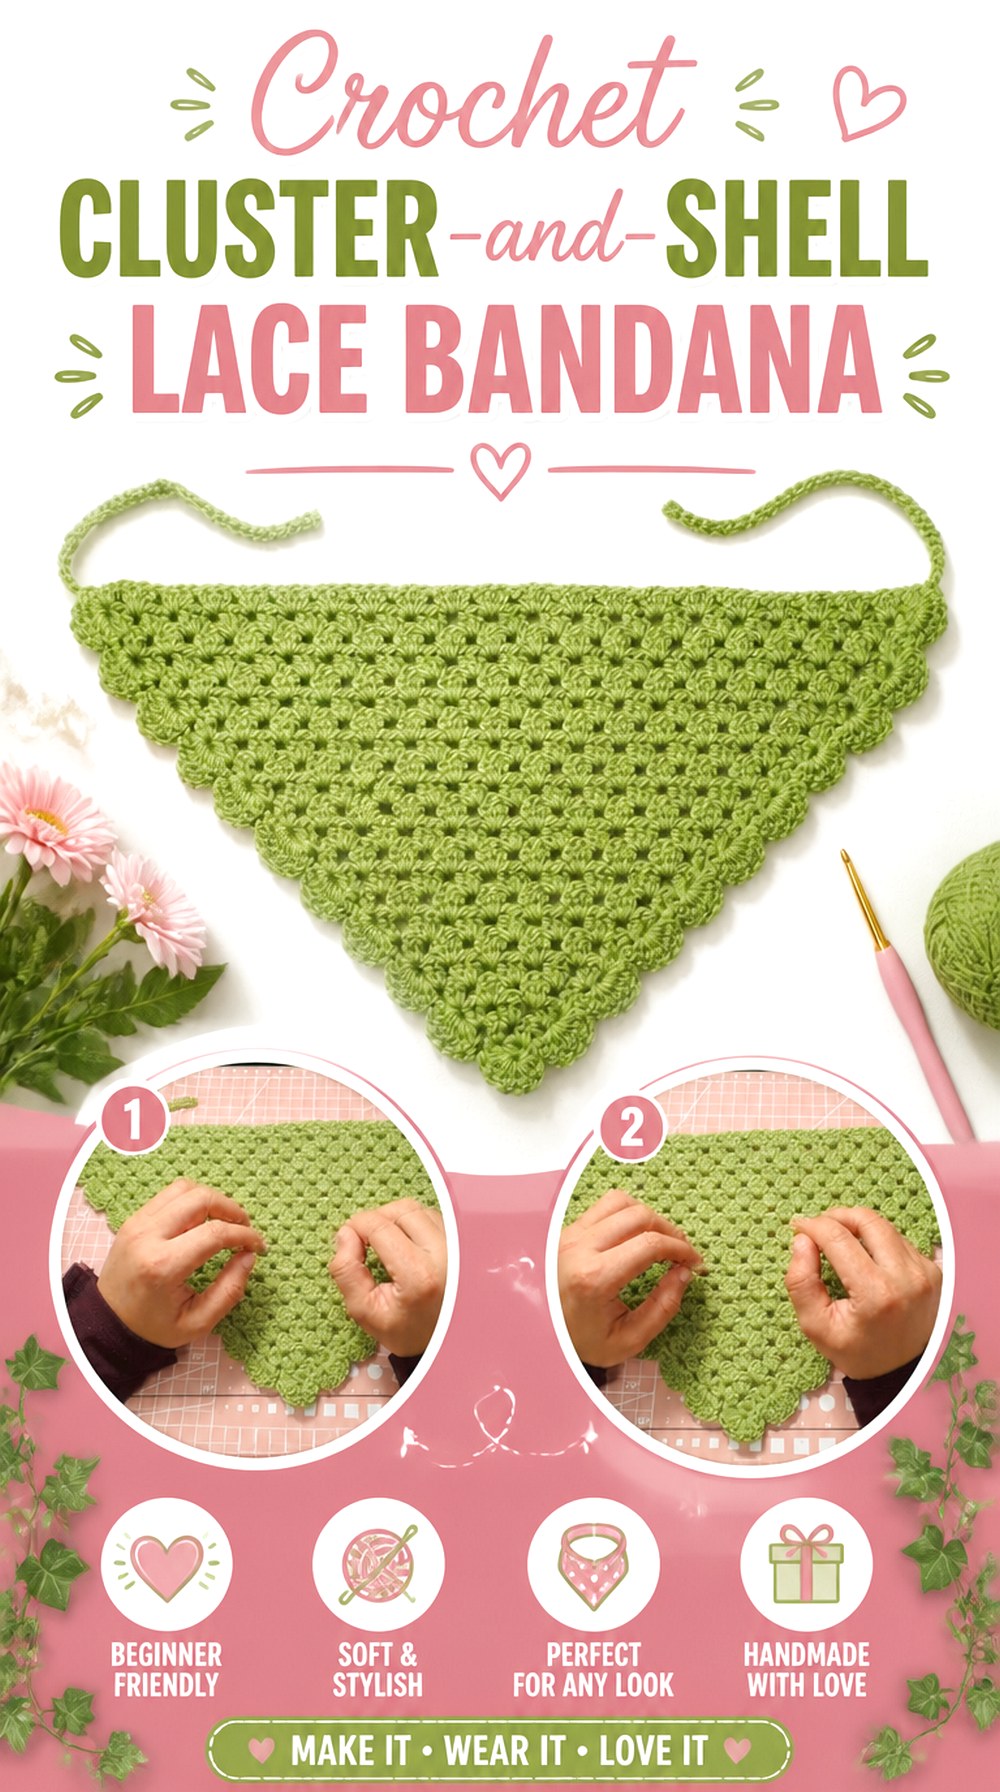
SAVEHappy stockist’s bandana combines cluster-based fabric with a shell-style finishing edge, creating a design where the center offers more visual substance than broad mesh while the perimeter carries much of the decorative movement.
That mixed-density approach is useful when you like lace detail but do not want the entire headscarf to be highly transparent. Clusters form recognizable stitch groupings, while shells soften the triangular outline. The main trade-off is that a decorative border can influence the finished shape if its tension differs significantly from the body.
Use Clusters When You Want More Coverage
Cluster-based crochet places several stitches into visually concentrated groups. Compared with large mesh, that usually means more yarn occupies the center of the triangle and less background shows through.
Consider that difference before selecting the design purely for its edging. If you want an airy accent with maximum visible hair, mesh may be closer to your goal; if you want the bandana itself to read more strongly, clustered fabric can be a useful compromise.
Test a Short Section of Shell Edging
Shell borders naturally introduce curves, but they should not force the side of the bandana into uncontrolled waves. Work enough of the edge to see how it sits, then place the fabric flat.
If the perimeter begins to flare or tighten noticeably, compare your work with the tutorial before continuing. Border tension is easier to correct over a short section than around the entire triangle.
Original Tutorial and Creator Credit
Creator: Happy stockist
10. Crochet Lace Edge Bandana with Tie Options
 SAVE
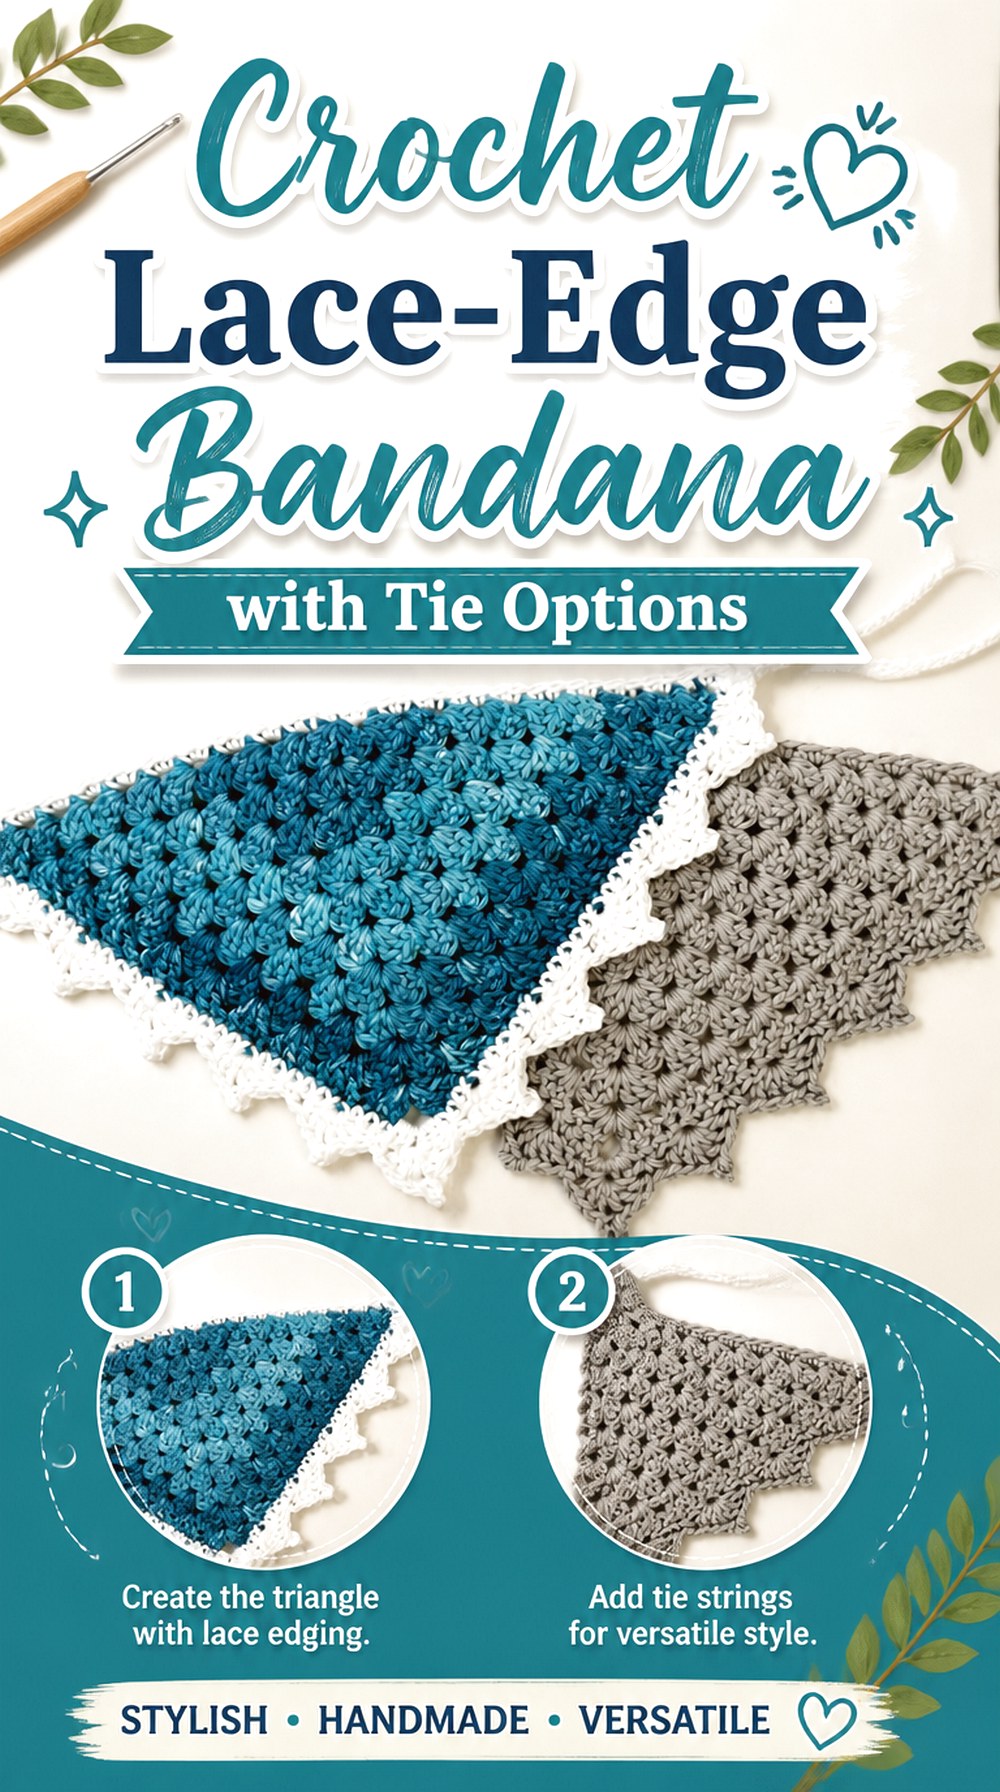
SAVENot every lace bandana needs openwork covering the entire triangle. Ashten Stitches places particular emphasis on the finishing treatment and demonstrates alternatives involving thicker and thinner tie approaches, giving readers a meaningful choice around the bandana’s perimeter and fastening.
This makes the project useful for someone who wants decorative lace character while keeping more substance through the main body. Tie scale also changes the styling more than it might seem: broad ties can become a visible design feature, while narrow ties keep the eye on the triangle and lace edge.
Let Hairstyle Guide Tie Width
A tie that looks balanced with loose hair may feel different beneath a bun or against thicker braids. Think about where the knot will sit and how visible you want it to be.
Wider ties can distribute visual weight along the sides, while finer ties create a lighter finish. Neither is universally better; the useful choice is the one that works with the bandana body and your preferred wearing position.
Size the Body Before the Decorative Edge
An elaborate edge can add apparent depth or width, but it should not be responsible for making an undersized center fit. Try on the main triangle at the stage shown in the tutorial before depending on the border.
Check where the corners fall and whether the center covers the intended area. That gives you a much clearer basis for deciding how substantial the final edging should feel.
Keep the Border from Reshaping the Triangle
A lacy perimeter should follow the existing sides rather than dramatically tightening or expanding them. Lay the bandana down during finishing and compare its silhouette with the pre-border shape.
Some decorative movement is intentional in lace, but obvious cupping or uncontrolled ruffling can indicate that the edge and body tensions are not cooperating. Refer back to the creator’s method before finishing the full border.
Original Tutorial and Creator Credit
Creator: Ashten Stitches
11. Crochet Textured Picot Kerchief Bandana
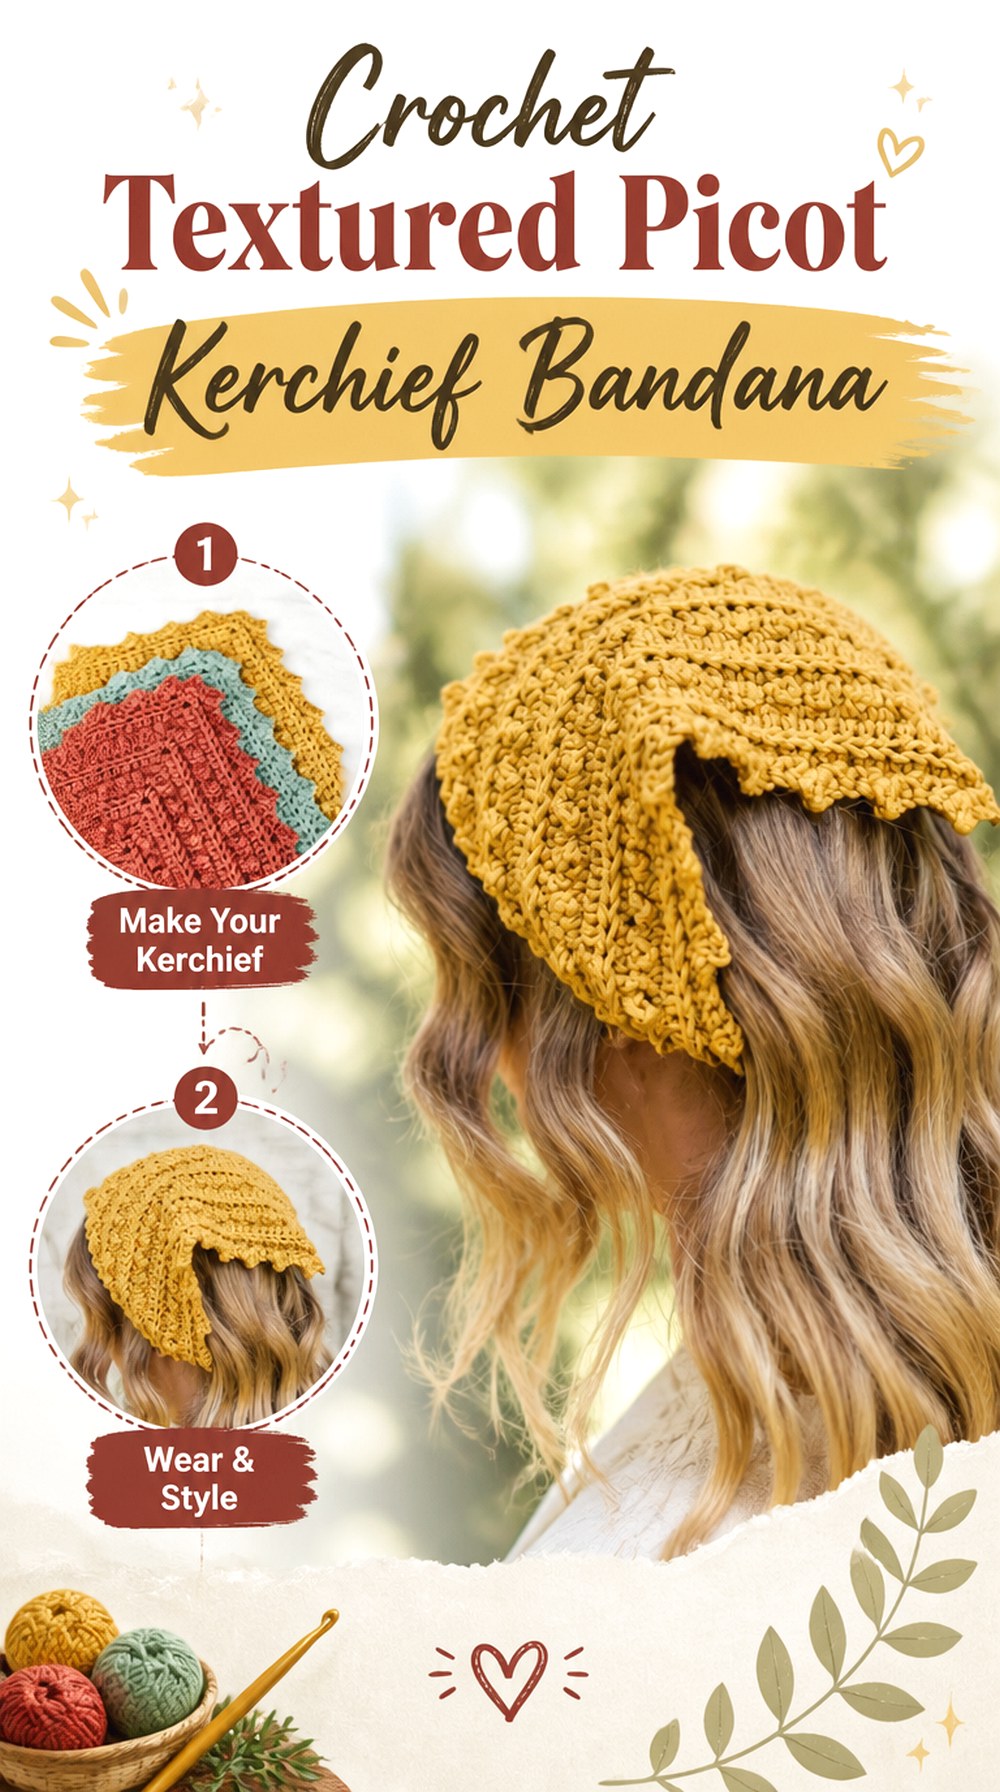 SAVE
SAVEThe Turtle Trunk’s Picot Bandana takes a denser route to decorative headwear. Rather than relying on very large openings, the design uses surface texture and picot details to give a small kerchief shape visual interest. The creator provides the project as a dedicated bandana tutorial and pattern.
This makes it a useful counterpoint to the widest mesh designs. More crochet remains visible across the center, while the small pointed details create a lace-adjacent finish around the fabric. It suits readers who like decorative edges but want a bandana that reads as a clearer block of crochet when worn.
Choose Coverage by Corner Placement
A size description is less useful than seeing where the corners actually sit on your head. Before committing to finishing, check the front edge, lower point, and the distance the two sides need to travel before tying.
Your hairstyle can change that preferred placement. Use the creator’s sizing information where relevant, but judge the final choice by the way you intend to wear the bandana rather than the label alone.
Use Stitch Definition to Show Small Picots
Tiny decorative points can disappear visually in yarn with a strong halo or highly distracting color changes. If the picots are a major reason you like this project, look at a small finished section before deciding the yarn is right.
Clear definition is especially helpful around a detailed edge because the viewer sees the silhouette first. The border should remain recognizable without needing to inspect it from very close range.
Original Tutorial and Creator Credit
Creator: The Turtle Trunk
12. Crochet Scarf Scale Lace Bandana
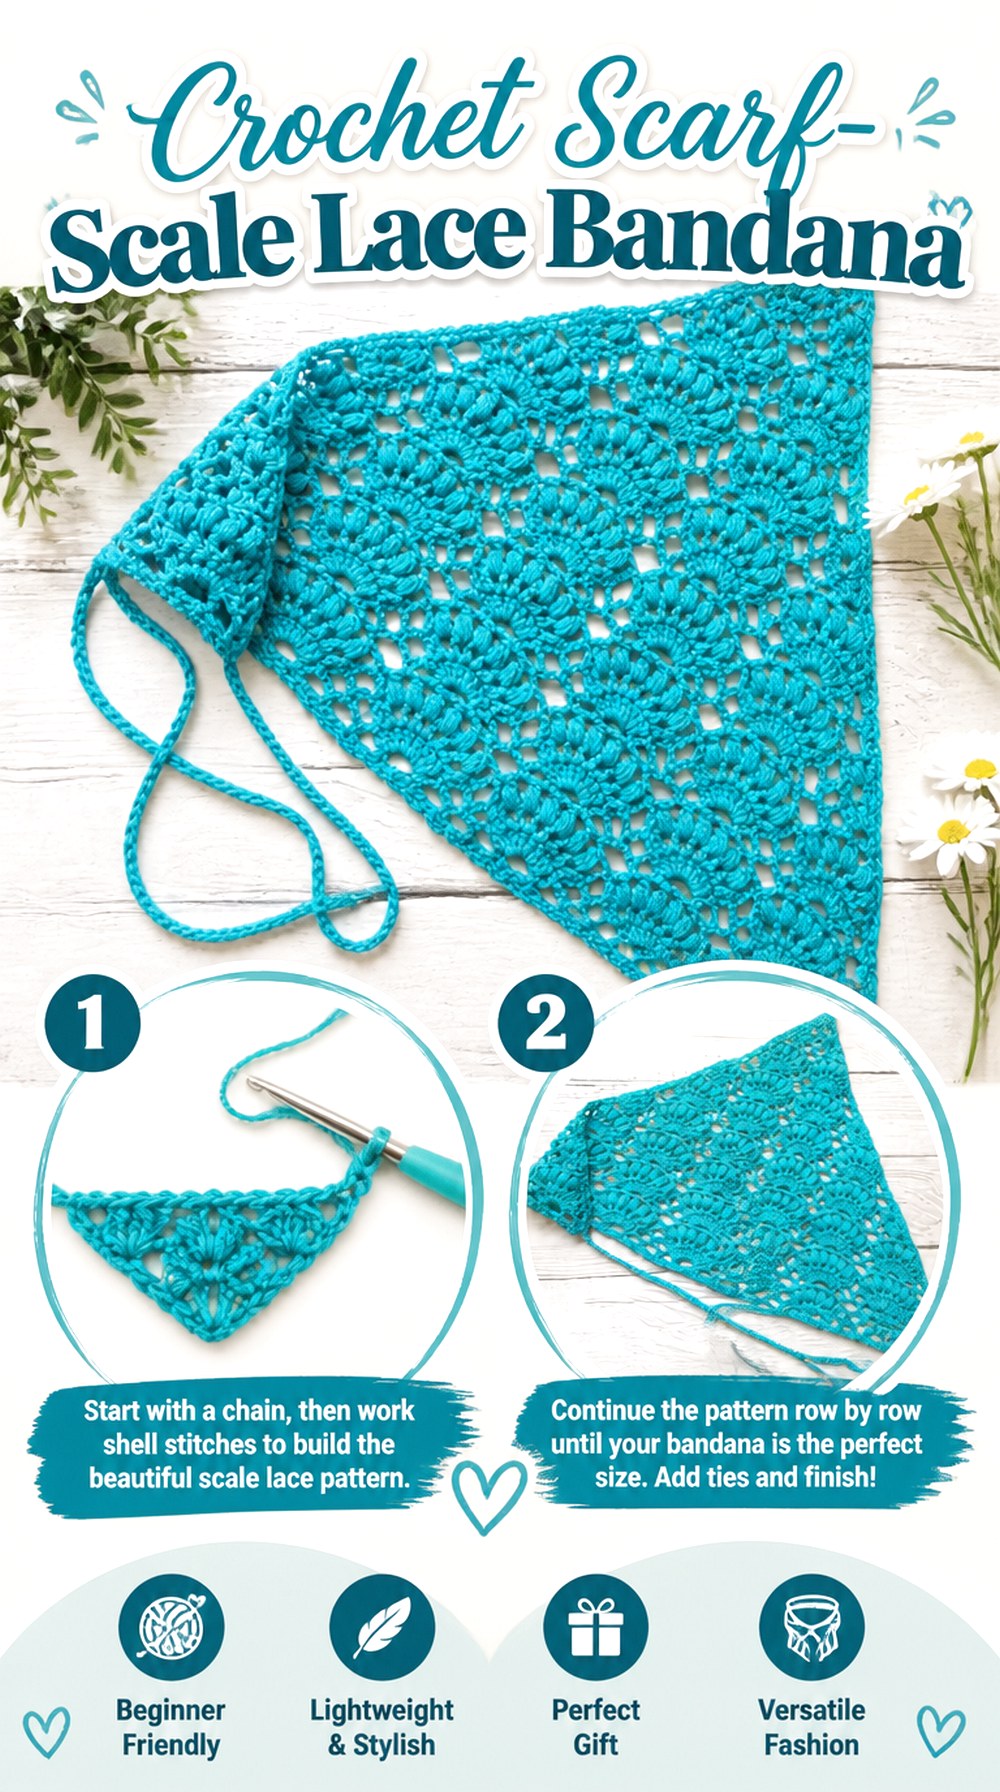 SAVE
SAVETLH Patterns presents a lace bandana tutorial that can also be adapted toward a shawl, making scale itself one of the project’s distinguishing ideas. The source uses a triangular lace construction and explicitly frames the design as something that can extend beyond headscarf proportions.
That makes this a practical choice for readers who enjoy a stitch pattern enough to imagine it as more than one accessory. It also introduces an important planning question: a triangle that works beautifully at bandana scale may feel different once it grows larger because weight, drape, and the relationship between depth and width become more noticeable.
Decide Whether You Really Need Scarf Scale
It is easy to keep enlarging a repeat when the pattern allows it, but more fabric is not automatically more useful. Decide whether your main goal is a fitted head accessory, a loose headscarf, or something that begins to function more like a shoulder piece.
That decision tells you when to start assessing the fabric as a finished object instead of simply continuing the repeat.
Check Drape as the Triangle Grows
Additional size means additional yarn weight. A lace fabric that feels relatively crisp when small may hang differently after more rows or sections are added.
Lift the work from the table and let it fall naturally as it grows. If you are substituting yarn, this hanging check is especially valuable because fiber, thickness, and tension can all influence the larger fabric.
Separate Headwear Fit from Shawl Adaptation
Being adaptable does not mean one finished size should serve both functions equally well. For a bandana, the upper edge and ties need to work around the head. For a shawl-like version, body coverage and drape become more important.
Treat those as separate fitting decisions. Follow the creator’s construction guidance while stopping at the scale that serves your intended use.
Original Tutorial and Creator Credit
Creator: TLH Patterns
13. Crochet Linked Filet Scallop Bandana
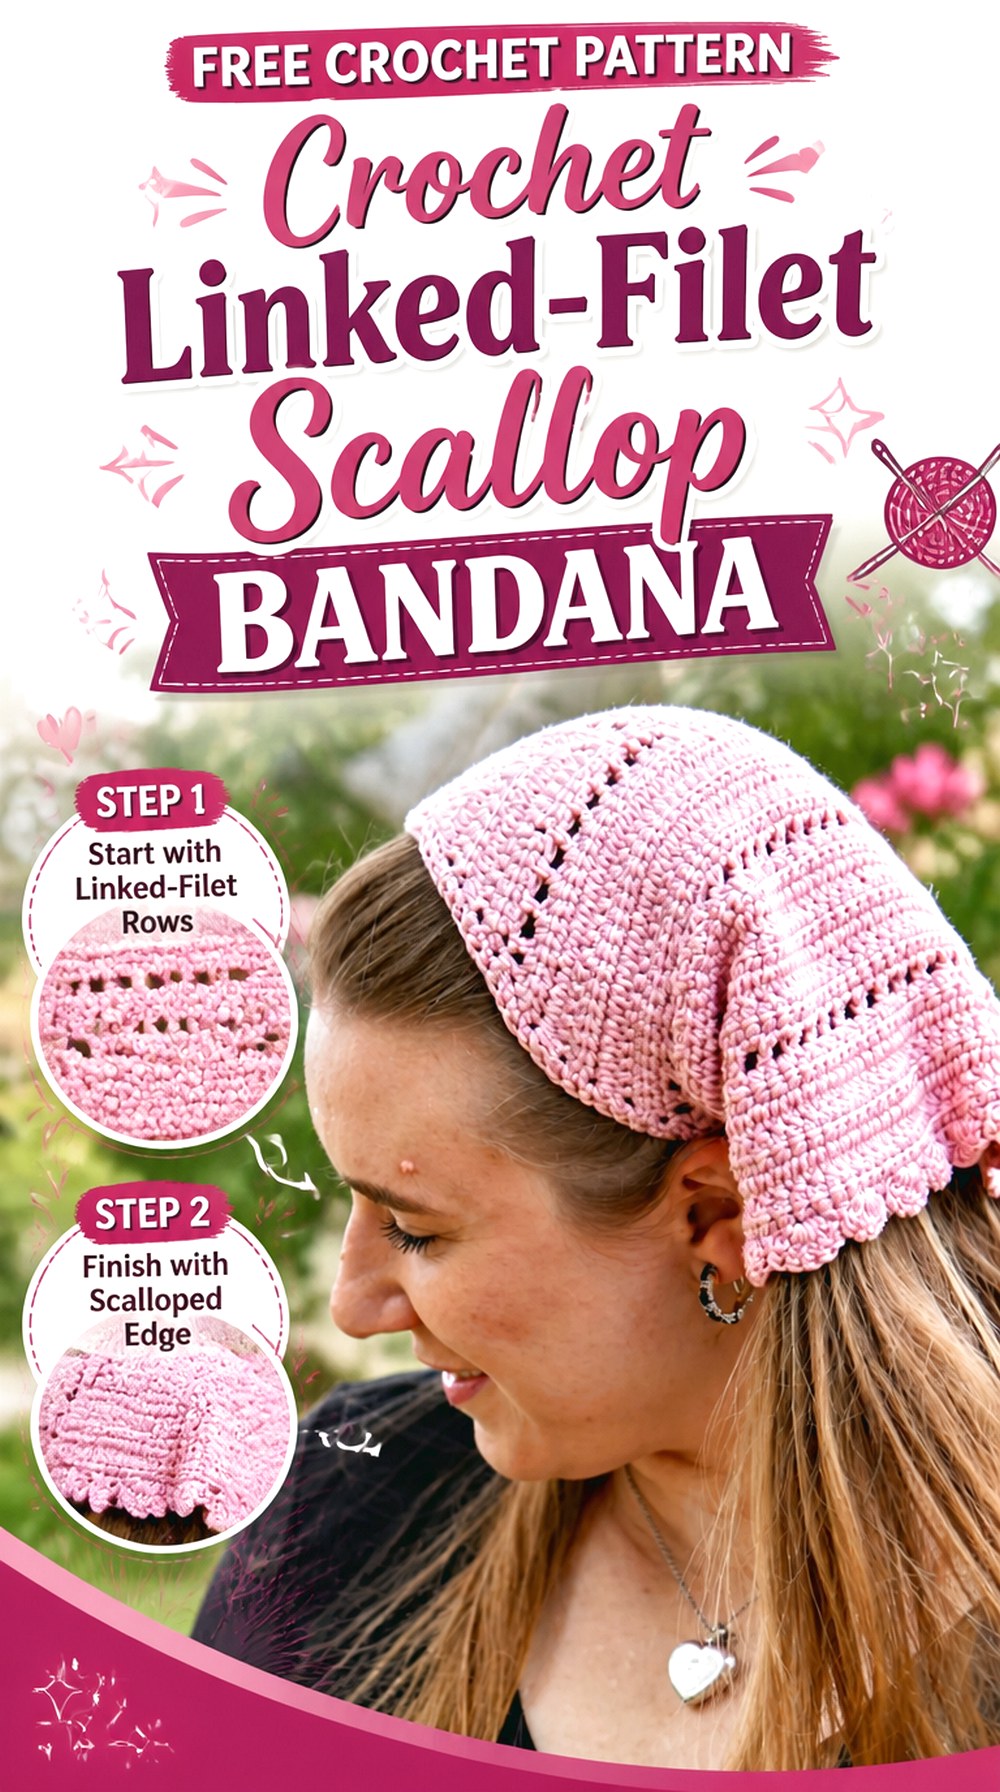 SAVE
SAVENicki’s Homemade Crafts combines several textures in one head bandana: linked crochet provides more substantial areas, filet introduces deliberate openings, and a scalloped border finishes the perimeter. The original pattern page presents these features as part of the same design.
That contrast is what gives this project its identity. Instead of choosing between dense fabric and lace, you get both within one triangle. It can therefore suit readers who want decorative negative space without making every part of the bandana transparent. The mixed construction also makes fabric behavior worth watching because the denser and more open sections can respond differently to tension.
Watch How Mixed Density Hangs
Sections containing more yarn can carry different visual weight from open filet areas. Once a representative portion is complete, lift the fabric and see whether the transitions hang smoothly rather than judging it only while pinned or flattened.
A balanced piece does not need every section to behave identically, but the changes should look intentional. Yarn substitution can make those differences more pronounced.
Give the Scallops a Stable Foundation
Scalloped edges are easiest to appreciate when the underlying side of the triangle is already sitting cleanly. An unstable or strongly distorted base edge can make the curves appear uneven.
Before reaching the decorative finishing stage, check both sloping sides and correct any obvious tension issue you can identify. The border is a finishing feature, not a reliable way to conceal major shape problems.
Compare Linked Sections with Filet Openings
The contrast between more substantial linked crochet and open filet is central to this design. If your yarn is extremely fuzzy or the color pattern is highly busy, that contrast may become less obvious.
Look at the fabric from several feet away. If the two textures still read as distinct, the mixed-density effect is doing its job without requiring exaggerated color changes.
Original Tutorial and Creator Credit
Creator/Site: Nicki’s Homemade Crafts
14. Crochet Fine Yarn Granny Lace Bandana
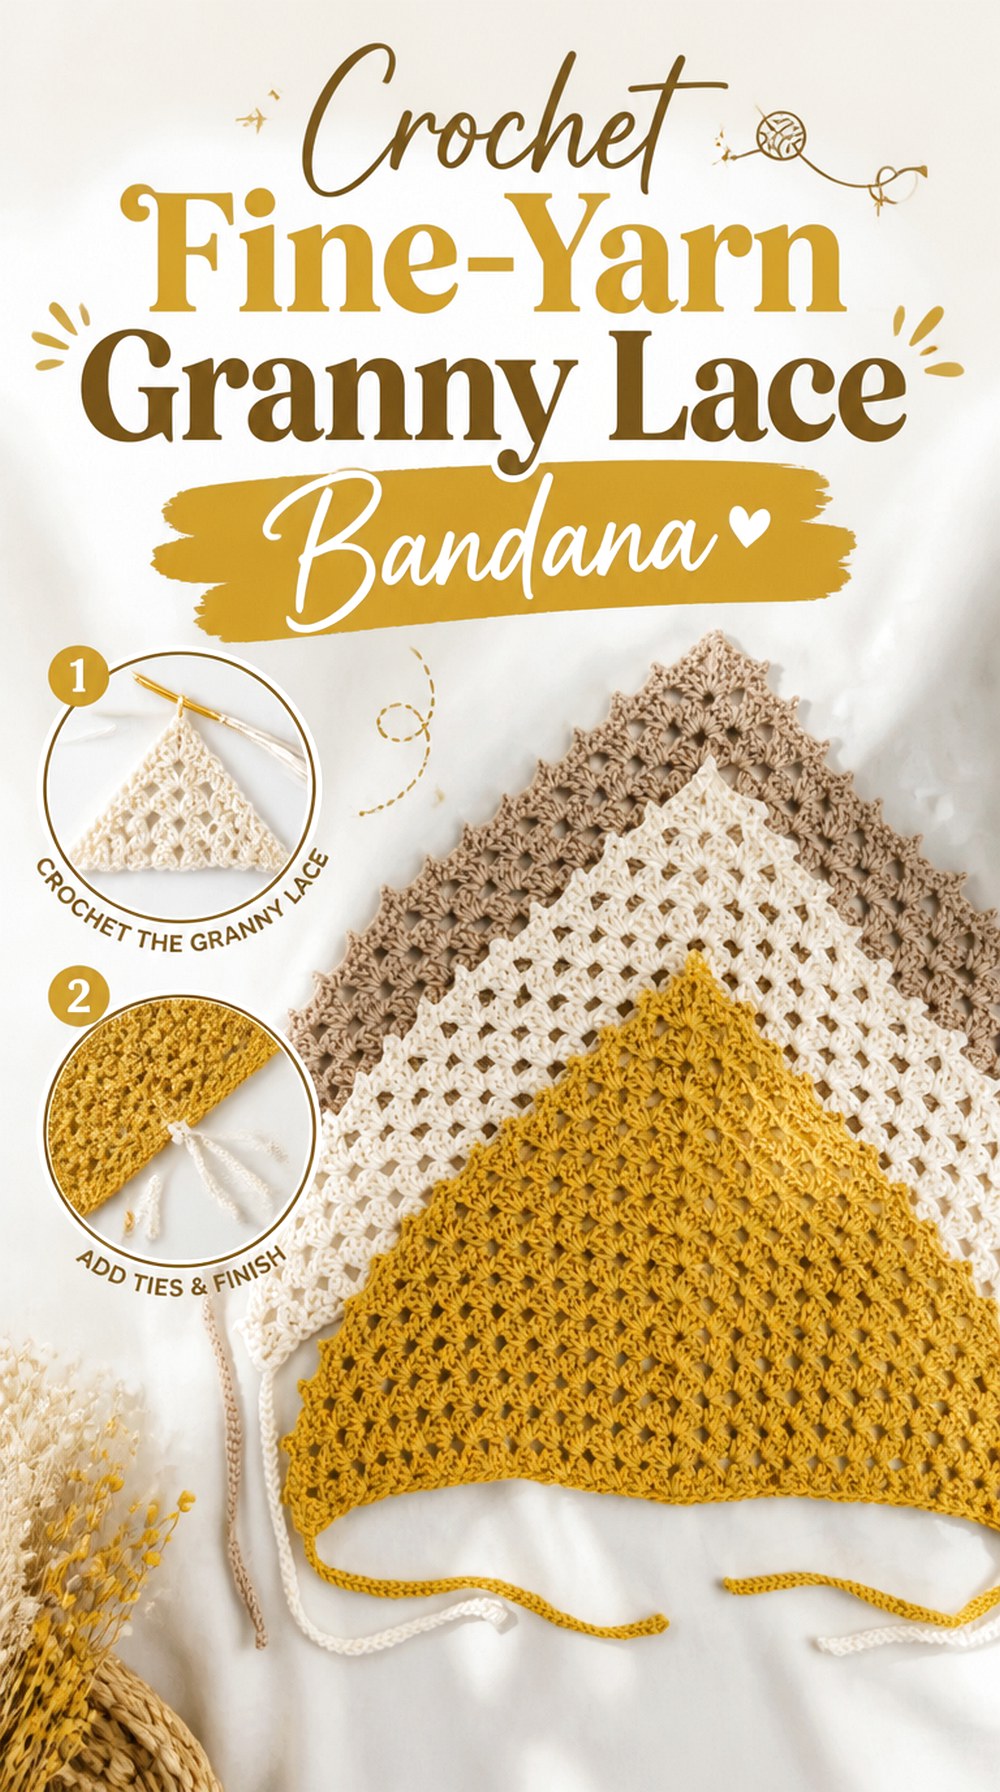 SAVE
SAVEHayHay Crochet uses the familiar granny-triangle idea at a finer scale, creating an airy head accessory where the spaces between clusters become a visible part of the look. The original tutorial also presents a decorative picot option, giving the perimeter another layer of detail without changing the essential granny structure.
This approach makes sense for readers who enjoy the recognizable rhythm of granny crochet but want a lighter-looking result than a chunky triangle would provide. It also demonstrates how changing yarn scale can substantially alter the personality of a familiar construction, even before color enters the decision.
Keep Granny Clusters Light in Scale
The relationship between the cluster and the opening matters more than the yarn label alone. A thicker substitution can enlarge both, causing the triangle to reach wearable dimensions with fewer repeats and giving each stitch group more visual weight.
If changing yarn, stop according to actual fit rather than assuming the original number of repeated sections will produce the same proportions.
Treat the Picot Edge as Optional Styling
The granny body already creates a repeated pattern of filled and open areas, so a detailed edge is not required to make the piece visually interesting. A picot finish can add delicate points when you want another decorative layer.
With a strongly striped or self-changing yarn, a simpler perimeter may keep the result from feeling crowded. Choose the edge according to the whole fabric rather than in isolation.
Stop by Actual Head Coverage
Granny triangles invite repetition, but bandana fit depends on where the upper corners and bottom point land on the wearer. Try the piece on before automatically adding another full section.
This is particularly important after a yarn substitution. A small difference in cluster scale repeats across the entire triangle and can turn into a noticeable difference in finished width and depth.
Original Tutorial and Creator Credit
Creator/Site: HayHay Crochet
15. Crochet All Over Shell Lace Bandana
 SAVE
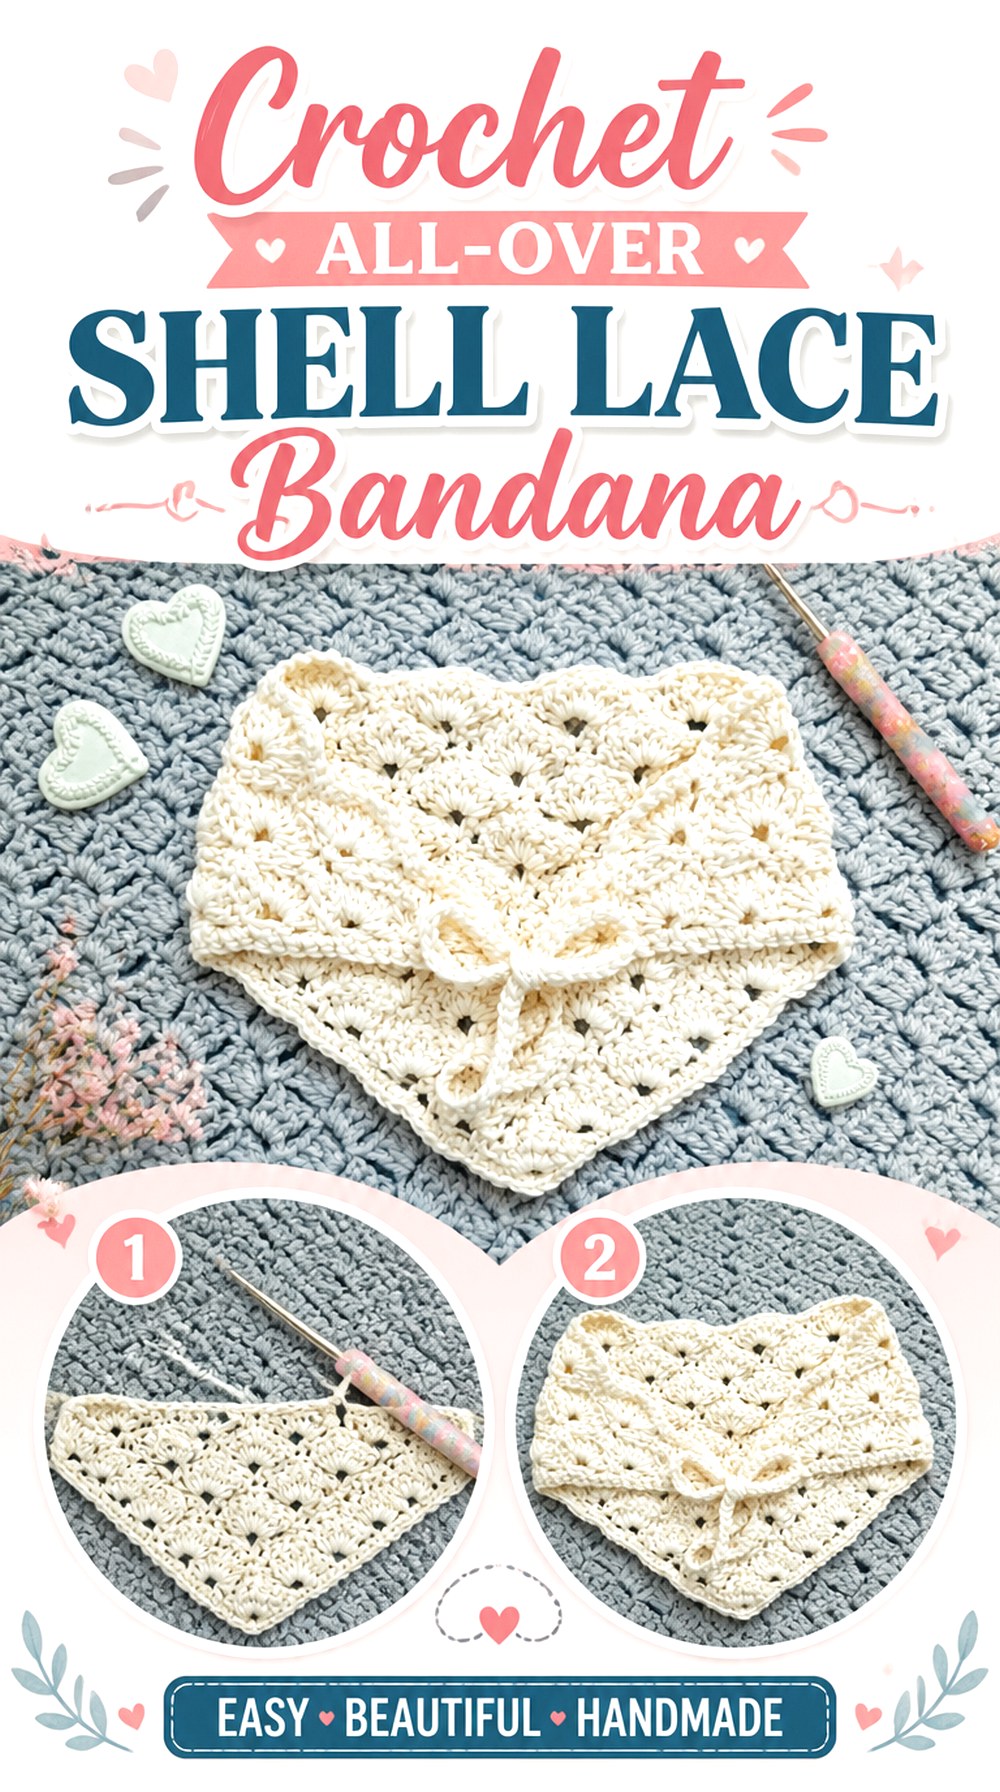
SAVESelina Veronique’s original bandana pattern makes shell stitch the dominant texture rather than saving curved groups for the border alone. The finished design uses those repeated shells to create a feminine, open decorative surface across the triangle.
This is an appealing alternative to straight-line filet and grid patterns because the eye follows arcs and repeated curves instead of squares or diamonds. Shells also place several stitches into concentrated groups, so the fabric can appear more substantial than very open netting while still retaining intentional spaces. Consistency in those groups helps the overall rhythm remain clear.
Let the Shell Rhythm Stay Even
A shell pattern is read through repetition. If neighboring groups vary significantly in size because tension changes, the eye can notice the interruption before it notices any individual stitch.
Pause occasionally and view several repeats together. You are looking for a steady visual rhythm, not measuring for machine-like uniformity. Consistent yarn handling generally matters more here than making decorative adjustments halfway through the fabric.
Catch Edge Waviness Before Finishing
Curved stitch groups naturally create movement, but unwanted rippling at the outer edge can make the finished triangle harder to position neatly on the head.
Lay the developing bandana down without pulling it into shape. If the sides begin to wave more than the tutorial’s example, check your tension and the creator’s construction guidance before adding substantially more fabric.
Recheck Drape After Yarn Substitution
Shells concentrate yarn into groups, so a heavier or stiffer substitution can change how the triangle hangs. A fabric that remains flexible in one yarn may feel noticeably more structured in another.
Make enough of the design to see several shells, then let the sample hang. Choose based on the combination of motif definition and movement rather than assuming the same stitch pattern behaves identically in every fiber.
Original Tutorial and Creator Credit
Creator/Site: Selina Veronique
16. Crochet Joined Heart Square Bandana
 SAVE
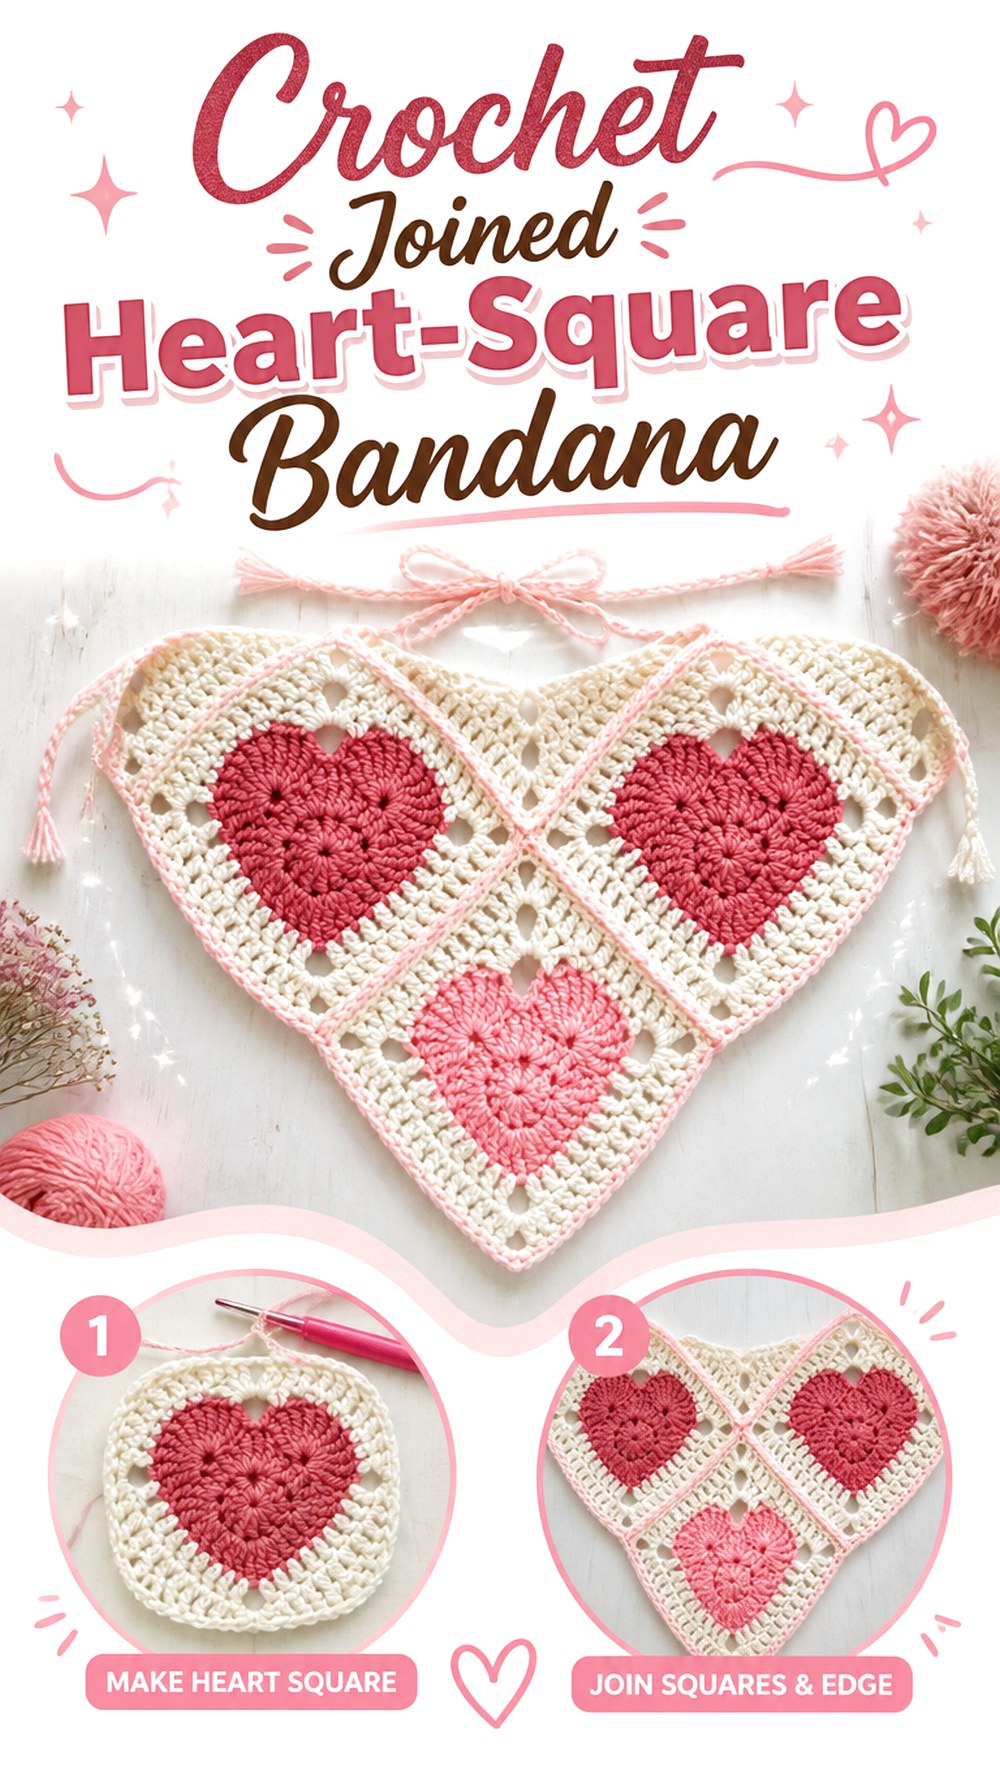
SAVELa Tía Ni takes the heart theme in a different direction by placing hearts inside granny-style squares and joining the individual units to form a bandana. The video covers the heart-square foundation, joining, border, and ties, so modular assembly is integral to the finished piece rather than merely decorative.
Compared with filet hearts, these motifs have stronger boundaries and can support more obvious color blocking. The trade-off is that orientation and joining become part of the visual success of the project. Every square contributes not only its heart but also a visible portion of the final layout.
Turn Every Heart the Same Direction
With directional motifs, layout mistakes can survive all the way to the final join if you do not inspect the arrangement first. Place the completed pieces in their intended positions with every heart visibly oriented before joining begins.
Take a quick reference photo if useful. It provides a simple way to restore the arrangement when pieces are moved during assembly without relying on memory.
Use Contrast to Control Motif Readability
The heart can either stand out strongly from its surrounding square or blend into a softer tonal design. Both can work, but the choice changes the whole character of the bandana.
Before producing every motif, make one complete color combination and view it against the hair color or clothing you expect behind the lace. That reveals the practical level of contrast more accurately than looking at yarn skeins side by side.
Keep Joined Seams Flexible
Motif joins need enough stability to hold the pieces together, but excessively tight joining can make the assembled bandana behave differently from the individual squares.
After connecting a few motifs, let them relax naturally and check whether the seam pulls their edges inward. If it does, compare your joining tension and method with the creator’s demonstration before assembling the remaining layout.
Original Tutorial and Creator Credit
Creator: La Tía Ni
17. Crochet Fine Scale Lace Headscarf Bandana
 SAVE
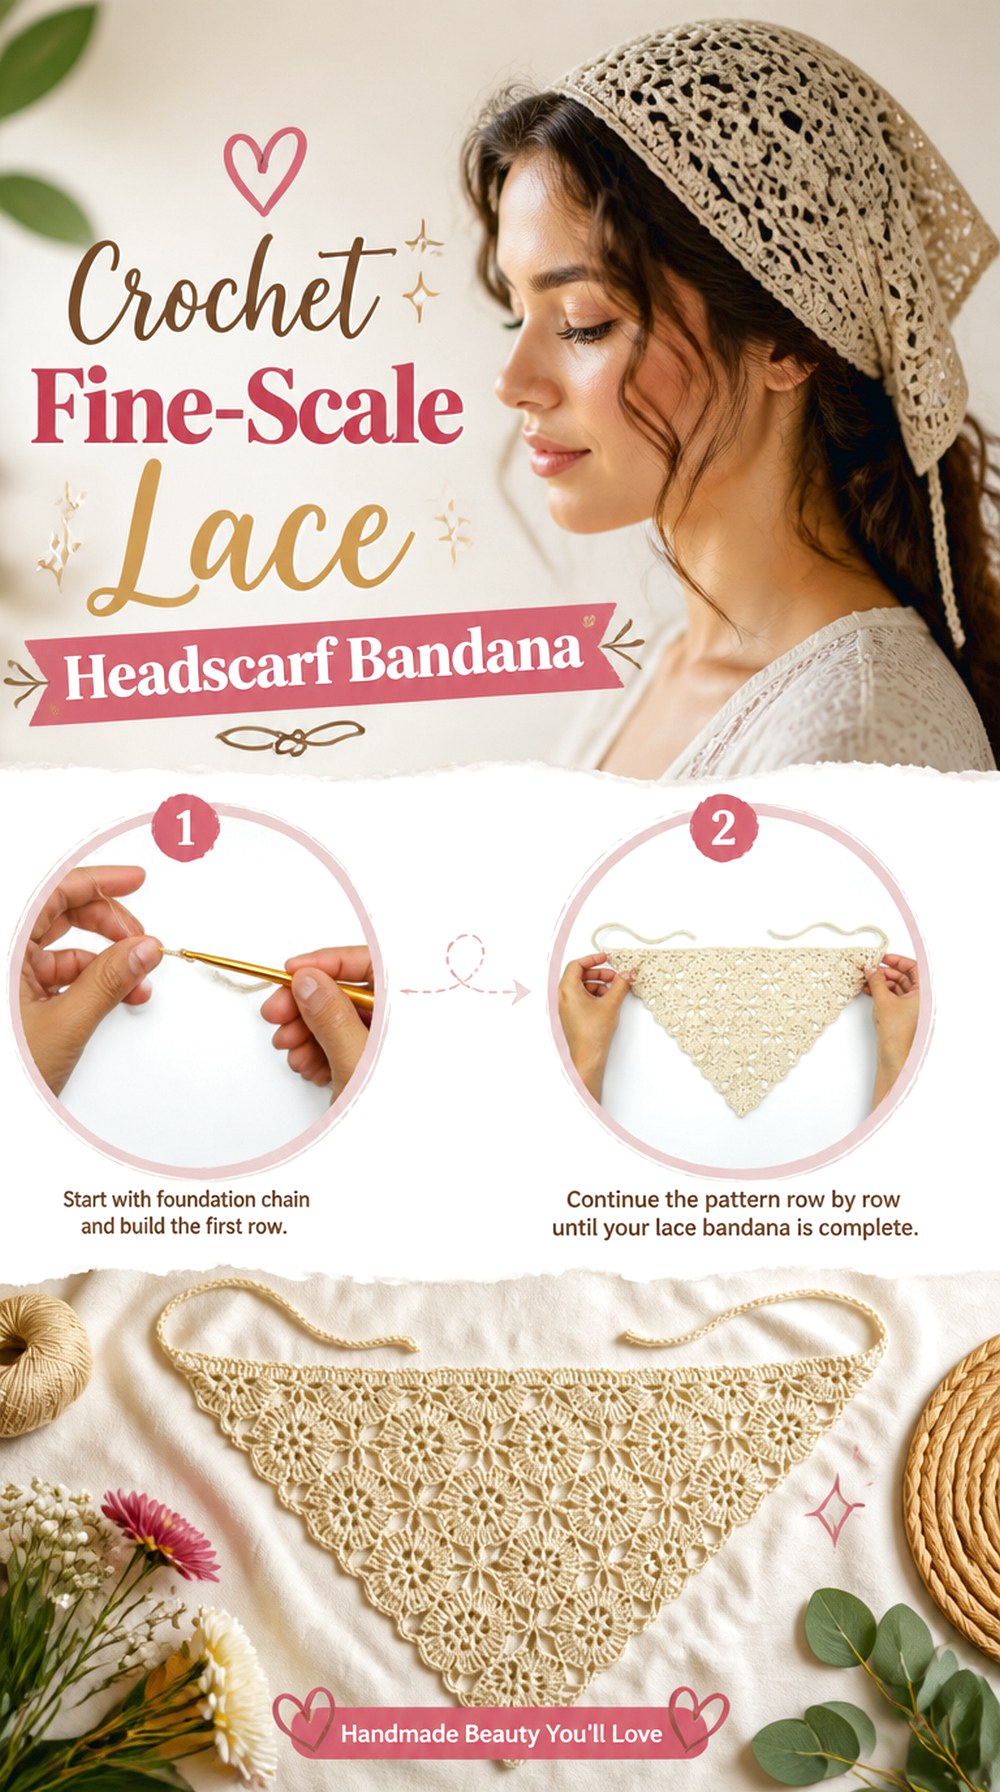
SAVEThe Crochet Channel’s lace bandana tutorial demonstrates a lightweight triangular headscarf in a comparatively fine stitch scale. The source identifies the demonstrated material as 4-ply milk cotton with a small hook, providing a useful contrast with broad mesh and chunkier granny-style constructions elsewhere in this list.
Visually, this style works when you want lace that reads more like a delicate textile than an oversized net. Small openings and stitch groups can create a polished surface, but the details rely on clarity. Substituting a dramatically thicker yarn would not simply make the same fabric heavier—it could also enlarge the pattern and change how quickly the triangle reaches wearable dimensions.
Favor Clear Definition in Fine Lace
When openings are relatively small, the boundaries between stitches do more of the visual work. Smooth definition can help the pattern remain visible without requiring dramatic holes.
If you prefer a yarn with significant halo or texture, make a representative sample first. You may love the softer effect, but it is useful to know in advance how much of the fine lace detail will remain recognizable.
Secure the Bandana Without Stretching It
Fine open fabric can expand when the ties are pulled, particularly if the main triangle is slightly undersized. Try the bandana in its intended position using only comfortable tension.
The goal is for the body and ties to work together. If the lace has to be pulled firmly across the head to make the knot reach, reconsider the fit rather than relying on stretch as the sizing method.
Original Tutorial and Creator Credit
Creator: The Crochet Channel
Which Crochet Lace Bandana Style Should You Choose?
Start with the feature you want to notice first. For maximum visible negative space, the Crochet Wide-Mesh Picot Bandana is the clearest direction. Choose the Crochet Diamond-Grid Lace Bandana, Crochet Heart-Filet Lace Bandana, or Crochet Dragonfly Openwork Bandana when you want the holes themselves to create recognizable geometry or imagery.
For modular detail, the joined daisy and heart-square designs make individual motifs the focus. The cluster-and-shell, textured picot, and lace-edge versions offer more visual coverage through the center. Floral lace gives a softer all-over effect, while fine-yarn granny and fine-scale lace designs keep the stitch pattern comparatively delicate. If you enjoy adapting one triangular construction to different uses, the scarf-scale option offers the most obvious route toward a larger accessory.
Conclusion
The biggest difference between these 17 crochet lace bandana ideas is not color but the way each design uses open and filled space. Broad mesh makes hair part of the visual effect, filet turns negative space into pictures, modular motifs emphasize individual flowers or hearts, and shells, clusters, granny stitches, and picots provide more substantial alternatives.
Before choosing your project, compare the finished triangle’s depth, upper width, tie treatment, motif scale, and overall fabric density. Then consider whether your yarn will preserve the definition and drape that attracted you to the design. Once you have settled on the structure and coverage you want, use the credited original tutorials for the creators’ exact stitches, shaping, assembly, and finishing details.
Frequently Asked Questions
What yarn works well for a crochet lace bandana?
The useful choice depends on the lace. Smooth yarn can make small filet cells, diamonds, and graphic motifs easier to see, while a softer halo may produce a more blended appearance. Thickness also changes motif scale and finished dimensions. Rather than assuming one fiber or weight is universally best, compare your yarn with the source project and make a representative swatch when substituting. Follow the yarn label and creator guidance for care.
How do I know when a crochet lace bandana is large enough?
Check it on the intended wearer before relying solely on a repeat count or general size name. Notice where the upper corners sit, how far the lower point extends, and whether the ties can meet comfortably without stretching the lace body. If you changed yarn, hook, or tension, your triangle may reach the desired size at a different point from the source example. Use the original tutorial’s sizing guidance where provided.
Should I block a crochet lace bandana?
Blocking can help some lace fabrics settle and make open motifs easier to see, but the appropriate method depends on the yarn fiber and project construction. Do not assume every bandana should receive the same heat, moisture, or stretching treatment. Check the yarn label and any finishing guidance from the creator. When blocking is suitable, focus on encouraging a balanced triangle rather than aggressively stretching the fabric into dimensions it does not naturally hold.
Why is the edge of my lace bandana ruffling?
Ruffling can occur when an edging contains more effective length than the side it is attached to, although the exact cause depends on the construction. A border that is too tight can create the opposite problem and pull the triangle inward. Stop after a short section, let the work relax, and compare it with the source example. Check your tension and the creator’s placement instructions before completing the entire perimeter.
Can I substitute a different yarn weight for a lace bandana?
You can often experiment with another yarn, but changing weight can alter opening size, motif scale, drape, and the point at which the triangle becomes large enough to wear. A thicker yarn does not simply produce a thicker copy of the same result. Make enough fabric to reveal the actual lace pattern, then judge both appearance and fit. Follow the tutorial closely for construction while stopping according to the dimensions and coverage you need.
How can I keep the ties from stretching the openwork?
First make sure the bandana body is already large enough to sit in the intended position without being pulled tightly. The ties should secure the triangle rather than stretch it into place. When trying on the unfinished project, use gentle knotting tension and watch whether the nearest mesh or motif sections distort. If they do, reassess the body size, tie construction, yarn behavior, and the original creator’s finishing method before fastening off.