8 Crochet Balaclava Ideas for Different Fits, Hoods, and Face Openings
Crochet balaclavas range from close-fitting winter headwear to roomy hoods, neck-warming cowls, motif-based designs, and playful statement pieces. The most useful difference is not color—it is how the project fits around the crown, frames the face, covers the neck, and holds its shape after repeated wear.
These eight ideas give you noticeably different construction and styling options. You can compare a streamlined ribbed version with a slouchy hood, a granny-square design with a dense ski mask, or a drawstring neck warmer with a bunny-ear balaclava. The notes below focus on the choices that matter before you commit to a tutorial: stretch, face-opening stability, yarn behavior, seams, motif sizing, neck coverage, and how easily the finished shape can be adapted.
Quick List
- Crochet Close-Fit Ribbed Balaclava
- Crochet Checker-Detail Hood Balaclava
- Crochet Collar-First Winter Balaclava
- Crochet Full-Coverage Ski Mask Balaclava
- Crochet Granny Square Balaclava Hood
- Crochet Slouchy Balaclava Hood
- Crochet Drawstring Neck-Warmer Balaclava
- Crochet Bunny Ear Balaclava Hood
Choose the Balaclava Shape Before Choosing the Color
Start by deciding how much structure and coverage you actually want. A fitted balaclava sits closer to the crown and usually needs more careful face-opening tension because small fit differences are noticeable. A slouchy hood gives extra room at the back, while a collar or turtleneck construction extends farther down the neck. Ski-mask versions place more fabric across the face, so the opening becomes one of the most important fit checkpoints.
Motif hoods behave differently again. Granny squares introduce seams and corners that influence the finished silhouette rather than creating one continuous stretch of fabric. Drawstrings add adjustability, while decorative ears intentionally change the crown shape. Looking at construction, opening, closure, texture, and intended use produces more meaningful variety than choosing projects that differ only by color.
Yarn, Stretch, and the Face Opening Work Together
Balaclavas sit against several moving areas at once: the crown, cheeks, jaw, and neck. That makes stretch useful, but uncontrolled stretching can cause the opening to widen or the hood to slide backward. A ribbed border can help define the edge, while a denser stitch texture can create a firmer, more mask-like shape. Softer or more open fabric usually hangs more like a hood.
Do not assume that substituting another yarn at the same labeled weight will create identical results. Fiber content, twist, elasticity, and stitch density can all change the finished fabric. When fit matters, compare the creator’s material information with your own swatch and check the project against the intended wearer’s measurements before finishing the face edge or permanent seams.
1. Crochet Close Fit Ribbed Balaclava
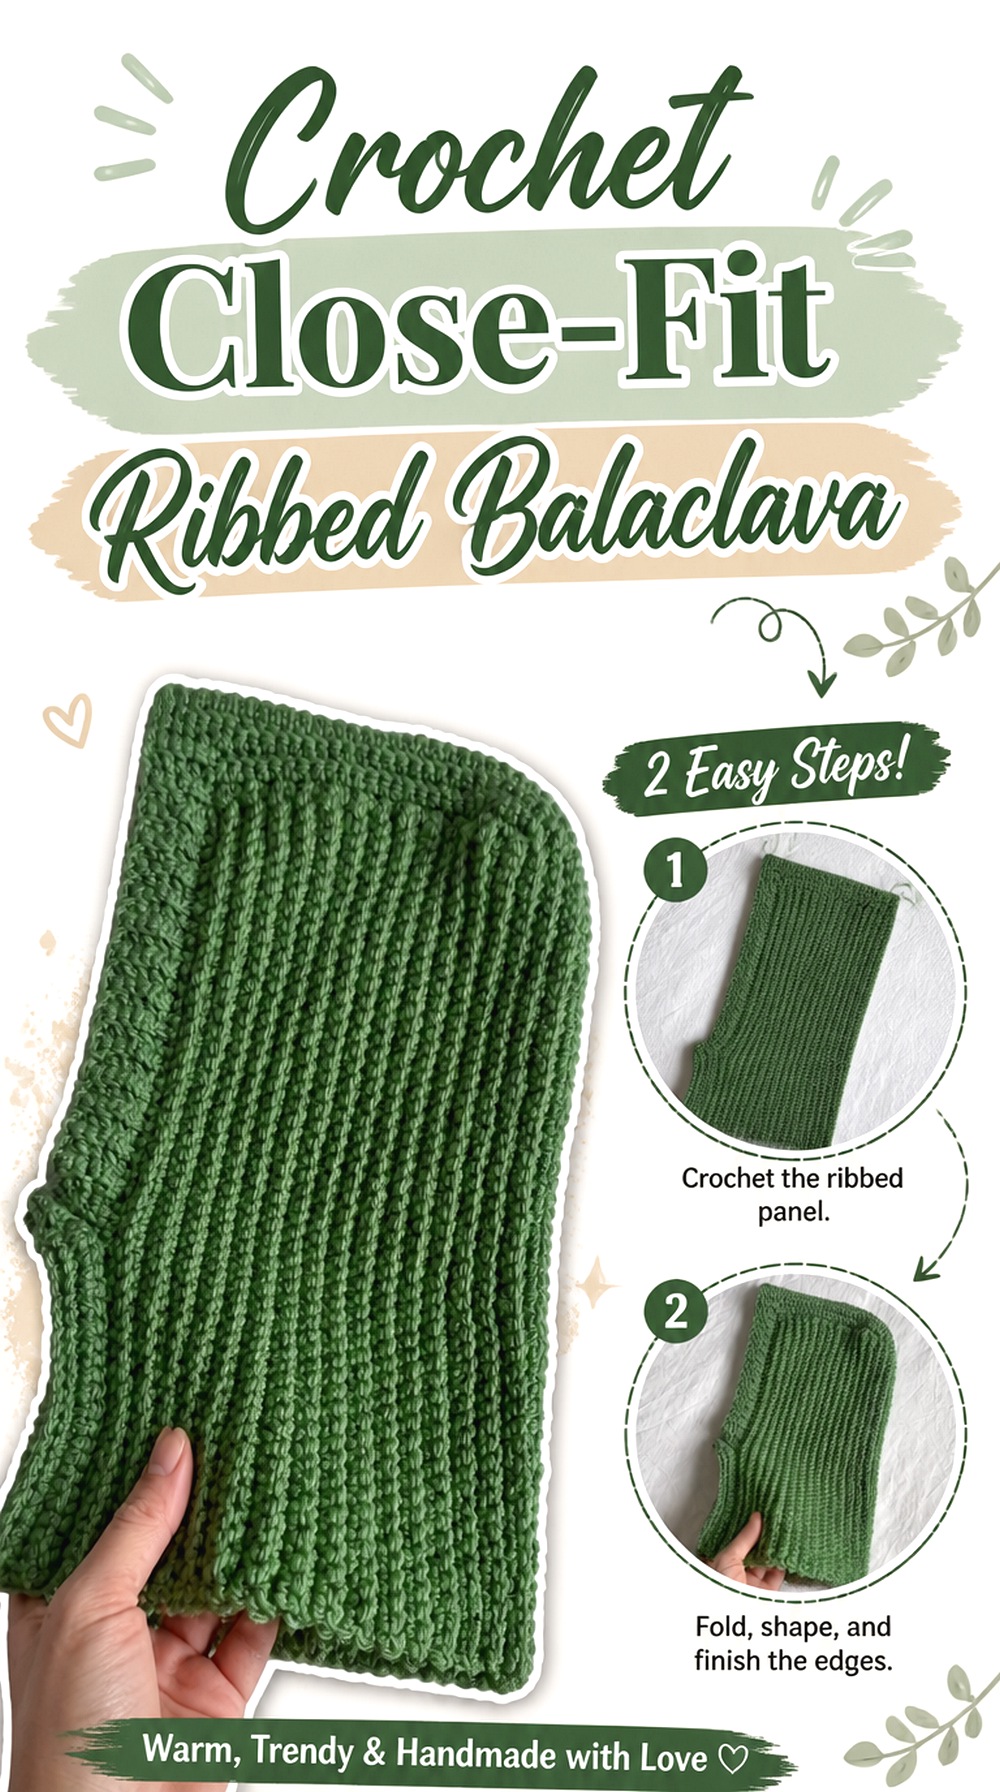
This streamlined balaclava is a useful choice when you want the finished piece to read primarily as fitted headwear instead of an oversized hood. Kenikse Crochet’s tutorial works with a DK-weight yarn and finishes the face opening with ribbing, giving the front edge a defined look rather than leaving it as a plain crochet edge. The construction also includes joining the sides, so alignment affects how neatly the hood sits.
Compared with the roomier and more decorative projects later in this list, this option keeps the silhouette simple. It is especially worth considering when you want the yarn color or stitch texture to remain secondary to a clean overall shape.
Measure the Face Opening Before Final Ribbing
Ribbing can change both the appearance and usable size of an opening. Before treating the edging as purely decorative, check whether the unfinished opening already sits where you want it around the forehead, cheeks, and chin. If it is noticeably too small or too loose beforehand, edging alone may not correct the underlying proportions.
Try to judge comfort without pulling the fabric aggressively into position. A border should refine the opening rather than compensate for a hood that does not fit.
DK Fabric Keeps the Profile Relatively Refined
The tutorial specifies DK-weight yarn, which distinguishes this design from the chunkier balaclavas in the collection. A lighter fabric can make a close-fitting silhouette feel less bulky around the sides of the face and under coat collars.
If substituting yarn, compare the actual fabric rather than relying only on the weight label. A much thicker, stiffer, or fuzzier substitute can push the project away from its neat profile and make seams or ribbing more prominent.
Check the Joined Edges Before Hiding Ends
A seamed construction gives you a valuable checkpoint before finishing. After joining, place the piece in its intended orientation and make sure the seam is not pulling the crown to one side or shortening one section unexpectedly.
If the two edges have been worked with noticeably different tension, correcting that imbalance before weaving in the final ends is usually easier than trying to disguise a twisted fit later.
Original Tutorial and Creator Credit
Creator: Kenikse Crochet
2. Crochet Checker Detail Hood Balaclava
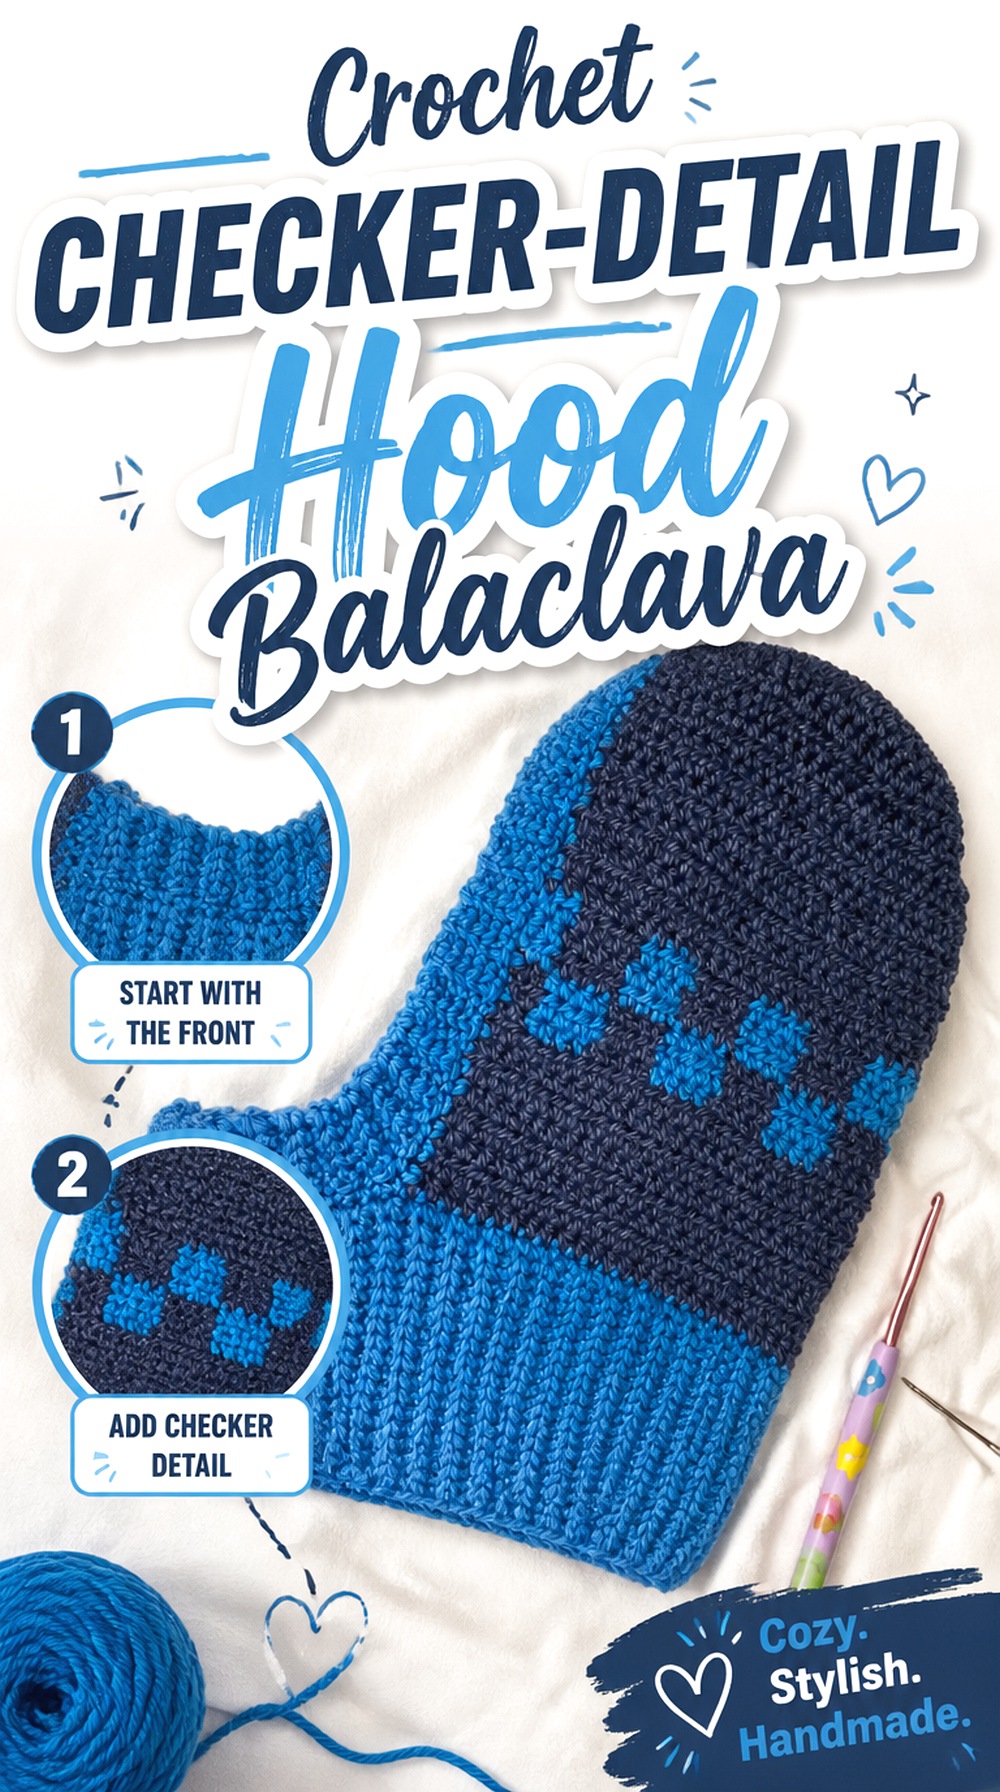
This version adds a graphic option to a ribbed balaclava without turning the whole project into a joined-motif hood. The Made in the Moment tutorial includes optional checker detailing, ribbing, hood construction, decreases, a top seam, and front edging. That combination makes it a useful middle ground between a completely plain fitted balaclava and the more modular granny-square design later in the list.
The checker element can become the visual focus, but the underlying shape still matters more than the color arrangement. If you want a balaclava that feels contemporary and decorative while retaining a recognizable hood structure, this is one of the more flexible directions to compare.
The Checker Detail Changes Visual Density
A checker motif creates stronger blocks of contrast than a solid fabric, so placement can affect how broad or narrow different parts of the hood appear. Before adding several colors, decide whether you want the graphic area to dominate the entire balaclava or simply act as an accent.
High contrast naturally makes changes in alignment more visible as well. If crisp checks are important to your plan, watch how the tutorial handles the transition between decorative sections and the surrounding hood.
Crown Shaping Controls the Finished Hood Silhouette
The tutorial includes decreasing before the top of the hood is seamed. That shaping is worth watching closely because crown depth can determine whether a balaclava looks fitted, pointed, or excessively roomy at the back.
When adapting the size, do not focus only on the circumference around the face. Check vertical depth too. A hood can be wide enough around the head and still sit awkwardly if the crown section is too short or too long.
Front Ribbing Should Stretch Without Flaring
The edge around the face has a difficult job: it needs enough give to make the balaclava comfortable to put on while still returning to a stable shape. If edging tension is too loose, the border can wave outward; too tight, and it may pull uncomfortably around the face.
Check the opening after a small section of edging rather than assuming the final border will behave correctly once the entire edge is complete.
Original Tutorial and Creator Credit
Creator: made in the moment
3. Crochet Collar First Winter Balaclava

A collar-first design shifts attention from the face opening to neck coverage. Life by Susan | Crochet begins this balaclava with the collar before joining and developing the hood above it. Visually, that creates more of a garment-like transition at the bottom than a balaclava that simply stops at the jaw or has a narrow lower edge.
Choose this direction if neck coverage is one of your priorities or if you plan to wear the hood with a coat that leaves space around the collar. The construction also gives you a clear point at which to evaluate how the lower section feels before the entire hood is complete.
A Collar-First Start Emphasizes Neck Coverage
Starting with the lower section makes the collar a structural part of the project rather than an afterthought. That can be useful if you dislike cold gaps between a hat and coat neckline.
Before continuing upward, check whether the collar sits comfortably without bunching high under the chin. Extra fabric may feel cozy when standing still but can become bulky once another jacket or scarf is layered over it.
Watch the Transition Between Collar and Hood
The point where the hood grows from the collar affects both mobility and appearance. If this area becomes too tight, turning the head may pull the lower fabric upward. If it is excessively loose, the balaclava can lose the close neck coverage that makes this style appealing.
When comparing sizes or making adjustments, look at this junction from the side as well as the front rather than judging the face opening alone.
Drape Matters More Around a Taller Collar
A stiff fabric can give a collar strong shape, but it can also create more bulk where the balaclava overlaps a coat. A softer fabric generally collapses more easily but may provide less defined structure.
That trade-off matters more here than in a short-neck ski mask. If substituting yarn, make a fabric sample large enough to bend and fold so you can judge whether the collar feels comfortable at the neck.
Original Tutorial and Creator Credit
Creator: Life by Susan | Crochet
4. Crochet Full Coverage Ski Mask Balaclava
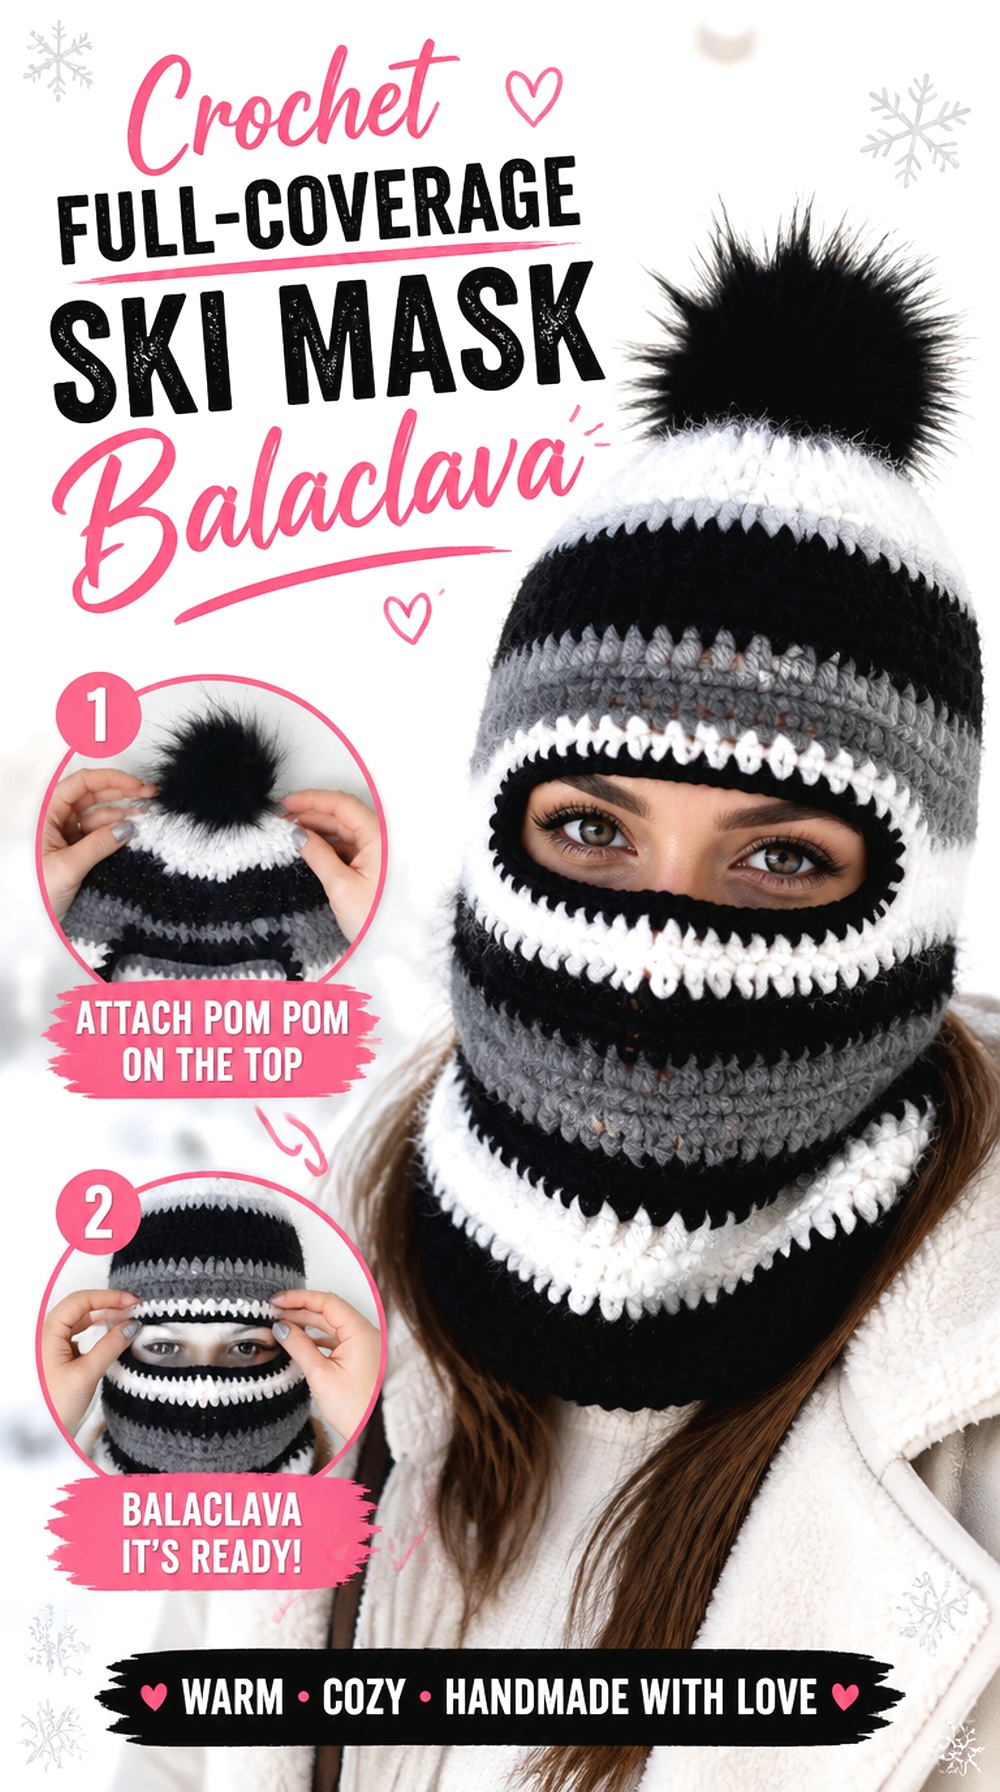
For significantly more facial coverage, this Brunaticality project takes the balaclava in a ski-mask direction. The tutorial separates the construction into neck and lower-face coverage, the eye opening, forehead, crown, and finishing details. That produces a very different result from an open hood because the fabric surrounds a much smaller visible area of the face.
This style is worth choosing for the distinctive mask silhouette rather than simply as a substitute for any balaclava. The relationship between the opening and the wearer’s eyes becomes a functional fit issue, so checking placement before completing the upper section is more important than it would be on a wide face-framing hood.
Keep the Eye Opening Clear and Comfortable
With a smaller opening, a few misplaced rows or an overly tight edge can noticeably affect visibility and comfort. Check the opening while the work is still easy to adjust, and make sure fabric does not creep into the wearer’s normal field of view.
Do not rely on stretching the opening aggressively during wear. The project should sit securely without needing to be pulled away from the eyes or repeatedly repositioned.
Dense Fabric Creates a More Mask-Like Shape
A close ski-mask profile depends more heavily on fabric stability than a loose hood does. Very open stitches or highly drapey yarn may soften the silhouette and allow the opening to change shape more easily.
That does not automatically make a softer yarn unsuitable, but it does change the result. Decide whether you want a clearly defined face opening or a more relaxed textile look before substituting materials.
Place Decorative Contrast Away From Sight Lines
The tutorial uses several yarns and finishing details, making this style a natural candidate for color blocking. For a wearable mask, however, function should come before decoration around the eye area.
If you add fuzzy yarn, raised texture, or dimensional embellishment, keep it from interfering with the opening. A dramatic contrast at the crown or outer edge can provide visual interest without adding distracting fibers close to the eyes.
Original Tutorial and Creator Credit
Creator: Brunaticality
5. Crochet Granny Square Balaclava Hood
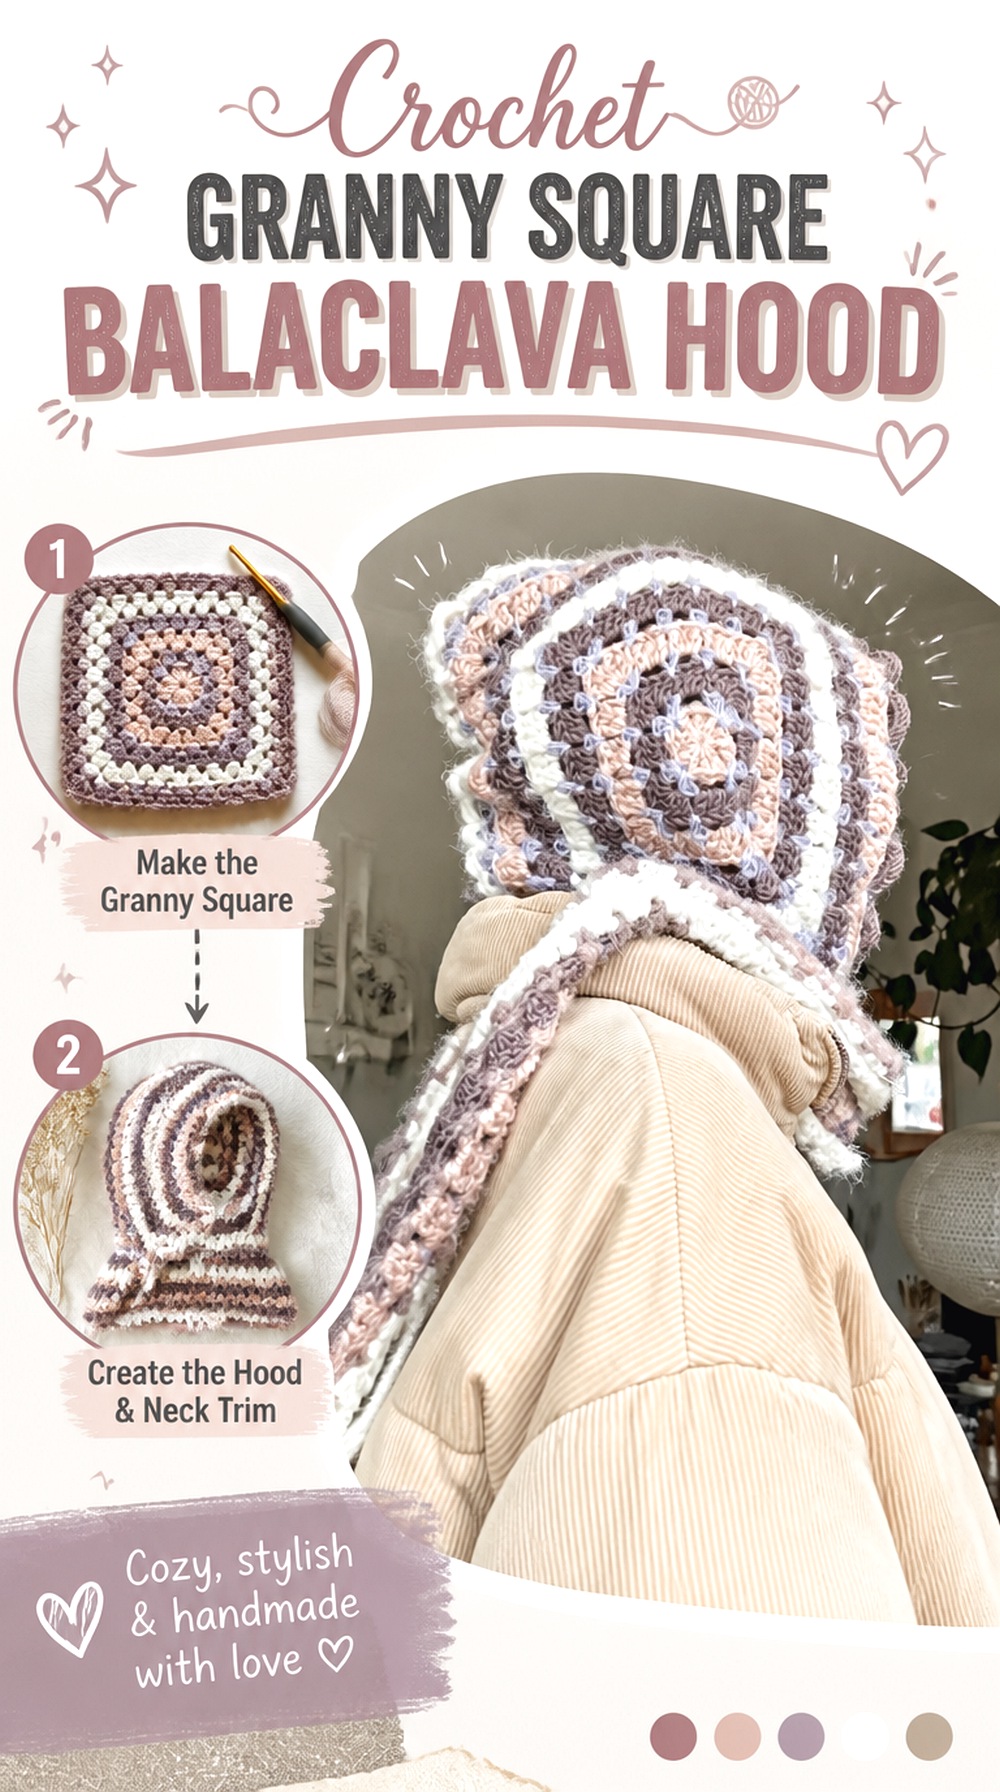
A granny-square balaclava replaces continuous hood fabric with visible motifs, so its seams, corners, and color changes become part of the finished design. Rose – Fiber Art’s tutorial uses granny-square construction to build the hood shape, giving this project a more modular appearance than the fitted or ski-mask versions.
This is a strong option if you want the crochet itself to remain visibly graphic rather than blend into one uninterrupted surface. It also gives you more opportunities to plan color placement before assembly. The trade-off is that square dimensions and joining consistency become important fit factors because small motif differences accumulate once several pieces meet around the head.
Block the Squares Before Judging Their Layout
Motifs that look almost identical while freshly crocheted can settle into different dimensions once blocked. Comparing them before joining lets you spot uneven corners, inconsistent edge lengths, or one square that is noticeably larger than the rest.
For a headwear project, those differences can affect more than visual neatness. A mismatched section can pull the hood off-center or create an unexpected bulge, so establish consistent finished motif dimensions before permanent assembly.
Mixed Fibers Can Change How the Hood Hangs
The tutorial’s material list combines different yarn types, including a fuzzy strand in parts of the project. Mixing yarns can create interesting surface contrast, but fibers with different elasticity and halo may not relax or stretch in exactly the same way.
If you create your own combination, compare the fabrics after blocking. A light, fuzzy section next to a denser square may react differently around seams, especially once the balaclava is repeatedly put on and removed.
Corner Placement Becomes Part of Face Framing
With motifs, the viewer can immediately see where square corners and joins land. Before sewing everything permanently, arrange the pieces and check how those lines frame the forehead, temples, and sides of the hood.
You can also use color strategically. A high-contrast square near the face will draw more attention than the same square placed toward the back, so layout planning can change the appearance without altering the construction.
Original Tutorial and Creator Credit
Creator: Rose – Fiber Art
6. Crochet Slouchy Balaclava Hood
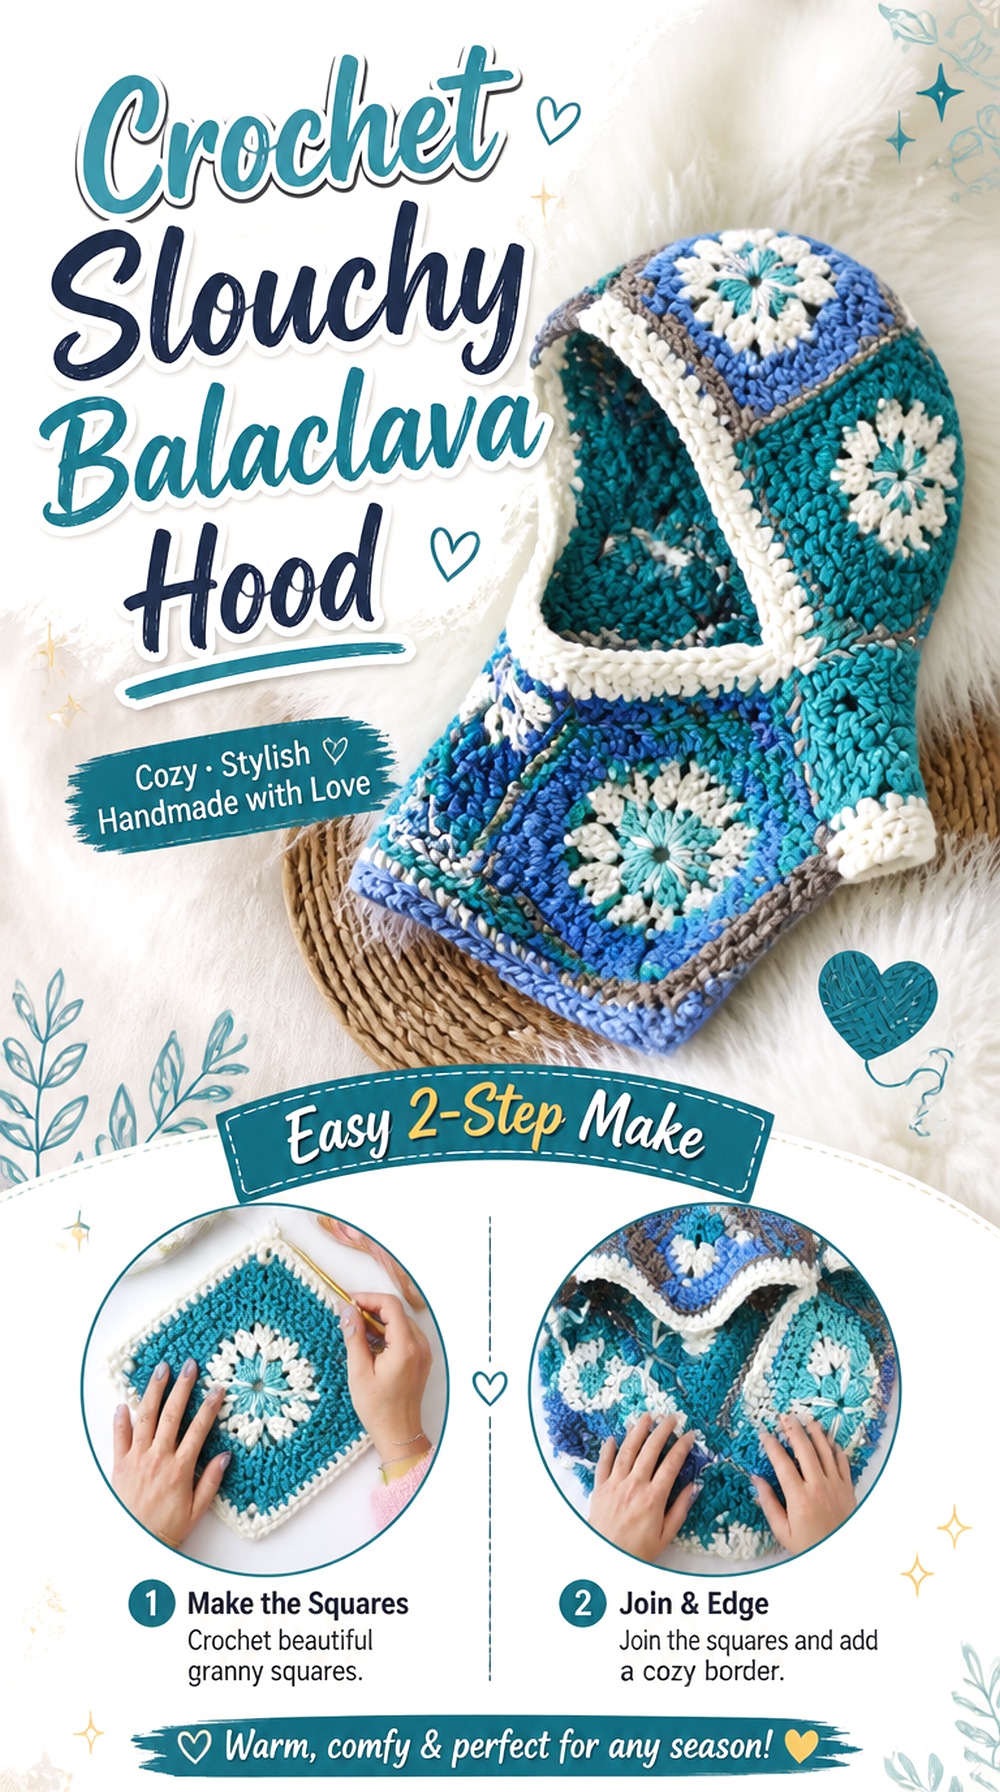
Sirin’s Crochet offers a noticeably looser direction with a slouchy balaclava. Instead of aiming for the close crown shape of a ski mask or streamlined fitted hood, this style allows extra visual volume around the head. That difference makes it useful for readers who prefer headwear that feels closer to a relaxed hood.
The slouch also changes where fit matters. You do not necessarily need the back of the crown to sit closely against the head, but the front edge still needs enough control to keep the hood positioned comfortably. This project is therefore a good comparison point if you like the balaclava concept but do not want the compressed appearance of more fitted versions.
Extra Crown Volume Creates the Slouch
A slouchy shape needs intentional extra room. Simply making every part of a fitted balaclava larger can also enlarge the face opening and neck, which is not necessarily the effect you want.
When adapting this style, distinguish between volume at the back of the hood and fit at the front. Preserve a usable face frame while allowing the crown and rear section to carry the relaxed silhouette.
Keep the Front Edge Stable While the Back Stays Relaxed
The most successful contrast in a slouchy hood is often between a controlled opening and softer volume behind it. If the entire project is equally loose, the front can drift backward or expose more of the ears and neck than intended.
Check how the edge sits after moving your head rather than judging it only while standing still. A comfortable hood should not require constant repositioning.
Choose This Shape When You Prefer Room Over Compression
A close-fitting balaclava can sit neatly beneath another hood, while a slouchier shape makes more of a standalone visual statement. That difference is worth considering before you start, especially if the final piece needs to fit under a helmet, tight coat hood, or narrow collar.
For casual layering where extra crown volume is welcome, the looser profile may feel more natural than trying to size up a fitted pattern.
Original Tutorial and Creator Credit
Creator: Sirin’s Crochet
7. Crochet Drawstring Neck Warmer Balaclava
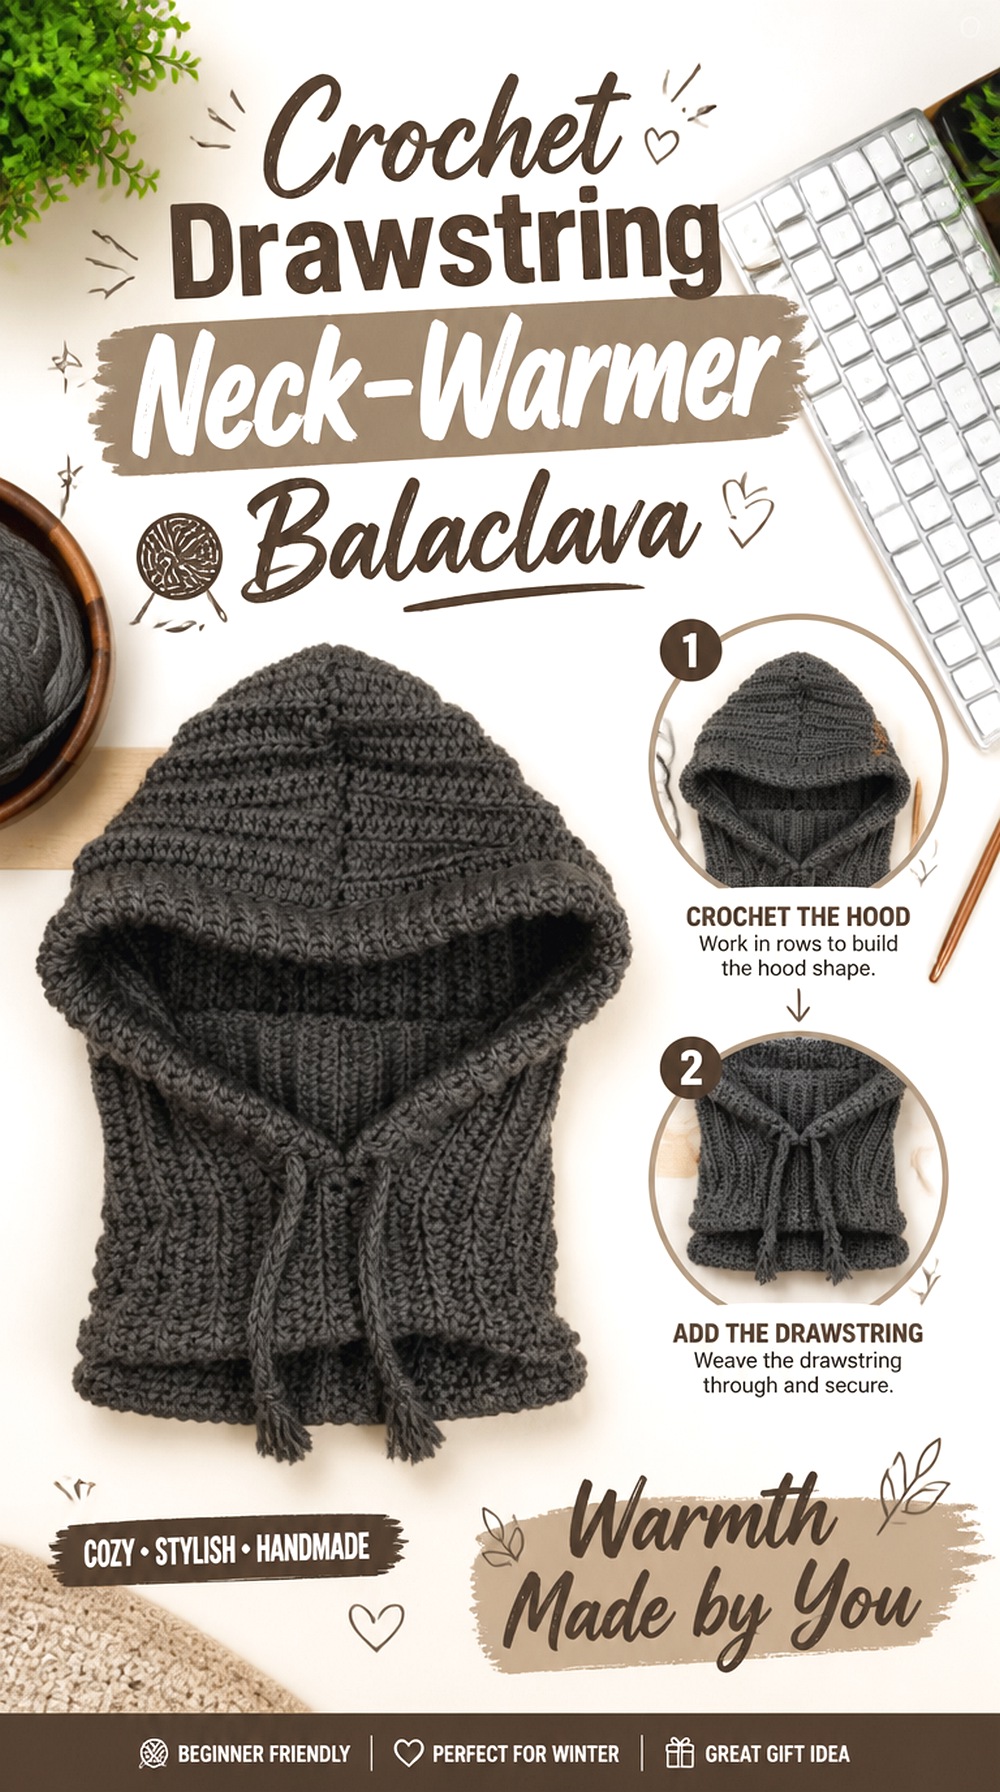
TCDDIY’s hooded balaclava combines a neck tube, shaped hood, face brim, and drawstring, making it one of the most garment-like options here. The lower section extends beyond simple head coverage, while the adjustable front detail lets the opening play a more active role in the finished styling.
Choose this design if you like a hood-and-neck-warmer combination rather than a minimal ski mask. Because several structural elements meet in one piece, it is worth evaluating the neck, hood depth, and brim separately as you work. A good fit in one area does not automatically mean the other sections will sit exactly as you want.
The Neck Tube Gives the Hood Garment-Like Coverage
A substantial neck tube can fill the gap between the hood and outer clothing, but it also adds fabric where jackets and coat collars already overlap. Think about how you plan to layer the balaclava before deciding whether extra neck volume suits your wardrobe.
If the project will usually sit under a high collar, test the combined bulk. If it will be worn over a sweater with an open neckline, the extended lower section may be more useful.
The Drawstring Changes Both Fit and Styling
Unlike a fixed ribbed edge, a drawstring lets the wearer alter the front opening. That is useful for styling, but it also means the brim and cord need to move smoothly rather than distort the surrounding crochet.
Check the opening both relaxed and adjusted. A drawstring should not be the only thing keeping an excessively large hood in position. For children’s items, avoid casually adapting cords around the head or neck without checking appropriate safety guidance.
Texture Can Add Noticeable Weight Around the Neck
The tutorial uses a textured hood construction and a separate neck section. A richly textured fabric may look substantial, but that same density can make a long hood feel heavier than a simple open-stitch version.
If you prefer a lighter feel, compare your yarn and swatch before committing to the full neck tube. Changing fiber or stitch density can affect both drape and how quickly the fabric rebounds after being stretched.
Original Tutorial and Creator Credit
Creator: TCDDIY
8. Crochet Bunny Ear Balaclava Hood
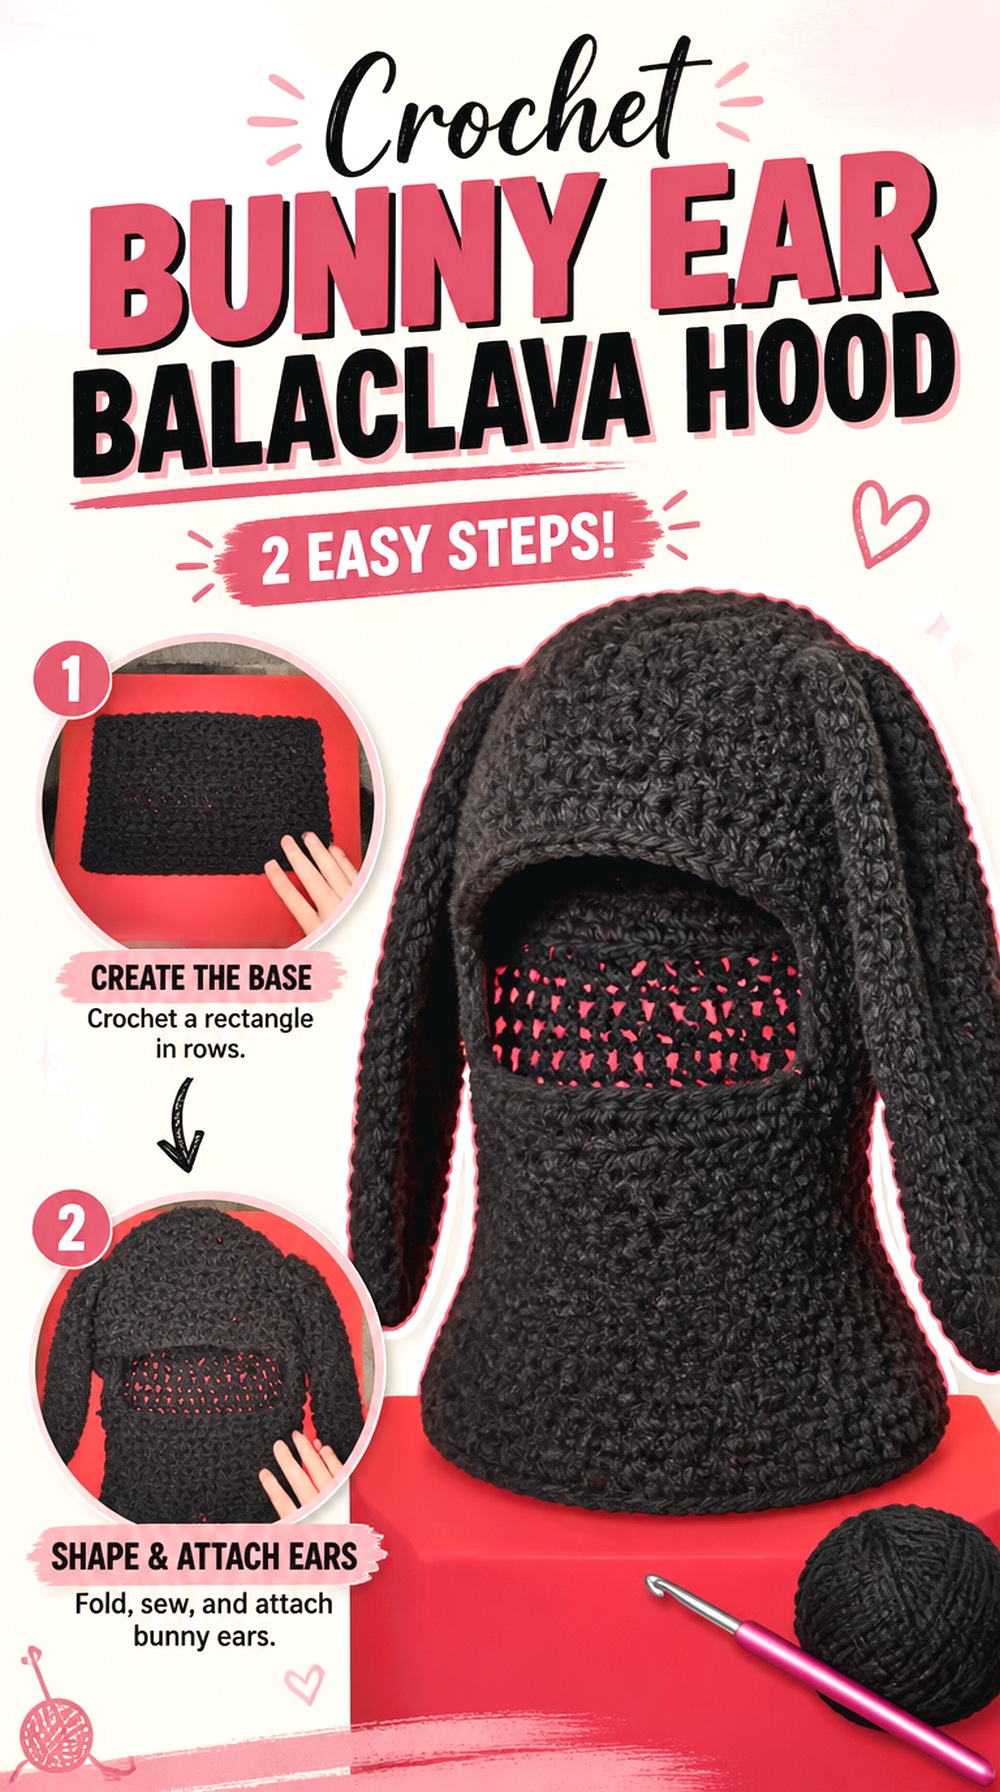
A bunny-ear balaclava turns the crown into the main design feature. Faith.Wisest’s tutorial uses chunky yarn and adds elongated ears above the hood, giving the project a playful silhouette that is immediately different from every other option in this collection.
The key choice here is whether you want the balaclava to function mainly as understated cold-weather headwear or as a statement accessory. The ears add height and movement, so the crown needs to support them without the face opening becoming distorted. This is also a project where color can reinforce the design—soft neutrals, high contrast, or intentionally bright shades will produce very different moods without changing the recognizable bunny-ear shape.
Ear Placement Controls the Character of the Silhouette
Ears placed closer together can create a different visual impression from ears positioned farther toward the sides. Before securing them permanently, pin or hold them in place and view the balaclava from the front and side.
Also check whether both ears lean in a similar direction. Small differences that are barely noticeable when the hood lies flat can become much more obvious once the project is worn upright.
Chunky Yarn Magnifies Small Fit Differences
The tutorial uses chunky yarn, so each section builds visible thickness quickly. That can produce a strong, cozy-looking shape, but it also means small changes in tension can have a larger visual effect than they might in a finer fabric.
Do not assume that switching to another chunky yarn will produce the same proportions. Compare your fabric and measurements with the tutorial’s fit checkpoints before attaching decorative pieces or finishing the opening.
Keep the Ears From Distorting the Crown
Decorative ears should sit on the hood rather than pull the entire crown upward. If an ear is heavy, overly dense, or attached under tension, the surrounding fabric can buckle.
Before final finishing, wear or support the balaclava in its normal shape and observe the crown. If the hood changes noticeably when the ears hang naturally, revisit their placement or attachment rather than trying to hide the distortion with additional edging.
Original Tutorial and Creator Credit
Creator: Faith.Wisest
Which Crochet Balaclava Shape Fits Your Goal?
| Project | Overall Fit | Face Treatment | Neck Coverage | Defining Feature |
|---|---|---|---|---|
| Close-Fit Ribbed Balaclava | Fitted | Ribbed opening | Moderate | Streamlined profile |
| Checker-Detail Hood | Fitted hood | Front ribbing | Moderate | Optional graphic checks |
| Collar-First Balaclava | Hood with defined lower section | Open face | Higher | Integrated collar |
| Ski Mask Balaclava | Close coverage | Small eye opening | Close | Mask-style face coverage |
| Granny Square Hood | Modular | Open face | Hood-length | Visible motif construction |
| Slouchy Balaclava | Relaxed | Open face | Moderate | Extra crown volume |
| Drawstring Neck-Warmer | Structured hood | Adjustable brim | High | Neck tube and drawstring |
| Bunny Ear Hood | Hooded | Open face | Moderate | Dimensional ears |
If you mainly want a neat layer beneath winter clothing, start with the close-fit or checker-detail versions. Choose the collar-first or drawstring designs when neck coverage matters more. The granny-square hood is the strongest motif option, while the bunny ears create the clearest decorative statement. For more facial coverage, the ski-mask construction is the distinct choice; for less compression, compare the slouchy hood.
Conclusion
The right crochet balaclava depends less on a favorite color and more on how you want the finished piece to behave. A ribbed close-fit hood keeps the shape compact, a ski mask increases facial coverage, and a slouchy version gives the crown more room. Granny squares bring visible seams and color planning, while a collar or neck tube can make the project feel closer to a garment. Bunny ears shift the focus toward decorative styling.
Before choosing, compare the face opening, crown depth, neck coverage, fabric density, and how the project will layer with other clothing. Use the original tutorials near each idea for the creators’ exact construction details and finishing sequence.
Frequently Asked Questions
How snug should a crochet balaclava fit around the face?
It should sit securely enough that the opening stays in place during normal movement without needing to be repeatedly pulled back into position. That does not mean the edge should feel restrictive. Check the forehead, cheek, and chin areas independently because one can feel tight while another is loose. If the design uses ribbing or a drawstring, evaluate the basic hood fit before expecting the finishing detail to correct major sizing problems.
Can I use a different yarn weight for a crochet balaclava tutorial?
You can adapt many designs, but a different yarn weight can change far more than thickness. It may alter the crown depth, face-opening size, stiffness, drape, and how much the fabric stretches. Rather than substituting by label alone, make a swatch and compare it with any gauge or measurement information the creator provides. For motif projects, compare the finished square dimensions before joining; for fitted hoods, check the developing piece against actual head measurements.
Which crochet balaclava style works better with glasses?
A wider open-face hood is usually easier to evaluate with glasses than a ski-mask opening because there is less fabric close to the frames. However, the exact result depends on the wearer’s glasses and the project’s fit. Try the developing hood on with the glasses before completing the face edging. Pay particular attention near the temples, where thick seams, ribbing, or a tight opening may press the frames against the head.
Should granny squares be blocked before assembling a balaclava?
Blocking first is useful because it lets you compare the finished dimensions and corner shapes of the motifs before the seams lock them together. That is particularly important for headwear, where a slightly oversized square can pull the hood off-center or create unwanted fullness. Make the squares consistent according to the yarn and pattern you are using, then arrange them in their planned orientation before joining so you can check both fit and color balance.
How can I stop a crochet balaclava face opening from stretching out?
Start with stable, consistent edging rather than trying to tighten an already oversized opening at the very end. Fiber choice matters too: some yarns rebound more readily than others after stretching. Check your edging tension over a short section before completing the full opening. If the tutorial uses ribbing, follow the creator’s construction closely, since changing the ribbing method or picking up too much fabric around the edge can change how it sits.
What should I check before adding a drawstring to a balaclava?
Make sure the hood already fits reasonably well when the cord is relaxed. The drawstring should provide adjustment, not compensate for an opening that is dramatically too large. Check that the cord travels smoothly through the intended edge and does not pull the fabric into uncomfortable folds. If adapting a drawstring balaclava for a child, consider age-appropriate clothing-safety guidance before adding cords near the head or neck.