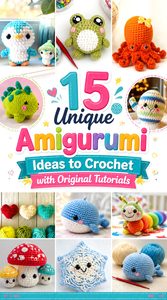
Amigurumi can range from compact round creatures with very little assembly to detailed animals that depend on carefully positioned limbs, ears, fins, wings, or surface embellishments. This collection brings together 15 noticeably different ideas, including ocean animals, farm favorites, fantasy creatures, a mushroom, and a flat-panel duck.
The differences matter when choosing your next project. A jellyfish puts the visual focus on hanging tentacles, while a dinosaur depends on back details, a dragon adds wings and horns, and a flat crochet duck approaches stuffed construction differently from conventional work-in-the-round amigurumi. Along the way, you’ll find practical considerations for yarn, stuffing, feature placement, safety, resizing, and finishing. Each idea also links directly to an original creator tutorial so you can use the designer’s instructions for the actual construction.
Quick List
- Crochet Frilled Axolotl Amigurumi
- Crochet Flat-Belly Whale Amigurumi
- Crochet Spotted Dinosaur Amigurumi
- Crochet Patchwork Cow Amigurumi
- Crochet Spiral-Tentacle Jellyfish Amigurumi
- Crochet Little Pony Amigurumi
- Crochet Long-Eared Bunny Amigurumi
- Crochet Bow-Tie Cat Amigurumi
- Crochet Pocket Dragon Amigurumi
- Crochet Low-Sew Frog Amigurumi
- Crochet Curled-Arm Octopus Amigurumi
- Crochet Mushroom Family Amigurumi
- Crochet Flat-Panel Pocket Duck Amigurumi
- Crochet Big-Eared Elephant Amigurumi
- Crochet Two-Tone Penguin Amigurumi
Choosing Yarn, Tension, and Stuffing for Amigurumi
Amigurumi fabric usually benefits from being dense enough to contain stuffing cleanly, but that does not mean every project should feel rigid. Your yarn, hook choice, tension, and stuffing all influence the final silhouette.
Smooth yarn can make stitch definition and embroidered details easier to see. Plush or chenille yarn creates a softer, larger-looking toy but can make individual stitches harder to identify, especially during increases and decreases. Switching yarn thickness also changes scale, so do not assume that a yarn substitution will produce the same finished measurements as the tutorial.
Stuff gradually rather than treating stuffing as a final step. Rounded heads generally need even distribution, while narrower necks, feet, tails, and sitting bases may require more careful shaping. Overstuffing can stretch the fabric and distort proportions; understuffing may leave a project looking collapsed. When the exact result matters, follow the original designer’s yarn and hook recommendations before experimenting.
Think About Construction Before Choosing a Project
Two amigurumi that look equally compact can involve very different amounts of assembly. Designs with an integrated head and body reduce one major seam, while animals with separate legs, ears, horns, fins, or facial pieces place more emphasis on accurate attachment.
If sewing is the part you enjoy least, consider the axolotl, dragon, frog, cat, or another design where major body sections are integrated. If you enjoy shaping a character through assembly, the elephant, dinosaur, cow, or pony provides more opportunity to adjust the finished posture.
Flat-panel amigurumi is another option entirely. Instead of forming most of the body in continuous rounds, pieces can be worked flat and joined around the edge before stuffing. That construction gives the Pocket Duck below a noticeably different silhouette from the rounded animals in the rest of the collection.
Plan Facial Features and Small Parts with the Recipient in Mind
Eye position can change an amigurumi expression surprisingly quickly. Before permanently securing eyes, noses, muzzles, or embroidered mouths, compare both sides of the face and view the piece from the front rather than relying only on stitch counts.
The same care applies to appendages. Uneven ears, wings, horns, or gills may be more noticeable after stuffing because the finished body creates a clearer centerline. Pins or removable markers can help you preview placement before sewing.
Several tutorials in this collection use or discuss plastic safety eyes. For an item intended for a baby or young child, consider embroidered or crocheted facial features instead of small detachable components, and check the original tutorial plus the material manufacturer’s guidance. Buttons, beads, glued decorations, and other small pieces deserve similar consideration. Decorative amigurumi and toys intended for active handling may need different finishing choices.
1. Crochet Frilled Axolotl Amigurumi
 SAVE
SAVEThis axolotl stands apart because its recognizable silhouette comes from the combination of an oversized rounded head, compact body, small limbs, and layers of contrasting external gills. The HuloHula design connects the head and body rather than treating them as two separately sewn sections, while the limbs and frill-like gills are added afterward. That makes the project a useful choice if you want a largely continuous central shape with enough assembly to practice careful placement.
The finished expression depends heavily on symmetry. Because the head is broad and the side details are prominent, slight differences in gill position or facial placement can become more visible than they would on a simpler round plush.
Balance the Gills Before Sewing
The external gills create most of the axolotl’s character, so treat their placement as a design decision rather than simply attaching them as soon as they are finished. Arrange the pieces on both sides of the head and compare the overall outline from straight ahead.
If one side appears heavier, adjust spacing before fastening anything permanently. Changing yarn thickness can also make the gills proportionally larger or smaller, so reassess their position if you substitute materials.
Keep the Head Shape Firm but Controlled
A broad head can lose its intended shape if stuffing gathers into one area. Add stuffing in smaller amounts and distribute it toward the outer edges before closing access to the interior.
Dense crochet fabric helps prevent filling from peeking between stitches, but tightening excessively can make later shaping uncomfortable. If you change the recommended yarn or hook, make a small tension sample first and check whether the fabric remains flexible enough to stuff neatly.
Choose Facial Details for the Intended Use
The original project uses small facial components along with embroidered details. For a display piece, that creates a crisp, polished expression. For a toy intended for a younger recipient, crocheted or embroidered eyes may be a more suitable adaptation than detachable plastic parts.
Keep any adaptation visual rather than changing the underlying shaping unless the designer provides guidance for doing so.
Original Tutorial and Creator Credit
Creator/Site: HuloHula
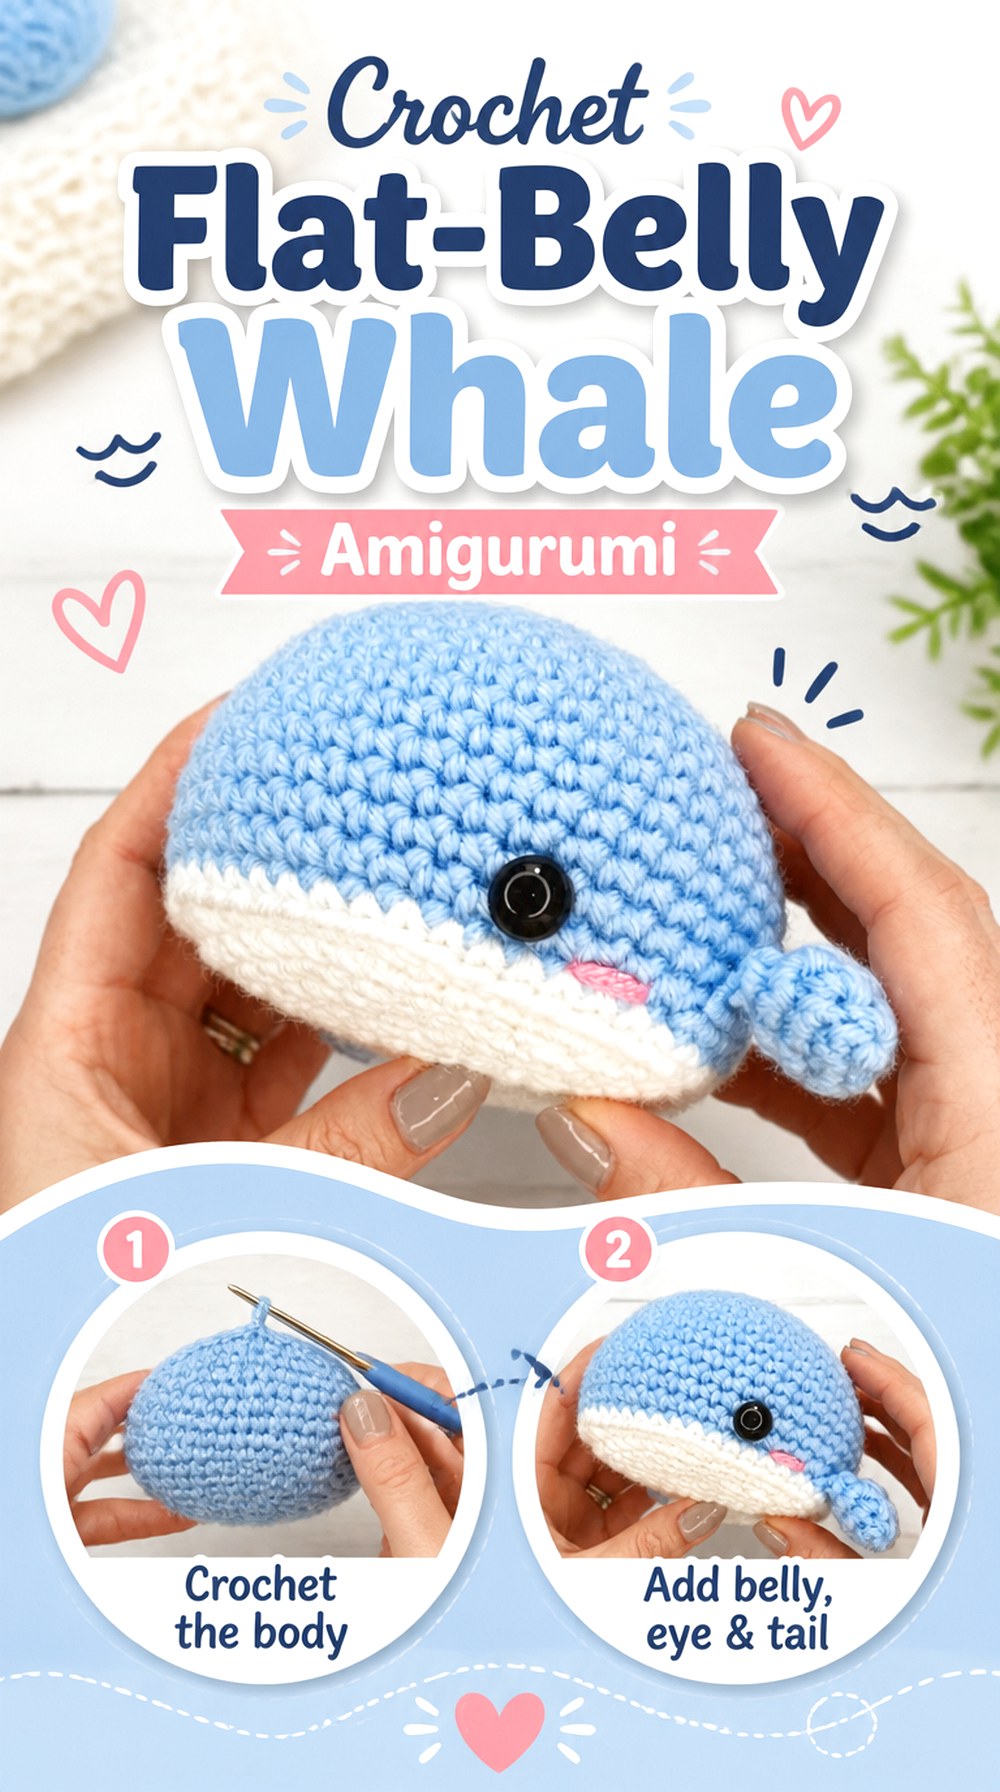
2. Crochet Flat Belly Whale Amigurumi
 SAVE
SAVEFor a sea-creature project with a clean, simple profile, this crochet whale offers a strong contrast to animals with multiple standing legs. Hooked by Robin’s tutorial produces a whale with a broad domed upper body and flatter underside, along with side fins and a separate tail. That flatter base makes the finished whale particularly suited to shelf or desk display because its silhouette reads clearly from the side.
The design is also useful for studying how relatively small appendages can establish the identity of a mostly rounded amigurumi. The exact angle of the fins and tail matters more visually than adding lots of surface decoration.
Use the Base as a Shape Check
Before the whale is completely closed, place the body on a flat surface and look at the profile. Stuffing that concentrates too heavily in the lower section may fight against the flatter-belly effect.
The goal is not to force the toy perfectly flat but to preserve the distinction between the domed back and lower surface shown by the designer. Material substitutions can change how readily the body holds that contrast.
Position Fins and Tail as a Set
Rather than attaching each fin independently and hoping they match, preview both side fins before sewing. Then check the tail against the body’s centerline.
Small differences in angle can make the whale appear to twist or lean. Photographing the pinned pieces from directly above or straight ahead can reveal asymmetry that is harder to notice while holding the project.
Reconsider Scale When Changing Yarn
A thicker yarn can make a simple whale dramatically larger without changing the basic pattern, but the fins and tail will enlarge with the body as well. That can change how the toy sits and how much weight the appendages carry.
If you substitute yarn, use a compatible hook and judge the developing fabric rather than relying on the original project’s finished dimensions.
Original Tutorial and Creator Credit
Creator: Hooked by Robin
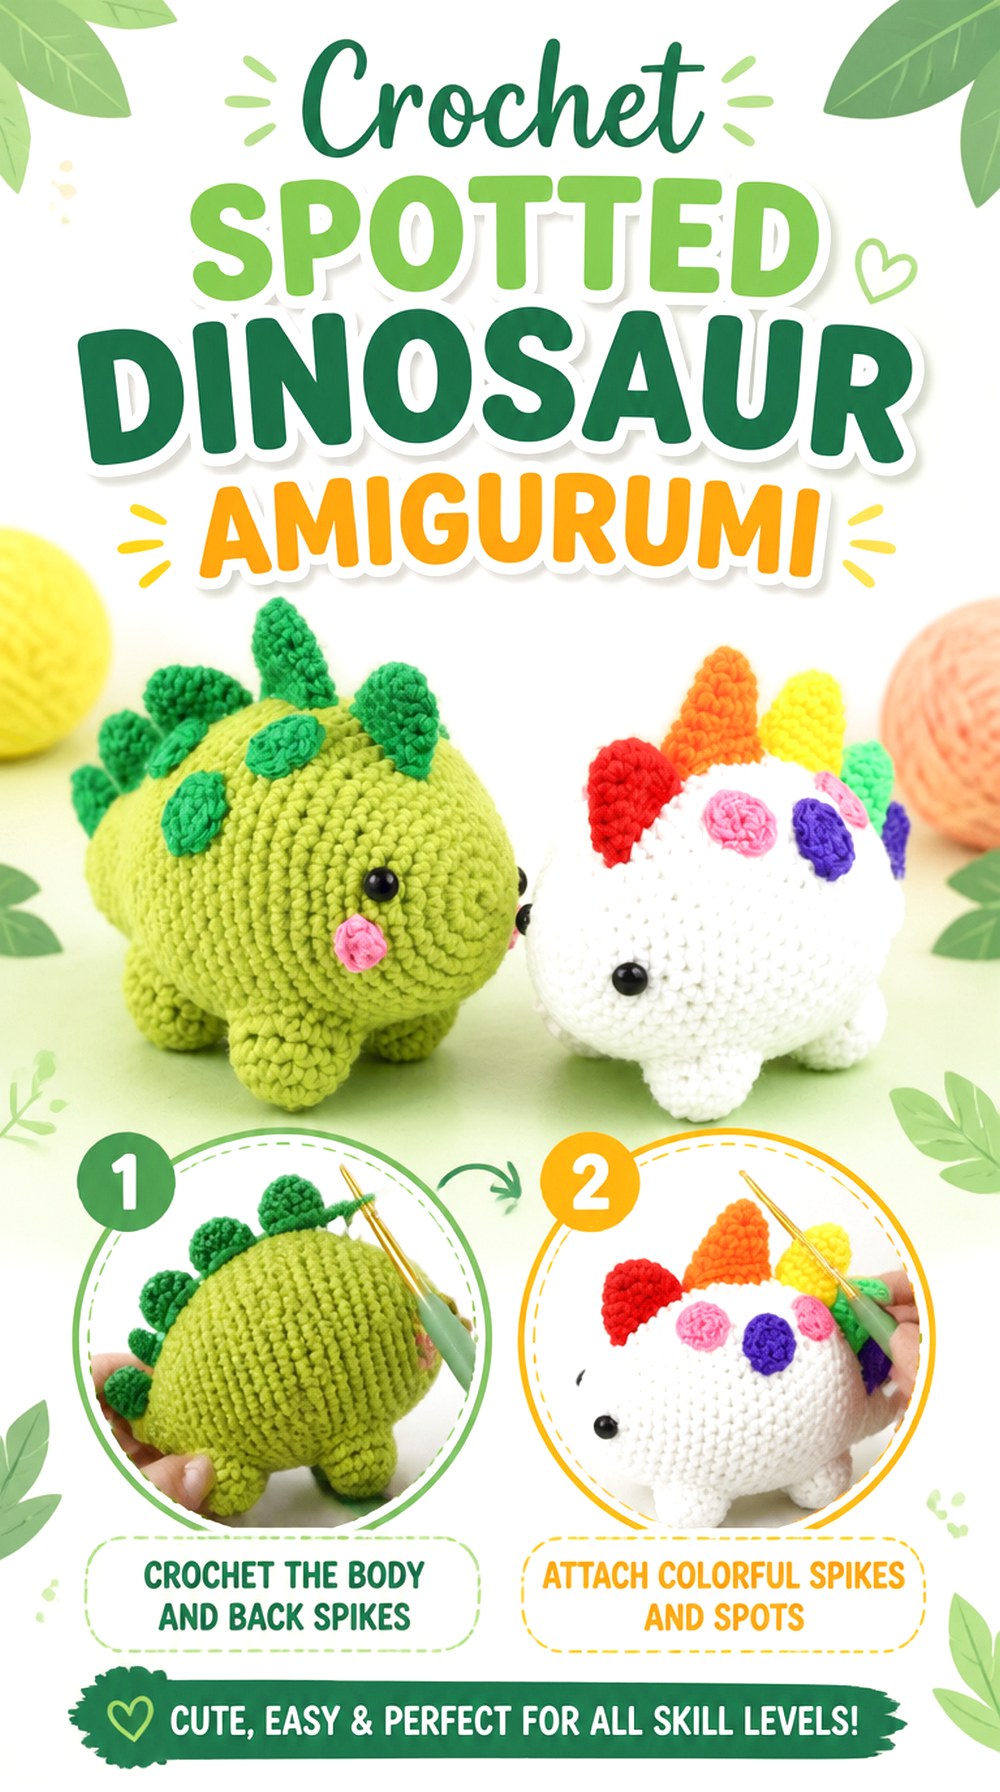
3. Crochet Spotted Dinosaur Amigurumi
 SAVE
SAVEThis dinosaur uses a long rounded body with short legs, a row of dimensional back spikes, and optional surface spots. Those back details make it visually different from a basic stuffed animal even before color enters the design. StringyDingDing’s original tutorial constructs the main dinosaur form and then adds several sizes of spikes along with legs and decorative spots.
It is a good project for crocheters who enjoy using assembly to change a silhouette. The individual additions are relatively small, but their spacing controls whether the dinosaur reads as balanced and intentional rather than crowded.
Establish the Spine Line First
Before sewing the back pieces down, identify the visual center running from the head area toward the rear of the body. Pinning every spike before attaching the first one makes it easier to judge progression and spacing.
If the body twists slightly from spiral crochet, use the finished shape—not merely the round transition—as your alignment reference. The goal is a visually centered row when the dinosaur is sitting naturally.
Treat Spots as Secondary Details
Spots add contrast, but they should support rather than overpower the body shape and spikes. Preview them after the structural pieces are positioned.
You can vary the colors without changing the pattern, but avoid making every surface detail compete equally for attention. A restrained palette often makes the dimensional back pieces easier to read.
Check the Sitting Position During Assembly
Short stuffed legs can influence whether the dinosaur rests evenly. Pin the limbs and place the body on a surface before sewing them permanently.
If one leg pushes the body noticeably higher than another, adjust the attachment point rather than trying to correct the imbalance with excessive stuffing.
Original Tutorial and Creator Credit
Creator/Site: StringyDingDing
4. Crochet Patchwork Cow Amigurumi
 SAVE
SAVEA crochet cow introduces a different type of character building: the silhouette comes from the snout, ears, horns, limbs, and body, while contrasting patches create the familiar hide pattern. Grace and Yarn’s revised cow design integrates the legs, body, and head into one main construction and adds details such as a tail and spots afterward.
That combination makes this idea appealing if you want the visual complexity of a larger animal without creating every major body section independently. The most important planning happens around proportion, stuffing, and the distribution of decorative patches.
Support the Neck as You Stuff
An integrated body does not automatically guarantee that the head will remain well supported. As the form develops, distribute filling through the upper body and neck rather than concentrating it only inside the head.
Check the posture from the side before closing. If the head seems to pull forward, review the designer’s stuffing and construction guidance rather than adding random extra stitches.
Plan Patch Placement Before Attachment
Cow spots look most natural when they feel distributed rather than mirrored mechanically. Lay out the available pieces across the visible surfaces and judge the toy from several angles.
The contrast color can draw attention quickly, so leave enough uninterrupted background color for the overall cow silhouette to remain clear.
Original Tutorial and Creator Credit
Creator/Site: Grace and Yarn
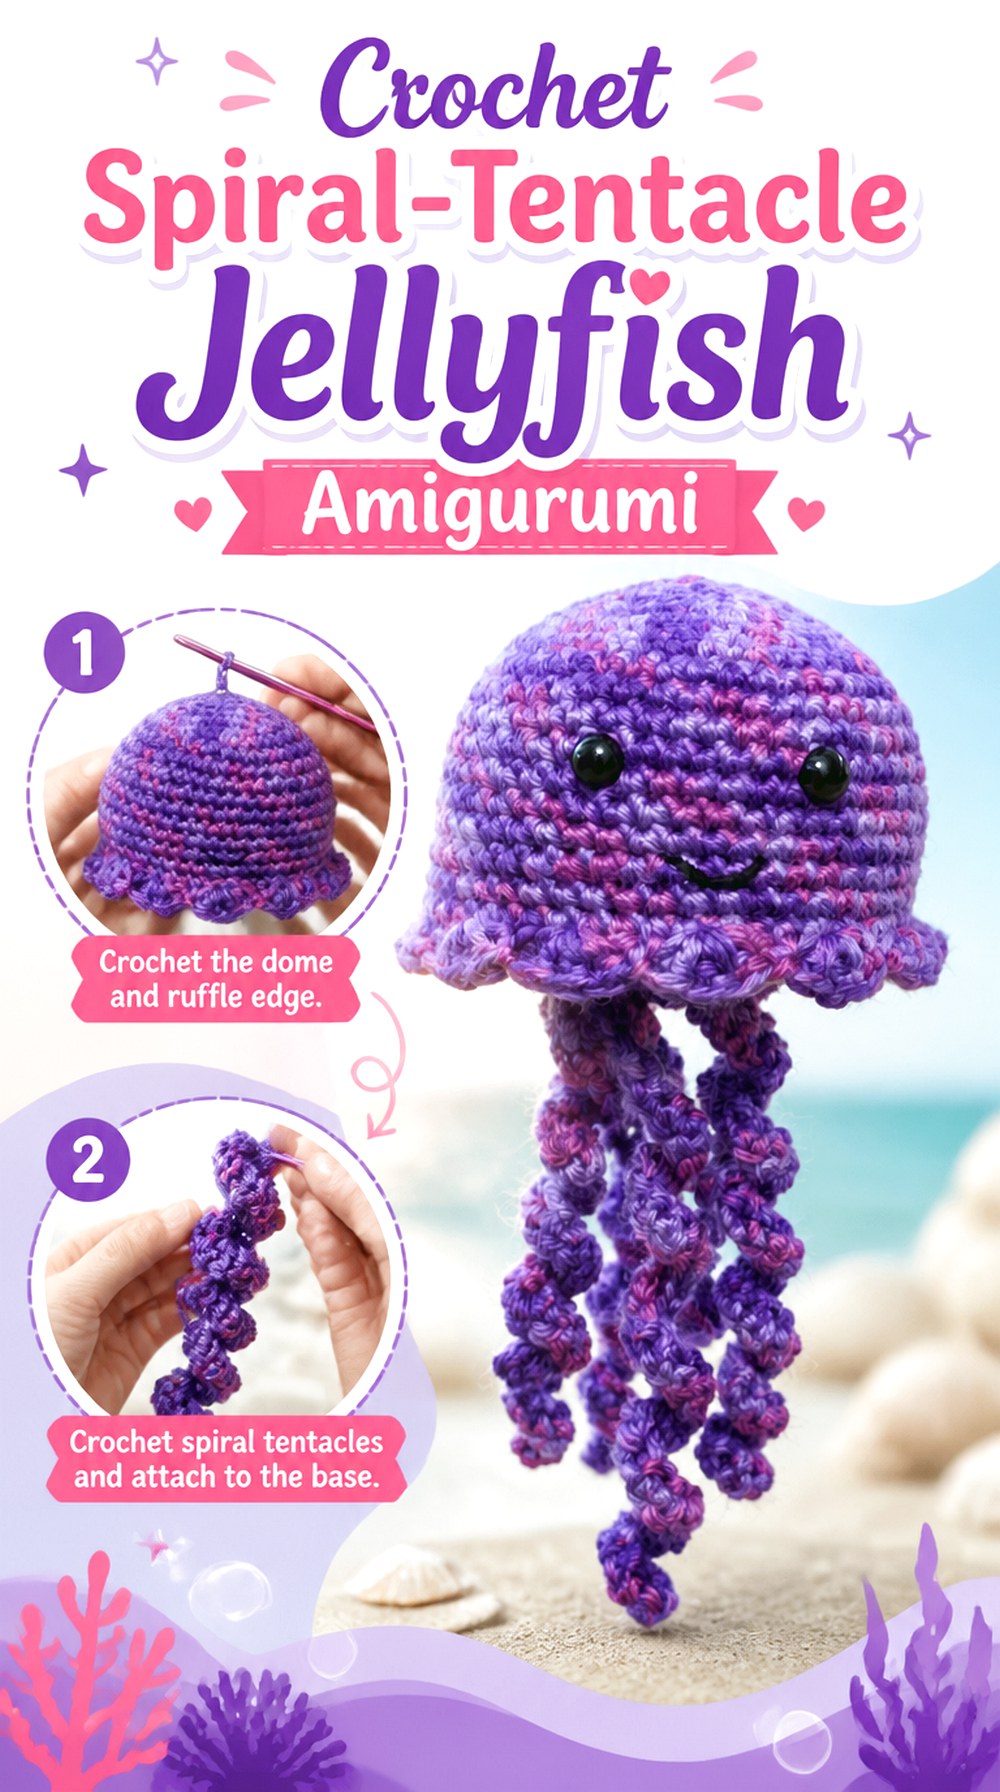
5. Crochet Spiral Tentacle Jellyfish Amigurumi
 SAVE
SAVEA jellyfish changes the usual amigurumi balance because almost all of its volume sits at the top while the lower half is defined by movement. Loops & Love Crochet’s project forms the head from two pieces that are joined together and then adds multiple spiral tentacles underneath. The designer also shows an optional hanging loop, making the same basic form usable as either a small plush-style decoration or hanging accent.
This is one of the strongest choices in the collection if you want to focus on shape and texture rather than limbs. The tentacles provide variation without requiring a conventional standing pose.
Vary Tentacles Without Losing Balance
Different tentacle lengths can make the jellyfish feel more organic, but distribute them around the underside rather than grouping all of the longest pieces together.
Hold the finished head up before fastening the last few strands and check where empty gaps remain. The goal is visual fullness without creating one unusually heavy side.
Decide Between Hanging and Freestanding Display
Adding a top loop changes how the project is viewed. A hanging jellyfish exposes the underside and tentacle arrangement much more clearly than one resting on a shelf.
If you plan to hang it, make sure the attachment point is secure and appropriate for the item’s weight. Decorative hanging pieces should also be placed where young children or pets cannot pull on loose strands.
Small Parts Need Extra Consideration
The original design uses safety eyes. If the jellyfish is intended for a baby or young child, use a suitable stitched alternative and consider how the dangling tentacles affect intended use.
A decorative jellyfish and a handled toy have different safety considerations, so choose finishing details accordingly.
Original Tutorial and Creator Credit
Creator/Site: Loops & Love Crochet
6. Crochet Little Pony Amigurumi
 SAVE
SAVEA pony brings a longer horizontal silhouette to a collection dominated by round or upright characters. All About Ami’s original pony design uses deliberately shaped body sections, legs, and a dimensional tail to build the recognizable equine form.
This project works well when you want assembly to contribute directly to posture. The relationship between the legs and body matters because even small changes in attachment angle can affect whether the pony appears balanced. It is also a useful alternative to projects that depend primarily on oversized heads or facial expressions for personality.
Check Leg Alignment from the Side
Pin the legs before sewing and rest the body on a flat surface. Look at the pony from both sides as well as from the front.
Legs that appear evenly spaced while the toy is held in your hand may shift the body once it is set down. Small placement adjustments are much easier before the seams are secured.
Preserve the Horizontal Silhouette
Avoid overstuffing narrow appendages until they become bulky compared with the main body. The pony’s identity depends partly on keeping the torso, legs, and tail visually distinct.
If you change yarn weight, assess the proportions as the individual pieces develop rather than assuming the original relationship will remain identical.
Original Tutorial and Creator Credit
Creator/Site: All About Ami
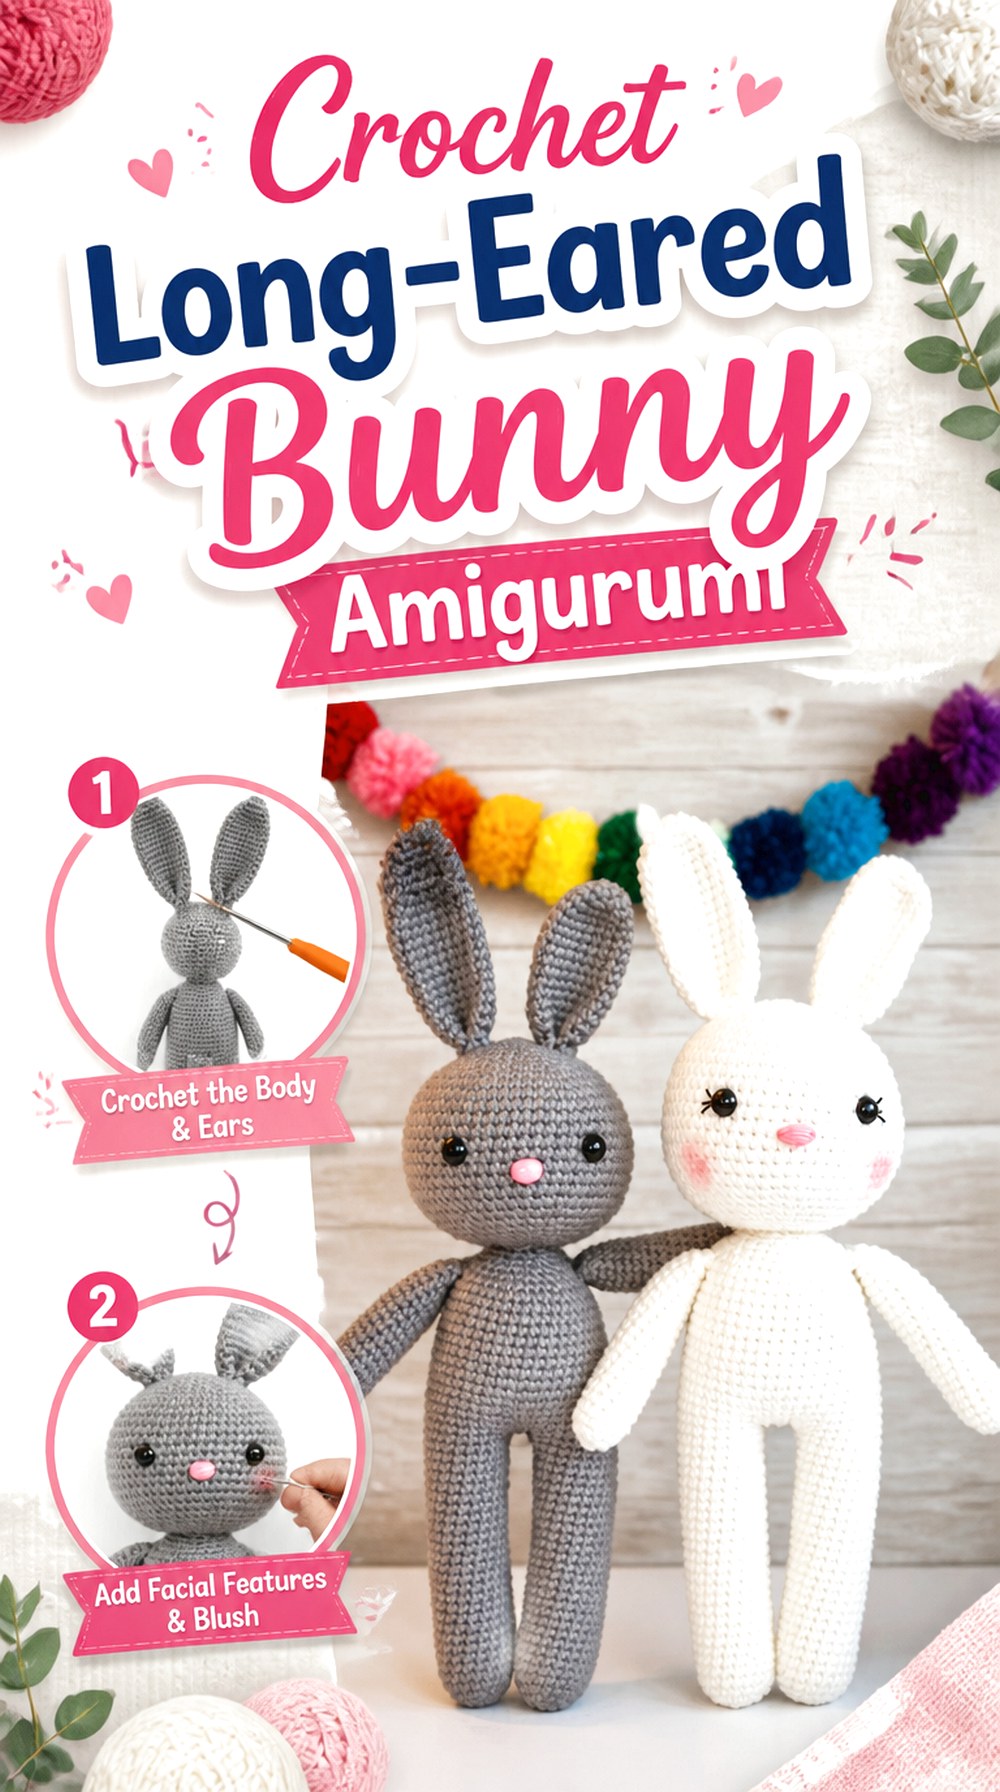
7. Crochet Long Eared Bunny Amigurumi
 SAVE
SAVELong ears immediately change the proportions of a crochet toy, which is why this bunny earns a place among more rounded animals. The Friendly Red Fox design pairs an upright stuffed bunny form with elongated ears and a small pom-pom tail, leaving the main body simple enough that accessories or color changes can alter the character without changing the animal itself.
The ears become the dominant feature, so consistency between them matters more than it might on a project with very small ears. This also makes the bunny a useful project for practicing careful assembly along a clear vertical centerline.
Match the Ear Angle Before Sewing
Two equally sized ears can still look mismatched if one tilts farther forward or outward. Pin both, then look at the bunny from the front and side.
If the fabric relaxes after handling, account for that before fastening the base of each ear. A symmetrical attachment does not necessarily mean the ears must stand perfectly parallel; it means their visual relationship should look intentional.
Think About the Tail as an Embellishment
A pom-pom tail adds texture that differs from the crocheted body. That contrast can be charming for a display piece, but separate embellishments deserve extra thought when the item will be handled heavily.
For a young recipient, consider a securely crocheted alternative and avoid assuming that a decorative attachment is appropriate for every use.
Original Tutorial and Creator Credit
Creator/Site: The Friendly Red Fox
8. Crochet Bow Tie Cat Amigurumi
 SAVE
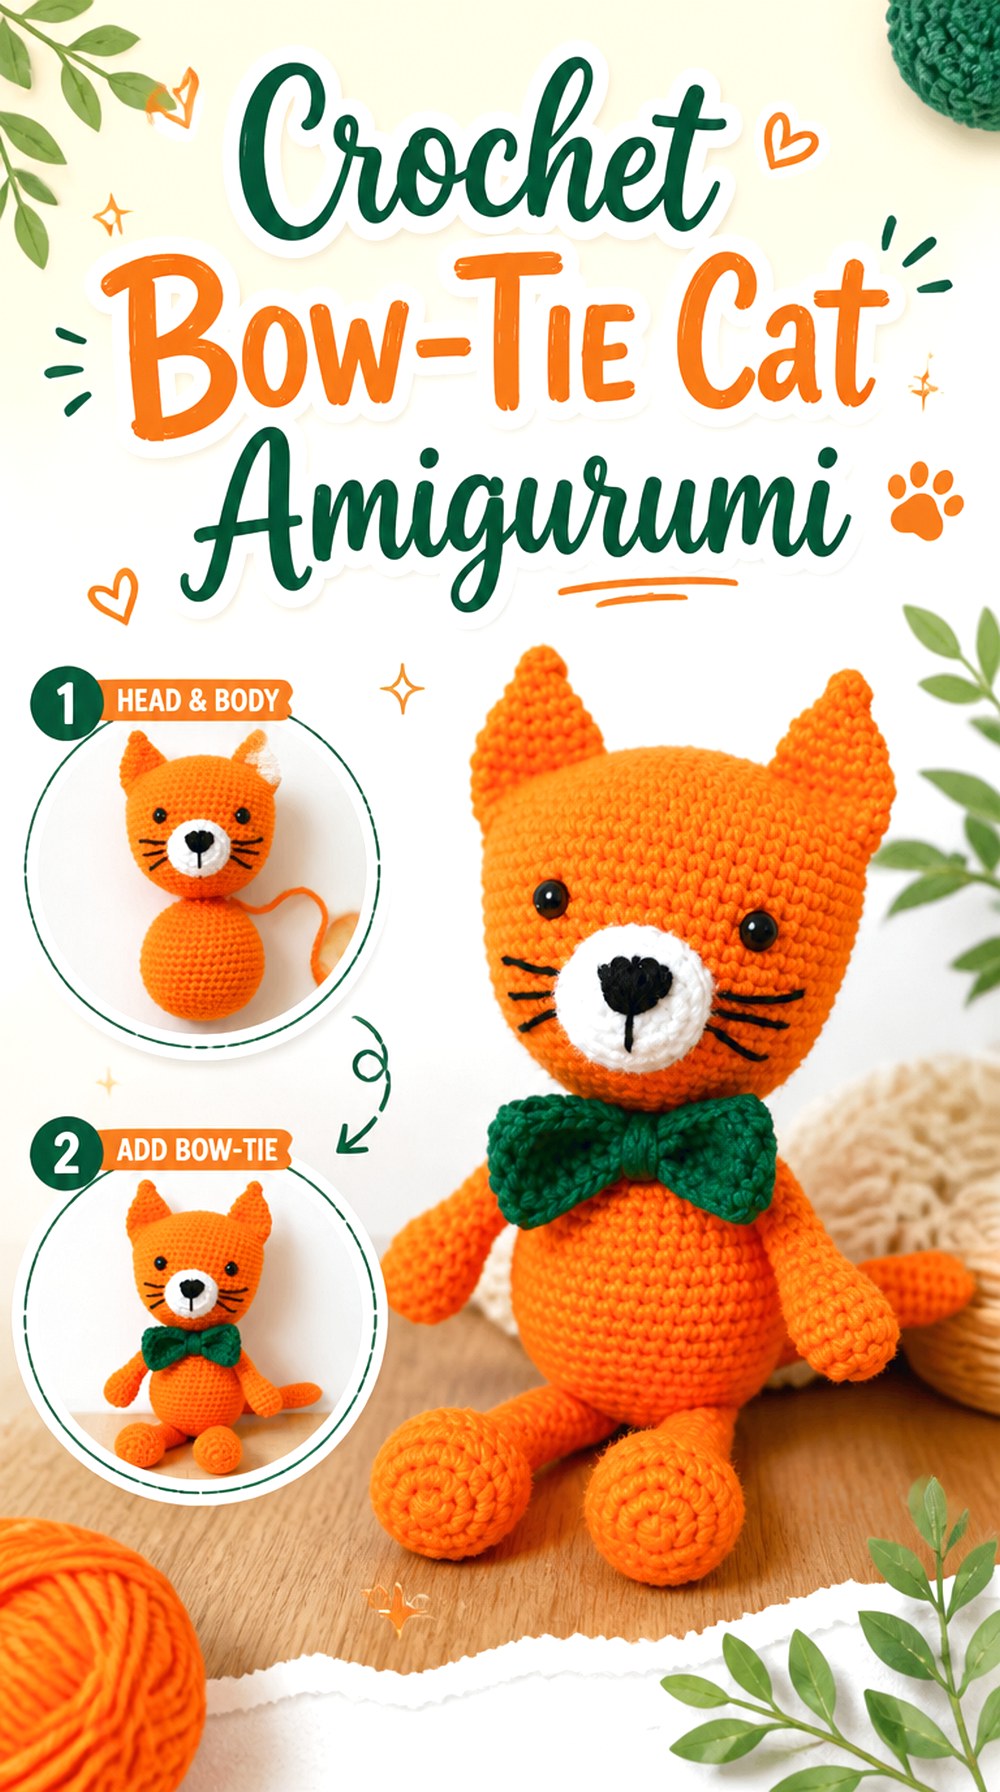
SAVESimon the Cat from Lovey Dovey Yarns offers a taller amigurumi silhouette with the head and body crocheted as one continuous main section. A separate muzzle helps define the face, while a bow tie turns the finished cat into something more character-driven than a basic animal plush.
Because the torso is elongated, stuffing consistency becomes particularly noticeable. This idea suits readers who want an amigurumi with more vertical presence while still minimizing the seam between the head and body.
Shape the Muzzle Before Finalizing the Expression
The muzzle acts as an anchor for the rest of the face. Pin it first, then judge the eye and embroidered feature placement around it.
If the muzzle sits slightly off-center, compensating with the eyes usually makes the imbalance more obvious. Correct the central feature instead of building additional asymmetry around it.
Keep a Tall Body Evenly Stuffed
Longer forms can develop dense areas and hollow areas if large handfuls of filling are inserted at once. Add smaller amounts and distribute them before progressing upward.
A very firm lower body paired with a soft neck can create an unintended hinge. Check the profile periodically and follow the creator’s construction guidance where extra support matters.
Let the Bow Tie Stay an Accent
The bow tie gives the cat personality without altering the main construction. If you change its color or scale, keep it proportionate to the chest so it does not hide the body shaping.
For a frequently handled toy, secure accessories carefully and consider embroidered alternatives when detachable decoration would be unsuitable.
Original Tutorial and Creator Credit
Creator/Site: Lovey Dovey Yarns
9. Crochet Pocket Dragon Amigurumi
 SAVE
SAVEFantasy amigurumi offers more freedom than realistic animal shaping, and this Pocket Dragon from Sweet Softies uses that freedom well. The compact design builds much of the head, body, and tail into a continuous form, then gains its dragon identity through details such as ears, horns, and contrasting wings.
Compared with the dinosaur earlier in the list, this project relies less on a row of back spikes and more on a clear winged silhouette. That makes it a good choice if you want a small fantasy creature where a few strategic features transform a relatively compact base.
Make the Wings Read as a Pair
Wings sit high on the visual hierarchy of a dragon. Before sewing them, compare their size and orientation and decide whether the tips should angle outward, backward, or more vertically according to the designer’s example.
Even when both pieces contain the same stitches, differences in tension can change the outline. Light blocking or reshaping may help when appropriate for the yarn.
Watch Stitch Visibility with Plush Yarn
The source discusses a plush-style yarn option, which produces a very different surface from smooth cotton or acrylic. Thick fuzzy yarn can make small stitches and round transitions difficult to see.
Use markers generously and count deliberately. If you substitute a smoother yarn, expect the finished dragon to show sharper stitch definition and potentially a different overall scale.
Keep Horns and Ears Proportional
Small head details are effective because they do not compete with the wings. If you modify the project, resist enlarging every feature simultaneously.
Test the pieces against the unfinished head before committing to placement. A tiny change in horn position can alter the expression or make the head appear wider.
Original Tutorial and Creator Credit
Creator/Site: Sweet Softies
10. Crochet Low Sew Frog Amigurumi
 SAVE
SAVECrocheniacs’ frog offers a relatively compact animal design with reduced sewing and a rounded, friendly expression. The tutorial demonstrates the body along with the limbs, blush, eyes, and final eye attachment, and the creator notes that the finished frog can also be adapted as a small keychain-style project.
The frog is a useful contrast to the elephant or pony because you are not relying on numerous large pieces to establish the silhouette. Instead, facial placement and the relationship between the body and smaller limbs do much of the visual work.
Use the Eyes to Set the Character
Frog faces are especially sensitive to eye spacing because the eyes form part of the animal’s overall head outline. Preview both sides before securing them.
If you change yarn thickness, do not automatically keep the same eye size. Compare the hardware or stitched features with the new scale of the head first.
Keep Keychain Adaptations Lightweight
If you plan to turn the frog into a bag charm or keychain, think about the added pull placed on the top of the body. A hanging attachment should connect securely to the crocheted fabric rather than relying on a delicate decorative strand.
Also consider whether plastic facial components are suitable for an item that may be knocked around inside a bag.
Original Tutorial and Creator Credit
Creator: Crocheniacs | Amigurumi Teacher
11. Crochet Curled Arm Octopus Amigurumi
 SAVE
SAVECroby Patterns’ crochet octopus takes the tentacled concept in a different direction from the jellyfish. Instead of a domed top with loose hanging spirals, the octopus combines a rounded stuffed head with longer individual arms that create a broader footprint around the body.
That makes this project a strong choice when you want an amigurumi whose character comes from the arrangement of repeated appendages. It can also be displayed differently from a standing animal because the arms create visual width and movement around the central form.
Spread the Arms Before Final Attachment
Lay the octopus on a flat surface and arrange all of the arms before securing their final positions. Check for unusually large gaps and avoid placing every curl in the same direction.
A slightly irregular arrangement generally looks more organic than perfectly mirrored tentacles, but the finished piece should still feel balanced around the head.
Check Curl Behavior After Yarn Substitution
The way a crocheted arm curls depends partly on yarn thickness, fiber behavior, tension, and construction. A substitute yarn may create a tighter or looser spiral than the designer’s example.
Make one arm first and compare it against the body before completing the rest. That gives you an early warning if the proportions are shifting.
Original Tutorial and Creator Credit
Creator: Croby Patterns
12. Crochet Mushroom Family Amigurumi
 SAVE
SAVENot every amigurumi needs to represent an animal. NobleKnits’ mushroom tutorial creates small stuffed mushrooms using a stem, cap, and underside, with more than one finished scale demonstrated.
This makes the idea particularly useful for a grouped display because size differences can create variation without introducing completely different construction. A mushroom also places the focus on proportion rather than limbs: the width of the cap compared with the stem is what makes the form convincing.
Judge the Cap-to-Stem Ratio Early
Before permanently assembling the pieces, rest the cap over the stem and view the mushroom at eye level. A cap that feels too narrow or too deep can change the entire character.
This checkpoint becomes especially important when using substituted yarn because even small gauge differences between pieces may alter how neatly they meet.
Use Scale to Build a Cohesive Group
The source presents multiple sizes, making a mushroom family more visually interesting than several identical pieces in different colors.
For a coordinated set, keep some elements consistent—such as yarn family or cap style—while varying scale. That creates a group that reads as intentional rather than as unrelated leftovers.
Original Tutorial and Creator Credit
Creator: NobleKnits
13. Crochet Flat Panel Pocket Duck Amigurumi
 SAVE
SAVESpin a Yarn Crochet’s Pocket Duck is the structural outlier in this collection. Instead of building the main shape as a conventional three-dimensional spiral, the design uses separate pieces worked in flat rows and joins them to create a lightly stuffed, two-dimensional amigurumi style. The original tutorial describes five main pieces and notes that the tightly worked panels may naturally curl before assembly.
This makes the duck a worthwhile choice if you want to explore amigurumi without relying exclusively on continuous rounds. Its compact profile also lends itself well to small decorative displays.
Do Not Mistake Panel Curl for Failure
Dense flat crochet often curls before it is joined to a matching panel. The original source specifically notes this behavior, so judge the piece after assembly rather than trying to force every unfinished panel completely flat.
Changing yarn or hook size can alter the amount of curl, which is another reason to check the designer’s material guidance before substituting.
Align the Panel Edges Carefully
Because the silhouette is created by joined flat pieces, uneven edge matching can distort the duck more noticeably than a slightly uneven seam on a round body.
Use removable markers to align important curves before joining. Pay particular attention around the head, beak area, and base where the outline needs to remain recognizable.
Adapt Accessories Without Hiding the Shape
A small bow, scarf, or other embellishment can personalize a pocket-style duck, but keep accessories proportional to its compact body.
If the piece is intended for a young child, avoid loosely attached decorations and consider stitched facial details instead of small plastic components.
Original Tutorial and Creator Credit
Creator/Site: Spin a Yarn Crochet
14. Crochet Big Eared Elephant Amigurumi
 SAVE
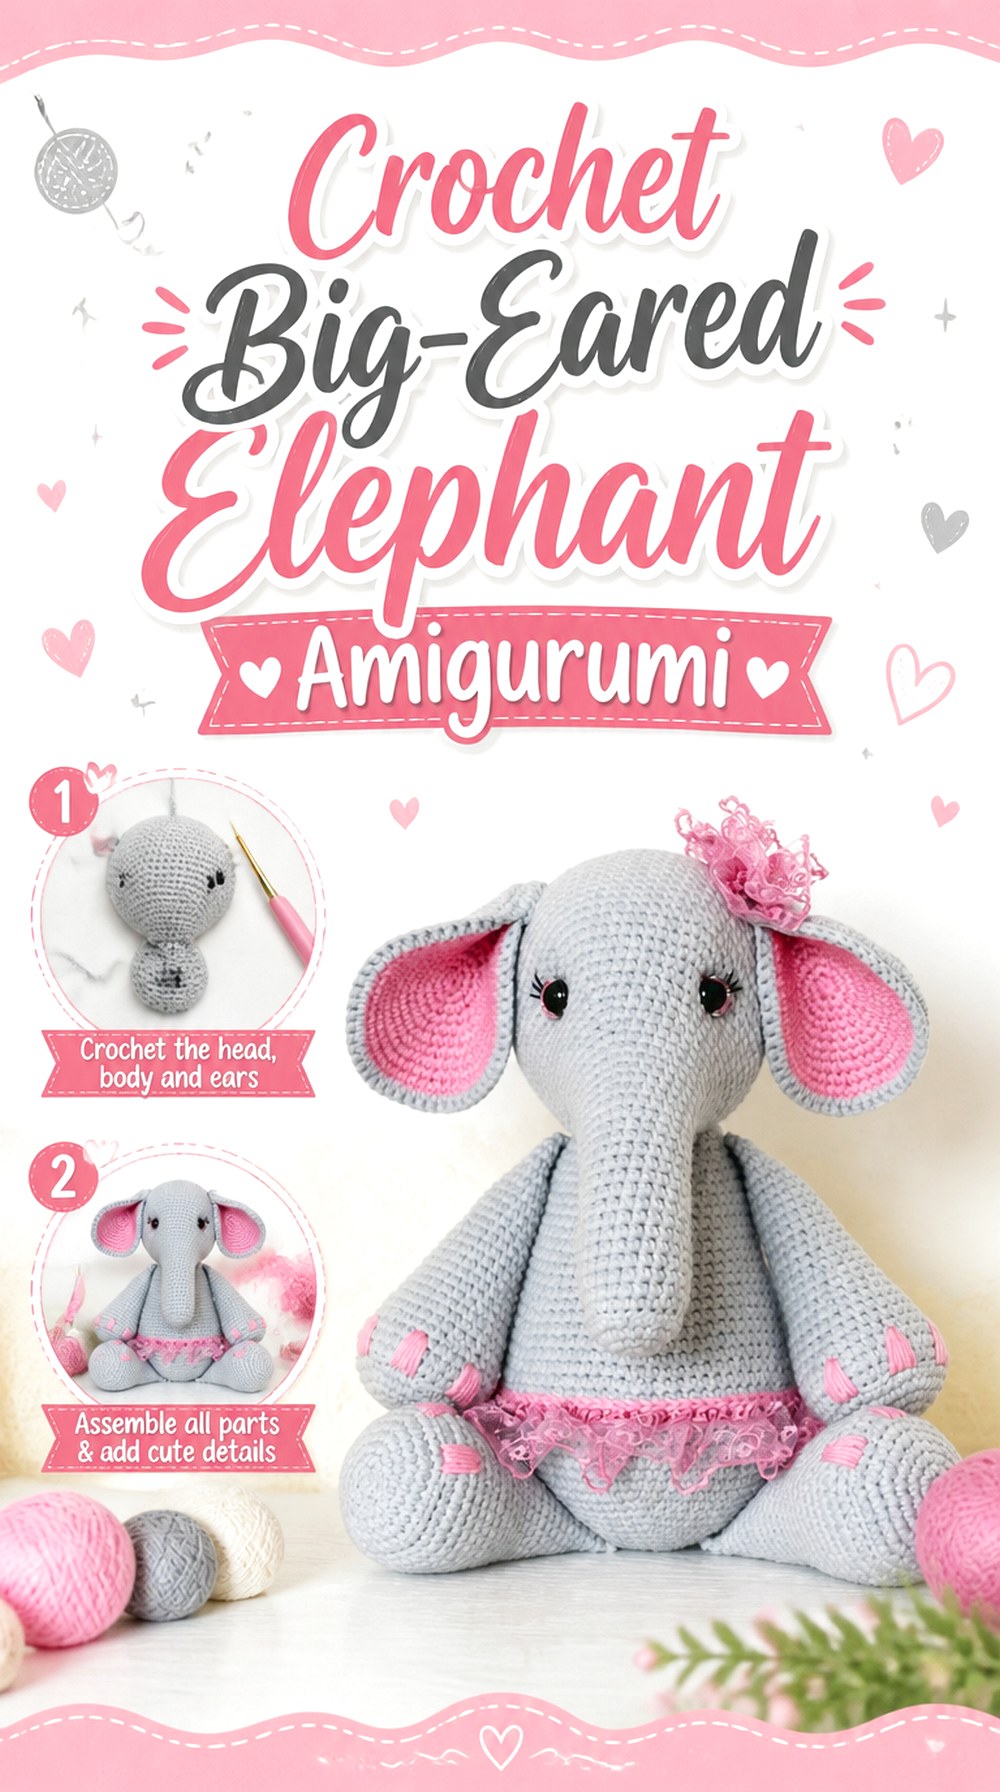
SAVEAn elephant offers several features that are unusual among the other ideas here: broad layered ears, a projecting trunk, and a large seated body. Cuddly Stitches Craft’s Ellie design also includes optional decorative clothing and flower details, allowing the underlying elephant to work either as a simpler animal or a more dressed character.
Because the ears create so much width, this project rewards deliberate assembly. It is also a useful option for someone who enjoys a more substantial toy with numerous shaping and finishing decisions rather than a compact one-piece plush.
Let the Ears Define the Silhouette
Large ears should look balanced relative to the head even if tiny differences in handmade fabric remain. The original design constructs the ear with inner and outer sections, making alignment especially important.
Pin both completed ears in place and compare the overall width before sewing. Moving an ear by a small amount can noticeably change the expression.
Watch the Trunk’s Centerline
A trunk naturally draws the eye to the center of the face. Before attaching or finishing surrounding facial features, make sure the trunk appears centered when viewed straight on.
Do not use an uneven eye position to compensate for a crooked trunk. Correct the central feature first whenever possible.
Decide Whether Clothing Adds Value
The skirt and flower treatment shown by the designer can create a more character-specific elephant, while omitting those pieces keeps attention on the animal shape.
Choose the version according to the intended use. Additional accessories create more seams and potentially more maintenance, especially if the amigurumi will be frequently handled.
Original Tutorial and Creator Credit
Creator/Site: Cuddly Stitches Craft
15. Crochet Two Tone Penguin Amigurumi
 SAVE
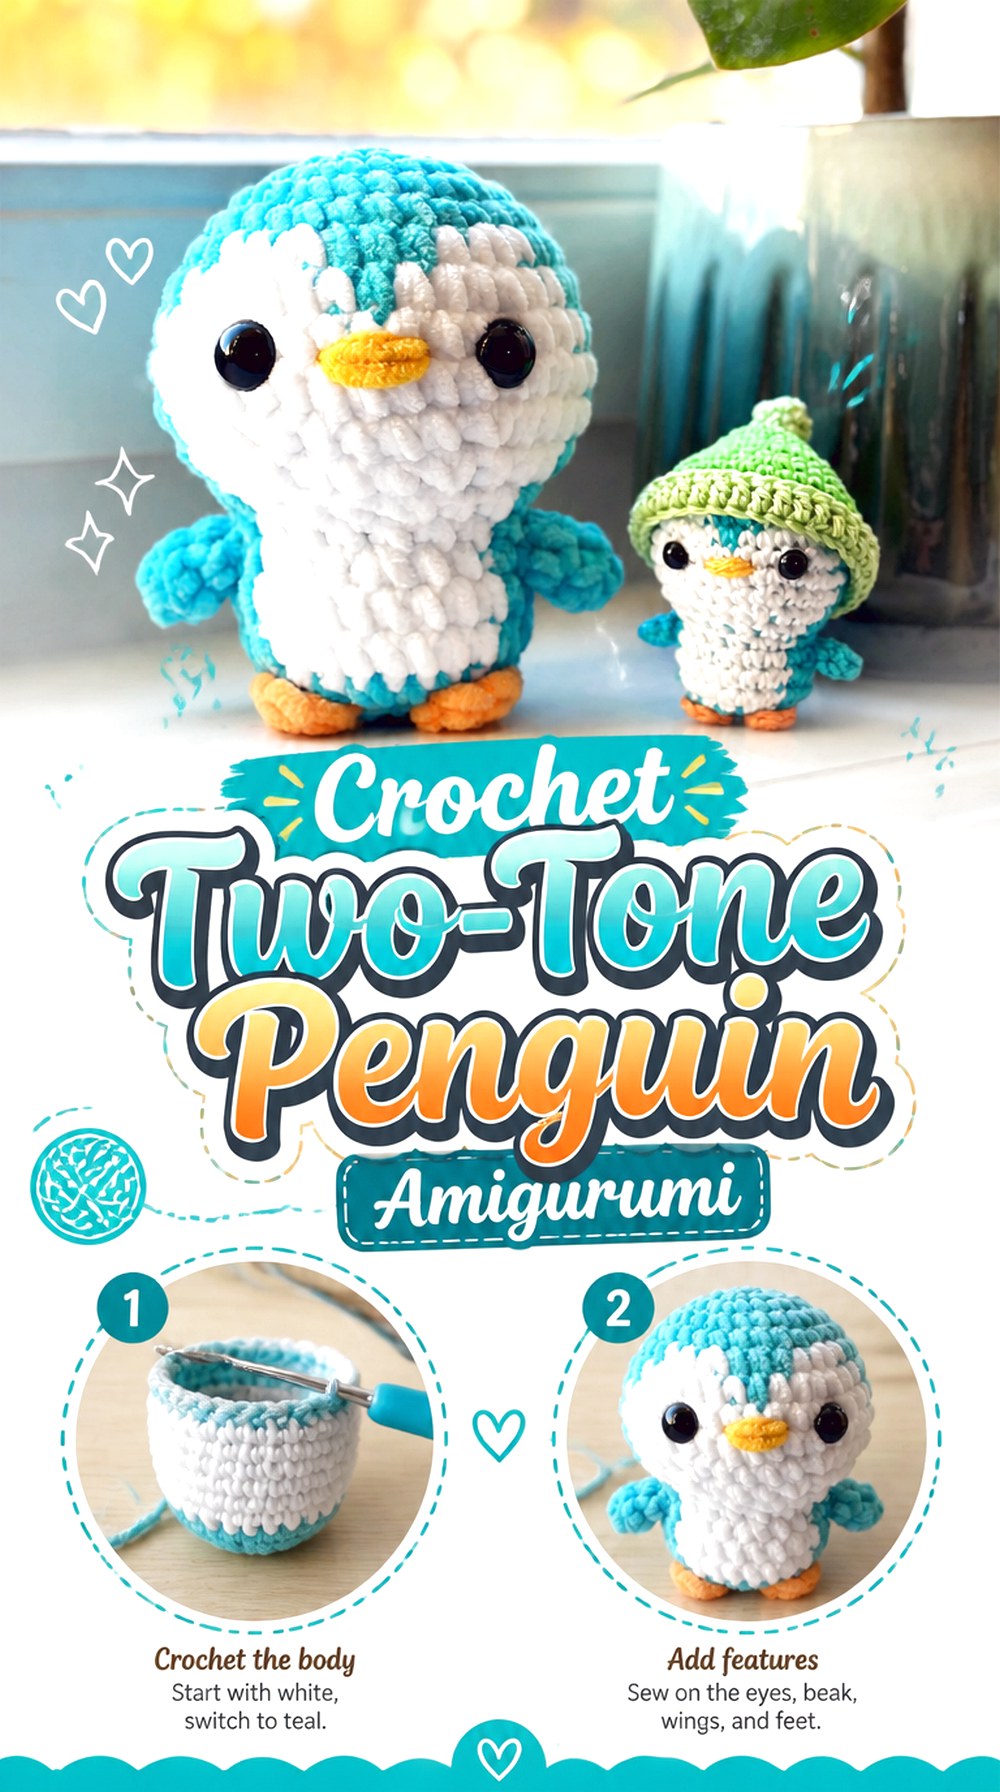
SAVEA penguin is a good final choice because the recognizable design depends as much on color placement as on the basic stuffed shape. DIY Fluffies’ tutorial demonstrates a penguin with contrasting body areas, wings, and feet and explains that changing yarn thickness can produce different finished scales from the same underlying design.
That makes the project useful if you want to practice clean color transitions while keeping the number of animal features relatively restrained. A smooth boundary between the dark body and lighter front can have more visual impact than adding extra embellishment.
Keep Color Changes Visually Clean
Contrasting yarn makes uneven transitions easier to see. Pay attention to where the designer changes color and keep your round marker accurate so the boundary does not drift unintentionally.
A slight spiral jog is common in continuous-round crochet. Follow the tutorial’s demonstrated method rather than inventing extra corrective stitches that could change the shaping.
Compare Wings Before Sewing
Penguin wings or flippers are simple pieces, but their position affects posture. Pin both at the same stage and decide whether the finished penguin should appear relaxed, slightly outstretched, or tucked close to the body according to the tutorial.
Check the toy from behind as well as from the front; rear alignment often reveals differences that the face distracts from.
Resize Through Materials with Caution
The designer demonstrates that different yarn sizes can create different overall scales. This approach is usually more predictable than independently changing stitch counts throughout an amigurumi pattern.
Still, use a hook appropriate to the substituted yarn and confirm that the resulting fabric is dense enough to hold stuffing cleanly.
Original Tutorial and Creator Credit
Creator/Site: DIY Fluffies
Comparing These Amigurumi Ideas
If you are choosing by construction rather than animal, the differences become clearer:
| If You Want To Practice | Good Projects to Compare |
|---|---|
| Integrated body shaping | Axolotl, Cat, Cow, Dragon |
| Precise appendage placement | Dinosaur, Pony, Elephant |
| Tentacles and movement | Jellyfish, Octopus |
| Color contrast | Cow, Dinosaur, Penguin |
| Flat-panel construction | Pocket Duck |
| Fantasy details | Dragon |
| Display-friendly shapes | Whale, Mushroom, Jellyfish |
| Prominent facial positioning | Frog, Bunny, Cat |
| Scaling through yarn changes | Penguin, Mushroom, Whale |
No single construction style is automatically better. A low-sew body reduces assembly but can make shaping mistakes harder to isolate, while separate pieces create more finishing work but give you additional control over posture and placement. Choose according to the part of amigurumi making you actually want to practice.
Conclusion
These 15 unique amigurumi ideas cover far more than variations on the same round stuffed animal. The whale emphasizes a low display profile, the jellyfish and octopus introduce moving tentacle shapes, the Pocket Duck uses flat panels, the elephant relies on large layered features, and the dragon turns a compact base into a fantasy creature with wings and horns.
When deciding what to make, compare construction as carefully as appearance. Consider how much sewing you want, whether color changes matter, how visible the stuffing and tension will be, and who will ultimately handle the finished piece. Once you choose a design, use the linked original tutorials for the creator’s exact construction details rather than trying to recreate the project from a roundup description.
Frequently Asked Questions
Can I use plush or chenille yarn instead of cotton for amigurumi?
Sometimes, but expect the result to change. Plush and chenille yarn generally create a larger, softer surface and can hide individual stitches, while smoother yarn makes stitch structure easier to see. Hook size must also suit the substituted yarn. If the original designer provides substitution guidance, follow it first. Otherwise, make a small sample and confirm that your fabric is dense enough to contain stuffing before committing to the full project.
How do I stop stuffing from showing through crochet stitches?
Visible stuffing usually means the fabric is too open, the piece is overstuffed, or both. Check whether the hook is producing a dense fabric with your chosen yarn. Add filling gradually instead of forcing large amounts into the piece. If changing hook size significantly would alter the designer’s intended gauge, compare your fabric with the original tutorial before proceeding.
Are safety eyes suitable for every amigurumi?
No single eye treatment is appropriate for every recipient or use. Plastic safety eyes and other small components require particular caution when a finished item is intended for babies or young children. Embroidered or crocheted eyes can avoid detachable plastic pieces. Always consider the complete project—including buttons, bows, pom-poms, beads, and hanging loops—and follow relevant manufacturer and creator guidance.
What is the safest way to make amigurumi larger or smaller?
When the pattern allows it, changing yarn thickness and using a compatible hook can resize the entire design while preserving the original stitch relationships. Altering individual stitch counts is more complicated because increases, decreases, limb placement, and accessories may all depend on the original proportions. If the creator supplies specific resizing instructions, follow those instead of assuming every section can be enlarged independently.
Why does my amigurumi lean or look asymmetrical after assembly?
The problem may come from stuffing distribution, spiral-round movement, or the position of attached pieces rather than the crochet itself. Before sewing limbs, ears, wings, or horns, pin all matching parts and view the project from several directions. Rest standing or sitting designs on a flat surface as well. Correcting placement before sewing is usually easier than trying to disguise an imbalance afterward.
Can I sell amigurumi made from these tutorials?
Selling permissions are determined by each individual designer, and they are not identical across crochet patterns. Check the current terms on the original tutorial or pattern page before offering finished items for sale. Do not assume that access to a public or no-cost tutorial automatically includes commercial permission, and do not reproduce or redistribute the creator’s written pattern, charts, photographs, or instructional material.
How should handmade amigurumi be washed or cared for?
Care depends on the yarn fiber, stuffing, facial components, embellishments, and construction. Follow the yarn label and any care guidance supplied by the original designer. Mixed materials may require more cautious treatment than the yarn alone suggests. Before washing, inspect attached ears, limbs, buttons, eyes, bows, or other details for loose areas, particularly on pieces that are handled frequently.