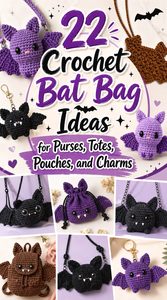
Crochet bat bags can take several very different forms. A bat can define the entire silhouette of a purse, sit inside a granny-square panel, spread across a flap as a flat appliqué, or hang from a finished bag as a dimensional charm. Those construction choices matter just as much as color because they affect the opening, usable bag space, strap placement, stretch, and how clearly the bat remains visible.
The first ideas below include complete bat-bag tutorials, while many later options use verified bat squares, appliqués, or amigurumi tutorials as design components for a separately chosen bag construction. That distinction gives you more ways to plan a bag without treating a motif tutorial as instructions for a finished purse. Compare the bat scale, bag structure, closure, and attachment method before settling on the version that suits how you actually want to carry it.
Quick List
- One-Piece Crochet Devil Bat Messenger Bag
- Crochet Bat Appliqué Envelope Clutch
- Crochet Bat Granny Square Box Tote
- Crochet Wing-Silhouette Bat Crossbody Purse
- Crochet Graphic Bat Flap Shoulder Bag
- Crochet Bat Square Drawstring Project Bag
- Crochet Scattered-Bat Market Tote
- Crochet Plush Bat Charm Drawstring Backpack
- Crochet Bat Appliqué Zipper Notions Pouch
- Crochet Mini Bat Keychain Phone Crossbody
- Crochet Bat Square Patchwork Shoulder Bag
- Crochet Oversized Bat Appliqué Satchel
- Crochet Hanging-Bat Charm Crescent Bag
- Crochet Soft Bat Accent Wristlet
- Crochet Plush Bat Charm Bucket Bag
- Crochet Bat Appliqué Belt Bag
- Crochet Flying-Bat Book Tote
- Crochet Chunky Bat Top-Handle Pouch
- Crochet Amigurumi Bat Pocket Backpack
- Crochet Flying-Bat Foldover Clutch
- Crochet Bat Charm Drawstring Crossbody Bag
- Crochet Bat Appliqué Everyday Tote
Choose the Bat Construction Before the Bag Shape
Start by deciding whether the bat should be the bag or decorate an otherwise conventional bag. A shaped bat purse makes the theme unmistakable, but its wings and outline can affect where seams, openings, and strap attachments fit. A granny-square bat is easier to place inside a rectangular construction because the motif already has straight outside edges.
Flat appliqués offer the most freedom. They can be centered, offset, repeated, or added after the main bag is complete, provided they do not interfere with a zipper or flap. Dimensional amigurumi bats work differently again: treat them as charms or surface accents rather than structural components. If you are adapting a motif-only video, choose the bag construction separately instead of assuming the motif tutorial covers lining, straps, closures, or load-bearing seams.
Plan Structure, Stretch, and the Opening Together
A decorative bat will not compensate for a bag that stretches more than intended. Open crochet fabric, long unsupported straps, and soft fibers can all change shape as a bag is used. If maintaining a crisp rectangular silhouette matters, consider a denser fabric, lining, reinforcement, or a construction designed to support the contents you expect to carry. Do not assume a decorative tutorial establishes any particular weight capacity.
The opening deserves the same attention. Bat ears, wings, feet, or appliqué tips should not obstruct a zipper path, button loop, drawstring channel, or flap fold. On a lined bag, decide where decorative stitching will go before installing the lining. On an unlined openwork bag, consider whether small items could work through gaps. These choices determine whether the project functions as everyday storage, a compact accessory, or mainly a seasonal statement piece.
Match Bat Scale to the Part of the Bag People Will See
A wide bat silhouette needs uninterrupted horizontal space. Before making several motifs, compare the finished bat or blocked square with the usable front panel of the planned bag. A single large appliqué may suit a broad satchel, while a small pouch often looks clearer with one compact motif instead of several crowded bats.
Placement can also solve practical problems. Keep dimensional bats away from the lower corners if they would repeatedly rub against surfaces. Leave space around strap anchors so wings do not disappear under hardware or thick joins. For a repeated motif layout, arrange the pieces on the finished or blocked panel first and view the composition from normal carrying distance. That simple checkpoint can reveal uneven spacing, motifs hidden by folds, or a design that looks balanced flat but changes once the bag has depth.
1. One Piece Crochet Devil Bat Messenger Bag
 SAVE
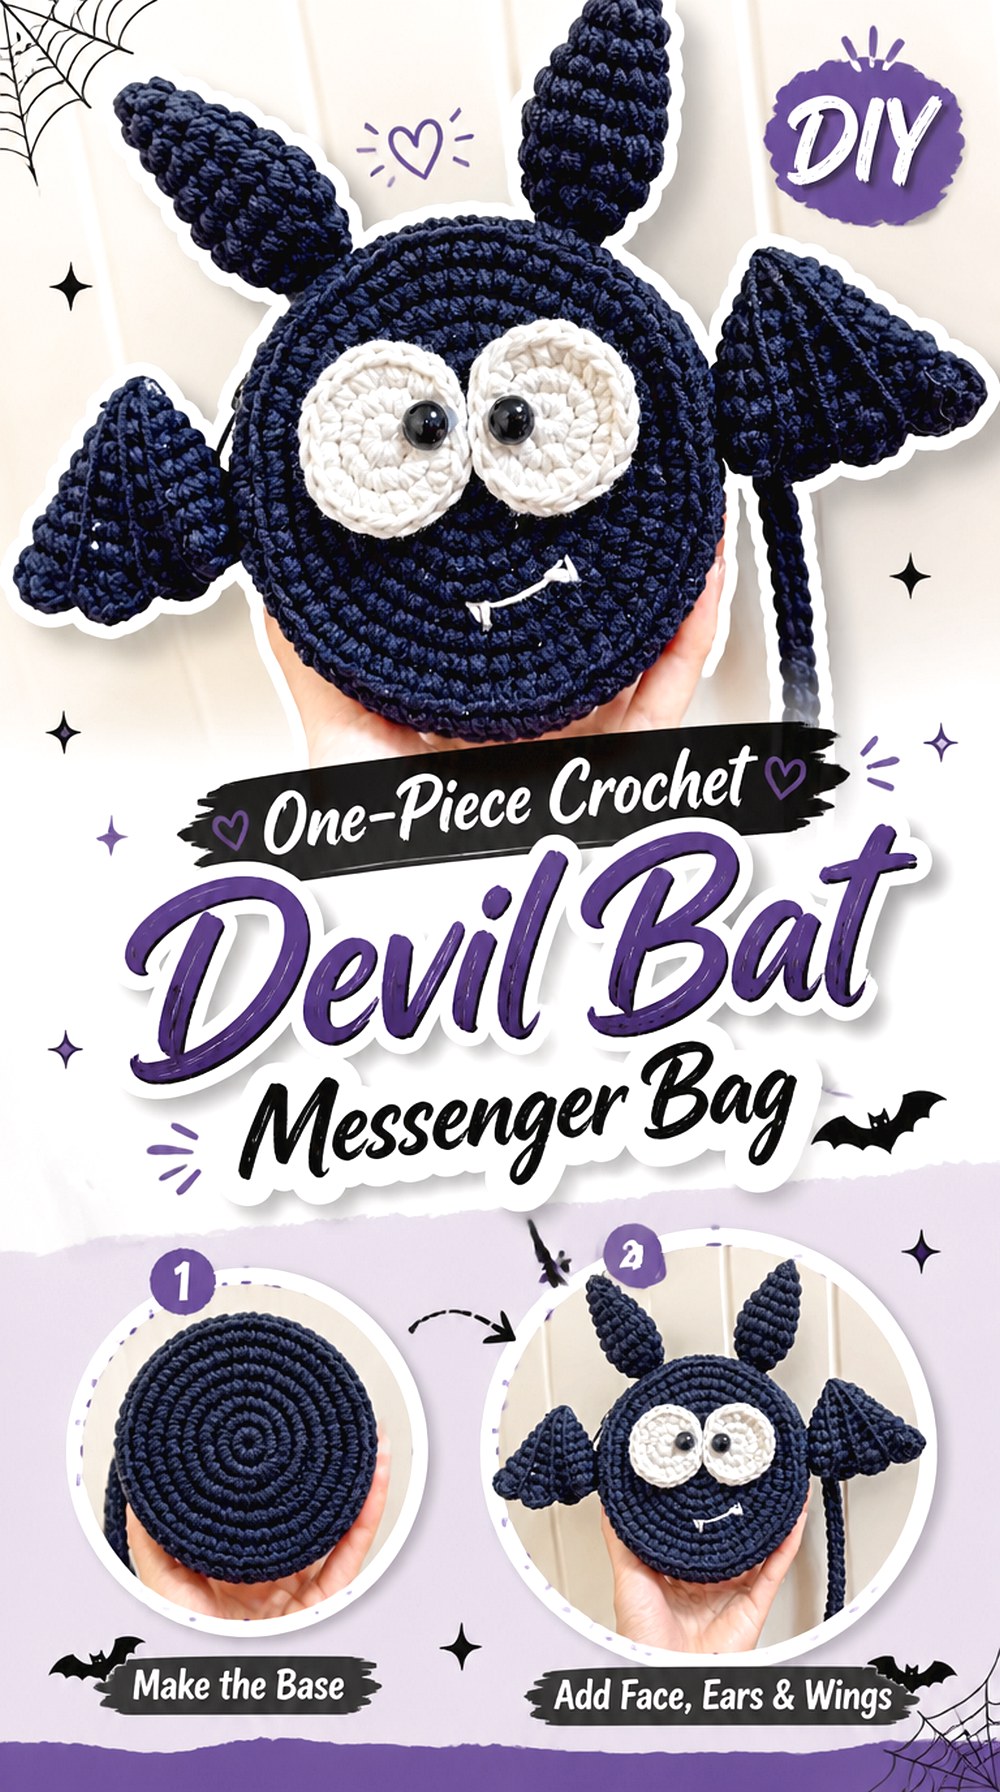
SAVEThis messenger-style idea makes the bat character part of the bag rather than treating it as a separate embellishment. The source tutorial presents a small Halloween bat/devil bag with a one-piece construction, so it is a useful starting point when you want a recognizable creature shape and a crossbody-style carry without building the theme from individual squares.
Because the character features and bag structure are closely connected, this version makes more sense for readers who want a novelty accessory than for someone seeking a plain rectangular everyday bag. Pay particular attention to how the finished opening relates to the ears, wings, and strap area.
The Character Shape Controls the Usable Front
On a novelty messenger bag, decorative edges occupy some of the visual space that would be plain fabric on a standard pouch. Before changing proportions, think about which parts make the bat immediately recognizable. Enlarging or shortening one area without considering the rest can change the balance between the bag body, wings, and facial details.
Keep Strap Stress Away From Decorative Edges
A strap attachment should rely on stable bag fabric rather than a projecting wing tip or other ornamental point. If you adapt the strap, inspect where tension will enter the main body when the bag is worn. Reinforcement is more useful at the actual attachment area than making decorative wings unusually stiff.
Decide Whether the Novelty Shape Fits Your Storage Needs
A character bag can have a different internal shape from a conventional rectangle. Think about the items you expect to carry and whether the opening gives comfortable access. If capacity is a priority, compare the finished form with a standard messenger construction before choosing the novelty silhouette simply for its appearance.
Original Tutorial and Creator Credit
Creator: PinDIY
2. Crochet Bat Appliqué Envelope Clutch
 SAVE
SAVEAn envelope clutch gives a flat bat appliqué a clean background and avoids competing with a long strap. Place one bat across the front face, keeping its wing tips clear of the edges and the section that folds over. The result can feel more graphic than cute, especially when the surrounding clutch uses a restrained color palette.
The Jolly Lizard source teaches the bat appliqué itself, not a finished clutch, so pair it with an envelope-bag construction whose finished panel provides enough uninterrupted room. This is a useful route if you already have a clutch pattern you like and mainly need a distinctive bat element.
Protect the Fold From the Wing Tips
Lay the appliqué on the clutch before permanently attaching it and close the flap several times. A wing that crosses the fold may buckle or disappear when the clutch is shut. Moving the bat slightly lower can preserve the whole silhouette while keeping the folding edge flexible.
Leave the Closure Area Visually Quiet
A button, snap, magnetic closure, or other fastening method can compete with a centered bat. Plan both before sewing on the appliqué. If the closure lands in the middle of the bat body, shifting the motif or choosing a concealed fastening may give the front a cleaner composition.
Flat Decoration Suits a Hand-Carried Bag
A flat appliqué is less likely than a stuffed charm to swing or catch while the clutch is held under an arm. That makes surface decoration particularly useful here. Secure the outer edges neatly, especially around pointed wing sections that could otherwise lift with repeated handling.
Original Tutorial and Creator Credit
Creator: Jolly Lizard
3. Crochet Bat Granny Square Box Tote
 SAVE
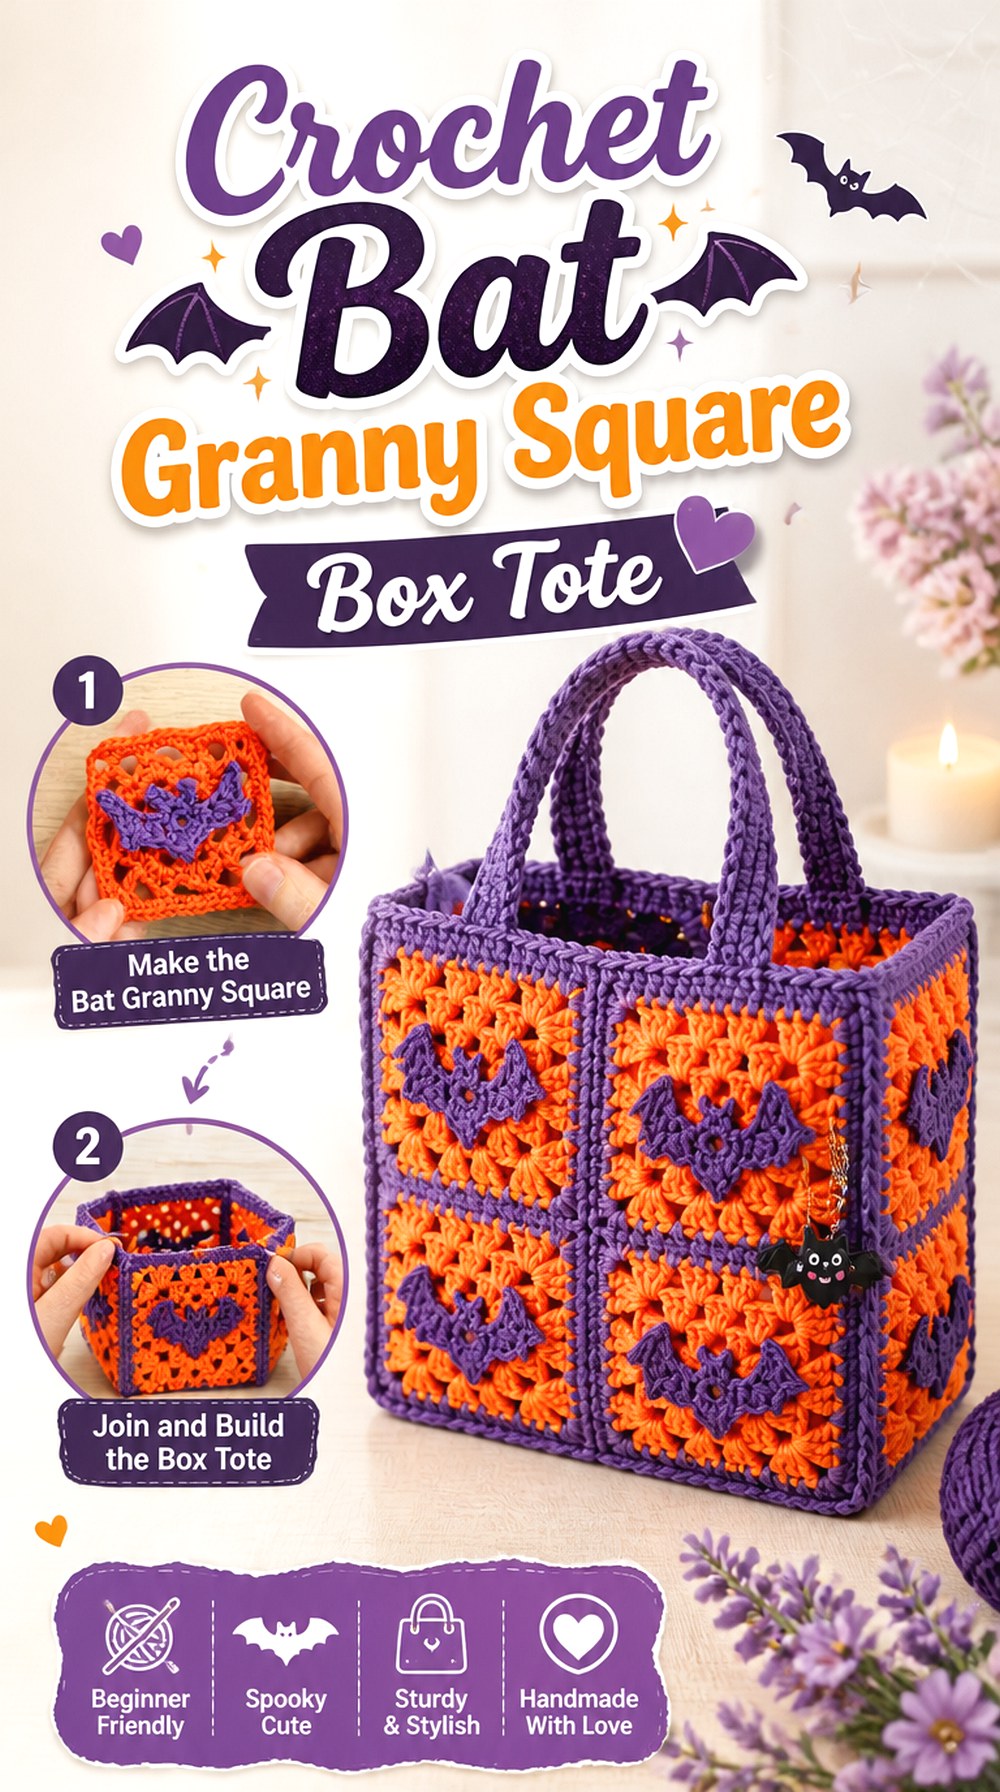
SAVEA bat granny square can become the focal panel of a boxier tote while the remaining sides stay simple. This approach gives the Halloween motif a defined frame and lets you choose a bag with more depth than a flat two-panel tote. Use one square as the central feature or coordinate it with plain squares sized to match after blocking.
HappyBerry Crochet’s tutorial focuses specifically on a bat granny square. It does not establish the complete tote structure, so the important planning step is matching the blocked motif dimensions to the tote construction you intend to use. A framed front panel is especially helpful when you want the bat to remain readable instead of disappearing into busy patchwork.
Block Before Designing the Surrounding Grid
A granny square can change dimensions after finishing or blocking. Complete the bat square first, then use its actual blocked dimensions when deciding how many companion blocks or border rounds the bag front needs. Designing the tote around an assumed measurement can create awkward joins later.
A Boxed Base Adds a Different Kind of Structure
Giving a tote depth changes how a square front panel behaves. The bat should remain mainly on the flat face instead of turning around a lower corner where part of the silhouette becomes hard to see. Plan the side and base depth separately from the motif panel.
Plain Companion Panels Can Strengthen the Focal Motif
Not every surface needs another bat. Solid or low-detail side and back panels can make a single motif more noticeable and reduce visual crowding. They also give you greater freedom to position handles without covering the wings.
Original Tutorial and Creator Credit
Creator: HappyBerry Crochet
4. Crochet Wing Silhouette Bat Crossbody Purse
 SAVE
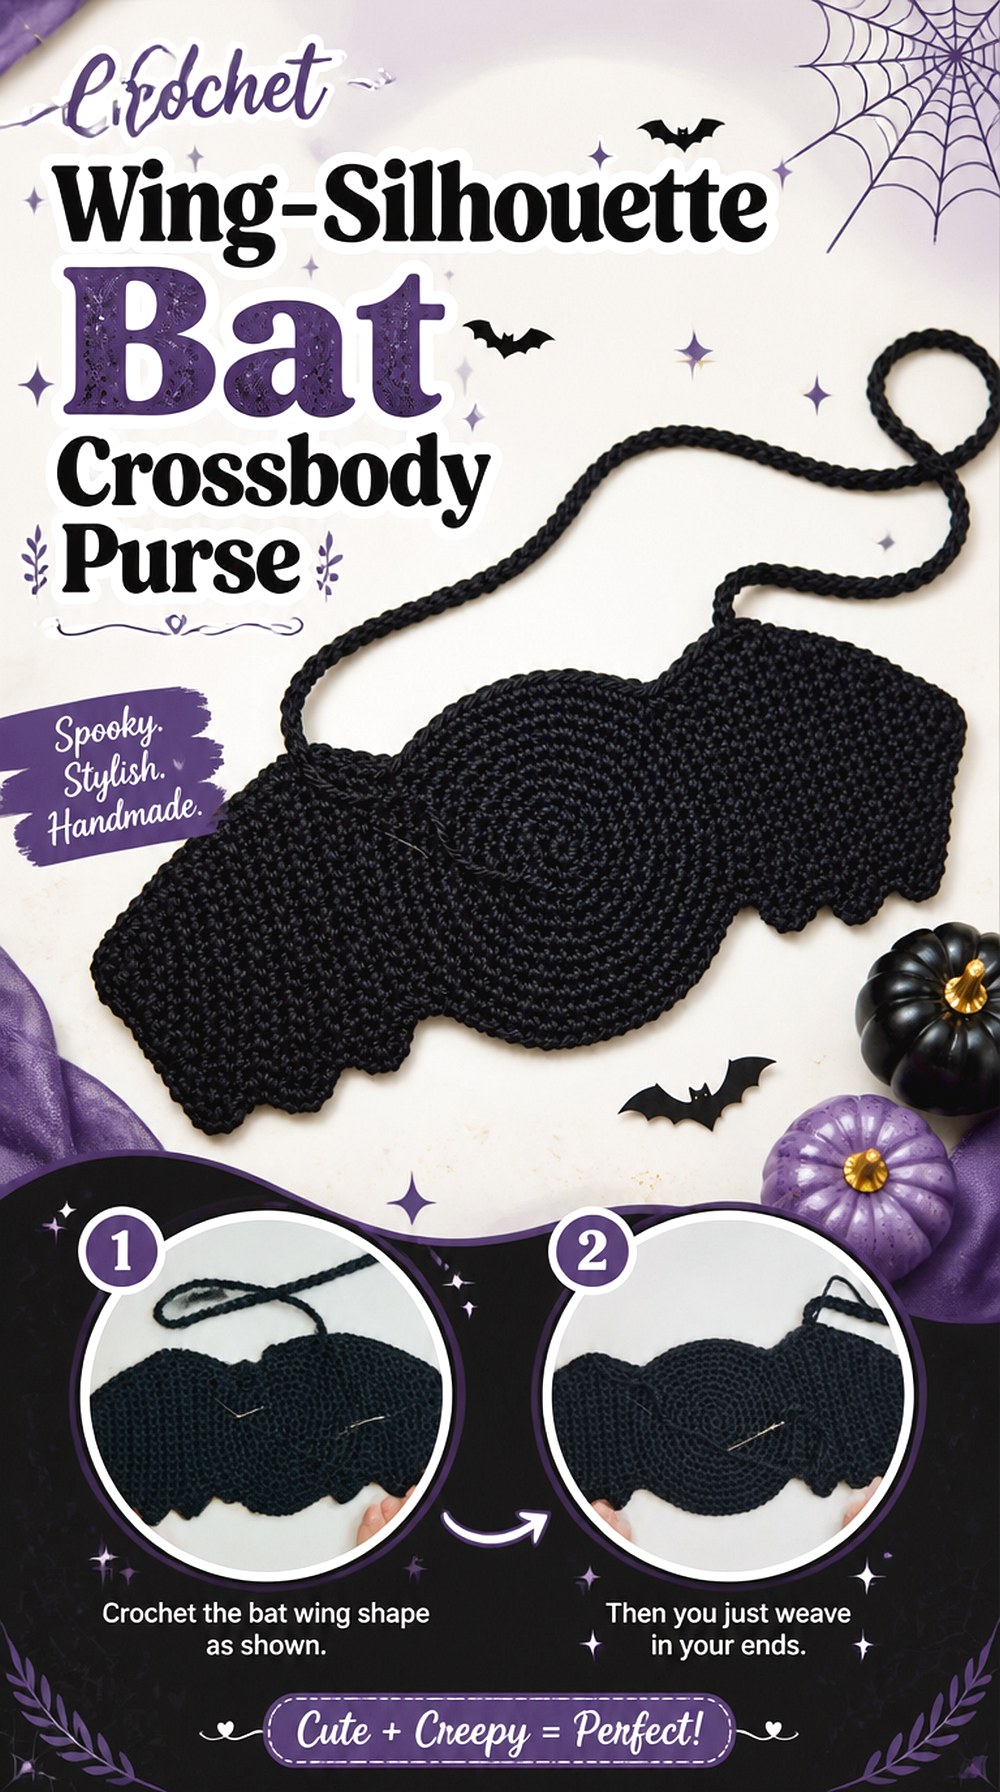
SAVEHere the bat silhouette defines the actual purse, creating a much stronger character shape than a rectangular bag with surface decoration. Stitch and Hound Crochet’s source is one of the complete bag tutorials in this collection, showing bat motifs worked into the finished purse and a strap rather than stopping at an appliqué.
This option stands out when the outline matters more than maximizing a conventional rectangular storage area. The wings create the broad horizontal visual, so keep them visible instead of adding extra decorations around them. If you plan to modify the strap or interior, make those decisions without interfering with the shaped outside edge.
Let the Wings Remain the Main Silhouette
Extra tassels, bulky side tabs, or large hardware near the wings can make the outline harder to read. If you want embellishment, concentrate it where it does not compete with the outer bat shape. The recognizable profile is already doing most of the decorative work.
Check the Opening Before Changing the Strap
A longer or differently positioned strap changes how a shaped purse hangs against the body. Before altering it, consider whether the purse still rests upright enough for the opening to function as intended. A dramatic silhouette is less useful if the contents naturally push toward an awkwardly angled opening.
Lining Should Follow the Interior, Not the Wings
If you decide to add lining, base it on the usable internal cavity rather than tracing every decorative point on the exterior. Keeping lining construction relatively simple can avoid unnecessary bulk in shaped edges while still helping contain smaller belongings.
Original Tutorial and Creator Credit
Creator: Stitch and Hound Crochet
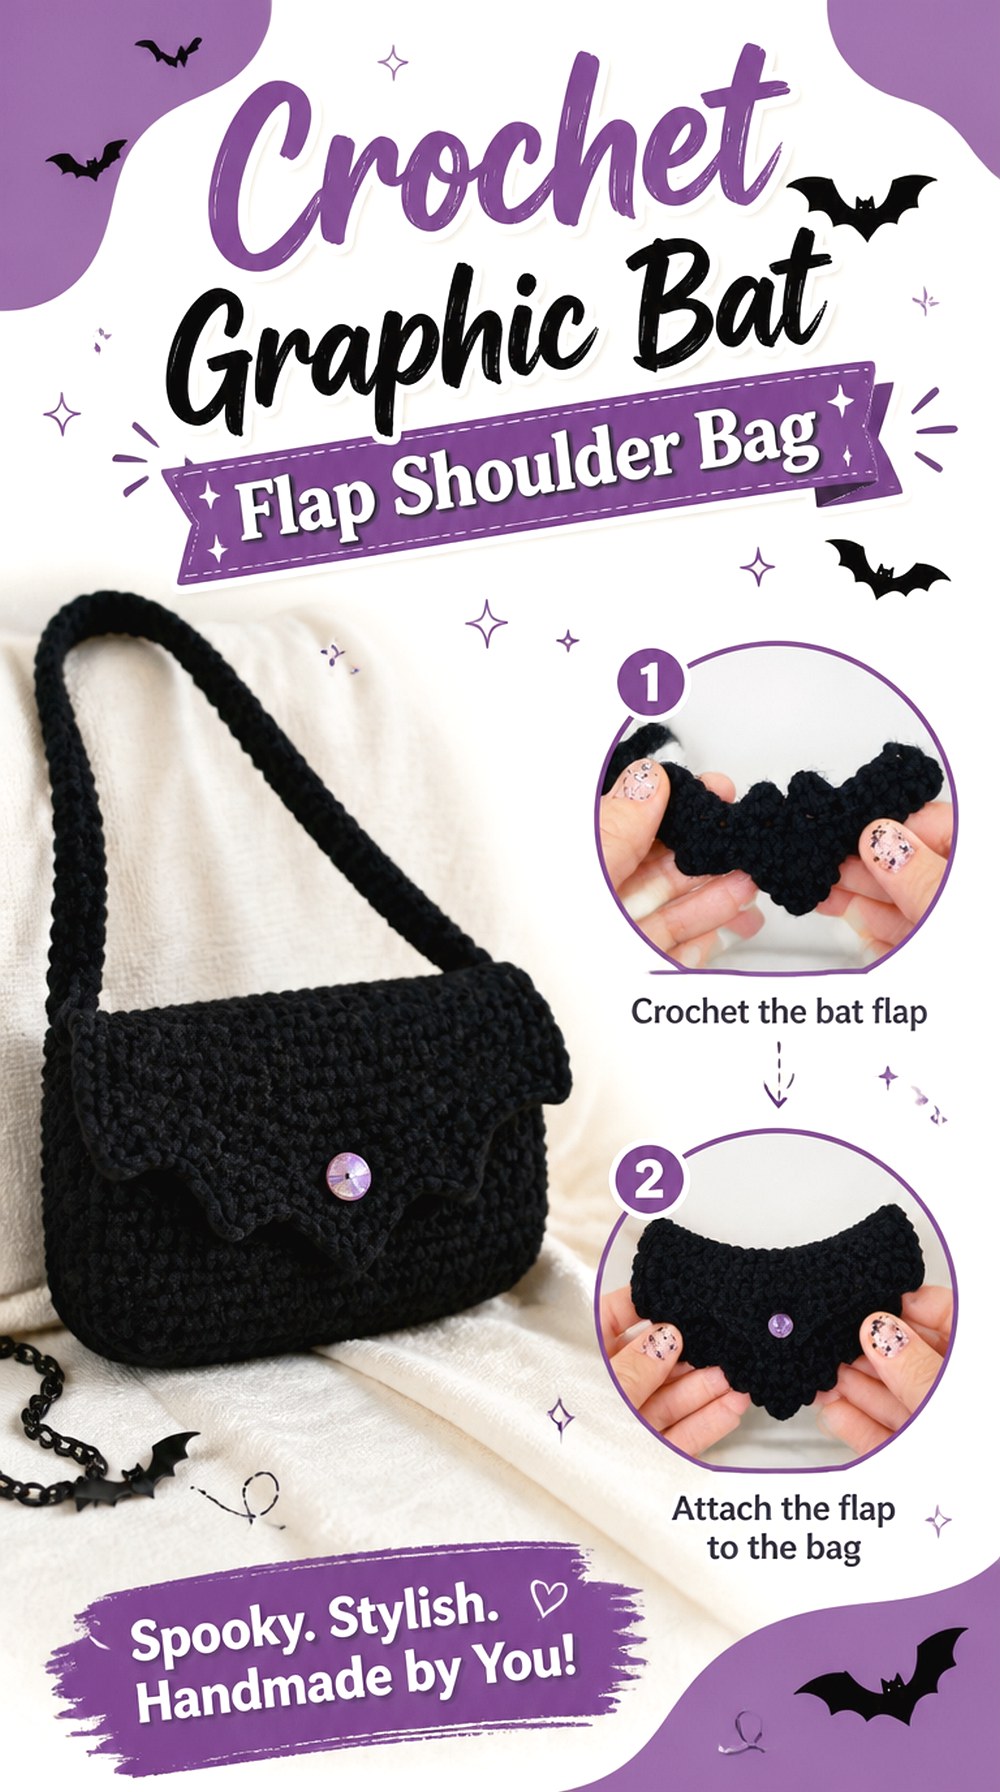
5. Crochet Graphic Bat Flap Shoulder Bag
 SAVE
SAVEA broad shoulder-bag flap gives a graphic bat motif a natural focal position. The Ahuyama Crochet source creates a bat appliqué associated with the Batman logo, so use the tutorial as visual inspiration for a bold winged motif while keeping intellectual-property considerations in mind if you are making products for sale or public branding.
For a personal bag, the graphic shape can work well on a plain flap where the wings remain easy to read. Because the tutorial is for an appliqué, not the shoulder bag itself, select a separate bag construction and confirm that the flap is large enough before making the motif.
Center the Motif on the Closed Flap
Position the bat while the flap is in its normal closed position, not while the bag lies completely unfolded. A motif that appears centered on the flat piece may sit too high once the flap bends over the opening. Pinning temporarily first makes this easy to check.
Keep Hardware Outside the Main Graphic
A visible turn lock, button, or buckle through the middle of a strong bat graphic can divide the silhouette. If your bag construction permits it, place fastening hardware where it does not interrupt the motif, or choose a different placement for the bat.
Commercial Use Needs a Separate Rights Check
The source title explicitly references the Batman logo. Making a generic bat bag and reproducing a recognizable protected logo are not necessarily the same thing. If the finished item will be sold, advertised, or branded, confirm the relevant rights rather than assuming a crochet rendition is automatically unrestricted.
Original Tutorial and Creator Credit
Creator: Ahuyama Crochet
6. Crochet Bat Square Drawstring Project Bag
 SAVE
SAVEA single bat granny square can give a drawstring project bag a seasonal front without requiring every surface to be motif crochet. Build the bag shape separately, then use the bat block as a featured panel or pocket-sized decorative section. The drawstring format creates a different function from a tote because the upper portion needs enough flexibility to gather.
The Knotting Perch tutorial supplies the bat granny square, so confirm the blocked square size before choosing the surrounding panel dimensions. Keep the motif below the gathering area; otherwise the bat may distort each time the top is pulled closed.
Separate the Motif Zone From the Drawstring Channel
The upper edge needs room to gather. Leave the bat square below that moving section so the wings stay flat and visible. If the motif extends too close to the channel, repeated opening and closing can make the design look compressed.
Build Width Around the Finished Square
Treat the blocked square as a known component and plan the surrounding fabric around it. If the project-bag body needs to be wider, borders or companion panels can expand the front without stretching the bat square itself out of shape.
Think About What Could Slip Through the Fabric
Project bags often hold small notions as well as yarn. If the granny-square fabric or joins leave openings that are larger than you want, consider lining or an internal pouch rather than relying on the outer crochet alone to contain small pieces.
Original Tutorial and Creator Credit
Creator: The Knotting Perch
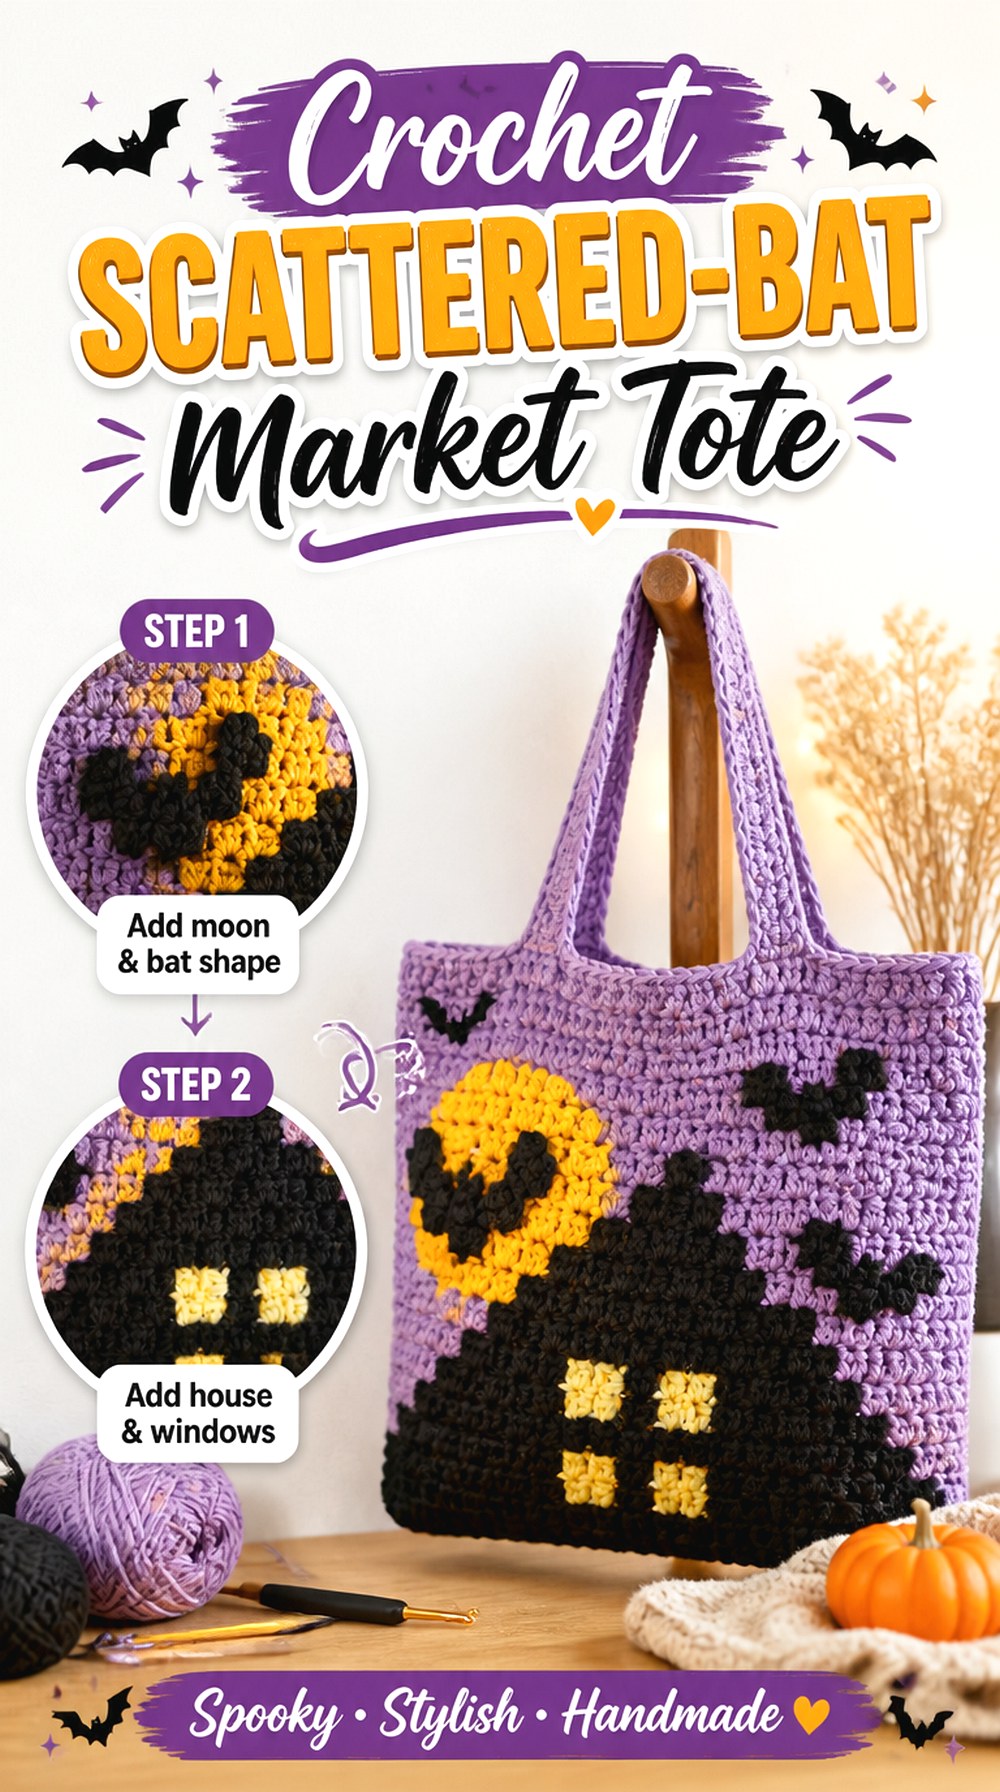
7. Crochet Scattered Bat Market Tote
 SAVE
SAVEInstead of one centered statement bat, repeat small flat bats across a larger tote front. The scattered arrangement gives the surface a print-like look and allows the negative space between motifs to become part of the design. RepeatCrafterMe’s source teaches an easy crochet bat appliqué rather than a full tote, making it suitable for this mix-and-place approach.
A market-style tote has enough visible fabric to experiment with several positions, but avoid placing delicate wing points where the bottom repeatedly rubs against surfaces. Complete the tote panel first, arrange all bats without fastening them, and only then commit to the final spacing.
Use Uneven Placement Deliberately
A scattered design does not need a rigid grid, but randomness still benefits from planning. Rotate or offset the bats while keeping enough space between them for every silhouette to remain distinct. Photographing the temporary layout can help you spot unintended empty zones.
Keep the Bottom Wear Zone Simpler
Appliqué edges positioned directly on the lowest corners may receive more abrasion when the bag is set down. Moving the decorative cluster higher preserves the visual effect while leaving the base easier to reinforce or clean.
Handles Should Frame Rather Than Cover the Design
Lay the handles or strap joins over the panel while testing motif placement. A bat tucked partly beneath a wide handle can look accidental. Either leave a clear vertical corridor for the handle attachments or intentionally design the bats around them.
Original Tutorial and Creator Credit
Creator: RepeatCrafterMe
8. Crochet Plush Bat Charm Drawstring Backpack
 SAVE
SAVEA soft three-dimensional bat can turn a simple drawstring backpack into a Halloween accessory without changing the backpack body itself. Attach the bat as a removable charm near the top or strap junction rather than sewing it permanently across the main storage area. That lets the dimensional element move freely without covering the drawstring channel.
Keep Calm and Crochet’s source focuses on a cute crochet bat rather than a backpack. The adaptation works best when you already have a bag construction and want one soft feature that can be removed after the season or repositioned when it gets in the way.
Choose an Attachment Point That Does Not Cinch
Do not fasten the charm directly through a part of the casing that must slide during opening and closing. A separate loop, sturdy tab, or appropriate removable attachment point can keep the bat clear of the moving drawstring.
Dimensional Bats Need More Clearance
A stuffed accent projects farther from the bag than an appliqué. Consider how the backpack will sit against a chair, car seat, or the wearer’s back. Hanging the bat near the outer top edge may be more practical than placing it where it will be continually compressed.
Removability Makes Seasonal Storage Easier
If the bat detaches, the backpack can continue to be used without the Halloween accent and the charm can be stored separately. It also makes cleaning simpler when the bag and stuffed component have different care needs. Check the yarn and filling care information used for each piece.
Original Tutorial and Creator Credit
Creator: Keep Calm and Crochet
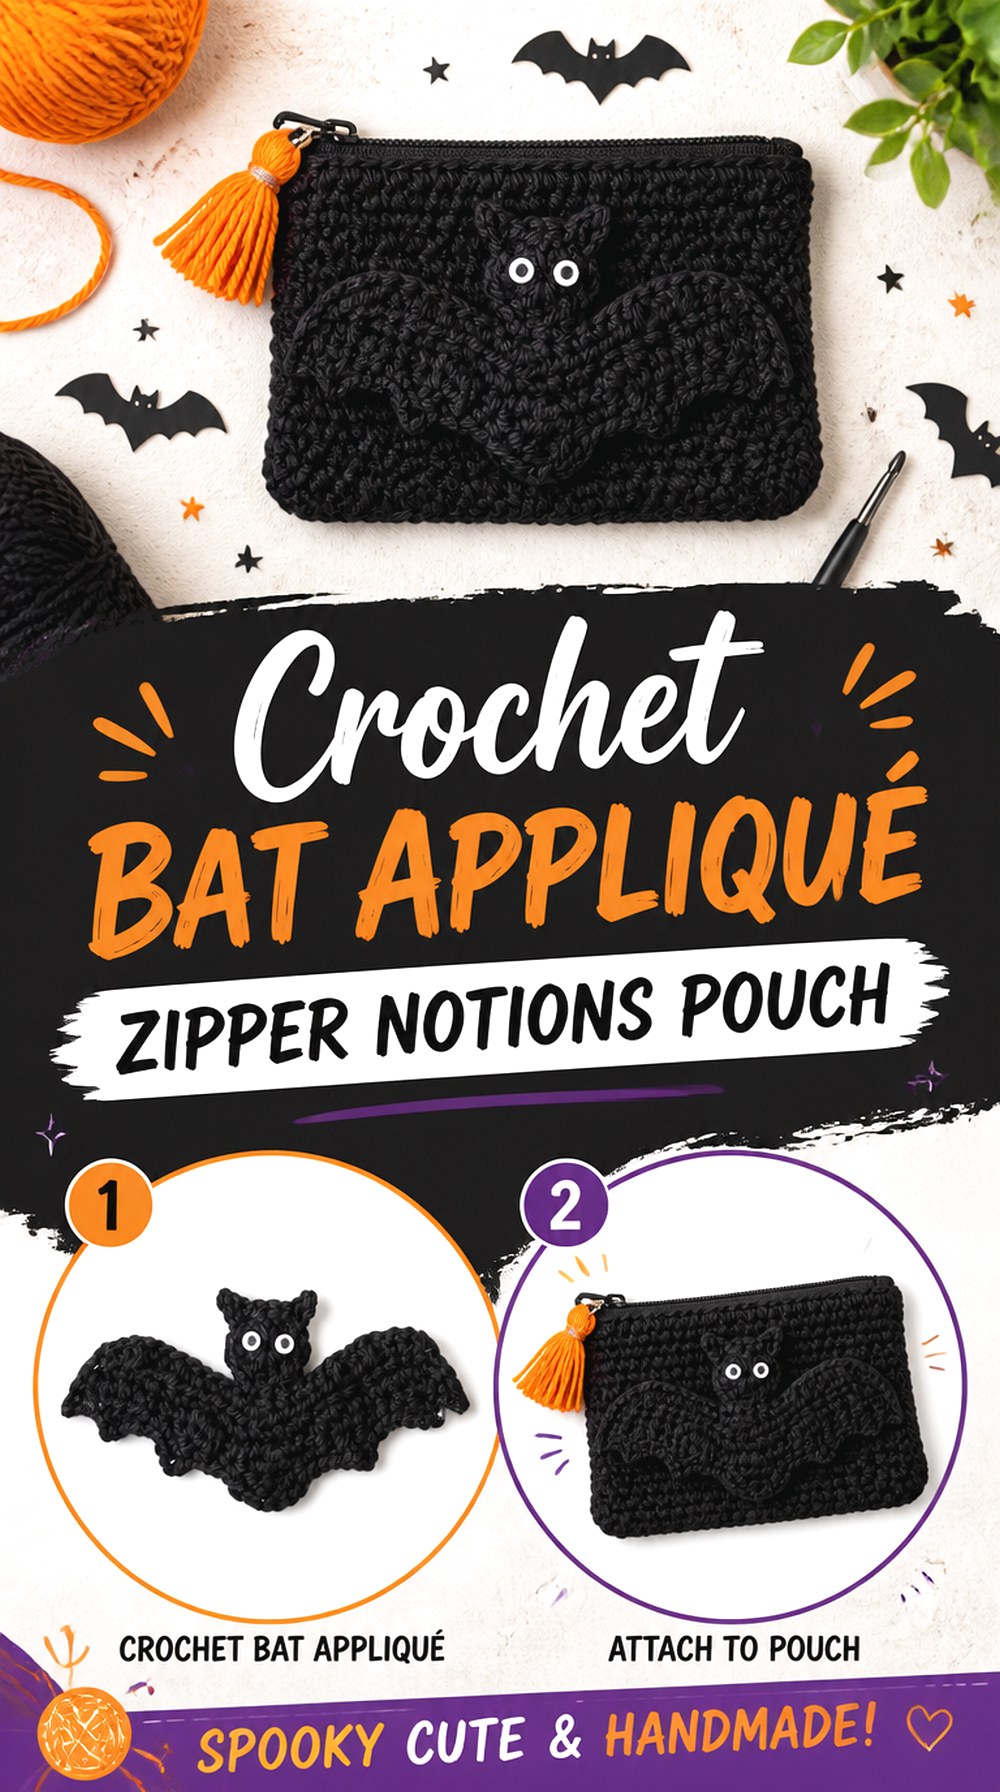
9. Crochet Bat Appliqué Zipper Notions Pouch
 SAVE
SAVEA small zipper pouch benefits from a single clear motif rather than a crowded layout. Place a flat bat on one face, leaving a deliberate gap below the zipper tape so the wings do not interfere with installation. GoldenLucyCrafts’ tutorial focuses on the bat appliqué, giving you a decorative component that can be attached to a pouch whose size and closure you choose separately.
This format works particularly well when you want a small seasonal organizer rather than a full purse. The compact front also forces you to think carefully about scale: the bat should be clearly visible without touching every edge.
Install or Mark the Zipper First
The exact sewing order depends on your chosen pouch construction, but you should know where the zipper will sit before committing to the appliqué position. That prevents wing tips from disappearing beneath the zipper area or making later assembly awkward.
One Strong Motif Can Fill a Small Front
A notions pouch does not need repeated bats. A single centered or slightly offset silhouette can provide enough visual interest while leaving a clean border around the edges. That border also gives seams and finishing space.
Consider a Lining for Tiny Contents
If the pouch will hold stitch markers, needles, or other small tools, evaluate the density of the crochet fabric. Lining may help prevent small pieces from catching in or slipping through the outer fabric, although it adds a separate sewing and care consideration.
Original Tutorial and Creator Credit
Creator: GoldenLucyCrafts
10. Crochet Mini Bat Keychain Phone Crossbody
 SAVE
SAVEA narrow phone crossbody does not offer the broad front panel of a tote, so a small detachable bat keychain makes more sense than an oversized appliqué. Hang it from a side tab, strap ring, or other suitable attachment point while keeping the opening unobstructed. The bag itself can remain simple and slim.
Fame art with Poonam’s source teaches an amigurumi bat keychain. That makes this idea particularly adaptable: the bat can move between bags instead of being permanently sewn to one project. Check the scale of the finished charm against the width of your chosen phone-bag construction before deciding where it belongs.
Keep the Charm Smaller Than the Bag’s Main Function
A phone crossbody should still open comfortably and sit reasonably flat. If a dimensional charm overwhelms the narrow pouch, move it to the strap attachment rather than the center front. The bat should decorate the carrier without blocking access to the phone.
A Side Tab Gives the Keychain a Clear Job
Instead of piercing the crocheted body repeatedly, plan a dedicated attachment point as part of the bag construction. That helps keep pulling forces away from decorative stitches and makes the charm easier to remove when you want a plainer look.
Check Small Parts Before Gifting
Amigurumi keychains may incorporate small facial or attachment components. For a bag intended for a young child, inspect every component and choose age-appropriate alternatives rather than assuming a decorative keychain is suitable for unsupervised use.
Original Tutorial and Creator Credit
Creator: Fame art with Poonam
11. Crochet Bat Square Patchwork Shoulder Bag
 SAVE
SAVEA patchwork shoulder bag can use several bat squares instead of relying on one front motif. The repeated blocks create a busier, more textile-like Halloween surface and make the joins part of the finished design. Pair bat blocks with simpler coordinating squares if using the motif on every panel feels visually dense.
Handmade with love’s source is a bat granny-square tutorial. Because it does not determine the finished shoulder-bag dimensions, make and block a sample square before deciding the grid. Matching square dimensions matters more here than on a single-motif bag because small differences accumulate when multiple blocks are joined.
Repetition Magnifies Small Size Differences
Two squares that look nearly equal on their own may not align cleanly across a larger panel. Compare blocked dimensions and border shape before joining a full set. Correcting inconsistent blocks first is less disruptive than forcing them into a finished grid.
Decide Which Direction the Bats Should Face
Repeated motifs can all face the same direction or change orientation intentionally. Lay out the entire front and back before joining so upside-down or sideways bats are a design choice rather than an assembly surprise.
Carry Straps Need Their Own Stable Zone
Do not assume a decorative join is the ideal place for shoulder-strap stress. Plan where the strap ends meet the bag and consider reinforcing that area independently, especially if the patchwork fabric is soft or open.
Original Tutorial and Creator Credit
Creator: Handmade with love
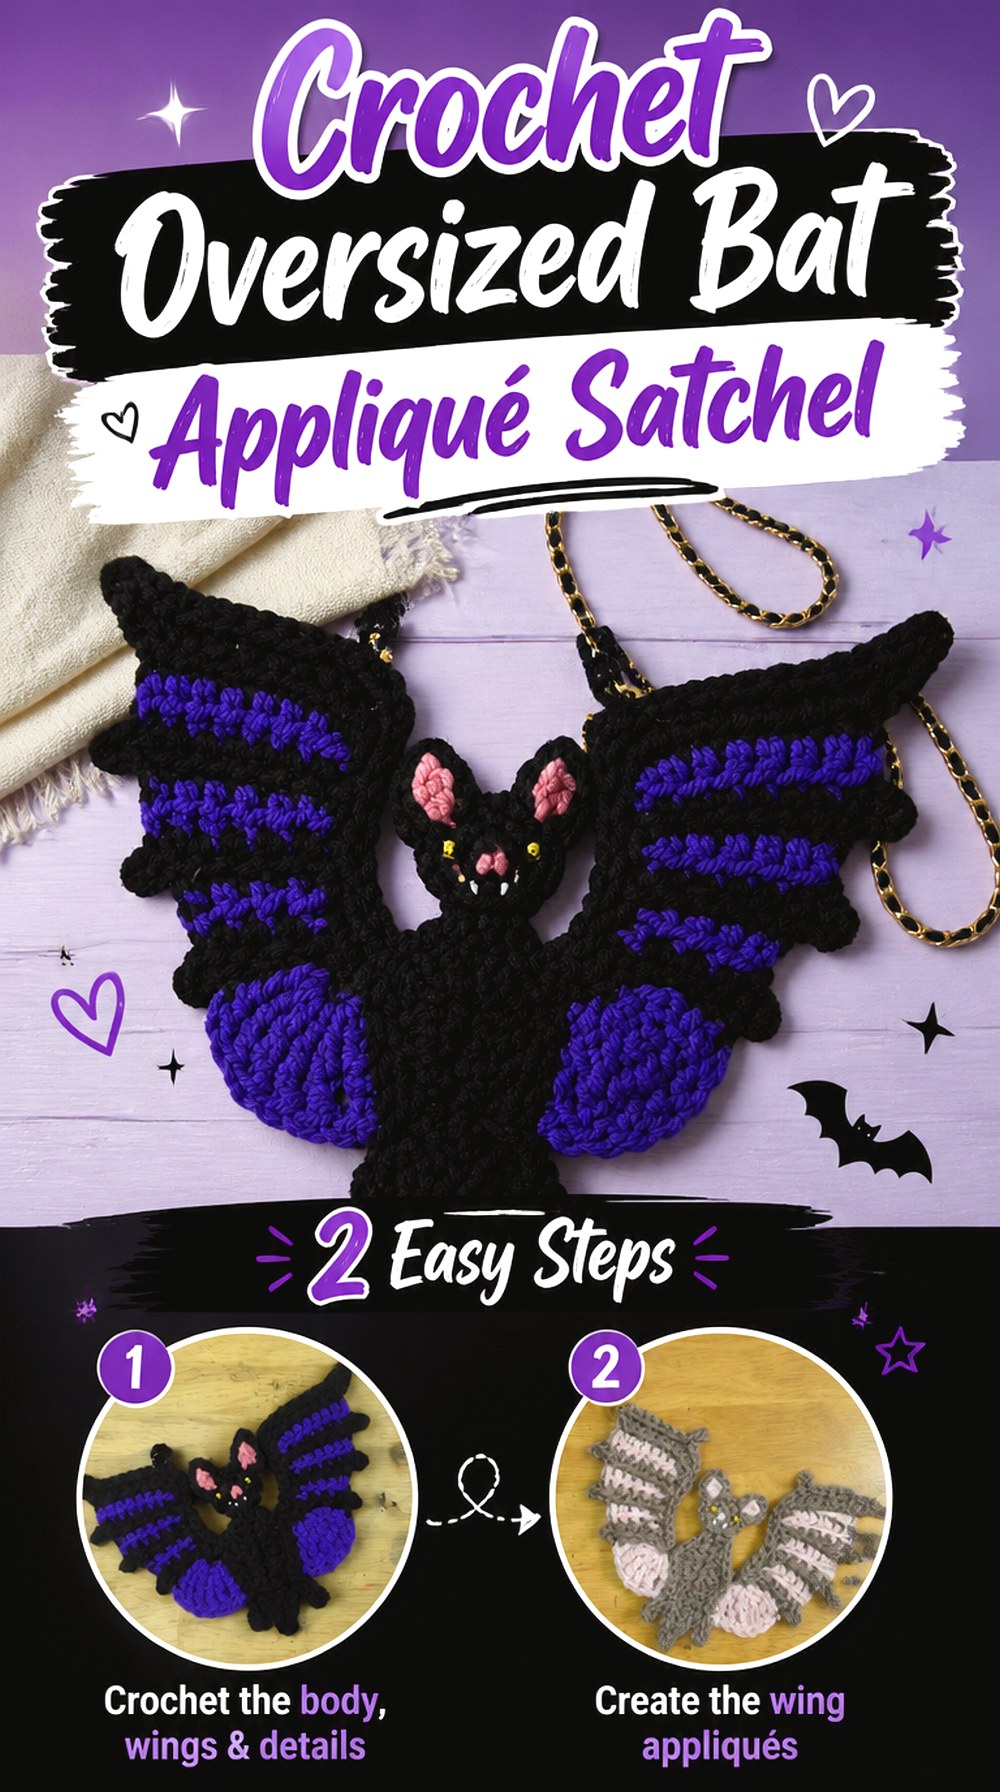
12. Crochet Oversized Bat Appliqué Satchel
 SAVE
SAVEA broad satchel gives a wide-winged bat appliqué enough horizontal room to become the main front feature. Lizfaerie Crafts’ bat has a clearly dimensional-looking head-and-wing arrangement while remaining an appliqué, making it a stronger surface statement than a tiny repeated motif.
The source teaches the appliqué rather than the satchel. Complete or plan the bag front first, then compare the available surface with the finished bat before sewing it on. Because the original design may include small decorative facial elements, decide whether those details suit the intended user and use before transferring the concept to a carried accessory.
Give the Wings an Uninterrupted Span
Large bat designs lose impact when side seams or pockets cut through them. A plain central front panel provides the clearest setting. If the satchel has an exterior pocket, decide whether the bat belongs on the pocket itself or above it rather than straddling two moving layers.
Surface Details Need to Suit the User
The associated pattern information mentions bead details as one possible facial treatment and specifically cautions against seed beads for babies or very young children. For a child’s bag, choose secure, age-appropriate alternatives instead of treating every decorative option as interchangeable.
Attach Pointed Edges With Carrying in Mind
Wide wings create several narrow tips that may catch if left loose. When applying the bat, check the full perimeter and decide which areas need secure attachment while still preserving the intended shape. Avoid pulling the appliqué so tightly that the satchel front puckers.
Original Tutorial and Creator Credit
Creator: Lizfaerie Crafts
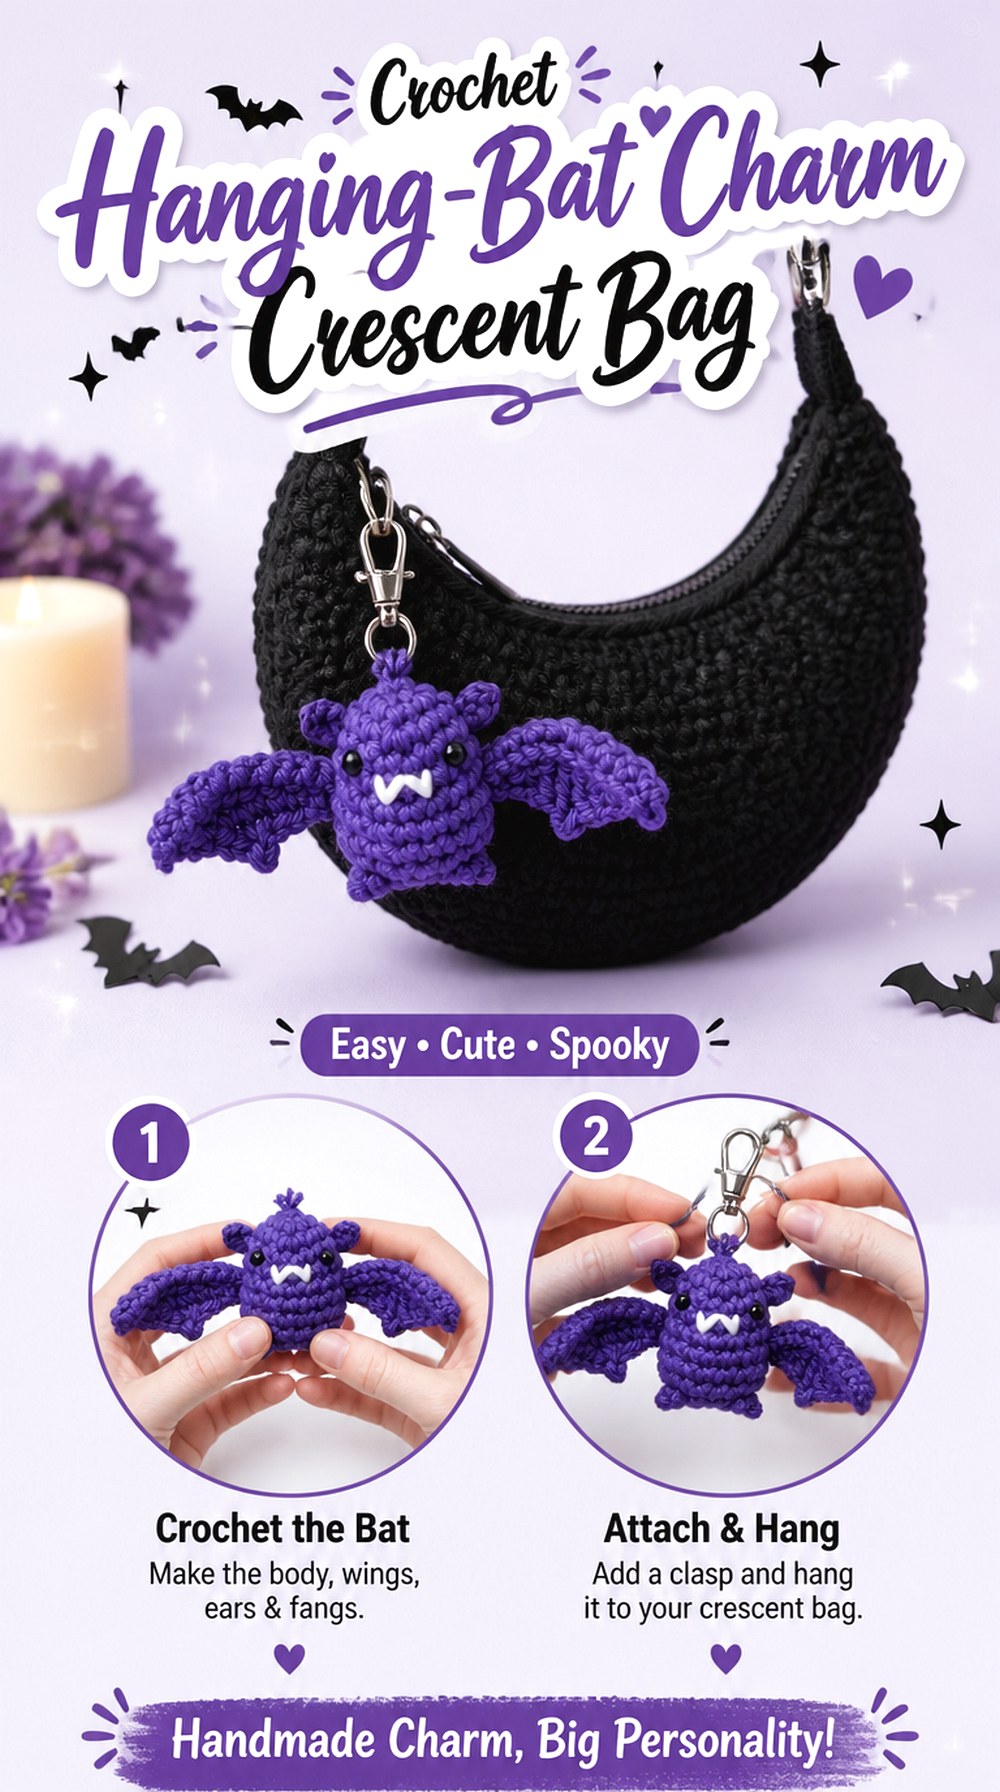
13. Crochet Hanging Bat Charm Crescent Bag
 SAVE
SAVEA crescent shoulder bag already has a curved silhouette, so a hanging bat charm adds movement without competing for a flat central panel. Attach one small bat near a strap connection so it hangs beyond the curved edge rather than being compressed against the bag body. This keeps the crescent shape and bat readable at the same time.
Club Crochet’s source teaches hanging crochet bats and includes options associated with poseable features. For a bag adaptation, decide whether you actually need those elements. A simple soft charm may be more appropriate for frequent carrying, particularly when the accessory could contact phones, cards, or other belongings.
Curved Bags Leave Less Flat Display Space
Trying to sew a dimensional bat across a rounded crescent panel can make it tilt unpredictably. Using it as a hanging accent lets gravity establish the orientation and leaves the curved bag surface free to flex.
Poseable Elements Change the Use Case
The source describes hanging bats with poseable features involving materials such as wire or magnets. Those additions may make sense for display but are not automatically desirable on a carried bag. Decide based on the intended wearer, surrounding belongings, and how the charm will be handled.
Keep the Bat Clear of the Zipper Path
Many crescent bags use an opening along the upper curve. Whatever closure your separate bag construction uses, attach the charm where it cannot swing into the zipper or other moving closure hardware.
Original Tutorial and Creator Credit
Creator: Club Crochet
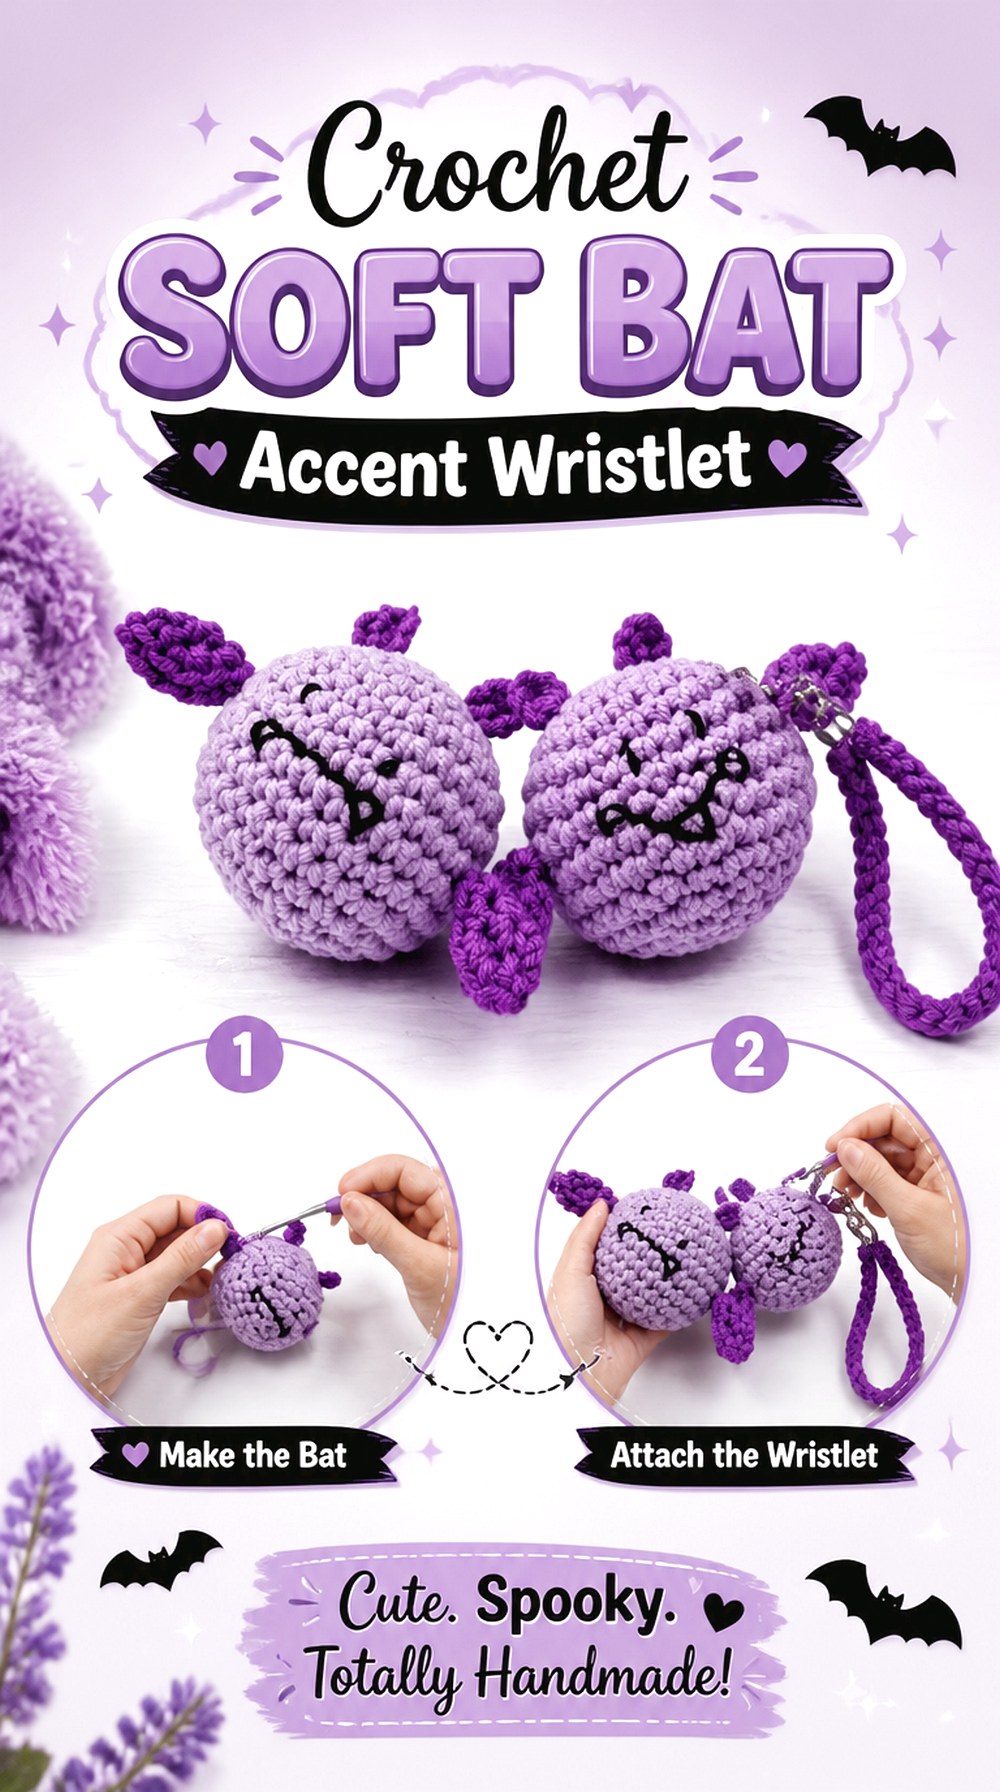
14. Crochet Soft Bat Accent Wristlet
 SAVE
SAVEA wristlet has very little spare surface and is constantly handled, so a small soft bat accent should stay compact. Position it near one side of the pouch or attach it at the wrist strap rather than covering the opening. That preserves the quick-access function while still giving the bag a strong seasonal detail.
Crochet Musings’ source teaches a complete crochet bat rather than a wristlet. Use the bat as a separate accent and choose a pouch construction independently. This version is especially different from the flat appliqué bags because the bat provides texture and movement rather than becoming part of the pouch panel.
Keep Bulk Away From the Hand Grip
A wristlet often rests close to the hand or wrist. A stuffed bat positioned directly where the bag is gripped can become uncomfortable or obscure the strap. Shift it toward the outer side so the decorative volume does not compete with handling.
A Small Attachment Loop Adds Flexibility
A dedicated loop gives you the option to remove the bat for storage, cleaning, or year-round use. It also avoids repeatedly fastening and unfastening through the body stitches of the pouch.
Coordinate Care for Two Different Components
A stuffed bat and a flat bag body may not dry or reshape in the same way. If the accent detaches, each piece can be cleaned according to its materials. Verify the yarn and stuffing care instructions rather than assuming the entire accessory can be treated identically.
Original Tutorial and Creator Credit
Creator: Crochet Musings
15. Crochet Plush Bat Charm Bucket Bag
 SAVE
SAVEA bucket bag offers enough height for a dimensional bat to hang from its upper edge while the drawstring or other closure remains functional. Use the plush bat as one prominent charm instead of trying to cover the curved bag body with a flat decoration. The rounded bag and soft creature create a more playful result than the graphic totes earlier in the list.
The crochetmezaddy tutorial focuses on a bat plushie, so this is an adaptation rather than a full bag tutorial. Decide on the bucket-bag construction separately and check the charm’s finished scale against the bag before choosing its attachment point.
Let the Charm Hang Beside the Opening
If the bat hangs directly over the center of the opening, it may need to be moved every time the bag is used. A side attachment lets the drawstring or closure work independently while keeping the character visible.
A Rounded Bag Changes How Flat Decoration Reads
Curved bucket walls can distort broad appliqués, which is why a hanging plush fits this format well. The bat remains three-dimensional regardless of the bag’s curve and does not need a broad flat panel to preserve its shape.
Keep Stuffed Details Away From Heavy Friction
A plush charm located at the very bottom may brush clothing or surrounding surfaces constantly. Higher placement near the bag’s top can reduce that friction and helps the bat remain visible when the bag is carried.
Original Tutorial and Creator Credit
Creator: crochetmezaddy
16. Crochet Bat Appliqué Belt Bag
 SAVE
SAVEA belt bag has a shallow, horizontally oriented front, which naturally suits a wide flat bat. Use one appliqué across the center while leaving clearance around the zipper, side seam, and strap attachment. Compared with a tote, there is much less room for error because almost every part of the panel contributes to fit or access.
Tiffany Bliss’ source teaches the bat appliqué rather than a finished belt bag. Make or measure the belt-bag front first, then decide whether the bat fits without wrapping around the sides. A smaller motif or partial placement may be preferable to squeezing a broad silhouette into insufficient space.
Horizontal Proportion Is the Main Constraint
The bat’s wings may suit the overall direction of a belt bag, but the height is limited. Check both dimensions, not just width. A motif that technically fits from side to side can still crowd the zipper or lower seam.
Leave Room for the Bag to Bend
Belt bags curve around the body. If a stiff or heavily attached appliqué spans the entire front, it may resist that movement. Keeping some plain fabric around the bat gives the bag room to flex more naturally.
Test Placement at the Intended Wearing Angle
Pin the bat temporarily and wear the empty bag before attaching it. A motif that appears level on a table may tilt once the strap is adjusted around the waist or worn crossbody.
Original Tutorial and Creator Credit
Creator: Tiffany Bliss
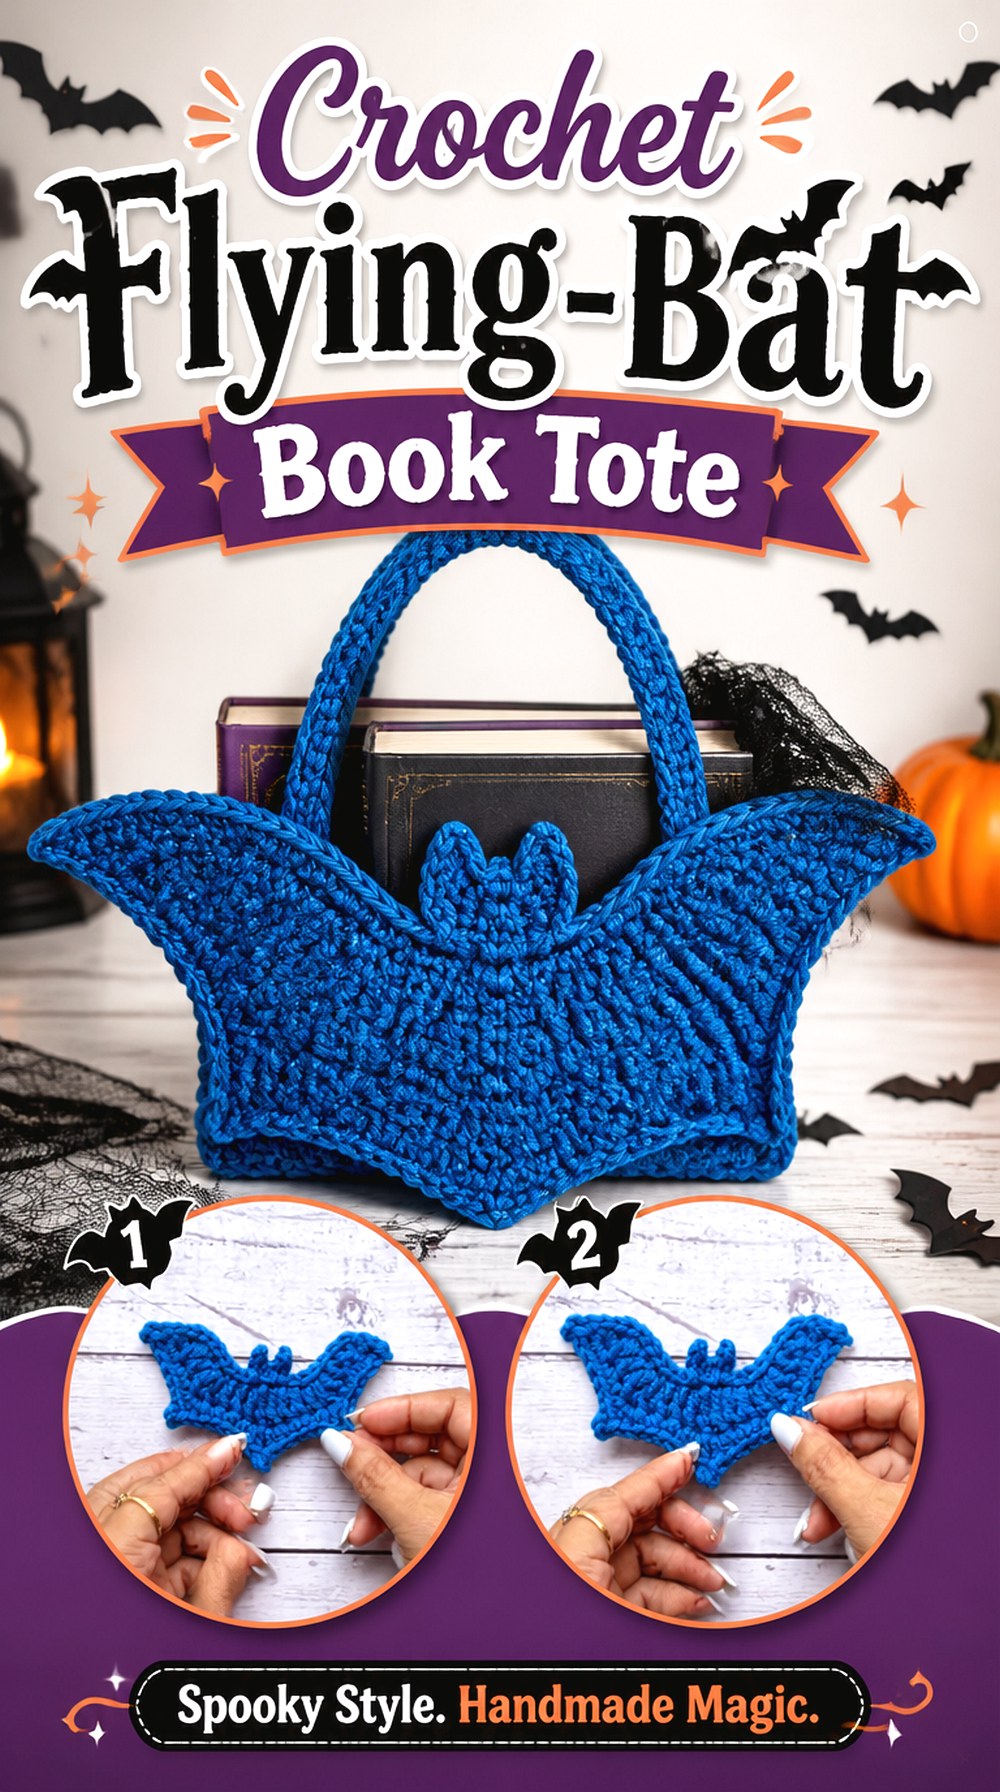
17. Crochet Flying Bat Book Tote
 SAVE
SAVEA tall rectangular book tote offers a broad canvas for a small flight of bats. Instead of one giant motif, arrange several flat bats rising diagonally from one lower corner toward the opposite upper side. This layout keeps the tote recognizable as a practical rectangular bag while giving the front more motion than a centered appliqué.
The Crochet Chemistry’s source teaches a bat appliqué that can also function as Halloween decoration. For this adaptation, repeat the motif only after making one sample and comparing its scale with the bag front. Leave clear areas around handle attachments and the base.
A Diagonal Layout Adds Movement Without More Colors
Changing orientation and spacing can create visual interest even if all bats use the same yarn. Start with the largest visual cluster low on one side, then experiment with wider gaps toward the opposite corner rather than forcing the motifs into straight rows.
Protect the Flat Reading Surface
A book tote often becomes slightly rounded when filled. Keep the most important bat shapes away from the extreme side edges, where the panel can turn away from view. The center two-thirds of the front usually offers a clearer display zone.
Reinforce Function Separately From Decoration
Books can make a bag demanding to carry, but the bat appliqués do not strengthen the tote. Choose a bag construction, strap system, and materials appropriate to your intended contents and avoid making unsupported capacity claims based on appearance alone.
Original Tutorial and Creator Credit
Creator: The Crochet Chemistry
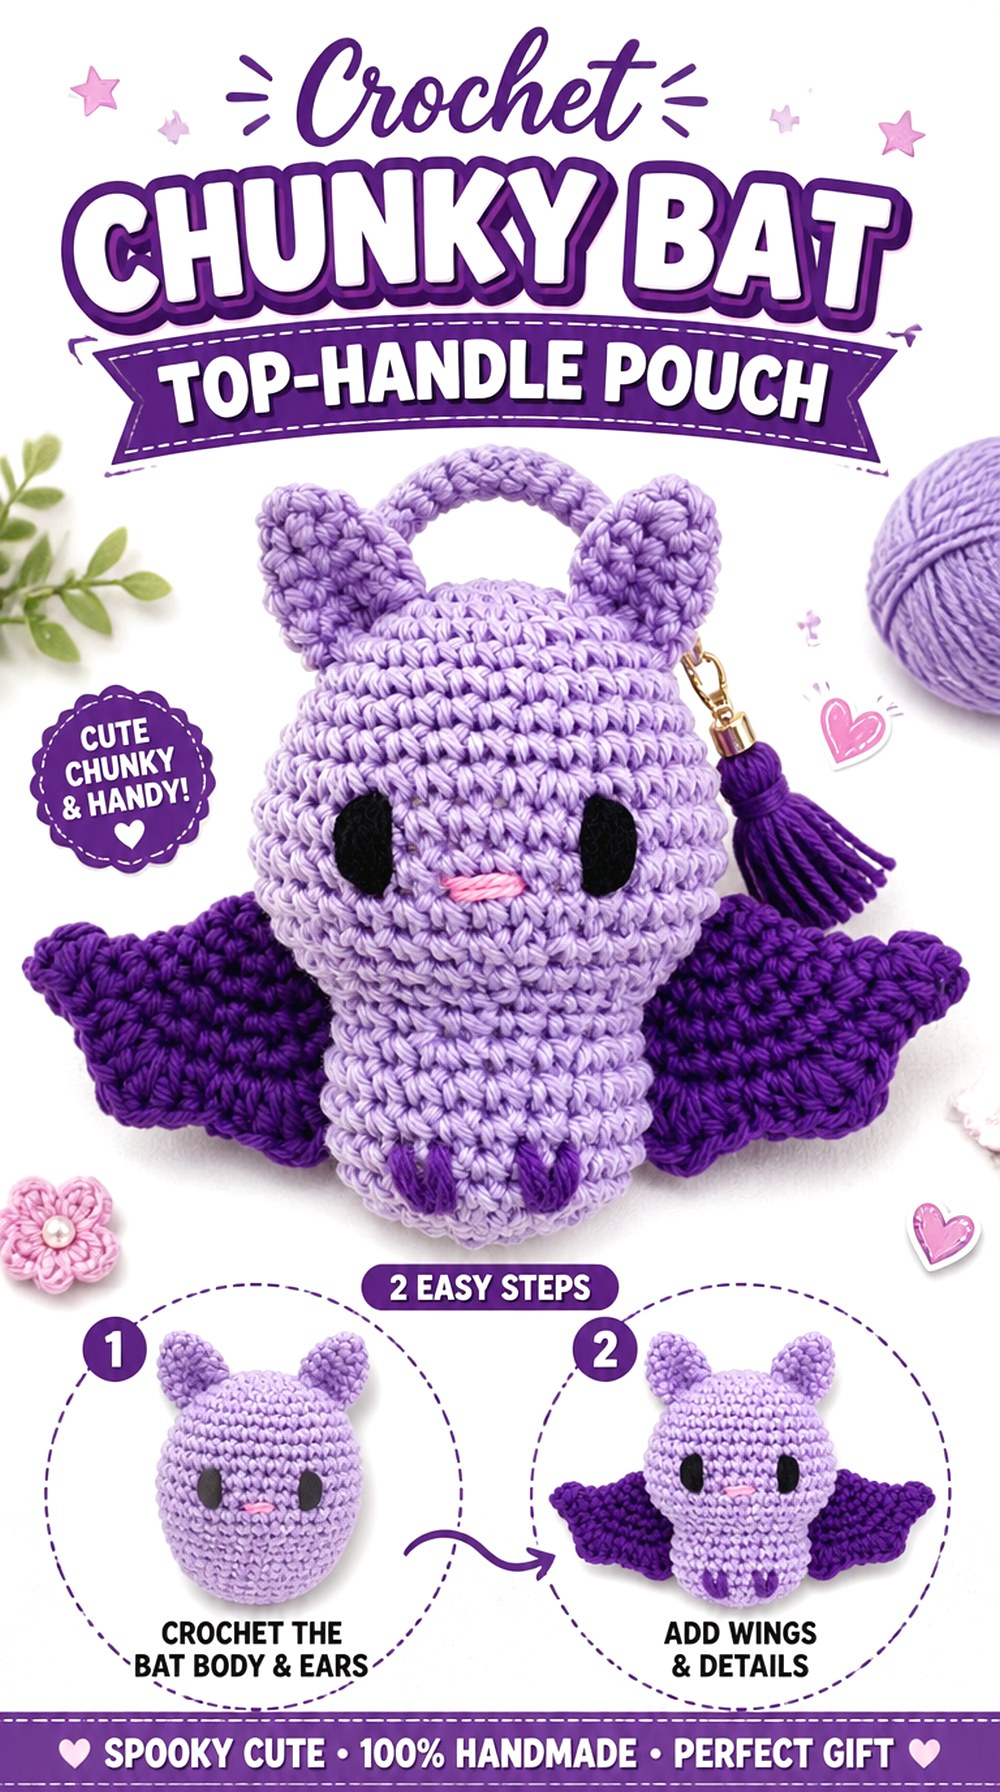
18. Crochet Chunky Bat Top Handle Pouch
 SAVE
SAVEA small top-handle pouch paired with a plush bat gives you a compact character bag without forcing the bag itself into a winged silhouette. Attach the bat to one side of the handle base or use it as a removable topper so the pouch opening remains easy to reach.
DIY Fluffies’ tutorial demonstrates an amigurumi bat and shows that the design can be worked with different yarn styles, including a softer bulky-looking treatment in the source presentation. For a bag adaptation, the key issue is proportion: a larger plush can quickly overwhelm a small pouch, so make the bat and bag sizes work together rather than assuming one scale suits every carrier.
The Handle Should Stay Easy to Grasp
Do not wrap a dimensional bat around the central part of a short top handle unless that is genuinely comfortable to hold. Offset attachment preserves a clean gripping area and prevents the charm from bearing the bag’s weight.
Chunkier Texture Makes the Accent Visually Heavier
A plush bat with substantial texture becomes a strong focal point. Pairing it with a simple bag body usually gives the design more clarity than adding additional dimensional decorations around it.
Balance the Bag Before Final Attachment
Temporarily clip or pin the finished bat to the pouch and lift the bag by its handle. If the accent makes one side tip noticeably, move it closer to the center or use it as a hanging charm rather than a permanently fixed side piece.
Original Tutorial and Creator Credit
Creator: DIY Fluffies
19. Crochet Amigurumi Bat Pocket Backpack
 SAVE
SAVEInstead of hanging a plush bat from a backpack, give it a defined home on the front. A shallow exterior pocket can hold or frame the amigurumi bat so the character appears to peek out while remaining removable. This creates a very different visual from a flat sewn appliqué and lets the bat double as a separate decorative object.
Brunaticality’s tutorial teaches an amigurumi bat, not the backpack. Choose the backpack structure independently and size the pocket around the completed bat rather than trying to predict the finished fit from yarn labels alone.
Build the Pocket Around the Finished Bat
Finish the bat first, then decide how much of it should remain visible. A pocket that is too deep hides the wings and face, while one that is too shallow may not retain the plush securely. The pocket is a display frame as much as storage.
Keep the Main Compartment Independent
The character pocket should not interfere with the backpack’s primary opening. If the main bag uses a zipper, flap, or drawstring, leave enough separation that removing the bat does not require opening the entire backpack.
Removable Plush Needs Secure but Simple Retention
If the bat is meant to come out, avoid sewing it permanently into the pocket. Instead, design the pocket itself to hold the character appropriately for the intended use. For children’s items, review any small parts on the amigurumi before treating it as a toy.
Original Tutorial and Creator Credit
Creator: Brunaticality
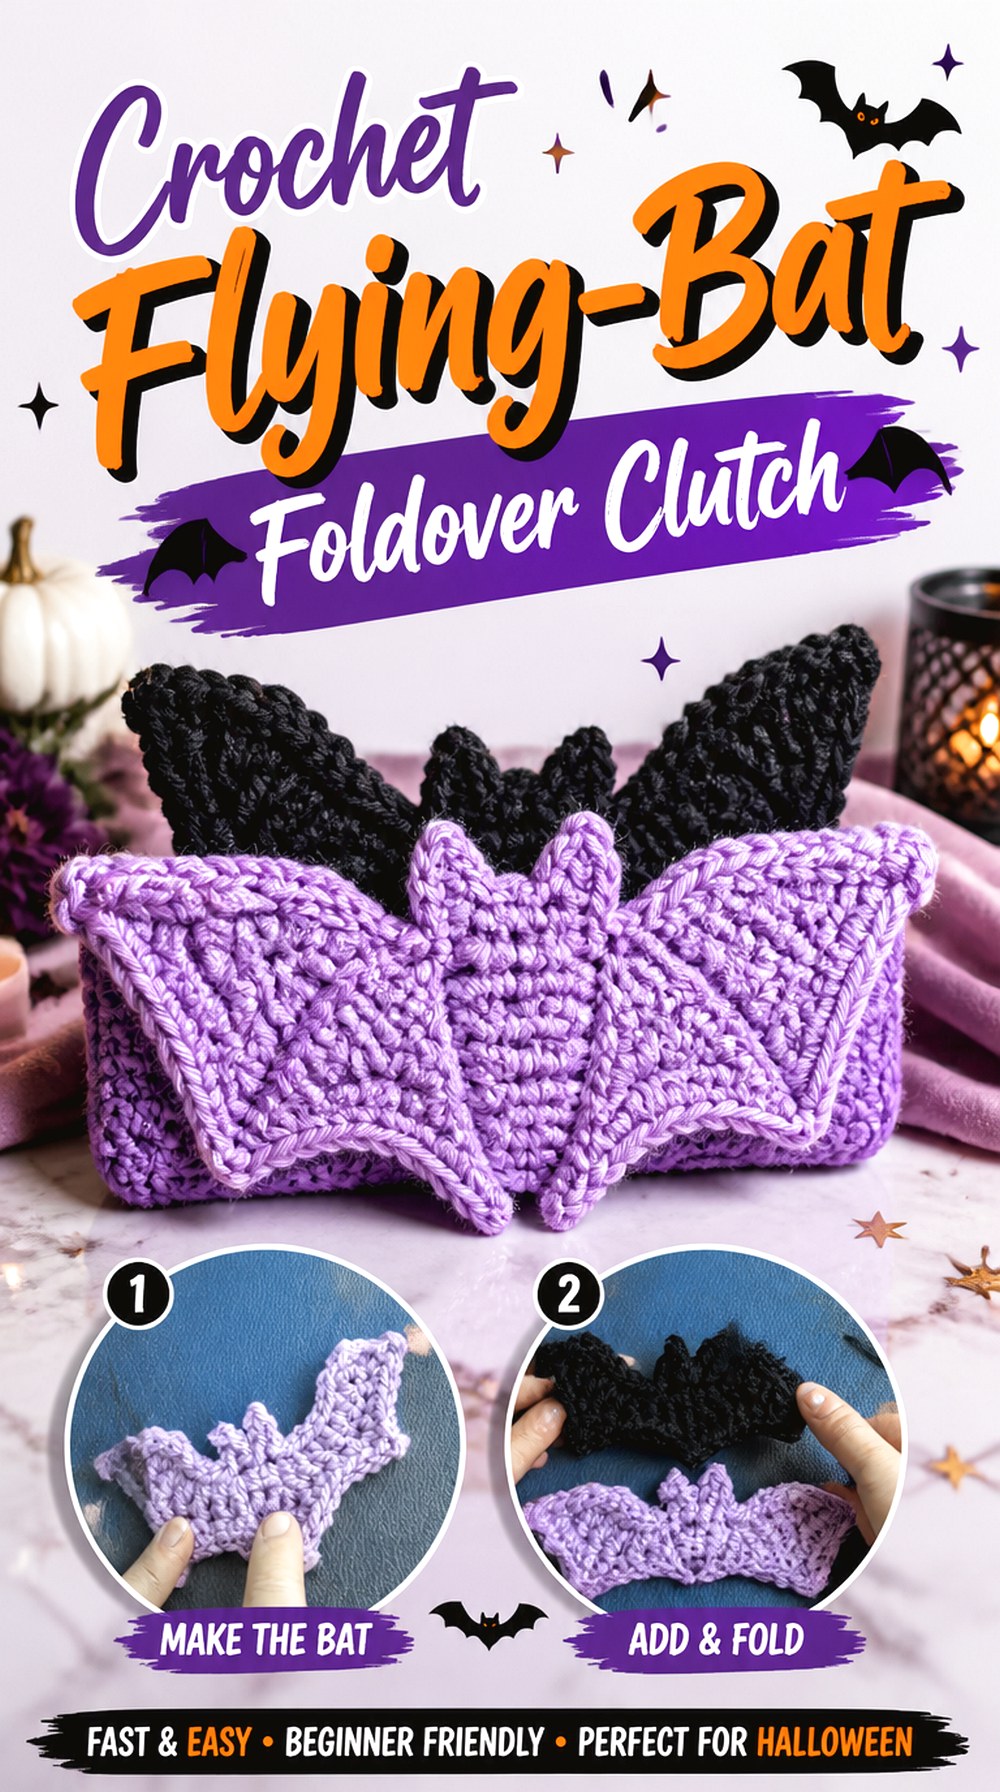
20. Crochet Flying Bat Foldover Clutch
 SAVE
SAVEA foldover clutch offers two visual states: fully open and folded for carrying. Arrange several quick flat bats on the lower front section so the motif cluster remains visible after the top portion folds down. Caro-stitched’s tutorial focuses on quick crochet bats, which makes it useful when you want repetition without relying on a single oversized centerpiece.
Because the clutch construction is separate, mark the final fold before arranging the bats. This project is less about one perfect central motif and more about creating a small swarm whose spacing still makes sense when the bag changes shape.
Design for the Folded View First
The clutch will usually be seen while folded, so use that as the primary composition. A bat positioned beautifully on the upper unfolded panel may vanish behind the fold during normal use. Mark the visible area before attaching anything.
Vary Angles Without Crowding the Silhouettes
Several similar bats can look lively if their wing directions and spacing differ. Keep enough background around each one that the shapes do not visually merge into a dark mass, particularly when both motifs and bag use deep colors.
Keep the Fold Line Flexible
Avoid placing thick joins or multiple appliqué layers directly across the area that must bend. A clean fold helps the clutch retain its intended shape and makes the bat placement look deliberate rather than distorted.
Original Tutorial and Creator Credit
Creator: Caro-stitched
21. Crochet Bat Charm Drawstring Crossbody Bag
 SAVE
SAVEA drawstring crossbody can carry a dimensional bat as a removable side charm while keeping the bag body simple. This option differs from the backpack version because the charm sits closer to the hip and may move more while walking, so attachment and scale deserve extra thought.
Loops and Knots Crochet’s source is a full bat tutorial rather than a bag construction. Use the finished bat as the decorative component and select a separate drawstring crossbody design. The source presents the bat as an intermediate-level project, so readers who mainly want a quick flat accent may prefer one of the appliqué options elsewhere in this collection.
Hip-Level Movement Changes Charm Placement
A charm at the lower side of a crossbody can bounce against the bag while walking. Position it high enough that the bat remains visible without constantly brushing surrounding surfaces or the wearer’s hand.
Do Not Share the Drawstring’s Working Loop
If the charm is attached directly to the cord that opens the bag, its weight can complicate tightening and loosening. Give it a separate stable loop or attachment point so the closure and decoration operate independently.
Choose Dimensional Detail for the Right Reason
A plush bat provides character and texture, but it is bulkier than an appliqué. Choose this version when the removable, three-dimensional look is part of the goal—not simply because it seems more elaborate.
Original Tutorial and Creator Credit
Creator: Loops and Knots Crochet
22. Crochet Bat Appliqué Everyday Tote
 SAVE
SAVEThe final idea keeps the bag itself deliberately simple: use a familiar rectangular tote construction and add one clean bat appliqué as a seasonal focal point. This is the easiest concept to adapt back to year-round use because the tote shape does not depend on Halloween styling. A contrasting removable panel or carefully placed appliqué can change the look without rebuilding the entire bag concept.
OhMeOhMyCrochet’s source teaches a crochet bat appliqué rather than a tote. That separation is useful if you already have a bag pattern whose structure, dimensions, lining, and handles you trust and only need a bat motif to personalize the front.
Give an Everyday Tote Plenty of Negative Space
One well-positioned bat often reads more clearly than filling the panel with additional Halloween objects. Leave enough plain fabric around the wings for the silhouette to remain distinct when the tote is being carried rather than displayed flat.
Add Decoration After Structural Decisions
Determine handle placement, top finishing, pockets, and any lining before deciding exactly where the bat belongs. Structural features should dictate the available decoration zone, not be awkwardly rerouted around an appliqué attached too early.
Removable Seasonal Styling Is an Option
If you want the tote to work outside Halloween season, consider attaching the bat to a removable accessory panel or using another nonpermanent concept appropriate to your bag construction. Make sure any attachment method remains secure enough for normal carrying and does not snag clothing.
Comparing the Four Main Crochet Bat Bag Styles
| Bat treatment | Ideas in this collection | Main advantage | Main planning issue |
|---|---|---|---|
| Bat-shaped complete bag | 1, 4 | The whole silhouette carries the theme | Opening, usable interior shape, and strap placement |
| Granny-square bat panel | 3, 6, 11 | Straight-edged motifs integrate easily into modular bags | Blocked square size and compatibility with surrounding panels |
| Flat bat appliqué | 2, 5, 7, 9, 12, 16, 17, 20, 22 | Flexible placement on many existing bag shapes | Clearance around folds, zippers, seams, and handles |
| Dimensional bat charm or plush | 8, 10, 13, 14, 15, 18, 19, 21 | Can often be removable and repositioned | Bulk, movement, secure attachment, and small-part suitability |
If you want the bat to dominate the entire accessory, start with one of the complete shaped bags. Granny-square options make more sense when you enjoy modular panel planning, while appliqués are the most flexible route for adapting a bag construction you already know. Dimensional bats work best when movement and character are worth the extra bulk.
Conclusion
The most useful way to choose among these 22 crochet bat bag ideas is to decide how deeply the bat should affect the construction. The one-piece messenger and shaped crossbody make the creature part of the bag itself. Granny-square versions suit modular totes and project bags, while flat appliqués let you add a bat to clutches, zipper pouches, belt bags, and everyday totes without redesigning the basic carrier. Plush and amigurumi bats are better when you want a removable accent with dimension.
Once you know which approach suits the intended use, check motif scale, opening clearance, strap placement, and fabric structure before committing. Use the original tutorials near each idea for the exact bat, square, or complete-bag construction they actually teach.
Frequently Asked Questions
Can I use a bat appliqué tutorial to make a complete crochet bag?
Yes, but the appliqué tutorial only solves the decorative part. You still need a suitable bag construction for the body, base, opening, straps, and any lining or closure. Make the bag panel—or at least establish its finished dimensions—before deciding on motif scale. This keeps the bat from covering seams, zipper areas, handle attachments, or folds that the separate bag construction needs.
Should I choose a bat granny square or a separate bat appliqué?
Choose a granny square when you want the bat built into a modular panel with straight outer edges. It is useful for patchwork totes and square-front bags, but the blocked square dimensions need to match the surrounding construction. Choose an appliqué when you want more freedom to position the bat on an already completed or planned surface. Appliqués also make asymmetric and repeated layouts easier.
When is lining worth considering for a crochet bat bag?
Lining is worth considering when the outer crochet has openings that could lose small items, when you want more separation between contents and decorative stitching, or when the chosen bag construction benefits from additional internal support. It is not automatically required for every bag. Check whether your complete-bag tutorial includes lining; motif and amigurumi tutorials generally do not establish how the finished carrier should be lined.
How do I stop a bat motif from being hidden by the bag hardware?
Mark all fixed and moving features first: handles, strap tabs, zipper path, flap fold, drawstring channel, buttons, and pockets. Then temporarily position the bat and view the bag in its normal closed and carried state. This is especially important with wide wings, because a motif that looks centered on a flat panel may be partly covered once the bag is assembled or worn.
Why might a crochet bag strap stretch even when the bat motif looks firm?
The motif and strap are separate structural issues. A dense bat appliqué or granny square does not prevent a long crocheted strap from lengthening under use. Fiber characteristics, stitch structure, strap length, and reinforcement all affect how the strap behaves. If stretch matters, choose or adapt a bag construction with that concern in mind rather than assuming the decorative bat provides reinforcement.
Can I make a bat bag for a child?
You can adapt many bat themes for a child’s bag, but assess every component individually. Small beads, detachable eyes, charms, magnets, wire, long cords, and loosely attached embellishments may change suitability. Some source tutorials are designed as general decorations or amigurumi rather than children’s accessories. Choose secure, age-appropriate finishing and do not infer child safety simply because the finished bat looks cute.
What is the easiest way to make a bat bag without changing a bag pattern I already use?
A flat appliqué is generally the least disruptive approach because the existing bag body can stay unchanged. Complete the relevant panel or establish where the seams, closure, and handles will be, then position a bat where it will remain visible and flat. A detachable bat charm is another flexible option if you want seasonal decoration without permanently attaching a motif to the fabric.