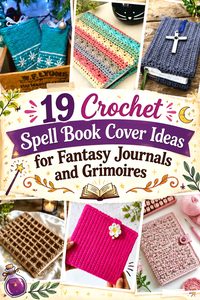
A crochet spell book cover can lean theatrical, scholarly, botanical, antique, or quietly mysterious without relying on black yarn and a pentagram for every design. The most useful choices also differ in function. Some fitted jackets stay on a journal while you write, while removable sleeves protect a favorite book during storage or travel. Texture, closure style, motif placement, and added dimension can change both the mood and how practical the finished piece feels.
The ideas below use real crochet book-cover and book-sleeve tutorials as construction references, then explore ways those formats can suit fantasy journals, grimoires, campaign notebooks, reading journals, or decorative display books. You will find tapestry panels, lace, granny motifs, plaid surface work, bobbles, dense textures, dimensional details, ties, buttons, and more. The goal is to help you choose a structure first and develop the spell-book character around it.
Quick List
- Crochet Stitched-Eye Spell Book Cover
- Crochet Diamond-Tapestry Grimoire Jacket
- Crochet Dark-Academia Plaid Spell Book Sleeve
- Crochet Antique-Lace Grimoire Cover
- Crochet Retro-Cluster Spell Book Sleeve
- Crochet Toadstool Spell Book Sleeve
- Crochet Mini-Motif Patchwork Spell Book Cover
- Crochet Heart-Sigil Spell Book Cover
- Crochet Botanical-Tapestry Spell Book Cover
- Crochet Triple-Tie Spell Book Sleeve
- Crochet Magnetic-Clasp Spell Book Cover
- Crochet Crossover-Stitch Spell Book Jacket
- Crochet African-Flower Spell Book Sleeve
- Crochet Waffle-Texture Spell Book Sleeve
- Crochet Spiked-Sedge Four-Tie Spell Book Case
- Crochet Vintage Paperback Spell Book Cover
- Crochet Linked-Double-Crochet Spell Book Cover
- Crochet Bobble-Rune Spell Book Cover
- Crochet Frost-Rune Mosaic Spell Book Sleeve
Decide Between a Fitted Cover and a Protective Sleeve
Start with how you want to use the book. A fitted jacket normally wraps the front cover, spine, and back cover, often with inner flaps that hold it in place. That format works well for a journal or grimoire you want to open frequently without removing the crochet piece. A sleeve is different: the entire book slips inside, making the crochet fabric more useful as protection during storage or transport.
Book thickness matters as much as height and width. A thick journal can pull a seemingly correct rectangle too tightly across the spine, while excess width may leave a slim paperback sliding around inside a sleeve. Check the actual book with the crochet fabric relaxed rather than relying only on nominal book dimensions. Also consider future embellishments. Raised eyes, flowers, bobbles, appliqués, and buttons add bulk that may affect shelving or carrying.
Choose Fabric for Structure, Detail, and Daily Handling
Spell-book styling often depends on surface detail, but not every stitch fabric behaves the same way. Dense crochet can support graphic motifs and help a cover keep a defined outline, while lace and open granny fabrics produce a lighter, more decorative result. Highly textured stitches may make a plain color feel substantial without requiring extra appliqués.
Yarn substitution can change more than appearance. A thicker or heavier yarn may create a bulkier spine and stiffer flap, while a softer yarn can stretch more around a loaded sleeve. When a project uses tapestry colorwork, surface crochet, mosaic work, or multiple motifs, consistent tension becomes especially important because uneven sections may alter the final dimensions. If you intend to line a sleeve, decide before finishing the edges; the lining needs enough room for the book without forcing the crochet shell outward.
Plan Closures and Embellishments Around the Book
Buttons, ties, loops, magnetic closures, and wraparound straps can all strengthen a spell-book theme, but the closure should suit the construction. A button placed under excessive tension can distort a soft front panel. Long ties can create an appealing old-manuscript look, yet they need enough flexibility to wrap comfortably without crushing the book corners.
Treat raised decoration as part of the structure rather than an afterthought. Large eyes, leaves, mushrooms, flowers, bobbles, charms, or embroidered lines are easiest to position when you know where the spine, hinge, and closure will sit. Keep bulky additions away from areas that need to fold repeatedly. If you add hard beads, charms, or other non-yarn embellishments, consider how the book will be stored; a decorative cover that looks impressive on display may need gentler handling than a flat everyday journal cover.
1. Crochet Stitched Eye Spell Book Cover
 SAVE
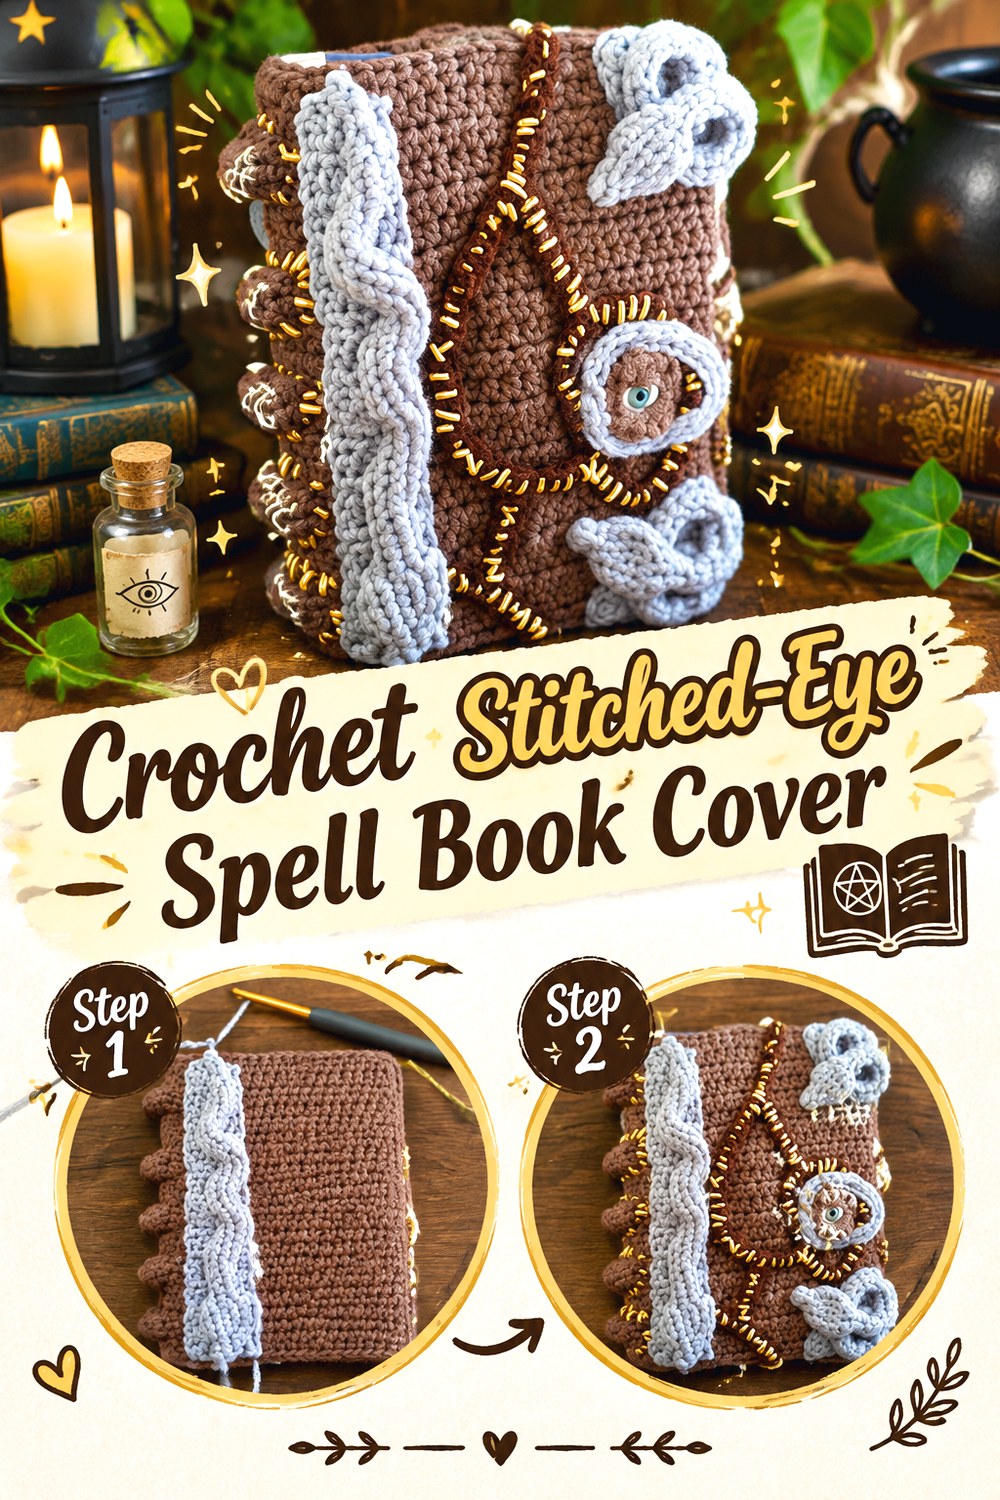
SAVEFor the most immediately recognizable grimoire look, build the design around a dramatic central eye and raised surface details rather than color alone. Crochet by Coraggio’s Hocus Pocus-inspired cover uses an eye, snake-like elements, scar details, and a rectangular cover structure that can be adjusted around a book. Those elements make it a useful reference for anyone who wants a deliberately aged, enchanted-object appearance instead of a conventional notebook cozy.
An editorial variation could use earthy browns, mossy greens, or charcoal tones and reinterpret the surface details as vines, stitched runes, roots, or magical seals. Because the relief is substantial, this concept is especially suited to a display grimoire or journal that will not be tightly packed between other books.
Make the Eye a Focal Point, Not an Obstacle
A dimensional eye immediately dominates the cover, so establish its location in relation to the book’s hinge and opening before adding surrounding decoration. Keeping the main raised feature away from the spine allows the cover to flex more naturally. If you substitute another centerpiece—such as a crocheted crystal, moon, beetle, or cabochon-style motif—compare its thickness with the way the book will be stored. A very raised centerpiece can be visually effective but inconvenient on a crowded bookshelf.
Control the Raised Surface Details
Scars, cords, vines, and serpent-like appliqués can make a flat rectangle look much more sculptural, but extra layers also add weight and stiffness. Arrange decorative lines so they reinforce the composition instead of clustering around one edge. If a piece begins to curl after embellishment, the added surface work may be changing tension across the base fabric. Light reshaping may help, but the better approach is to distribute bulky details before everything is permanently attached.
Think About Shelf Contact
Hard or strongly raised embellishments may press against neighboring books, especially when the journal is stored upright. For a frequently handled notebook, softer crochet appliqués are generally easier to live with than rigid decorations. A cover intended mainly for photographs, costume use, or altar-style display can tolerate more dimension. Matching the embellishment level to the real use prevents a visually dramatic cover from becoming awkward every time you open or store the book.
Original Tutorial and Creator Credit
Creator/Site: Crochet by Coraggio
2. Crochet Diamond Tapestry Grimoire Jacket
 SAVE
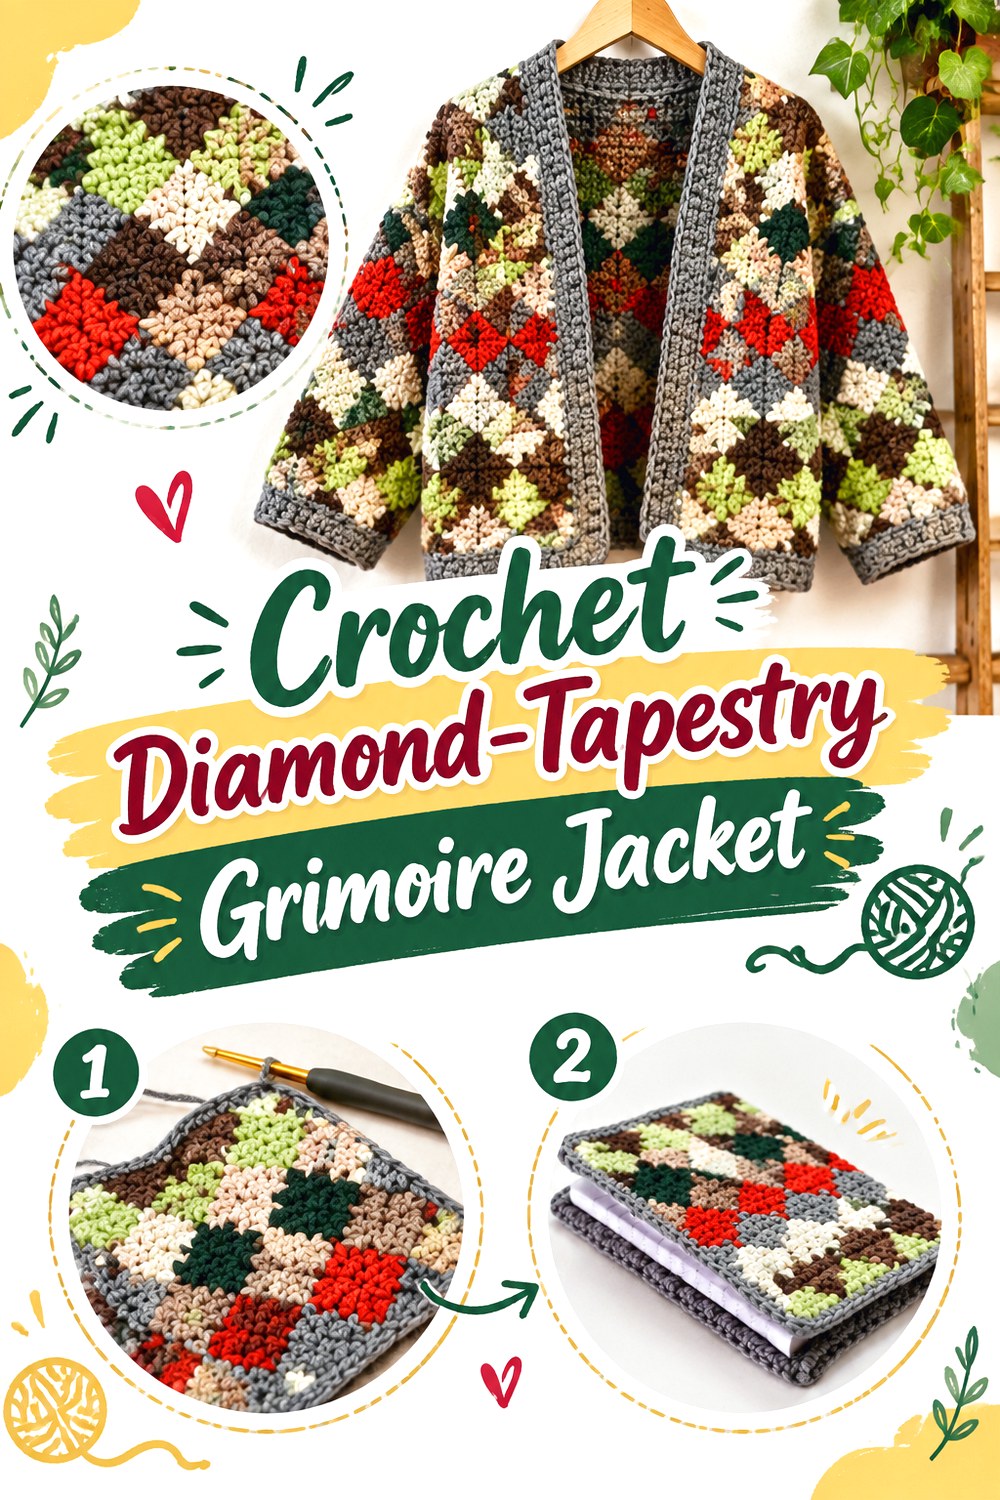
SAVEA repeating diamond motif gives a grimoire a more restrained occult-library character. De Estraperlo’s tapestry crochet notebook tutorial constructs a cover from an outer tapestry panel plus inner pieces that form the book-holding flaps, creating a jacket that remains on the notebook rather than functioning as a removable pouch. The small geometric diamond pattern provides a strong reference for adapting symbolic colorwork to a practical cover.
For a spell-book interpretation, the repeating geometry could suggest wards, alchemical marks, stars, or abstract sigils without needing a literal illustration. This approach suits readers who want fantasy styling that still looks polished enough for an everyday journal, sketchbook, or tabletop-game notebook.
Map the Motif Before the Spine
Repeating tapestry patterns look most intentional when the design does not break awkwardly at a highly visible edge. Before committing to a motif repeat, compare its width with the front, spine, and back areas of the intended book. You do not need to force perfect symmetry, but deciding which part of the repeat should appear near the center can prevent an accidental-looking cutoff. Keep in mind that changing yarn or tension can alter how many repeats fit across the finished cover.
Keep Inner Flaps Low-Bulk
Inner flaps need enough grip to hold the book covers without turning the front and back boards into thick padded layers. Decorative tapestry work may be more useful on the exterior than inside the fold-over sections. If you adapt the cover for a journal with a flexible cover, check that the flaps do not pull or bow it. A hardback can usually tolerate more structure, while a thin notebook benefits from a lighter interior treatment.
Use Contrast Without Losing the Pattern
Tapestry motifs depend on visible separation between colors. Two shades that look different in skeins can blend once worked into small geometric shapes. Before making the full panel, compare a small section in the lighting where the book will usually be used. For an antique grimoire effect, contrast does not have to mean bright color; a pale parchment shade against charcoal, rust against brown, or muted gold against deep olive can still keep the geometry readable.
Original Tutorial and Creator Credit
Creator/Site: De Estraperlo
3. Crochet Dark Academia Plaid Spell Book Sleeve
 SAVE
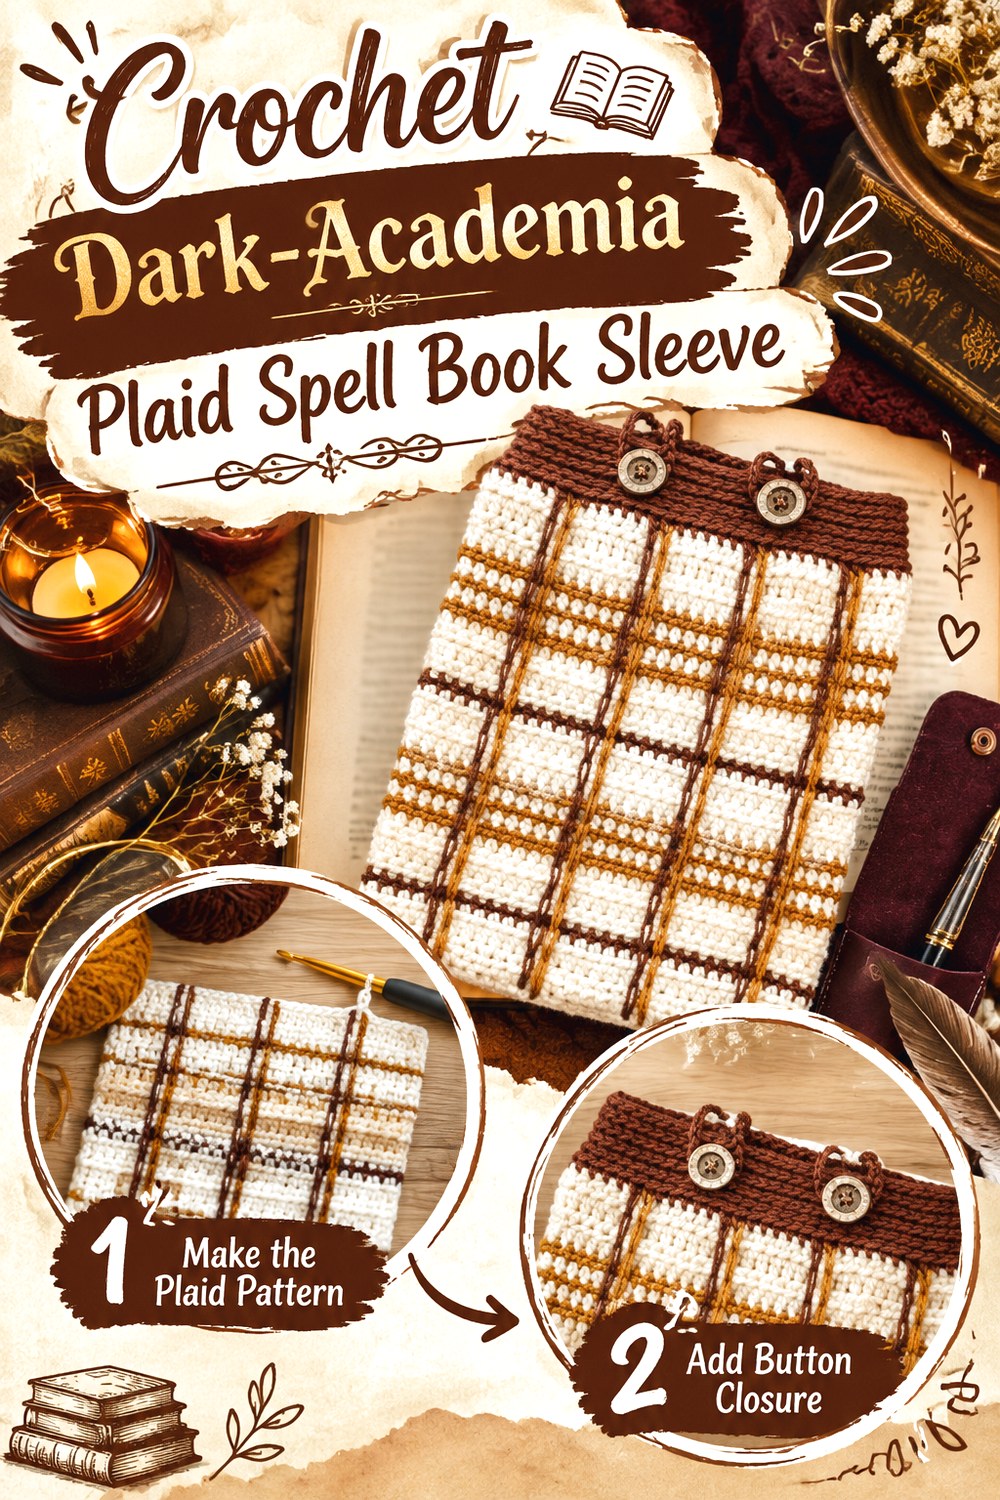
SAVEA plaid sleeve shifts the spell-book look away from theatrical fantasy and toward an old-library, dark-academia aesthetic. Woodland Stitchcraft’s Academia Book Sleeve uses a tartan-inspired surface treatment with textured crochet and clean intersecting lines, making it an especially useful reference when the goal is a scholarly cover that can still feel mysterious.
Instead of traditional school colors, consider combinations inspired by weathered libraries: charcoal and parchment, forest and brown, oxblood and muted gold, or deep navy with gray. Because this is a sleeve rather than a fitted jacket, the finished piece can protect a regular reading book while still providing the visual character of a spell-book accessory.
Keep Surface Lines From Distorting the Base
Surface crochet adds visual structure, but pulling those lines too tightly can gather the fabric beneath them. The base should remain flat before and after the intersecting details are added. Work with the book nearby and periodically compare the sleeve width to the intended fit. If the plaid lines begin shortening the panel, relaxing the surface tension is usually more useful than trying to compensate by stretching the completed sleeve.
Build a Palette With Hierarchy
Plaid can become visually busy when every line competes equally. Choose a dominant base shade, then let one or two secondary colors create the grid. For a grimoire-inspired version, a small amount of warm contrast can suggest antique leather tooling or metallic manuscript details without making the whole sleeve bright. If you plan to add a charm or closure afterward, leave enough visual breathing room for that element rather than layering decoration over an already crowded tartan.
Match Thickness to the Book
A textured sleeve creates more insulation and bulk than a flat fitted cover. That can be useful for a treasured hardback, but it may feel oversized around a thin paperback. Test the opening with the actual book as the piece develops. The best fit should allow insertion without aggressively stretching the surface lines; repeated over-stretching may alter the plaid alignment or make the top edge lose its shape.
Original Tutorial and Creator Credit
Creator/Site: Woodland Stitchcraft
4. Crochet Antique Lace Grimoire Cover
 SAVE
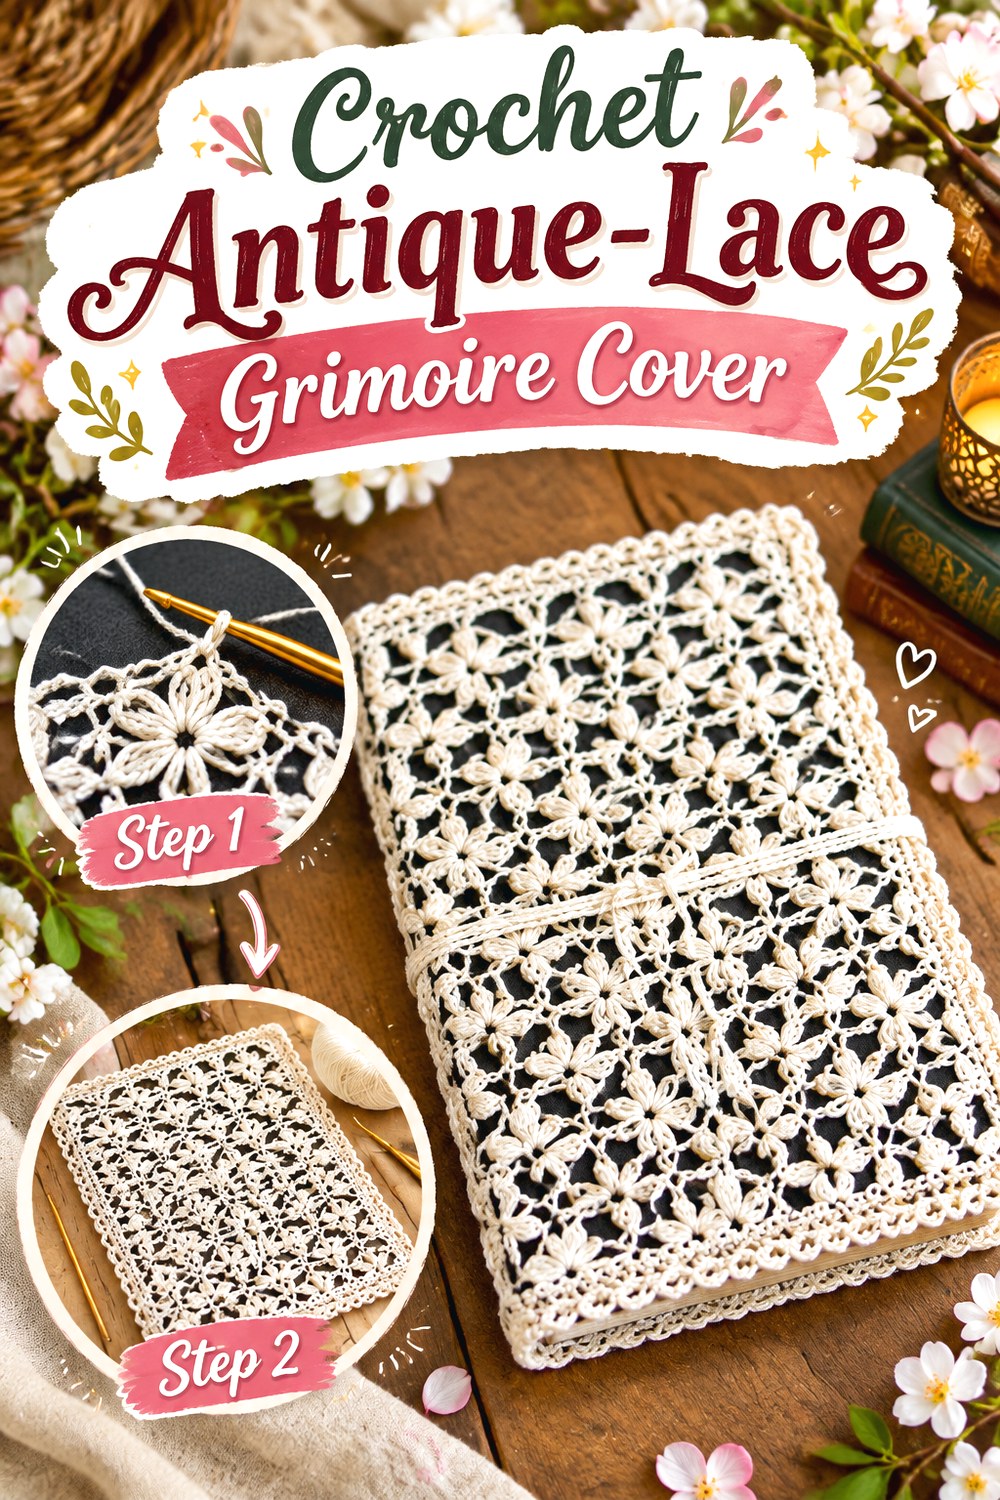
SAVELace gives a spell book the feeling of an heirloom manuscript rather than a rugged sorcerer’s tome. Kirsten Holloway Designs’ lace Bible cover provides an original tutorial reference for a decorative openwork cover that can also inspire journals and other special books. The fabric is visually lighter than tapestry or bobble-heavy options, making it a good direction for romantic gothic, Victorian, celestial, or cottage-magic styling.
A muted ivory, faded rose, smoke gray, or dark plum could change the atmosphere without altering the fundamental lace character. This concept works especially well when the underlying book cover contributes to the final appearance, because open spaces allow some of that color to show through.
Let the Underlying Book Become Part of the Design
Open lace does not visually erase the book beneath it. A strongly colored hardback may show through and alter the finished palette, while a neutral journal can make the stitch pattern stand out more clearly. Before choosing yarn, hold it against the actual cover rather than evaluating it only against a white surface. This interaction can be used intentionally—for example, a dark book under pale crochet can emphasize every opening in the lace.
Protect Delicate Openwork From Snags
Decorative open stitches are more vulnerable to catches than a dense tapestry fabric. If the book will regularly travel inside a bag with keys, pens, zippers, or hardware, consider whether a lace jacket is practical for that use. It may be better suited to a bedside journal, ceremonial notebook, guest book, or display volume. Avoid adding charms at points where they could repeatedly pull on an already open fabric.
Keep the Edges Controlled
Lace can look elegant across the main panels yet lose that refined effect if the opening, corners, or flap edges become wavy. Compare both sides as you work and pay attention to whether the edging is adding or removing tension. Blocking or gentle shaping may improve a fiber that responds well to it, but always follow the yarn’s care guidance rather than assuming every material should be treated the same way.
Original Tutorial and Creator Credit
Creator/Site: Kirsten Holloway Designs
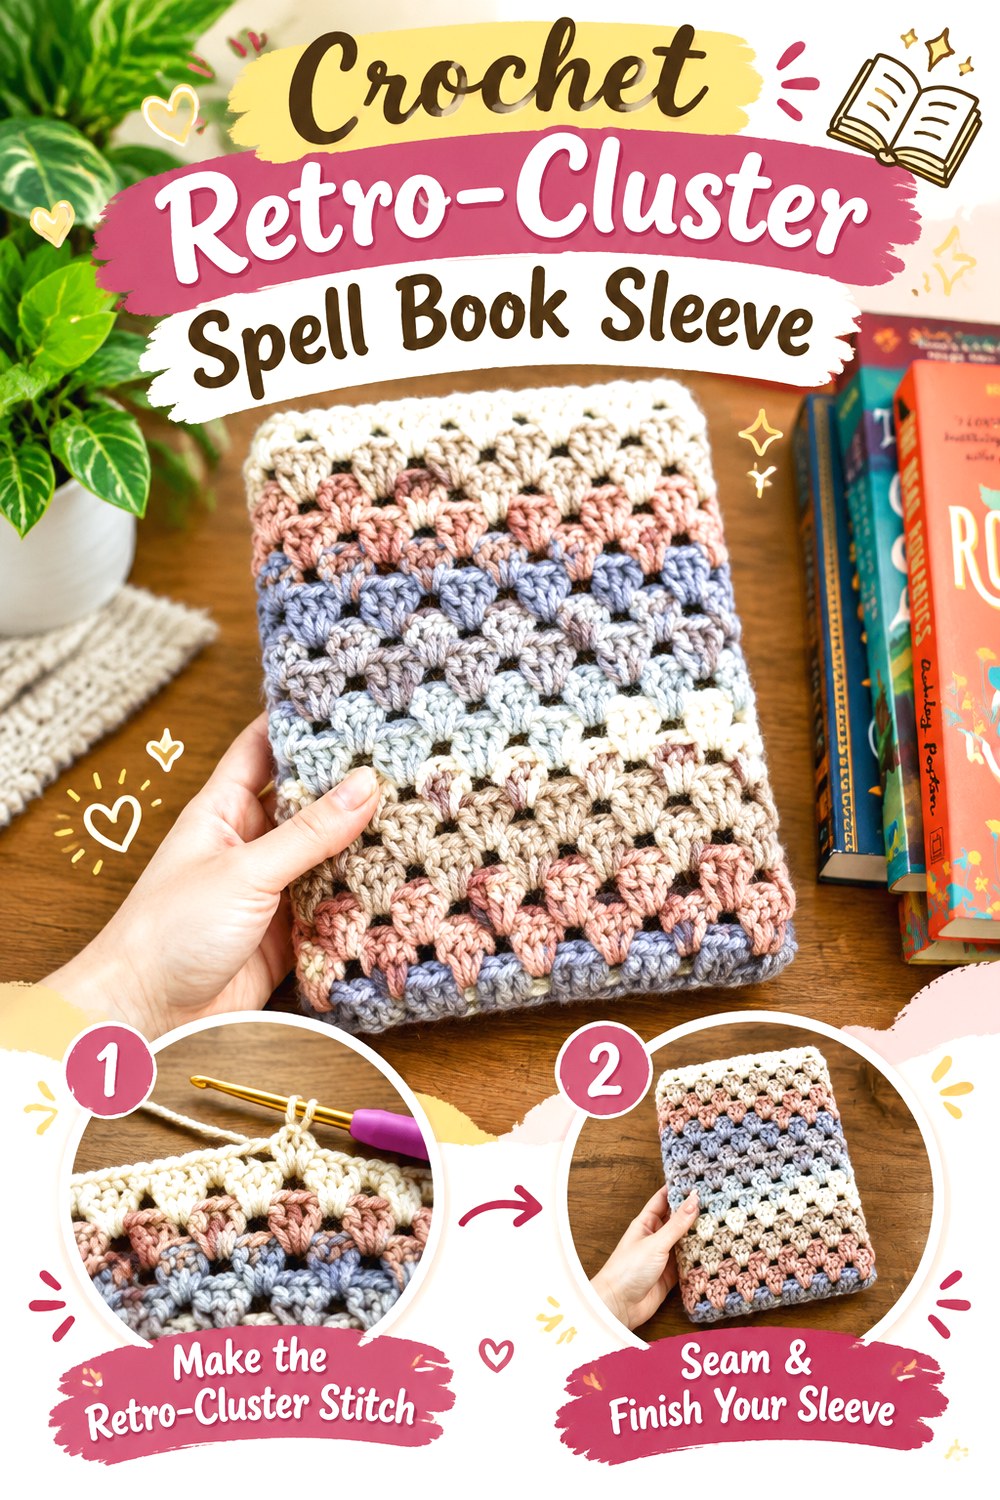
5. Crochet Retro Cluster Spell Book Sleeve
 SAVE
SAVEOpen cluster stitches can create a spell-book sleeve that feels more vintage and handmade than dark or dramatic. Maria’s Blue Crayon presents a retro granny-stitch book sleeve and discusses lining as a way to improve the sleeve’s durability, making the tutorial a useful bridge between decorative openwork and practical book protection.
For a magical variation, work with unusual manuscript-inspired color combinations instead of conventional granny-square brights. Tarnished gold, moss, aubergine, clay, and parchment can make familiar clusters feel like something from an eccentric apothecary shelf. This is a good option when you want the crochet fabric itself to provide the personality rather than adding large appliqués.
Decide on Lining Before Final Finishing
A lining can keep pens, book corners, or small objects from pushing through open spaces, but it also changes interior capacity. If you plan to add one, account for that extra layer when checking the sleeve around the book. Choose a lining that sits smoothly rather than bunching at the base. Because fabric and yarn may shrink or behave differently during cleaning, care should follow the materials actually used rather than a single assumed washing method.
Give the Book Enough Entry Room
Open cluster fabric can stretch, which sometimes makes an unfinished sleeve appear more forgiving than it will be after edging or lining. Check the book at several stages, particularly near the opening. The top should not require force every time the book is inserted. Conversely, too much ease can allow a heavy book to slide around and pull the fabric out of shape, so aim for comfortable rather than loose clearance.
Original Tutorial and Creator Credit
Creator/Site: Maria’s Blue Crayon
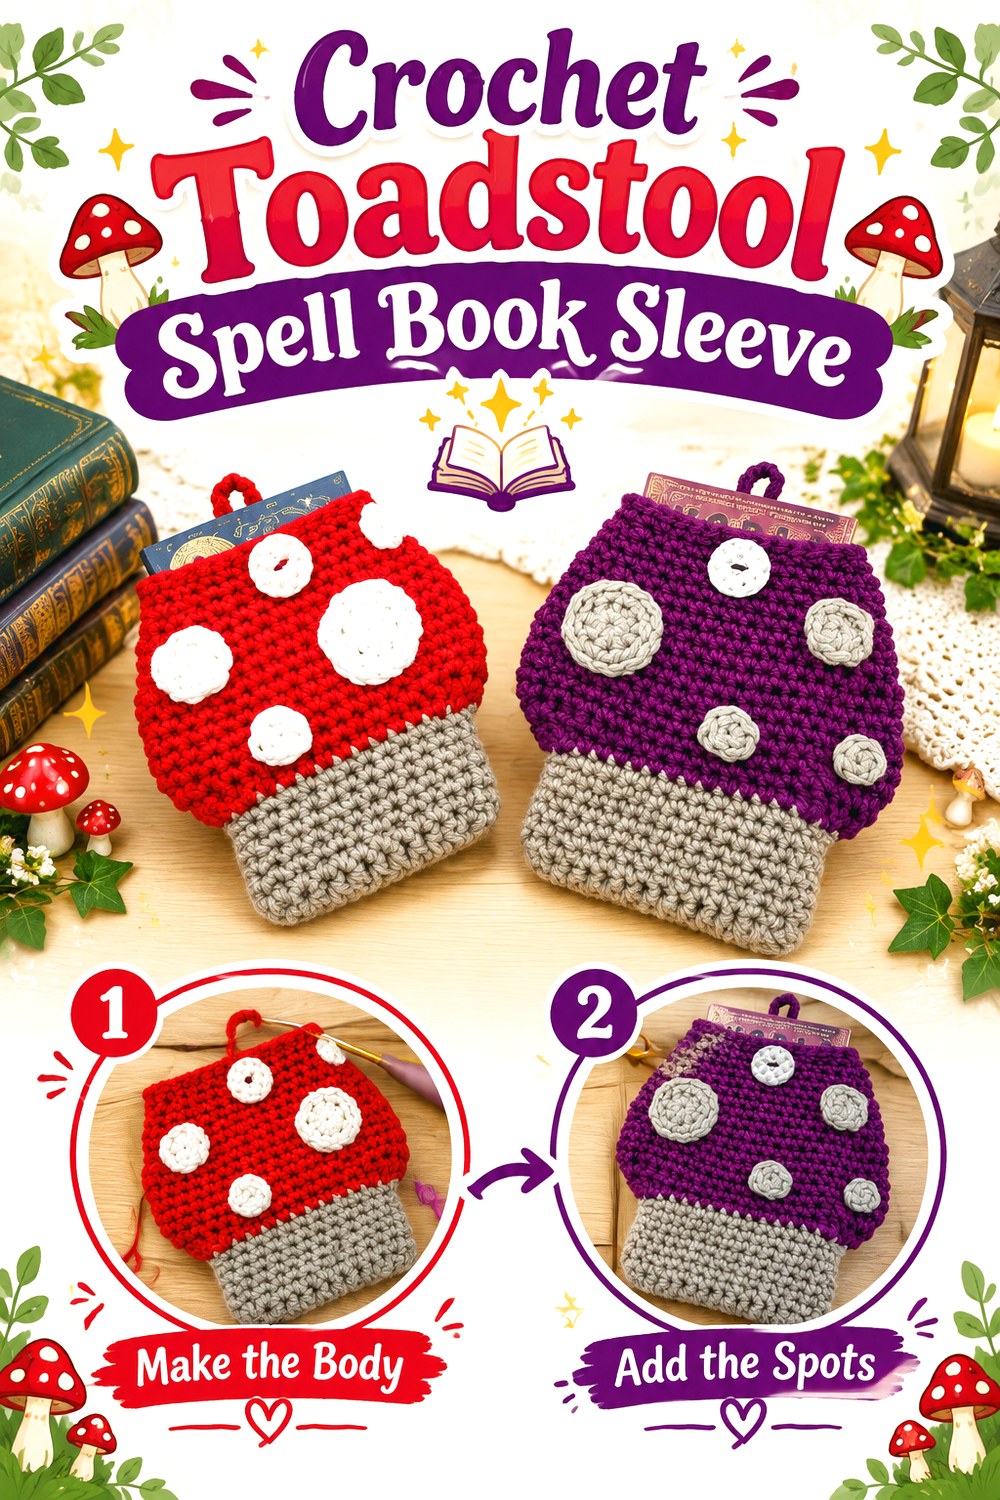
6. Crochet Toadstool Spell Book Sleeve
 SAVE
SAVEInstead of making the magic theme depend on symbols, let the entire silhouette become the motif. Green Fox Farms Designs’ Mushroom Book Sleeve turns a book protector into a recognizable mushroom-shaped piece, creating a noticeably different direction from rectangular jackets and tapestry covers.
For a spell-book collection, this shape suits woodland magic, herbal journals, potion notes, foraging records, fairy-tale books, or nature-themed campaign notebooks. A cap-and-stem profile already supplies enough visual storytelling that extra decoration can stay minimal. It also gives a collection variety when several other covers are rectangular and heavily patterned.
Preserve the Toadstool Outline
A shaped sleeve succeeds when the silhouette remains legible after the book is inserted. If the book is much larger, thicker, or differently proportioned than the source project, do not assume simply adding rows will preserve the mushroom shape. Compare the intended cap-to-stem balance as you adapt. Excessive stuffing of a tight sleeve can pull curved edges outward until the distinctive outline reads more like an irregular rectangle.
Use Surface Details Sparingly
Spots, embroidery, leaves, or tiny appliqués can strengthen the woodland theme, but the mushroom shape is already the main feature. Too many additions may compete with the silhouette or create snag points. A few asymmetrical spots or a small vine near one edge can be more effective than covering every available area. If the book will travel, favor soft flat embellishment over beads or rigid pieces that could press into the contents of a bag.
Original Tutorial and Creator Credit
Creator/Site: Green Fox Farms Designs
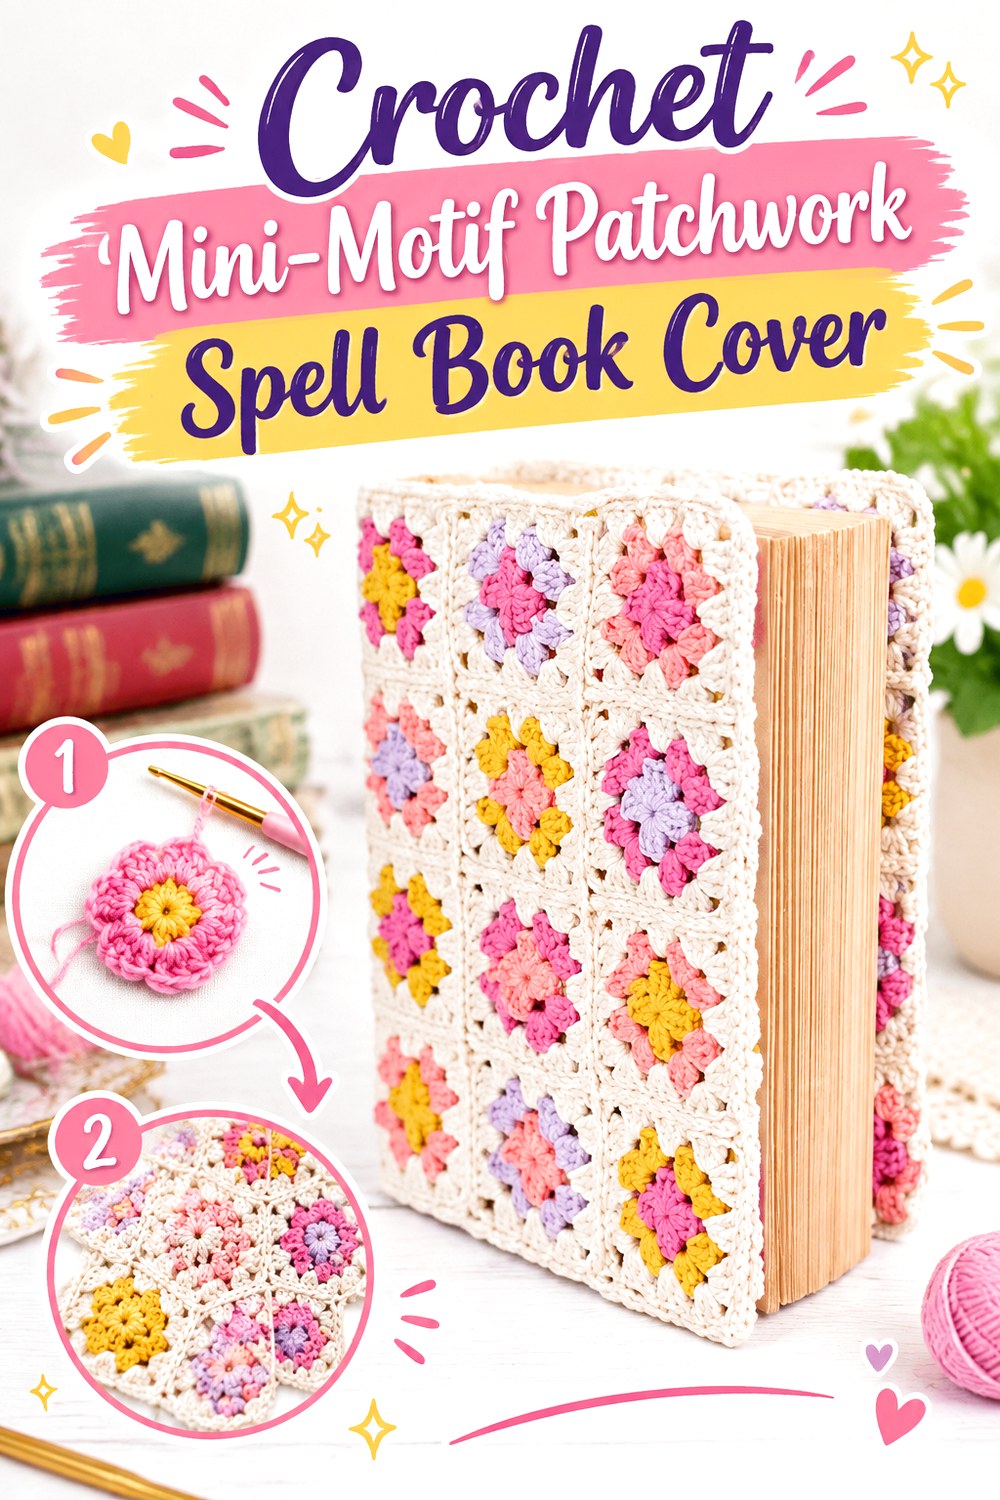
7. Crochet Mini Motif Patchwork Spell Book Cover
 SAVE
SAVETiny motifs create the look of an assembled manuscript cover, almost as though separate magical seals were joined into one textile. DROPS Design’s Binding Romance book cover uses small granny-square motifs to form a fitted crochet cover and includes guidance for adapting the size, making it a useful reference for a modular spell-book interpretation.
Instead of identical color placement, the squares could alternate between moonlit neutrals, jewel tones, herbarium greens, or deliberately mismatched “collected relic” combinations. The modular format is also useful for using small quantities of yarn, though the final dimensions still depend on consistent motif size and joining.
Make Motif Size Consistency the Priority
With small squares, a minor tension difference repeated across many motifs can become a noticeable mismatch in the assembled panel. Compare motifs as you go rather than waiting until every square is finished. If one is consistently larger, identify whether the difference comes from tension, yarn thickness, or finishing. Blocking may improve moderate variation when appropriate for the fiber, but it is easier to correct the cause before joining the whole cover.
Keep Joins Flexible Near the Spine
Patchwork seams can become thicker and less flexible than the individual motifs. Plan where those joins fall in relation to the book spine and hinges. A rigid ridge exactly where the cover needs to fold can make the jacket feel awkward when opened flat. If adapting the motif layout, consider whether the spine would benefit from a simpler strip or a join arrangement that bends comfortably without forcing the squares out of shape.
Treat Color Placement Like a Page Layout
A patchwork grimoire can look deliberate even when many colors are involved. Repeat one anchor shade around the composition, or place the darkest motifs where you want visual weight. Random placement works best when it still has some rhythm. Before joining, arrange the squares on a table and photograph different layouts; it is much easier to move them at that stage than after the seams are completed.
Original Tutorial and Creator Credit
Creator/Site: DROPS Design
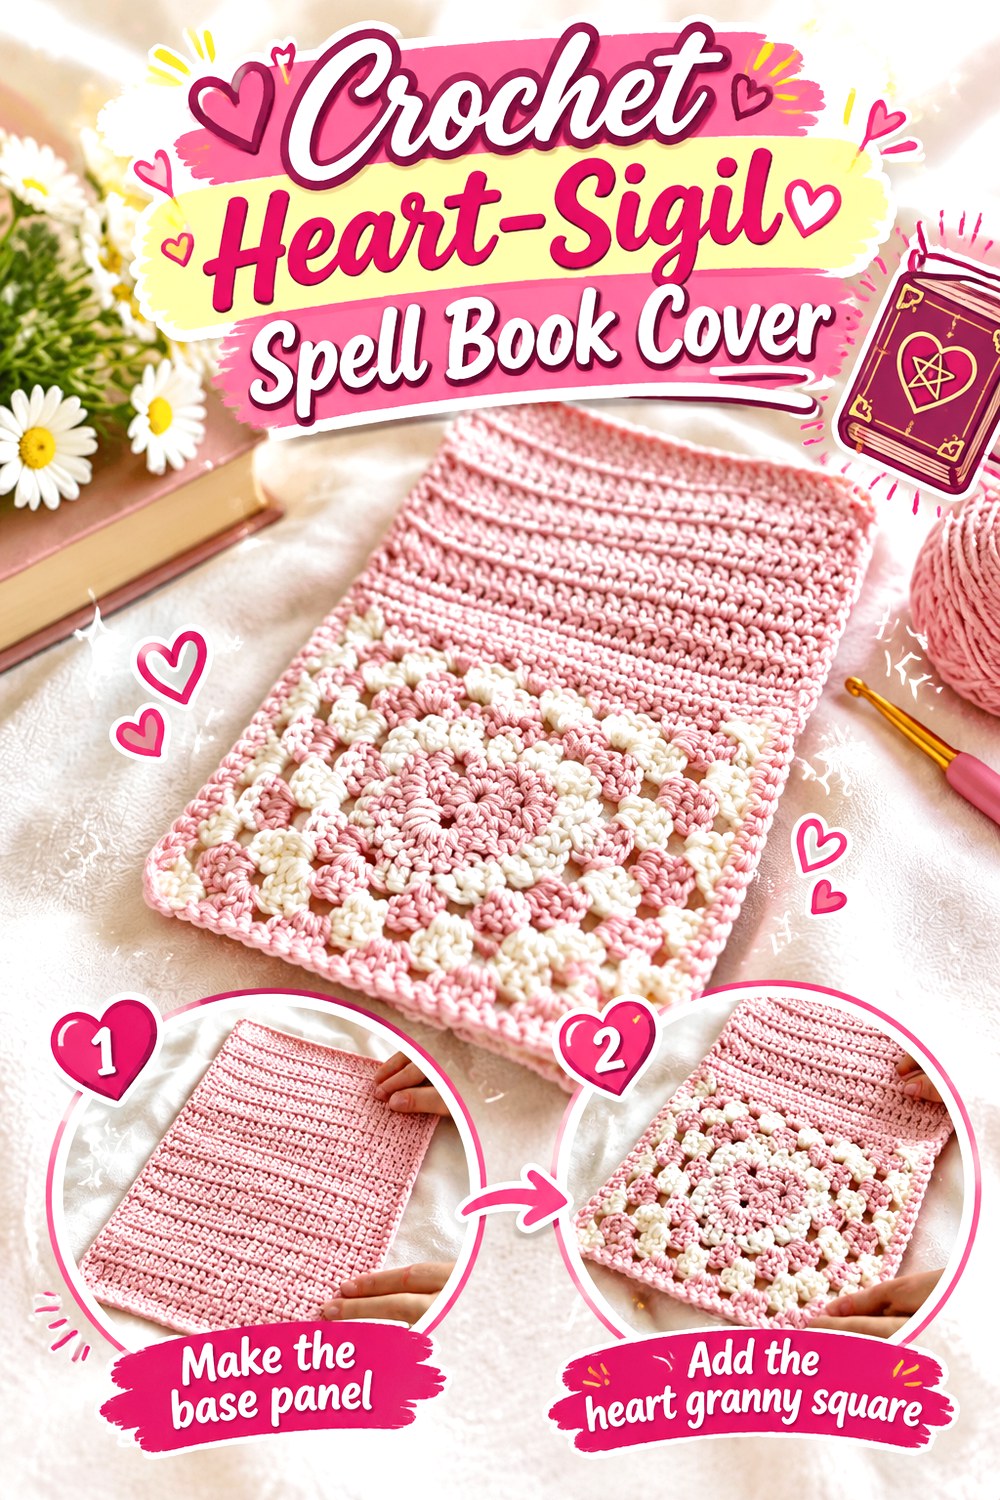
8. Crochet Heart Sigil Spell Book Cover
 SAVE
SAVEA heart motif does not have to read as sweet or romantic. In a dark palette, a centered heart can resemble a seal, relic, anatomical symbol, or enchanted emblem. Mahum’s video tutorial begins with a heart granny square and develops it into a rectangular book cover with the remaining book-cover components and a clasp, providing a useful reference for transforming a single statement motif into a complete jacket.
This construction direction is attractive when you want one clear image on the front instead of a repeating pattern. The same design logic could inspire other centered motifs later, provided the chosen tutorial or pattern supports the construction you intend to make.
Recheck Proportions After the Motif Becomes Rectangular
A centered square motif can look balanced on its own but shift visually once extra fabric extends it into a book-sized rectangle. Place the work over the intended cover before the outer dimensions are finalized. The visual center of the front board is more important than the center of the entire opened jacket. Remember that some width belongs to the spine and back, so the motif should be evaluated with the book closed as well as laid flat.
Make the Clasp Work With the Symbol
A closure near a large front motif can either reinforce the composition or interrupt it. Decide whether the clasp should visually disappear, sit beneath the emblem, or become part of the magical theme. A contrasting button might resemble a seal; a subtle one keeps attention on the heart. Whatever style you choose, avoid pulling the closure so tightly that it distorts the motif or forces the book’s front cover to curve.
Change Mood Through Color, Not Construction
One advantage of a strong heart motif is that atmosphere can shift dramatically without redesigning the underlying cover. Deep red against brown can feel gothic; green and cream can lean botanical; black and silver can suggest celestial magic. If you change yarn, however, check the resulting motif size before assuming the original proportions will still fit the book. Fiber and gauge changes affect construction even when the color plan is purely cosmetic.
Original Tutorial and Creator Credit
Creator: mahum 🎀
9. Crochet Botanical Tapestry Spell Book Cover
 SAVE
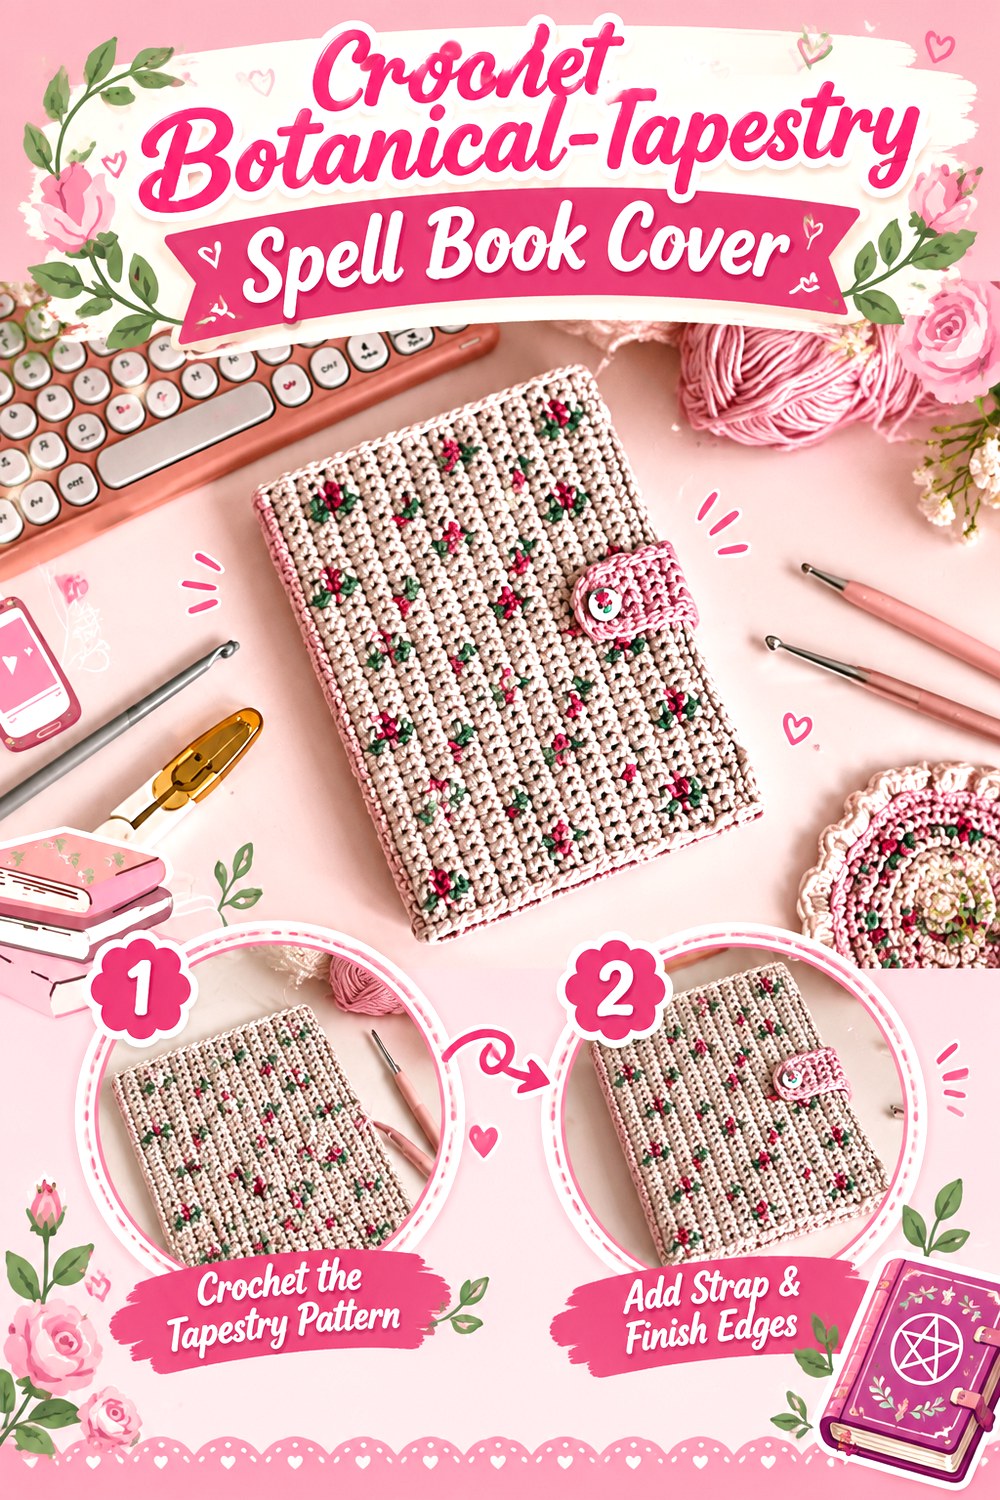
SAVEA floral tapestry cover gives the grimoire idea a botanical direction suited to herbal notes, garden journals, potion books, or nature-themed reading diaries. Artist1c_kat3’s floral book sleeve tutorial uses tapestry crochet, separate graphic areas, border finishing, and a buttoned clasp while demonstrating a format designed to be adjusted for different books.
For a fantasy adaptation, ordinary flowers could become nightshade-inspired blooms, abstract herbs, moonlit leaves, or symmetrical botanical emblems. Tapestry work keeps the decoration relatively flat, which is an advantage if you want an illustrated surface without the bulk of appliqués.
Control Color Changes at the Image Edges
Small botanical shapes become muddy when carried colors or tension changes distort their outlines. Focus on keeping the working tension comparable across color transitions rather than pulling the inactive yarn too tightly. The wrong side does not need to look identical to the front, but it should remain smooth enough that the panel does not pucker. Periodically laying the work flat can reveal distortion before it is built into a larger section.
Fit the Graphic to the Front Board
Treat the motif area as an illustration with boundaries. A flower cut off at the spine can appear accidental unless the design is intentionally asymmetrical. Measure the visible front-board area separately from the total cover width and decide where the graphic should sit when the book is closed. This is especially important if the closure also occupies front-cover space. A small shift during planning can create a more deliberate final composition.
Check Button Tension With the Book Filled
Journals often become thicker after notes, ephemera, stickers, or inserts are added. If the book is likely to grow, a closure fitted tightly on day one may become restrictive later. Consider whether the loop or clasp has reasonable flexibility, and test it around the actual book rather than an empty mock-up. The aim is to keep the cover closed without compressing the pages or pulling the tapestry panel out of square.
Original Tutorial and Creator Credit
Creator: artist1c_kat3
10. Crochet Triple Tie Spell Book Sleeve
 SAVE
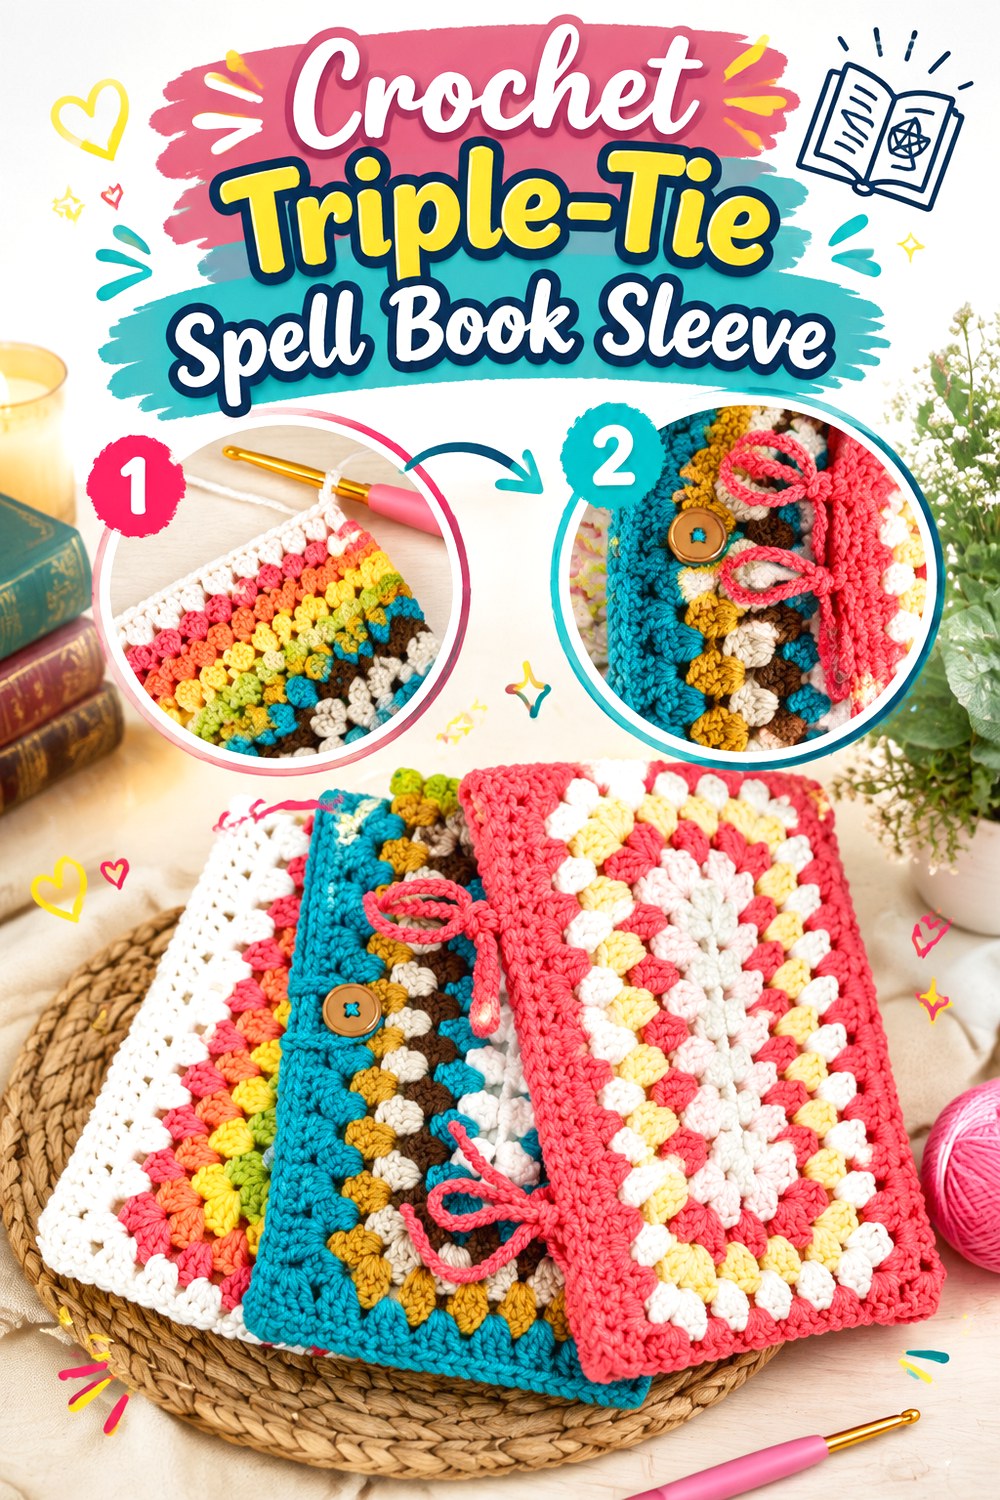
SAVEWraparound ties naturally suit the visual language of old journals, field notebooks, and hand-bound manuscripts. Ashten Stitches’ granny-rectangle book sleeve tutorial demonstrates a sleeve format with three tie options, making it a useful reference when the closure itself is a major design decision rather than a small finishing detail.
For a spell-book version, the ties could be tone-on-tone for an understated look or deliberately contrasting to resemble cords securing an old archive. The granny-style fabric keeps the body visually relaxed, so the finished sleeve can feel more like a textile book wrap than a rigid case.
Pick a Tie Style for the Real Use
A decorative wrap that circles the book several times can look convincingly antiquarian, but it takes longer to open than a simple loop. For a journal used several times a day, a quicker tie arrangement may be more practical. For a display grimoire or travel notebook, the ritual of wrapping can be part of the appeal. Whatever option you choose, make sure the cord does not repeatedly catch in open stitches near the sleeve edge.
Keep Long Cords From Becoming the Weak Point
Ties receive repeated pulling even when the sleeve body is lightly handled. Check where each cord joins the crochet fabric and avoid relying on a delicate open space to carry all the tension. If you lengthen the ties for a dramatic wraparound effect, remember that extra length also means extra leverage when pulled. A secure attachment and reasonable tension matter more than making the closure as tight as possible.
Original Tutorial and Creator Credit
Creator: Ashten Stitches
11. Crochet Magnetic Clasp Spell Book Cover
 SAVE
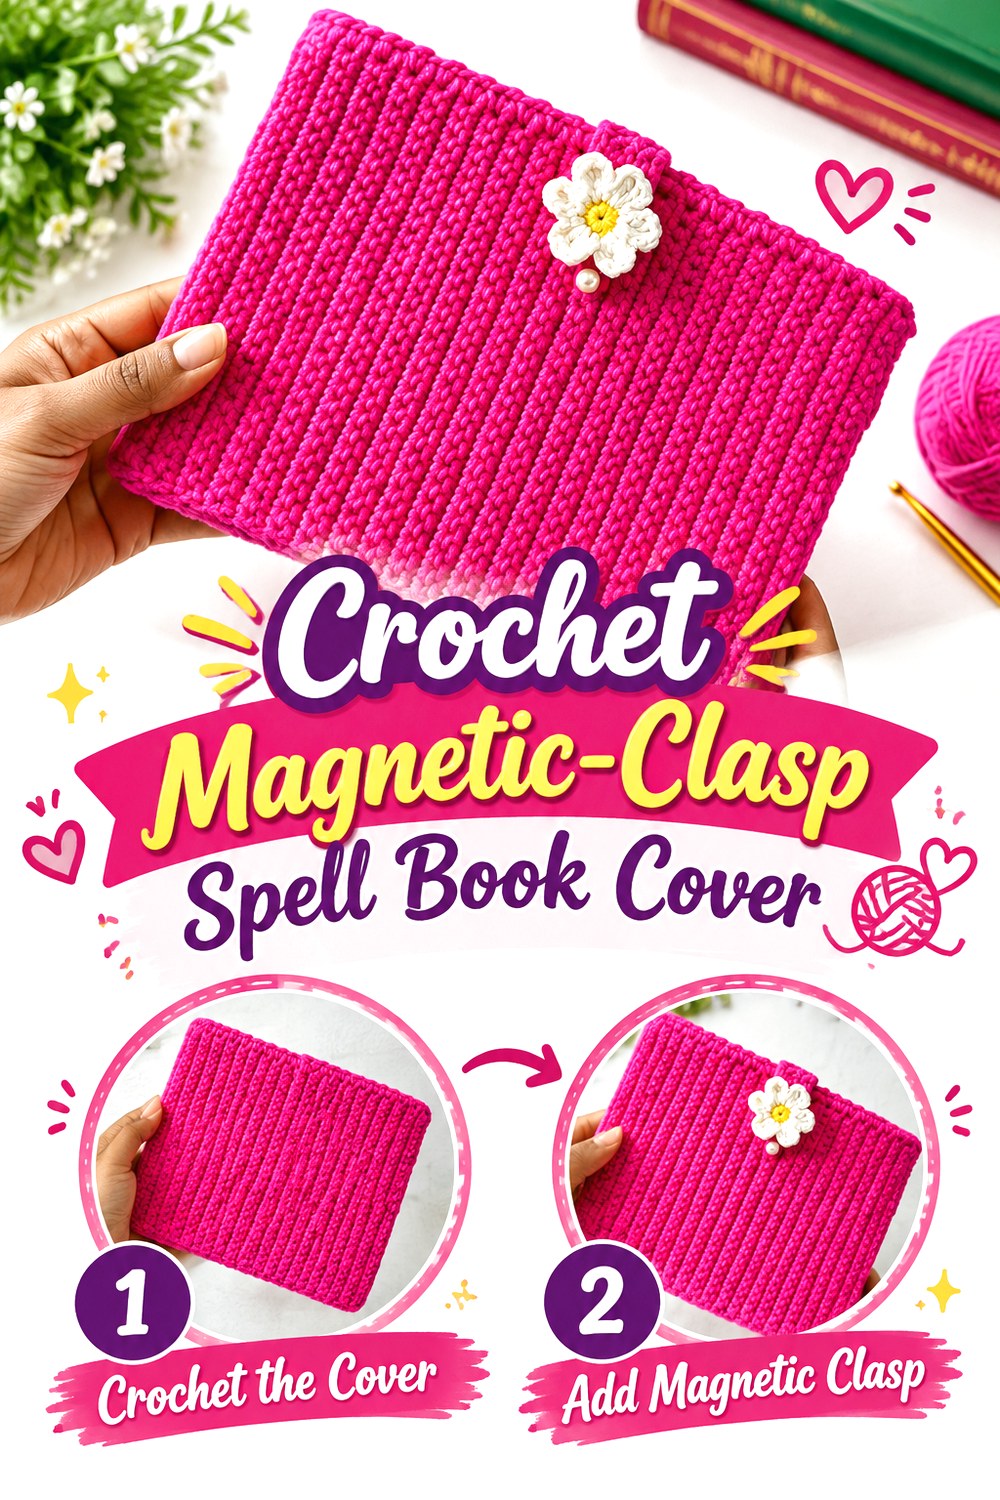
SAVEA magnetic closure creates a cleaner exterior than dangling ties and can suit a sleek alchemist’s journal or modern fantasy notebook. Lya Bags Jardim’s book-cover tutorial uses a magnetic button as part of the closure, giving a useful original reference for readers who want hardware integrated into a crochet cover rather than relying on a yarn loop alone.
This approach works particularly well when the visual focus belongs on texture or a small centered emblem. A simple tab with concealed or coordinated hardware can look more like a crafted journal accessory than a soft sleeve.
Position Hardware Before the Cover Is Finished
Magnetic hardware is easier to plan when you know how the filled book sits inside the crochet shell. Mark the closure location with the actual book in place so the tab reaches comfortably without pulling the front panel sideways. If the hardware requires backing or reinforcement, that should be considered before inaccessible layers are closed. Avoid treating the magnet as a last-minute decoration because its position affects both alignment and tension.
Be Cautious When Adapting for Electronics
A construction designed for a physical book should not automatically be transferred to an e-reader or tablet with the same magnetic hardware. Device manufacturers may have specific guidance about magnetic accessories or cases. If you want this look for an electronic reader, check the device documentation first and choose a closure compatible with that model. A crochet button-and-loop version can preserve a similar silhouette without assuming hardware compatibility.
Original Tutorial and Creator Credit
Creator: Lya Bags Jardim
12. Crochet Crossover Stitch Spell Book Jacket
 SAVE
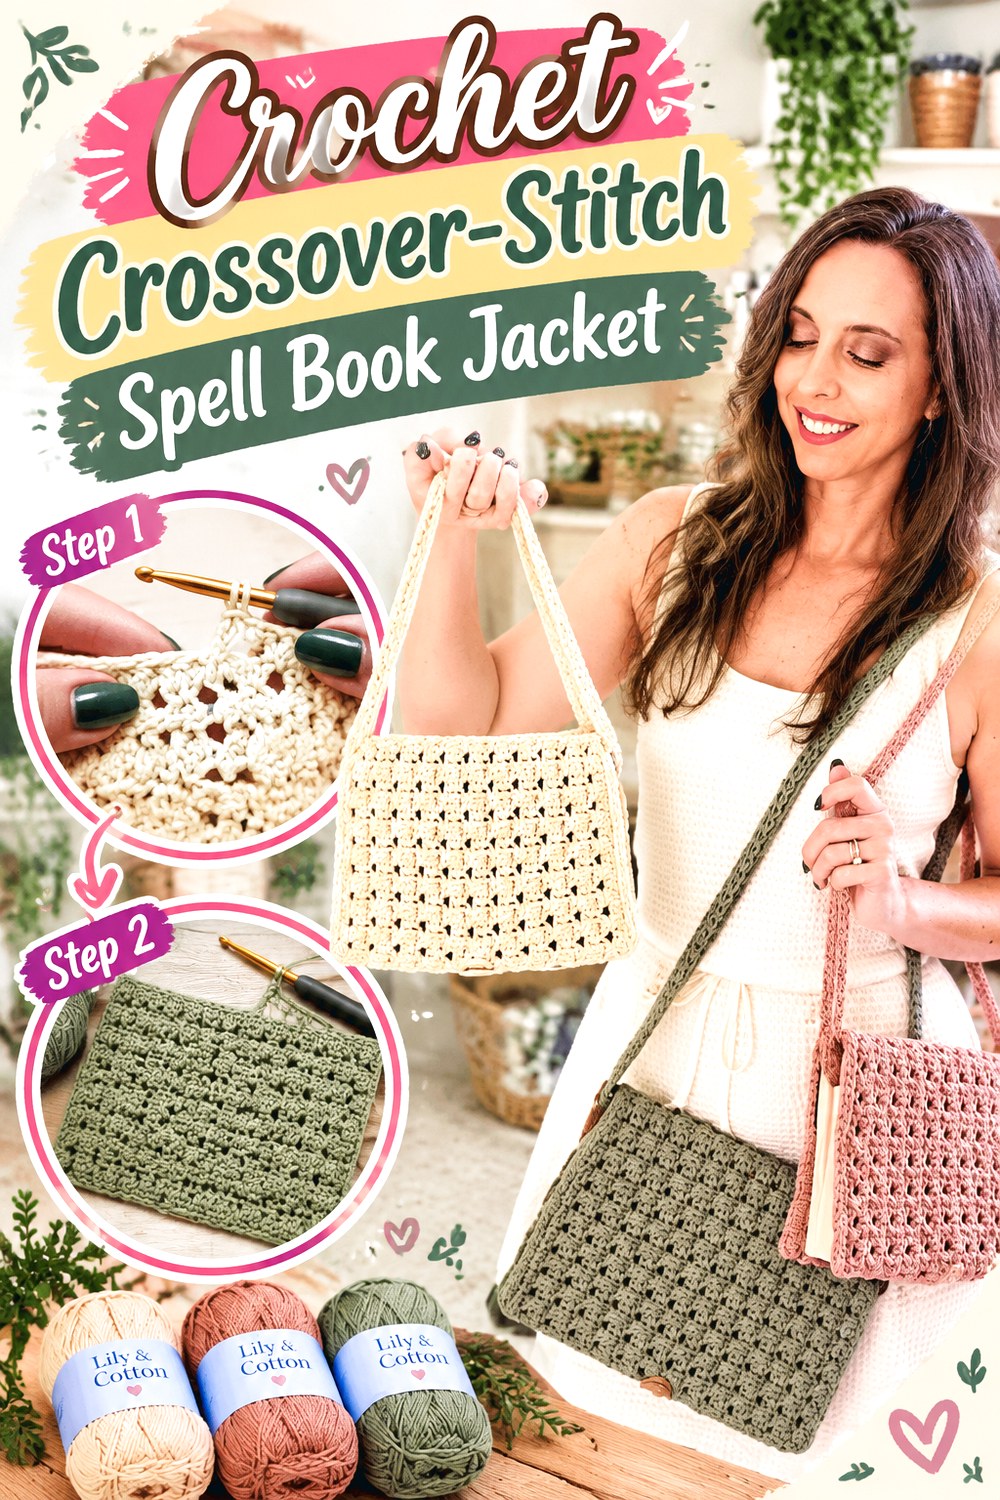
SAVETexture can create a convincing grimoire surface even when there is no pictorial motif. Briana K Designs’ made-to-measure book-cover pattern uses a Reed Crossover Stitch and forms a fitted jacket by folding the completed fabric into pockets for the book covers. The design also presents optional features such as a carrying strap that can double as a bookmark and a button closure.
That combination makes this a strong choice for a practical spell-book journal: the surface already has enough visual movement to work in one color, while the optional carrying element can make a regularly used notebook easier to handle.
Measure the Book as an Object, Not a Label
Two books sold under the same general format can differ in thickness, board size, or spine shape. A made-to-measure cover works best when you use the actual volume as the fit reference. Check the jacket while the book is closed and opened. Too little allowance can make the boards resist opening; too much may cause the pockets to shift. If the book is a journal that will expand with inserts, consider that future thickness as well.
Watch Stretch in a Carrying Strap
A crochet strap that supports the weight of a book experiences different stress than the main jacket. Yarn, stitch structure, strap length, and book weight can all influence stretch. If you adapt the carrying feature, inspect the attachment points and test it carefully before trusting it with a treasured volume. Reinforcement may be worth considering for a heavier book, but the appropriate method should suit the specific construction rather than being added blindly.
Make a Bookmark Feature Earn Its Place
A strap or extension that also functions as a page marker can reduce the need for separate accessories, but it should lie smoothly inside the book. Avoid bulky knots, charms, or thick embellishments on the part that will sit between pages. For a magical theme, the visible end could carry a small tassel or color change while the section inside the book remains flat and gentle on the paper.
Original Tutorial and Creator Credit
Creator/Site: Briana K Designs
13. Crochet African Flower Spell Book Sleeve
 SAVE
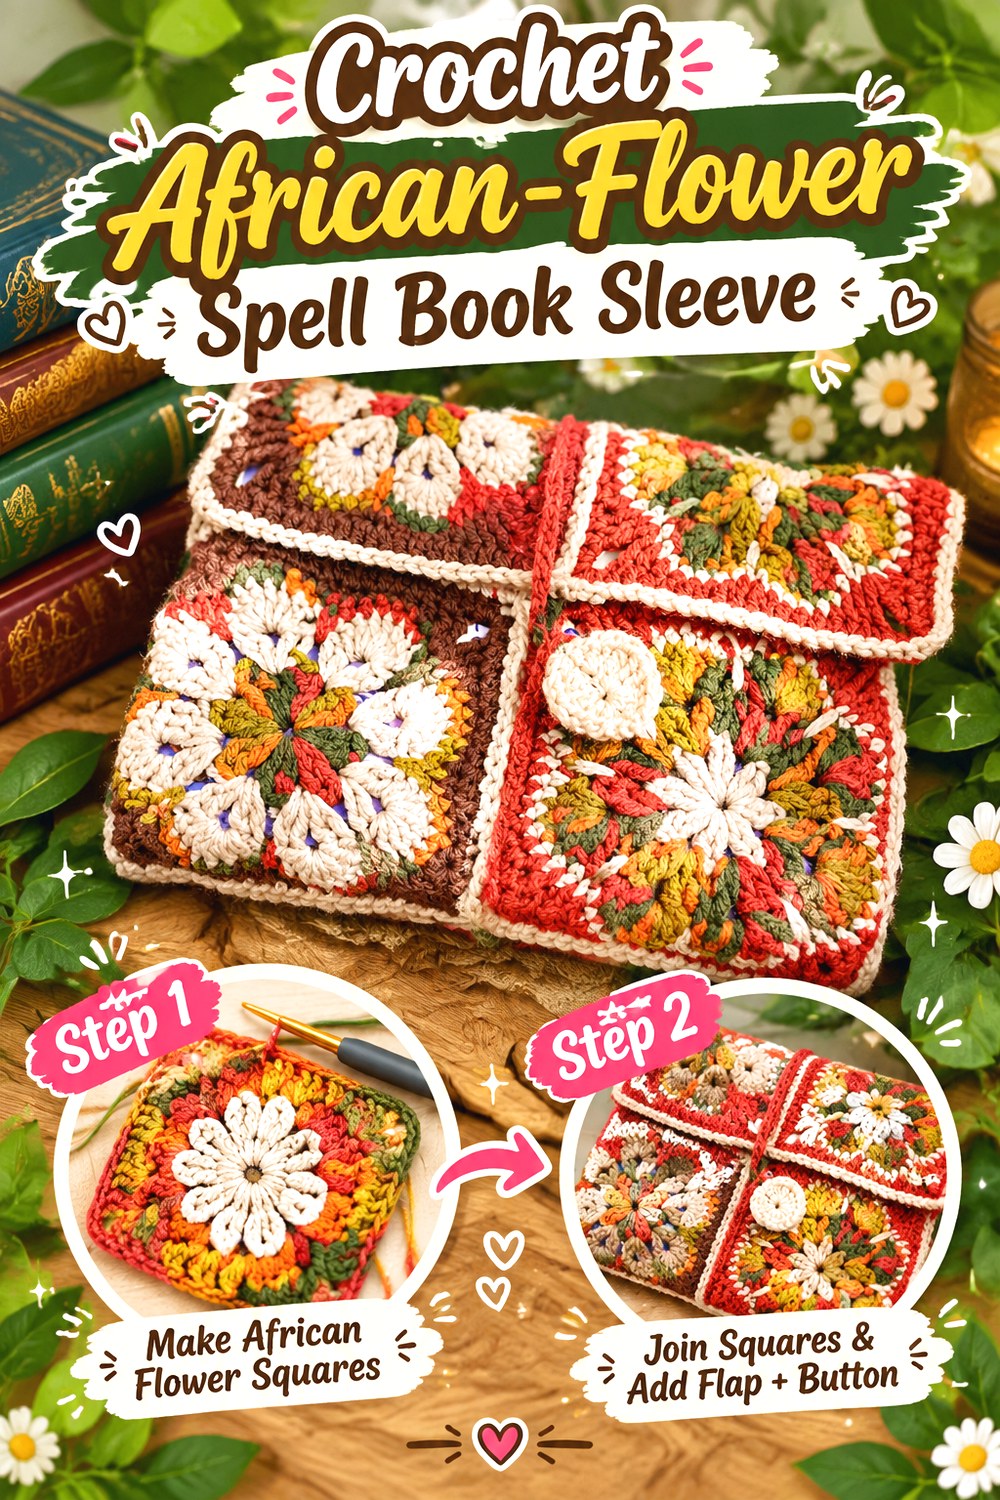
SAVEAn African-flower motif gives the front of a spell book a medallion-like focal point without requiring tapestry colorwork. Karinate’s book-sleeve tutorial uses an African flower square as a major design element and adds a button closure with a leaf-shaped closure detail, creating a strong botanical-fantasy reference.
For a grimoire version, the central flower can read as a magical seal simply through palette choices. Dark green, ink blue, plum, rust, or parchment tones can move the motif away from a summery floral mood while preserving its layered geometry. The leaf closure provides a second small botanical detail without covering the entire sleeve in embellishments.
Size the Motif Before Building Around It
A large central square controls much of the final width and proportion. If yarn substitution makes the flower significantly larger or smaller, the rest of the sleeve may need more adjustment than expected. Compare the completed motif with the actual book before assuming the surrounding sections will compensate. For a narrow journal, an oversized flower may overwhelm the front; for a large hardback, a tiny motif can lose the medallion effect.
Use the Leaf Closure as a Visual Bridge
The closure detail can connect the central flower to the edge of the sleeve, creating a more coherent botanical composition. If you alter its color, consider whether you want the leaf to disappear into the background or deliberately draw the eye toward the button. Keep the functional loop easy to operate; adding excessive decorative stitching to a closure piece can make it stiffer without improving how securely it works.
Keep Motif Joins Smooth
Where a decorative square transitions into the rest of the sleeve, uneven tension can create ridges or puckering. Lay the piece flat periodically and compare both sides. A small amount of texture is natural, but the book should not have to force the front panel flat every time it is inserted. If your chosen fiber can be blocked safely according to its care guidance, finishing may help refine the shape, but sound joining tension remains the better foundation.
Original Tutorial and Creator Credit
Creator: Karinate
14. Crochet Waffle Texture Spell Book Sleeve
 SAVE
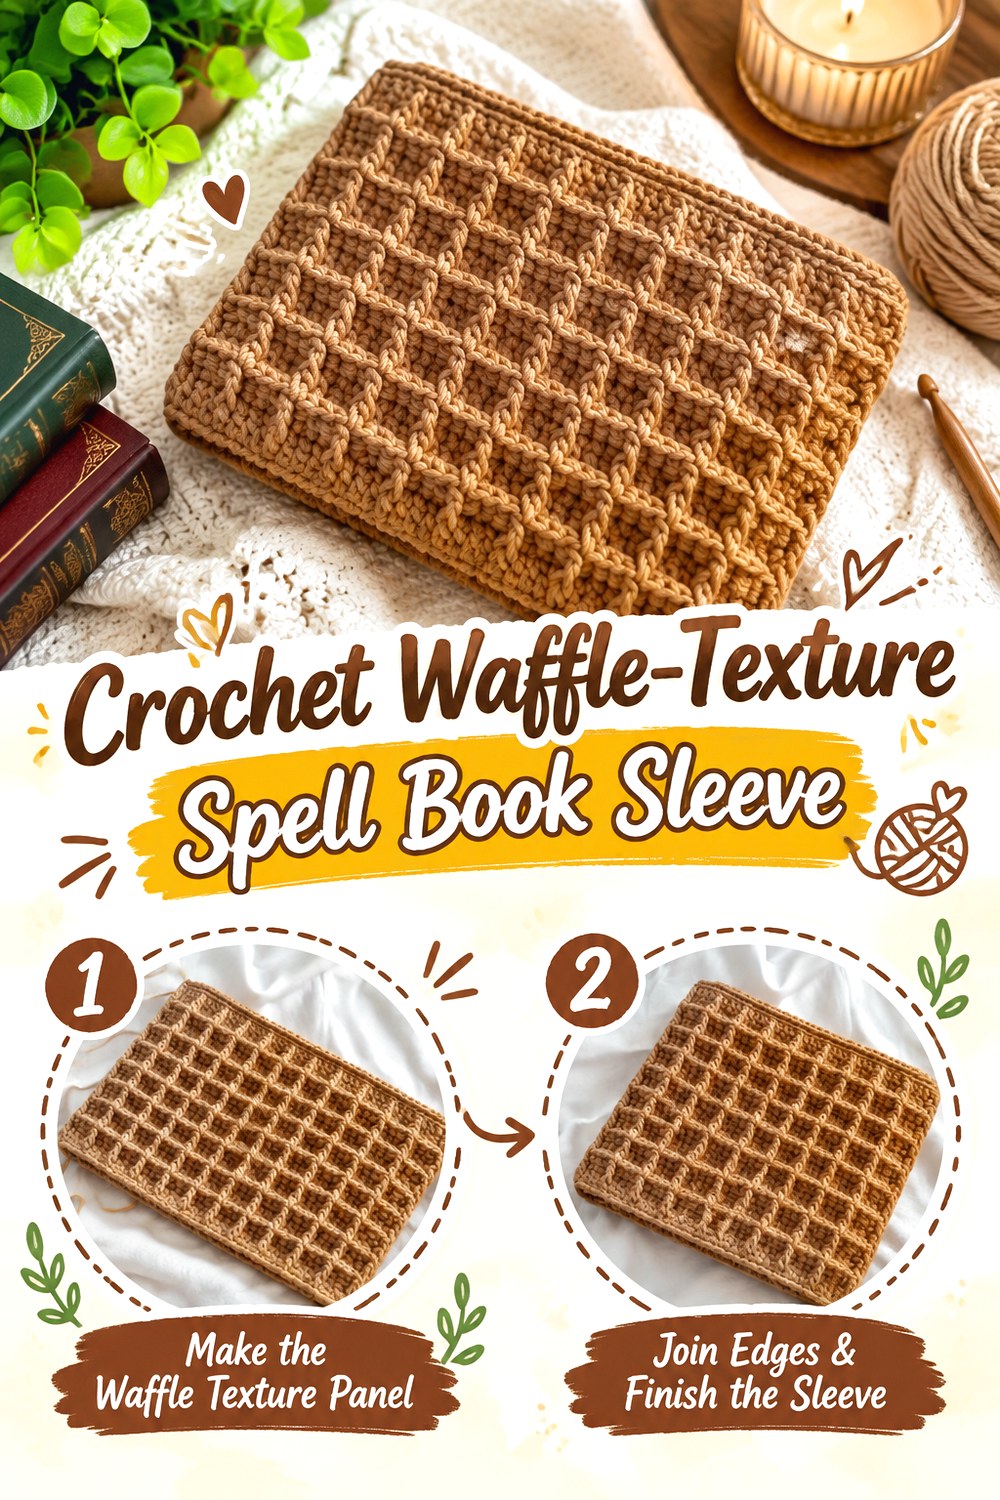
SAVEIf you prefer an unillustrated cover, deep waffle texture can make a single-color sleeve feel substantial enough for a fantasy library. From littlespot’s book-sleeve tutorial uses a pronounced waffle-style crochet fabric, offering a strong reference for a project where relief and shadow create most of the visual interest.
Worked in charcoal, parchment, bark brown, dusty purple, or lichen green, the grid can suggest stone blocks, old windowpanes, or a restrained magical lattice. Because the texture is already bold, this version does not need many extra appliqués. A small cord, tag, or single button can be enough if you want an additional fantasy cue.
Account for the Depth of the Fabric
Highly textured stitches can produce a thicker sleeve than a flatter stitch pattern made with comparable yarn. That extra depth may be useful for cushioning a book, but it also occupies room in a tote or shelf. Test the sleeve with the intended book rather than judging width only while the fabric lies flat. Deep texture may compress somewhat during use, but it should not need to be stretched aggressively to accommodate the book.
Avoid Burying the Texture Under Decoration
The grid-like relief is the main design feature, so large appliqués may obscure the very quality that makes this sleeve different. If you want a more explicit spell-book theme, consider small details at the opening or a narrow contrasting border instead. Metallic-looking yarn accents can be effective in tiny amounts, but always check how a specialty yarn behaves alongside the main fabric before committing it to a high-friction edge.
Original Tutorial and Creator Credit
Creator: from littlespot
15. Crochet Spiked Sedge Four Tie Spell Book Case
 SAVE
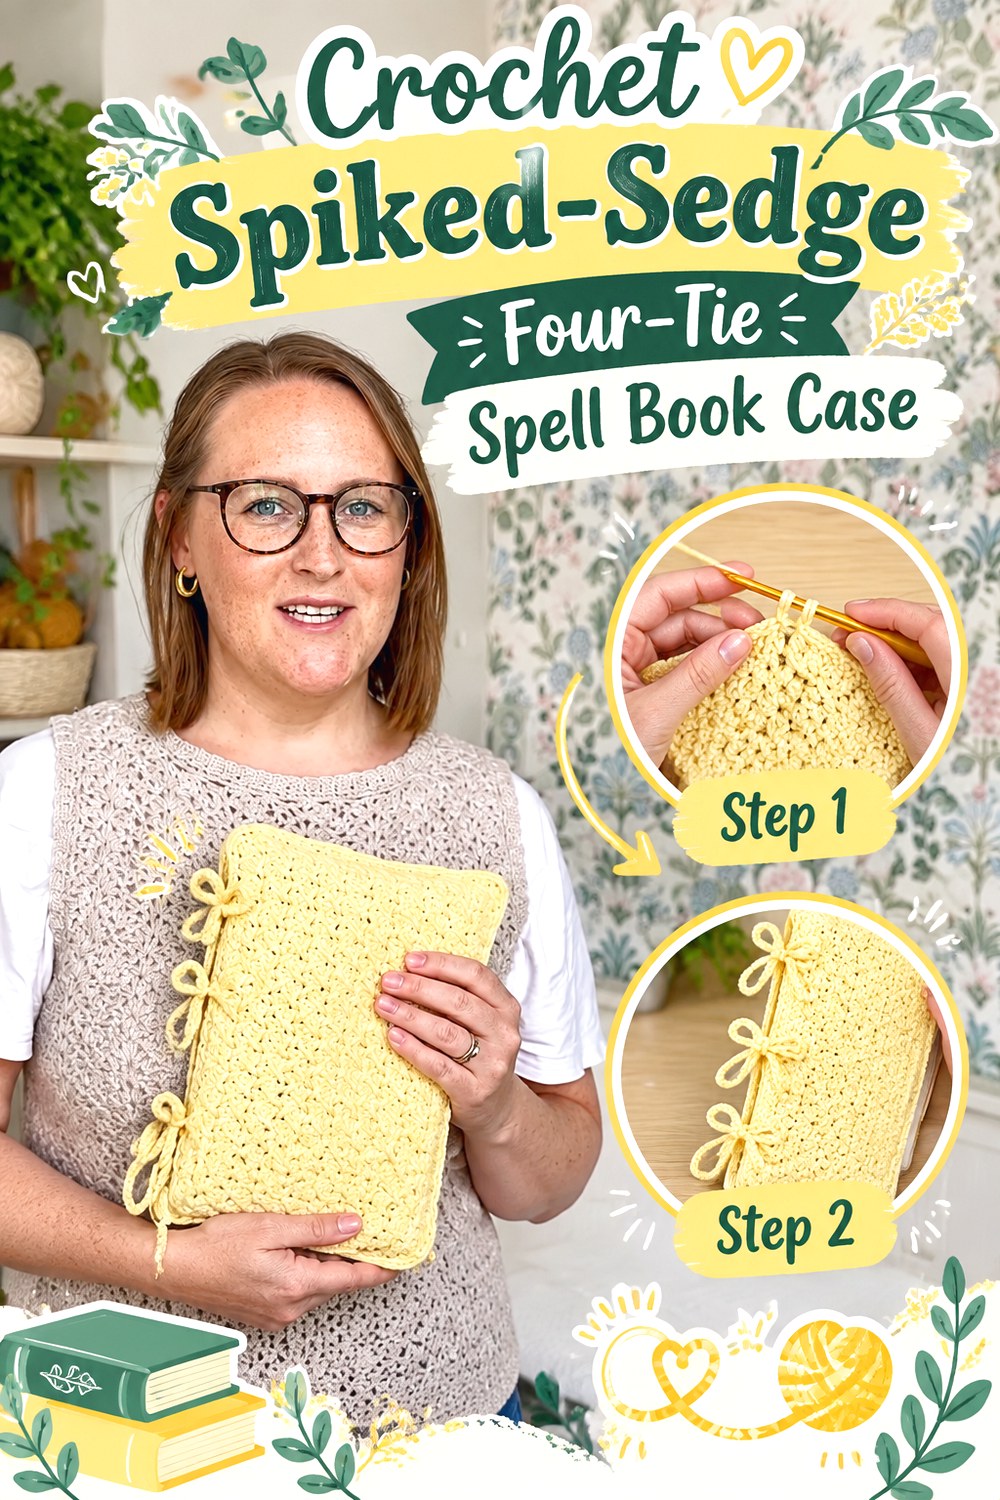
SAVEMultiple ties can make a book look like a bundle of private notes secured for storage. MYO Make Your Own’s “Ammie” book cover uses spiked sedge stitch, separate crochet pieces, and four straps or ties, giving this concept a different closure language from a single button or wrap cord.
For a spell-book adaptation, the tied edges could resemble an archival field journal, herbalist’s notebook, or book of collected formulas. A muted solid color allows the textured stitch to remain visible, while contrasting ties can emphasize the handmade binding effect.
Balance Four Ties Instead of Overtightening Them
Multiple ties distribute the visual closure around the book, so none needs to be pulled extremely tight. Fasten them with the book inside and check whether the cover remains square. If one corner begins drawing inward, loosen the corresponding tie rather than trying to compensate elsewhere. The closure should keep the case orderly, not compress the boards or pages. This is particularly relevant for soft notebooks that can bend more easily than hardbacks.
Let the Texture Carry the Middle
With four closures already framing the cover, the center can stay comparatively quiet. The spiked-sedge texture provides enough surface interest for a minimal spell-book aesthetic. If you add a motif, keep it flatter and smaller than you might on an undecorated jacket. A tiny embroidered rune or stitched label can provide character without turning the central panel, textured background, and four ties into competing focal points.
Original Tutorial and Creator Credit
Creator/Site: MYO Make Your Own
16. Crochet Vintage Paperback Spell Book Cover
 SAVE
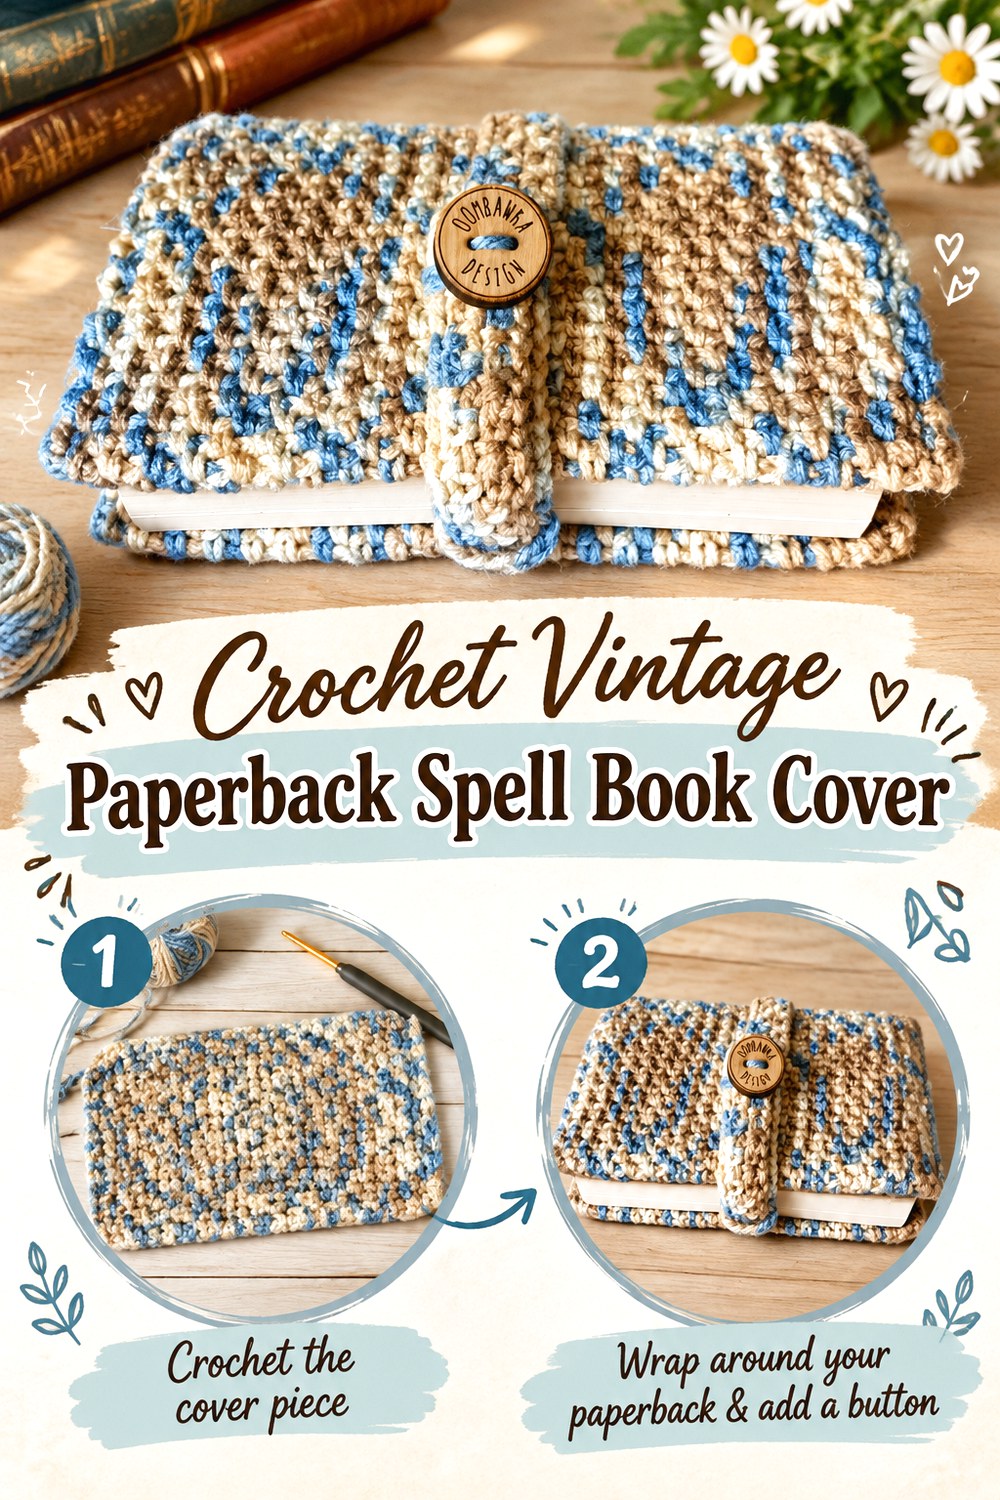
SAVENot every spell book needs to be a massive hardback. Oombawka Design Crochet’s paperback cover pattern draws on an old-fashioned fitted book-cover format and includes optional features such as a strap, button, and page-marker treatment. That makes it a practical reference for transforming an ordinary paperback into a discreet pocket grimoire or enchanted-reading accessory.
This version works particularly well for readers who want the crochet cover to stay attached during reading instead of removing the book from a sleeve. A solid, lightly variegated, or intentionally pooled-looking yarn can create atmosphere while keeping the overall silhouette familiar.
Protect Flexible Paperback Covers From Excess Tension
Paperback boards can curl more readily than hardback covers, so the inner pockets should hold the book without pulling strongly at the corners. Try the cover on before the final finishing is complete. If the book bows when closed, the jacket may be too tight. A looser fit is not automatically better, though; oversized flaps can slide off while reading. Aim for secure contact without visible distortion of the paper cover.
Keep Optional Features Flat Around the Pages
A bookmark or page-marker element should lie comfortably without creating a thick lump near the binding. The same applies to a button tab that folds over the front. If you add beads or charms for a magical effect, keep them outside the page area and consider whether they could dent a paperback during storage. Flat yarn details usually suit a regularly read book better than heavy hardware.
Experiment With Yarn Patterning Carefully
A variegated or pooling yarn can give a simple fitted cover an unexpectedly complex surface, but the effect depends on stitch count, tension, and color sequence. Treat any planned color alignment as a design experiment rather than a guaranteed result after substitution. If the magical look depends on a particular color rhythm, make a useful sample first instead of assuming the skein will reproduce the same distribution across a different book size.
Original Tutorial and Creator Credit
Creator/Site: Oombawka Design Crochet
17. Crochet Linked Double Crochet Spell Book Cover
 SAVE
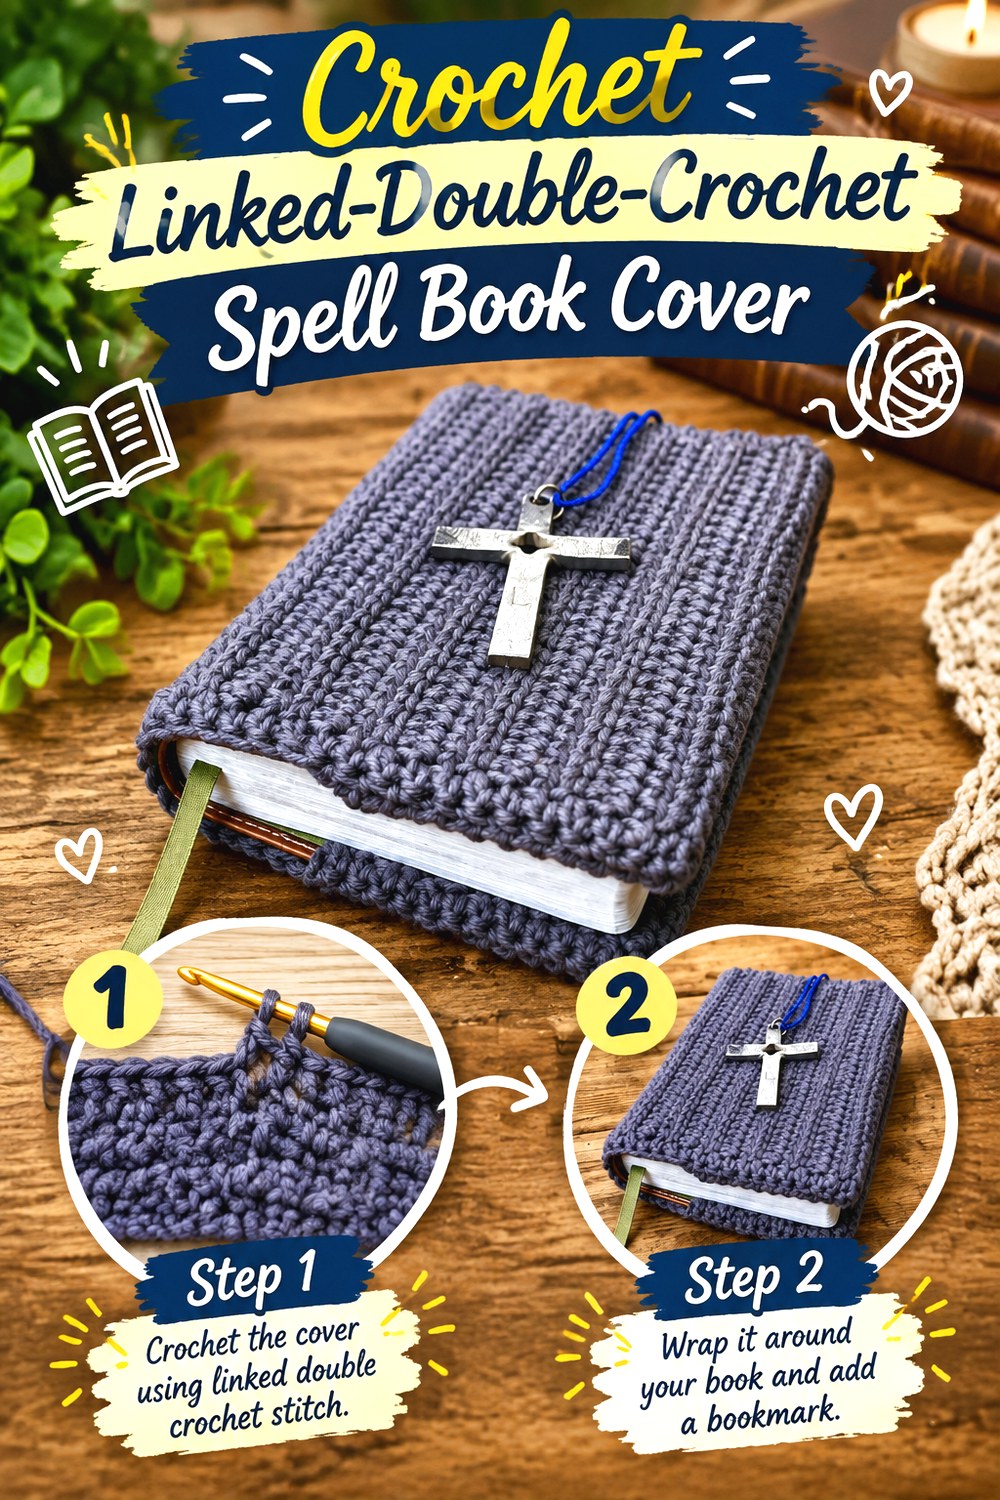
SAVEA dense, uninterrupted fabric can make a spell book feel more like a textile-bound volume than an openwork cozy. I Crochet So Hard’s Margie Book and Bible Cover uses linked double crochet to create a tighter-looking fabric and is designed around customizable book sizing, providing a useful source for this understated approach.
For fantasy styling, the dense surface is a strong blank canvas. You could keep it plain for a severe archive look, add a narrow embroidered border, attach one small crest, or use subtle tonal striping. Because the base fabric does most of the structural work visually, the project does not depend on a large front motif.
Use Density Where It Helps
A tighter-looking stitch fabric offers more visual coverage than open granny work, which can be useful if you do not want the original book cover showing through. The trade-off is that a dense fabric may feel firmer and can use yarn differently from a more open stitch. If substituting yarn or hook size, check the hand of the fabric early. A cover that becomes board-like may not flex comfortably around the spine.
Treat Custom Sizing as a Fit Check
“Customizable” does not mean every change can be made without recalculating the fit. Use the source’s adjustment guidance and compare progress with the actual book. Pay attention to spine thickness and the amount tucked inside the front and back covers. If switching from a hardback to a paperback, the same amount of negative tension may not behave equally well because the underlying covers have different rigidity.
Original Tutorial and Creator Credit
Creator/Site: I Crochet So Hard
18. Crochet Bobble Rune Spell Book Cover
 SAVE
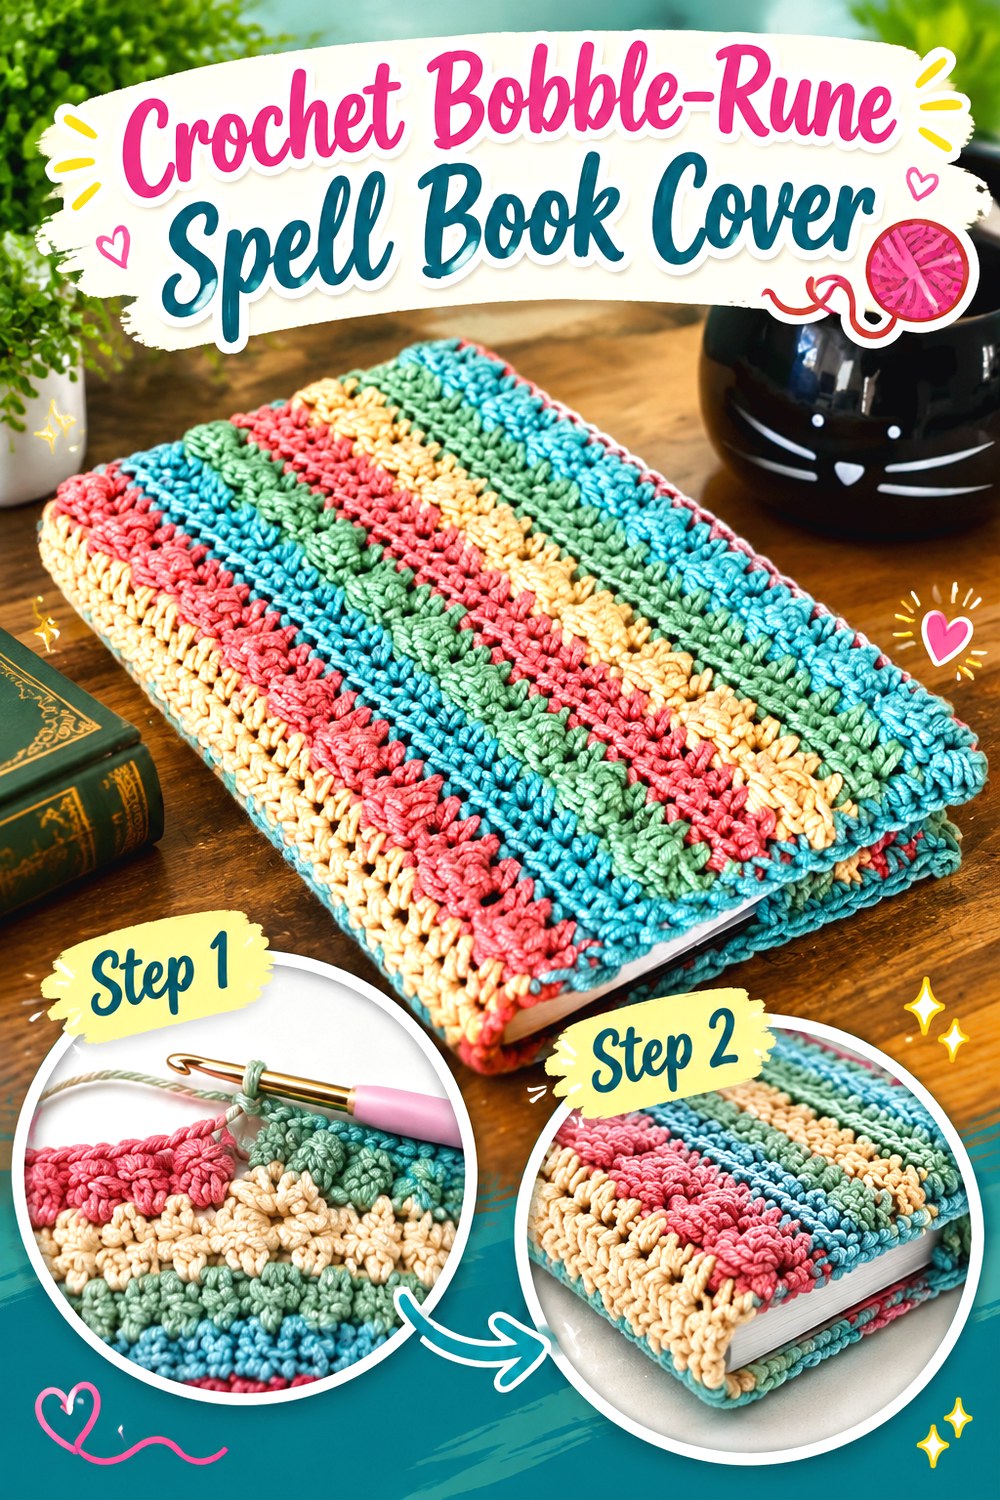
SAVEBobbles can imitate raised inscriptions without requiring separate appliqués. Play Hooky with Me’s book-cover tutorial uses bobble-textured rows within a cover that can be fitted to book measurements, offering an excellent reference for a dimensional but still integrated surface.
For a spell-book interpretation, the bobbles can be treated visually as runes, constellation points, studded leatherwork, or rows of mysterious script. Even when the stitch placement remains faithful to the original tutorial, color choices can move the finished cover toward gothic, celestial, rustic, or whimsical styling. Because the relief is built into the fabric, there are fewer attached pieces to catch than on a heavily appliquéd grimoire.
Keep Raised Rows Away From Critical Folds
Bobbles add thickness, and that thickness can matter near the spine or an inner fold. When assessing the finished dimensions, look at where the most prominent texture will sit once the book is closed. A raised area centered on the front board is easier to showcase than one trapped in a hinge. If adapting the cover length, follow the creator’s sizing logic rather than arbitrarily moving textured sections into areas that need to bend.
Use Bobble Rhythm as Symbolism
You do not need literal letters for the surface to feel rune-like. Repeated clusters, interrupted lines, or alternating color blocks can suggest coded marks without reproducing a recognizable alphabet. This keeps the design abstract and lets the stitch texture remain the focus. If you do experiment with a custom bobble chart, make sure it does not substantially change width or stiffness before assuming the original cover measurements will still work.
Watch the Overall Thickness
A bobble panel is naturally more dimensional than its flatter background. This may be appealing on a display journal but bulky inside a narrow bag. Consider how the cover will be used before adding more raised elements on top. A flat button or simple tie may complement the texture better than another sculptural centerpiece. The most successful version often has one source of strong dimension rather than several competing layers.
Original Tutorial and Creator Credit
Creator: Play Hooky with Me
19. Crochet Frost Rune Mosaic Spell Book Sleeve
 SAVE
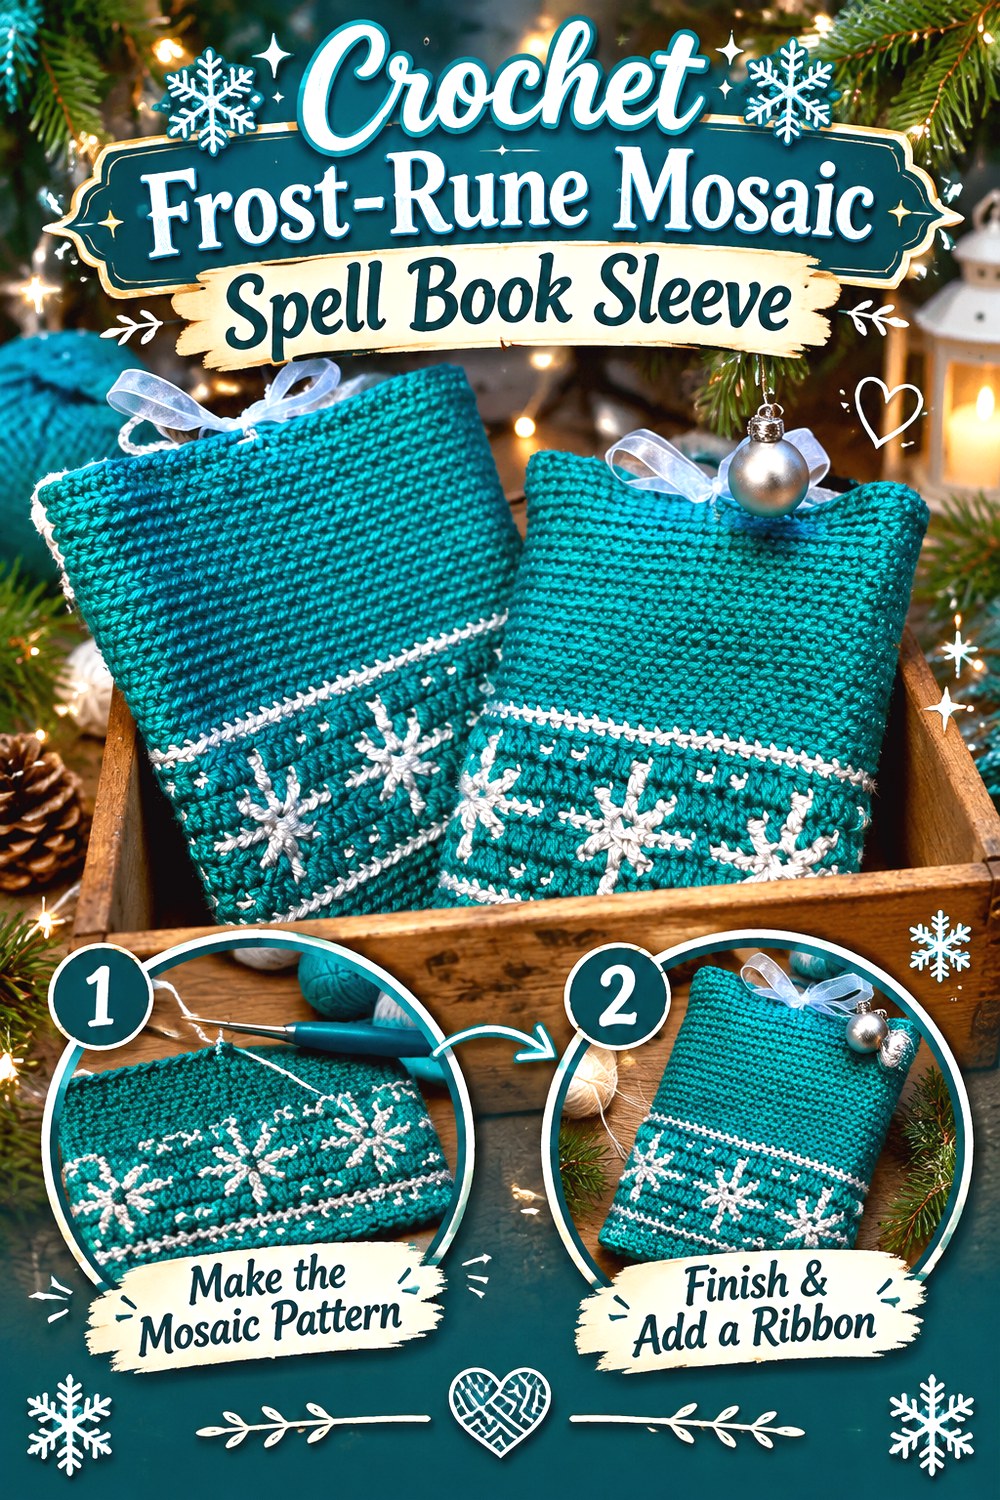
SAVEOverlay mosaic crochet offers a graphic finish with a very different character from tapestry or granny motifs. Concrete Gems’ book-cover project uses an overlay mosaic snowflake design on a sleeve worked around the book, with a loop intended for a ribbon closure. That combination gives a clear reference for a winter grimoire, ice-magic journal, celestial archive, or geometric rune book.
Although the source motif is a snowflake, the finished visual language can extend beyond Christmas when the palette is changed. Deep blue and silver-gray can feel wintry; black and parchment can make the geometry resemble an engraved sigil; muted green and cream can push it toward folk magic.
Keep Mosaic Tension Consistent
Overlay mosaic fabric depends on orderly stitch placement and clear geometry. Pulling one color more tightly than another can narrow sections and distort the motif. Check the panel flat as it grows and compare the edges rather than waiting until the sleeve is complete. If you substitute yarn, make sure both colors behave similarly enough that one does not create a noticeably heavier or looser layer than the other.
Reframe the Snowflake as a Rune
A motif’s mood is partly created by context. Geometric snowflake shapes can read as ice crystals, stars, wards, or abstract runes when removed from conventional holiday colors. This makes the design useful beyond seasonal gifting. Keep surrounding embellishments restrained so the mosaic remains legible; extra embroidery across the graphic can make the layered stitch work harder to read rather than more magical.
Let the Ribbon Closure Stay Replaceable
A separate ribbon or cord can become an easy way to change the cover’s mood without remaking the crochet shell. Velvet-like ribbon can create a formal grimoire effect, while a plain crochet cord feels more rustic. Whatever material you use, check that it slides through the intended loop without abrading or stretching it. Mixed materials may also require different care, so remove detachable ribbons before cleaning when appropriate for the materials involved.
Original Tutorial and Creator Credit
Creator/Site: Concrete Gems
Which Crochet Spell Book Cover Style Should You Choose?
Choose a fitted jacket when you want the crochet to stay on the book during reading or writing; the diamond tapestry, lace, patchwork, heart-sigil, crossover-stitch, vintage paperback, and linked-double-crochet options all emphasize that relationship with the book itself. A removable sleeve makes more sense when protection during storage or transport is the main goal, especially for the plaid, mushroom, waffle, or mosaic designs.
For the strongest visual motif, look toward the stitched eye, botanical tapestry, African flower, heart, or frost-rune mosaic. If you prefer atmosphere without an illustration, the plaid, waffle texture, spiked sedge, linked crochet, and bobble approaches can feel magical through texture and palette alone. Closures also change the personality: ties feel archival, buttons feel handmade and familiar, and magnetic hardware creates a cleaner modern finish.
Conclusion
The most convincing crochet spell book covers are not simply ordinary book cozies made in darker yarn. Construction can do much of the storytelling. A raised eye makes a cover feel like an enchanted object, tapestry turns the front into an illustrated panel, lace suggests an heirloom manuscript, plaid creates an academic mood, and ties or hardware can make the closure itself part of the character.
Choose according to the book you actually plan to cover, then consider how much texture, protection, flexibility, and decoration that use can comfortably support. Once you have settled on a direction, use the linked original tutorials for exact construction details and any project-specific sizing or material information. From there, palette and carefully chosen embellishments can give the finished piece its own grimoire identity.
Frequently Asked Questions
Can I adapt a crochet book-cover tutorial to a thick grimoire or journal?
Often, but the spine thickness needs to be treated as part of the total fit rather than as an afterthought. A journal with a thick binding requires more fabric across the opened cover than a thin notebook of similar height and width. Follow the original designer’s sizing or adjustment guidance where provided, and check the piece around the actual closed book before finishing flaps, seams, or closures. Journals that will accumulate inserts may also need a little future allowance.
Is a fitted cover or a sleeve better for a crochet spell book?
A fitted cover is usually more convenient when the book will be opened often because it stays attached while you read or write. A sleeve is useful when the priority is protecting the entire book between uses or carrying it in another bag. Neither format is automatically better. Consider whether you want immediate access, extra exterior cushioning, a visible spine, and room for dimensional decoration before choosing the construction.
Should I line a crochet spell book sleeve?
A lining can be worthwhile when the crochet fabric is open, when book corners can poke through stitches, or when you want a smoother interior. It also adds another layer and can slightly reduce interior space. Plan for it before final sizing rather than inserting fabric into an already tight sleeve. Care requirements may change when yarn and fabric are combined, so follow the guidance for the actual materials used rather than assuming one washing method suits both.
How can I keep a crochet book cover from stretching out?
Start with a fabric appropriate to the intended weight and avoid repeatedly forcing an undersized cover around the book. Dense stitch patterns generally behave differently from open granny or lace fabrics, and long straps or closures can receive additional stress. Check attachment points and fit periodically during use. Fiber choice also matters, so consult the yarn label for care guidance and avoid assuming that blocking or washing will restore every stretched fabric.
What embellishments work well on a spell book without making it too bulky?
Flat embroidery, tapestry motifs, surface crochet, small appliqués, and modest buttons are easier to store than very large raised pieces. Dimensional eyes, flowers, charms, or sculptural details can work beautifully on display books but may press against neighboring volumes or catch inside bags. Place bulky decoration away from the spine and hinges, and think about how often the book will be handled before deciding how elaborate the surface should become.
Can I change the yarn or hook from the original tutorial?
You can choose different materials when the construction allows it, but a substitution may change fabric thickness, drape, stretch, motif dimensions, and the overall fit around the book. Do not assume the original stitch or row counts will produce the same measurements with a different yarn-and-hook combination. Follow the source’s adjustment guidance where available, make a useful sample when fit is important, and compare the developing fabric directly with the intended book.