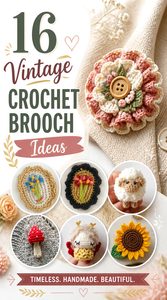
Vintage crochet brooches can range from tiny thread flowers that resemble old-fashioned corsages to padded folk-art figures, felted blooms, embroidered medallions, and whimsical nature pins. That variety matters: a flat brooch behaves differently on clothing from a stuffed design, while fine thread, felted wool, layered petals, buttons, embroidery, and beads can each create a very different period-inspired effect.
This collection brings together 16 projects with clearly different silhouettes and construction styles. Along with floral classics, you will find a matryoshka, butterfly, sheep, mushroom, angel, heart, and snowflake. The notes below focus on choosing scale, keeping a brooch stable when worn, handling embellishments thoughtfully, and deciding which vintage direction fits your wardrobe or gift idea. Exact construction details remain with each credited original tutorial.
Quick List
- Crochet Button-Center Ruffle Corsage Brooch
- Crochet Gathered Rosette Brooch
- Crochet Thread Daisy Pin Brooch
- Crochet Rose Cluster Lapel Brooch
- Crochet Peony Heirloom Brooch
- Crochet Felted Chrysanthemum Brooch
- Crochet Poppy Botanical Brooch
- Crochet Sunflower Thread Brooch
- Crochet Butterfly Keepsake Brooch
- Crochet Toadstool Beaded Brooch
- Crochet Textured Sheep Brooch
- Crochet Angel Lace Lapel Brooch
- Crochet Matryoshka Keepsake Brooch
- Crochet Snowflake Winter Brooch
- Crochet Ribbon-Trim Heart Brooch
- Crochet Oval Embroidered Vintage Brooch
What Makes a Crochet Brooch Look Vintage?
A vintage effect usually comes from the relationship between shape, scale, texture, and finishing rather than from one specific color. Rounded corsage flowers can suggest mid-century accessories, tiny thread blooms can resemble older handmade lacework, and padded folk motifs have a different nostalgic character altogether. Buttons, restrained embroidery, small leaves, ruffled petals, and softly contrasting borders can reinforce those directions without requiring a literal reproduction of an antique piece.
Scale is especially important. A fine flower pinned to a blouse reads differently from a large dimensional corsage intended for a coat. Before changing yarn thickness, consider whether enlarging the motif will also increase weight, petal droop, or leverage on the pin back. When adapting a tutorial, preserve the broad proportions that make the original shape recognizable, then adjust color and embellishment more freely.
Choose Structure According to Where the Brooch Will Be Worn
A brooch for a sturdy coat or project bag can tolerate more thickness than one intended for lightweight knitwear. Layered petals, stuffing, felted fabric, buttons, or beads all add visual interest, but they can also move the center of gravity farther away from the garment. A broad backing or well-positioned pin can help a dimensional piece sit more evenly.
Flat thread motifs generally place less strain on fabric, although fine crochet can curl or lose definition if it is not finished appropriately for the fiber. Padded figures need a tidy back so the pin does not disappear into the stuffing. For very open or loosely knitted garments, test the brooch carefully before wearing it; the pin and decorative elements should not catch surrounding stitches unnecessarily.
Plan Embellishments and Backing as Part of the Design
Vintage-inspired brooches often benefit from buttons, embroidery, beads, felt, ribbon, or contrasting thread, but decoration should not overwhelm a small crochet base. One strong focal detail usually reads more clearly than many unrelated additions. A special button can become a flower center, for example, while embroidery can emphasize the border or face of a folk-style motif.
Treat the back with the same care as the front. Secure yarn ends, check that added pieces cannot rotate easily, and position the brooch fitting so the finished piece hangs in the intended direction. Care requirements can also change when several materials are combined. Follow the yarn label and the original creator’s guidance, and consider spot handling rather than assuming a decorated brooch can be washed exactly like an undecorated crochet swatch.
1. Crochet Button Center Ruffle Corsage Brooch
 SAVE
SAVEA double-layer ruffled flower has the substantial silhouette of a small vintage corsage without requiring a complicated figurative shape. Fiber Flux’s original project stacks two crocheted flower layers and finishes the center with a button; optional leaves extend the outline beyond a simple circle. That layered profile gives this idea more depth than a flat applique while keeping the construction visually straightforward.
This style suits cardigans, coat lapels, shawls, and structured bags where the flower has room to sit without being crushed. Changing the button can alter the mood considerably, so an understated center works well when the yarn already creates strong texture.
Let the Center Establish the Period Mood
The button is small, but it becomes the visual anchor because the ruffles radiate around it. A matte, fabric-covered, shell-like, or understated decorative button can make the brooch feel more heirloom-inspired, while a brightly novelty-shaped center shifts it toward contemporary craft styling. Whatever you choose, check that its weight is appropriate for the flower and that it can be attached firmly without pulling the middle out of shape.
Keep the Two Ruffle Layers Distinct
Layering works best when the upper and lower sections remain visually readable instead of collapsing into one bulky mass. Yarn substitution can change that balance: a lofty yarn may exaggerate the ruffles, while a smoother yarn may show the layered edge more clearly. If adapting the materials, compare the depth of the finished flower with the garment you intend to pin it to before adding extra leaves or decoration.
Original Tutorial and Creator Credit
Creator/Site: Jennifer Dickerson / Fiber Flux
2. Crochet Gathered Rosette Brooch
 SAVE
SAVEThis flower takes a different route to volume. Joanne Wardle’s tutorial creates a highly textured crochet flower that is shaped and secured into its finished form, with the center left open for a button or other decoration. The example is intended to sit relatively flat compared with a heavily padded corsage, making it useful when you want a noticeable floral pin without a large amount of projection from the garment.
Its compact, gathered appearance suits a retro cardigan, felt hat, scarf, or fabric bag. Because the flower itself supplies so much texture, restrained color choices can make the silhouette feel more polished rather than visually busy.
Watch the Shape Before Adding the Center
The flower’s character comes from how evenly its fullness is distributed. Before covering the middle, place the piece on a flat surface and check whether one section is bunching more strongly than the others. A center embellishment can disguise a small opening, but it will not correct an obviously uneven outer profile. Shape first, embellish second, and attach the pin only after you are satisfied with the direction in which the flower should sit.
Use Embellishment to Control Contrast
The source suggests several possible center treatments, including buttons and beads. If you want a vintage effect, think of the center as contrast rather than extra decoration for its own sake. A dark center can sharpen a pale flower, while a tone-on-tone center gives a quieter textile look. If beads are used, keep their combined weight in mind so the brooch does not tip forward.
Original Tutorial and Creator Credit
Creator/Site: Joanne Wardle / Made By Joanne
3. Crochet Thread Daisy Pin Brooch
 SAVE
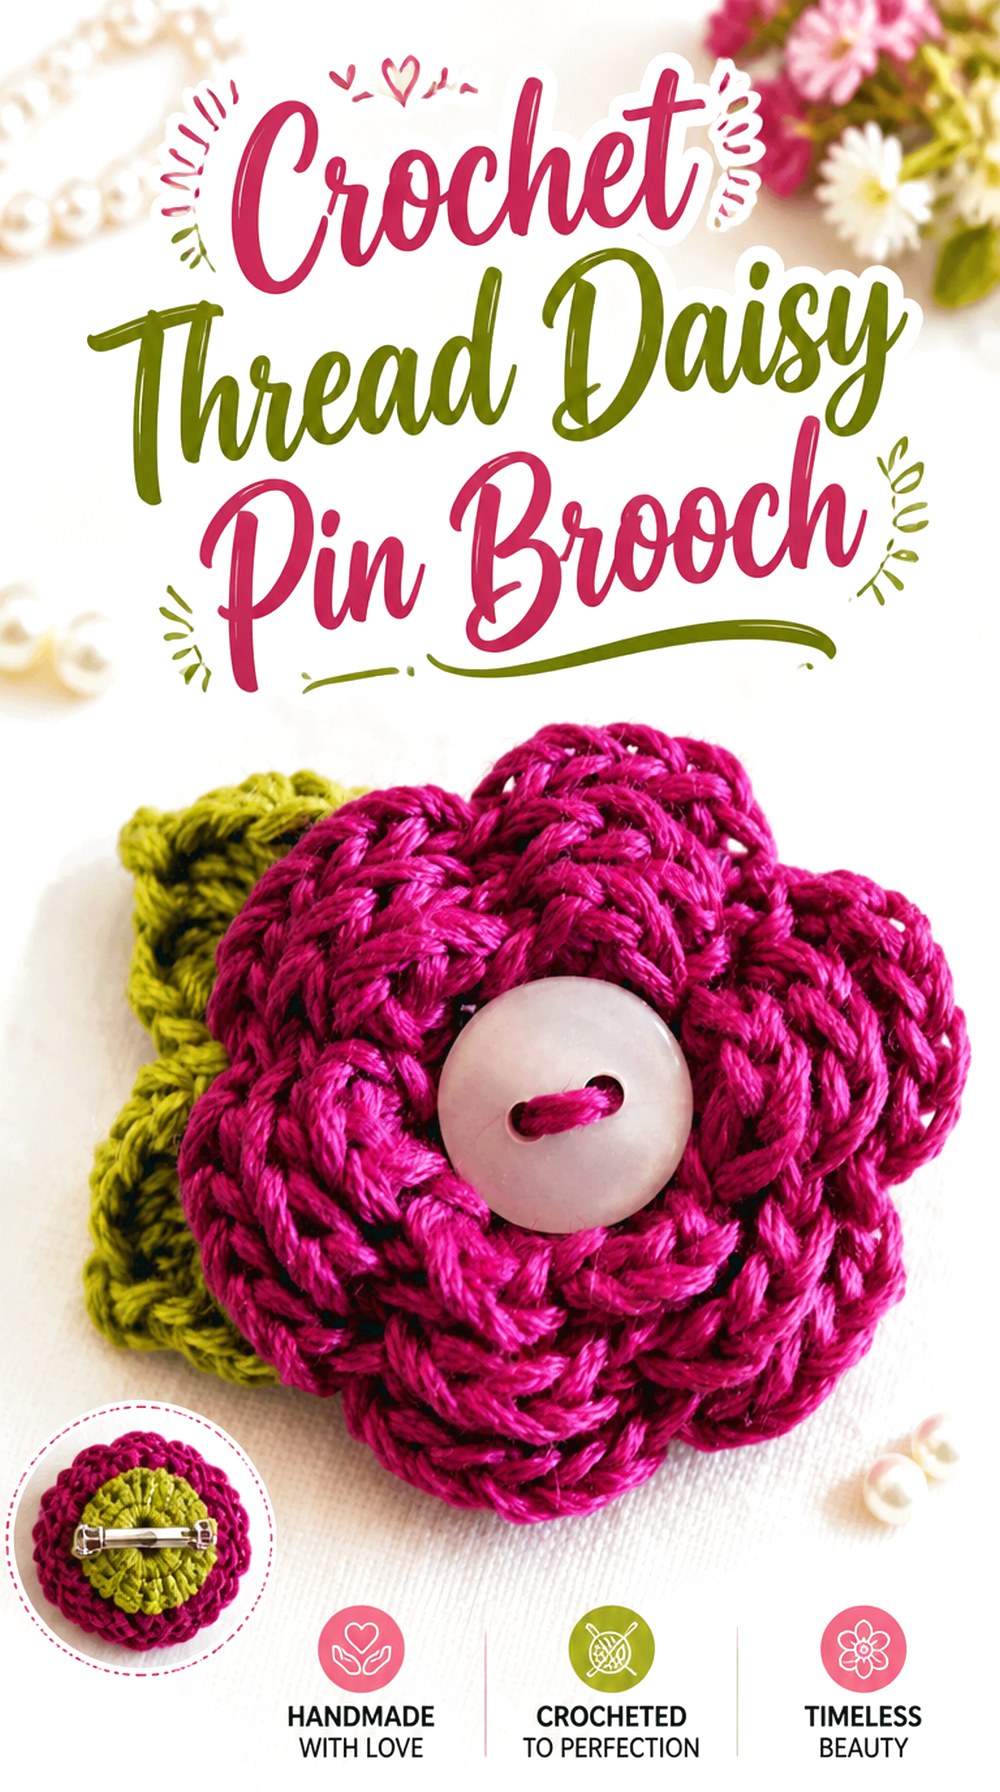
SAVEA thread-scale daisy gives the collection a lighter, more jewelry-like option. Cre8tion Crochet’s Daisy Delight design is specifically presented as a pin, brooch, or hair accessory and uses a defined flower center with petals and optional leaves. The source also shows how substantially the finished scale changes when the motif is made in thicker yarn instead of embroidery thread.
That scale flexibility is useful for vintage styling. In thread, the flower can look delicate on a blouse or collar; made larger, the same basic form becomes closer to a bold retro floral badge. The simpler outline also makes this a good counterpoint to the densely ruffled flowers elsewhere in the list.
Decide on Scale Before Choosing the Backing
A tiny thread flower and a larger yarn version do not need the same visual or structural backing. On the smaller version, an oversized pin mechanism can show around the edges. On a larger version, a very small fitting may allow the flower to rotate. Make the scale decision first, then choose hardware that fits comfortably within the back of the finished motif.
Keep the Daisy Shape Legible
Daisies rely on a clear distinction between the center and radiating petals. If you add leaves, beads, or extra edging, make sure those additions do not compete with that simple graphic outline. Thread can also emphasize small differences in tension, so check the petal arrangement before attaching the brooch fitting and gently shape the flower according to the fiber and creator guidance.
Original Tutorial and Creator Credit
Creator/Site: Lorene / Cre8tion Crochet
4. Crochet Rose Cluster Lapel Brooch
 SAVE
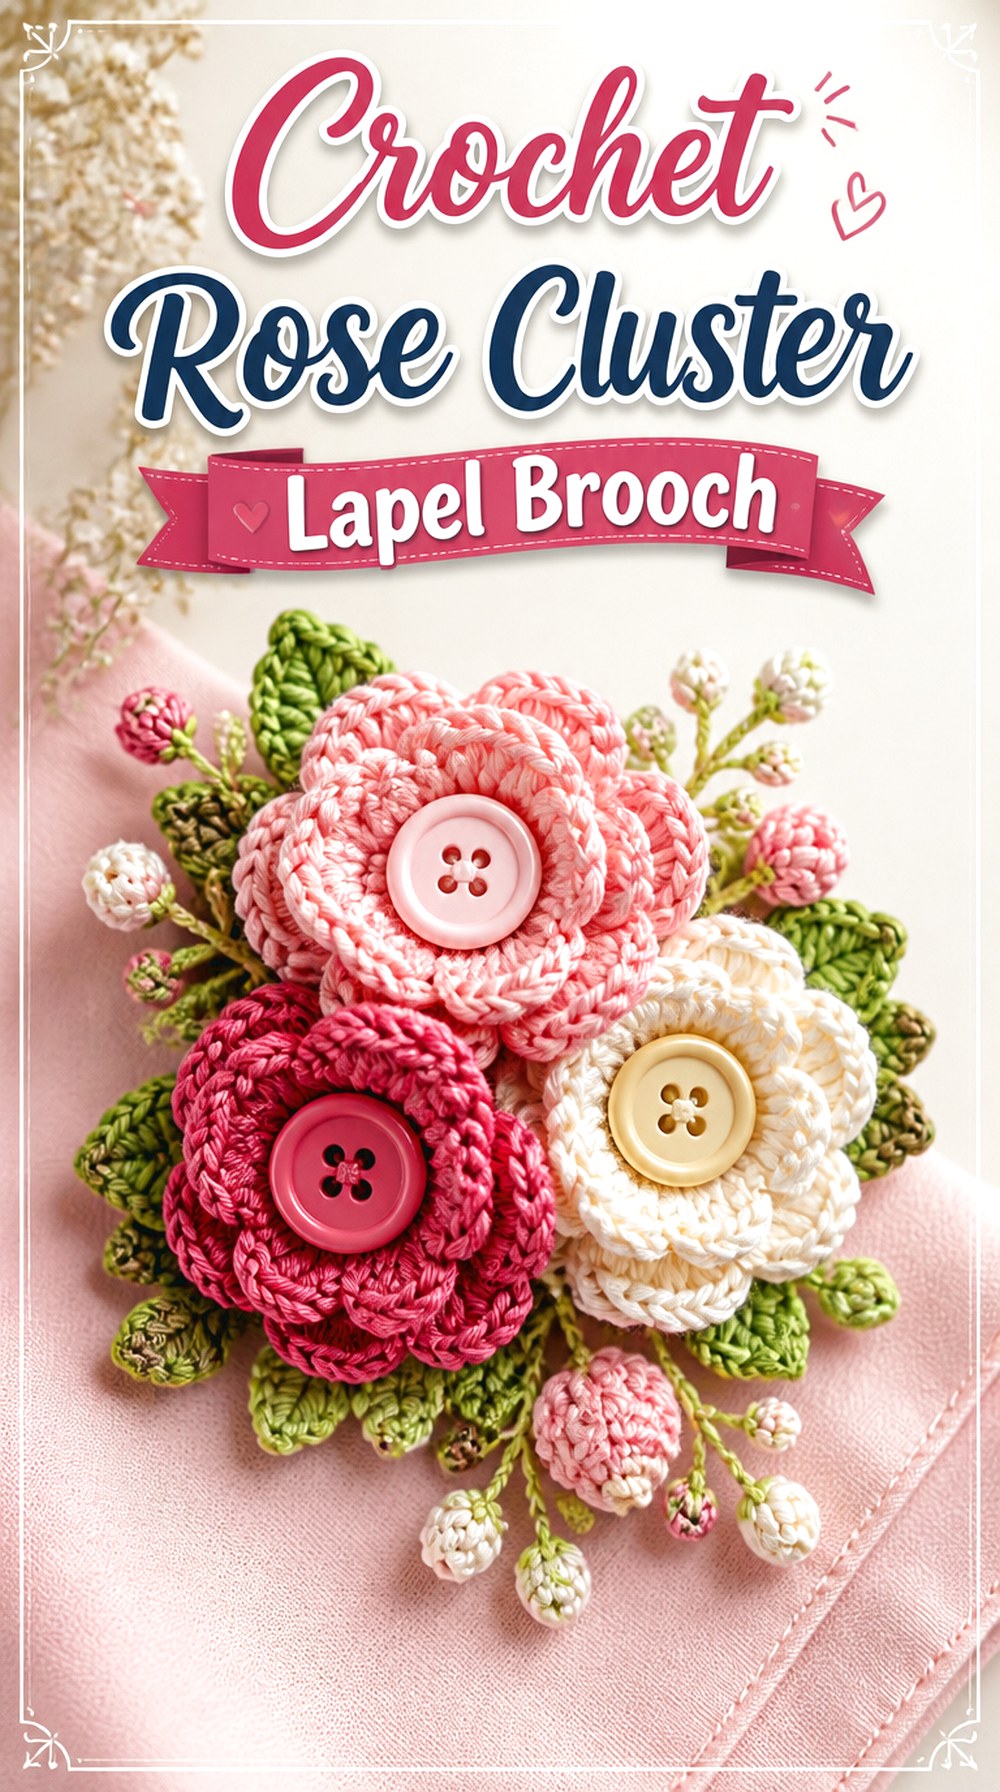
SAVEInstead of centering the design on one bloom, this brooch groups several small roses with leaves on a supporting base. The Crochet Circle’s project uses multiple roses to create a statement arrangement rather than a single symmetrical flower, giving it the look of a miniature floral corsage or old-fashioned dress ornament.
The clustered layout is useful when you want asymmetry and depth. It can sit nicely on a coat, shawl, or bag where a wider composition has room to show. Because several separate elements meet on the same base, arrangement matters almost as much as color: overlapping every rose equally can make the design look crowded, while varied spacing lets individual blooms remain visible.
Build a Clear Floral Hierarchy
A cluster tends to look more intentional when the eye can identify a focal bloom and then travel through smaller supporting forms. Before sewing everything permanently, arrange the roses and leaves on the backing and view them from the distance at which the brooch will usually be seen. Slight differences in angle can create more natural movement than placing every flower upright and evenly spaced.
Make the Base Work Harder Than the Front
The decorative surface may attract attention, but the hidden foundation carries the combined weight of several motifs. Keep the backing large enough to support the cluster without protruding obviously around the edges. If the flower arrangement feels unstable before the pin is attached, correct that first rather than relying on the garment to hold everything in position.
Avoid Excess Bulk Between the Roses
More motifs do not automatically create a richer-looking brooch. If leaves, flower edges, and yarn tails stack in the same area, the underside can become thick and difficult to pin neatly. Trim and secure finishing work carefully, and consider whether every planned leaf contributes to the outline. Leaving a small amount of visual breathing room can make a cluster look more refined.
Original Tutorial and Creator Credit
Creator/Site: The Crochet Circle
5. Crochet Peony Heirloom Brooch
 SAVE
SAVEThe peony tutorial from sew ritzy~titzy is one of the strongest choices here for deliberately nostalgic styling because the creator combines the crochet flower with fabric leaves and demonstrates a vintage earring component as a possible center. Buttons or beads are also offered as alternatives.
That mixed-media approach gives the brooch an assembled-heirloom feeling rather than the appearance of a single crochet applique. It would work particularly well on plain outerwear, a cloth handbag, or a simple scarf where the flower can become the focal accessory. If you adapt the idea with an older jewelry component, inspect that component first so weak edges, sharp metal, or unstable fastenings are not hidden inside the finished brooch.
Balance the Crochet Flower With the Centerpiece
A decorative center can make the brooch memorable, but the peony still needs to read as a flower. Lay the proposed center on the bloom before sewing it down and check whether it overwhelms the surrounding petal texture. A small jewelry component may look proportionate on thick yarn but oversized on a finer adaptation. Scale the embellishment to the finished flower rather than choosing it independently.
Treat Mixed Materials as a Care Limitation
Crochet yarn, fabric leaves, metal jewelry components, beads, and felt may all respond differently to moisture and friction. Once these materials are combined, care should be based on the most delicate component rather than the yarn alone. If you use a reclaimed earring or button, clean and inspect it appropriately before assembly and avoid assuming the finished brooch can be washed like a plain crochet piece.
Preserve the Soft Peony Silhouette
A peony should look full rather than sharply geometric. If the flower seems compressed after assembly, check whether the center has been sewn too tightly or whether the back is pulling the crochet inward. The finished form can be substantial, so test its position on the intended garment before finalizing the pin orientation.
Original Tutorial and Creator Credit
Creator/Site: Dawn / sew ritzy~titzy
6. Crochet Felted Chrysanthemum Brooch
 SAVE
SAVEFelting changes the character of crochet more dramatically than a simple yarn substitution. Yarnspirations’ Red Heart chrysanthemum is crocheted and then felted, creating a denser flower surface and a distinct handmade finish. The pattern page identifies the project specifically as a pin and provides a downloadable construction resource.
For a vintage-inspired wardrobe, this kind of dense textile flower can resemble a soft corsage and works particularly well against substantial fabrics. It is structurally different from the crisp thread daisy and open ruffle flowers because the finishing process intentionally changes the fabric after crocheting.
Swatching Matters More When Felting Is Involved
Felting changes dimensions and stitch visibility, so substitution deserves extra caution. Different fibers do not felt in the same way, and some do not felt effectively at all. Use the fiber and care information given by the original pattern rather than assuming any yarn with a similar thickness will behave identically. If you change materials, make a small sample first so the finished transformation is not a surprise.
Let Density Do the Structural Work
A felted flower already gains visual solidity through its compacted surface. Extra backing, heavy beads, or stiff internal layers may be unnecessary and could make the brooch cumbersome. Once the flower is finished, assess how well it holds its shape before adding anything beyond the required brooch attachment.
Account for the Finished Flower’s Weight
Even a soft flower can pull on lightweight clothing if it becomes dense after finishing. Test it on a garment comparable to the one you intend to wear it with. A coat lapel, felt hat, or sturdy bag can generally support more substantial accessories than a delicate open cardigan.
Original Tutorial and Creator Credit
Creator/Site: Yarnspirations / Red Heart
7. Crochet Poppy Botanical Brooch
 SAVE
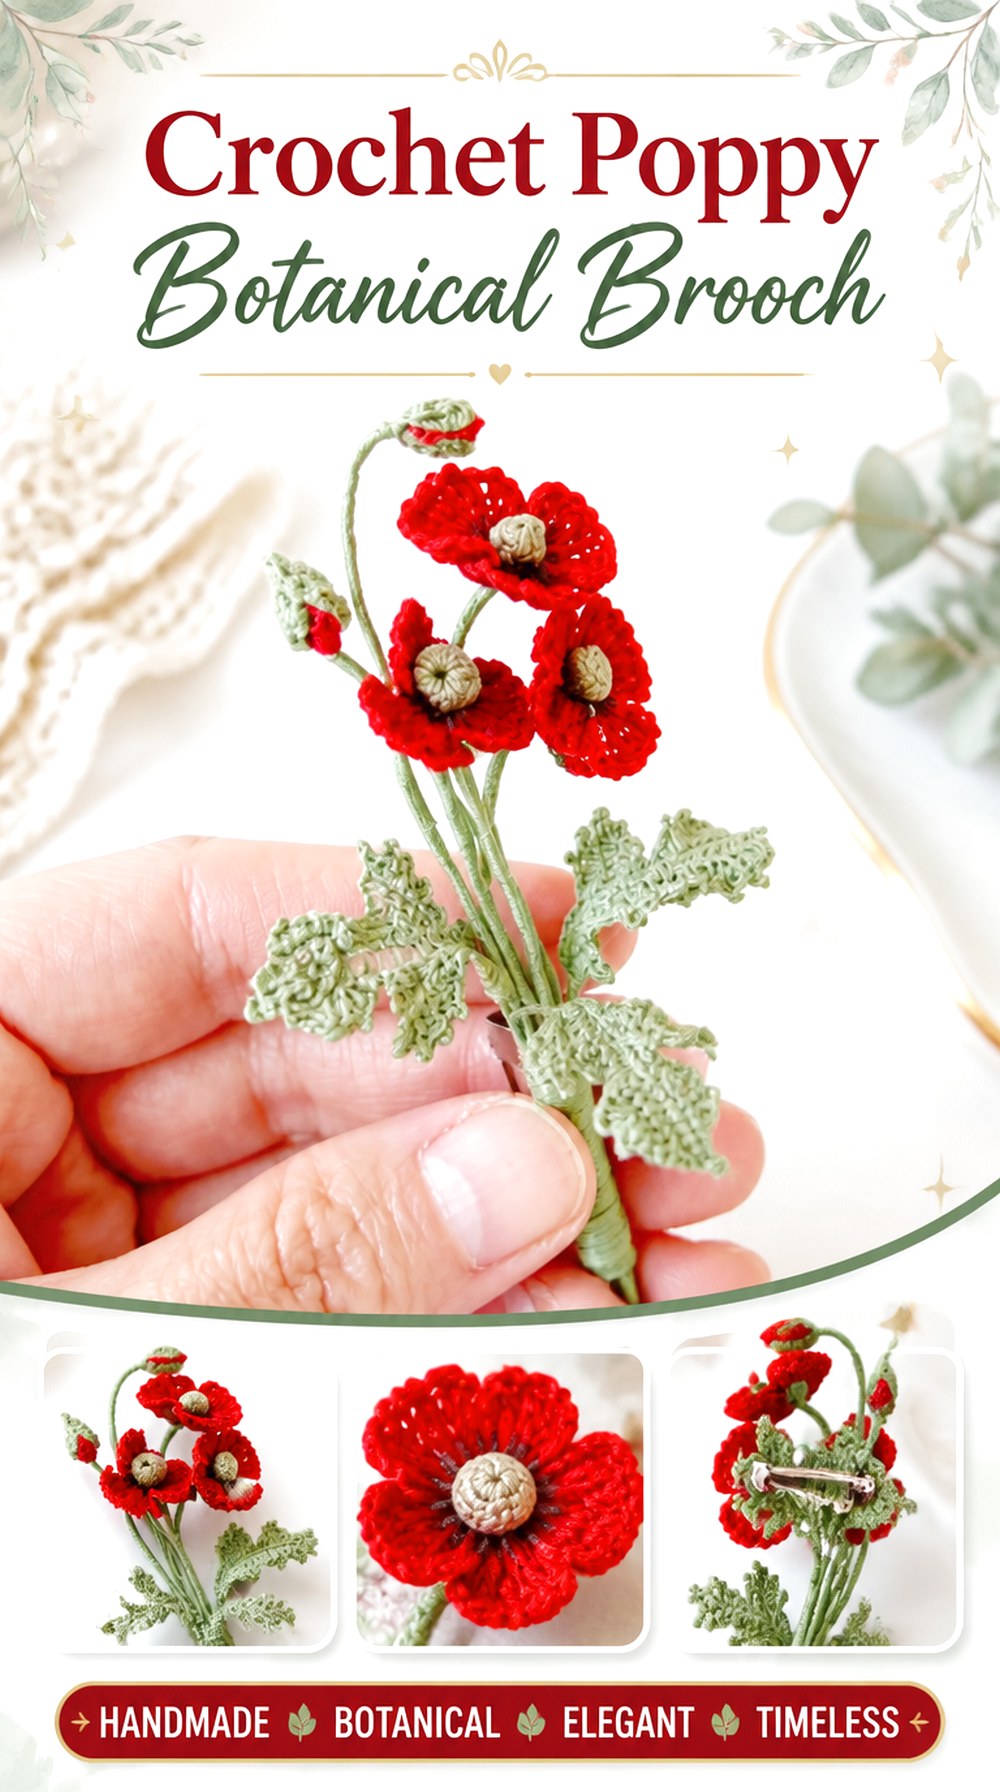
SAVETinyLimeCraft’s poppy brooch moves toward botanical detail, with separate attention to petals, the flower center, and leaves. That makes it a strong option for readers who prefer a refined floral specimen rather than a simplified badge-like blossom.
The asymmetry of a flower-and-leaf arrangement also gives it a different styling role from a round corsage. Positioned along a lapel or scarf edge, the brooch can follow the line of the garment instead of sitting as a centered circle. Because the tutorial uses fine-scale materials and structural components, check the original source carefully before substituting yarn or changing scale; enlarging delicate botanical parts can alter the balance substantially.
Keep the Botanical Parts in Proportion
A realistic-looking floral brooch depends on the relationship between petals, center, and foliage. If you change yarn or thread size, every component should still appear to belong to the same flower. An oversized leaf beside a small bloom can make the design feel accidental. Compare the pieces together before permanent assembly rather than evaluating each one separately.
Position the Pin Around the Visual Direction
Unlike a circular flower, a botanical brooch has an obvious direction. Decide whether you want the flower to sit upright, diagonally, or horizontally before attaching the hardware. The correct pin orientation is the one that supports the intended display without allowing the flower to swing downward.
Be Cautious With Fine Structural Elements
The source includes fine materials and detailed floral components. If you substitute components or introduce wire, thread, or other structural materials, make sure exposed ends cannot scratch the wearer or snag clothing. Decorative brooches are handled repeatedly, so concealed construction should remain secure as well as attractive.
Original Tutorial and Creator Credit
Creator: TinyLimeCraft
8. Crochet Sunflower Thread Brooch
 SAVE
SAVESure It’s sunflower pin has a compact, graphic flower shape with a strongly defined center and radiating petals. The tutorial is specifically framed as a crochet brooch or hijab pin and uses fine crochet thread, creating a much different scale from chunky corsage-style flowers.
For vintage styling, the sunflower can lean either rustic or mid-century depending on color and placement. A small version has enough visual contrast to stand out on a solid cardigan without dominating it. Because the source also uses finishing materials to help the piece hold its form, consult the tutorial before replacing those techniques with a different stiffening or shaping approach.
Keep the Petal Ring Even
Sunflowers depend on a balanced radial outline. Before the brooch back is attached, rotate the finished flower and check whether the petals appear evenly distributed from every angle. Small differences become more obvious around a dark, strongly contrasting center. Shape the piece according to the tutorial and material rather than forcing uneven petals into place with heavy glue.
Consider Fabric Before Adding Stiffness
A crisp flower can look attractive, but very stiff edges may catch fine knitwear more readily than softer crochet. Think about where the brooch will be worn before deciding whether to make it firmer than the source intends. Outerwear and bags can usually accommodate a more rigid pin than a lightweight scarf.
Original Tutorial and Creator Credit
Creator: Sure It
9. Crochet Butterfly Keepsake Brooch
 SAVE
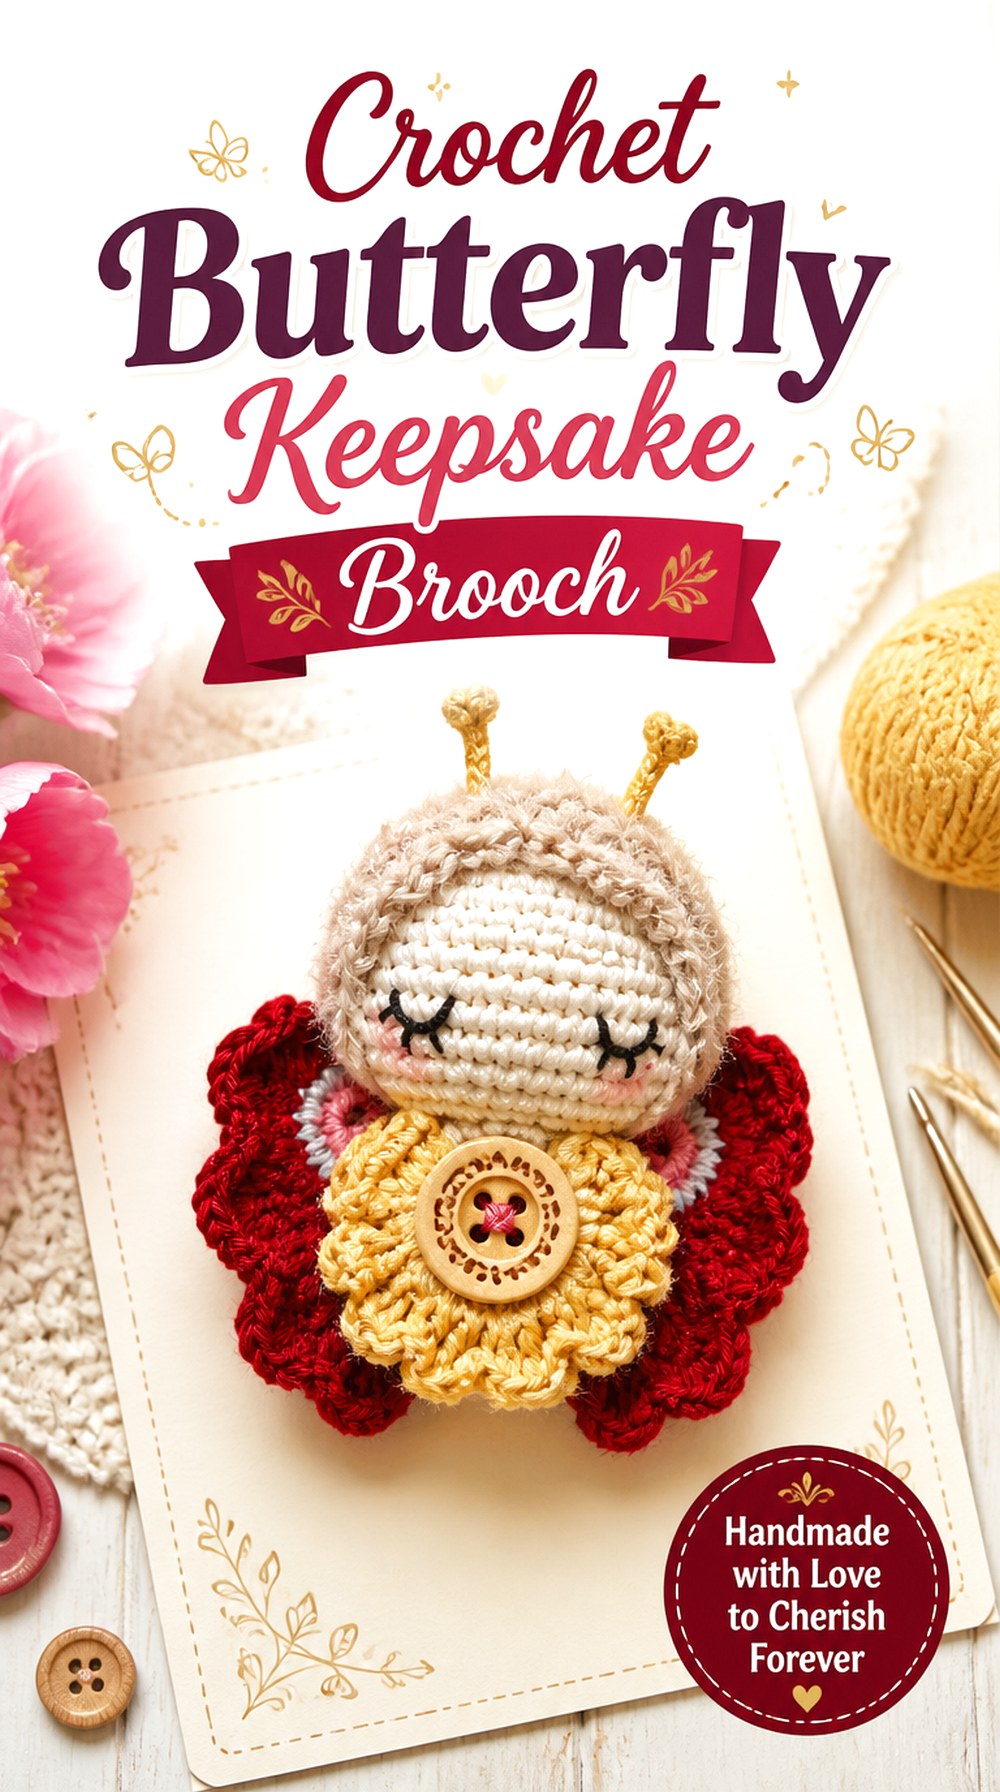
SAVEThis butterfly is much more dimensional than a flat butterfly applique. CrochetConfetti’s tutorial presents a small character-style butterfly brooch with a crocheted body, delicate wings, tiny limbs, antennae, facial details, and a pin attachment.
That makes it a whimsical keepsake choice rather than a conventional floral accessory. It can work on a sturdy cardigan, fabric tote, or display piece where the dimensional details will not be flattened. The combination of stuffing and protruding elements also means that finishing deserves more attention than it would on a flat motif.
Protect the Wing Shape
The wings carry much of the butterfly’s identity, so avoid letting the body or pin attachment distort them. Before sewing the brooch fitting permanently, place the butterfly flat and check that both sides remain visually balanced. If one wing is pulled inward by assembly, correct the tension before adding further decoration.
Keep Facial Details Secondary
Character details can make the butterfly expressive, but the overall silhouette should still read immediately as a butterfly. Tiny embroidery, cheeks, or decorative accents are most effective when they support rather than compete with the wings. If you alter the embellishment style, consider how those changes affect the vintage mood; restrained embroidery can create a softer keepsake quality.
Reserve Dimensional Pins for Supportive Surfaces
Stuffed brooches stand away from the garment and can exert more leverage on the pin than a flat motif. Test this one on stable fabric before wearing it on delicate knitwear. For display on a bag, hat, or coat, check that the projecting antennae and limbs will not be constantly rubbed or caught.
Original Tutorial and Creator Credit
Creator: CrochetConfetti
10. Crochet Toadstool Beaded Brooch
 SAVE
SAVEA fly-agaric-style mushroom immediately introduces a woodland, storybook form that feels at home with vintage folk accessories. DOSSOVA’s tutorial is specifically for a crochet mushroom brooch and identifies it as a beaded crochet piece rather than simply a mushroom applique.
This project is a good alternative when you want something nostalgic without using flowers. Its recognizable cap-and-stem silhouette can carry strong contrast, while beadwork supplies small points of texture. Because the shape is directional, the hardware should be attached only after you decide how upright you want the finished mushroom to sit.
Use Beads as Surface Detail, Not Ballast
Beads can give a mushroom cap attractive dimension, but too much concentrated weight can make a small brooch rotate or sag. If you substitute different beads, compare their size and weight with the scale of the crochet. Secure each embellishment carefully and check the reverse side so thread ends do not interfere with the brooch fitting.
Keep the Cap and Stem Visually Connected
A mushroom reads clearly when the cap feels proportionate to its stem. Changes in yarn thickness or tension can upset that relationship even if each individual piece looks neat. Assemble the major crochet forms first, view them together, and make decorative decisions only after the overall silhouette is working.
Think About Snagging Before Wearing It on Knitwear
Beads and dimensional edges can catch loose fibers more readily than a smooth flat pin. A woven coat, dense cardigan, or fabric bag may therefore be a more forgiving surface than very open lace crochet or a delicate knitted scarf. Test the brooch on an inconspicuous area if the garment is fragile.
Original Tutorial and Creator Credit
Creator: DOSSOVA
11. Crochet Textured Sheep Brooch
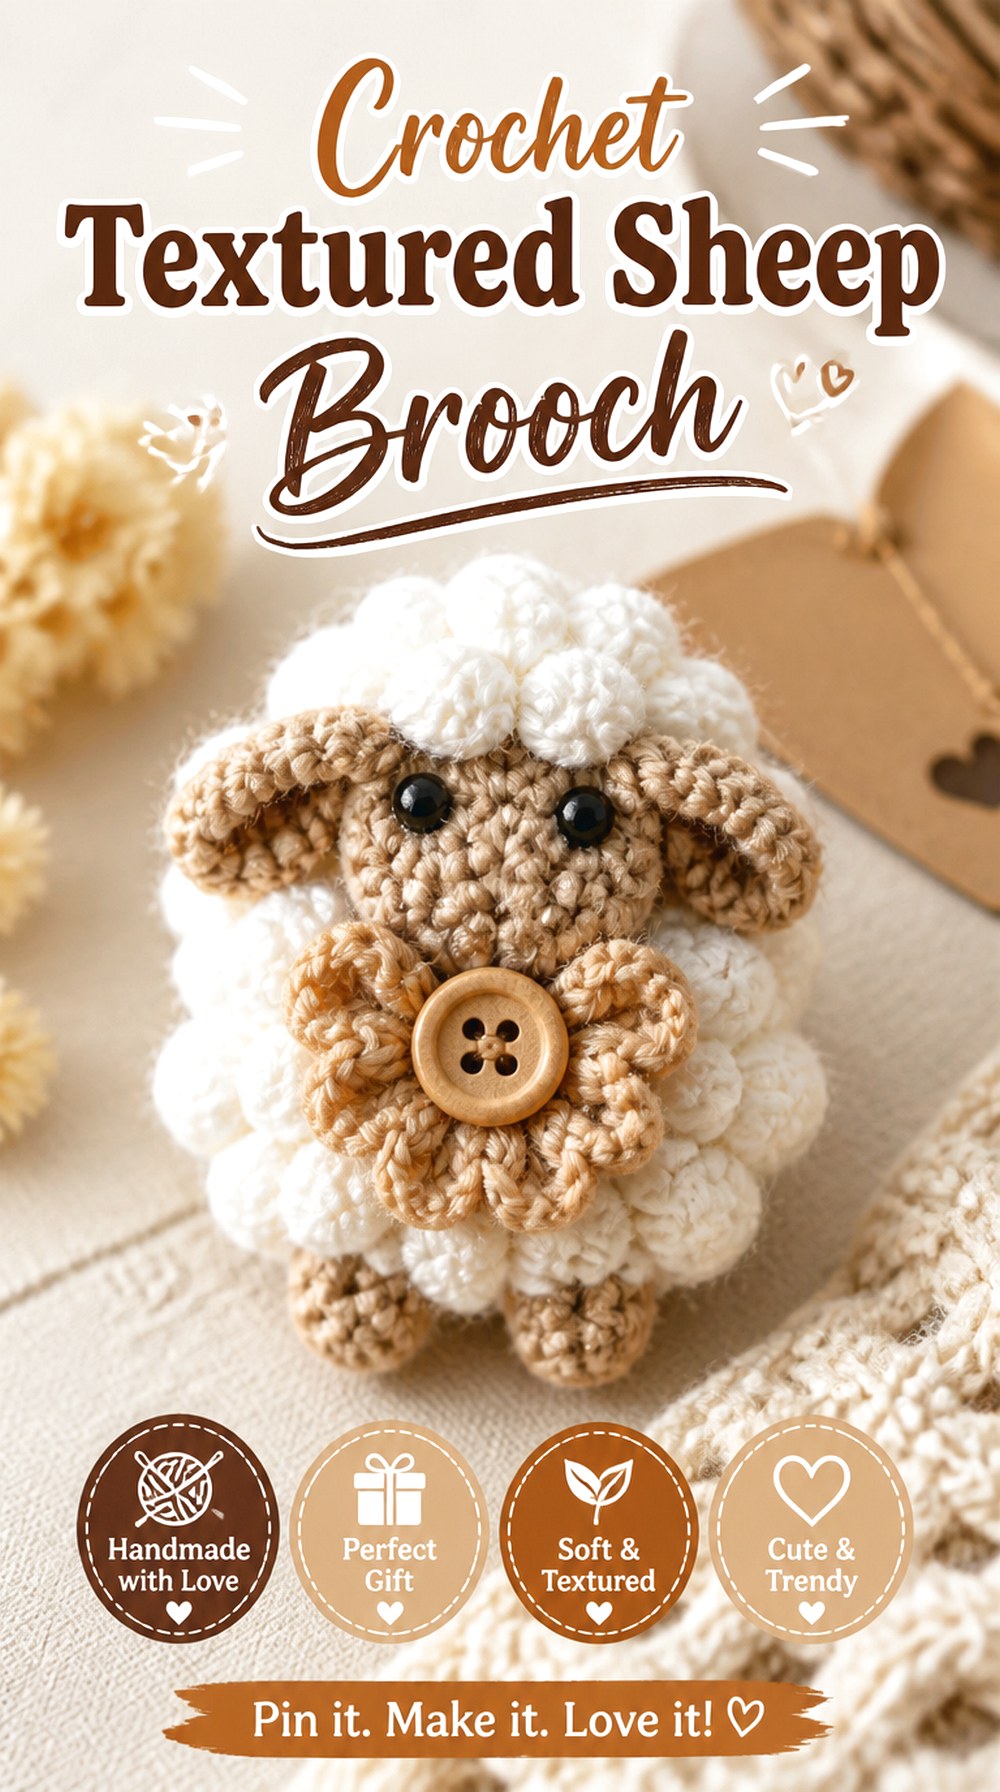 SAVE
SAVEHello stitches’ sheep brooch stands apart through surface texture. The detailed tutorial uses a fur-style crochet treatment to build the sheep’s characteristic body, so the tactile quality of the fabric is central to the finished animal rather than just decorative edging.
That fluffy profile gives the brooch a handmade folk-art quality that works particularly well on denim, tweed-like outerwear, project bags, or craft aprons. Because texture can obscure edges and attachment points, take extra care with the reverse side. The pin needs to sit securely even though the front intentionally looks soft and irregular.
Make Texture Read as Wool, Not Clutter
The success of a sheep motif depends on preserving a recognizable head and body outline despite the fluffy surface. If you substitute a thicker or fuzzier yarn, check whether important contours disappear. A texture that looks appealing in a skein can overwhelm a tiny brooch, so compare the finished density with the scale of the animal.
Keep the Pin Away From Loose Loops
A fur-like crochet surface can create loops or projecting fibers that should not become trapped in the fastening mechanism. Before attaching the brooch back, identify a stable section of the reverse side and keep decorative texture away from the moving parts of the pin.
Check Small Details for the Intended Recipient
Any added eyes, beads, buttons, or other small components should be considered carefully when the brooch is intended as a gift. A sharp pin already makes a brooch unsuitable as an unsupervised play object for a young child. Treat the finished item as a wearable accessory rather than a toy unless the original design and components are explicitly appropriate for another use.
Original Tutorial and Creator Credit
Creator: hello stitches
12. Crochet Angel Lace Lapel Brooch
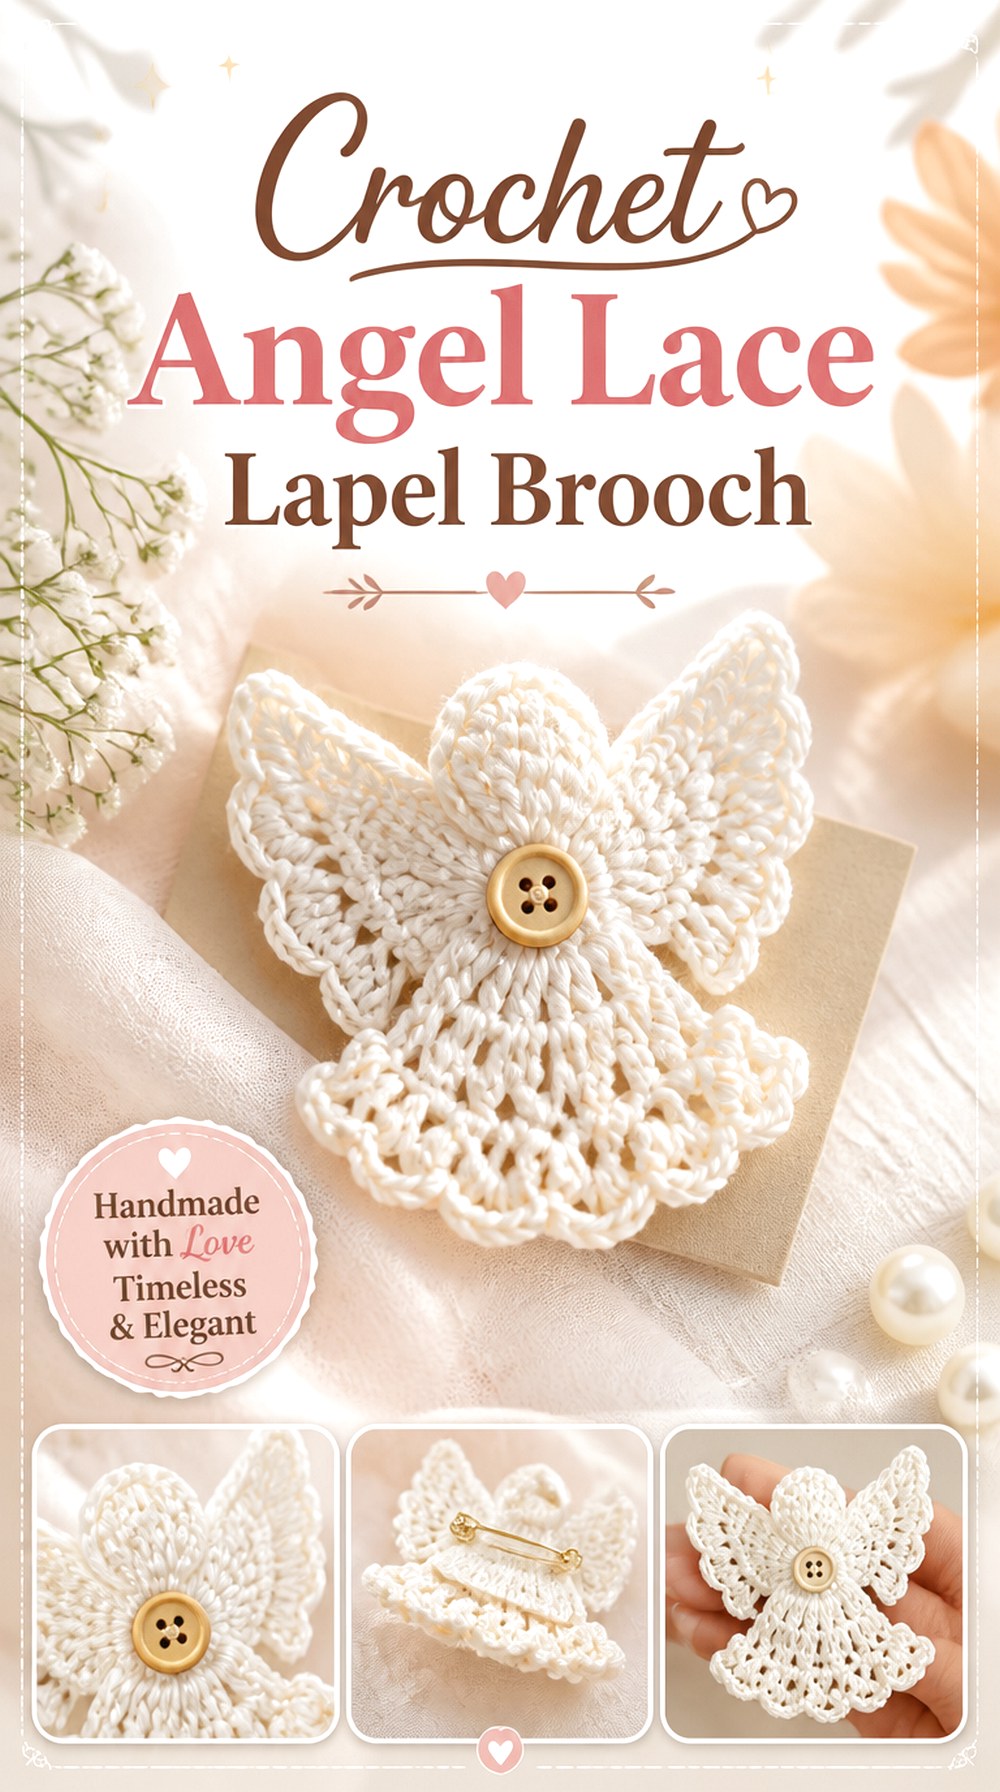 SAVE
SAVEKim Guzman’s angel pin has the vertical, symmetrical silhouette of a traditional lapel or holiday ornament rather than a circular badge. CrochetKim’s source presents several yarn-and-hook options, showing that the same basic angel concept can be interpreted at different scales.
A fine version can feel almost lace-like, while a larger yarn interpretation will read more as a textile ornament. That makes this project particularly useful if you like vintage religious, holiday, or keepsake accessories but want something flatter and less figurative than an amigurumi-style character.
Match Scale to the Garment
The angel’s long outline means enlargement affects more than width; it also increases the visual drop below the pin. Before choosing a thicker yarn, consider whether the finished piece will still sit neatly on a lapel or whether it would function better on a bag, stocking, or decorative textile.
Maintain Symmetry Through Finishing
A small imbalance in the wings or lower body can make a symmetrical figure look tilted even when the pin itself is level. Lay the angel flat before attaching the hardware and check both sides carefully. Blocking or shaping should follow the fiber and creator guidance rather than an assumed treatment.
Leave Enough Space Around the Silhouette
This motif benefits from visual breathing room. If worn beside a collar, scarf fold, or other brooch, surrounding fabric can hide one wing and make the shape harder to identify. Place it where the complete outline remains visible.
Original Tutorial and Creator Credit
Creator/Site: Kim Guzman / CrochetKim
13. Crochet Matryoshka Keepsake Brooch
 SAVE
SAVEAnnaboo’s House gives this brooch a distinctly folk-art character by combining crochet with stuffing, felt, fabric, and drawn or applied facial details. The project is worked as a small padded matryoshka rather than as a flat doll applique, making it one of the most three-dimensional vintage-inspired choices in the collection.
The mix of textiles gives plenty of room for personalization without changing the underlying silhouette. Small floral fabric, muted head-scarf colors, or simple facial styling can push it toward a nostalgic keepsake look. Because the body is stuffed and assembled from multiple materials, the reverse needs to remain clean enough for the pin to sit firmly.
Coordinate Fabric With Crochet Instead of Matching Exactly
The little fabric and felt sections can create deliberate contrast with the crocheted body. Rather than trying to match every color perfectly, choose one repeated tone that ties the textiles together. Too many unrelated prints on such a small surface can obscure the doll shape.
Keep Stuffing Light and Even
A brooch needs enough padding to look dimensional without becoming toy-like or heavy. Overstuffing can bow the back outward, making the pin difficult to attach neatly. Before closing the piece, check its side profile and make sure the face and body remain proportionate.
Secure Applied Details for Repeated Handling
Brooches are picked up by the edges, fastened, unfastened, and brushed against clothing. Felt faces, fabric skirts, and other attached details therefore need more than attractive placement. Follow the source’s assembly method carefully and inspect the finished edges periodically if the brooch is worn often.
Original Tutorial and Creator Credit
Creator/Site: Annaboo’s House
14. Crochet Snowflake Winter Brooch
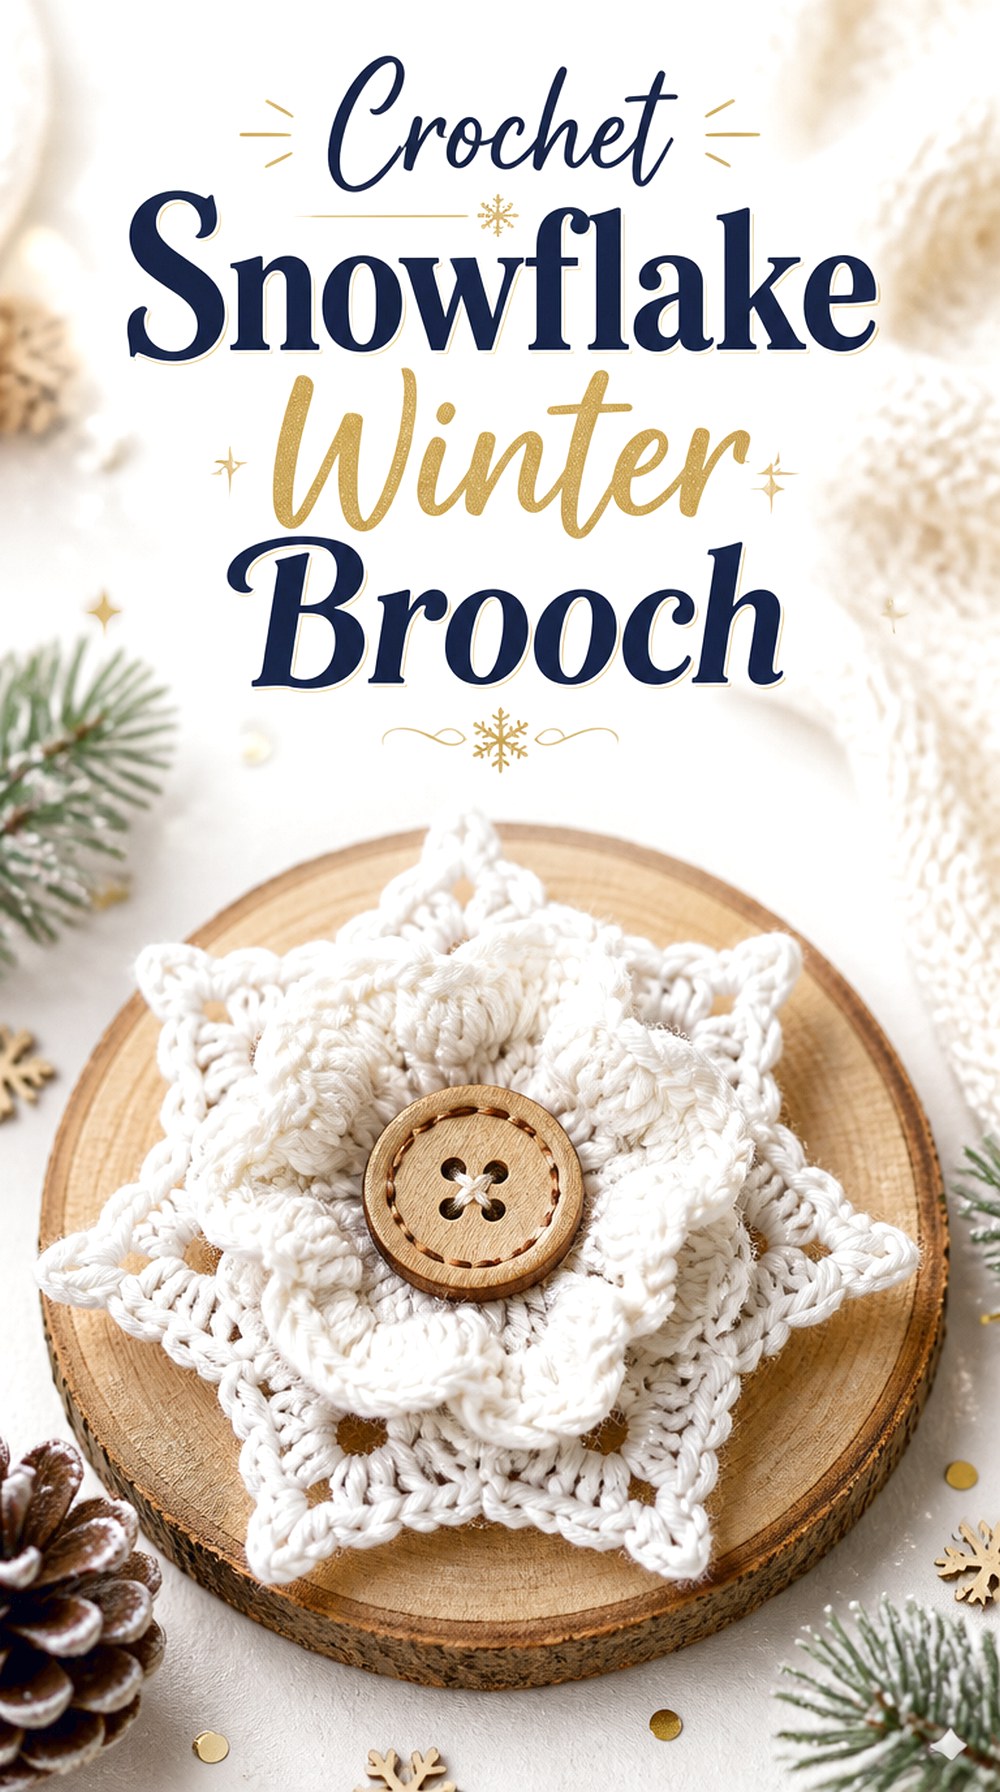 SAVE
SAVEBella Coco’s snowflake tutorial is specifically presented as a brooch when a pin is added to the back. Its open, radiating structure provides a welcome contrast to dense flowers and padded figures, and the geometry naturally suits vintage winter styling.
A snowflake pin can work on a dark coat, scarf, hat, or gift textile where its points remain easy to see. The main challenge is not adding more decoration but maintaining the clarity of the shape. Very fuzzy yarn or excessive embellishment can blur the open structure that makes a snowflake recognizable.
Prioritize Crisp Points Over Extra Decoration
Before adding beads, metallic thread, or another border, make sure the basic snowflake already looks balanced. If the points curl or overlap, additional ornament will usually make the shape harder to read. Shape and finish the motif according to the original tutorial and chosen fiber first.
Check the Pin Doesn’t Show Through the Openwork
Unlike a solid brooch, a snowflake may reveal part of the hardware through its gaps. Position the pin on the back and view the piece from the front before sewing it permanently. The fitting should be supported by stable crochet sections without becoming a distracting line across the open center.
Original Tutorial and Creator Credit
Creator: Bella Coco
15. Crochet Ribbon Trim Heart Brooch
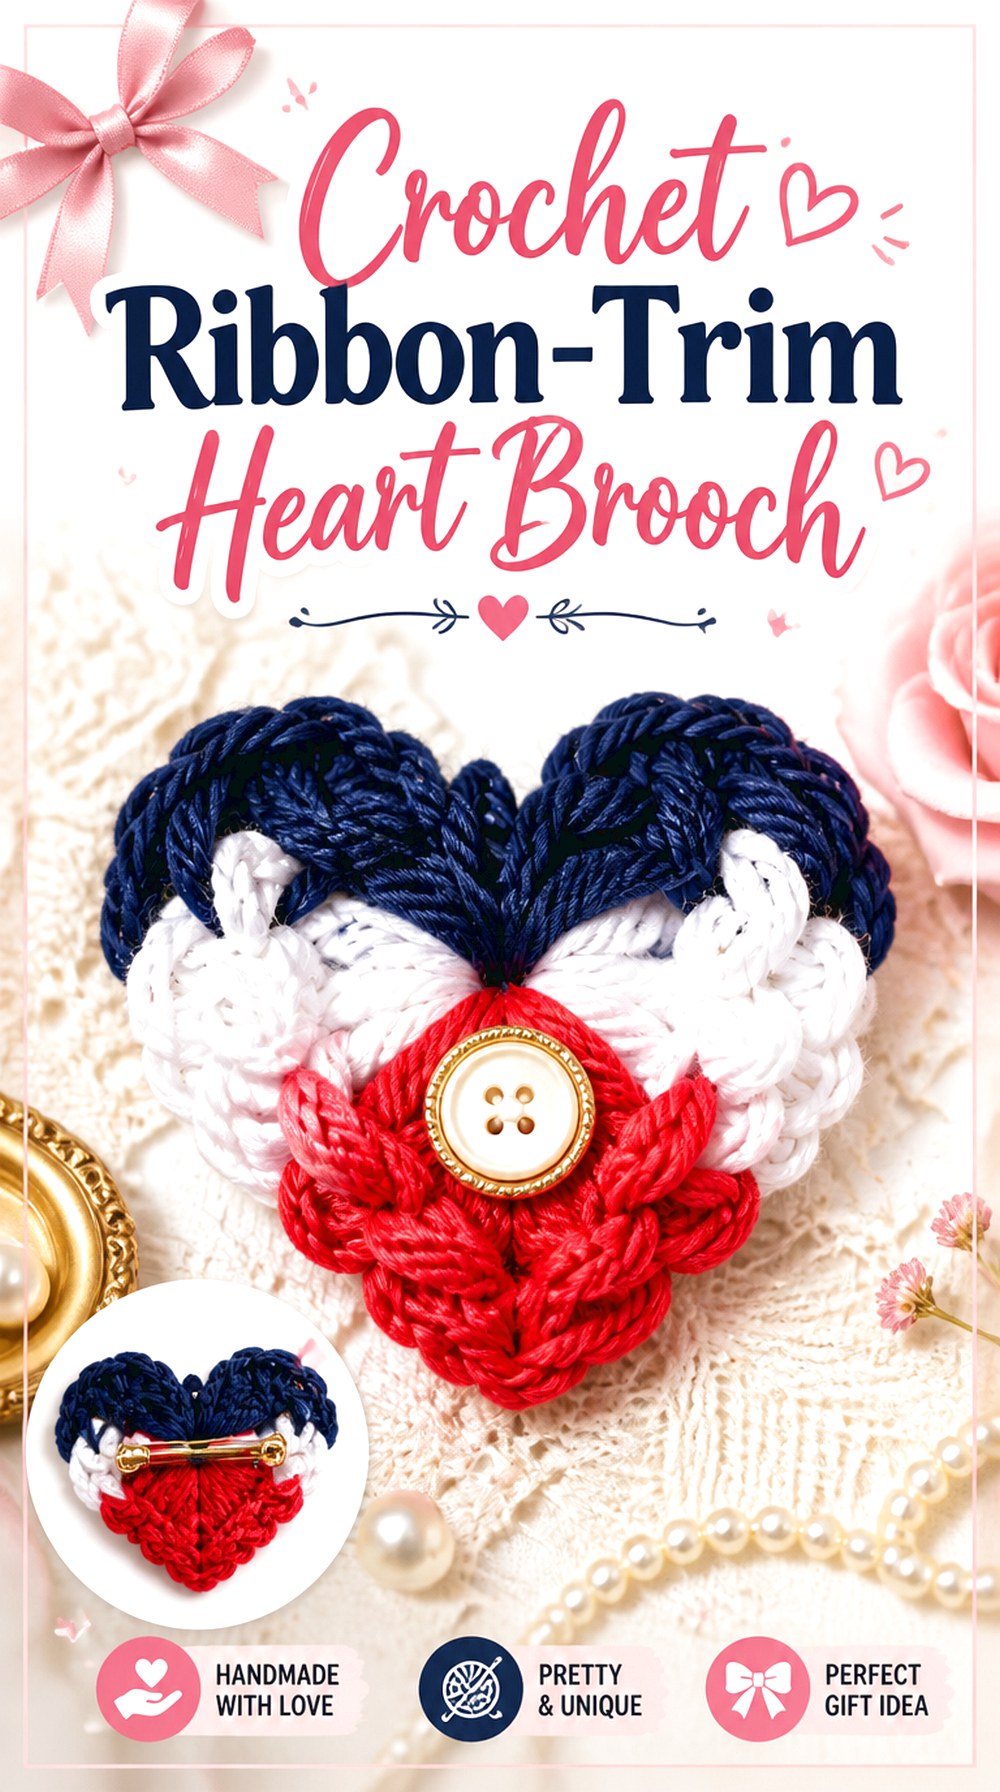 SAVE
SAVESuzetta’s Heart Pin is a direct, recognizable shape that offers a calmer vintage option among the more elaborate flowers and figures. The original pattern provides heart motifs intended specifically for a pin back and suggests ribbon or yarn-bow embellishment.
That makes it suitable for sweetheart, remembrance, Valentine’s, or simple keepsake styling without depending on a specific floral season. A small bow can give the heart a nostalgic handmade finish, but the clean outline is strong enough to stand alone if you prefer a quieter brooch.
Keep the Point and Upper Lobes Defined
A heart loses its character quickly if the lower point curls or the top indentation becomes obscured. Before adding a bow or pin fitting, lay the motif flat and make sure both halves appear balanced. A thicker yarn may enlarge the heart but can also soften those defining contours.
Place Ribbon Where It Does Not Hide the Shape
If you use a bow, treat it as an accent rather than a second focal object. A wide ribbon can cover too much of a small heart or add unnecessary bulk near the pin. Test the embellishment temporarily, then check the brooch from normal viewing distance before securing it.
Original Tutorial and Creator Credit
Creator/Site: Suzies Stuff
16. Crochet Oval Embroidered Vintage Brooch
 SAVE
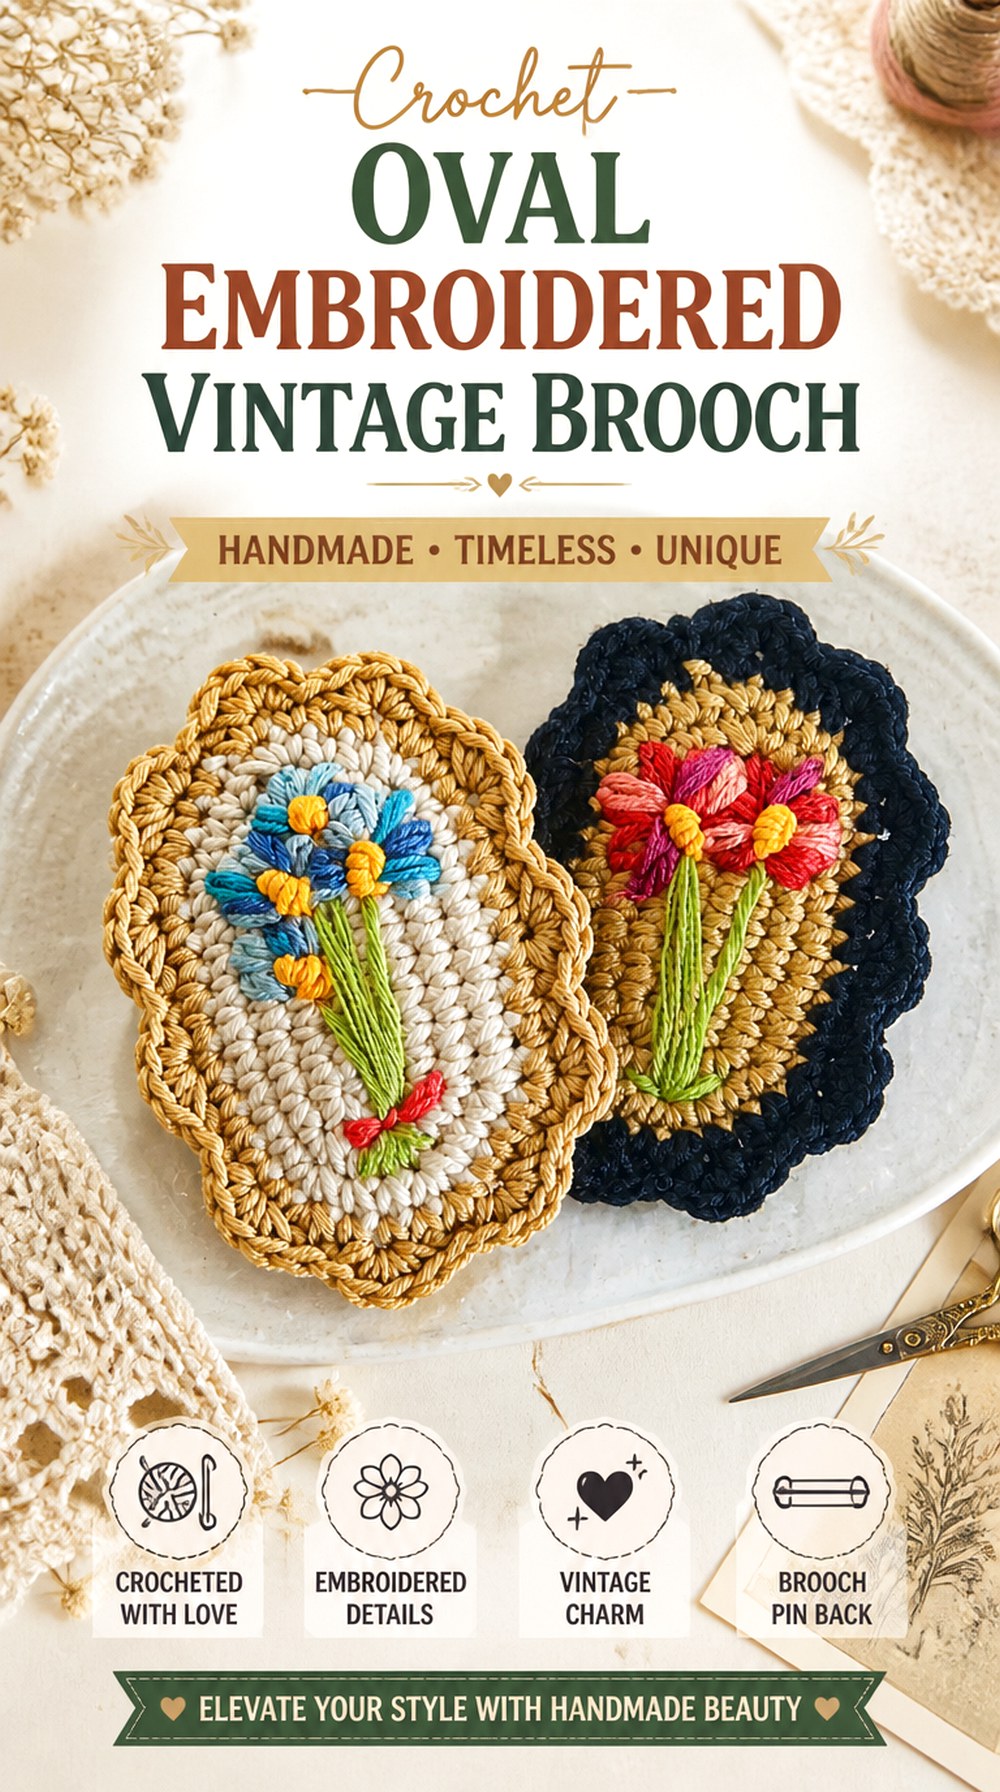
SAVELanas y ovillos’ vintage brooch is the most literal antique-jewelry-inspired design in this collection. The tutorial builds an oval crochet base, changes color for a decorative outer edge, and adds embroidery to the surface, creating the feel of a textile medallion rather than a flower or character.
The oval format is especially useful for blouses, coat lapels, scarves, and small purses because it resembles the proportions of a traditional cameo or embroidered badge. It is also a strong choice when you want the vintage mood to come from border treatment and surface decoration instead of bulky petals.
Treat the Oval as a Frame
The outside edge establishes the visual boundary of the brooch, so the interior decoration should feel contained by it. When adapting embroidery colors, choose a focal area rather than filling every available space. Leaving some background visible can make the border appear more intentional and preserve the medallion effect.
Maintain the Oval During Edging
Decorative borders can pull a small base out of proportion if tension varies around the curves. Check the shape as you work and compare both ends of the oval before adding embroidery. A distorted foundation will remain visible even after decorative stitching is complete.
Use Embroidery to Personalize Without Rebuilding the Crochet
This idea is particularly adaptable because the surface treatment can change while the underlying crochet form remains stable. Small floral marks, simple geometric accents, or restrained contrasting stitches can give different historical moods without altering the tutorial’s construction. Keep embellishment flexible enough that the brooch remains wearable rather than stiff and board-like.
Original Tutorial and Creator Credit
Creator: Lanas y ovillos
Comparing the 16 Vintage Crochet Brooch Styles
| Brooch idea | Overall profile | Strongest vintage character | Main planning checkpoint |
|---|---|---|---|
| Button-Center Ruffle Corsage | Layered and dimensional | Retro textile corsage | Keep stacked layers readable |
| Gathered Rosette | Compact and textured | Soft handmade flower pin | Shape fullness before adding the center |
| Thread Daisy | Fine and graphic | Delicate floral jewelry | Match backing size to finished scale |
| Rose Cluster | Wide and asymmetrical | Miniature floral corsage | Balance individual roses on the base |
| Peony Heirloom | Full mixed-media flower | Reworked jewelry and fabric details | Keep embellishment proportionate |
| Felted Chrysanthemum | Dense and sculptural | Soft felted corsage | Confirm fiber behavior before felting |
| Poppy Botanical | Directional flower and foliage | Fine botanical pin | Decide orientation before attaching hardware |
| Sunflower Thread | Small radial flower | Graphic thread accessory | Preserve even petal spacing |
| Butterfly Keepsake | Stuffed and dimensional | Whimsical textile jewelry | Protect wings and projecting details |
| Toadstool Beaded | Compact woodland figure | Storybook folk accessory | Control bead weight and snagging |
| Textured Sheep | Soft animal silhouette | Rustic folk-art pin | Keep the animal outline visible through texture |
| Angel Lace | Flat and vertical | Traditional lace-like keepsake | Maintain symmetry and scale |
| Matryoshka Keepsake | Padded mixed-media figure | Folk textile souvenir | Avoid overstuffing the back |
| Snowflake Winter | Flat openwork motif | Classic seasonal crochet | Conceal hardware behind openwork |
| Ribbon-Trim Heart | Flat symbolic motif | Sweetheart keepsake | Preserve the heart outline |
| Oval Embroidered Vintage | Flat medallion | Cameo-like textile jewelry | Keep the oval stable during edging |
Conclusion
These 16 vintage crochet brooch ideas offer much more variation than a row of similar flowers. The ruffled corsage, peony, rose cluster, daisy, poppy, sunflower, and chrysanthemum explore very different floral structures, while the matryoshka, sheep, butterfly, mushroom, angel, heart, snowflake, and embroidered oval bring folk, seasonal, geometric, and keepsake influences into the mix.
Choose according to both appearance and intended surface. Fine thread motifs suit lighter styling, while stuffed or densely textured brooches generally make more sense on supportive fabrics. Mixed-media designs deserve extra attention to weight, care, and fastening. Once you have chosen a direction, use the credited original tutorials for exact construction details and keep your own adaptations focused on color, scale, embellishment, and thoughtful finishing.
Frequently Asked Questions
What yarn works best for a vintage crochet brooch?
There is no single best yarn because these brooches depend on different construction styles. Fine cotton or crochet thread can give flowers and medallions crisp, jewelry-like detail, while a thicker yarn creates a more obvious textile corsage. Felted projects need a fiber appropriate for the creator’s felting method, and textured animal designs may rely on the yarn to create their surface effect. Check the original tutorial before substituting, especially when changing fiber as well as thickness.
How can I make a crochet brooch look more antique without copying a vintage piece?
Work with broad visual cues rather than recreating a specific antique. Muted floral colors, cream thread, small buttons, restrained embroidery, softly contrasting borders, folk motifs, and compact corsage shapes can all suggest an older handmade accessory. The goal is a coherent finish. One carefully chosen button or embroidered detail often creates a stronger vintage mood than combining lace, pearls, ribbon, beads, and metallic thread on the same small brooch.
Should I add felt to the back of a crochet brooch?
Felt can be useful when the crochet back is uneven, the pin needs a broader sewing surface, or you want to conceal finishing work. It is not automatically necessary for every design. A tiny thread flower may become unnecessarily bulky with a large felt layer, while a dimensional cluster can benefit from a stable base. If you add felt, trim it so it remains hidden from the front and make sure the extra layer does not interfere with the pin mechanism.
How do I stop a heavy crochet brooch from tipping forward?
First check whether the brooch itself is heavier than the garment can comfortably support. A stuffed figure or layered corsage may simply work better on a coat, bag, or denser fabric. Pin placement also matters: mounting the hardware too high or on a flexible section can allow the lower half to swing outward. Before sewing the fitting permanently, hold it temporarily against the back and test the brooch on fabric similar to its intended surface.
Can I use vintage buttons or old jewelry pieces on crochet brooches?
Yes, when the component is in suitable condition and can be attached safely. Inspect old buttons, earrings, or decorative pieces for sharp edges, corrosion, unstable stones, loose settings, or damaged fastening points before incorporating them. Also consider weight. A heavy jewelry component may distort a fine crochet flower even if it looks attractive at the center. Mixed materials can change care requirements, so avoid assuming the finished brooch can be washed like plain crochet.
Can I resize a crochet brooch simply by changing yarn and hook size?
Sometimes, but the result is not always a straightforward enlargement or reduction. Changing yarn thickness can affect stiffness, petal definition, stuffing volume, bead proportions, embroidered details, and how much weight the pin must support. It can also make a delicate lapel pin unexpectedly bulky. If scale is important, compare the creator’s original materials with your substitute and make a sample component first rather than committing to every part of a multi-piece brooch.
Where are vintage crochet brooches safest to wear?
Stable woven or densely constructed fabrics generally make the easiest surfaces for brooches, especially dimensional designs. Coat lapels, sturdy cardigans, fabric bags, hats, and scarves can work well depending on the weight of the piece. Use more caution with very fine fabric or open knitwear because the metal pin or decorative edges may leave marks or catch fibers. A brooch pin is also a sharp object, so these accessories should not be treated as unsupervised toys for young children.