Crochet boot cuffs can be much more varied than a short tube of yarn peeking above a boot. Depending on the construction, they can look like chunky sock tops, fitted ribbing, delicate lace, textured bobbles, rustic buttoned wraps, or highly decorative cuffs with hearts and floral accents. The right choice also depends on where the boot ends on the leg and how much room exists between the boot opening, clothing, and calf.
These 16 crochet boot cuff ideas focus on genuinely different constructions and visual treatments rather than color swaps. You’ll find options with flexible sizing, dense and open fabrics, functional and decorative buttons, folded trims, cross-stitched motifs, and embellishments. Each idea also highlights what to check before adapting the original tutorial so you can choose a cuff that works with your boots as well as your preferred style.
Quick List
- Crochet Chunky Button-Tab Boot Cuffs
- Crochet Fisherman-Style Heart-Button Boot Cuffs
- Crochet Cross-Stitched Heart Boot Cuffs
- Crochet Custom-Fit Prismatic Boot Cuffs
- Crochet Shell-Texture Moonshadows Boot Cuffs
- Crochet Ribbed-Brim Button Boot Cuffs
- Crochet Puff-Texture Boot Cuffs
- Crochet Wrapped Lace Ribbon Boot Cuffs
- Crochet Picot-and-Puff Lace Boot Cuffs
- Crochet Custom Ribbed Picot Boot Cuffs
- Crochet Slip-Stitch Rib Boot Cuffs
- Crochet Snowdrop Bobble Boot Cuffs
- Crochet Rustic Herringbone Wrap Boot Cuffs
- Crochet Cluster-Stitch Button Boot Cuffs
- Crochet Even-Moss Wrap Boot Cuffs
- Crochet Fold-Over Rose Boot Cuffs
Measure Where the Crochet Boot Cuff Will Actually Sit
Calf circumference alone does not tell you whether a boot cuff will fit comfortably. First decide how you intend to wear it. A cuff tucked partly inside a tall boot may sit lower on the leg than one displayed entirely above an ankle boot, and those two positions can have noticeably different circumferences.
Measure at the actual wearing point and consider what will be underneath the cuff—bare skin, tights, leggings, or jeans. For stretchy ribbed constructions, the finished piece may reasonably be smaller than the body measurement, but the amount depends on yarn, stitch pattern, and tension. Open lace and heavily textured fabrics can behave differently.
When a tutorial provides its own sizing system or adjustment method, follow that guidance rather than applying a universal amount of negative ease. Before finishing the second cuff, compare the first one against the intended boot and clothing combination.
Match Fabric Thickness to the Boot Opening
A substantial cuff can create the convincing appearance of a chunky sock top, but thickness becomes important when any portion of the crochet must fit inside the boot. Super-bulky yarn, bobbles, clusters, layered lace, and folded edges all occupy more space than a compact ribbed fabric.
If the boot already fits closely around jeans or leggings, consider a cuff that remains mostly above the opening. A thinner rib, slip-stitch fabric, or lightweight lace design may be easier to tuck. Conversely, a wide boot shaft can accommodate more texture without creating pressure around the leg.
Also consider stretch recovery. A cuff that expands easily but stays stretched after wear may begin to slide. Ribbing can help, but fiber, stitch construction, gauge, and repeated washing all affect the result. When substituting yarn, make a small fabric sample and compare its stretch and thickness with the tutorial’s intended fabric before committing to both cuffs.
1. Crochet Chunky Button Tab Boot Cuffs
 SAVE
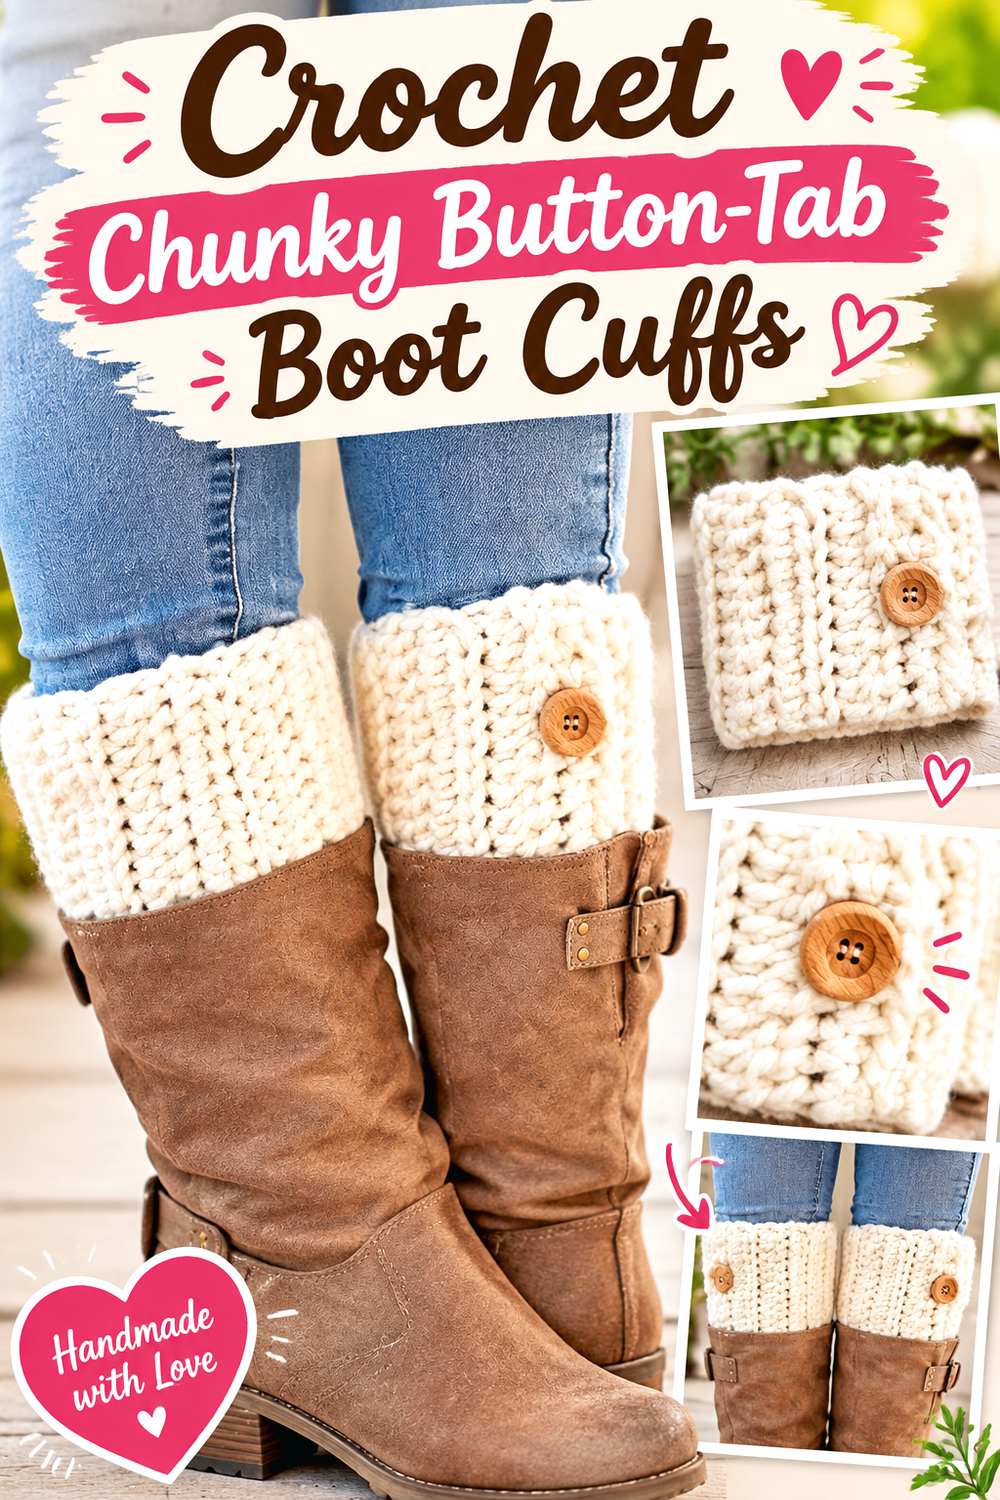
SAVEA substantial ribbed panel and folded button tab give this version the appearance of a carefully finished boot accessory rather than a plain tube. The original A BOX OF TWINE project is worked as a rectangular piece before the short ends are joined, with a separate tab and button creating the most recognizable visual detail. The tutorial specifically allows circumference to be adjusted through the number of rows.
This idea suits boots with enough room for a visibly chunky cuff. The tab provides a strong side detail, so it is particularly effective when several inches of crochet remain exposed instead of disappearing inside the boot.
Check the Circumference Before Joining
A flat rectangle is convenient because you can wrap the unfinished fabric around the intended wearing point before permanently joining it. Do that check with the same pants or leggings you expect to wear underneath. A chunky yarn can compress somewhat, but relying on the boot to force an oversized cuff into place may create unwanted bulk.
Let the Button Tab Stay Proportional
The button area attracts attention immediately, so changing yarn thickness can alter more than overall sizing. A much finer yarn may make the original tab feel visually oversized, while a substantially heavier substitution can make it bulky. If you substitute materials, compare the tab against the completed cuff before fastening everything permanently.
Original Tutorial and Creator Credit
Creator/Site: A BOX OF TWINE
2. Crochet Fisherman Style Heart Button Boot Cuffs
 SAVE
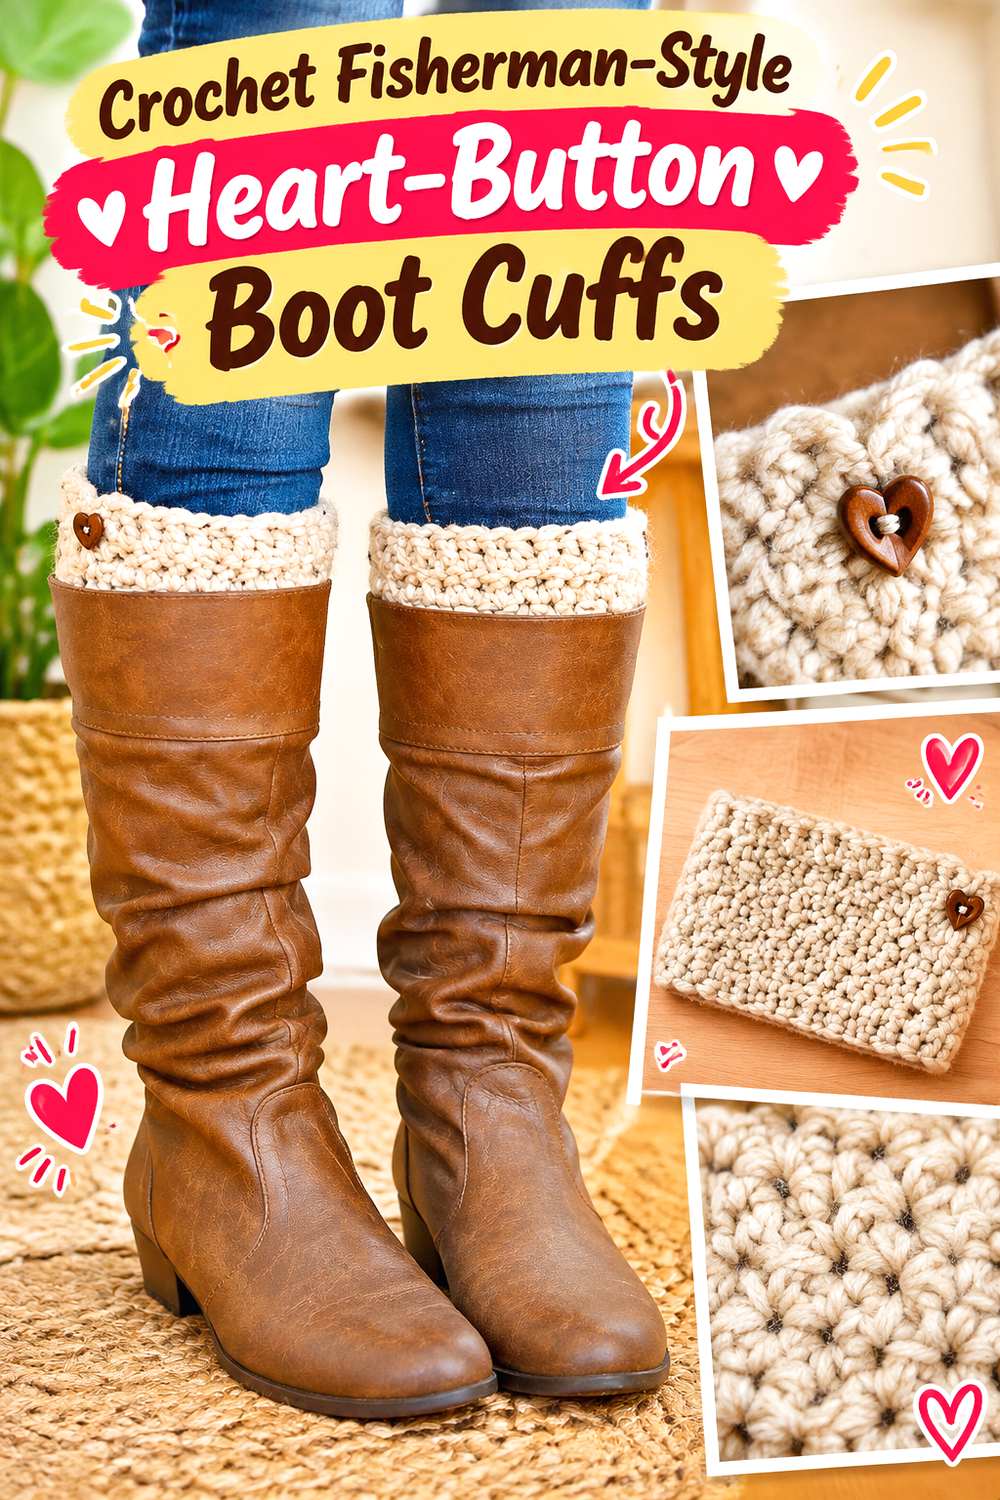
SAVEThese cuffs emphasize a simple, substantial fabric with the visual character of a chunky fisherman-style knit. Amy Latta’s original tutorial uses a straightforward rectangular construction, then joins the ends and adds small wooden heart buttons as optional embellishments. The designer also notes that the cuff height can be changed depending on the boot.
Because the fabric itself is visually quiet, the small heart button becomes a subtle focal point rather than competing with elaborate stitchwork. This is a useful direction when you want the cuff to coordinate with sweaters, coats, or scarves that already have strong texture.
Chunky Fabric Changes Boot Clearance
A thicker crochet fabric occupies meaningful space inside a fitted boot shaft. Before planning to tuck several rows beneath the boot opening, check the cuff with the actual footwear. If clearance is limited, expose more of the cuff above the boot rather than forcing multiple bulky layers between the leg and boot.
Keep Heart Buttons From Catching
Decorative buttons should sit where they remain visible without constantly brushing zippers, buckles, or other boot hardware. Positioning also matters when cuffs can rotate during wear. Before sewing an embellishment securely, pin or temporarily place it and check the cuff from both the front and side.
Original Tutorial and Creator Credit
Creator/Site: Amy Latta Creations
3. Crochet Cross Stitched Heart Boot Cuffs
 SAVE
SAVEInstead of relying entirely on crochet texture, this idea uses the finished fabric as a background for contrasting cross-stitched hearts. Three Fates Creations calls the design the Cross My Heart Boot Cuffs and combines the heart decoration with post-stitch ribbing and an edged finish. The source includes several circumference ranges from child through adult sizing and explains that the heart motif affects how adjustments should be planned.
The result is noticeably more graphic than a plain ribbed cuff. It can work well when you want a recognizable motif without attaching dimensional appliqués that might snag against a boot.
Plan the Cross-Stitch Motif Around the Leg
A repeating motif introduces a constraint that plain ribbing does not have. Changing circumference arbitrarily can disrupt spacing at the join. Follow the designer’s adjustment guidance and check where the repeat will meet before beginning the decorative embroidery.
Watch Tension Through the Post-Stitch Band
Raised post stitches can create a firmer, more elastic-looking band than the flatter body beneath them. If your crochet tension changes significantly between stitch types, compare the circumference before finishing. The transition should not create an unintended tight ring around the leg.
Use Contrast Without Losing Legibility
The hearts need sufficient visual contrast against the background to read cleanly. Extremely variegated or heavily heathered yarn can compete with small cross-stitch motifs. A calmer base fabric usually gives the embroidered detail more room to stand out.
Original Tutorial and Creator Credit
Creator/Site: Three Fates Creations
4. Crochet Custom Fit Prismatic Boot Cuffs
 SAVE
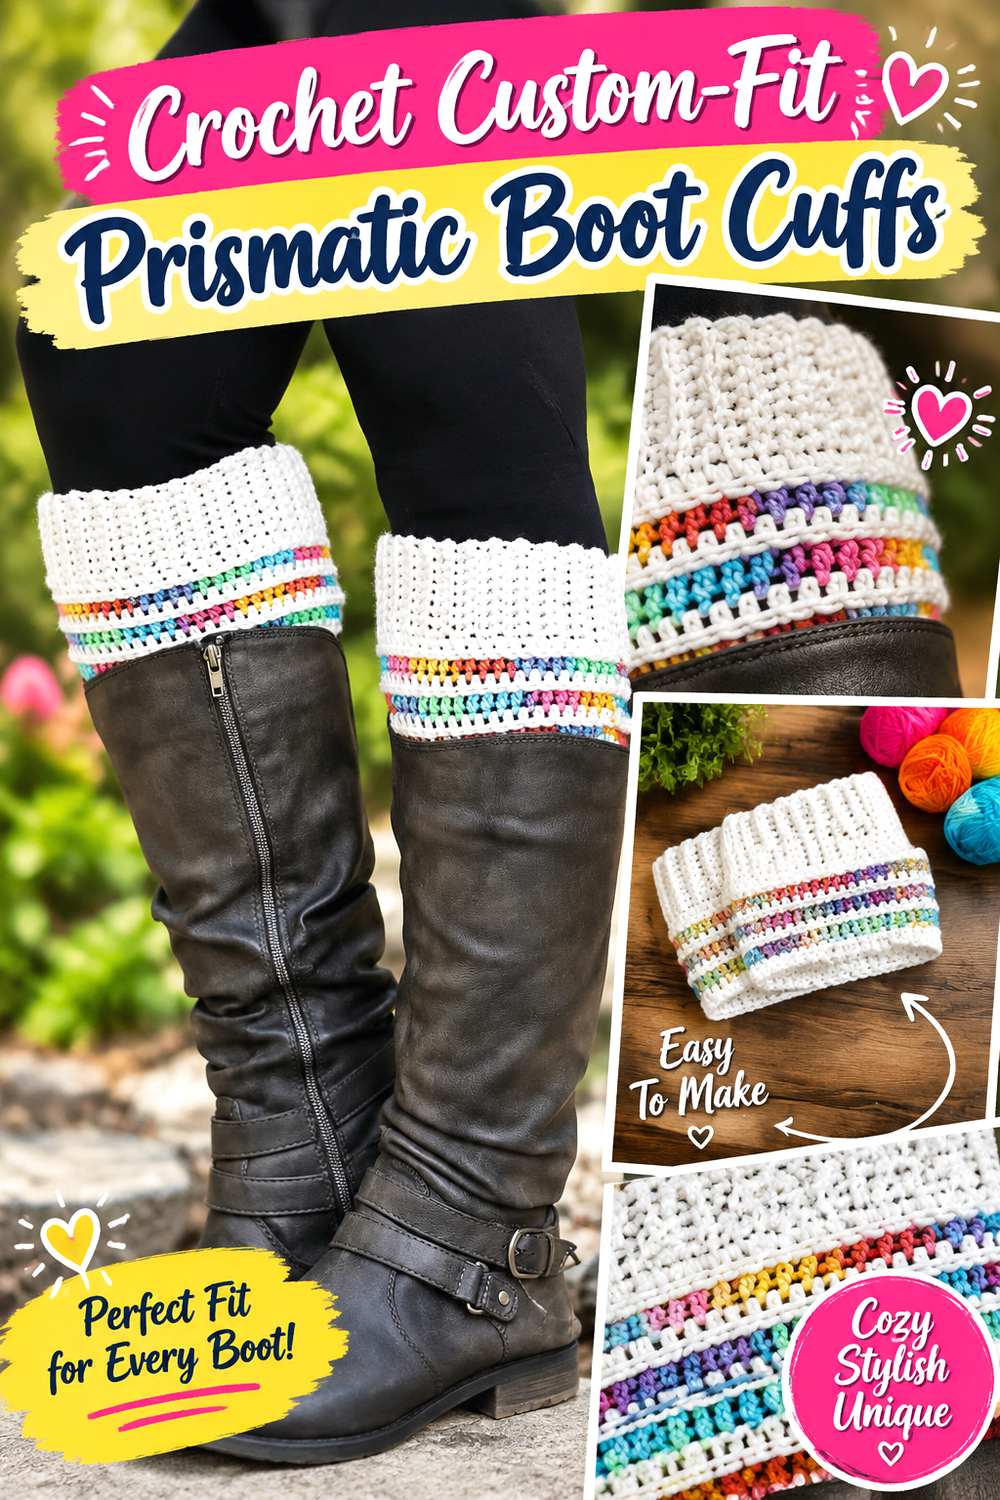
SAVEThe Prismatic approach is built around measurement rather than forcing every wearer into one fixed circumference. Winding Road Crochet specifically presents the design as adaptable to different boot styles, lengths, and wearers, with instructions based on reaching a measurement rather than merely completing a prescribed number of rows.
That makes this an appealing choice when standard sizing is your main concern. It is also useful if you want one pair to show generously above ankle boots while another version sits more discreetly with taller footwear. The adjustable concept is the defining feature here, not just the stitch texture.
Measure at the Actual Wearing Point
Take the circumference where the upper edge of the finished cuff will sit. Moving only a few inches higher or lower on the calf can change the needed measurement. When making the pair for specific boots, check the height of those boots before settling on the cuff length.
Decide Whether the Cuff Sits Inside or Outside the Boot
The source explicitly allows the cuffs to be worn in different ways. That choice affects the ideal thickness and length. A mostly external cuff can tolerate more visual substance, while a tucked version should be checked carefully for comfortable boot clearance.
Keep Paired Cuffs Truly Paired
Measurement-based patterns are flexible, but they also make consistency your responsibility. Record the dimensions or repeats used for the first cuff before beginning the second. Comparing the pieces unstretched and lightly stretched can reveal a tension difference before finishing.
Original Tutorial and Creator Credit
Creator/Site: Winding Road Crochet
5. Crochet Shell Texture Moonshadows Boot Cuffs
 SAVE
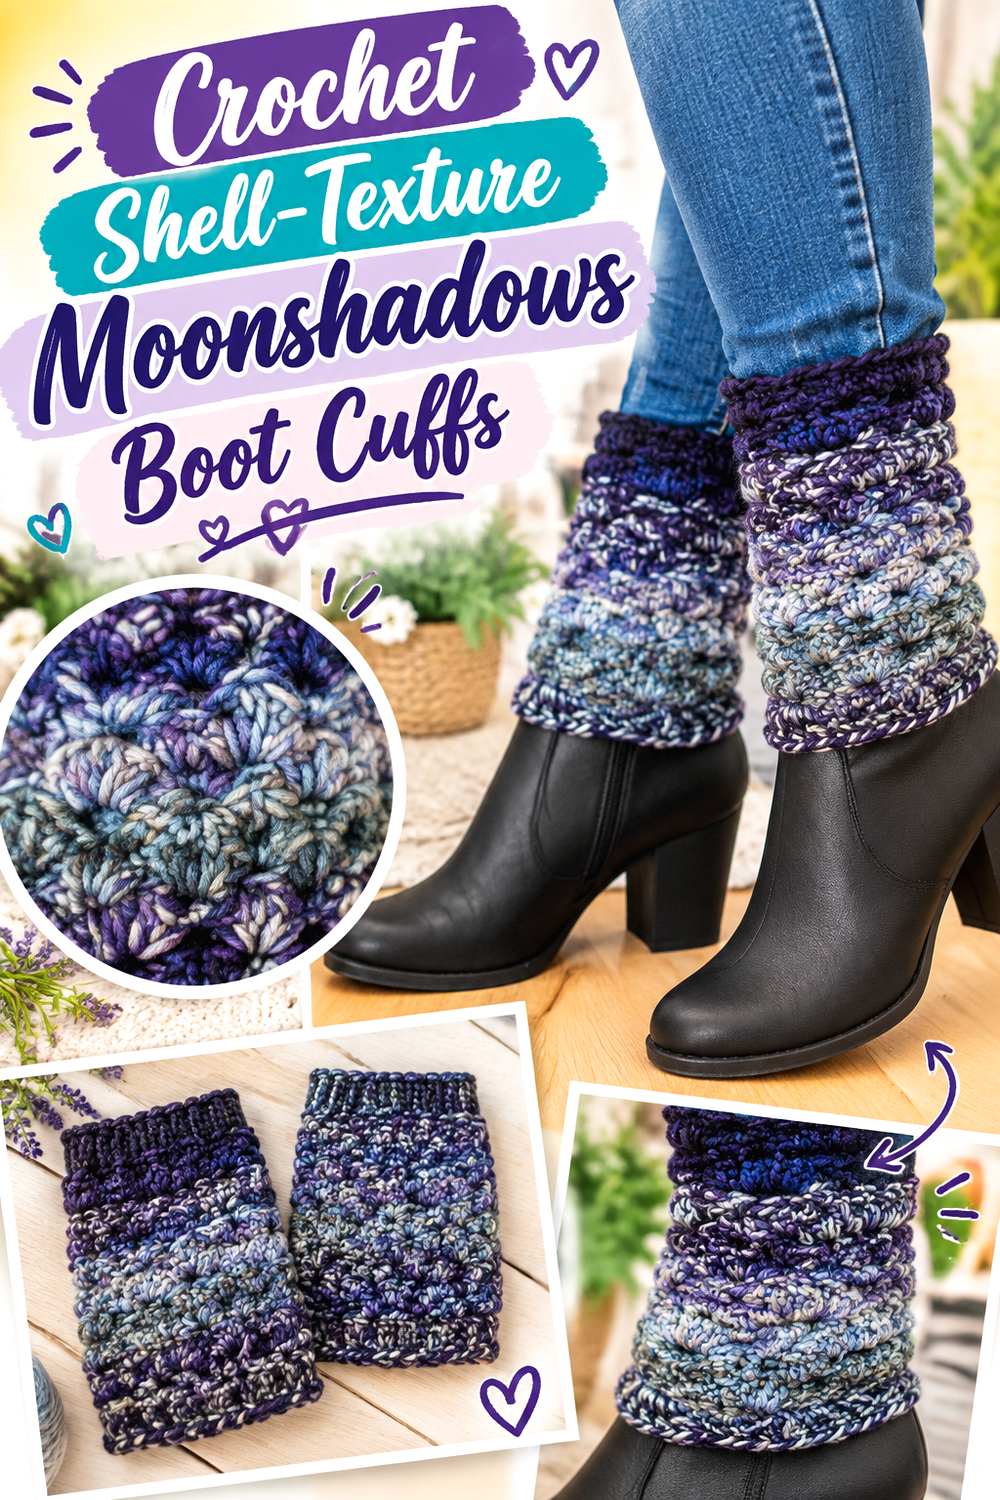
SAVECre8tion Crochet’s Sunset Into Moonshadows design uses repeated open sections and shell-like groups to create a much more decorative surface than ordinary ribbing. The original pattern is worked in the round and provides guidance for changing circumference and height while preserving the design repeat.
This is a strong option when the cuff itself should be the visible accessory rather than merely a warm border above the boot. The substantial vertical texture can also showcase changing or multicolored yarn effectively, although the stitch structure still needs to remain easy to see.
Open Texture Needs Enough Stability
Decorative openings reduce the amount of solid fabric supporting the cuff. If you substitute a much softer or more drapey yarn, the piece may relax more than expected. Check whether the upper edge remains where you want it before committing to extra height.
Test the Ring Before Building Height
Because this design begins as a joined ring, an early fit check is particularly useful. The original tutorial instructs readers to confirm that the starting ring can pass comfortably where needed. Correcting circumference early is much easier than after the full textured body is complete.
Use Variegation With Intention
A color-changing yarn can emphasize the shell pattern, but very short color changes may visually fragment it. If stitch definition is the priority, compare a sample in your chosen yarn before deciding whether the color movement complements or competes with the structure.
Original Tutorial and Creator Credit
Creator/Site: Cre8tion Crochet
6. Crochet Ribbed Brim Button Boot Cuffs
 SAVE
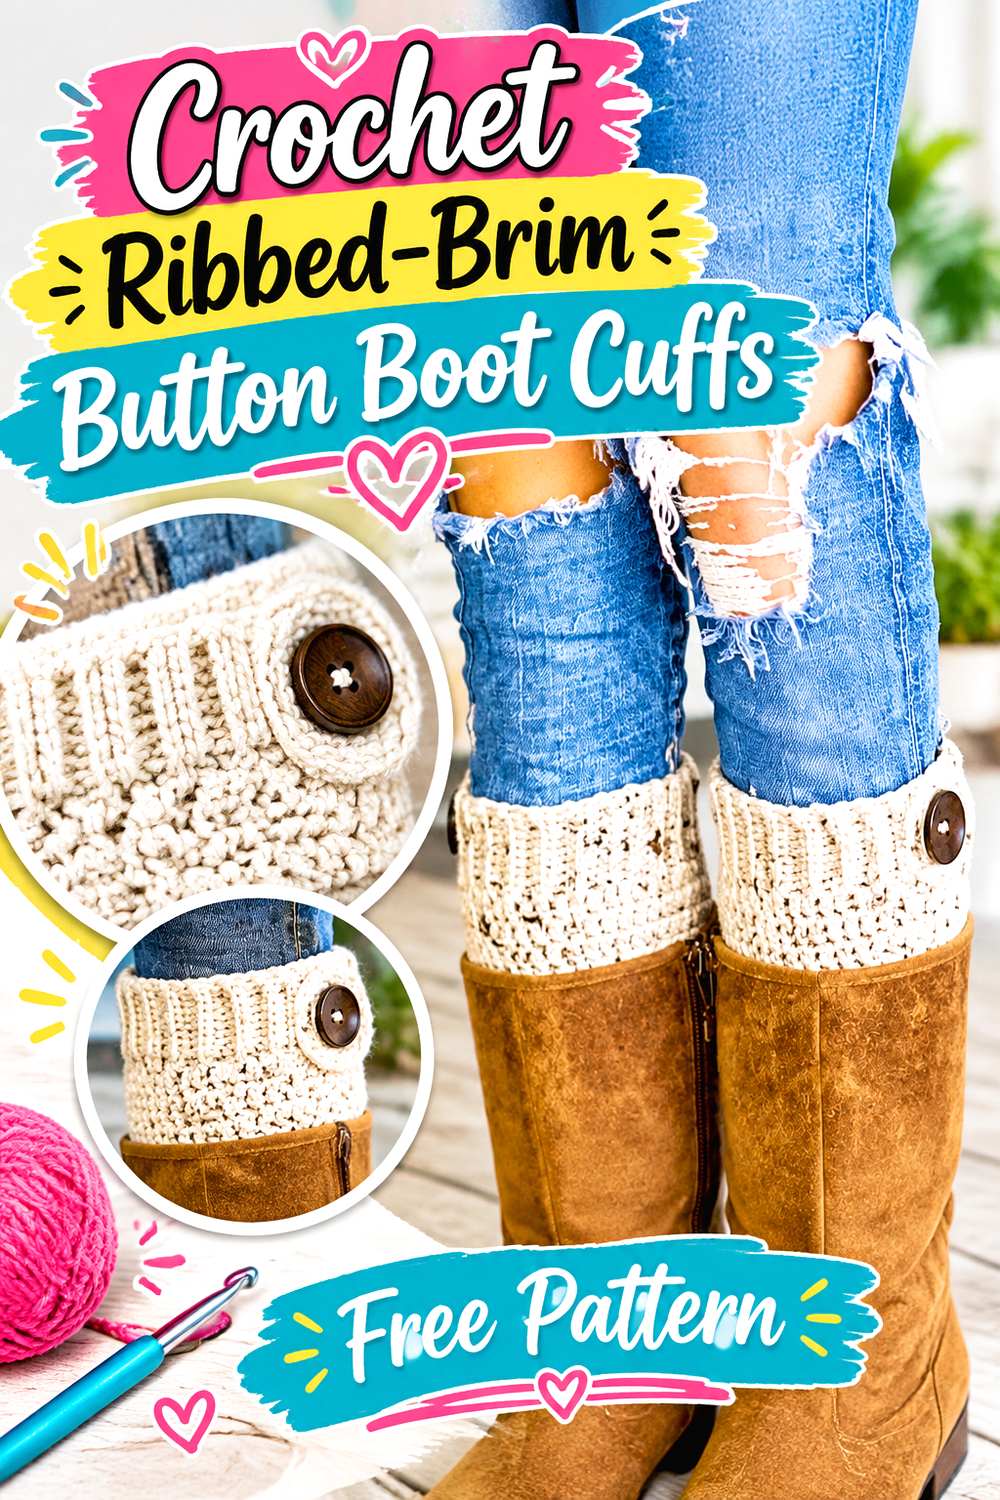
SAVEThis Lovable Loops design separates the cuff into two visual zones: a ribbed brim created flat and a body continued in the round. Buttons provide a final accent. The original page describes an adult one-size construction and notes that the brim and body are formed differently.
That construction makes the upper band look more deliberate than a single uninterrupted tube. Choose this direction when you like the familiar appearance of a ribbed sock top but still want a more substantial crochet body showing beneath it.
Separate Brim Fit From Body Fit
A ribbed upper section may stretch differently from the fabric below. When adjusting the project, avoid assuming that both areas will expand identically. Check the completed brim around the intended wearing point, then confirm that the body does not become unexpectedly loose or restrictive.
Buttons Work Best as Controlled Accents
Because the ribbing already adds strong vertical lines, the buttons do not need to be oversized to remain visible. Consider how their scale relates to the width of the brim. Also confirm whether your chosen placement leaves enough clearance around boot zippers or decorative straps.
Original Tutorial and Creator Credit
Creator/Site: Lovable Loops
7. Crochet Puff Texture Boot Cuffs
 SAVE
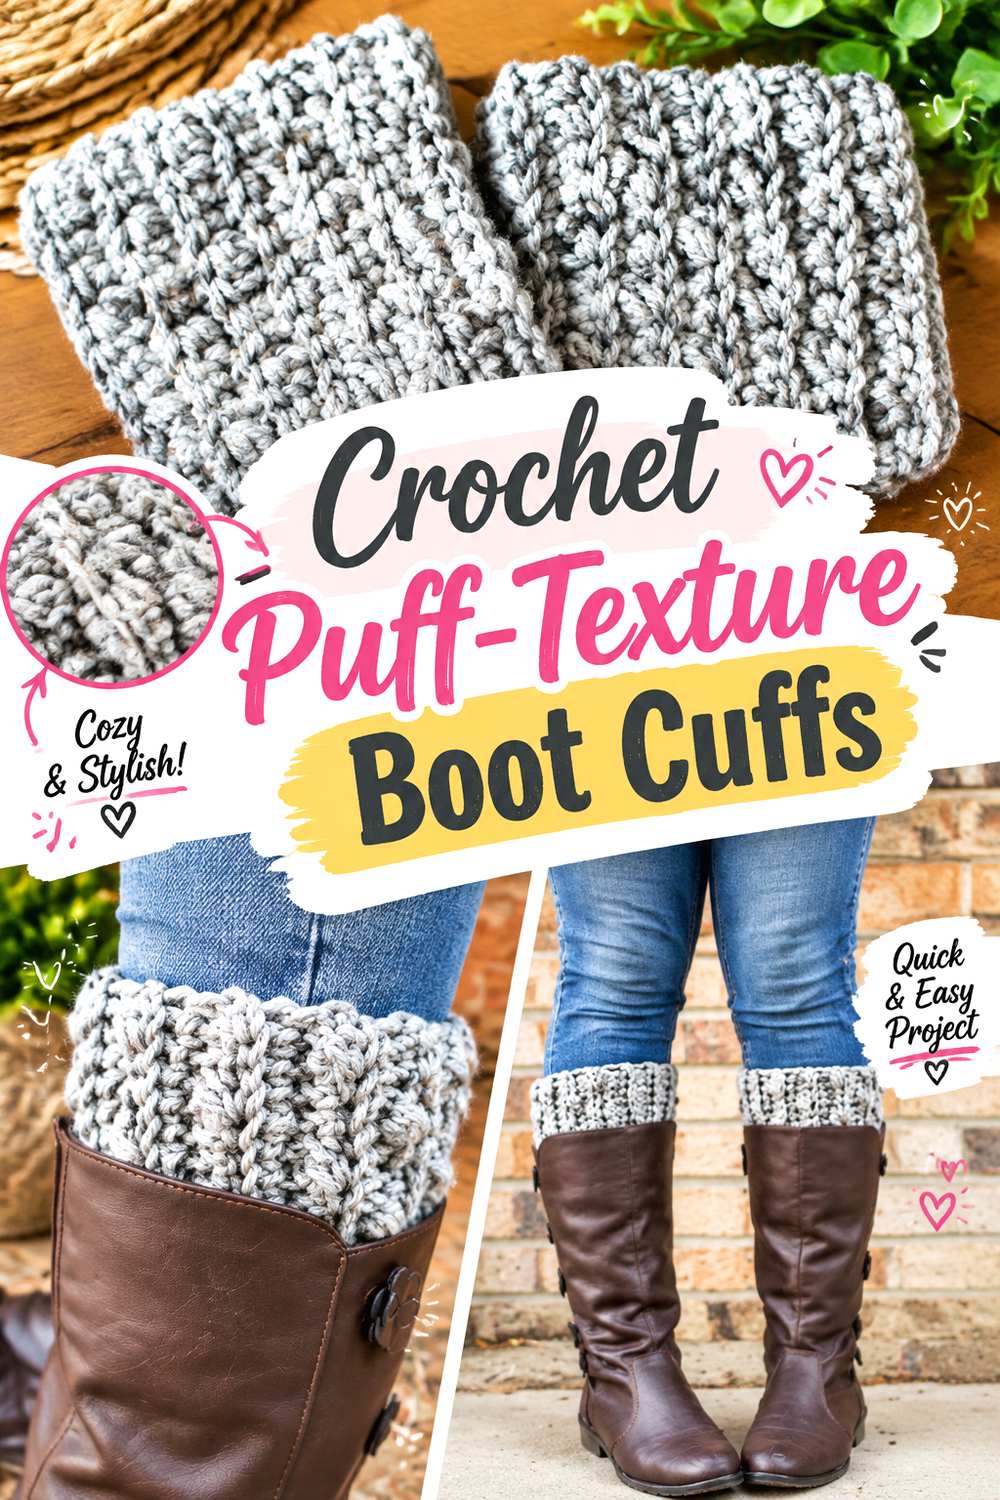
SAVEPuff stitches turn this otherwise compact cuff into a strongly textured accessory. Easy Crochet’s original pattern combines puff stitches with single crochet and works the fabric in the back loop, creating both raised individual details and an overall ribbed effect.
This style sits between minimal ribbing and highly decorative lace. The puffs are noticeable but remain integrated into the fabric, making the design useful when you want surface interest without loose trim, ribbons, or attached embellishments. Neutral yarn highlights the shadows around each puff, while color can make the texture more playful.
Puff Texture Adds Visual Volume
Raised stitches make the cuff appear thicker even when the underlying yarn is not exceptionally bulky. If the tops of your boots are narrow, decide how much of the puff-textured fabric actually needs to tuck inside. Keeping most of the pattern above the boot can preserve both comfort and visibility.
Stretch Matters More Than Flat Width
Back-loop fabric can provide useful flexibility, but the puff sections may not stretch exactly like plain ribbing. When assessing fit, gently expand the whole cuff rather than judging only its unstretched circumference. A comfortable fit should not depend on pulling the textured fabric to its limit.
Original Tutorial and Creator Credit
Creator/Site: Easy Crochet
8. Crochet Wrapped Lace Ribbon Boot Cuffs
 SAVE
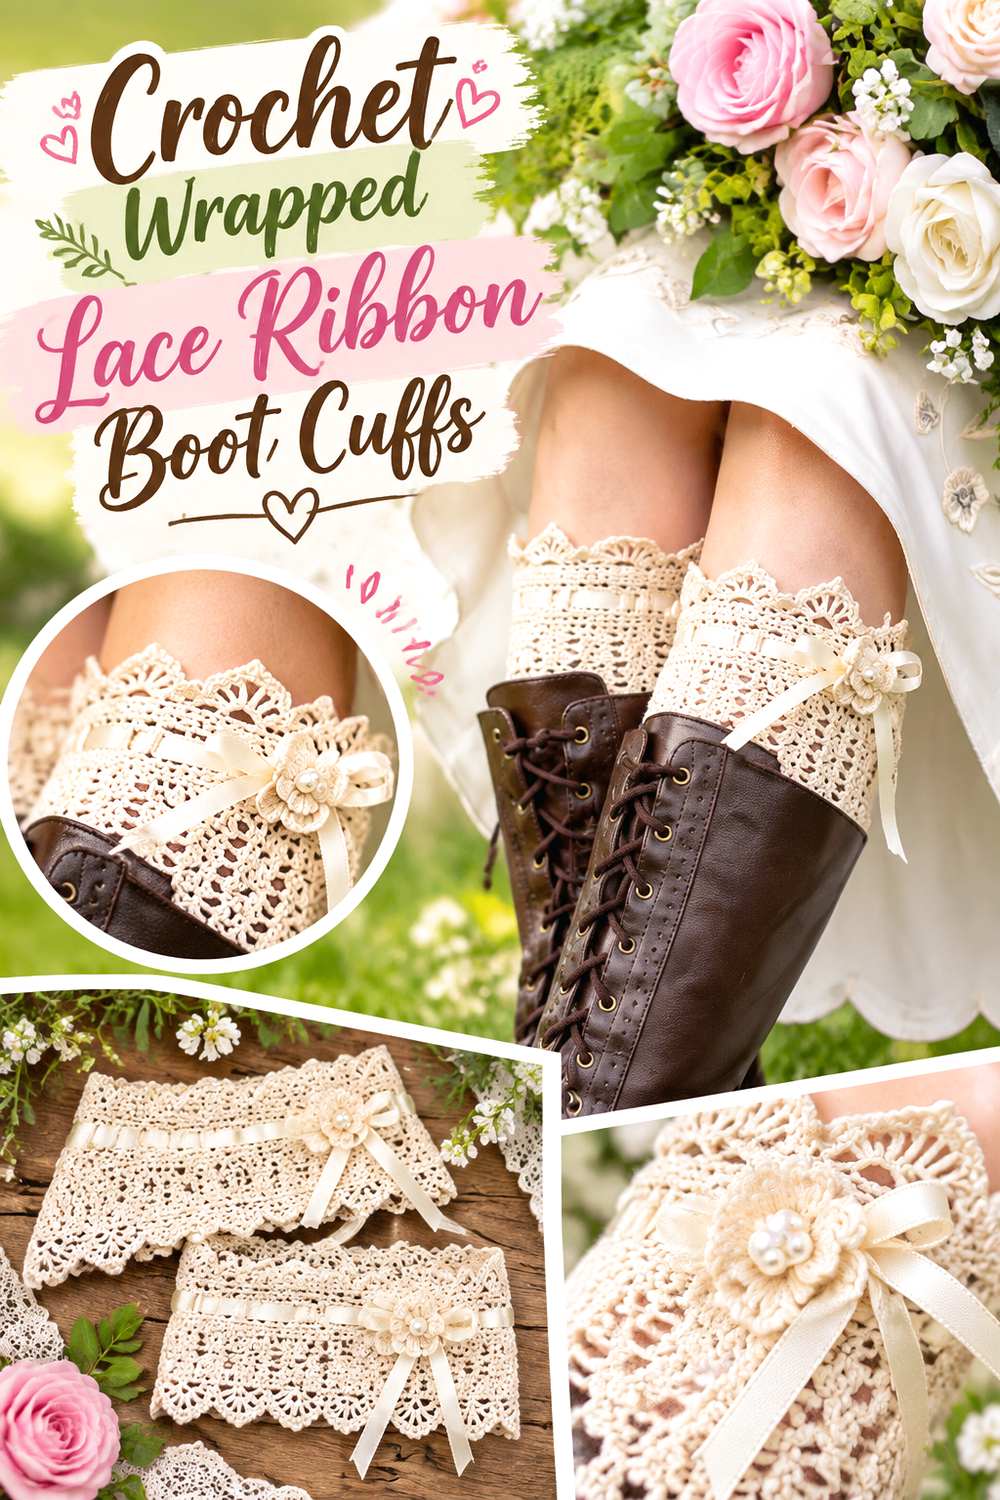
SAVEKirsten Holloway Designs takes the boot-cuff idea in a much lighter direction with the Wrapped in Lace design. The original tutorial presents six sizes and uses open lace with a delicate, event-ready appearance; the designer also shows ribbon as an optional styling element.
These cuffs make sense when visual delicacy matters more than creating the illusion of a thick winter sock. They can pair with dressier boots or warm-weather styling, and their openwork makes them substantially different from dense ribbed and bobbled alternatives.
Lace Benefits From Precise Sizing
Open fabric can stretch in less predictable ways than compact ribbing, particularly if the fiber or hook size changes. Use the source’s sizing and gauge information as the starting point rather than assuming that a larger hook simply creates a proportionally larger cuff.
Treat Ribbon as an Embellishment, Not a Fit System
A decorative ribbon can alter the look dramatically, but it should not need to be pulled tightly to keep an incorrectly sized cuff in place. Establish a comfortable crochet fit first. Then use the ribbon to refine the styling rather than compensate for excessive circumference.
Plan Care Around Mixed Materials
Crochet thread or yarn and ribbon may respond differently to washing, moisture, and heat. If you add ribbon or another non-yarn material, follow its care requirements as well as the yarn label and any care guidance supplied by the designer.
Original Tutorial and Creator Credit
Creator/Site: Kirsten Holloway Designs
9. Crochet Picot And Puff Lace Boot Cuffs
 SAVE
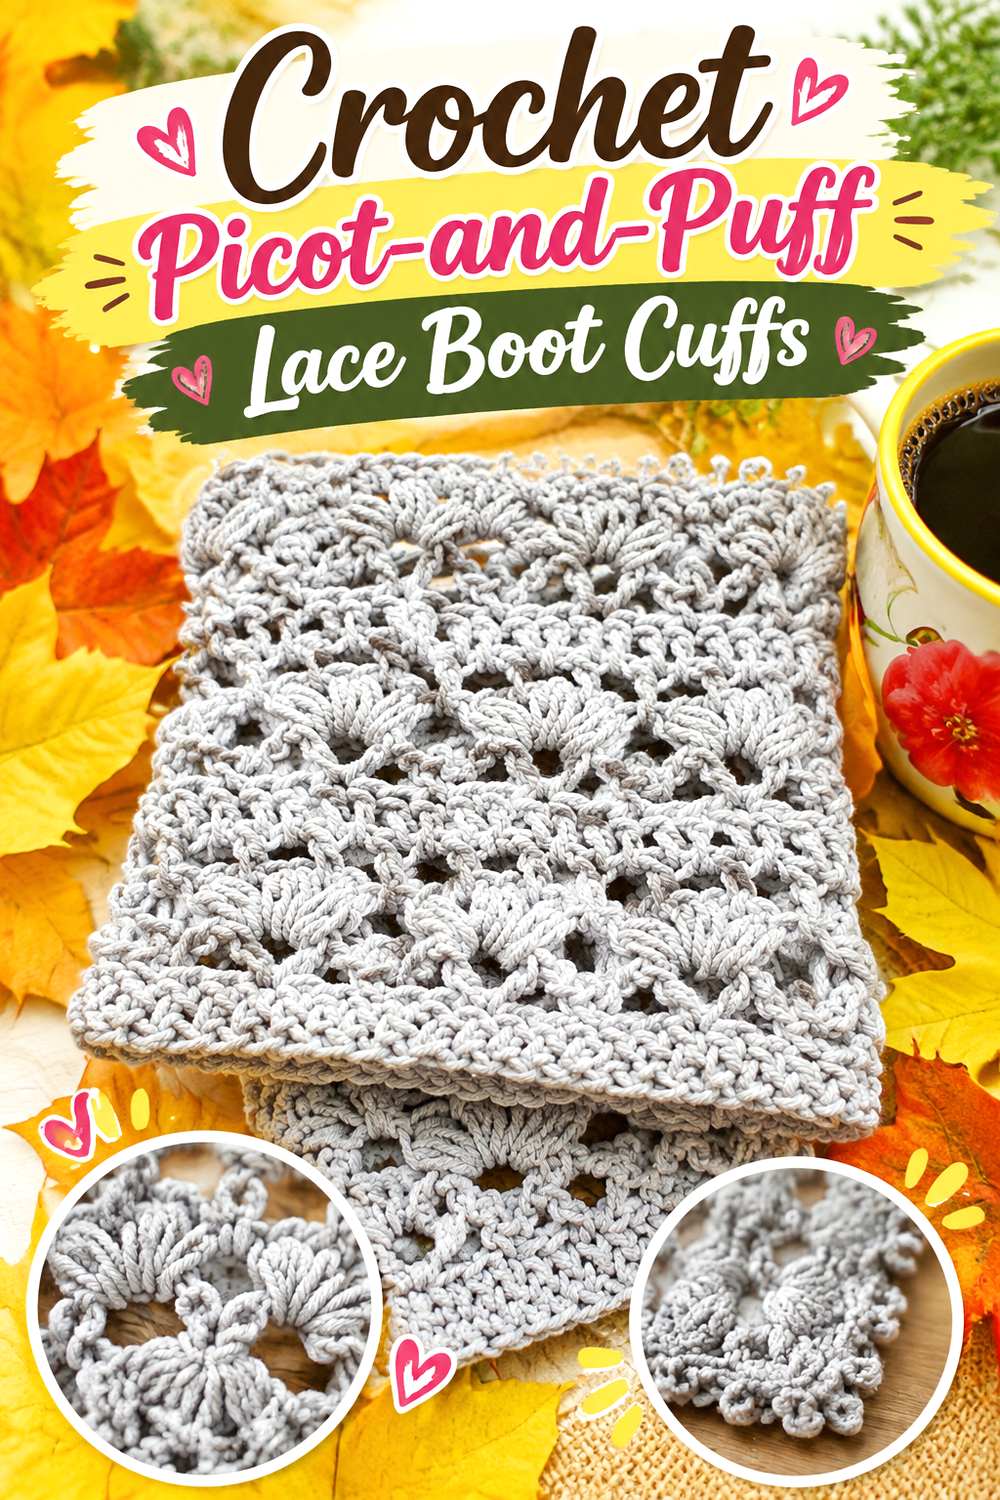
SAVEBeautiful Crochet Stuff combines several decorative elements—open V-shaped spaces, picot details, and puff texture—into one continuous cuff. The original tutorial is worked in the round and uses a repeating stitch structure that can be extended for additional height.
Compared with a single-stitch rib, this design has much more visual movement. It works well when you want the crochet itself to function almost like patterned trim above a plain boot. Because multiple textures are packed into a relatively small area, yarn choice has a major effect on how clearly each detail reads.
Busy Stitch Combinations Need Yarn Clarity
Smooth yarn tends to preserve small picots, open spaces, and puff outlines more clearly than highly fuzzy fiber. That does not make one fiber universally better, but it changes the finished emphasis. Decide whether you want crisp stitch architecture or a softer blended surface.
Verify Repeat Compatibility Before Resizing
The source specifies a stitch multiple for its construction. When changing circumference, preserve the tutorial’s repeat requirements rather than adding an arbitrary number of stitches. Otherwise the decorative sequence may fail to meet cleanly at the round join.
Blocking Can Clarify Openwork
Gentle blocking may help lace openings and picots settle into a more even shape, depending on fiber. Use a method appropriate for the yarn rather than applying one universal treatment. Embellished or heat-sensitive fibers may require particularly cautious care.
Original Tutorial and Creator Credit
Creator/Site: Beautiful Crochet Stuff
10. Crochet Custom Ribbed Picot Boot Cuffs
 SAVE
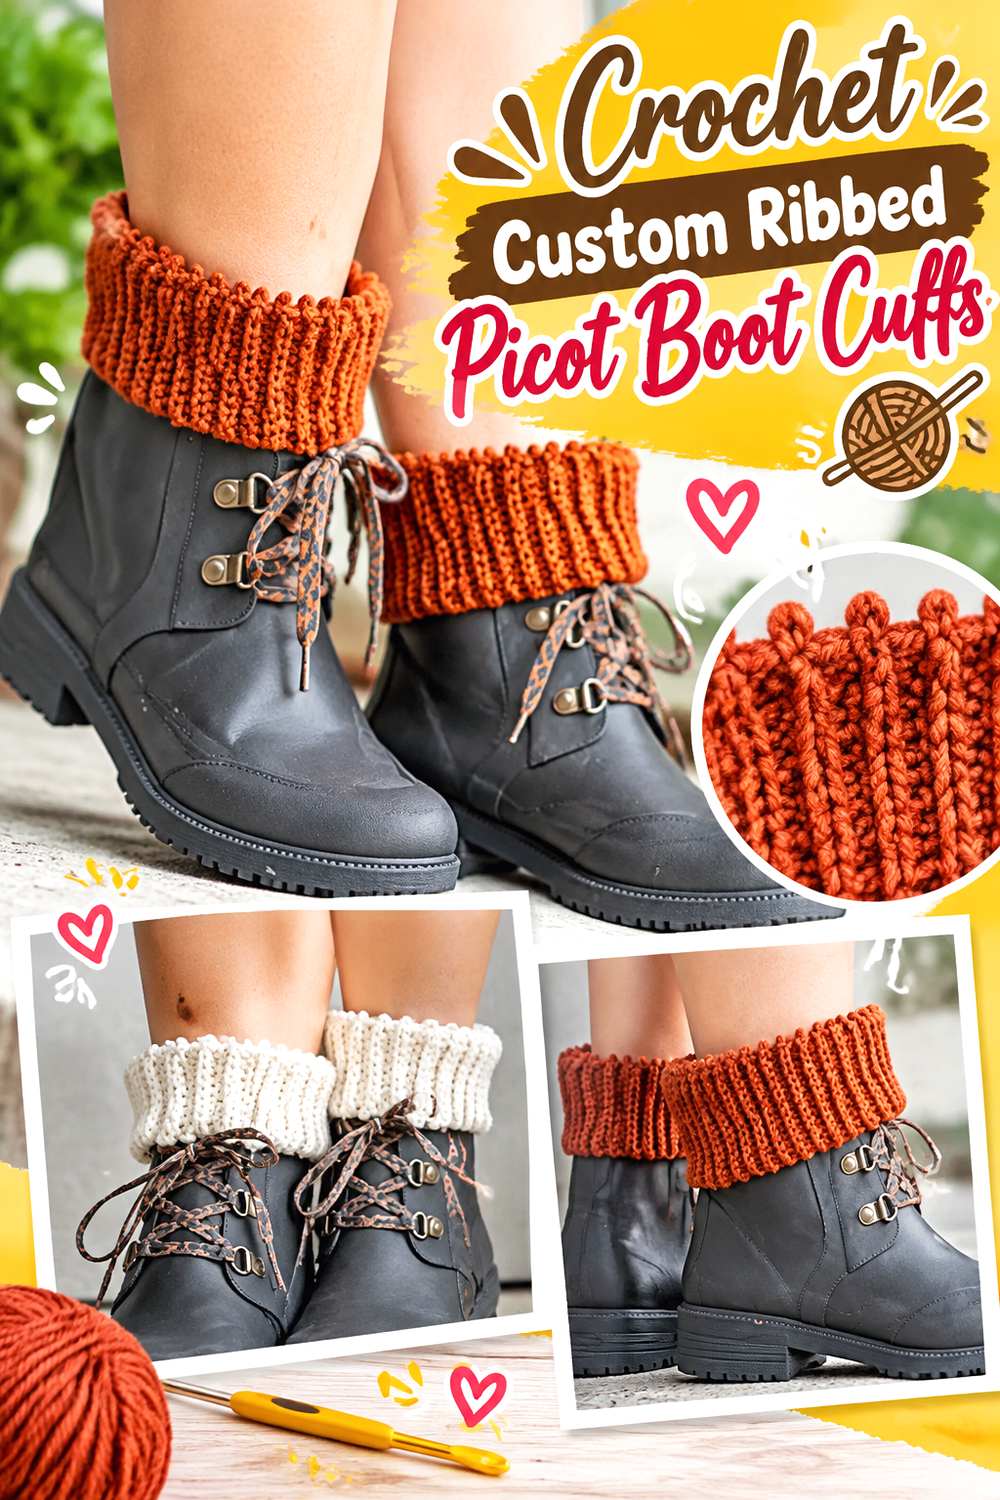
SAVEYay For Yarn centers its boot-cuff tutorial on straightforward ribbing and custom fit, with both a plain version and an option featuring picot edging. The source explains how a flat ribbed rectangle can be sized to the intended calf circumference before being seamed into a tube.
This makes the design a useful contrast to cuff patterns that depend on a fixed in-the-round stitch multiple. The vertical ribbing keeps the look clean, while a picot edge can introduce a small decorative finish without turning the whole cuff into lace.
Ribbing Is Forgiving, but Not Limitless
Back-loop ribbing can stretch substantially, but an excessively small cuff may still feel restrictive and distort the ribs. An oversized one may relax and slide. Follow the designer’s measurement logic and evaluate the fabric in its lightly stretched state, not only when completely relaxed.
Picot Edging Changes the Silhouette
A small pointed edge creates a softer, more decorative line above the boot than straight ribbing. If you want the cuffs to coordinate with minimalist outerwear, the plain version may be preferable. For dresses or more romantic styling, the picot detail can make the same underlying construction feel noticeably different.
Original Tutorial and Creator Credit
Creator/Site: Yay For Yarn
11. Crochet Slip Stitch Rib Boot Cuffs
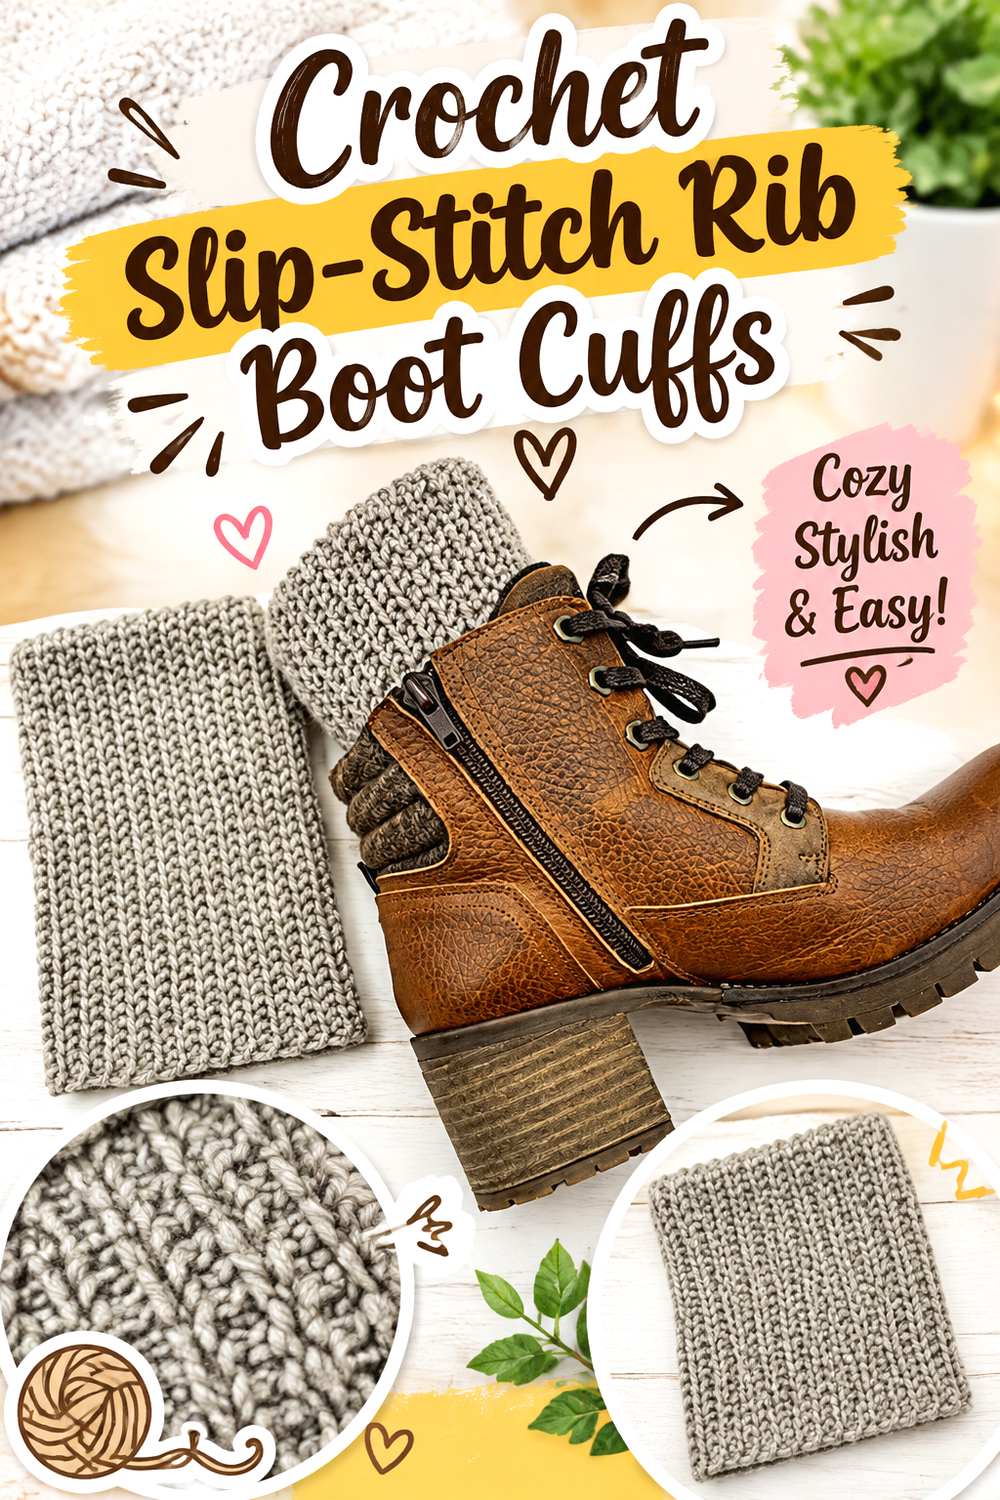 SAVE
SAVEKnitcroAddict uses front-loop slip stitches to create a compact ribbed fabric with a distinctly knit-like vertical appearance. The project is constructed as a flat piece, and the tutorial explains that changing the starting chain controls height while changing the number of rows affects circumference.
This is one of the cleaner-looking ideas in the collection. There are no added buttons, lace panels, or motifs competing with the ribbing, so it works particularly well if you want the texture to complement rather than dominate the boots.
Slip-Stitch Fabric Can Feel Compact
Slip-stitch crochet is often denser and shorter per row than taller stitches. Maintain relaxed, consistent loops so the fabric does not become unnecessarily rigid. When substituting a hook or yarn, judge the actual fabric rather than expecting it to behave like single- or double-crochet ribbing.
Use Scrap Yarn Only When It Behaves Consistently
The original project is presented as suitable for leftover yarn. If combining remnants, however, similar yarn weight does not guarantee identical stretch. Mixing fibers with very different elasticity can make the two cuffs behave differently unless the substitutions are sampled first.
Original Tutorial and Creator Credit
Creator/Site: KnitcroAddict
12. Crochet Snowdrop Bobble Boot Cuffs
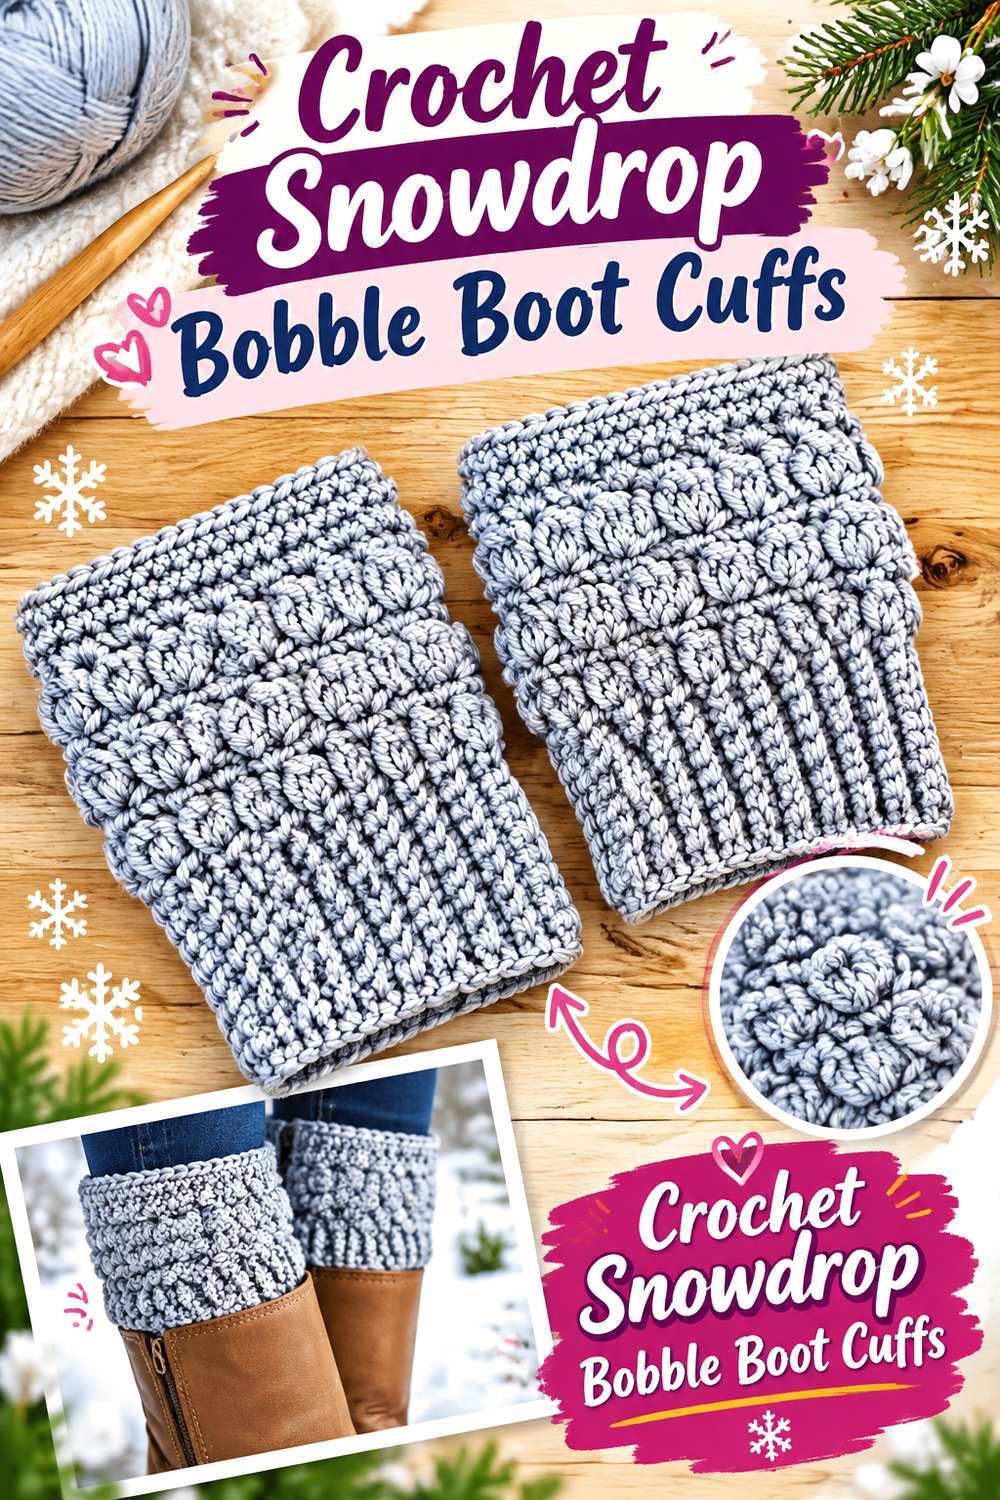 SAVE
SAVEThe American Crochet Association’s Snowdrop design starts with a back-loop single-crochet band and then adds alternating bobble and single-crochet texture after the piece is joined into a tube. This produces a noticeably dimensional lower section while retaining a ribbed portion that visually anchors the cuff.
It is a useful choice when you want more sculptural texture than puffs alone provide. The bobble field can remain largely outside the boot opening, allowing its raised surface to be seen rather than compressed.
Bobble Placement Drives the Look
Bobbles create distinct points of shadow and volume. A smooth, relatively solid yarn will generally make those shapes easier to distinguish, while heavily variegated color may make individual bobbles less obvious. Decide whether color or three-dimensional texture should carry the design.
Seaming Can Make or Break Stretch
The cuff begins as a flat band that is joined before the textured body is added. A seam that is much tighter than the surrounding ribbing can become the least flexible part of the piece. Keep the join secure without unintentionally cinching the circumference.
Give the Texture Room Above the Boot
Raised bobbles can feel bulky when trapped beneath a close-fitting shaft. If your boots have limited clearance, plan for more of the textured section to remain visible above the opening and keep the flatter portion closer to the boot.
Original Tutorial and Creator Credit
Creator/Site: American Crochet Association
13. Crochet Rustic Herringbone Wrap Boot Cuffs
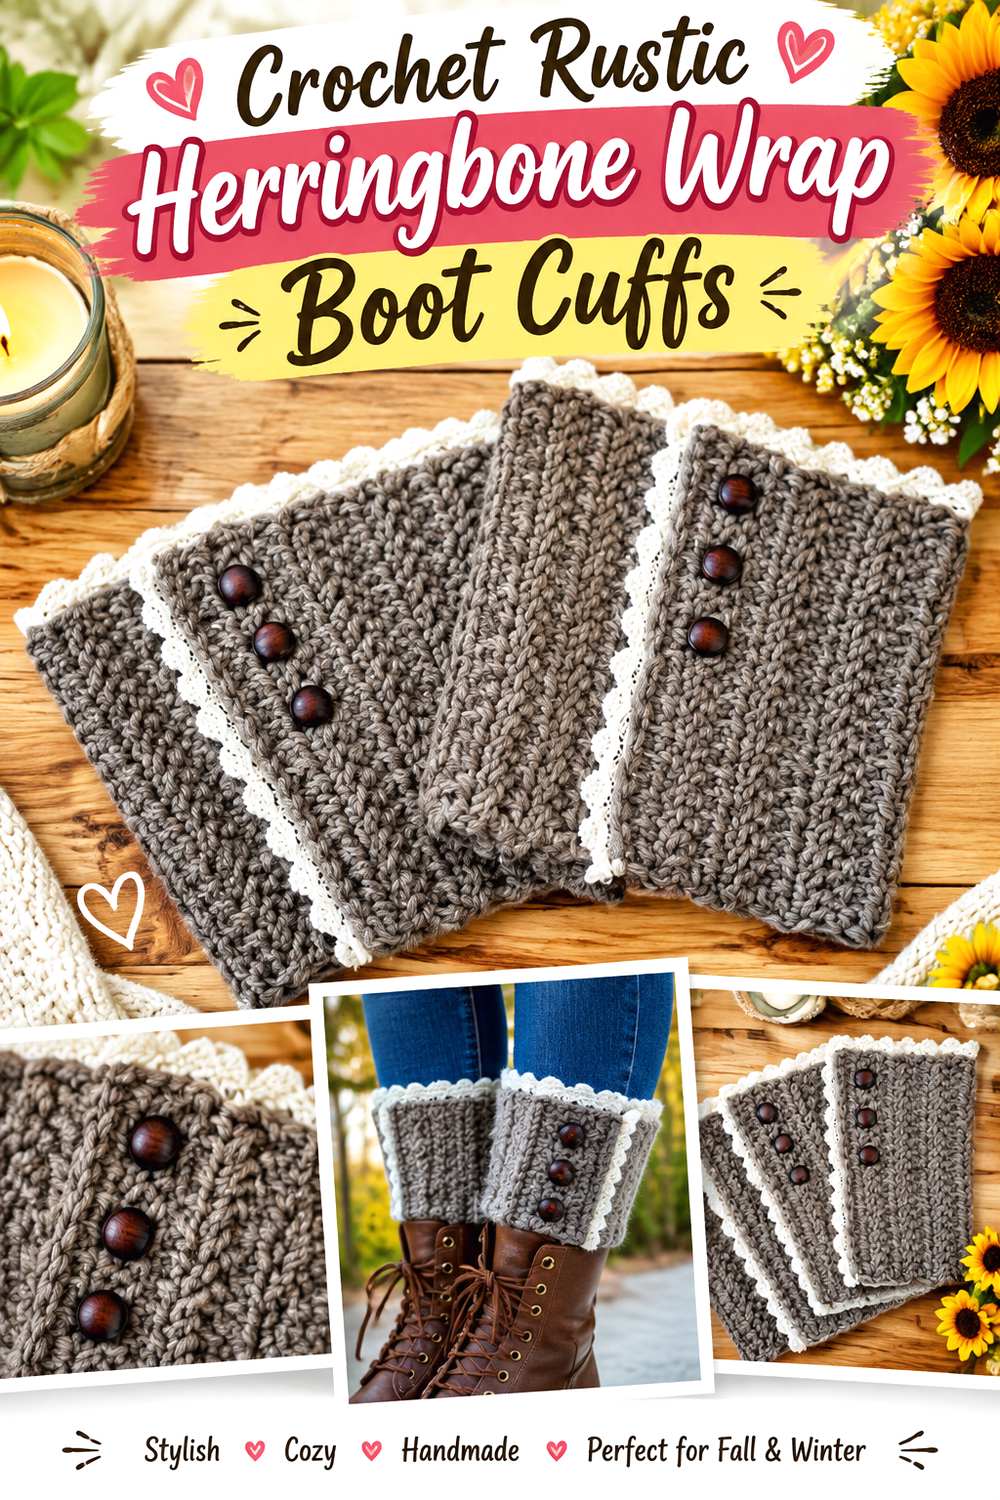 SAVE
SAVEHighland Hickory Designs gives this cuff a distinctly rustic finish by combining herringbone double crochet with decorative lace trim and a row of buttons. Rather than functioning only as a closed tube, the panel overlaps, and the buttons can interact with the spaces in the crochet fabric. The designer also explains how the panel can be adjusted to calf size.
This is one of the strongest choices when you want the closure itself to become a design feature. The external trim and buttons make it visually richer than a basic ribbed cuff without requiring an all-over lace fabric.
A Wrap-Style Cuff Offers Fit Flexibility
An overlapping edge provides some room to fine-tune how snugly the cuff sits, but the overlap still needs to look intentional. Before attaching all buttons permanently, wrap the completed panel around the leg and confirm that the edges lie flat rather than flaring away from each other.
Trim and Buttons Change Care Needs
A cuff made only from yarn can often be cared for according to the fiber label, but sewn trim and buttons introduce other materials. Check how each component tolerates washing or moisture. If necessary, choose removable or especially durable embellishments based on how frequently the cuffs will be worn.
Herringbone Fabric Rewards Even Edges
Because the cuff is a visible rectangular panel before it overlaps, inconsistent row edges are more noticeable than they might be in a hidden seam. Count carefully and maintain turning-chain tension so the buttoned edge remains neat.
Original Tutorial and Creator Credit
Creator/Site: Highland Hickory Designs
14. Crochet Cluster Stitch Button Boot Cuffs
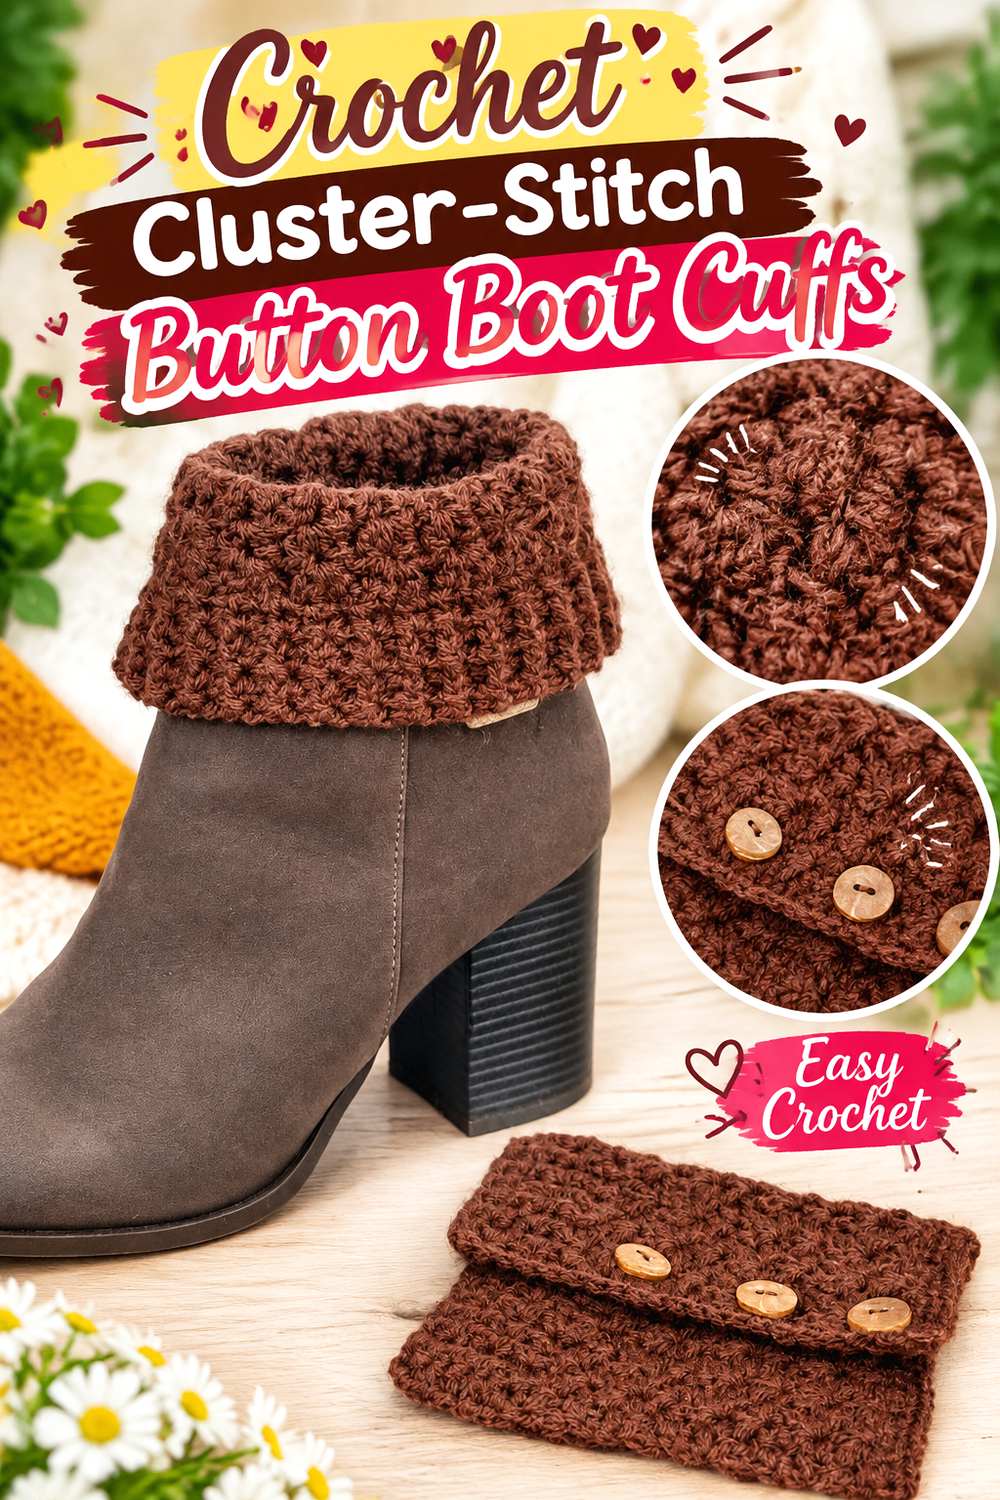 SAVE
SAVEFosbas Designs uses stacked double-crochet clusters to build a pronounced all-over texture, then finishes the project with a band and multiple buttons. The original tutorial provides several sizes and explains how both starting length and repeats can be adjusted for a more customized fit.
Compared with a simple decorative button attached to a finished tube, this design makes the buttoned edge a more integrated part of the look. The clustered body gives the cuff a patterned surface that remains noticeable even in a single solid color.
Cluster Texture Needs Room to Read
Clusters create small pockets of depth and shadow. Compressing them tightly beneath a boot can flatten the pattern and add unnecessary bulk. Check how much vertical space will remain exposed before deciding whether to add extra length.
Functional Buttons Require a Real Closure Test
If the buttons participate in fastening rather than serving only as decoration, test them several times before finalizing placement. The closure should be secure without forcing the surrounding crochet to stretch dramatically around each button.
Size From the Leg, Not a Generic Label
The tutorial offers multiple sizes but also emphasizes customization. Measure the intended wearer at the cuff position and use the source’s adjustment guidance. Clothing thickness should also be included when the cuffs will usually be worn over leggings or jeans.
Original Tutorial and Creator Credit
Creator/Site: Fosbas Designs
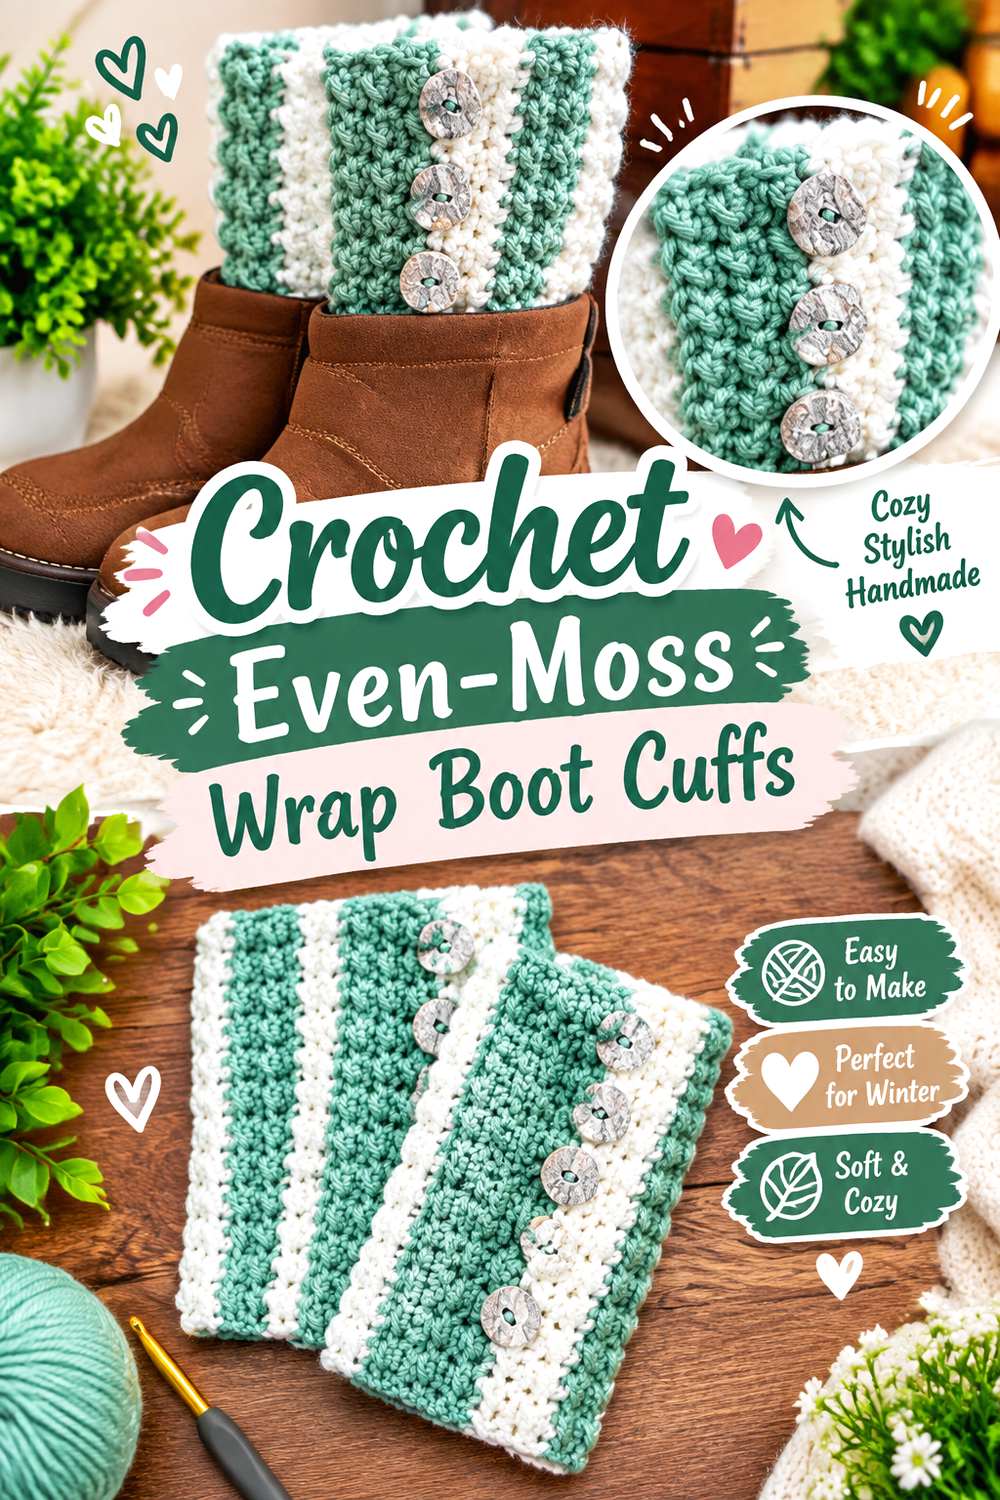
15. Crochet Even Moss Wrap Boot Cuffs
 SAVE
SAVECrochet ’n’ Create uses an even-moss-style combination of half double crochet and slip stitches to create a finely pebbled fabric. The source describes the cuff as a wrap-over design and includes buttonholes, buttons, and an option for changing color to create stripes.
The surface is less dimensional than bobbles or large clusters, which makes this a good middle-ground choice: visibly textured without becoming extremely thick. The overlapping buttoned edge also distinguishes it from seamed tubes and joined-round cuffs.
Even Moss Stitch Balances Texture and Stretch
Alternating shorter and taller stitches creates a compact surface, but the slip stitches must remain workable. Pulling them excessively tight can make subsequent rows difficult and reduce flexibility. The source itself cautions readers to keep those stitches loose enough to work into later.
Wrap-Over Construction Highlights Edge Alignment
Both ends remain visually important when one overlaps the other. If one edge becomes longer through inconsistent turning tension, it can be obvious once the buttons are fastened. Periodically lay the work flat and check that the rectangle remains square.
Stripes Magnify Row Inconsistencies
Color changes make horizontal alignment easier to see. That can be attractive, but it also exposes uneven row heights. When using stripes, keep the color-change intervals consistent between both cuffs and record where each change occurs.
Original Tutorial and Creator Credit
Creator/Site: Crochet ’n’ Create
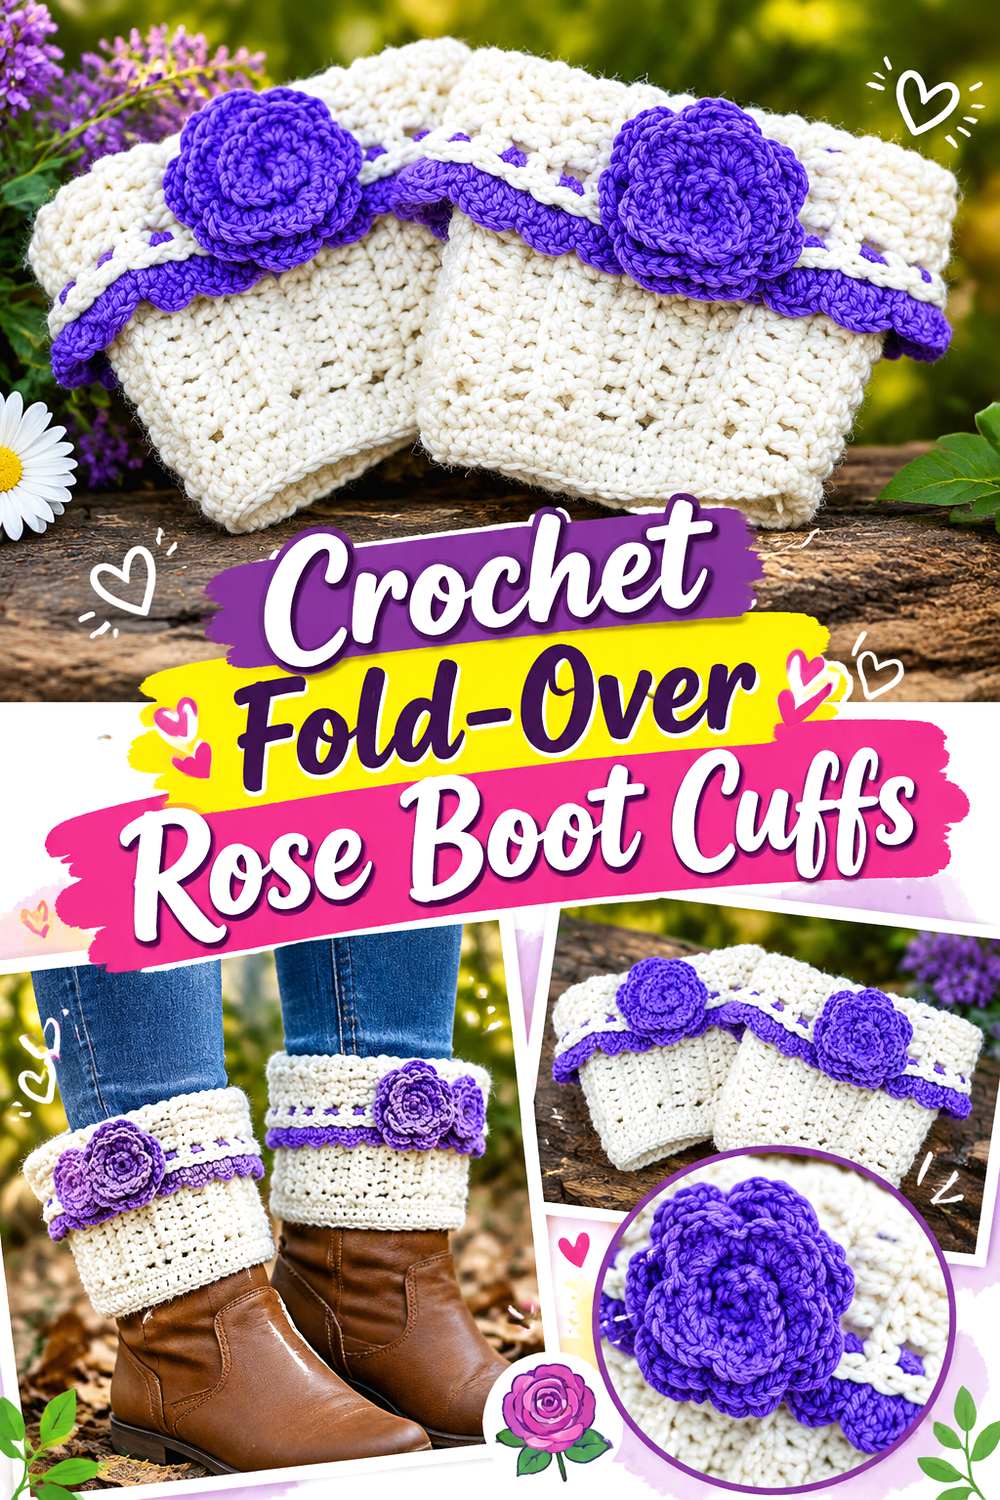
16. Crochet Fold Over Rose Boot Cuffs
 SAVE
SAVERose Cottage Crochet turns the upper edge into the main attraction. The original cuff combines a ridged body with contrasting shell-style trim, then folds the upper portion down and adds a crocheted rose that can be tied onto the finished cuff. The tutorial also shows that the same basic design can be embellished in other ways.
That gives this idea a particularly decorative, layered silhouette. Unlike cuffs where a small button merely punctuates the side, the trim and flower deliberately draw the eye toward the top of the boot.
The Fold-Over Trim Becomes the Focal Point
A contrasting edging adds both color and thickness. Before deciding how much cuff should remain visible, fold the finished edge into its intended position and assess the full depth of the trim. A taller exposed section may balance the layered upper edge better than a very narrow strip.
A Removable Rose Changes Styling
Because the source attaches its rose using crocheted ties, the embellishment can be treated as a styling element rather than an inseparable part of the cuff. That provides flexibility if you want a simpler look on some days or need to remove the flower for care.
Keep Embellishments Clear of Boot Hardware
A dimensional flower can catch against buckles, zipper pulls, or decorative straps. Before settling on its final position, wear the cuff with the intended boots and move the ankle through a normal range of motion. Shift the flower slightly if necessary to keep it visible and unobstructed.
Original Tutorial and Creator Credit
Creator/Site: Rose Cottage Crochet
Comparing the 16 Crochet Boot Cuff Ideas
If fit flexibility is the priority, the Prismatic, custom ribbed picot, rustic wrap, cluster-button, and even-moss wrap ideas provide especially clear routes for adapting circumference. For minimal bulk, the slip-stitch rib and lightweight lace approaches deserve a closer look. Puff, bobble, shell, and cluster constructions make a stronger texture statement but need more attention to boot clearance.
For decoration, the choices divide further. Cross-stitched hearts keep embellishment flat, while buttons, lace trim, ribbons, and the removable rose add physical components that can influence care and snagging. If you prefer the crochet fabric itself to do all the visual work, choose the Moonshadows shells, puff texture, picot-and-puff lace, slip-stitch ribbing, or Snowdrop bobbles instead.
Conclusion
The most useful crochet boot cuff idea is the one that matches both the look you want and the space available around your boots. Clean ribbing and slip-stitch fabric keep bulk under control, while puffs, bobbles, shells, clusters, and herringbone stitches put more emphasis on texture. Lace and picot versions create a lighter effect, and wrap-style or measurement-based constructions offer additional fitting flexibility.
Buttons, cross-stitch, ribbon, decorative trim, and removable flowers can personalize a pair further, but they also introduce decisions about placement and care. Once you have chosen the construction that suits your footwear, use the linked original tutorials for exact stitch counts, repeats, measurements, materials, and finishing instructions.
Frequently Asked Questions
How do I size crochet boot cuffs for my calves?
Measure around the leg at the exact height where the top edge of the cuff will sit, ideally while wearing the clothing you expect underneath it. Then compare that measurement with the sizing or customization method in the chosen tutorial. Do not automatically subtract the same amount from every measurement: ribbing, lace, bobbles, clusters, and different fibers can all stretch differently.
Can I use a different yarn weight for crochet boot cuffs?
Sometimes, but changing yarn weight can alter circumference, height, thickness, stitch definition, and stretch simultaneously. A thicker yarn may also make the cuff uncomfortable inside a close-fitting boot. If the tutorial does not specifically provide substitution instructions, make a sample and measure it. For fitted designs, matching the designer’s gauge or adjustment method is safer than simply changing hook size and assuming the proportions will remain the same.
Should crochet boot cuffs go inside or outside the boot?
Either arrangement can work depending on the design and footwear. Some cuffs are intended to have a lower section tucked into the boot so only the decorative upper edge shows, while others can sit primarily outside. Thick bobbles, clusters, fold-over trims, and bulky ribbing require more boot clearance. Test the cuff with the actual boots rather than judging fit on the leg alone.
How can I stop crochet boot cuffs from sliding down?
Start with accurate circumference and choose a fabric with appropriate stretch and recovery. Ribbed constructions can help, but a cuff that is substantially oversized may still slide. The boot itself can also support the lower section when part of the cuff is tucked inside. Avoid solving a poor fit by overtightening ribbons or decorative closures unless the original design specifically uses them for fitting.
Do crochet boot cuffs need blocking?
Not every pair does. Lace, picots, shells, and some textured stitches may benefit from gentle shaping so repeats and edges settle evenly, while compact ribbing may need little or no blocking. The correct method depends on fiber content and attached embellishments. Follow the yarn label and the original designer’s guidance rather than automatically applying heat or steam.
Can I add buttons, ribbons, or flowers to a plain crochet boot cuff?
Yes, provided the addition does not compromise fit or comfort. Check the embellishment against boot zippers, buckles, and straps, and consider whether it changes washing requirements. A removable flower or ribbon offers more flexibility than a permanently sewn decoration. For buttons intended to function as closures rather than decoration, reinforce placement appropriately and verify that the surrounding crochet is not being overstretched.