Small-scale crochet can fill surprisingly different decorating roles. Some miniature projects are freestanding objects for a shelf or desk, while others hang from walls, branches, rings, or garlands. There are also tiny functional containers, seasonal pieces, and true dollhouse-scale textiles where proportion matters much more than it does for ordinary “mini” decor.
The 14 ideas below deliberately cover those differences. You will find dimensional plants, a mushroom and pumpkin, a wreath, basket, mandala, bunting, ornaments, a tiny house, and an oval dollhouse rug. Along with the original tutorial for every project, the notes focus on the decisions that affect the finished result: scale, stability, fabric thickness, stuffing, display method, and where adaptation can change the look. Use the list to choose a miniature that suits both your crochet style and the space you actually want to decorate.
Quick List
- Crochet Mini Potted Leaf Plant
- Crochet Mini Flowered Cactus Pot
- Crochet Mini Hanging Pearl Plant
- Crochet Mini Decorative Flower Vase
- Crochet Mini Woodland Mushroom
- Crochet Mini Ribbed Pumpkin Accent
- Crochet Mini Ring Wreath Ornament
- Crochet Mini Round Storage Basket
- Crochet Mini Hoop Mandala Display
- Crochet Mini Flag Bunting Garland
- Crochet Mini Snowflake Ornament
- Crochet Mini Star Ornament
- Crochet Mini Thatch-Roof House
- Crochet Miniature Dollhouse Oval Rug
Decide What “Miniature” Means Before Choosing Yarn
Miniature crochet does not follow one universal scale. A palm-sized shelf ornament, a tiny car-mirror plant, and a dollhouse rug can all be described as miniature even though their proportions are very different.
Start with the intended display location. For a dollhouse, compare the project with the furniture, doorway, floor area, or doll before committing to the complete piece. For ordinary home decor, check whether the item needs enough visual presence to be noticeable from across a desk, shelf, or mantel.
Changing yarn and hook size can alter overall dimensions, but it can also change stitch definition, stiffness, and the apparent thickness of edges. A scaled-down basket made from material that remains visually bulky may stop looking like a basket. Likewise, extremely fine yarn can make a soft decorative object lose some of the substantial texture that made the original appealing.
Balance Structure and Softness at Small Scale
Tiny decor often exaggerates differences between firm and flexible crochet fabric. A basket, flower pot, vase, or standing house benefits from an outline that remains readable. A mandala, bunting flag, snowflake, or rug has a different requirement: the fabric needs to lie or hang cleanly without unwanted curling.
Stuffed pieces introduce another variable. Filling can sharpen the shape of a pumpkin, mushroom, cactus, or plant pot, but overfilling may stretch the stitches and make stuffing visible. Underfilling can leave a dimensional object looking collapsed.
For projects supported by rings, hoops, or other bases, decide whether you want to preserve the tutorial’s structure before substituting materials. Removing a support may fundamentally change how the piece hangs. Similarly, adding reinforcement to an originally soft project can alter its proportions. Treat miniature structure as part of the design rather than an afterthought.
Plan the Display and Finishing Before the Final Details
Because these projects are small, finishing details occupy a larger percentage of the finished object. A bulky knot, uneven seam, oversized hanging loop, or long loose tail can visually compete with the entire miniature.
Think about the viewing angle as well. A vase displayed on an eye-level shelf needs a convincing profile, while bunting or a mandala will usually be viewed from the front. Dollhouse pieces need to look proportionate beside surrounding objects instead of only looking attractive in isolation.
Very small embellishments also deserve practical consideration. Loose beads, detachable decorations, wire, tiny stuffed components, and miniature accessories may not be appropriate around young children or pets. Decorative items should also be kept away from open flames and other heat sources. For washing or cleaning, follow the yarn label and the original creator’s guidance, especially when a project combines yarn with stuffing, wire, wood, rings, or other materials.
1. Crochet Mini Potted Leaf Plant
 SAVE
SAVEA miniature leafy plant gives a shelf, workstation, windowsill, or small display a vertical accent without needing a real planter. Crochet Everyday’s tutorial shows a tiny plant with multiple green branches arranged inside a crocheted pot, creating a complete freestanding object rather than simply a flat botanical motif.
This version is worth choosing when you want several visible components in one miniature: foliage, pot, interior filling, and final arrangement. That also means assembly contributes heavily to the result. Leaves that are technically identical can produce very different silhouettes depending on how widely or narrowly the branches are positioned.
Build the Silhouette Before Judging the Leaves
The individual leaves are only one part of the finished impression. Step back after arranging the branches and look at the whole outline. A plant with every stem pointing in the same direction can appear flat even when the leaf work is neat.
If you adapt the project, change branch placement gradually. A wider plant may need a visually broader pot, while very tall foliage can make the base seem undersized. Let the container and foliage look intentionally related rather than scaling each component independently.
Keep the Pot Visually Grounded
Small upright crochet objects can become top-heavy. Test the plant on the actual surface where you intend to display it before deciding the base is stable enough.
The tutorial includes stuffing and assembly of the plant and pot. When changing materials, remember that a lighter or softer yarn can behave differently from the original. Add filling carefully enough to define the form without forcing large gaps between stitches, and confirm that the finished base sits as evenly as you want it to.
Choosing Colors Without Losing Leaf Definition
A miniature plant can handle subtle color variation, but strong contrast between the foliage and pot usually helps the silhouette remain readable from a distance. If several green shades are used, arrange them intentionally instead of depending on random placement.
For a very small display, one leaf color may actually look cleaner than a complex palette. Texture and branch spacing already create detail, so additional color is optional rather than necessary.
Original Tutorial and Creator Credit
Creator: Crochet Everyday
2. Crochet Mini Flowered Cactus Pot
 SAVE
SAVEA potted cactus creates a noticeably different botanical shape from a loose leafy plant. YarnIt Crochet’s tutorial presents a stuffed cactus standing in its own crocheted pot and finishes the arrangement with a small flower. The strong upright silhouette makes it especially suitable for a desk, narrow shelf, small plant grouping, or handmade display where a spreading plant would take up too much visual space.
Because the cactus body is stuffed, this project also gives you a chance to work with controlled three-dimensional shaping. The decorative flower can remain a focal point or be treated as an optional color accent when you prefer a quieter desert-inspired palette.
Watch the Cactus-to-Pot Proportion
A very tall cactus in a visually tiny pot can look unstable even if the construction itself stands correctly. Before final assembly, place the major components together and judge the relationship from normal viewing distance.
If adapting the size, consider the entire composition. Increasing only the cactus height is different from enlarging the whole object. A shorter, wider cactus reads as a compact shelf accent; a taller one creates more vertical emphasis.
Stuff for Form Rather Than Maximum Firmness
Stuffing should support the cactus outline without stretching the crochet fabric so aggressively that filling becomes visible. The exact amount will depend on the yarn, hook, and tension you use.
Work gradually and inspect the sides as well as the top. A cactus that appears smooth from the front may have an uneven profile from another angle. This matters more if the miniature will sit on an open shelf where several sides remain visible.
Let the Flower Stay in Scale
The small flower provides useful contrast, but an oversized bloom can dominate the cactus body and change the character of the design. If you substitute yarn for the flower, compare its finished scale with the cactus before attaching it permanently.
You can also omit or recolor a floral accent for a more minimal look without needing to change the main concept.
Original Tutorial and Creator Credit
Creator: YarnIt Crochet
3. Crochet Mini Hanging Pearl Plant
 SAVE
SAVEInstead of occupying a shelf, this miniature uses vertical hanging space. Make It Yourself By Papari’s project combines a small hanging basket with trailing string-of-pearls-style foliage and miniature yellow flowers. The result can function as a tiny suspended home accent rather than another freestanding plant.
That hanging format changes the decisions that matter. The length and balance of the plant are visible from below, and the attachment point becomes part of the design. It can suit a small wall hook, decorative peg, miniature display, or other lightweight hanging position where a trailing silhouette makes sense.
Check the Drop Before Finalizing the Hanger
A hanging miniature should be judged while suspended, not lying flat on a table. Temporarily hold it at the intended height and see whether the pot, hanger, and trailing foliage feel balanced as one composition.
If the suspension strands are much longer than expected, the plant may feel visually disconnected from its hanging point. If they are too short, the foliage and hanger can compete for space. Adapt length according to placement while preserving enough room for the plant itself to remain visible.
Spread the Trailing Elements Naturally
Trailing strands can bunch into a single narrow column if every attachment falls in the same area. Arrange them while the project is hanging and rotate the pot to see the miniature from different sides.
The source includes string-of-pearls foliage and small yellow flowers, giving the finished plant more visual movement than a solid stuffed leaf form. If you simplify the decoration, keep enough separation between trailing elements for the suspended shape to remain recognizable.
Treat the Attachment as a Functional Detail
A decorative hanger experiences different stress from a tabletop object. Check that the loop or attachment point is secure enough for the project’s own weight and intended placement.
Do not assume a decorative hanging loop is designed to support additional objects. This is decor rather than load-bearing storage, and substitutions in yarn or hardware can change how it behaves.
Original Tutorial and Creator Credit
Creator: Make It Yourself By Papari
4. Crochet Mini Decorative Flower Vase
 SAVE
SAVETukitaki’s miniature vase shifts the botanical theme toward the container itself. Rather than crocheting a complete planted arrangement, the tutorial focuses on a small shaped vase that can stand alone or hold appropriately sized decorative flowers.
This makes the project useful when you want a reusable base for changing miniature arrangements. A vase can be styled with crochet blooms, lightweight dried material, or simply displayed as a sculptural yarn accent. Its narrow opening and shaped body also create a different crochet challenge from the straight-sided basket: the silhouette has to remain deliberate as the form expands and contracts.
Make the Neck Clearly Different From the Body
The miniature reads as a vase largely because the narrower upper section contrasts with the fuller lower body. If a yarn substitution creates very thick stitches, that distinction can disappear.
View the work from the side while shaping it. A clear profile is more important than adding surface decoration. When scaling the project, maintain visible differences among the base, body, and opening instead of relying only on overall size.
Match Flowers to the Opening
A tiny vase can quickly look overcrowded. Test one or two stems before assembling a full bouquet and check whether the container still remains visible.
Large flowers may be suitable when you want an intentionally whimsical arrangement, but delicate miniature decor generally benefits from a clear relationship between bloom size, stem height, and vase width. Adapt the flowers to the vase rather than forcing a favorite flower pattern into an opening that is visually too small.
Consider Stability Before Adding Height
The tutorial notes stuffing as an optional stability consideration. Any adaptation that adds taller flowers can change the center of gravity.
Before displaying the finished arrangement near an edge, check how easily it tips. Lightweight decorative filling may help the profile without necessarily providing the same stability as a more substantial base, so treat final placement as part of the design decision.
Original Tutorial and Creator Credit
Creator: Tukitaki
5. Crochet Mini Woodland Mushroom
 SAVE
SAVEA single mushroom introduces a compact woodland accent without requiring a planter or hanging system. Winding Road Crochet’s tutorial shows a small mushroom with a contrasting stem and cap designed as autumn decor.
The rounded cap creates the visual focus, while the narrower stem prevents the finished shape from reading as a generic stuffed ball. A few can be grouped into a seasonal bowl or shelf arrangement, but one mushroom also works beside books, plants, or other woodland-inspired pieces. It is a useful choice when you want dimensional crochet with a small footprint and fewer display components than a miniature plant arrangement.
Keep the Cap and Stem Visually Distinct
The charm of a miniature mushroom depends on a readable transition between the two main forms. If both sections become similarly wide after a yarn substitution, the silhouette can lose its mushroom-like character.
Before final assembly, place the components together and inspect them from the side. Color contrast helps, but proportion should do most of the work.
Check the Base Before Creating a Group
A single mushroom that leans slightly may be easy to position, but several uneven pieces can make an arrangement look accidental. Test each finished mushroom on a flat surface before building a cluster.
For a permanent display, varying heights can create interest. Varying them intentionally is different from allowing inconsistent tension to determine the final shapes.
Original Tutorial and Creator Credit
Creator: Winding Road Crochet
6. Crochet Mini Ribbed Pumpkin Accent
 SAVE
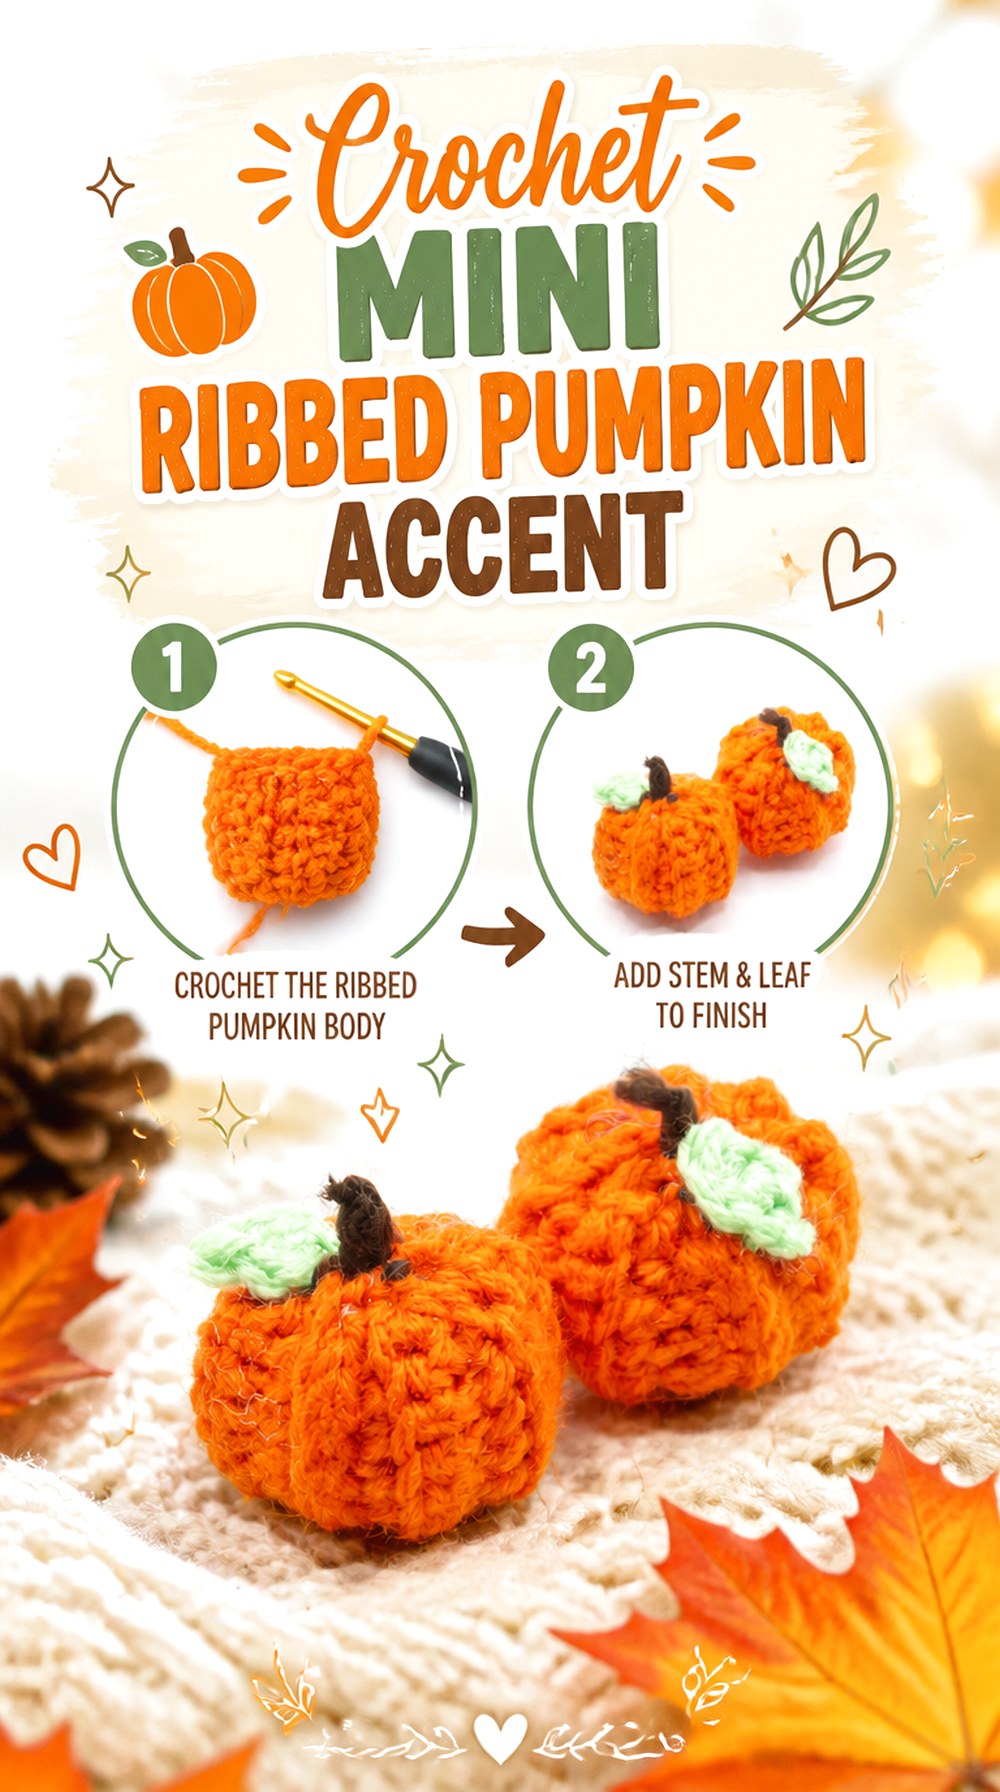
SAVEJess Crafting’s mini pumpkin uses a ribbed crochet surface to give the small form its recognizable segmented appearance. The finished object works as an autumn shelf accent, bowl filler, table decoration, or component in a larger seasonal arrangement. The creator also discusses using multiple pumpkins in a garland, which shows how the same small form can move from tabletop decor to hanging display.
Compared with the mushroom, the pumpkin has a broader, lower silhouette. That makes it easier to group with other objects without adding much height, and its strong ribbing means texture can remain visible even in a restrained single-color palette.
Shape the Ridges Consistently
The ribs provide much of the visual identity, so uneven tension can become noticeable at miniature scale. Inspect the pumpkin from several angles before considering the shaping complete.
If you make a group, they do not need to be perfectly identical. Slight size variation can look natural, but inconsistent finishing around the top or base can be more distracting than differences in overall diameter.
Decide Between One Accent and a Repeated Display
One pumpkin can punctuate a small shelf arrangement, while multiple pumpkins create stronger seasonal impact. Before making a large batch, decide whether they will sit together, be distributed through a room, or be connected as a garland.
That choice affects color planning. A restrained palette often looks more coordinated in a group, while one standalone pumpkin can carry a more unusual color without competing with neighboring pieces.
Original Tutorial and Creator Credit
Creator/Site: Jess Crafting
7. Crochet Mini Ring Wreath Ornament
 SAVE
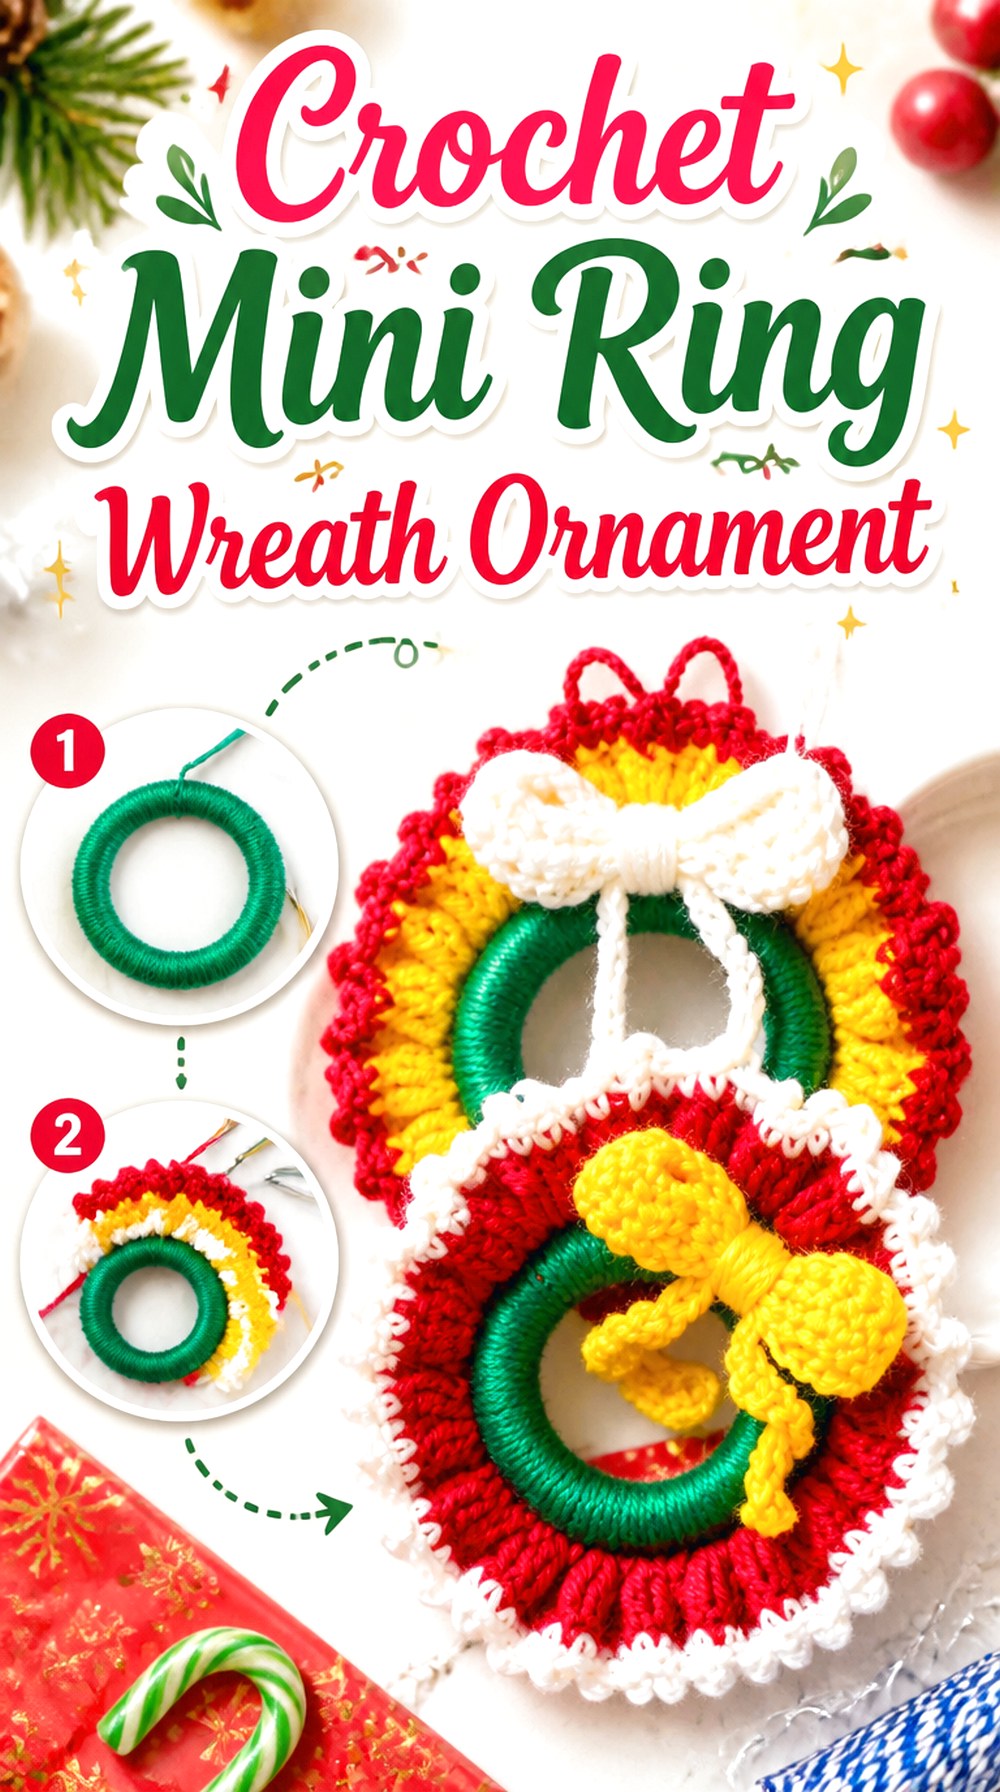
SAVEEasy Breezy Crochet’s miniature wreath is built around a wooden ring and finished with crocheted decorative details, including a bow. The supported circular construction produces a crisp outline that differs from stuffed wreath designs and makes the piece suitable for hanging as a small Christmas accent or ornament.
The ring is important because it establishes both scale and structure before the crochet decoration is added. That makes this a useful project for readers who want a tidy geometric result rather than relying entirely on stuffing or blocking to hold a circle.
Choose the Ring Before Planning the Scale
Because the crochet is built around a solid base, substituting a different ring changes the available circumference and can affect the amount and spacing of decorative crochet.
Do not assume the stitch distribution for one ring size will transfer unchanged to another. If you choose a different base, use the creator’s adjustment guidance and check that the covering remains full without becoming excessively crowded.
Leave Enough Space for the Bow to Read Clearly
A bow or other focal embellishment needs visual room. If the wreath edge is already highly textured, an oversized decoration can obscure the circular shape.
Temporarily position the embellishment before attaching it. The cleanest result usually comes when the wreath still reads as a wreath first and the bow acts as the finishing accent.
Original Tutorial and Creator Credit
Creator/Site: Easy Breezy Crochet
8. Crochet Mini Round Storage Basket
 SAVE
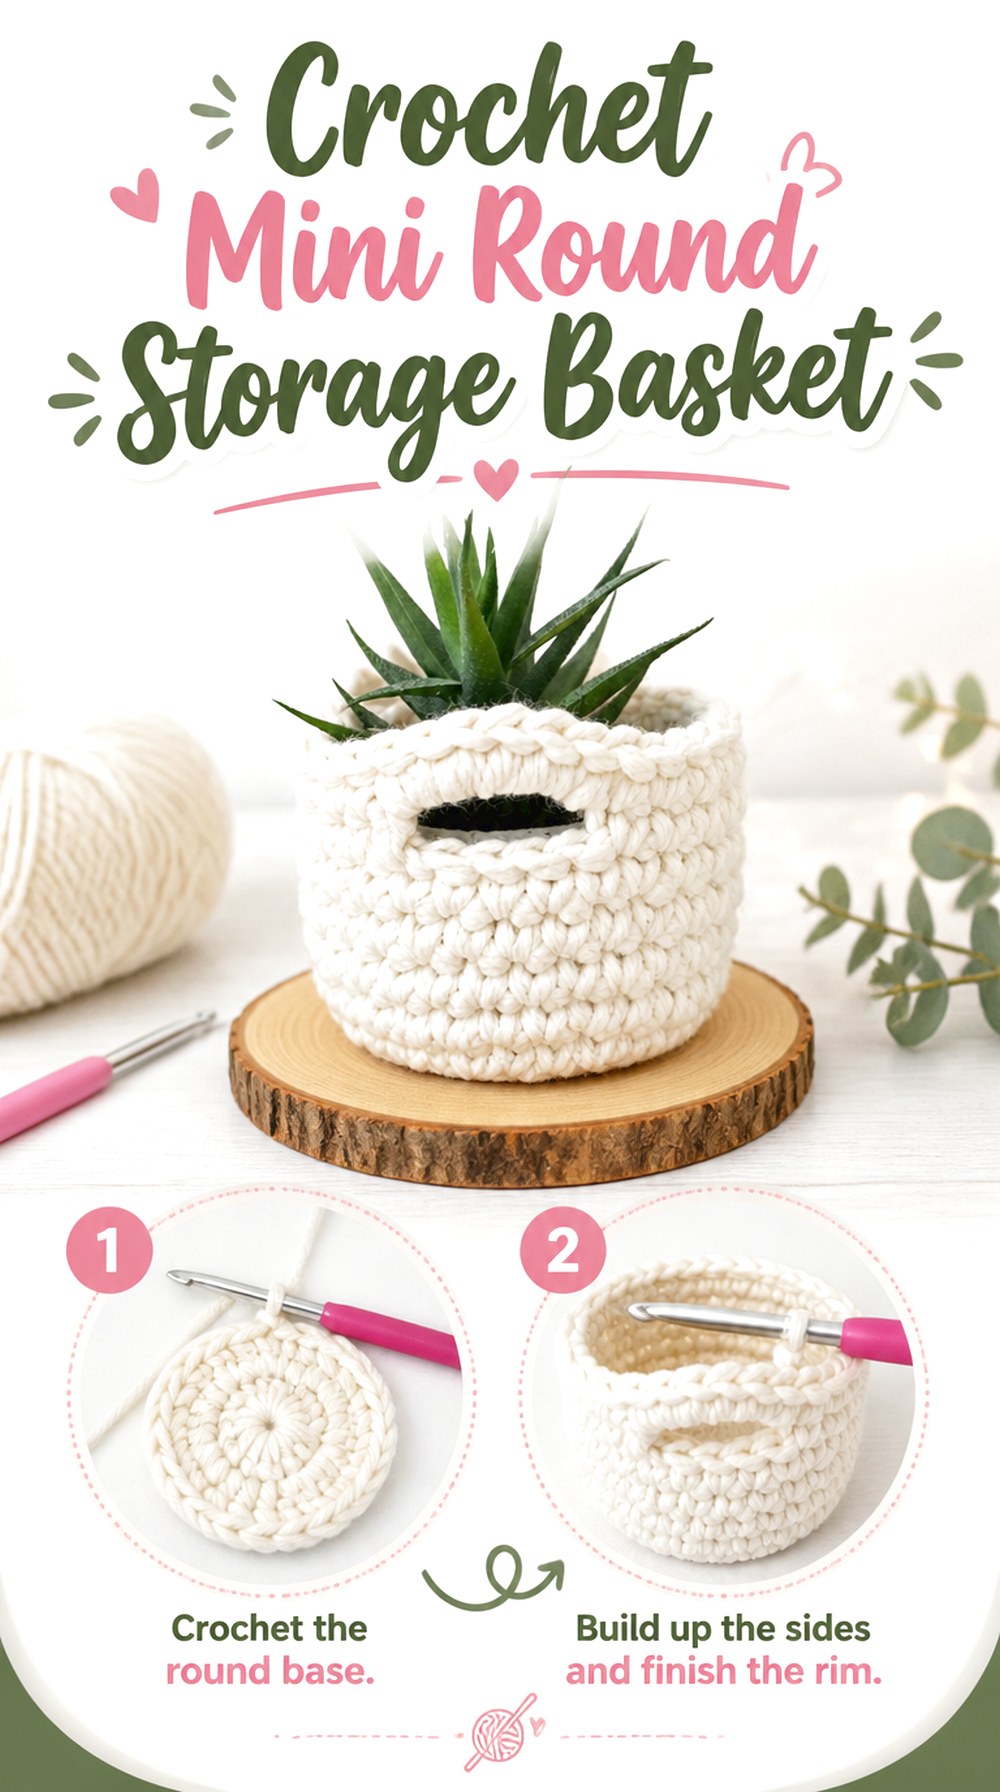
SAVEStitchberry’s mini basket combines decoration with practical tabletop storage. The pattern produces a compact round container with an open top, and the creator suggests uses ranging from holding small accessories or craft supplies to serving as a plant holder or standalone decoration.
This project earns its place in the list because an open container behaves differently from a stuffed miniature. The sides need enough body to keep the opening visible, while the base should sit reasonably flat. It can also be incorporated into a styled shelf rather than existing only as a seasonal ornament.
Protect the Opening From Collapsing
The most important visual cue is the usable open top. If a softer yarn causes the sides to fold inward, the basket may begin to read more like a pouch.
When substituting materials, consider how dense the resulting fabric feels before completing the full height. A firmer fabric generally produces clearer basket structure, although the tutorial’s original materials and gauge should remain your main construction reference.
Size It Around What You Want to Store
A decorative empty basket can be almost any convenient miniature scale. A functional catch-all needs enough usable interior space for its intended contents.
Before adapting the dimensions, gather the few objects you expect it to hold. Small jewelry, clips, craft notions, or other light items have very different space requirements. Avoid treating a decorative yarn basket as a container for heavy loads unless the construction was specifically designed for that use.
Original Tutorial and Creator Credit
Creator/Site: Stitchberry
9. Crochet Mini Hoop Mandala Display
 SAVE
SAVEHandmadebyRaine’s mini mandalas introduce thread crochet and hoop mounting to the collection. The design uses fine crochet thread and small hoops, with the finished pieces shown together as a decorative wall display.
Unlike a stuffed miniature, a mandala depends on open space as much as on yarn. The gaps, clusters, and circular structure create the pattern, while the hoop keeps the outline crisp. This is a strong choice when you want miniature decor that feels light and graphic rather than plush. It also provides a way to create a coordinated group without making every piece identical in color.
Let the Negative Space Stay Visible
Openwork can disappear when the background is visually busy. Before deciding where to hang the mandala, hold it against the actual wall or surface and check whether the stitch pattern remains readable.
A strong contrast between yarn and background can reveal delicate detail more effectively than adding more colors to the crochet itself.
Keep Tension Even Around the Hoop
Mounting reveals inconsistencies that might be less visible when the crochet lies loose. If one area is pulled harder than another, the center can appear off balance.
Attach or stretch the piece gradually around the circumference rather than finishing one side completely first. Follow the original tutorial for its specific mounting method and make adjustments cautiously if your hoop differs from the source.
Plan Multiples as One Composition
Several mini mandalas can read as one wall installation, so spacing between them matters almost as much as the individual color choices.
Lay the entire arrangement on a table before hanging it. A repeated circular shape already creates cohesion; you can then vary color or internal detail without making the grouping feel disconnected.
Original Tutorial and Creator Credit
Creator/Site: HandmadebyRaine
10. Crochet Mini Flag Bunting Garland
 SAVE
SAVECosy Rosie Crochet’s miniature bunting is composed of tiny triangular flags joined into a string, creating a narrow decorative line that can fit places where a larger garland would feel oversized. The creator suggests displaying it on shelves, in shadow boxes, on handmade cards, and in other compact settings.
Bunting is useful because its length can be adapted by changing the number of flags rather than redesigning the individual motif. It also turns small amounts of several colors into one coordinated decoration, making palette planning more important than dimensional shaping.
Decide the Final Length Before Making Every Flag
It is easy to keep adding miniature motifs because each one is small. Measure the intended shelf, frame, peg rail, or other display area first and estimate how many flags will actually fit.
Leave enough visual breathing room at the ends. A garland stretched tightly from edge to edge can look more like trim than deliberately draped bunting.
Repeat Colors With a Simple Rhythm
Random color can work, but a short repeated sequence often gives tiny flags more visual coherence. This is particularly useful when the bunting will sit near books, plants, or other colorful decor.
Lay the flags in order before joining them. Rearranging loose motifs is much easier than deciding a bright shade appears too concentrated after the entire garland has been assembled.
Original Tutorial and Creator Credit
Creator/Site: Cosy Rosie Crochet
11. Crochet Mini Snowflake Ornament
 SAVE
SAVEPassionate Crafter’s mini snowflake is a flat winter motif that can function as an ornament or applique. Its radiating points make it visually lighter than stuffed Christmas pieces, while the compact size makes repeated snowflakes practical for a tree, garland, package decoration, or small seasonal display.
Because the snowflake is defined by symmetry, finishing matters more than volume. Small differences among the points can become obvious once the piece is hanging alone, making this a good project for paying close attention to even tension and final shaping.
Shape the Points Before Adding a Hanging Loop
Do not let the loop determine which direction an uneven snowflake has to face. First lay the motif flat and decide whether its points need gentle shaping or blocking according to the fiber and creator guidance.
Once the snowflake looks balanced, position the hanger so the motif sits naturally rather than twisting to one side.
Think About Storage as Part of Reuse
Flat ornaments are compact, but delicate points can become folded or distorted when packed tightly with heavier decorations.
Store miniature snowflakes flat or with enough protection to preserve their shape. If the fiber allows blocking, the project may be reshaped later, but prevention is easier than correcting a heavily crushed motif.
Original Tutorial and Creator Credit
Creator/Site: Passionate Crafter
12. Crochet Mini Star Ornament
 SAVE
SAVEConfessions of a Homeschooler’s mini-star tutorial offers two small crochet star versions, including a basic star and a mini granny-style option. That choice lets you decide whether your miniature decor should have a cleaner solid shape or a more visibly crochet-specific motif.
Stars are especially flexible because they do not need to remain confined to Christmas decorating. Depending on color and hanging method, they can be used in nursery decor, gift wrapping, garlands, celestial displays, or a bowl of small textile ornaments.
Choose the Star Style for the Viewing Distance
A more detailed miniature may look interesting at arm’s length but visually merge into a simpler shape when viewed from across a room. If the stars are going on a tree or high shelf, judge them from that distance.
For a close-up garland or gift decoration, finer internal detail has more opportunity to remain visible.
Keep Every Point Equally Defined
The outer silhouette is the star’s strongest feature. When changing yarn, check whether the material gives enough definition to the points or causes them to round inward.
Gentle shaping may improve the outline, depending on the fiber. Follow the yarn label and source guidance rather than assuming every fiber should be blocked in the same way.
Original Tutorial and Creator Credit
Creator/Site: Confessions of a Homeschooler
13. Crochet Mini Thatch Roof House
 SAVE
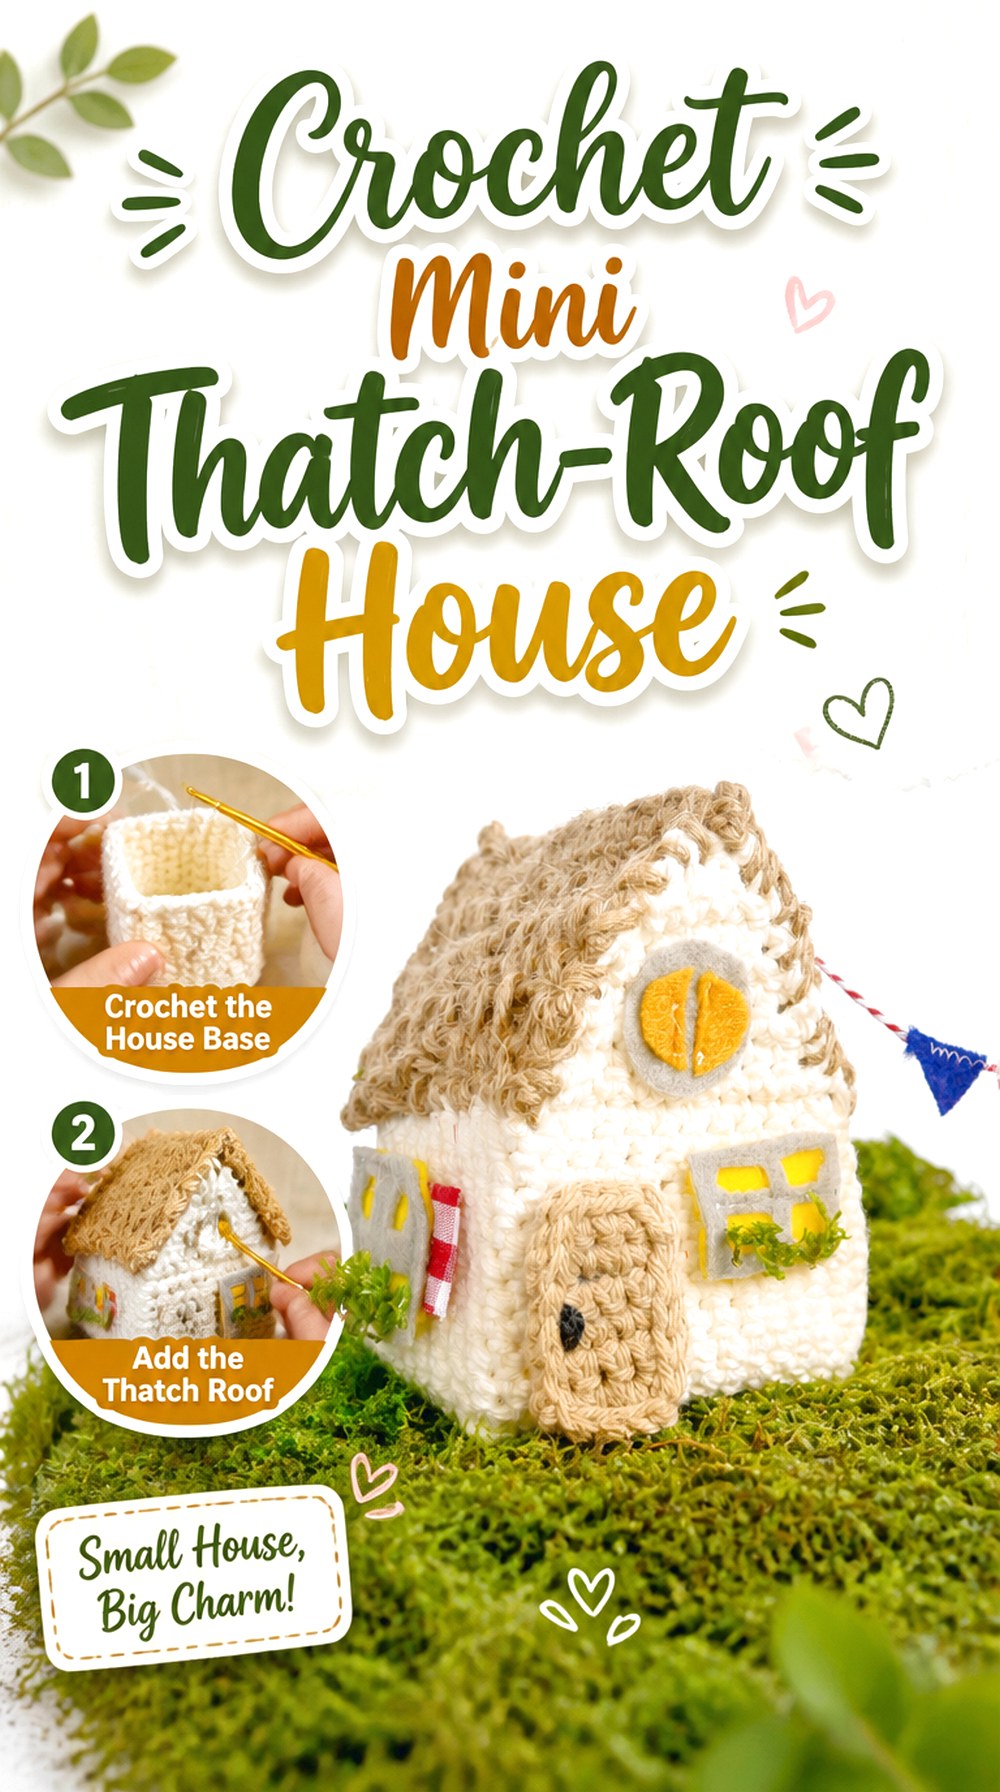
SAVEMama In A Stitch’s little crochet house is one of the most structural ideas in the collection. It has a defined house body, contrasting thatch-inspired roof, door and window details, and an opening roof that allows the interior to hold tiny objects.
That combination makes it more than a flat house ornament. It can anchor a miniature seasonal scene, fairy-style display, or small shelf vignette. The roof material also creates textural contrast against the crocheted house body, so the finished piece has visual interest even before additional miniature decorations are placed around it.
Preserve the Roofline
A house stops looking architectural quickly if the roof becomes uneven or too soft. During assembly, inspect the silhouette from the front and both sides instead of concentrating only on the seam.
If you substitute a different roof material, consider its stiffness and thickness. An especially bulky yarn may overwhelm the walls, while a very limp yarn can weaken the thatch-like profile that distinguishes this design.
Decide Whether the Interior Will Stay Accessible
The creator intentionally leaves part of the roof able to open for tiny storage. Before modifying the house, decide whether you value that feature.
A permanently closed decorative house can be finished differently from one that will be opened repeatedly. If you keep the storage function, make sure embellishments do not interfere with the roof movement.
Use Tiny Accessories Carefully
The house naturally invites miniature objects, but small detachable pieces can become choking hazards. The original creator also cautions readers about tiny toys around small children.
For an adult display, accessories can remain removable for restyling. In a household with children or pets, consider whether the scene should be placed out of reach or whether small components should be omitted entirely.
Original Tutorial and Creator Credit
Creator/Site: Mama In A Stitch
14. Crochet Miniature Dollhouse Oval Rug
 SAVE
SAVELoy Dollhouse’s tutorial is specifically for an oval crocheted miniature rug intended for a dollhouse, making it the most scale-dependent project in this collection. Instead of being merely a small version of ordinary decor, its success depends on how naturally it fits among miniature furniture.
An oval rug is useful for defining a tiny seating area, bedside zone, entry, or other small floor grouping. The elongated shape can also fit rooms where a round rug would consume too much width. Because it lies flat, fabric thickness and edge behavior matter more than stuffing or structural support.
Test the Footprint With Paper First
Before committing to the complete crochet piece, cut a paper oval approximately the size you expect and place it inside the room. Add the furniture that will sit on or beside it.
This simple mock-up tells you whether the rug will visually anchor the furniture or dominate the entire floor. A miniature that looks tiny in your hand can still be oversized once it enters a dollhouse room.
Keep the Fabric Thin Enough to Read as a Rug
Full-size rug proportions do not translate automatically to miniature scale. Thick yarn can create an object that looks more like a padded mat or cushion beside tiny furniture.
If you adapt the source with different materials, compare thickness as carefully as width and length. Finer yarn or thread may produce a more convincing scale, but changing materials also changes the crochet behavior, so sample first.
Use Furniture Placement to Judge the Shape
An oval is especially useful when you want directional flow. Position its long axis in relation to the bed, table, couch, or walkway rather than dropping it into the room without reference to the surrounding furniture.
If the rug will sit beneath a miniature table, check that enough of the edge remains visible for the oval shape to be understood.
Original Tutorial and Creator Credit
Creator: Loy Dollhouse
How These Crochet Miniature Decor Ideas Compare
| Project | Main Display Style | Form | Main Planning Issue |
|---|---|---|---|
| Mini Potted Leaf Plant | Shelf or desk | Dimensional | Branch arrangement and base stability |
| Flowered Cactus Pot | Shelf or desk | Stuffed dimensional | Cactus-to-pot proportion |
| Hanging Pearl Plant | Suspended | Dimensional/trailing | Hanging length and balance |
| Decorative Flower Vase | Tabletop | Hollow/shaped | Neck definition and bouquet scale |
| Woodland Mushroom | Tabletop | Stuffed dimensional | Cap-and-stem proportion |
| Ribbed Pumpkin | Tabletop or garland | Stuffed/textured | Consistent shaping |
| Ring Wreath | Hanging | Ring-supported | Base size and embellishment balance |
| Round Storage Basket | Tabletop | Open container | Sidewall structure |
| Hoop Mandala | Wall | Flat/openwork | Tension and background contrast |
| Flag Bunting | Hanging | Repeated flat motifs | Overall length and color rhythm |
| Snowflake Ornament | Hanging/applique | Flat motif | Symmetry and storage |
| Star Ornament | Hanging/garland | Flat motif | Point definition |
| Thatch-Roof House | Shelf/display scene | Structural dimensional | Roof shape and movable opening |
| Dollhouse Oval Rug | Miniature floor | Flat textile | Scale, thickness, and furniture footprint |
For something with year-round shelf presence, the basket, vase, house, or plant projects are especially adaptable. The wreath, pumpkin, snowflake, and star provide stronger seasonal signals. Bunting and mandalas use very little physical depth, making them useful where display space is limited, while the dollhouse rug is the option where proportion to surrounding furniture matters most.
Conclusion
Crochet miniature decor can be far more varied than a collection of tiny stuffed objects. These projects range from open containers and structured houses to trailing plants, flat ornaments, hoop-mounted lace, repeated bunting flags, and a genuine dollhouse floor textile.
Choose according to where the finished piece will live. A tabletop miniature needs different stability from a hanging one, and a dollhouse accessory requires much stricter attention to scale than a small shelf ornament. Yarn thickness, stuffing, support structures, and finishing can all change how convincing the miniature looks.
Once you have selected a project, use its original tutorial for the creator’s exact construction details rather than trying to infer them from the finished appearance. Thoughtful scaling and display planning can then make even a very small crochet piece feel intentional.
Frequently Asked Questions
What yarn works best for crochet miniature decor?
There is no single yarn that works for every miniature. Thicker yarn can create bold stitch texture and more substantial shelf decor, while fine yarn or thread is often better when realistic dollhouse proportions or delicate openwork are important. Start with the material specified by the original tutorial when possible. If you substitute, make a small sample first and assess thickness, stiffness, stitch definition, and final scale rather than assuming the same hook-to-yarn relationship will produce an equivalent result.
Can I make a regular crochet decor pattern miniature by using thinner yarn?
Sometimes, but yarn substitution alone does not guarantee a convincing miniature. A smaller yarn and hook can reduce dimensions, yet details such as borders, handles, stuffing, openings, or embellishments may remain proportionally awkward. This matters especially for dollhouse decor. Compare the developing project with its intended surroundings and consider whether all components still look believable. When accurate scale matters, a tutorial specifically designed as a miniature is usually a more dependable starting point.
How do I help small crochet decor stand upright?
Begin with even, sufficiently dense fabric and pay attention to the base shape. Stuffed projects should be filled gradually so they gain definition without becoming distorted. Baskets and containers may depend more on yarn body, stitch density, or a support included by the designer. Do not add wire, cardboard, glue, or other reinforcement automatically; it can change care and safety considerations. Check the original tutorial first to see how the creator intended the piece to hold its form.
Should miniature crochet decorations be blocked?
Flat motifs such as snowflakes, mandalas, bunting, stars, or rugs may benefit from shaping or blocking when the yarn and pattern are suitable for it. Stuffed amigurumi-style pieces generally depend more on tension, stuffing, and assembly than on conventional flat blocking. Because fibers react differently to moisture, heat, and steam, follow the yarn label and creator guidance. Test cautiously if you are unfamiliar with the fiber rather than applying the same blocking technique to every miniature.
How can I keep several miniature projects from looking cluttered together?
Use repetition selectively. A display can contain different shapes while still feeling coordinated if colors, scale, or material are related. Leave empty space around detailed objects instead of filling every gap with another miniature. For collections such as pumpkins, mushrooms, plants, or ornaments, arrange the pieces before committing to additional colors. One visually dominant object with a few quieter companions often reads more clearly than many equally detailed pieces competing for attention.
Are crochet miniature decorations suitable around children and pets?
That depends on the construction and placement. Very small detachable components, beads, buttons, wire, loose accessories, stuffing, and hanging cords can present risks, particularly for young children or pets that chew objects. Treat these projects primarily as decor unless the original design is specifically intended for play by the relevant age group. Keep small pieces out of reach when appropriate, and avoid displaying yarn decorations close to open flames, hot surfaces, or other ignition sources.