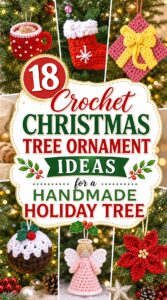
Crochet Christmas tree ornaments can look very different once they are actually hanging on a branch. A flat snowflake adds almost no bulk, a stuffed snowman creates a rounded focal point, and a tiny gift box or drum introduces more structure. That difference matters when you are planning a tree rather than simply choosing colors.
This roundup compares ornaments by construction, visual density, hanging behavior, storage, embellishment, and finishing rather than treating small color changes as separate ideas. You will find both traditional holiday symbols and playful dimensional pieces, with an original YouTube tutorial credited for every project. Use the comparisons to decide which shapes suit your tree, what details deserve extra attention, and where a flat, soft, or structured ornament will work best.
Quick List
- Crochet Lacy Snowflake Tree Ornament
- Crochet Mini Stocking Branch Ornament
- Crochet Spiral Candy Cane Tree Ornament
- Crochet Stuffed Snowman Tree Ornament
- Crochet Reindeer Head Tree Ornament
- Crochet Wrapped Gift Box Tree Ornament
- Crochet Nordic Gnome Tree Ornament
- Crochet Christmas Pudding Tree Ornament
- Crochet Angel Tree Ornament with Halo
- Crochet Vintage Bell Tree Ornament
- Crochet Lattice Bauble Tree Ornament
- Crochet Tiny Mitten Tree Ornament
- Crochet Five-Point Star Tree Ornament
- Crochet Owl Amigurumi Tree Ornament
- Crochet Mini Drum Tree Ornament
- Crochet Snow-Tipped Christmas Tree Ornament
- Crochet Soft Wreath Tree Ornament
- Crochet Hot Chocolate Mug Tree Ornament
Choose Ornament Shapes by How They Will Hang
Flat ornaments and dimensional ornaments solve different decorating problems. Snowflakes, stars, and wreaths sit close to the branch and are useful where the tree already has large baubles or deep foliage. Stuffed figures, drums, puddings, and miniature mugs project farther forward, so their shape can remain visible even against dense greenery.
Also look at where the hanging loop attaches. A loop positioned at the center top usually keeps a symmetrical ornament facing forward, while an off-center loop can make a small object lean. Before finishing several copies, hang the first one from the type of branch you actually use. That simple check reveals whether the ornament rotates, tips forward, disappears into the foliage, or needs a shorter or longer hanger.
Yarn, Stuffing, and Structure Change More Than the Look
A Christmas tree ornament does not need the same drape as a scarf or garment. For flat stars and snowflakes, clear stitch definition and a shape that can be blocked neatly may matter most. Stuffed characters need fabric dense enough that filling does not show prominently through the stitches. Structured projects such as gift boxes, drums, or mugs may also rely on their construction or an internal support to keep a recognizable silhouette.
Decorative fibers can add sparkle, but highly fuzzy yarn may hide tiny facial details or lace openings. Likewise, thicker yarn can turn a delicate motif into a heavier visual element. When changing the yarn used in a tutorial, make one sample first and judge the finished scale, stiffness, branch weight, and visibility before committing to a full matching set.
Plan Hanging Loops, Small Details, and Storage Before Finishing
The hanging loop is part of the ornament’s function, not just its final decoration. Make sure it is securely attached to the crocheted structure rather than to a fragile embellishment, and check whether its length lets the ornament clear neighboring branches. Long narrow shapes such as candy canes may need less loop length than compact shapes that need room to hang freely.
Storage matters too. Flat stars, mittens, stockings, and snowflakes can usually be packed with less pressure than dimensional ornaments. Stuffed pieces should not be crushed beneath heavier decorations if you want them to keep their shape. If an ornament includes beads, bells, wire, glued pieces, or other small components, consider where it will be displayed and whether those details are appropriate around young children or pets.
1. Crochet Lacy Snowflake Tree Ornament
 SAVE
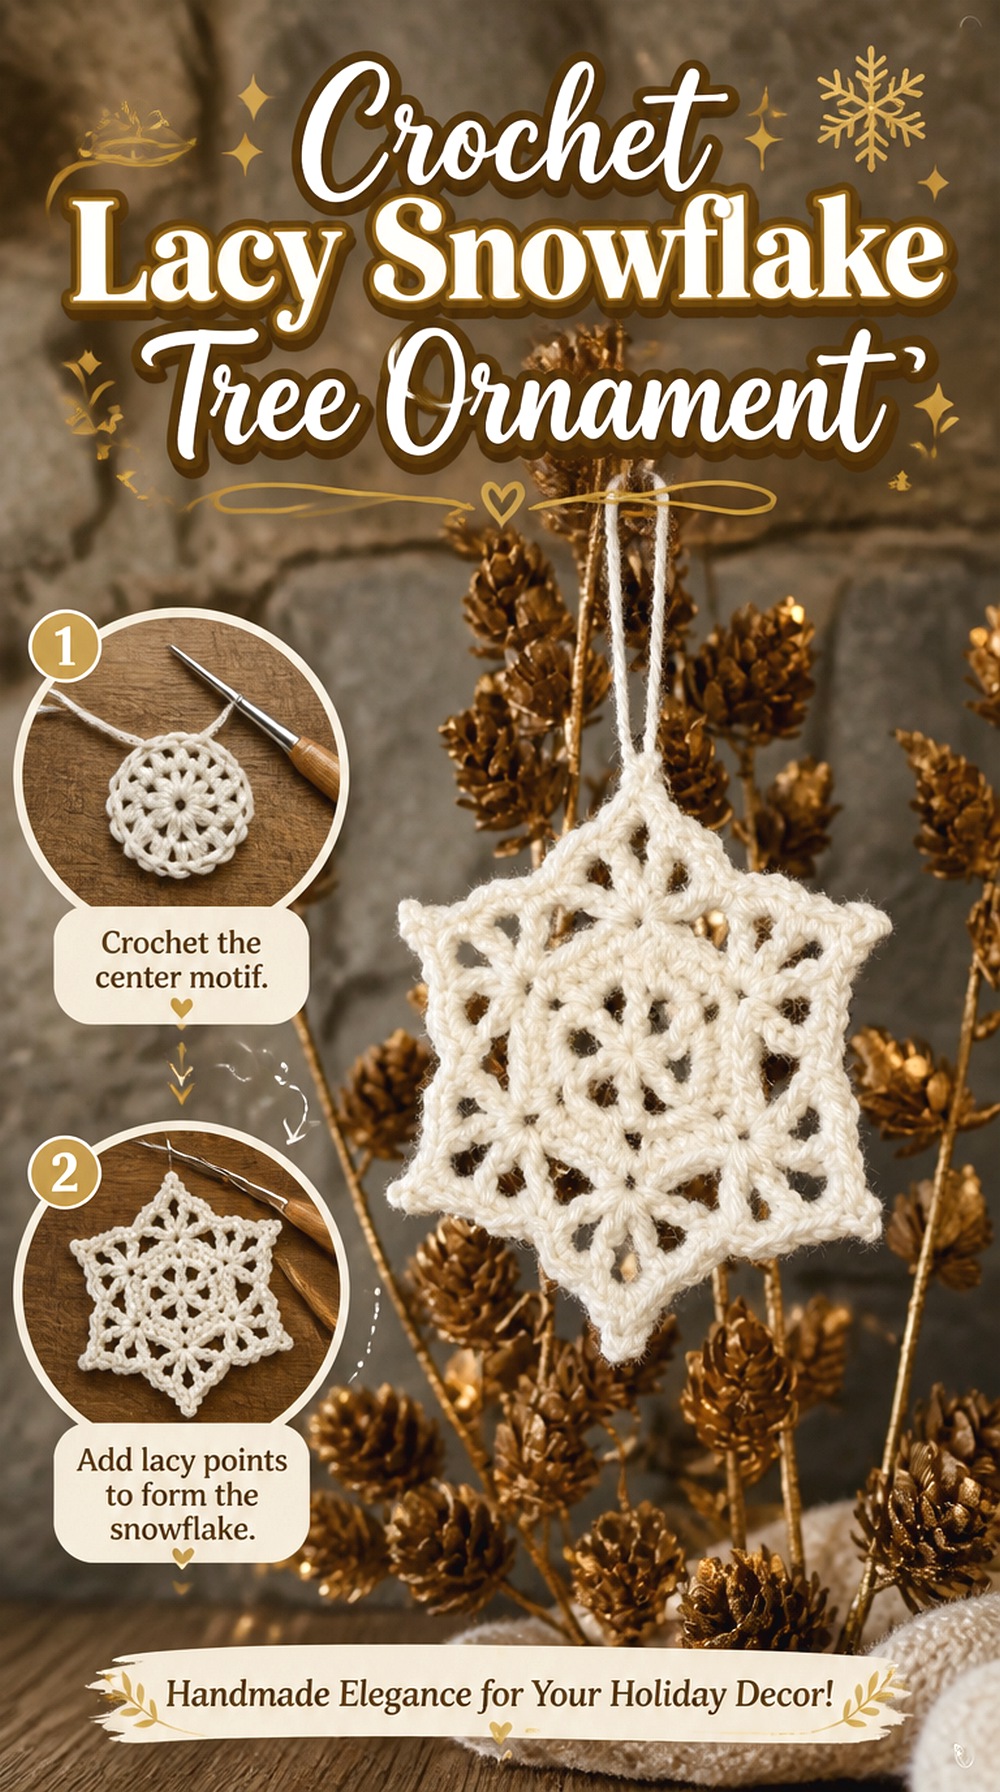
SAVEA crochet snowflake brings an open, airy shape to the tree and is one of the easiest ways to add handmade detail without filling much visual space. This version works especially well between round baubles because the points extend outward while the open areas allow the greenery behind it to remain visible.
The project is also useful when you want ornaments that can coordinate without becoming identical. Changing a neutral shade, adding subtle sparkle, or varying the hanging ribbon can create a group while keeping the same recognizable snowflake silhouette. The most important finishing question is whether the points hold a crisp, balanced shape after the piece is completed.
Blocking Determines Whether the Points Read Clearly
A lace-style snowflake can look uneven immediately after crocheting even when the stitches are correct. Before deciding that the motif is misshapen, compare its points and openings after appropriate shaping or blocking. The goal is not to stretch it aggressively but to help the repeated sections settle into the same orientation.
This matters most on a tree because an irregular point is easier to notice when light passes through the open spaces.
Fine Detail Works Best Where It Can Be Seen
Snowflakes are better suited to visible outer branches than deep areas where their openwork can disappear against dense needles. If your tree is heavily decorated, place them near contrasting ornaments or lights so the outline remains readable.
A lighter-looking motif also makes a useful visual break between several bulky stuffed ornaments.
Original Tutorial and Creator Credit
Creator: Pattern and Craft
2. Crochet Mini Stocking Branch Ornament
 SAVE
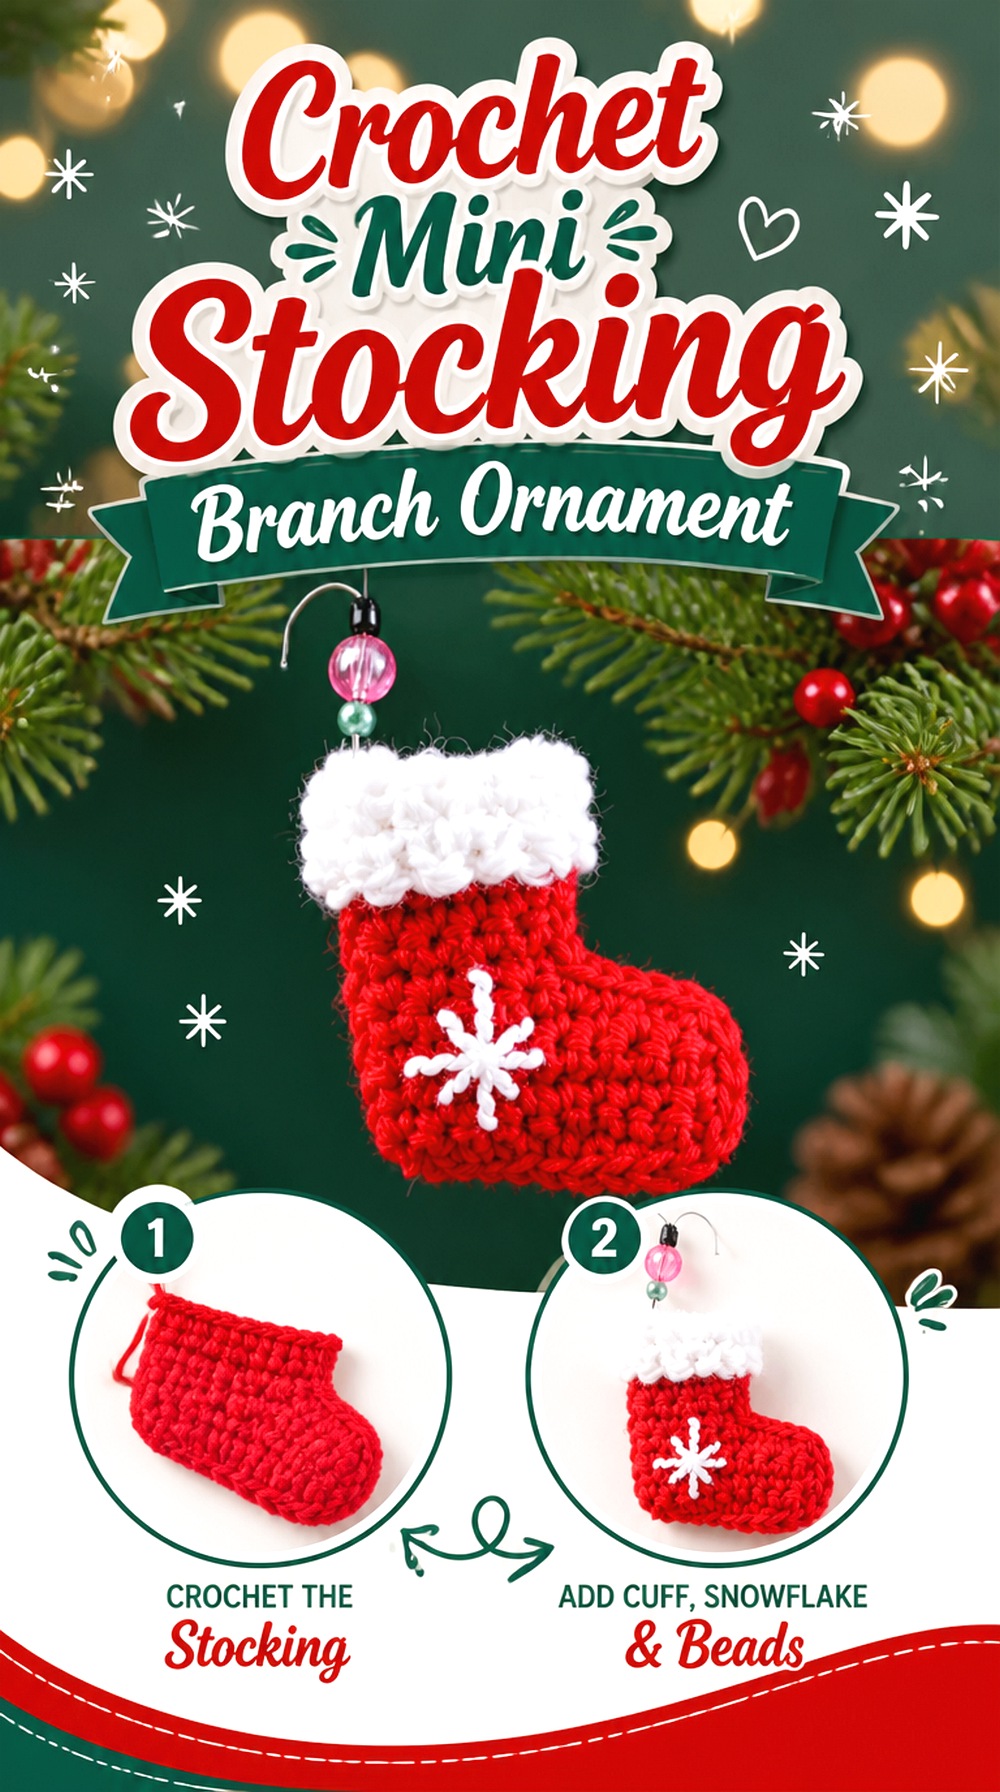
SAVEA miniature crochet stocking gives the tree a familiar Christmas shape without the volume of a stuffed character. Its small opening and curved foot make it more dimensional than a flat appliqué, yet it can still pack relatively flat for storage.
This is a good option when you want ornaments that can double as package accents or small decorative pieces after the holidays. The stocking shape also handles color blocking naturally: cuff, body, heel, or hanging loop can provide contrast without changing the basic construction. Before making a full set, pay attention to the finished opening and foot so both remain distinct rather than collapsing into one narrow tube.
The Foot Needs Enough Definition to Keep the Stocking Shape
The recognizable part of a mini stocking is the change in direction between the leg and foot. After finishing, check the piece from the side rather than only from the front. If the fabric has folded during storage or finishing, gently reshape it before hanging.
A clearly defined foot helps the ornament remain identifiable even when it is surrounded by other red, white, or green decorations.
Treat the Cuff as a Visual Anchor
Because the stocking is small, a contrasting cuff can help establish which end should face upward. If you change colors, compare the cuff width visually with the body rather than assuming more contrast is always better.
A very bulky cuff can overpower the tiny foot, while a narrower one keeps the silhouette balanced.
Original Tutorial and Creator Credit
Creator: Hectanooga1
3. Crochet Spiral Candy Cane Tree Ornament
 SAVE
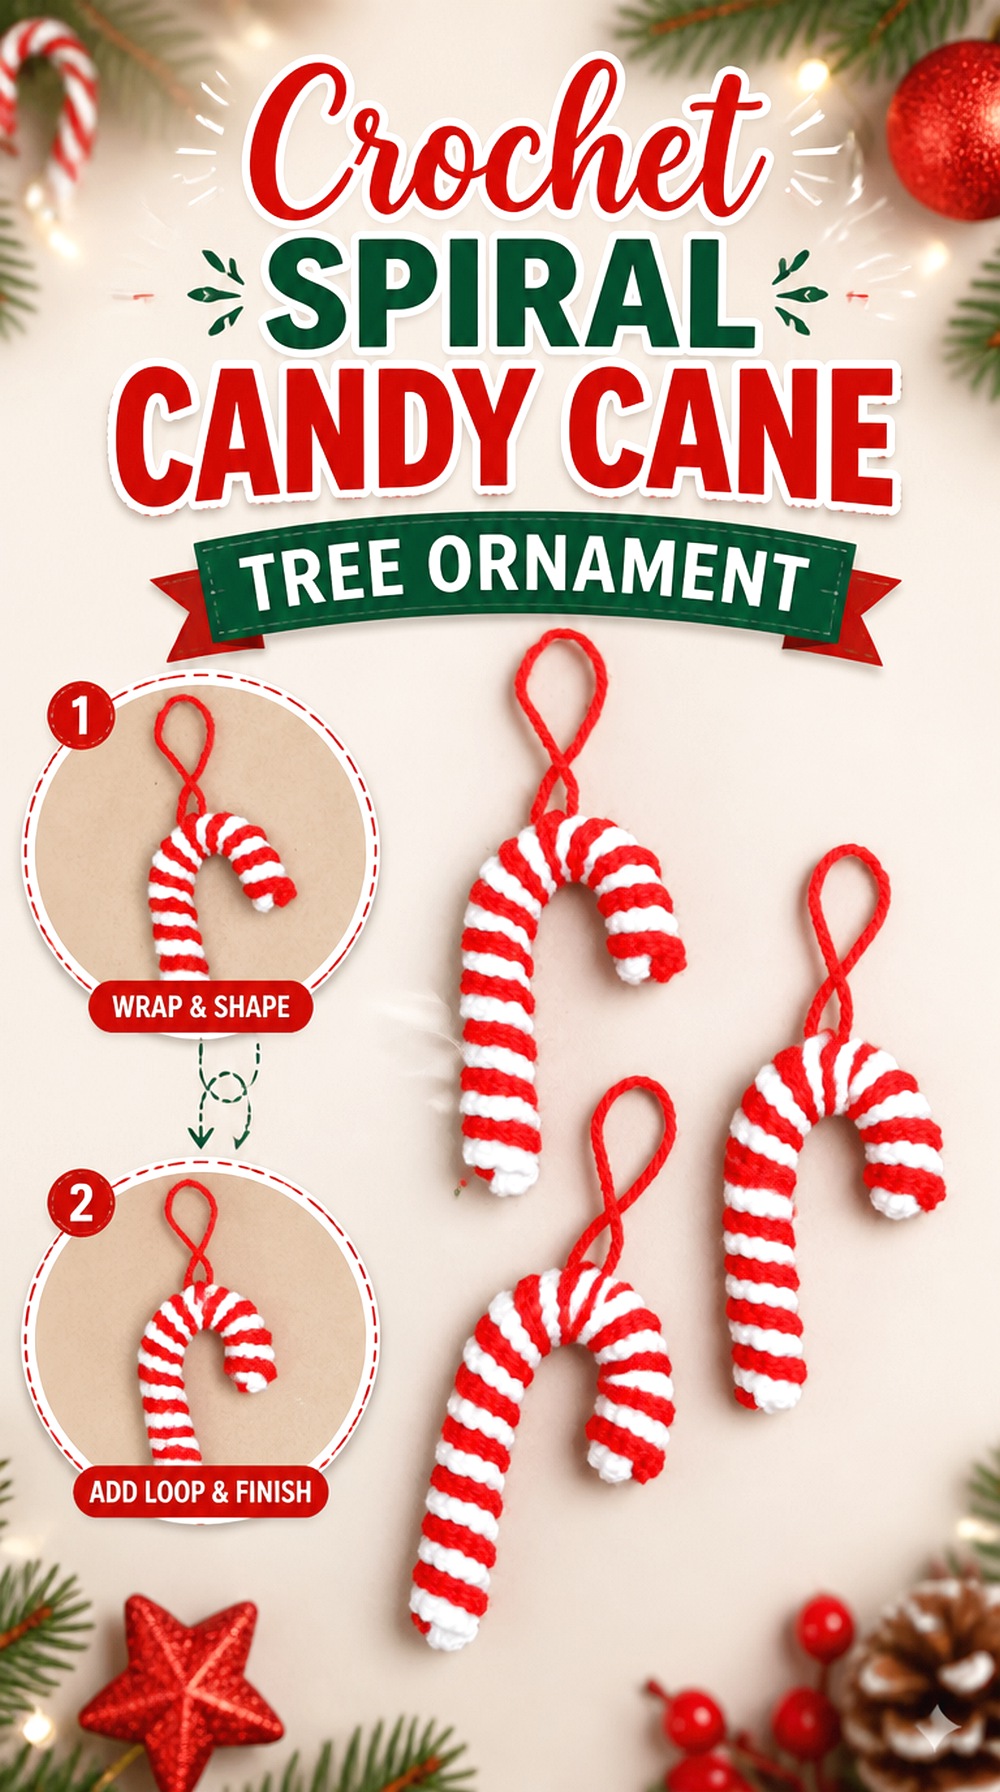
SAVEThis candy cane differs from the flat motifs in the collection because its identity comes from both color and a curved three-dimensional form. The tutorial combines contrasting crocheted coils and uses an internal support, creating the familiar hooked profile rather than relying on a printed or embroidered stripe.
The narrow shape works well where larger ornaments feel crowded. It can hang beside a trunk, near the tip of a branch, or between round baubles without covering much foliage. Because the final curve is important, the main planning decision is not simply which red and white yarn to use, but how firmly you want the ornament to hold that candy-cane bend.
The Inner Support Controls the Final Curve
The tutorial uses a pipe cleaner inside the ornament. That means the final profile can be shaped more deliberately than a completely soft crocheted piece.
When adapting the look, make the curve gradual rather than forcing a sharp bend that bunches the crocheted covering. Also check that no support end is exposed through the yarn before the ornament is placed on the tree.
Stripes Need Enough Contrast to Read at a Distance
The candy cane is usually viewed from several feet away, so subtle tonal changes can disappear. If you depart from red and white, choose two shades that remain visibly different under your Christmas lights.
A high-contrast spiral keeps the project recognizable even on a busy tree filled with many small decorations.
Original Tutorial and Creator Credit
Creator: Made by Phia
4. Crochet Stuffed Snowman Tree Ornament
 SAVE
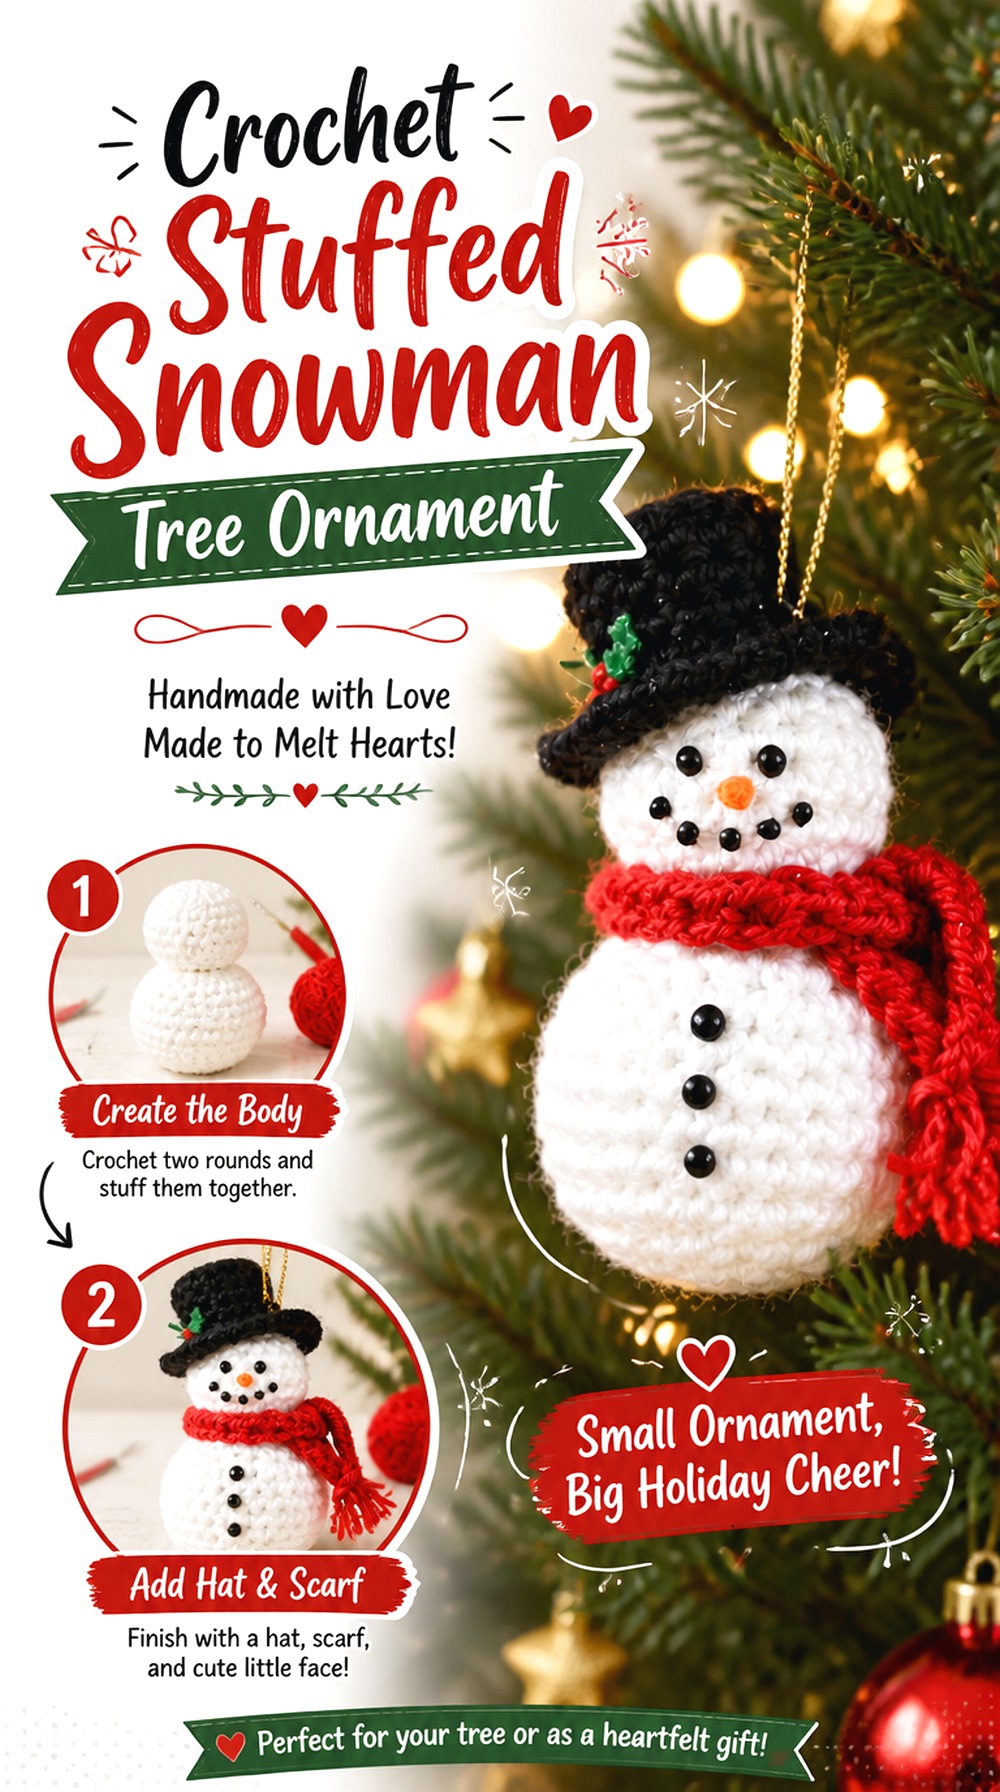
SAVEA stuffed crochet snowman adds a rounded character ornament to a tree that otherwise contains mostly flat motifs. The visible head-and-body form, hat, scarf, and face create a small focal piece that reads as a complete character rather than a decorative symbol.
Because this project has more finishing details than a snowflake or star, placement matters. It works especially well on a branch with enough open space around it to show the outline of the hat and body. If you customize the face or accessories, keep them proportional to the small form so the snowman does not become visually crowded.
Stuffing Should Support the Shape Without Distorting It
The purpose of filling is to establish the rounded snowman silhouette, not to stretch the stitches as far as they will go. Add enough to define the sections while watching for widening gaps or an overly firm surface.
Before closing the piece, compare the head and body from several angles. Correcting the distribution at that point is easier than trying to reshape an overfilled ornament later.
Facial Details Need to Stay Legible From the Front
Small eyes, buttons, and a carrot-style nose can disappear if they are placed too close together or hidden by the hat and scarf. Test the face while the ornament is upright.
If the piece is intended for a household with small children or pets, think carefully about detachable embellishments and choose finishing methods appropriate to where the ornament will be displayed.
Original Tutorial and Creator Credit
Creator: Crouton Crafts
5. Crochet Reindeer Head Tree Ornament
 SAVE
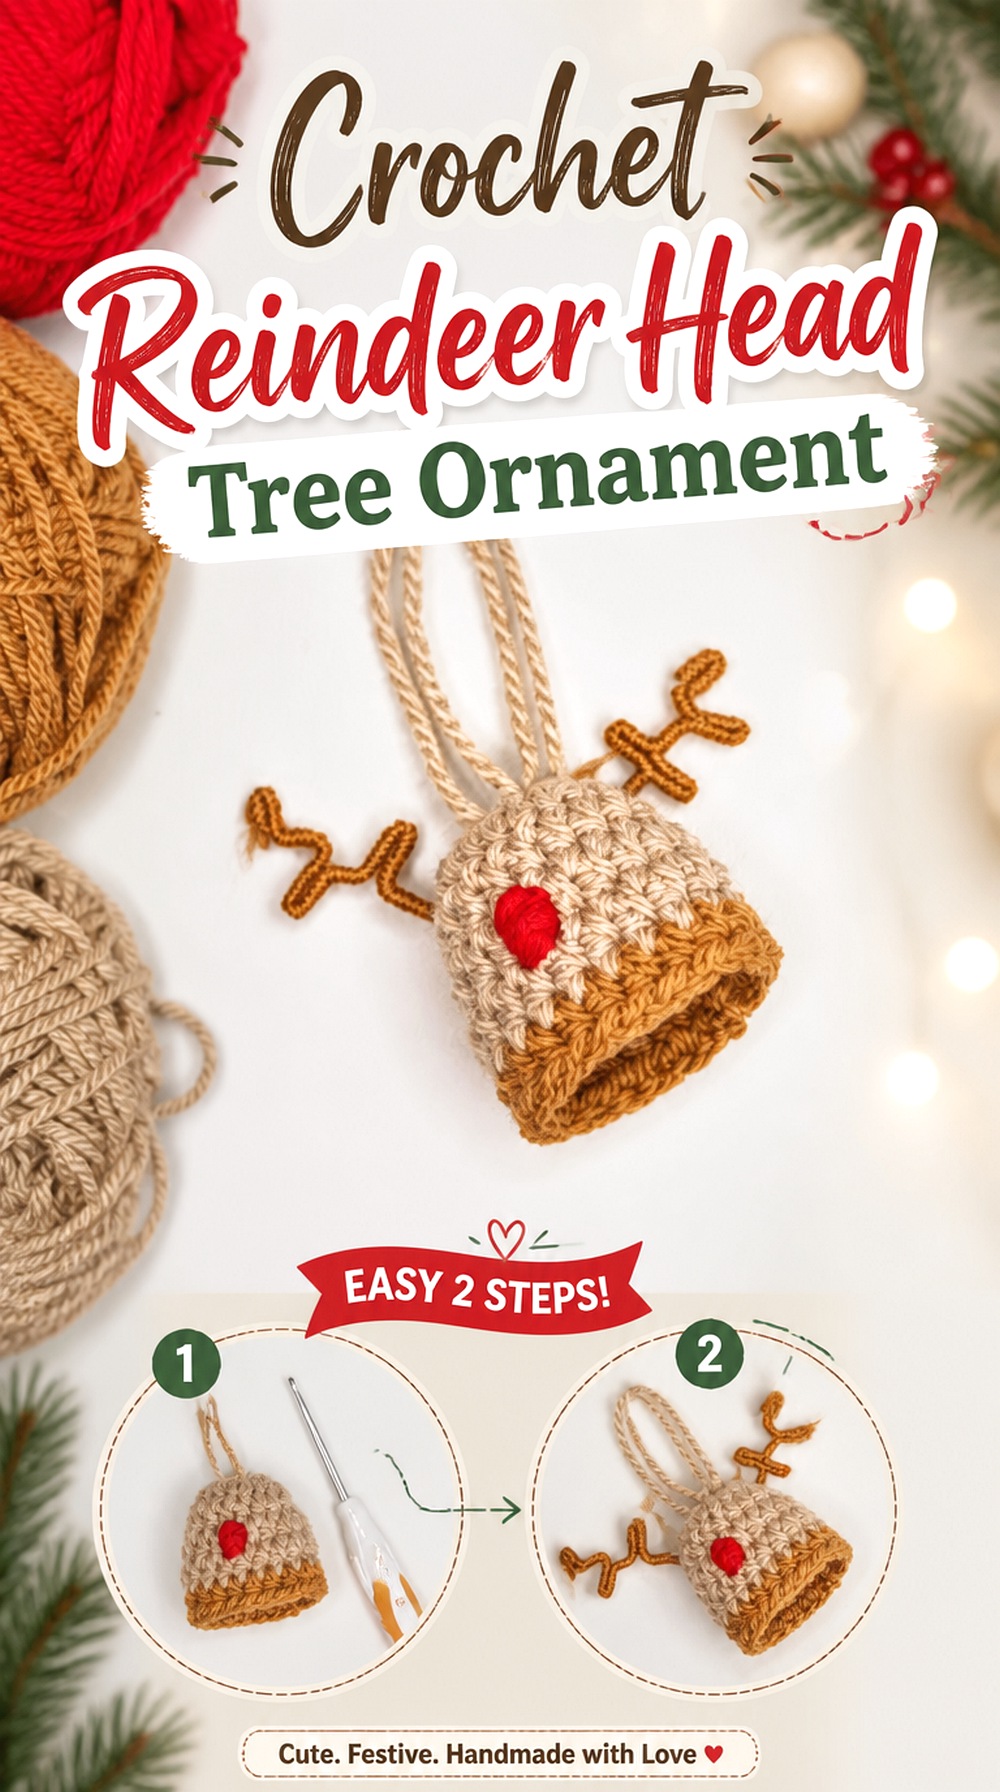
SAVEA crochet reindeer head creates a different type of character ornament: compact through the face but wider at the antlers. That horizontal spread makes it useful as a contrast to tall stockings, candy canes, and Christmas trees.
The tutorial presents the piece as both an ornament and a small decorative topper, with a crocheted head, contrasting nose, and formed antlers. For a Christmas tree, the antler shape is the detail worth planning most carefully. If they are too soft, the silhouette can disappear; if overly wide or rigid, they may catch neighboring branches when you place or remove the ornament.
Antler Support Needs a Clean, Covered Finish
The creator uses floral wire and also mentions a brown pipe cleaner as an alternative. If you adapt that part, make sure any internal support is completely covered and that trimmed ends cannot poke through.
This is especially important for an ornament that will be handled each year during decorating and storage.
Give the Face Enough Space Around It
Reindeer ornaments benefit from a branch position where the antlers are not hidden behind needles. Leave some empty space on either side so the head remains recognizable.
If you are mixing several character ornaments, a reindeer can also serve as a wider visual counterpoint to narrow gnomes or snowmen.
Original Tutorial and Creator Credit
Creator: mum2makes
6. Crochet Wrapped Gift Box Tree Ornament
 SAVE
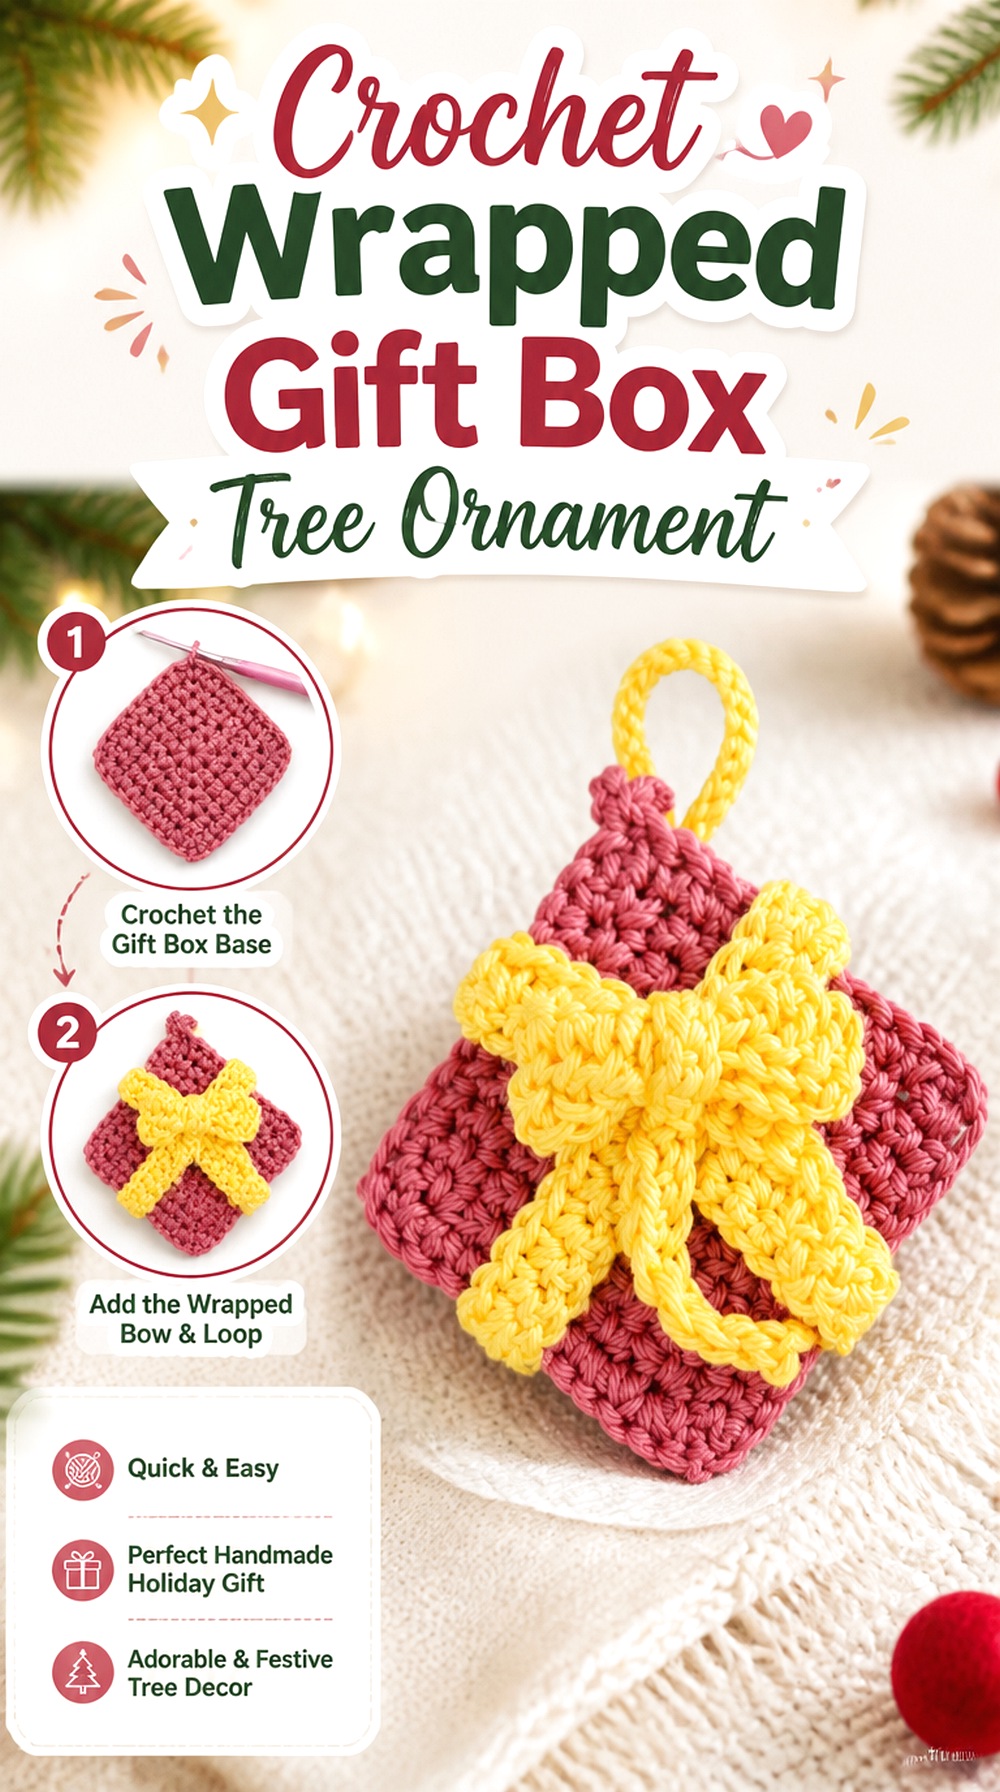
SAVEA miniature crochet present adds a geometric shape that most holiday ornament collections lack. Instead of a flat square pretending to be a package, this tutorial builds a dimensional box form with separate faces and a lid, then finishes it with ribbon-and-bow styling.
That makes it a strong choice when you want a structured ornament among softer characters. It can also carry unusual color combinations more easily than a traditional snowman or candy cane because almost any contrasting “wrapping paper” and ribbon pairing still reads as a gift. The trade-off is finishing: straight seams and balanced corners matter more here than on intentionally rounded ornaments.
Straight Edges Make the Miniature Box Convincing
Before assembly, compare the corresponding crocheted panels rather than assuming that small differences will disappear. A box highlights inconsistent panel sizes quickly because the edges are expected to meet cleanly.
As you assemble the form, keep checking opposite sides. Correcting a leaning panel early helps prevent the final present from looking twisted.
The Bow Should Decorate, Not Hide, the Shape
A large bow can overwhelm a tiny package, while a very thin one may disappear against textured yarn. Judge the bow after the box is assembled so you can see its real scale.
The most successful proportion lets the viewer recognize both the gift-box shape and the ribbon detail from the same angle.
Original Tutorial and Creator Credit
Creator: But First We Crochet
7. Crochet Nordic Gnome Tree Ornament
 SAVE
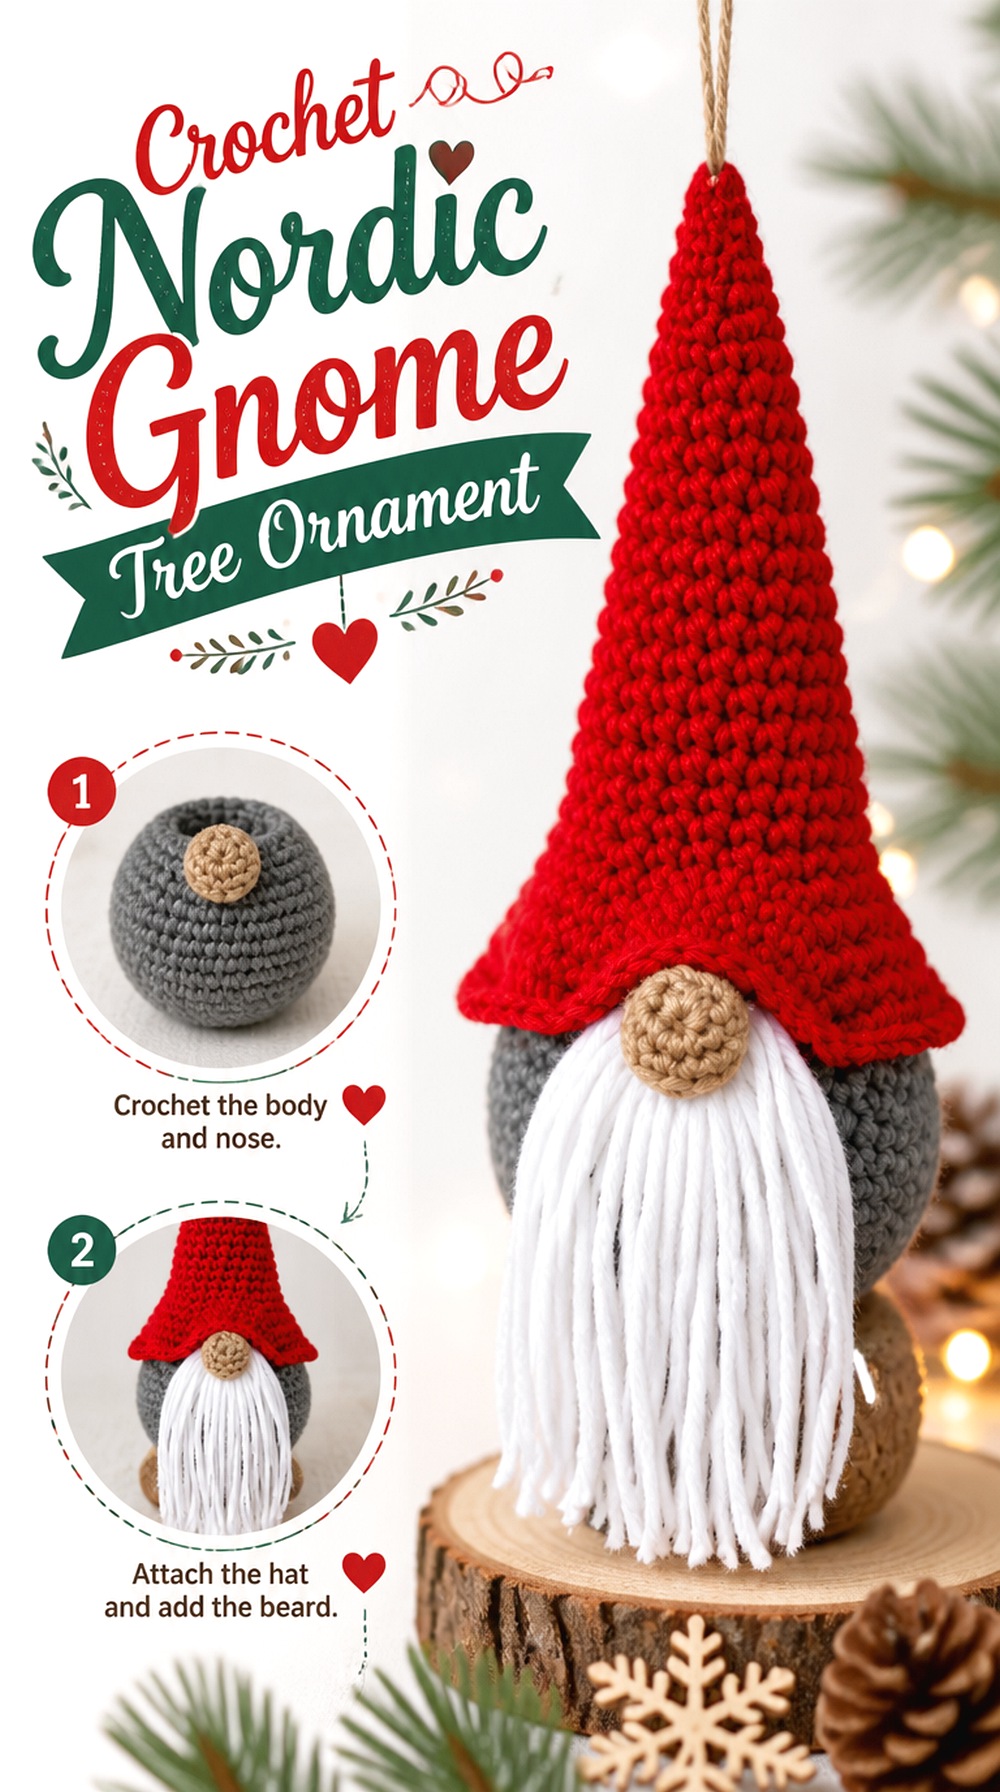
SAVEA crochet gnome brings a tapered, vertical silhouette to the tree. The hat, beard, body, and round nose create recognizable Scandinavian-inspired styling without needing a detailed face. That makes the project visually different from snowmen, reindeer, and owl ornaments even though all are small character pieces.
The tall hat helps the gnome stand out among round baubles, while the beard adds texture. If you customize one, keep the relationship between hat length and beard volume in mind. A very full beard can hide the body, whereas an oversized hat may make the ornament top-heavy when it hangs.
Hat Placement Controls the Character
With a gnome, there are no eyes to establish the expression, so the relationship between hat, nose, and beard becomes the face. Before securing the parts permanently, test the hat at slightly different heights.
A lower brim creates a more hidden-face look; a higher placement exposes more of the nose and beard. Choose one intentionally rather than letting assembly decide it by accident.
Texture Can Become the Main Decorative Feature
A fluffy or brushed-looking beard gives the ornament more depth, while a smoother beard produces a cleaner silhouette. Either can work, but avoid combining too many competing textures in such a small object.
If the tree already has tinsel, flocking, and glitter ornaments, a simpler yarn combination may help the gnome remain readable.
Original Tutorial and Creator Credit
Creator: naztazia
8. Crochet Christmas Pudding Tree Ornament
 SAVE
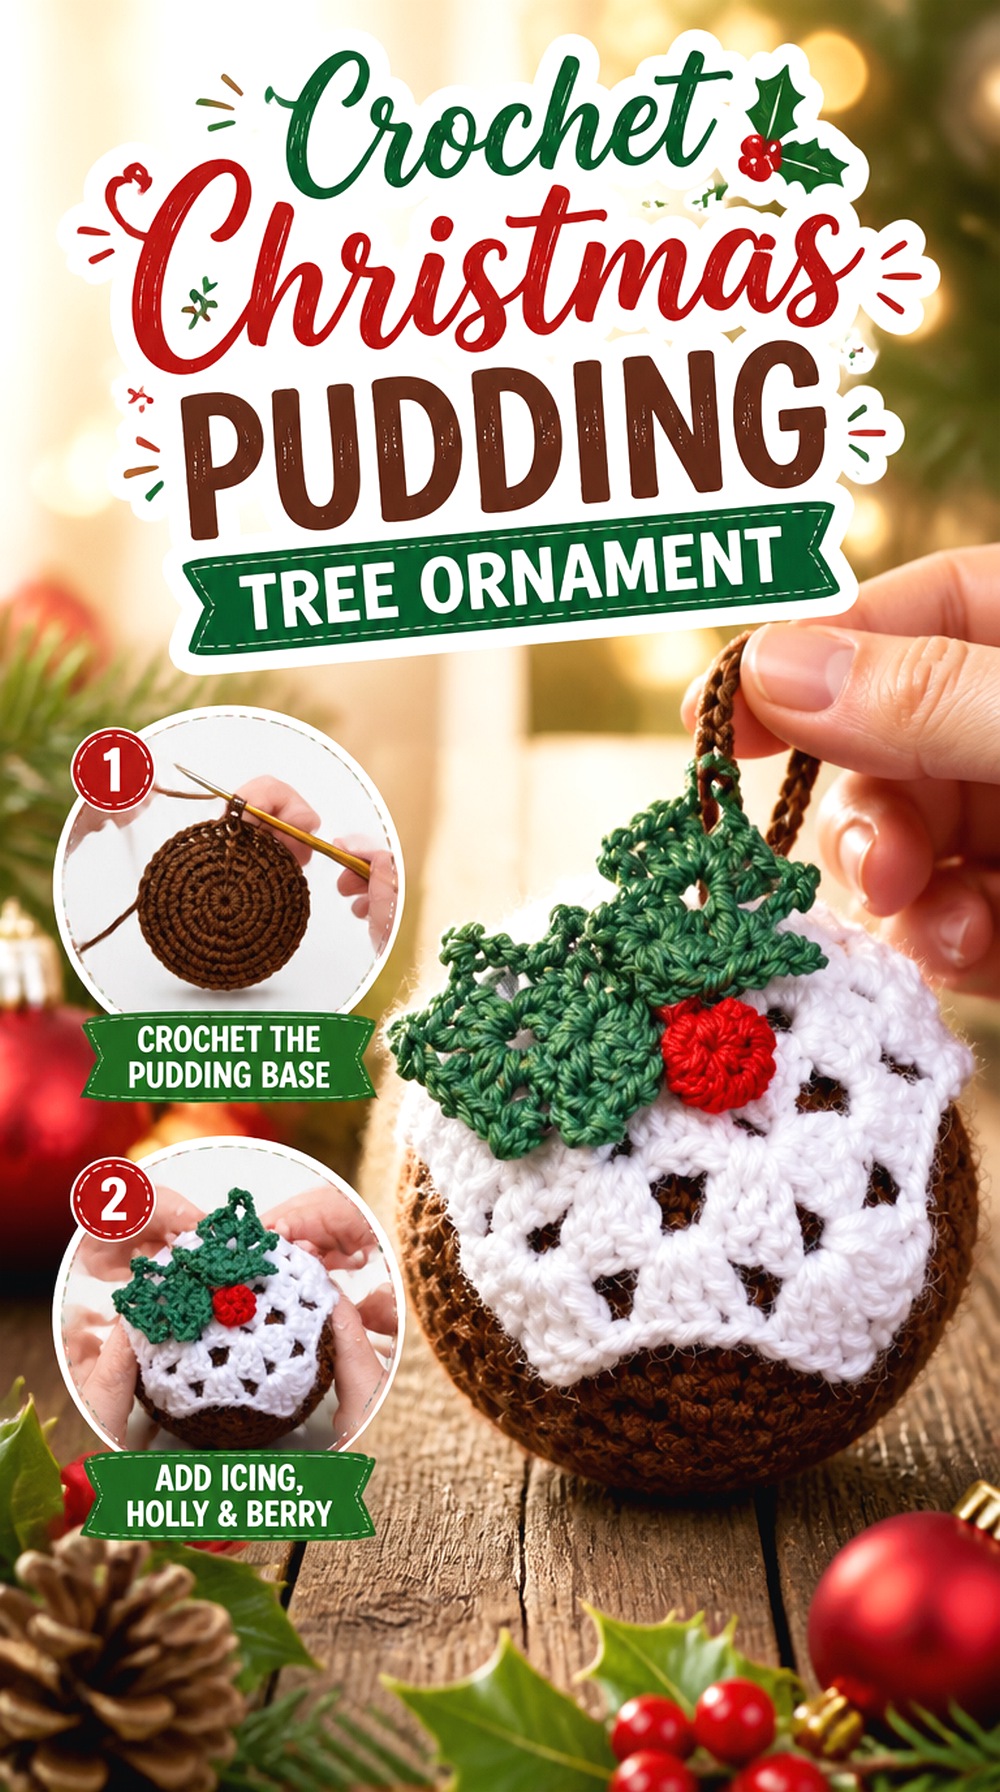
SAVEThe Christmas pudding ornament is one of the rounder, fuller projects in the collection. A brown stuffed body, white icing section, and small holly-style details create a recognizable holiday dessert rather than another winter character.
It works well on a tree where you want food-themed ornaments or traditional British Christmas references mixed with stars and bells. Because most of the interest sits on the upper portion of the pudding, check the hanging angle carefully. If the loop causes the piece to tilt backward, the icing and holly details can become harder to see.
Keep the Icing Edge Visible Against the Base
The white topping is what separates a Christmas pudding visually from a plain brown ball. When attaching or shaping that section, check the ornament from normal viewing distance.
The edge should remain visible around enough of the body to make the design clear. If it pulls too tightly toward the top, some of the characteristic “drip” effect can disappear.
Top Details Should Stay in Proportion
Holly leaves and berries add the holiday cue, but the pudding is small. Oversized embellishments can make the top look crowded and change how the ornament balances.
Before securing them, place the ornament upright and make sure the details do not obscure the hanging loop or force the piece to lean.
Original Tutorial and Creator Credit
Creator: Kara Ella Uy
9. Crochet Angel Tree Ornament with Halo
 SAVE
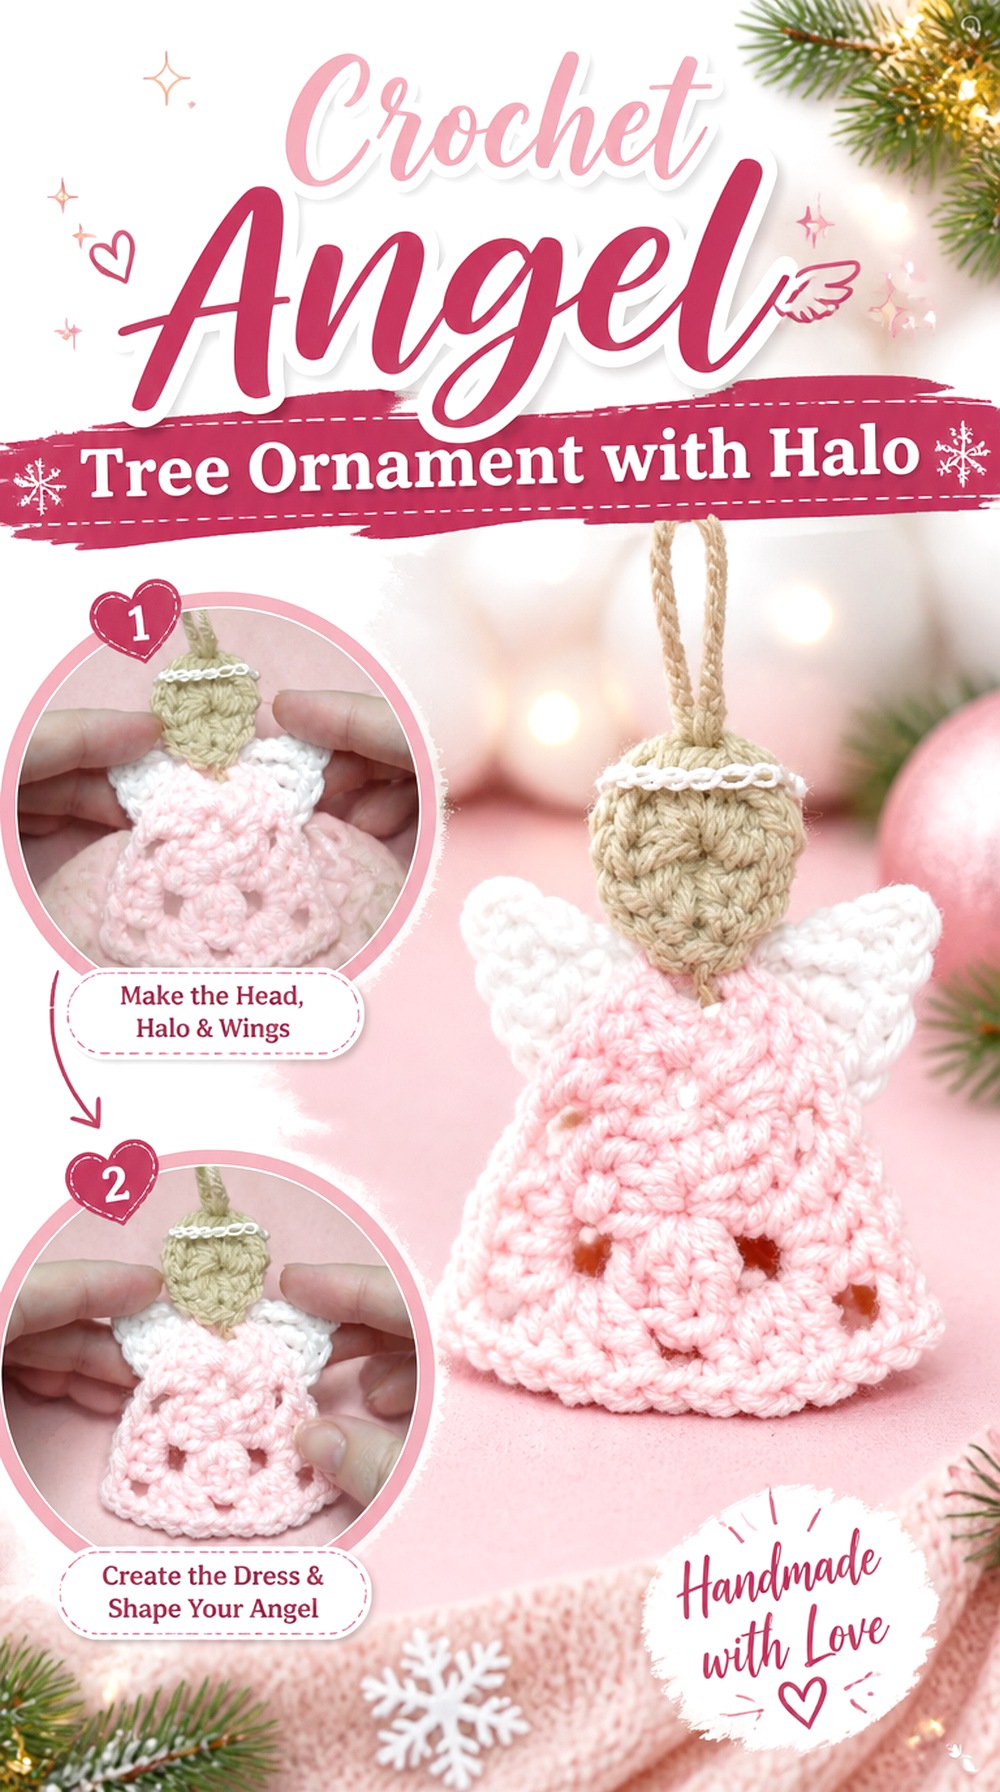
SAVEA crochet angel provides a graceful hanging silhouette with more vertical movement than a star or wreath. The head, wings, body, and halo create distinct zones, which makes this style useful near the upper third of a tree where its downward shape can remain visible.
Unlike a stuffed character, the angel can look decorative without needing many facial features. The primary decision is how crisp you want the wings and skirt to appear. Softer yarn creates gentler folds, while yarn with clearer stitch definition makes the wing edges and halo details more obvious.
Wing Symmetry Matters More Than Perfect Flatness
The two sides do not need to be rigid, but they should appear balanced when viewed from the front. Before securing the hanging loop, hold the angel by the proposed attachment point and check whether one wing falls noticeably lower.
This preview lets you correct the finishing before gravity exaggerates a small difference once the ornament is on the tree.
Give the Halo Some Visual Separation
If the halo sits too close to the head or matches the body exactly, it can disappear in the overall shape. A contrasting or subtly reflective yarn can help, but separation in placement is equally important.
Make sure the halo is not being pulled out of position by the hanger.
Original Tutorial and Creator Credit
Creator: Crochet Jewel
10. Crochet Vintage Bell Tree Ornament
 SAVE
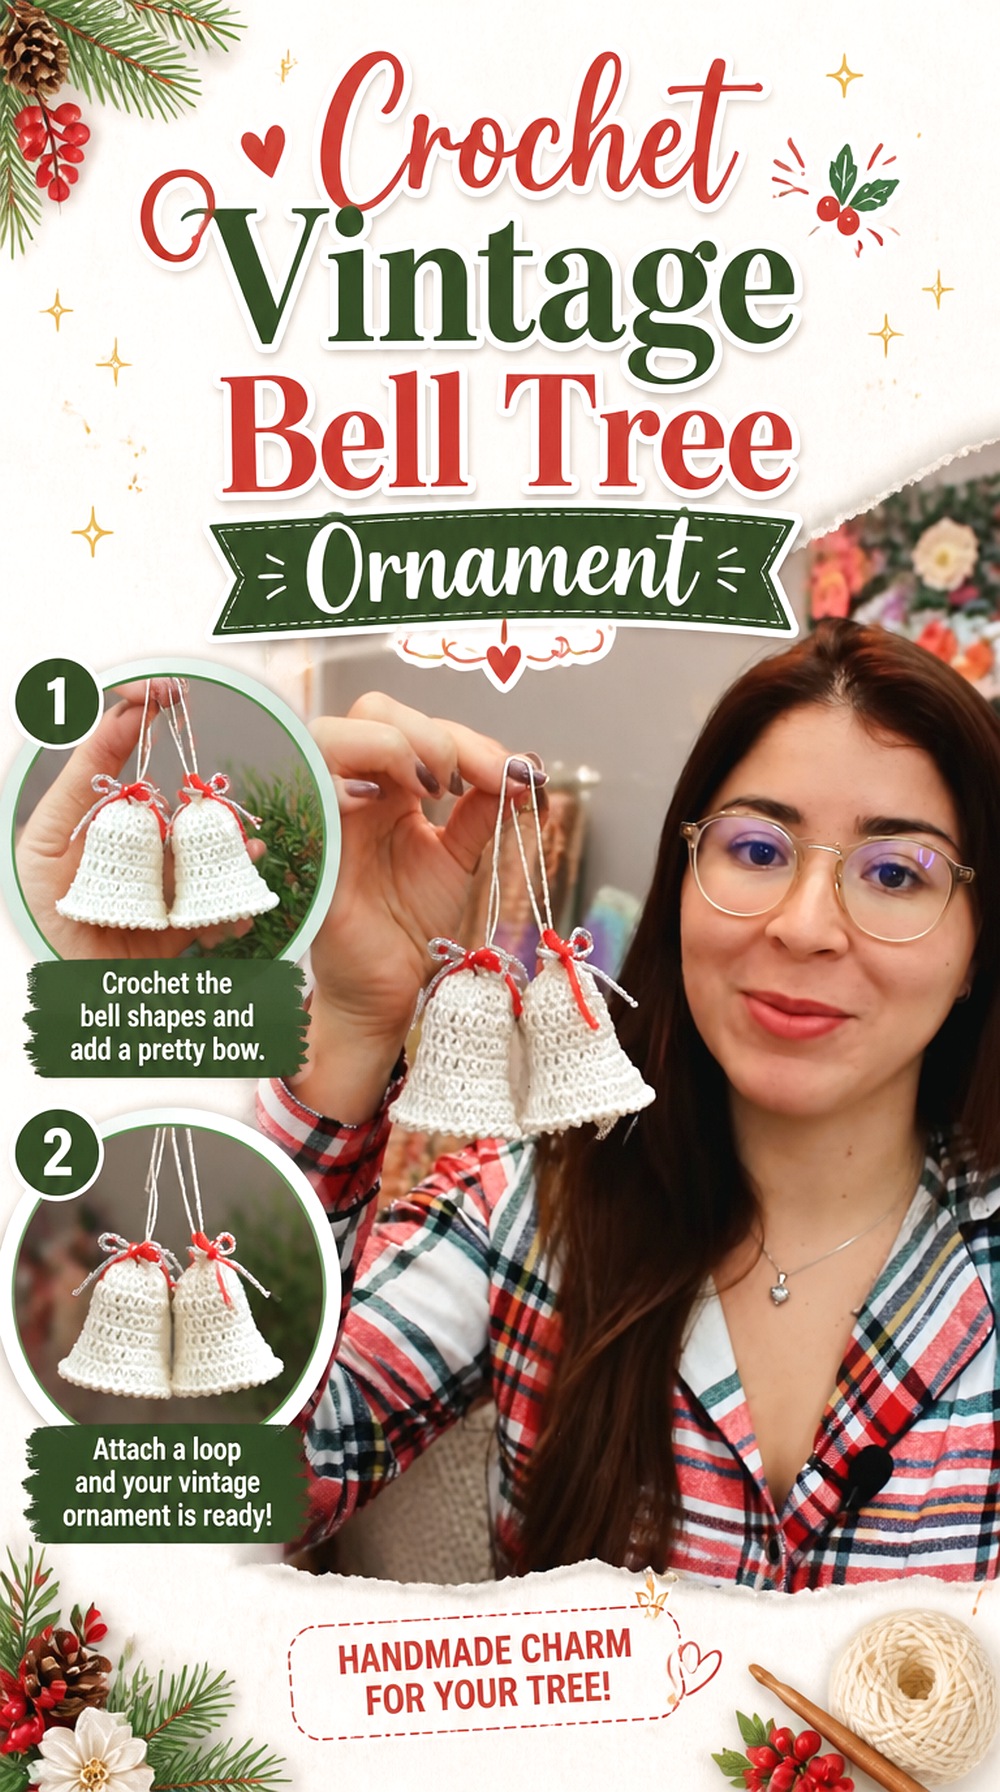
SAVEA crochet bell introduces a flared shape that looks traditional without repeating the round form of a bauble. This tutorial is inspired by a bell design the creator says was passed through generations in her family, giving the finished piece a distinctly vintage direction.
The bell is a good candidate for a more restrained palette—cream, red, metallic accents, or a single solid color—because the silhouette carries much of the decoration. Unlike a stuffed bell, this style depends on the crocheted fabric maintaining its flare. Pay attention to how the lower edge hangs after finishing.
The Flared Edge Needs Room to Show
Avoid placing this bell directly against a thick cluster of branches. If the lower edge is pushed inward by foliage, it can read more like a narrow pouch than a bell.
A branch tip or an area with open space below the ornament allows the shape to hang naturally.
Metallic Accents Can Change the Visual Weight
A small amount of sparkle can reinforce the vintage Christmas look, but metallic yarn often has stronger visual contrast than ordinary yarn. Use it where you want attention—such as the bow or edging—rather than assuming every element needs shimmer.
This keeps the bell shape from being lost inside reflective details.
Original Tutorial and Creator Credit
Creator: Brunaticality
11. Crochet Lattice Bauble Tree Ornament
 SAVE
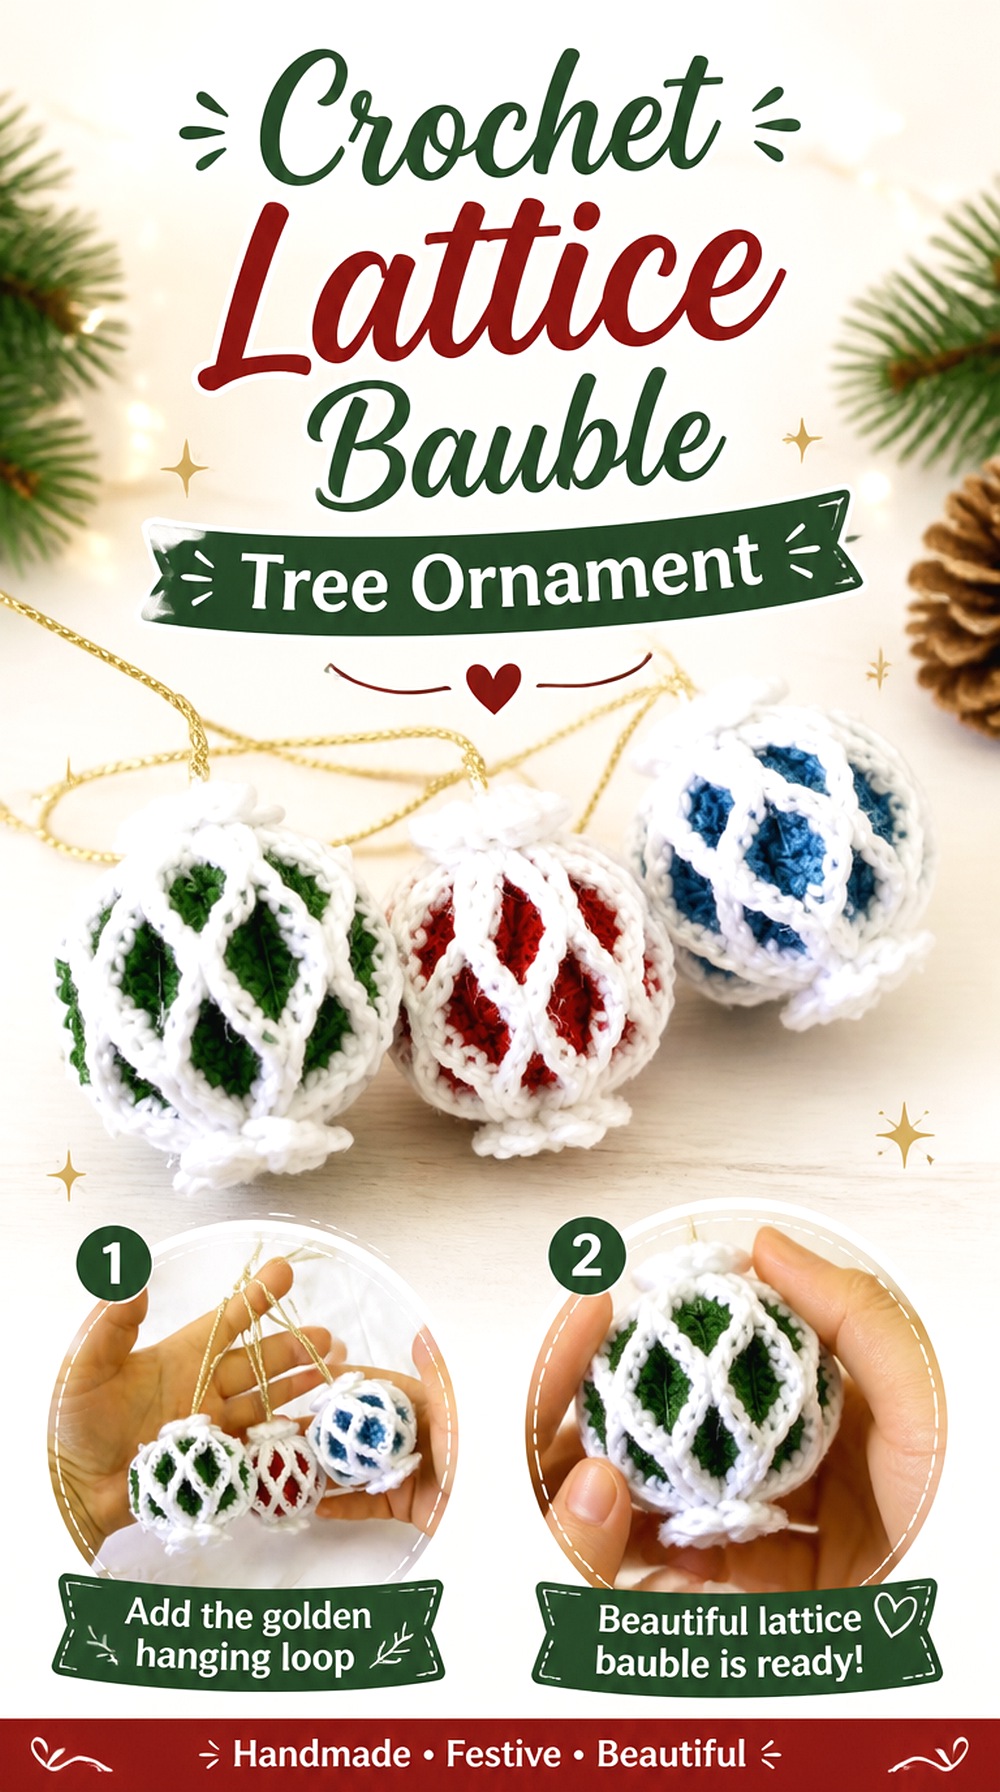
SAVEA lattice-covered bauble gives you the familiar round Christmas ornament shape but with crochet texture wrapped around it rather than a completely soft stuffed sphere. The open lattice is the standout feature: it lets the underlying form remain visible while adding a handmade layer.
This option is particularly useful if your tree already relies heavily on classic ball ornaments and you want crochet pieces that still fit that visual language. Because the lattice has to sit evenly around a round base, consistency matters. Large changes in tension can cause one area to bunch while another looks overly stretched.
Fit the Crochet to the Bauble, Not the Other Way Around
When a crochet covering is designed around an underlying ornament, the goal is even distribution. Check the fit before final closure and look for areas where the lattice is being pulled out of shape.
If you substitute a different base size, confirm that the tutorial’s construction can accommodate it rather than forcing the fabric around a form that is too large.
Openwork Changes With the Background Color
A white lattice over a dark bauble reads very differently from tone-on-tone crochet over a matching base. Decide whether you want the stitches themselves or the overall spherical texture to be the main feature.
High contrast emphasizes every opening; low contrast produces a subtler textured surface.
Original Tutorial and Creator Credit
Creator: Crochet Decor
12. Crochet Tiny Mitten Tree Ornament
 SAVE
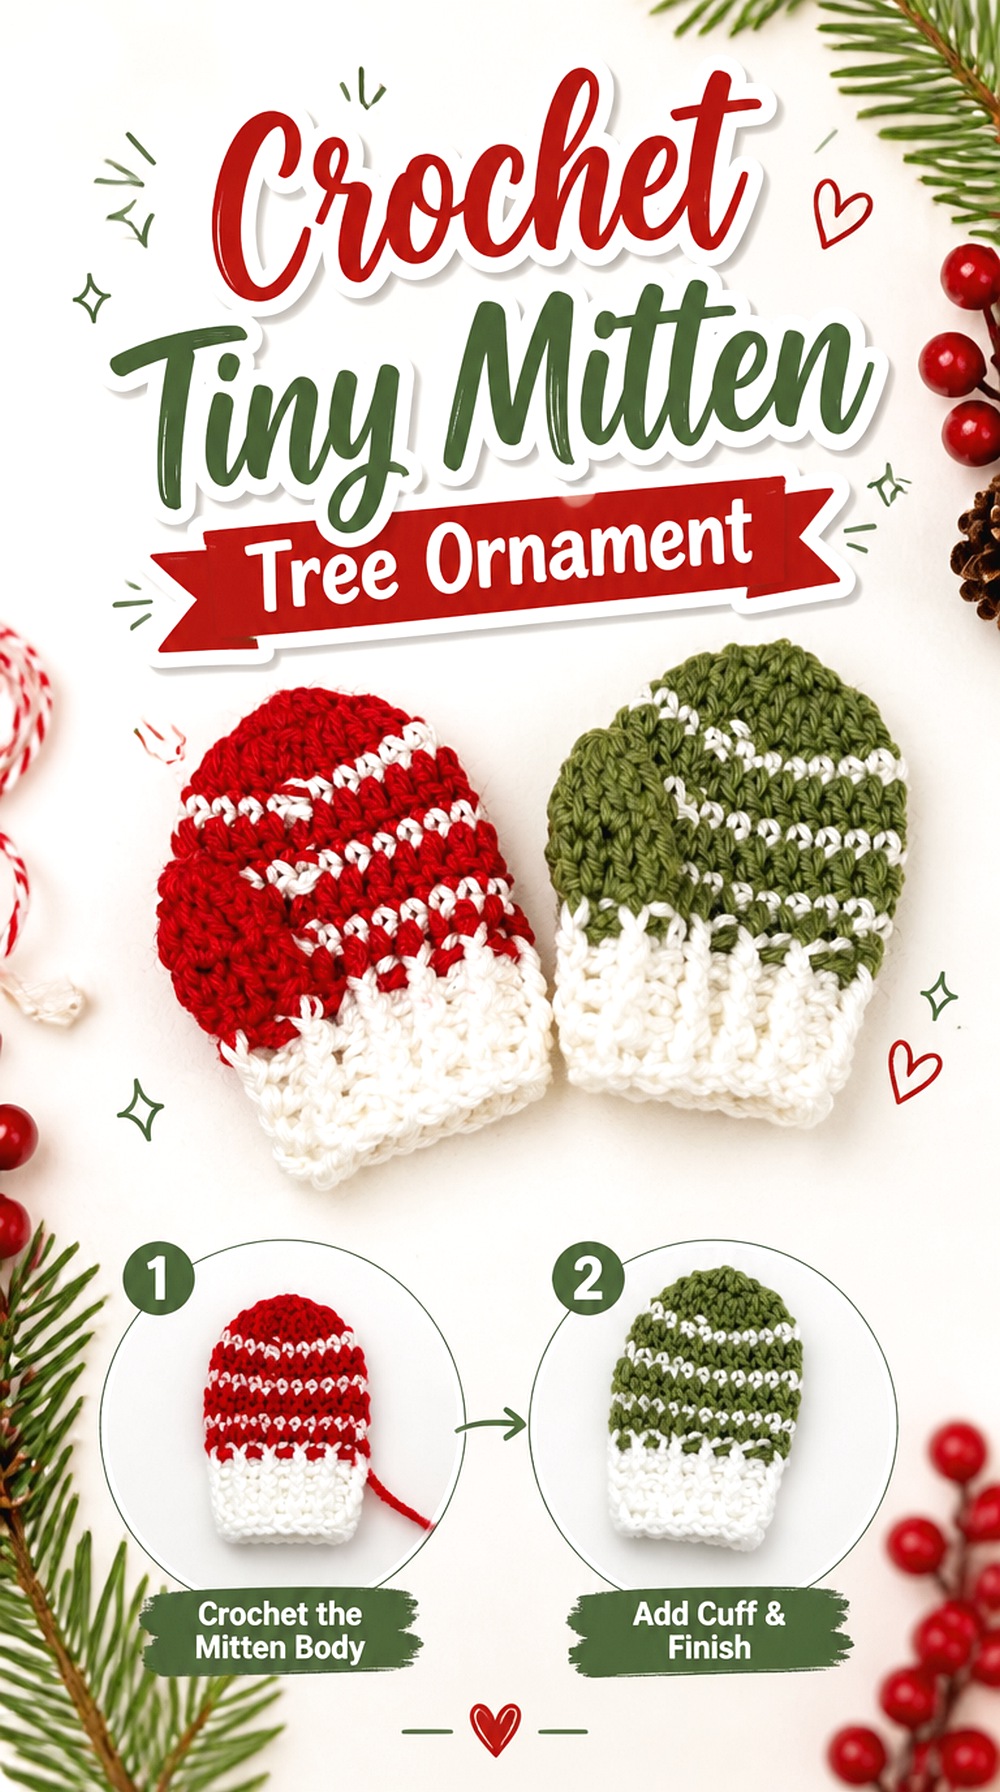
SAVEA tiny crochet mitten sits between a flat motif and a miniature wearable. The thumb gives it enough shape to feel dimensional, while the overall form remains compact and easy to display in multiples. The tutorial also presents the mittens as ornaments, garland pieces, Advent decorations, and gift toppers.
For a tree, matching pairs can create an intentional repeated motif without requiring every mitten to be identical. Consider alternating cuff colors or using two related shades across the pair. The main checkpoint is the thumb: if it disappears into the hand section, the mitten loses much of its character.
The Thumb Should Remain Visible From the Display Angle
Before adding the hanger, decide which side of the mitten will face outward. Position the ornament so the thumb is not pressed behind the hand or lost against the branch.
This small adjustment often matters more than adding another decorative stripe because it keeps the finished item immediately recognizable.
Cuff Texture Can Carry the Contrast
A cuff gives you a natural place to change yarn or texture without complicating the entire mitten. When adapting the tutorial, compare the cuff visually with the hand section.
If it becomes too bulky, the ornament may hang top-heavy; if it is too subtle, the mitten can look unfinished from a distance.
Original Tutorial and Creator Credit
Creator: Crochetclubstore
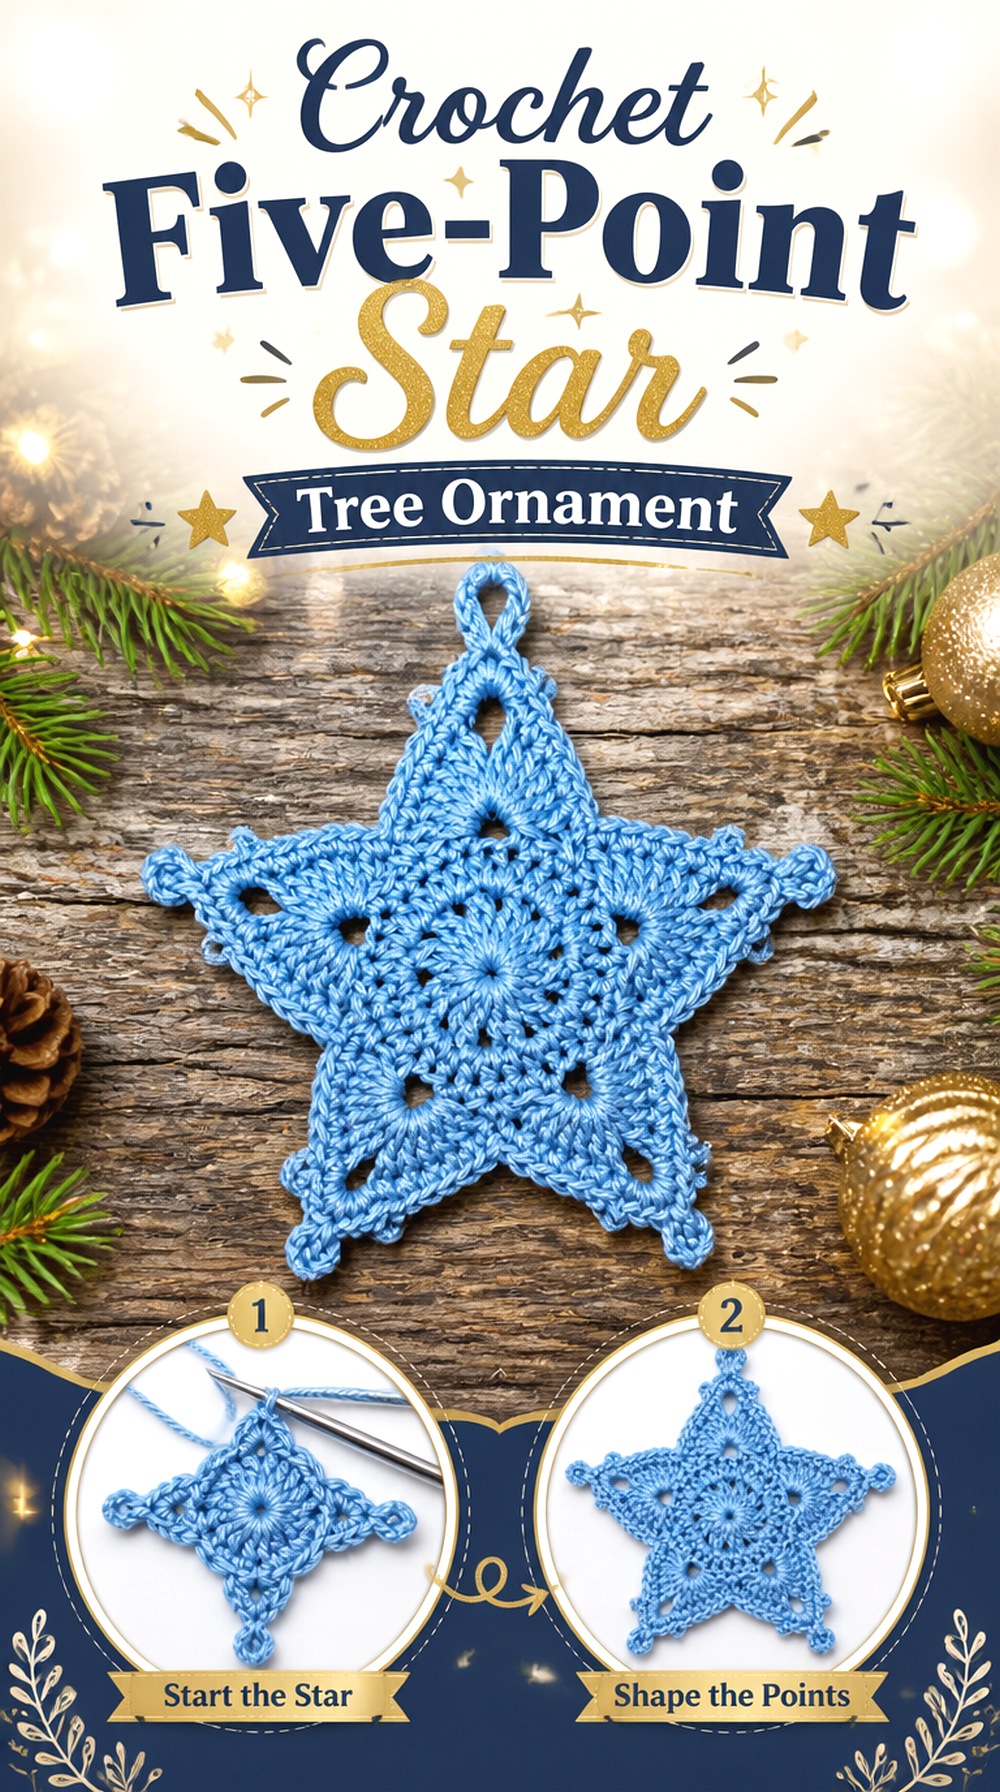
13. Crochet Five Point Star Tree Ornament
 SAVE
SAVEA crochet star gives strong geometry without the extra volume of a stuffed project. The five points create a clear outline that works at the branch tips, between round baubles, or as part of a coordinated group of flat ornaments.
This tutorial produces a detailed star motif rather than a plain solid shape, so stitch definition is important. If you plan to change the yarn, make one sample and check whether the points remain sharp enough for the design to read clearly. A very fuzzy fiber can soften the outline and hide the decorative openings.
Point Consistency Creates the Finished Symmetry
Stars reveal uneven tension quickly because every point is expected to echo the next. After completing the motif, compare opposite sections instead of inspecting each point in isolation.
If the shape needs blocking, use that stage to align the points and center rather than stretching individual tips farther than the rest.
Decide Whether You Want a Graphic or Delicate Star
A thicker, more solid-looking star becomes a stronger graphic element on the tree. A finer yarn produces a lighter ornament with more visible stitch detail.
Neither approach is automatically better; the right choice depends on whether your tree needs another focal ornament or a quieter spacer between larger pieces.
Original Tutorial and Creator Credit
Creator: Kristines Crochets
14. Crochet Owl Amigurumi Tree Ornament
 SAVE
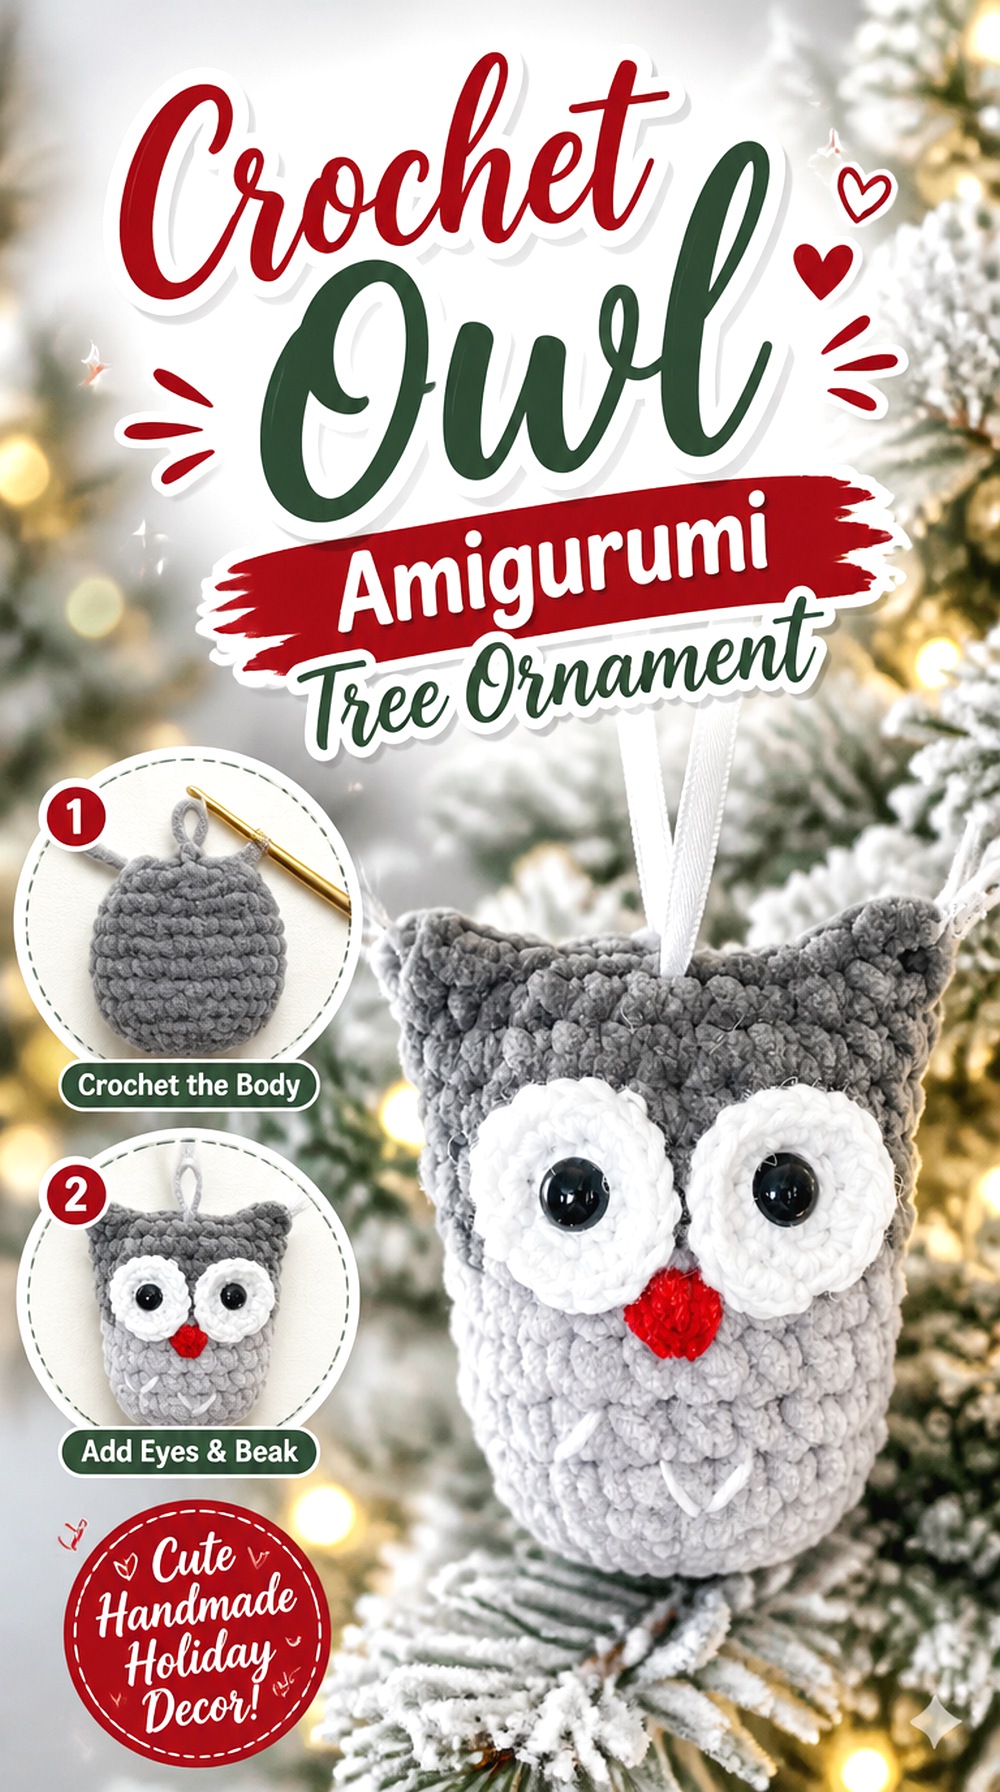
SAVEAn owl brings a woodland theme to Christmas decorating without relying on the usual Santa or snowman imagery. The rounded body, large eyes, beak, and ear details create a compact character that can work equally well on rustic, forest, or child-focused trees.
Because the face occupies so much of the ornament, color placement matters more than it does on a simple ball. Strong contrast around the eyes helps the owl remain readable from a distance. The project is also a useful alternative when you want an amigurumi-style piece that is shorter and wider than a gnome.
Eye Placement Defines the Whole Character
Large owl eyes attract attention first, so compare their height and spacing before securing them permanently. Small asymmetries can become very noticeable on a face this simple.
Hold the ornament at normal viewing distance rather than judging it only a few inches from your work surface.
Ear and Ribbon Details Affect the Outer Silhouette
The tutorial includes ear detailing and ribbon finishing. Make sure those elements are not hidden behind the hanging loop or branch.
If the outline looks crowded, simplify optional decoration rather than adding more around the face.
Original Tutorial and Creator Credit
Creator: Double Dutch Crochet
15. Crochet Mini Drum Tree Ornament
 SAVE
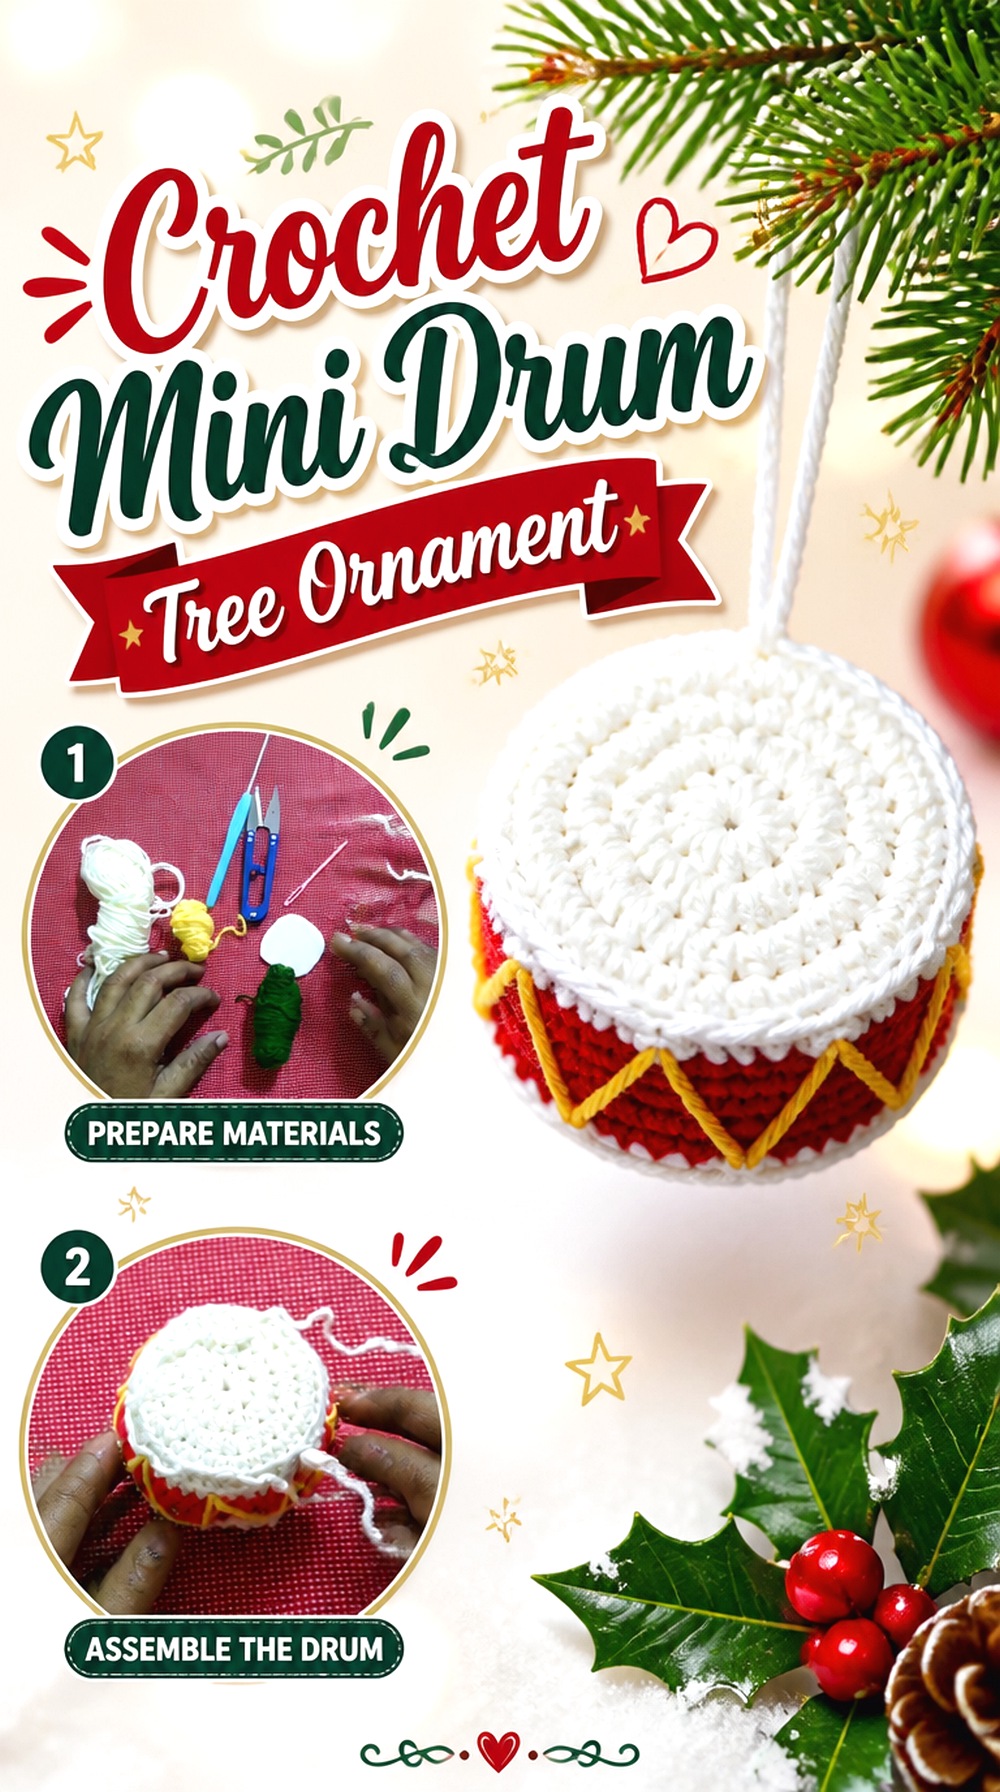
SAVEA mini drum creates a cylindrical ornament with a strong horizontal-and-vertical structure. That makes it visually distinct from every character and flat motif in the collection. It also brings a classic toy-soldier or holiday-parade reference without requiring a detailed figure.
Because the top and bottom should look level, the drum benefits from careful finishing. Uneven tension around the cylinder can make one edge flare or tilt. Use the first ornament as a shape test before producing several for a coordinated set. Color blocking around the body can add interest without changing the construction.
Keep the Cylinder From Looking Pinched
A drum should read as straight-sided rather than hourglass shaped. As the body develops, periodically set it upright and look at the profile.
If the center narrows noticeably, check whether your tension has changed. Catching that shift while crocheting is easier than trying to correct it after assembly.
Repeated Drums Work Well as a Tree Rhythm
Because the shape is geometric and easy to recognize, multiple drums can be distributed around a tree to create repetition. You can vary the main color while keeping the edging consistent so the set feels coordinated.
This works especially well alongside stars and bells, which introduce different silhouettes but still feel traditional.
Original Tutorial and Creator Credit
Creator: Club Crafteria
16. Crochet Snow Tipped Christmas Tree Ornament
 SAVE
SAVEA miniature Christmas tree hanging on a larger Christmas tree creates a playful repetition of shape. This version is stuffed and dimensional, with layered snow-style details, a trunk, and a small star at the top rather than being a simple flat triangle.
That construction gives it more presence than the flat star or snowflake while keeping a strongly vertical silhouette. It can work as a single focal ornament or as part of a woodland section with the owl, reindeer, and gnome. Pay attention to the trunk and topper because both affect whether the small tree looks balanced when suspended.
Layered Snow Details Need to Stay Distinct
The contrast between the green tree and lighter snow-style edging is one of the project’s defining features. Make sure the lighter sections sit visibly on the surface rather than becoming buried in the body stitches.
If you substitute colors, preserve enough contrast for those layers to remain noticeable from normal viewing distance.
Check the Topper Before Fixing the Hanging Loop
The tutorial includes a crocheted star at the top. Because both the star and hanger occupy the upper point, confirm that one does not pull the other backward.
Hold the finished tree by the proposed loop position and adjust the topper before securing everything permanently.
Original Tutorial and Creator Credit
Creator: Jess Crafting
17. Crochet Soft Wreath Tree Ornament
 SAVE
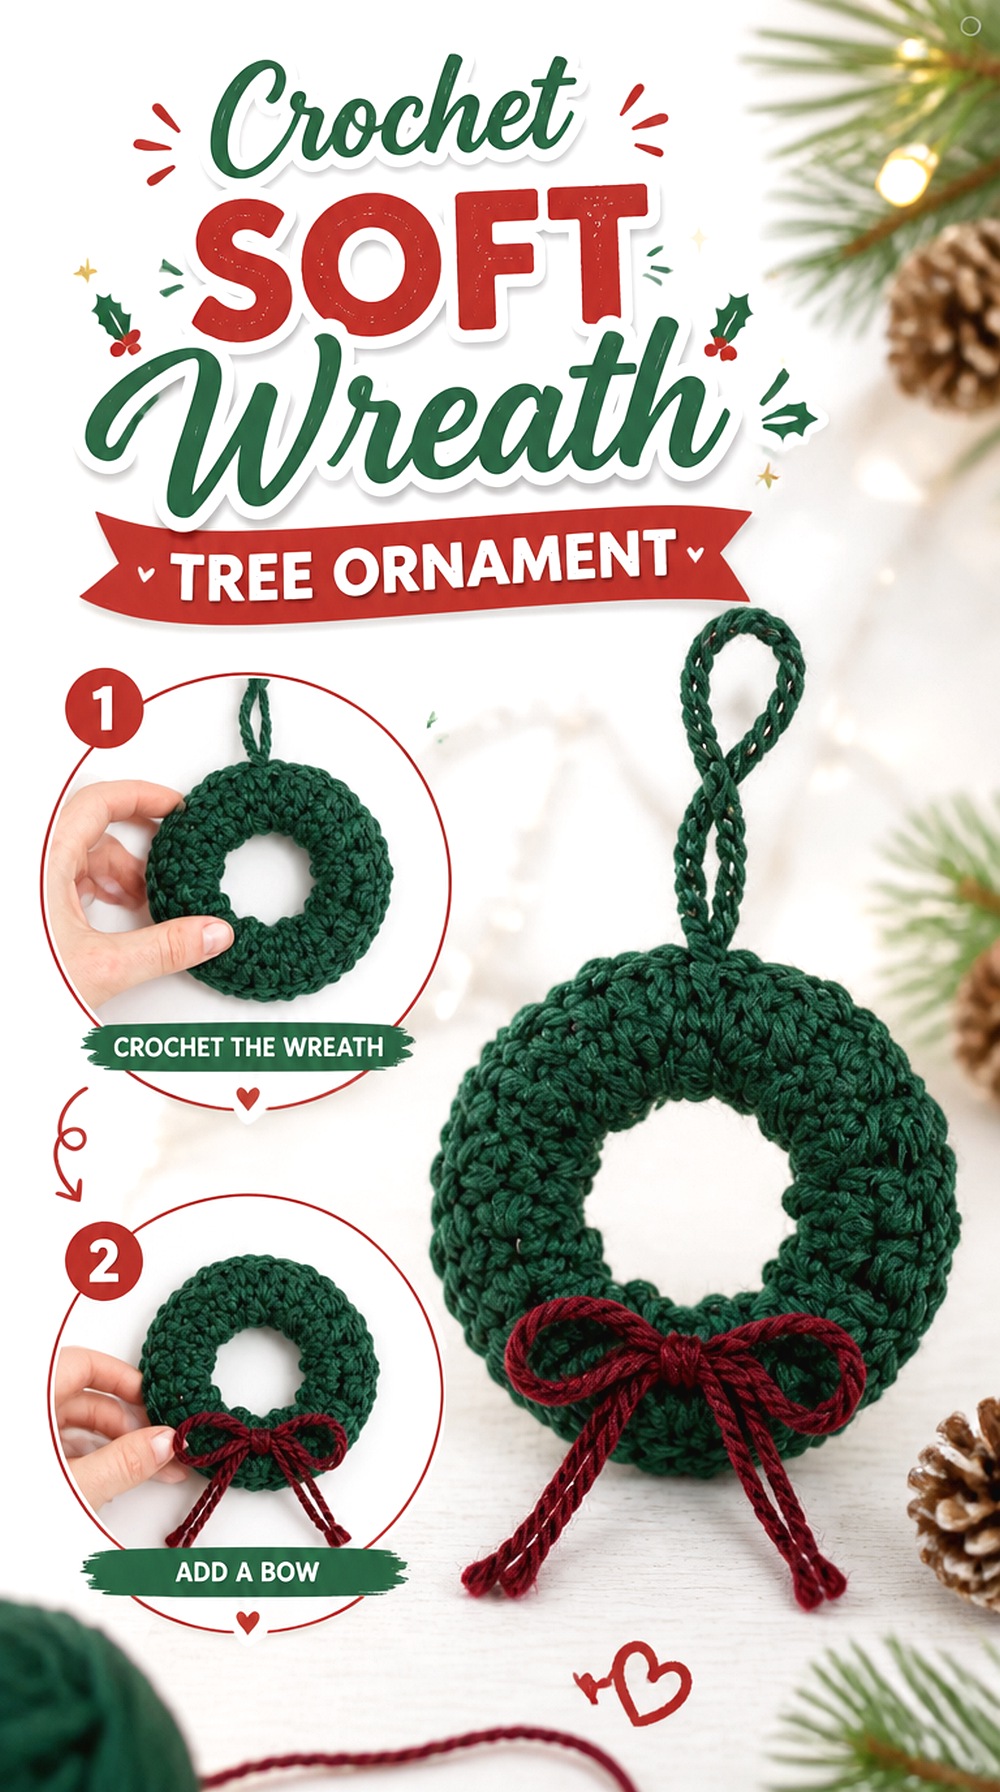
SAVEA small crochet wreath brings a circular outline without becoming another solid bauble. The center opening keeps it visually light, while the bow provides a clear top and helps orient the ornament when it hangs.
This tutorial forms the wreath from a crocheted rectangle before assembly, which is a useful contrast to designs worked around a rigid ring. That soft construction can make storage easier, but it also means the final circle depends on even joining and finishing. Check the shape before attaching the hanger so you can correct any obvious oval or twist.
The Center Opening Should Remain Clearly Defined
A wreath loses its identity when the inner space collapses. After assembly, gently arrange the crochet so the center opening looks intentional rather than pinched.
On the tree, avoid pressing the wreath tightly against a dense branch cluster, which can visually fill that center and make the ornament read as a generic round piece.
Use the Bow to Establish the Top
The bow is not only decoration; it tells the eye how the wreath should hang. Place it first, then decide where the loop should sit relative to it.
If the hanger is offset, the wreath may rotate until the bow sits at an angle rather than at the top.
Original Tutorial and Creator Credit
Creator: Desert Blossom Crafts
18. Crochet Hot Chocolate Mug Tree Ornament
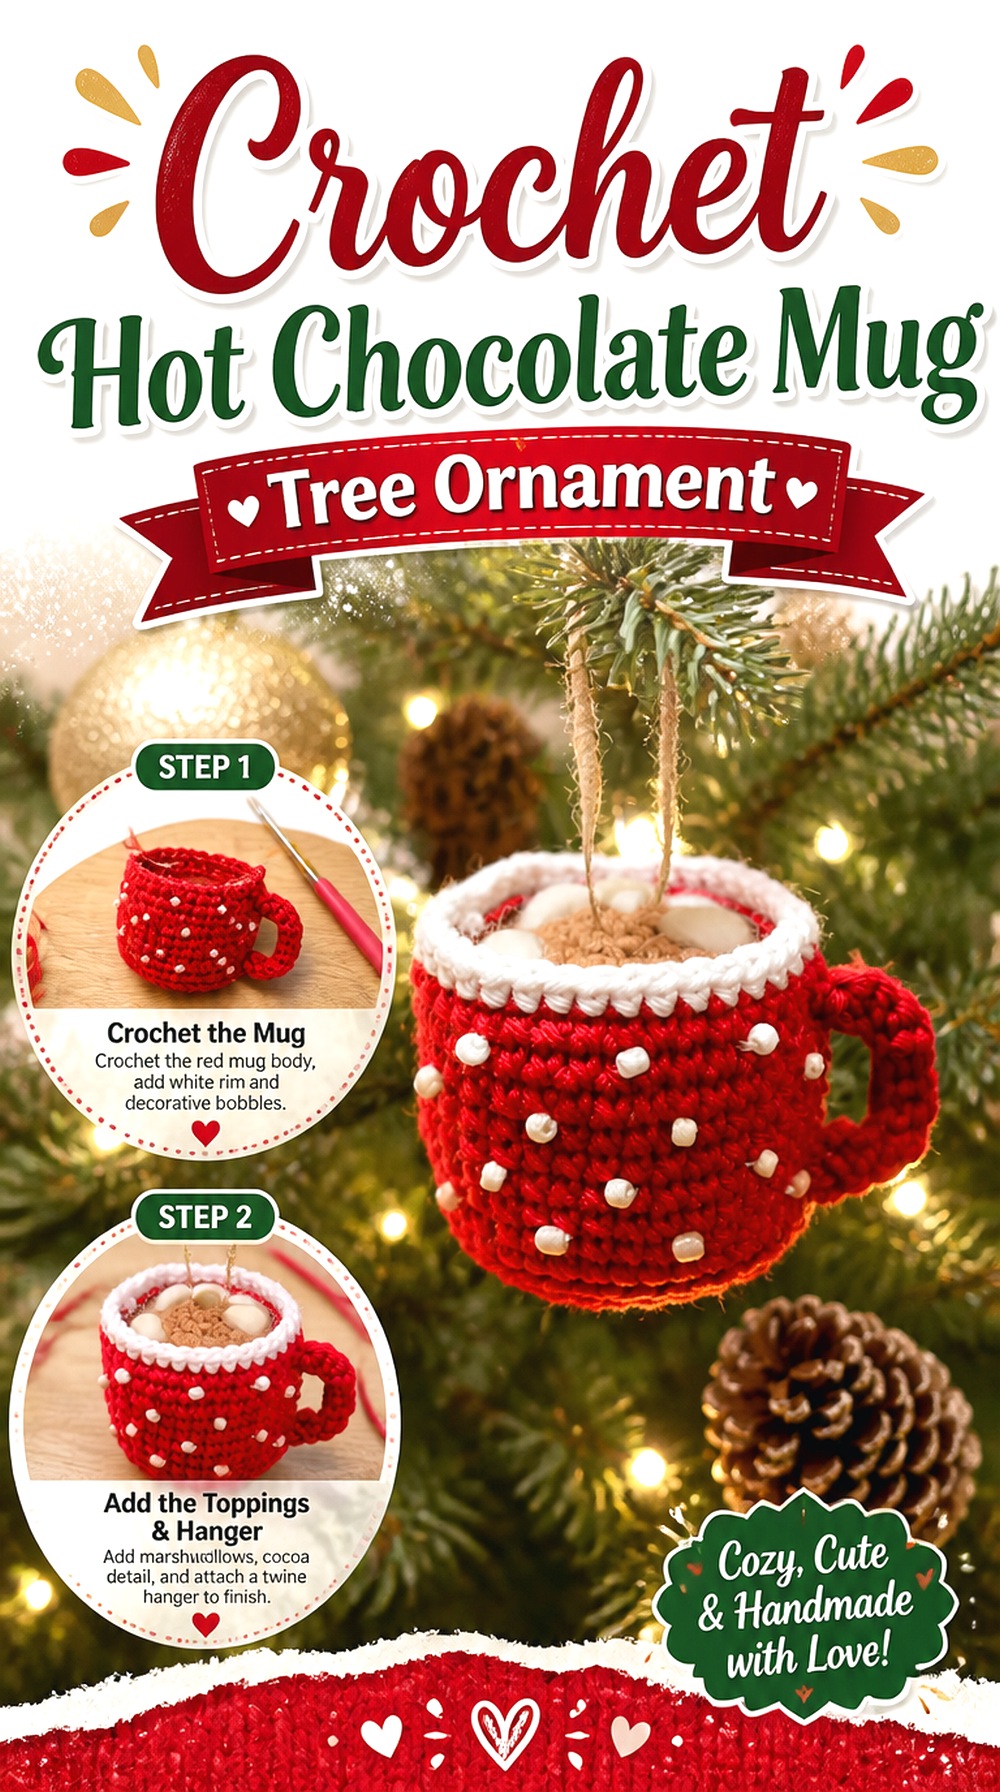 SAVE
SAVEA miniature hot chocolate mug is the most object-like ornament in this collection. Instead of relying on a traditional star, bell, or character, it turns a cozy seasonal drink into a small stuffed decoration with a mug body, handle, cocoa surface, and marshmallow details.
The unusual shape makes it an excellent focal ornament, especially on trees with food, kitchen, or cozy winter themes. It is also more construction-heavy than a flat motif, so plan for finishing time rather than treating it as a quick substitute for a snowflake. The handle and top surface deserve particular attention because both need to remain visible when the mug hangs.
Internal Support Helps the Mug Keep Its Form
The tutorial includes cardboard as part of the mug construction. If you follow that approach, keep in mind that an ornament containing a non-washable internal support should be treated differently from an all-yarn piece during cleaning or storage.
Avoid crushing the mug beneath heavier decorations, because the recognizable cup shape depends on those straight sides.
The Handle Must Read From the Front
A mug without a visible handle can look like a small cylinder. Before sewing the handle permanently, test the ornament from its intended viewing angle and make sure the handle extends clearly beyond the body.
Also verify that the hanging loop does not make the mug rotate so the handle disappears behind it.
Keep the Cocoa Toppings Visually Separate
Marshmallow-style details are small, so strong contrast with the cocoa surface helps. Avoid overcrowding the top with so many additions that the rim becomes difficult to see.
The goal is a recognizable mug first and decorative toppings second.
Original Tutorial and Creator Credit
Creator: olliehollycrochet
Flat, Stuffed, or Structured: Which Ornament Style Suits Your Tree?
Choose flat ornaments such as the snowflake, star, mitten, and soft wreath when you want handmade detail without adding much bulk. They are particularly useful for filling smaller gaps and for trees that already contain many large glass or plastic baubles.
Stuffed designs such as the snowman, pudding, owl, gnome, and miniature Christmas tree create stronger focal points. Use them where an open branch gives the shape room to be seen.
Structured pieces—the gift box, drum, lattice bauble, candy cane, and hot chocolate mug—add the greatest contrast in form. They are useful when the tree needs recognizable objects rather than more flat motifs, but they generally deserve more attention during assembly, hanging, and storage.
Conclusion
The most useful way to choose among these 18 crochet Christmas tree ornament ideas is to think about silhouette first. Pick snowflakes, stars, mittens, or wreaths when you need flatter decorations; choose snowmen, owls, gnomes, puddings, and mini trees for soft dimension; and use drums, presents, baubles, candy canes, or the hot chocolate mug when you want stronger structure.
A mixed tree usually benefits from more than one category because the changes in scale and depth keep handmade decorations from blending together. Make one sample before committing to multiples, check how it hangs on a real branch, and adjust yarn, loop length, or embellishment placement as needed. Use the original tutorials credited above for the creators’ exact construction details.
Frequently Asked Questions
Which crochet Christmas tree ornaments are easiest to store flat?
Snowflakes, stars, mittens, mini stockings, and soft wreaths generally require less storage depth than fully stuffed characters or structured objects. Even so, protect pointed motifs from being bent sharply and avoid packing decorative beads or bows beneath heavy items. If a flat motif has been blocked into shape, storing it without severe folds can reduce the amount of reshaping needed the following Christmas.
How do I stop crochet ornaments from disappearing inside the tree?
Match the ornament’s shape and contrast to its placement. Openwork snowflakes need visible background contrast, while dark stuffed ornaments may disappear deep inside dense greenery. Try hanging the first finished piece before making a set. If the ornament sits too far inside the branches, a slightly longer loop may help; if it swings excessively or drops below nearby decorations, a shorter loop may work better.
Should I use the same yarn weight for every ornament on one tree?
Not necessarily. A coordinated tree can still include different yarn weights, but changing thickness also changes scale, stiffness, and visual weight. A yarn that works well for a stuffed snowman may make a delicate snowflake much bulkier than expected. When substituting yarn, make one ornament first and compare its finished proportions with the rest of your decorations before producing several copies.
How can I keep stuffed crochet Christmas ornaments from looking lumpy?
Distribute stuffing gradually instead of forcing a large amount into one area. Shape the ornament while filling it and check it from the front, back, and side before closing. The goal is enough filling to establish the intended form without stretching the crochet so much that gaps become prominent. Small objects such as snowmen, puddings, owls, and mini trees benefit from especially careful distribution because minor lumps are more noticeable at that scale.
Are beads, bells, wire, and other embellishments suitable for every Christmas tree?
No. Decorative extras can be appropriate for adult display areas, but their suitability depends on where the ornament will be used. Small detachable pieces, exposed wire ends, bells, beads, or glued decorations deserve extra consideration around young children and pets. Secure components appropriately and avoid assuming a decorative crochet ornament is automatically suitable for unsupervised handling simply because most of the item is made from yarn.
How do I make a set of crochet ornaments look coordinated without making all 18 identical?
Repeat one or two design choices instead of repeating the entire project. For example, use the same cream accent across a bell, stocking, drum, and mitten, or repeat one hanging ribbon style across several different shapes. Keeping a limited palette while varying silhouettes produces a more intentional tree than making eighteen nearly identical ornaments. Shape variety can provide interest while color and finishing details provide cohesion.