11 Crochet Halloween Wall Hanging Ideas for Spooky Seasonal Decor
Halloween crochet does not have to mean another stuffed pumpkin on a shelf. Wall hangings can bring the same seasonal character to a room while using vertical space, and the format can range from crisp tapestry panels to loose garlands, dimensional characters, gothic fiber art, and open spiderwebs.
These 11 crochet Halloween wall hanging ideas are deliberately varied. Some create one strong focal point, while others spread across a mantel, doorway, corner, or gallery wall. You will also find meaningful differences in structure: flat colorwork needs clean edges and a good mounting plan, while dimensional pieces need balanced weight and secure hanging points. Use the notes below to compare display footprint, finishing, materials, storage, and the details worth checking in each original tutorial.
Quick List
Crochet Graphic Halloween Tapestry Wall Panel
Crochet Coffin Goth Wall Hanging
Crochet Pumpkin Statement Wall Hanger
Crochet Soft Hanging Ghost Wall Decoration
Crochet Spiderweb Bunting Wall Garland
Crochet Gossamer Spider Specimen Wall Hanging
Crochet Dracula Portrait Wall Hanging
Crochet Corner Spiderweb Wall Accent
Crochet Pumpkin Ghost and Bat Wall Garland
Crochet Mini Pumpkin Wall Garland
Crochet Poseable Hanging Bat Wall Accent
Choose the Wall-Hanging Shape Before the Halloween Motif
Start with the space you actually need to decorate. A narrow section beside a doorway can handle a coffin, ghost, portrait, or hanging bat without consuming much horizontal room. A mantel, window, long shelf, or wide blank wall gives bunting and garlands enough room to spread out. Tapestry panels and dimensional specimen-style pieces are better treated as focal points with some empty space around them.
Also think about viewing distance. Fine spiderweb openings and detailed colorwork deserve a place where their shapes remain readable. Larger, simpler silhouettes tolerate being seen from farther away. Measuring the intended display area before choosing a tutorial can prevent a beautiful finished project from feeling either lost or crowded.
Structure, Drape, and Mounting Matter More Than Color
Wall decor does not experience the same wear as a garment, but yarn behavior still matters. A very soft fabric may drape attractively in a ghost or garland yet make a graphic panel look less crisp. Firmer fabric can help a tapestry or mounted piece keep its outline, although the actual yarn and hook should follow the creator’s instructions when size or gauge affects the design.
Look beyond the crocheted portion as well. Some projects rely on dowels, cords, magnets, wire, stiffening products, or other supports. Others simply need loops at each end of a strand. Review the full material list before starting, especially when a project mixes crochet with structural components. That avoids finishing the yarn work only to discover that the intended display method requires supplies you do not have.
Plan for October Display and November Storage
Seasonal wall crochet is easier to reuse when storage is considered before embellishment. Flat tapestry panels can often be stored with less bulk than stuffed decorations, but only if their hanging hardware allows practical packing. Open spiderwebs can become tangled or distorted if pushed into a crowded box, while dimensional spiders, ghosts, and bats need protection from crushing.
Before adding extra beads, branches, long fringe, or delicate attachments, decide where the piece will live after Halloween. Removable display supports can sometimes make storage simpler, provided that changing the mounting method does not compromise the creator’s construction. If a hanging will be used outdoors or on an exposed porch, do not assume ordinary yarn or accessories are weather-resistant; confirm the fiber, hardware, and intended conditions first.
1. Crochet Graphic Halloween Tapestry Wall Panel
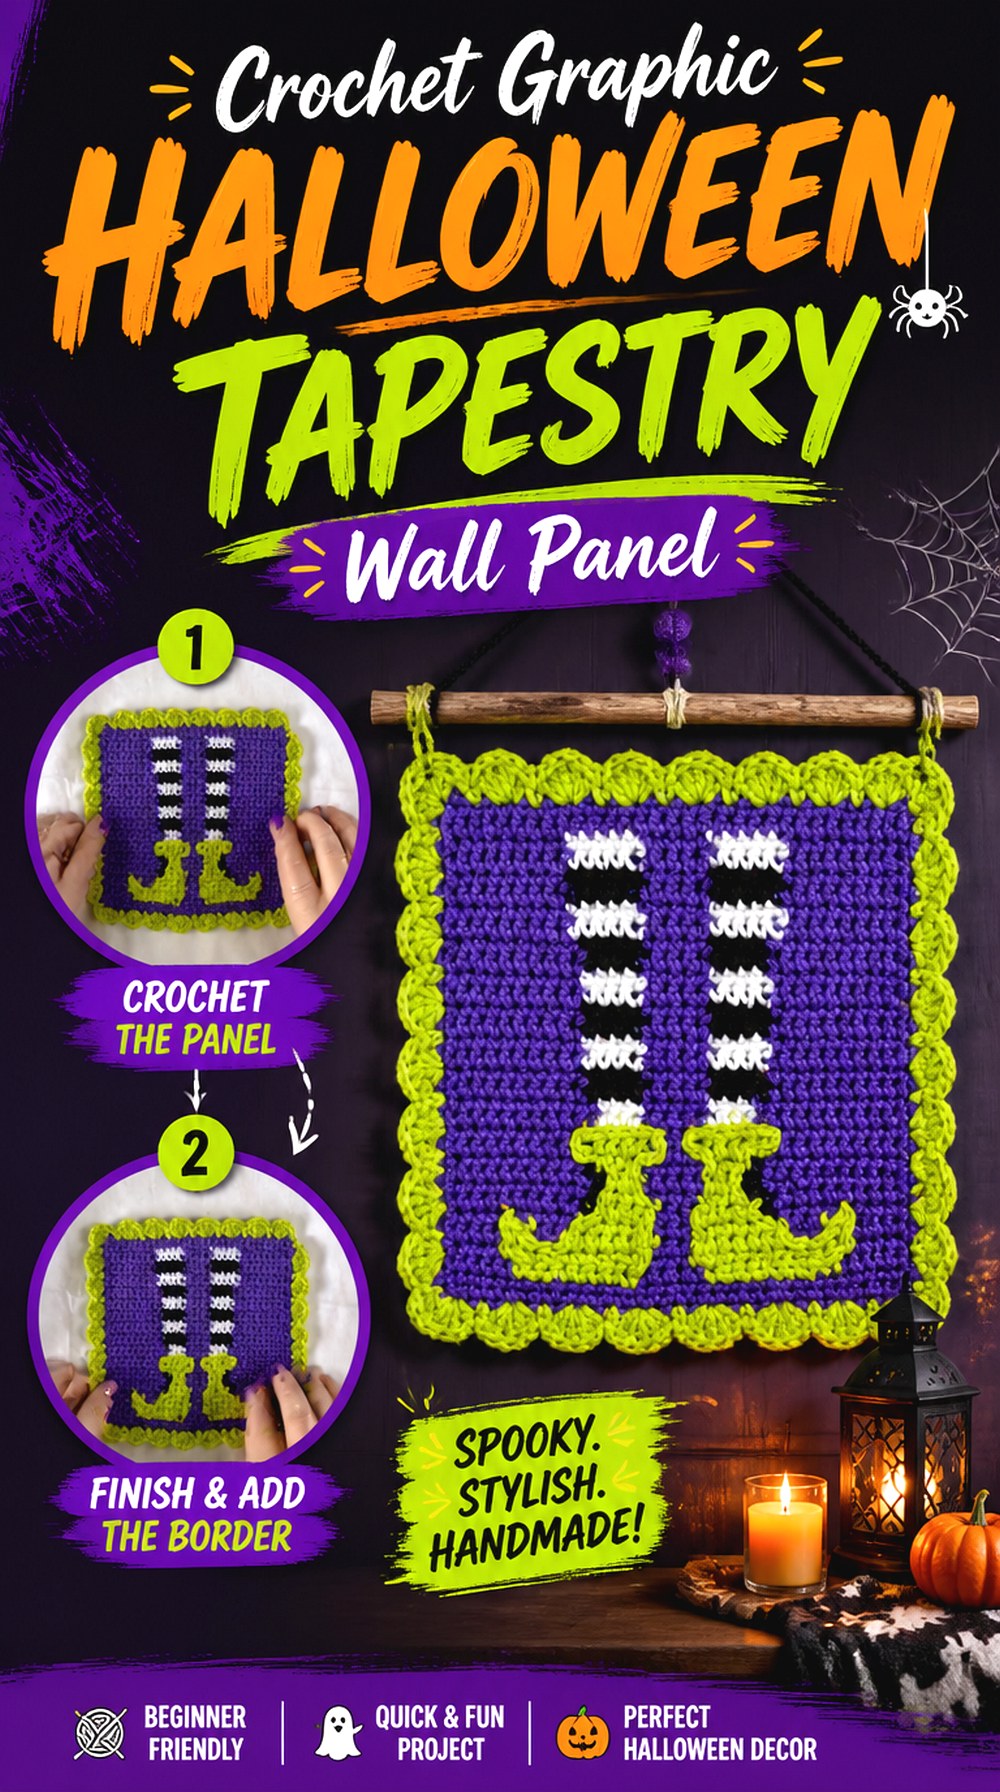
A flat tapestry is a strong choice when you want Halloween decor to behave more like framed fiber art than a hanging ornament. Jazzy0451’s tutorial focuses on Halloween crochet tapestries and covers graph reading, color changes, border finishing, surface crochet, and related wall-hanging presentation. That makes it particularly relevant for makers who enjoy a clear graphic image rather than a stuffed or dangling decoration.
This format also gives you a compact focal point. Compared with garlands, it concentrates the visual detail in one panel, so it can work above a small desk, shelf, or seasonal vignette without needing a long stretch of wall.
Crisp Color Boundaries Carry the Design
A graphic tapestry depends heavily on the edges between color areas. If contrasting sections become visually fuzzy, small Halloween shapes can lose definition when the panel is viewed from across the room. Pause periodically and look at the work from normal display distance rather than judging every change with the fabric immediately in front of you.
Color contrast deserves equal attention. Two appealing yarn colors can still be too similar in value to create a readable graphic image.
The Border Is Part of the Finished Artwork
Unlike a blanket square that may eventually disappear into a larger project, every outside edge of a wall panel remains visible. Wavy sides, uneven tension, or a border that pulls inward can affect how squarely the piece hangs.
The source tutorial specifically includes border and scalloped-edge content, so examine those finishing sections rather than treating edging as an afterthought. A clean perimeter can make the difference between a panel that reads as intentional wall art and one that looks unfinished.
Decide on the Mount Before Finishing
The tutorial description also points viewers toward attaching crochet wall hangings to a dowel. That is worth thinking about before the last finishing decisions are made.
Compare the width of your finished, blocked panel with the support you intend to use. The support should suit the actual finished piece rather than an assumed measurement. Also consider how visible you want the rod or hanging cord to be; exposed natural wood creates a different look from a nearly hidden mounting system.
2. Crochet Coffin Goth Wall Hanging

The coffin option pushes the collection toward gothic Halloween decor rather than cute seasonal characters. Randeere Repaints combines a crocheted coffin with a DIY goth wall-hanging presentation, making this a useful choice for a narrow vertical space or a darker gallery-wall arrangement.
Its silhouette does much of the decorating work. A recognizable coffin shape can stand alone without several surrounding motifs, and its narrow proportions offer an alternative to wide bunting or rectangular tapestry panels. It also gives you room to explore a more restrained palette if bright orange pumpkins and playful ghosts are not the look you want.
A Coffin Fits Spaces a Garland Cannot
Vertical wall pieces are useful around bookcases, mirrors, closet doors, and other places where there is height but little uninterrupted width. Before starting, hold a sheet of paper or another temporary shape in the intended area to judge how a narrow hanging will balance against nearby objects.
This is particularly helpful if you are building a Halloween gallery wall. Leaving open space around the coffin silhouette helps its outline stay recognizable instead of becoming visually tangled with neighboring pieces.
Check the Non-Crochet Components First
The tutorial is explicitly presented as both a crochet coffin project and a DIY goth wall hanging. That means the completed display may involve more than yarn and a hook.
Review the tutorial from beginning to end before buying supplies and identify which items belong to the actual hanging presentation. If you prefer an all-yarn project, confirm whether substituting any support or decorative component would change the way the finished piece hangs before making that adaptation.
Dark Yarn Needs Enough Definition
A gothic palette can look dramatic, but very dark yarn can hide texture and edge definition, especially in low indoor light. If the coffin will hang in a dim reading nook or hallway, examine the yarn in that room before committing to the entire project.
Contrast can come from the background, edging, adjacent decor, or mounting surface; it does not require turning the project brightly colored. The goal is simply to keep the silhouette readable where it will actually be displayed.
Original Tutorial and Creator Credit
Creator: Randeere Repaints
3. Crochet Pumpkin Statement Wall Hanger

A single pumpkin wall hanger gives you a softer Halloween focal point without committing to a full character scene. A Crafty Concept’s tutorial is specifically built around a crochet pumpkin wall hanger, so the finished object can bridge October decorating and more general fall styling.
This choice is especially useful when a room already contains several small Halloween objects. Instead of adding another cluster of motifs, one recognizable pumpkin creates a central shape. It can also sit beside darker crochet pieces—the coffin, spider specimen, or Dracula portrait, for example—without making the whole wall feel visually heavy.
Let One Pumpkin Have Enough Breathing Room
Statement wall decor works best when its outline is not crowded by frames, shelves, or other highly detailed crochet. Before selecting its final location, temporarily mark the approximate display zone and step back.
A pumpkin’s rounded outline can be a useful counterpoint to narrow vertical pieces and angular webs. In a mixed Halloween wall, that shape change is as important as changing colors because it stops the display from becoming a row of similarly proportioned rectangles.
Verify the Hanging Hardware Alongside the Yarn
Do not treat the hanger as something to improvise after the crochet is complete. Check the creator’s material information and observe how the finished pumpkin is supported before choosing your own wall hook or display spot.
If you alter yarn weight or other materials, the finished size and weight may also change. Rather than assuming the original hanging arrangement will still be ideal, evaluate the completed piece and use a support appropriate to its actual weight and construction.
Original Tutorial and Creator Credit
Creator: A Crafty Concept
4. Crochet Soft Hanging Ghost Wall Decoration
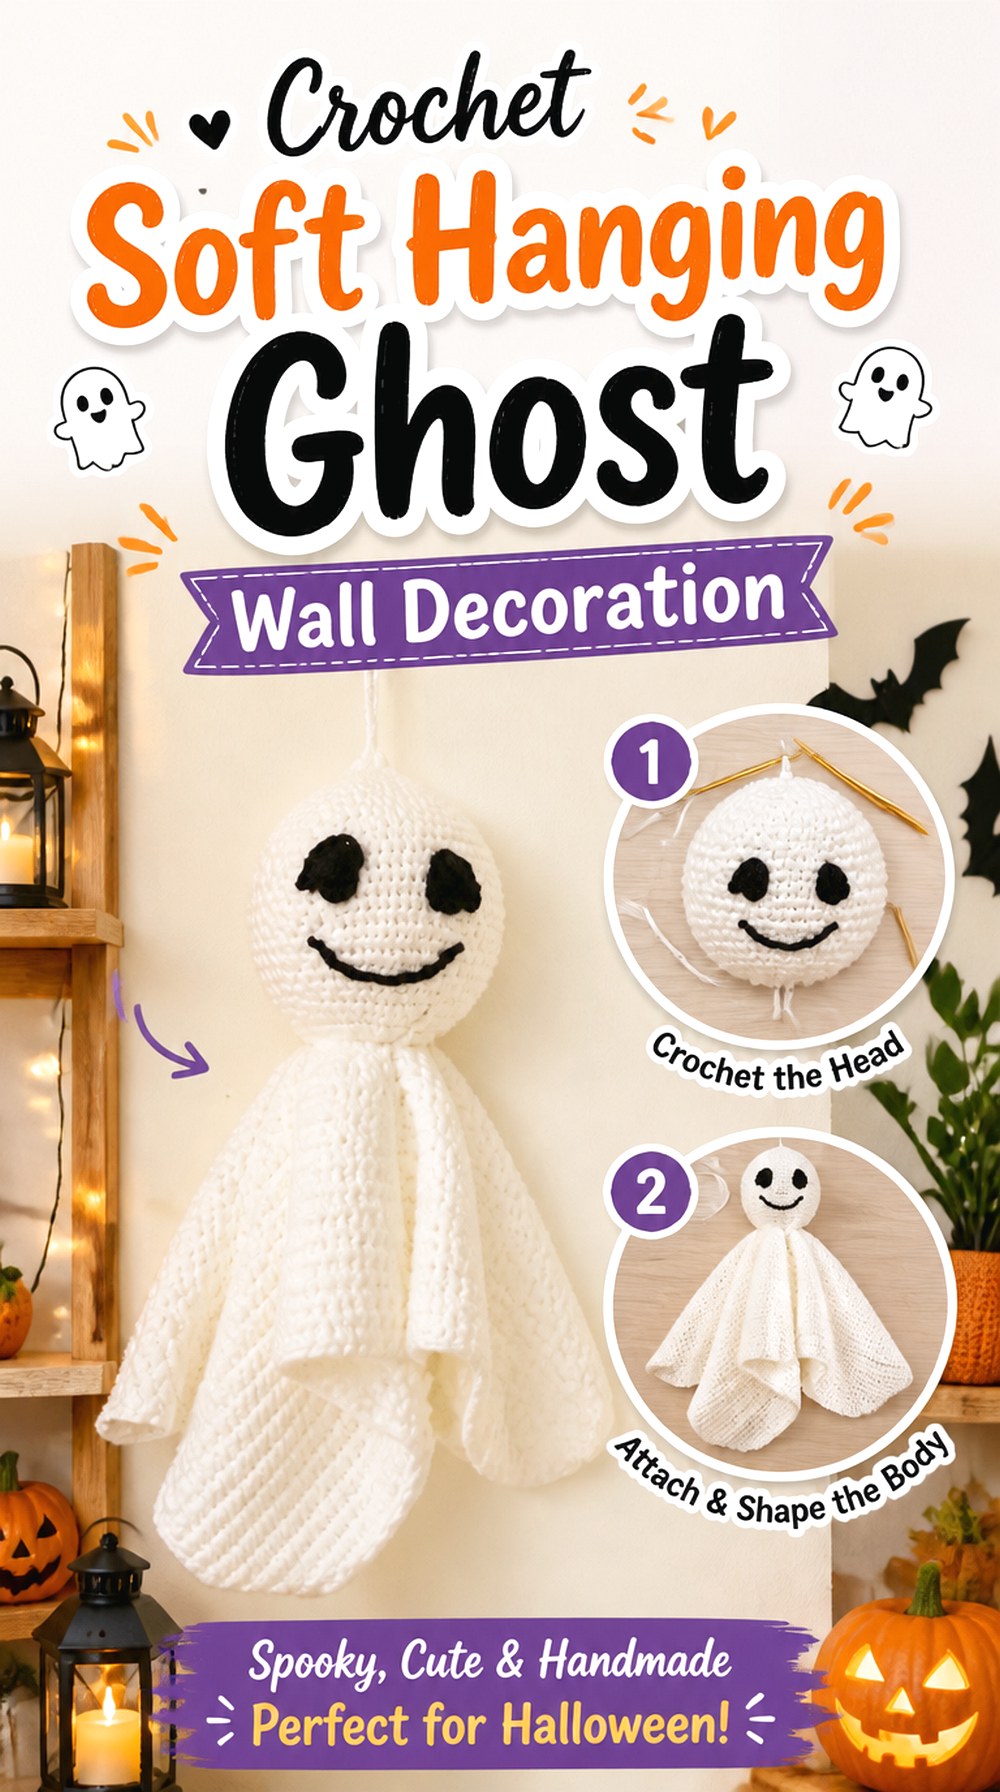
A hanging ghost adds movement and dimensional character that a flat tapestry cannot provide. Meladora’s Creations for Crochet shows a ghost designed specifically as a hanging Halloween decoration, including the hanging portion as part of the tutorial. The linked version is presented for left-handed crocheters.
This style works well when you want a light-colored element among darker Halloween decor. The soft ghost shape can hang from a wall hook, protected entry display, or similar interior location and still read clearly without a framed background. It also gives a gallery wall a break from rigid rectangles and geometric webs.
Judge the Face From Display Distance
Facial details can look perfectly positioned while the project is lying in your hands and surprisingly different once it hangs vertically. Before permanently securing the final expression, hold or pin the ghost in its intended orientation and view it from several feet away.
Pay attention to whether the eyes and mouth remain balanced relative to the whole head. Small placement shifts can noticeably change the character, particularly on a simple white shape where the face is one of the strongest contrasting details.
Keep the Hanging Point Centered
Soft crochet can rotate or lean if the hanging point does not balance the finished shape. Once the ghost is complete, let it hang freely before deciding that the presentation is finished.
If one side consistently pulls downward, first check whether attachments, tails, or shaping are affecting the balance rather than immediately changing the project. Use the tutorial’s hanging method as the starting point, and avoid adding heavy decorations on only one side unless you have checked how they change the finished hang.
Protected Display Is the Safer Assumption
A Halloween hanging may look appropriate for a porch, but appearance does not establish weather resistance. Unless the creator and material manufacturer specifically address outdoor exposure, plan for an indoor or well-protected location.
Moisture, direct weather, and repeated sun exposure can affect yarn and attached components differently. A sheltered wall, interior door, or entryway lets you use the ghost as seasonal decor without relying on unsupported outdoor-durability assumptions.
Original Tutorial and Creator Credit
Creator: Meladora’s Creations for Crochet
5. Crochet Spiderweb Bunting Wall Garland

Spiderweb bunting solves a different decorating problem: width. Crafty Crochet Castle’s tutorial creates a continuous Halloween bunting based on repeating web forms, making it suitable for stretching across a mantel, doorway, shelf, or long section of wall.
Openwork also makes this idea visually lighter than a row of stuffed characters. Even when the strand spans a broad area, empty space remains part of the design. That makes the bunting a good choice above heavier wall pieces or in a display that already contains pumpkins, portraits, or dimensional crochet.
Measure the Span Before Repeating Webs
The number of motifs that looks balanced depends on the actual wall. Rather than crocheting an arbitrary quantity first, measure the available span and consider how much drape you want between the hanging points.
Lay completed webs on a table and test spacing before joining or finishing the strand. This lets you compare a tighter, denser Halloween border with a lighter arrangement that leaves more space between motifs without needing to undo a finished display.
Openwork Benefits From Careful Shaping
Spiderwebs depend on holes, spokes, and points reading clearly. If the motifs curl, fold, or overlap heavily, the web effect becomes less obvious.
Check the creator’s finishing guidance and the care instructions for your chosen yarn before deciding how to shape the motifs. When blocking is appropriate for the fiber, consistent shaping can make repeated webs look more deliberate. Whatever method you use, allow the pieces to settle before deciding their final spacing along the strand.
Use Bunting as a Frame, Not Just a Focal Point
A strand does not have to be the main Halloween object on the wall. Because it runs horizontally, it can visually connect several separate pieces underneath it.
Try planning the wall as a whole before hanging everything. One tapestry or dimensional piece can provide the focal point, with web bunting acting as the upper border. Leaving a little visual separation between the strand and detailed pieces below prevents the openwork from merging into a busy mass.
Original Tutorial and Creator Credit
Creator: Crafty Crochet Castle
6. Crochet Gossamer Spider Specimen Wall Hanging
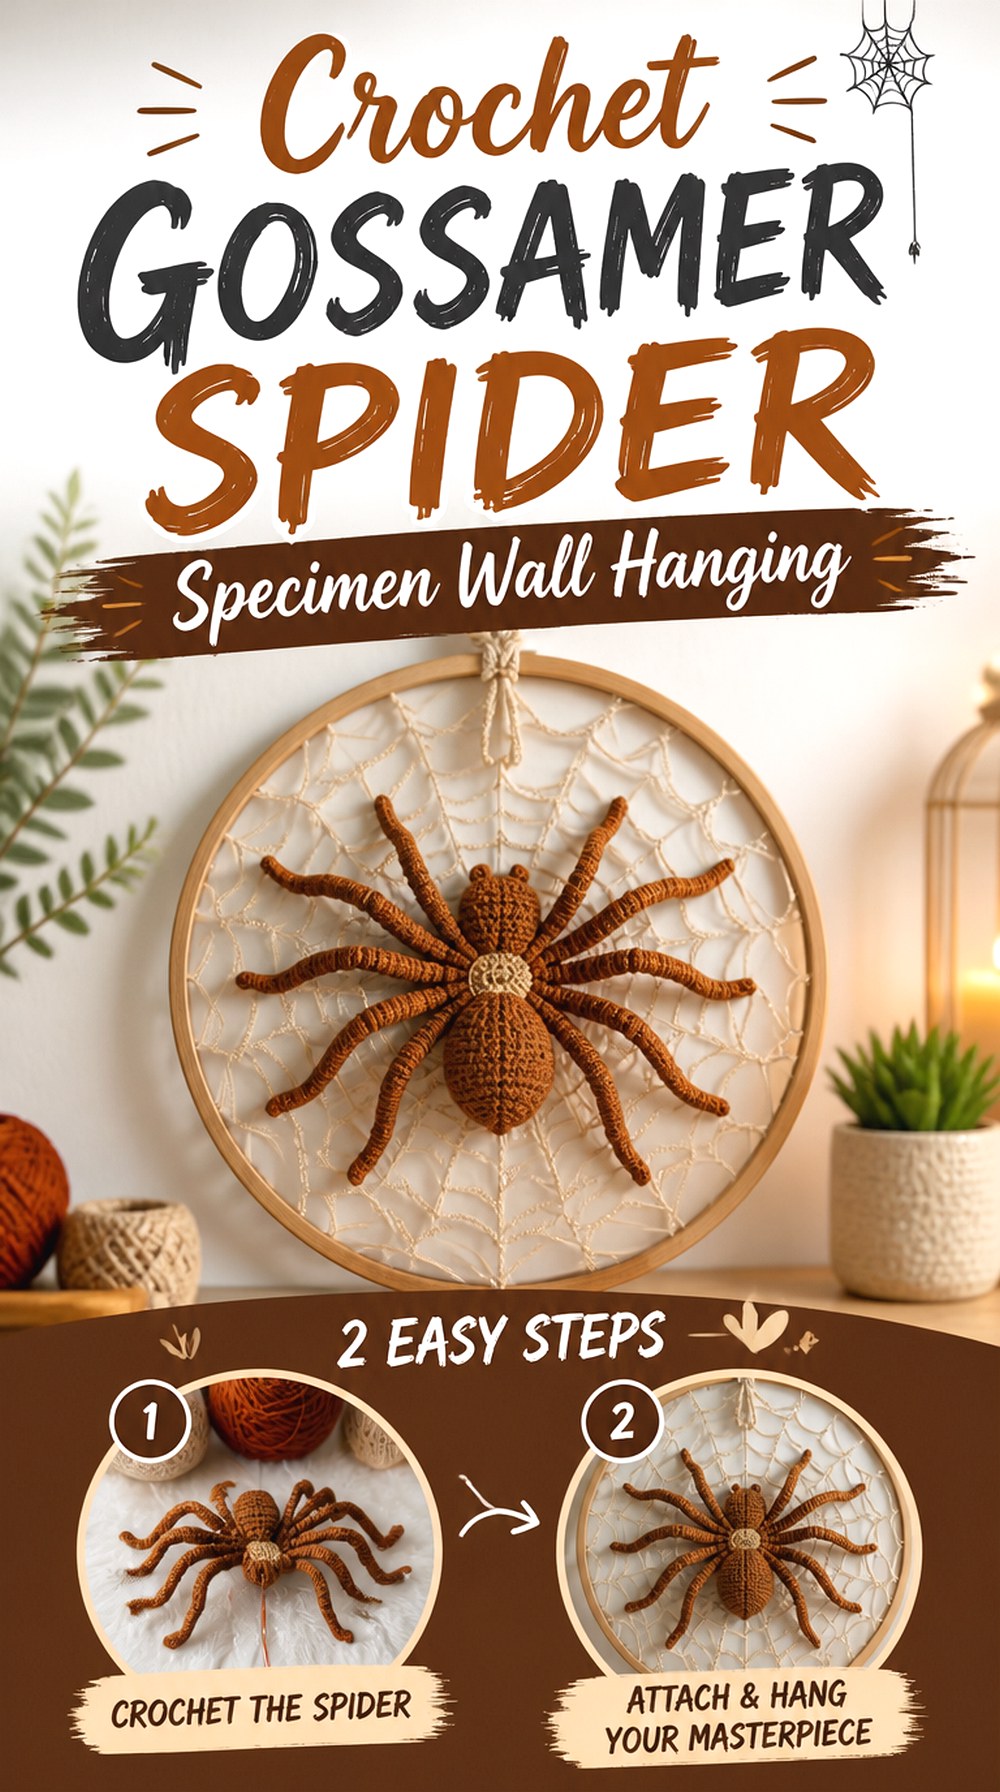
Woodland Stitchcraft’s Gossamer design is closer to fiber sculpture than ordinary bunting. The finished piece combines an octagonal crochet mount with a dimensional spider arranged like a preserved specimen, giving it a distinctive gothic or curiosity-cabinet feel. The source design also uses mixed-media structural materials rather than relying on yarn alone.
Choose this when you want one small object to command attention rather than fill a long wall. Its dimensional center separates it clearly from the flatter spiderweb projects and makes it particularly suited to a Halloween gallery wall, bookcase backdrop, or dark-academia-inspired seasonal corner.
Structural Supplies Are Essential Here
This is not the project to begin after buying yarn alone. Woodland Stitchcraft lists wire, stiffening spray, leather cord, and hot glue among the non-yarn materials used in the design.
Review those components and the associated handling requirements before starting. The spider’s dimensional appearance and the mount’s ability to remain presentable are connected to that structure, so replacing those materials casually may change the result more dramatically than substituting a decorative color.
The Spider Needs Contrast With Its Mount
Because the spider is the central feature, its legs and body should remain visually distinct from the background. Before committing to a low-contrast palette, place sample yarns together and view them in the room where the finished piece will hang.
A subtle palette can still work, but the form should not disappear into the mount under normal lighting. This matters especially for thin legs and other small dimensional details that rely on their silhouette.
Protect the Shape During Storage
Wire-supported or stiffened crochet should not be packed as casually as a soft garland. A storage box that presses directly against the dimensional spider can alter its positioning, while bending the mount can affect how it displays the following season.
Plan enough shallow, protected space for the completed piece. If the hanging cord can be positioned without crushing the crochet, keep it from tangling around the spider during storage as well.
Original Tutorial and Creator Credit
Creator: Woodland Stitchcraft
7. Crochet Dracula Portrait Wall Hanging

A Dracula portrait gives the wall a recognizable Halloween character while keeping the overall format compact. Molly’s source video is specifically identified as Part 1 of a Dracula wall-hanging tutorial, so it is best approached as a multi-part learning project rather than assumed to be completely contained in one video.
The portrait approach differs from both the loose hanging ghost and the graphic Halloween tapestry. Here the face is the focal point, so color placement and expression carry more visual weight. It suits a classic-monster display, especially when you want character-based decor without adding another stuffed figure.
Save the Full Tutorial Sequence Before Starting
Because the linked video is labeled Part 1, locate any continuation material from the same creator before committing yarn or finishing decisions.
This prevents a common problem with multipart tutorials: finishing the portion shown in the first video and only then discovering that later assembly or display information appears elsewhere. Previewing the entire sequence also helps you understand where major color, face, and mounting decisions occur.
Portraits Need Strong Facial Readability
Small color changes around hair, eyes, mouth, and other features can determine whether a crochet portrait remains recognizable on the wall. During the project, step away from the work periodically and judge the image from its likely viewing distance.
If two chosen colors merge visually, it is better to notice early than after finishing. You do not necessarily need brighter colors; you need enough separation between adjacent areas for the expression and silhouette to remain clear.
Give the Character Its Own Visual Territory
Character portraits can become lost when placed directly beside other face-heavy decorations. If Dracula is part of a larger Halloween wall, consider pairing the portrait with simpler shapes such as a web, pumpkin, or coffin rather than surrounding it with several competing characters.
This creates a visual hierarchy: the face becomes the focus, while nearby crochet supports the seasonal theme. It also helps a smaller portrait feel intentional rather than merely one object in a crowded collection.
Original Tutorial and Creator Credit
Creator: Molly
8. Crochet Corner Spiderweb Wall Accent
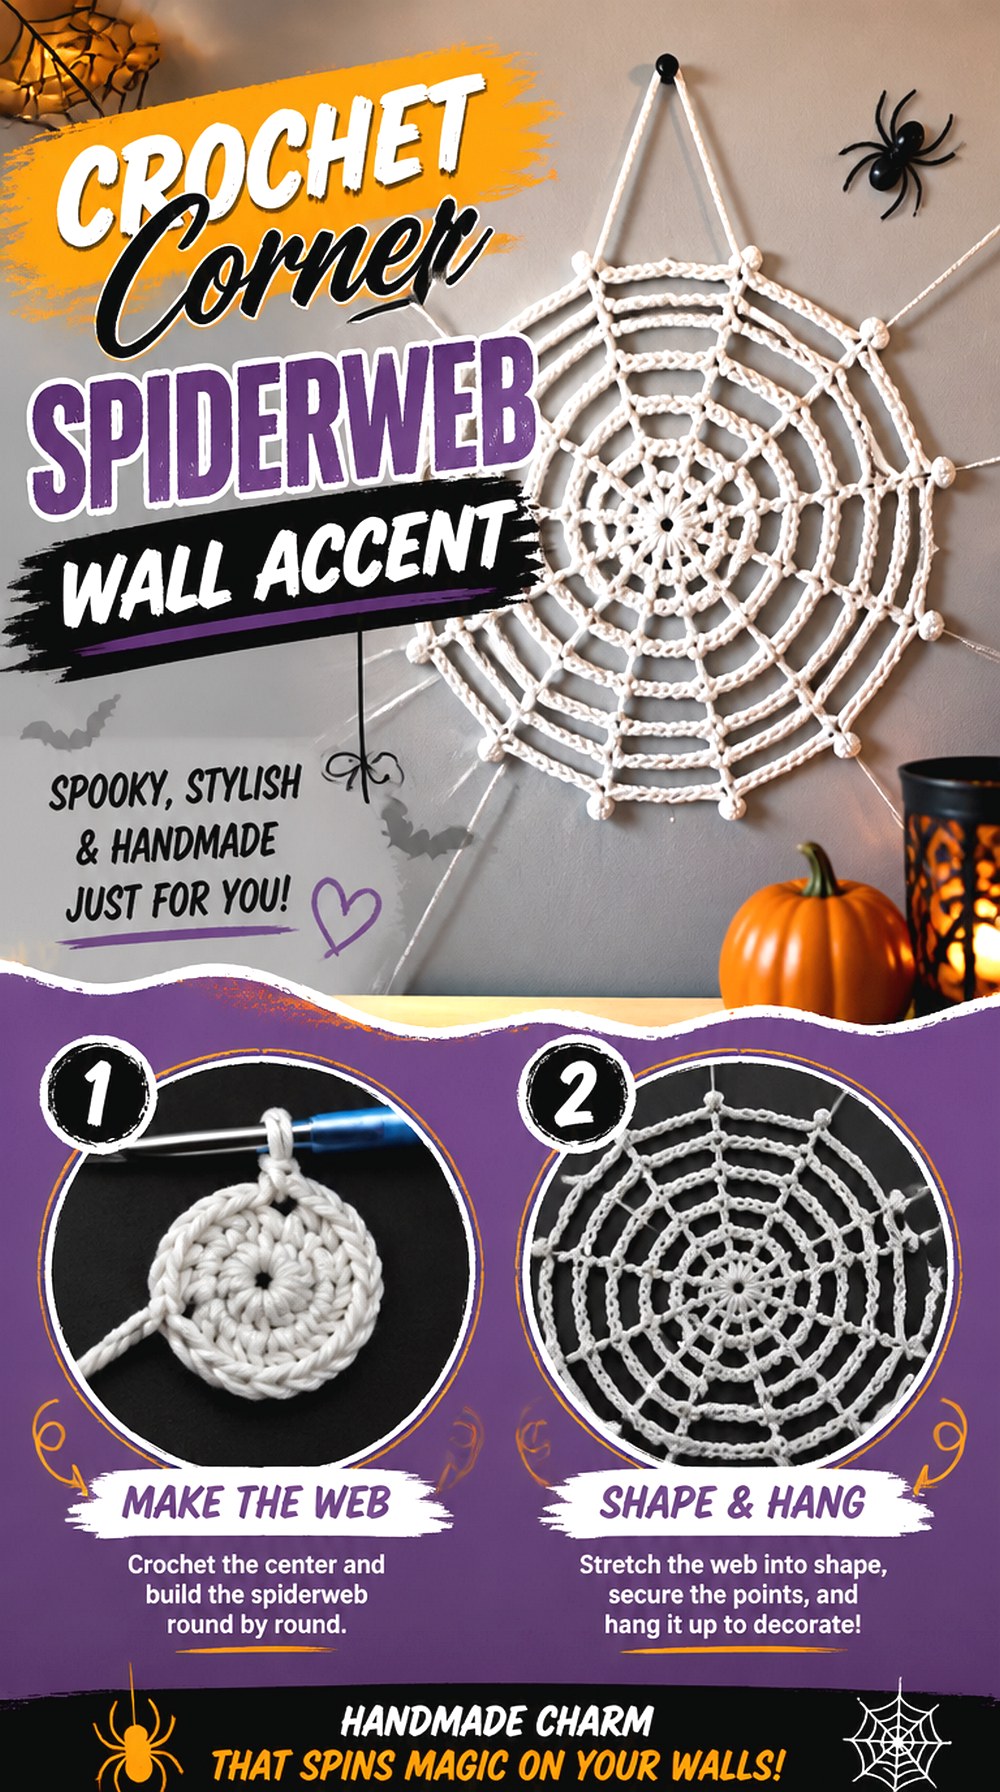
Instead of hanging a web in the middle of a wall, Brunaticality’s tutorial includes a corner-web version designed to sit in a room nook. The same tutorial also covers a round web and a small crochet spider, giving you options for adapting the overall display while keeping the corner version especially distinctive.
This is a smart choice for an awkward area that cannot accommodate a framed tapestry or long garland. The architecture of the room becomes part of the decoration, and the openwork can fill an otherwise empty corner without adding another solid block of color.
Check the Corner Angle Before Finishing
A web designed around a corner looks most convincing when its main lines sit naturally against the actual space. Test the unfinished piece in the intended corner before making final display decisions.
A tight nook, wide open corner, furniture obstruction, or nearby molding can alter how the web appears. The goal is not to force every room into the same setup shown in a tutorial, but to confirm that your particular location gives the crochet enough room to open visibly.
Avoid Stretching the Web Beyond Its Shape
Open crochet can look tempting to pull tighter in order to fill more wall, but excessive tension may distort the design or place unnecessary strain on its attachment points.
Let the finished web determine the practical span rather than making the wall dimension dictate an unnatural stretch. If the chosen corner is simply too large, a smaller surrounding decoration or a different placement can be more successful than forcing one piece to cover excessive space.
Original Tutorial and Creator Credit
Creator: Brunaticality
9. Crochet Pumpkin Ghost and Bat Wall Garland

For a wall that needs several Halloween symbols rather than one repeated motif, Urooj Zafar’s garland combines pumpkins, ghosts, and bats in a single strand. The tutorial covers the individual motifs and their joining into a finished garland or bunting.
The mixed silhouettes create more visual rhythm than an all-pumpkin strand. Rounded pumpkins, light ghost shapes, and spreading bat wings alternate naturally, making this a useful choice over a doorway, along a mantel, or across a broad blank area where one small focal piece would not have enough presence.
Lay Out Every Motif Before Joining
Mixed garlands can become visually uneven even when the individual motifs look good. Before attaching them, arrange all finished pieces on a table or floor in the same order you expect to hang them.
Check whether one side feels noticeably darker, heavier, or more crowded. You can then adjust the sequence before the joining stage. This planning step is especially useful when bats and pumpkins use stronger dark or saturated colors while ghosts create lighter visual gaps.
Consistent Scale Makes Mixed Shapes Feel Related
Different motifs do not need identical dimensions, but they should look as though they belong to one intentional strand. Follow the creator’s material guidance when you want the same proportions shown in the tutorial.
If you intentionally change yarn or hook choice, make a sample of more than one motif before producing the whole set. A substitution can affect each shape differently, so one successful pumpkin does not automatically guarantee that the bat and ghost will balance beside it.
Keep Small Decorative Parts Appropriate to the Display
The tutorial description lists additional facial-detail materials among its supplies. When adapting a decorative garland, consider who can reach it and where it will hang.
Small attached components should be secured appropriately, and a strand containing removable or loose pieces is better kept away from unsupervised young children and pets. For family spaces, embroidered or crocheted facial details may be worth considering when compatible with the intended look and construction.
Original Tutorial and Creator Credit
Creator: Urooj Zafar
10. Crochet Mini Pumpkin Wall Garland
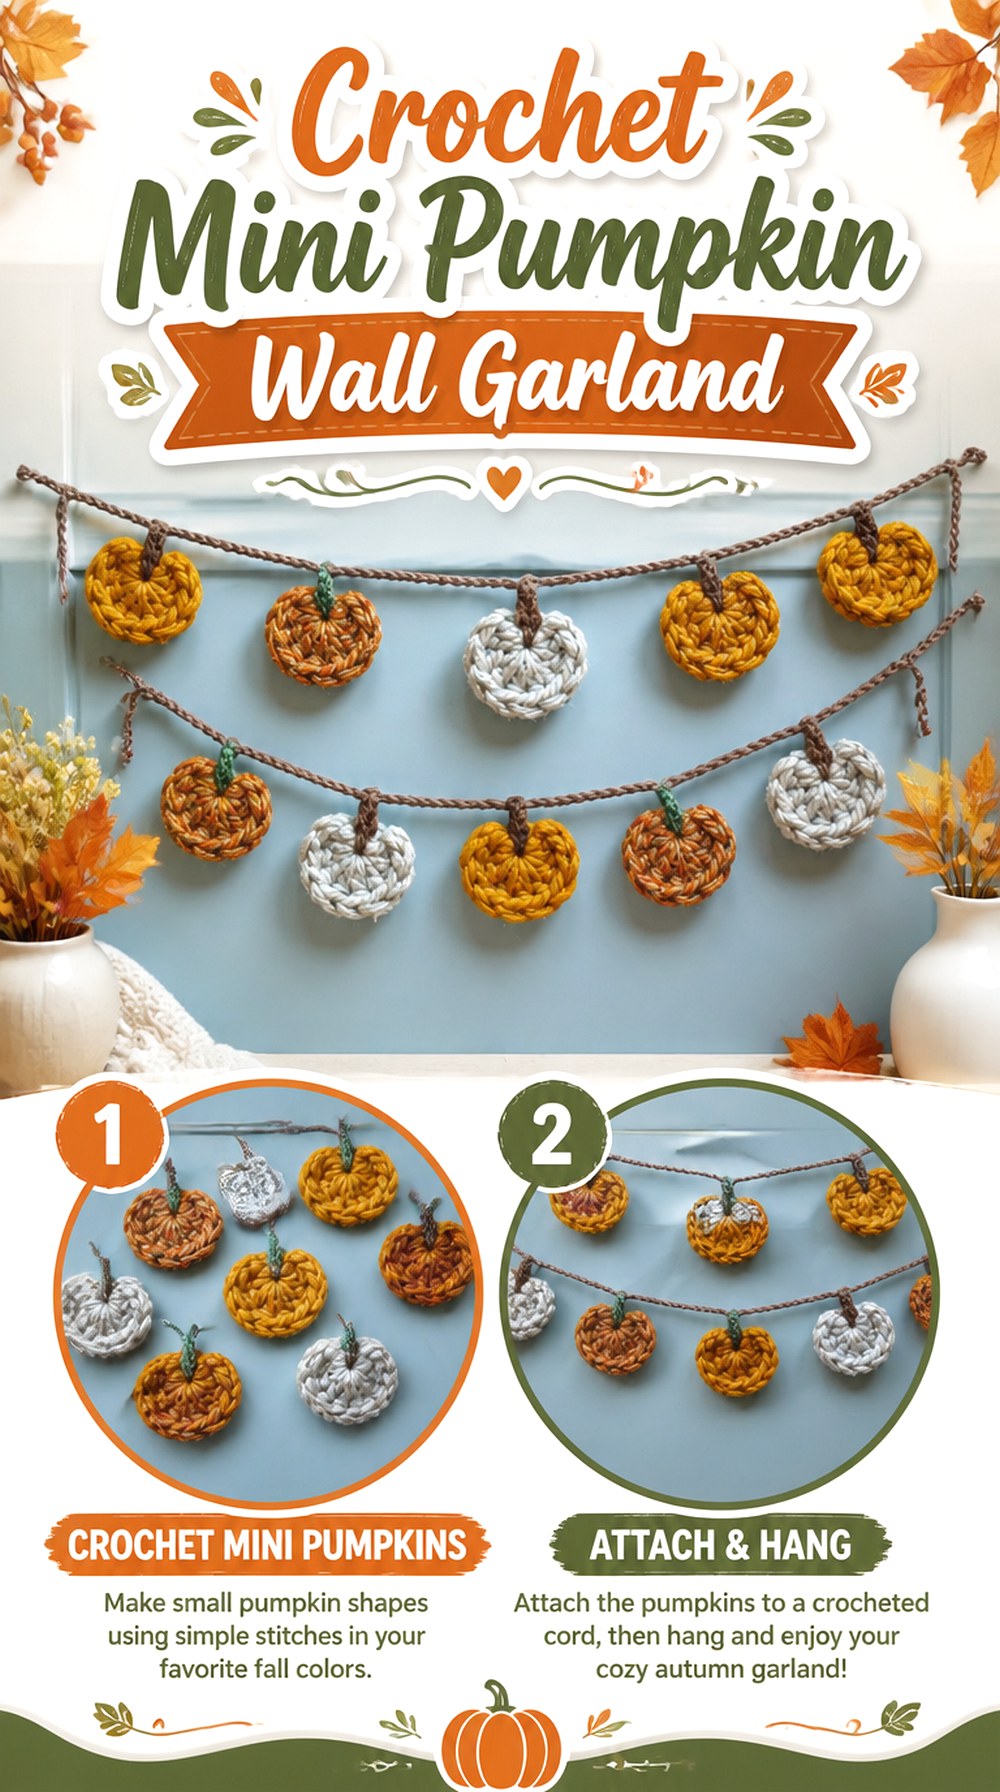
A row of pumpkins creates a cleaner, more repetitive look than the mixed Halloween garland. Brambles and Hart’s tutorial shows both the pumpkin motifs and how they are joined into a garland, with the finished length intended to be adjustable to the display.
Because pumpkins work for both Halloween and general autumn decor, this is one of the least theme-specific projects in the collection. It suits a room where you want the handmade seasonal texture to last beyond October 31 without keeping ghosts, bats, or vampires on display.
Repetition Makes Spacing More Noticeable
When every motif has essentially the same visual role, inconsistent spacing becomes easier to see. Arrange the pumpkins along the planned hanging line before permanently finishing the strand, then compare the gaps from a distance.
You can choose close spacing for a denser border or wider gaps for a lighter look. What matters is intentional rhythm. Testing the arrangement against the actual mantel, window, or wall is more reliable than deciding spacing only on the worktable.
Yarn Changes Can Alter More Than Pumpkin Size
The video demonstrates the project with specific yarn choices, but changing yarn can affect the apparent weight and drape of the whole garland as well as the individual motifs.
If you substitute substantially thicker or thinner yarn, make one sample pumpkin first and hold it against the intended display area. That quick comparison can reveal whether the modified scale still suits the wall and whether the hanging cord will need a different visual proportion.
Original Tutorial and Creator Credit
Creator: Brambles and Hart
11. Crochet Poseable Hanging Bat Wall Accent

Club Crochet’s hanging bat introduces a true three-dimensional accent to the collection. The tutorial features a bat with poseable wings and a hanging concept that uses magnets to let the finished character hang upside down from a suitable metal surface.
That makes it different from the wall panels and conventional garlands: instead of creating a background picture, the bat becomes a small object interacting with its display surface. One bat can serve as a compact accent, while several could inspire a larger grouping—provided each finished piece is supported safely and the tutorial’s construction is followed rather than guessed.
Pose the Wings After Choosing the Location
A wide wing position needs more surrounding clearance than a folded or sleeping-style pose. Decide where the bat will be displayed before treating the final wing position as purely decorative.
Near a shelf, doorway, or neighboring wall hanging, test that the silhouette remains visible without overlapping other objects. Leaving negative space around the wings helps the bat read immediately from a distance and makes its dimensional construction more noticeable than if it is squeezed into a crowded cluster.
The Magnetic Hanging Method Needs the Right Surface
The source tutorial describes magnets as part of the hanging concept, allowing the bat to attach upside down to metal. That means ordinary painted drywall should not be assumed to provide the same mounting method.
Decide where the piece can actually attach before beginning. If you are considering a different display arrangement, do not improvise changes that could leave the bat insecure. Any magnets or other small detachable components should also be kept securely contained and away from young children and pets.
A Small Accent Can Balance Larger Panels
Not every wall-hanging project needs to command the center of the display. A dimensional bat can occupy a small gap above a frame, near a Halloween tapestry, or beside a larger pumpkin piece and give the grouping a sense of movement.
Use it as punctuation rather than filler. If the surrounding wall is already visually busy, one clearly positioned bat can have more impact than covering every remaining gap with additional motifs.
Which Crochet Halloween Wall Hanging Fits Your Space?
For one central piece, the graphic tapestry, pumpkin wall hanger, Dracula portrait, coffin, or Gossamer spider display gives the eye a clear focal point. The coffin and Dracula lean more gothic or classic-horror, while the pumpkin provides the softest transition into general fall decor.
Choose spiderweb bunting, a mixed Halloween garland, or the pumpkin garland when you need width above a mantel, shelf, window, or doorway. The corner spiderweb solves an awkward empty nook without occupying the center of a wall. For dimensional accents, the ghost and hanging bat introduce movement and depth.
If several ideas will share one wall, mix formats rather than repeating similarly sized panels. One focal piece, one lighter horizontal element, and a small dimensional accent usually create clearer visual hierarchy than several equally detailed projects competing side by side.
Conclusion
These 11 crochet Halloween wall hanging ideas cover much more than flat seasonal panels. Choose the tapestry or Dracula portrait for graphic wall art, the coffin or spider specimen for a darker gothic focal point, and the pumpkin hanger for a softer fall-to-Halloween transition. Spiderwebs are especially useful when you need either a wide border or an unusual corner accent, while the ghost and bat add dimensional character. For a mantel or doorway, the mixed-motif and pumpkin garlands can fill more horizontal space without another large central piece.
Once you have chosen the display format, check the original tutorials for exact construction, supplies, finishing, and mounting details before starting.
Frequently Asked Questions
What type of crochet Halloween wall hanging is easiest to store?
Flat tapestry panels and other minimally embellished pieces generally take less bulky storage space than stuffed or wire-supported decorations. Garlands can also store compactly, but open spiderwebs need protection from tangling and distortion. Before making a seasonal piece, look at its hanging hardware and dimensional details. A project that uses fixed rods, stiffening, wire, or bulky embellishments may need a dedicated box rather than being folded with ordinary crochet items.
How do I keep a crochet wall panel from looking crooked?
First check whether the crochet itself is square and whether the edge tension is consistent. If the pattern or fiber is suitable for blocking, follow the appropriate finishing guidance before mounting it. Then compare the top edge with the dowel or other support and make sure the hanging points distribute the weight evenly. Do not try to correct a noticeably distorted panel solely by pulling harder on one side of the hanging cord.
Is cotton or acrylic better for crochet Halloween wall decor?
Neither is universally better. The creator’s specified yarn should be your first reference when size, structure, or gauge matters. In general, fiber choice can influence stitch definition, drape, weight, blocking behavior, and care. A graphic tapestry may benefit from a fabric that keeps its shape clearly, while a soft hanging character can tolerate more movement. Always check the yarn label and tutorial before substituting fiber or yarn weight.
Can I turn a crochet Halloween motif into a wall hanging?
Often, but the motif itself is only part of the problem. You also need to consider its finished dimensions, orientation, weight, edge stability, and a secure way to hang it. A flat pumpkin or bat appliqué may adapt easily to a garland, while a heavy stuffed piece requires more support. If the original tutorial was not designed for wall display, treat your mounting plan as a separate design decision rather than assuming any loop or cord will work.
How should I plan several crochet Halloween wall hangings together?
Start with one dominant piece and vary the scale around it. A tapestry or dimensional specimen can become the focal point, while bunting creates a horizontal line and smaller bats or ghosts fill selective gaps. Repeat a few colors to connect the group, but vary the silhouettes. Leaving open wall space between detailed projects is important; without it, separate motifs can visually merge and the hand-crocheted details become harder to appreciate.
Can crochet Halloween wall hangings be displayed outdoors?
Do not assume so simply because a project is seasonal decor. Yarn fibers, stuffing, adhesives, metal components, magnets, dowels, and stiffening products can react differently to moisture, sun, and temperature changes. Unless the designer and material manufacturers specifically support outdoor use, an indoor or protected display is the safer choice. For a covered porch, still consider wind, dampness, and how securely the finished piece can be attached.
What should I check before changing the yarn weight in a wall-hanging tutorial?
Expect the finished dimensions, fabric thickness, weight, drape, and sometimes the clarity of small design details to change. Make a sample when practical and compare it with the intended display area before committing to the whole project. This is especially important for tapestry images, repeated garland motifs, or pieces fitted to structural components. If the project depends on a specific mount or support, confirm that your resized crochet will still work with it.