16 Crochet Pumpkin Door Hanging Ideas for Fall Entry Decor
A crochet pumpkin door hanging can be as structured as a full wreath or as light as a strand of flat motifs. That difference matters. A deep stuffed arrangement may look impressive on an uncovered front door but become awkward behind a storm door, while a granny-square banner, medallion, or appliqué display takes up far less depth.
These 16 ideas cover wreaths, garlands, bunting, square panels, flat pumpkin shapes, jack-o’-lantern pennants, and dimensional pumpkin clusters. Some source tutorials are already designed as hanging decor; others teach a pumpkin component that can be adapted into a door piece without reconstructing the creator’s pattern. Use the comparisons below to decide how much structure, movement, depth, and seasonal detail makes sense for your own entry.
Quick List
- Crochet Pumpkin Harvest Wreath Door Hanger
- Crochet Pumpkin Grapevine Cluster Door Wreath
- Crochet Pumpkin Bunting Door Topper
- Crochet Pumpkin Vine Garland Door Frame Hanger
- Crochet Pumpkin Potholder Medallion Door Hanger
- Crochet Pumpkin Granny Square Pennant Door Hanger
- Crochet Pumpkin Patch Square Door Panel
- Crochet Pumpkin Appliqué Hoop Door Hanger
- Crochet Pumpkin Doily Medallion Door Hanger
- Crochet Jack-O’-Lantern Pennant Door Hanger
- Crochet Mini Pumpkin Keychain Cluster Door Charm
- Crochet Mini Stuffed Pumpkin Cascade Door Swag
- Crochet Smiling Pumpkin Plush Door Charm
- Crochet No-Sew Pumpkin and Vine Door Swag
- Crochet Ribbed Pumpkin Trio Door Hanger
- Crochet Pumpkin Coaster Cascade Door Hanger
Choose the Hanging Structure Before the Pumpkin Style
Start with the door rather than the yarn color. Wreaths give you a rigid base and a strong circular silhouette, but they also project farther away from the surface. Flat medallions, squares, appliqués, and pennants are better choices when clearance is limited. Garlands and bunting use width instead of depth and can work across the upper part of a door or around an indoor entry.
Dimensional pumpkins create more texture, but every stuffed element also adds weight. A three-pumpkin swag therefore needs a more dependable hanging point than a single flat motif. Before choosing a tutorial, decide whether you want one central focal piece, a vertical arrangement, a horizontal strand, or decor that frames the doorway. That decision quickly narrows the list to projects that suit the actual space.
Check Door Clearance, Movement, and Exposure
A crochet decoration that works on an interior wall does not automatically suit an exposed exterior door. Yarn can collect moisture, dirt, and dust, while repeated door movement can make loose garlands or long hanging cords shift. Unless a creator specifically provides outdoor-use guidance for the materials involved, treat crochet decor as an indoor or protected-entry decoration.
Also check what sits in front of the main door. Storm doors and screen doors can leave very little room for stuffed pumpkins, bulky wreaths, raised stems, or thick greenery. Flat pumpkin panels and medallions are usually easier to accommodate in tight spaces. For moving doors, position hanging cords so the decoration does not catch on handles, hinges, locks, or the door frame when opening and closing.
Plan Weight Distribution Before Final Assembly
A door hanging looks better when its center of gravity stays below the hanging point. Heavy embellishments concentrated on one side can make a wreath rotate, while a vertical swag can twist if its pumpkins are not balanced around the central cord or support.
Test the arrangement before permanently attaching anything. For a wreath, temporarily place the pumpkins and greenery and lift the wreath from its intended top point. For a banner or square panel, check whether the upper edge stays level. With garlands, compare the weight on both sides of the center. Stuffed pumpkins can be particularly deceptive because a relatively small shape may still weigh more than several flat motifs. A quick hanging test before final finishing can prevent repeated adjustments later.
1. Crochet Pumpkin Harvest Wreath Door Hanger
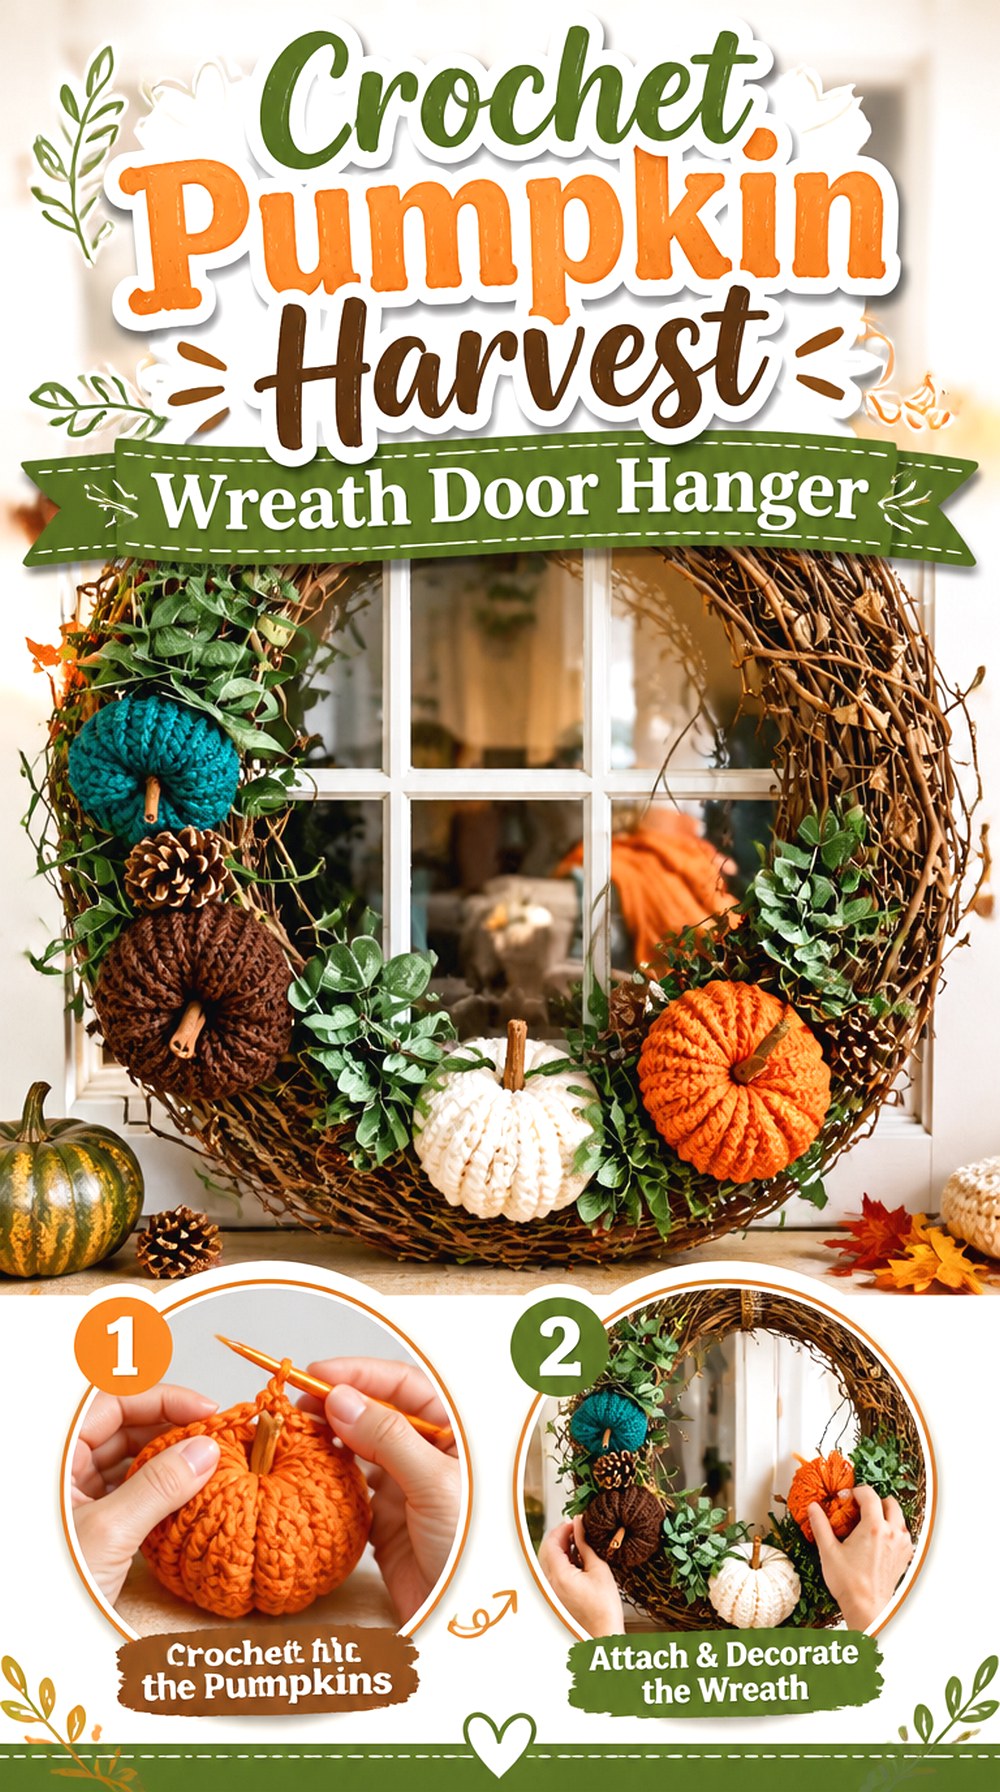
This is the statement-piece option for readers who want crochet pumpkins to be only one part of a fuller fall arrangement. MJ’s Off The Hook Designs builds the source project as a front-door wreath combining crochet pumpkins with a substantial wreath base, greenery, and additional natural-looking seasonal accents. That makes it visually denser than the flatter hangers later in this list.
Choose this direction when you have room for depth and want the door decor to read clearly from farther away. Because the pumpkins sit on a separate structure, you can also think about their spacing before attaching them instead of relying on the crochet fabric itself to support the entire display.
Alternating Pumpkin Scale Keeps the Circle Balanced
The source wreath uses pumpkins in more than one scale, which helps break up a repetitive ring of identical shapes. When adapting the visual arrangement, step back before securing the pieces and check whether one section looks noticeably heavier than another. Larger pumpkins naturally attract more attention, so distributing them around the focal area can keep the arrangement from appearing lopsided once it hangs vertically.
A Wreath Base Handles Weight Differently From Crochet Fabric
Here the wreath form, not a crocheted panel, carries the main structural load. That is helpful when adding dimensional pumpkins and greenery, but it also creates a thicker finished object. Measure the space available in front of your door before choosing this style. A protected open door may handle it comfortably, while a closely fitted storm door may favor one of the flatter medallion or banner ideas instead.
Keep Seasonal Extras Secondary to the Crochet
Greenery, pinecones, stems, and similar accents can fill visual gaps, but too many can hide the handmade pumpkin shapes that make the project distinctive. Arrange the crochet components first, then judge where an extra accent is actually needed. This approach is especially useful when the wreath will be viewed from the street, because broad pumpkin silhouettes remain easier to recognize than many small decorative details.
2. Crochet Pumpkin Grapevine Cluster Door Wreath

This version leaves more of the underlying wreath visible and treats the crochet pumpkins as a concentrated seasonal cluster. Simply Made by Erin Crochet demonstrates a fall pumpkin wreath built around a grapevine form with pumpkins, greenery, floral elements, and optional seasonal accents.
Compared with a densely filled wreath, the exposed grapevine creates more negative space and gives the arrangement a lighter visual footprint. It is a useful direction when you like mixed-material fall decor but still want crochet to provide the soft focal texture. The source also discusses using different pumpkin options, so the concept is well suited to combining previously made crochet pumpkins instead of requiring every decorative element to match perfectly.
An Off-Center Cluster Creates a Different Kind of Balance
A wreath does not have to be symmetrical to look deliberate. Concentrating pumpkins and greenery in one section creates movement around the open part of the ring. Before securing the cluster, hang the bare wreath and mark its natural top point. Then position the heavier elements while repeatedly checking whether their weight causes the wreath to rotate away from the intended orientation.
Leave Enough Grapevine Visible to Preserve the Shape
When the base itself contributes to the finished look, covering every section defeats the reason for choosing it. Let the ring remain recognizable around the pumpkin cluster. This also helps separate individual crochet shapes visually. If you already have several textured pumpkins, leaving more exposed base can prevent competing stitches, leaves, and floral pieces from merging into one dense mass.
Removable Accents Can Extend the Display Window
The source incorporates seasonal embellishments that can change the wreath’s mood. For your own door display, think about which parts should remain through the full fall season and which are specifically Halloween-oriented. Keeping temporary accents removable can make the same crochet pumpkin arrangement easier to restyle later without rebuilding the wreath.
Original Tutorial and Creator Credit
Creator: Simply Made by Erin Crochet
3. Crochet Pumpkin Bunting Door Topper
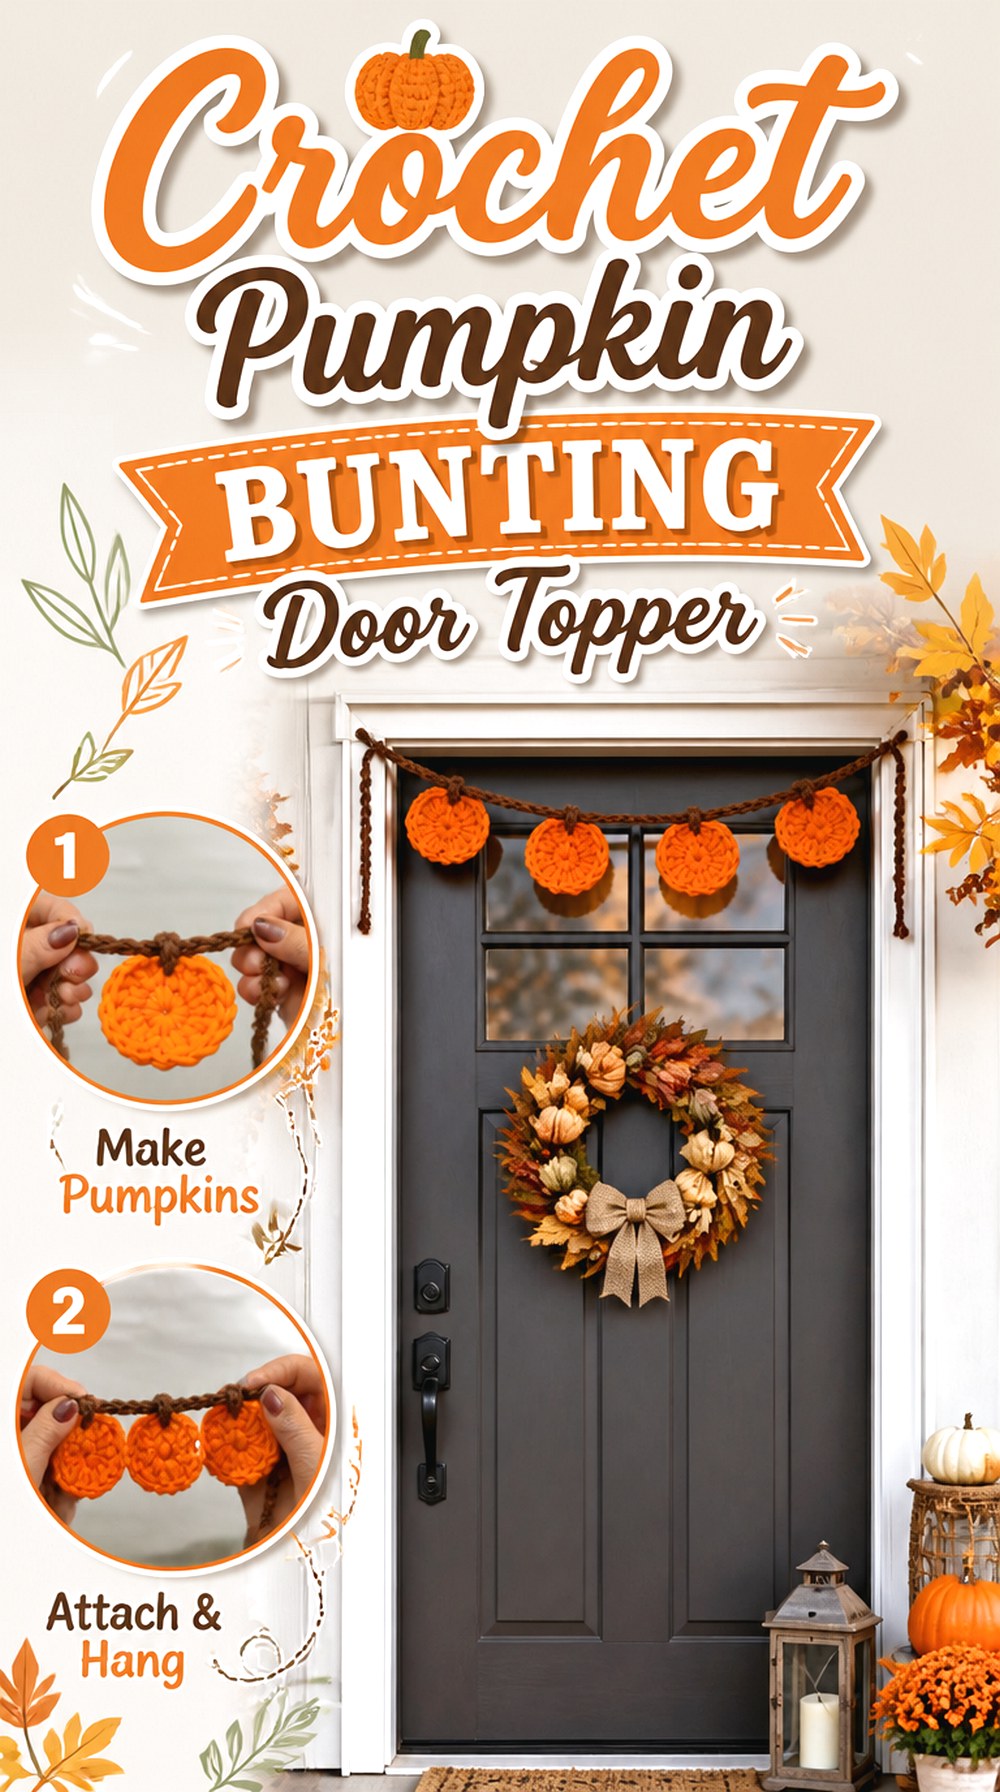
Pumpkin bunting is one of the lightest ways to bring crochet across a door. LoveCrafts demonstrates a strand of small flat pumpkin motifs that can be attached to ribbon, jute, string, or a crocheted chain. Instead of becoming one large centerpiece, the pumpkins repeat horizontally.
That format works especially well above an indoor doorway, across the upper portion of a door, or as part of a wider seasonal entry display. It also gives you more control over spacing than a solid panel. If the strand feels visually crowded, separate the pumpkins farther apart rather than automatically adding more motifs. The negative space between them is part of what keeps bunting readable.
Measure the Span Before Deciding How Many Pumpkins to Display
First choose where the two ends will attach, then measure that span. A narrow door does not need the same number of motifs as a wide archway. Instead of copying a project quantity without checking your space, make one pumpkin, decide how much breathing room you want around it, and use those actual dimensions to estimate the finished strand.
Watch for Sag at the Center
A horizontal strand naturally dips as weight is added. That can look intentional, but a deep sag may place the pumpkins too low or cause them to overlap other door hardware. Temporarily attach the completed motifs and hang the strand before finalizing their positions. Moving the outer pumpkins slightly inward can often create a cleaner curve without changing the crochet pieces themselves.
Original Tutorial and Creator Credit
Creator: LoveCrafts
4. Crochet Pumpkin Vine Garland Door Frame Hanger

Anita Louise Crochet’s tutorial creates a pumpkin garland where repeated pumpkin motifs connect through a curling vine-like strand. That makes this idea more organic than straight bunting. Instead of spacing pumpkins along a plain cord, the connector becomes part of the fall design.
For door decor, the strand can run horizontally or follow part of an indoor door frame. The curling green sections give the eye a continuous path between pumpkins, so the display can feel cohesive without adding leaves or separate filler motifs. Because the garland is flexible, it is also easier to store than a rigid wreath, provided the curls are not crushed or tangled between seasons.
Let the Vine Remain Visible Between Pumpkin Shapes
The connector is an important part of this design. Packing the pumpkins too closely can hide the curved vine and make the whole strand look like a row of orange disks. Lay the garland flat before hanging and adjust the spacing so both the pumpkin silhouettes and the green curls can be seen clearly.
Door Frames Need Secure but Low-Bulk Attachment Points
A flexible garland can shift when a nearby door opens and closes. Choose attachment points that keep the strand away from hinges and the latch side of the frame. Indoors, small removable hooks may suit some surfaces, but always follow the hook manufacturer’s surface and weight guidance rather than assuming an adhesive will hold on every painted or finished material.
Original Tutorial and Creator Credit
Creator: Anita Louise Crochet
5. Crochet Pumpkin Potholder Medallion Door Hanger
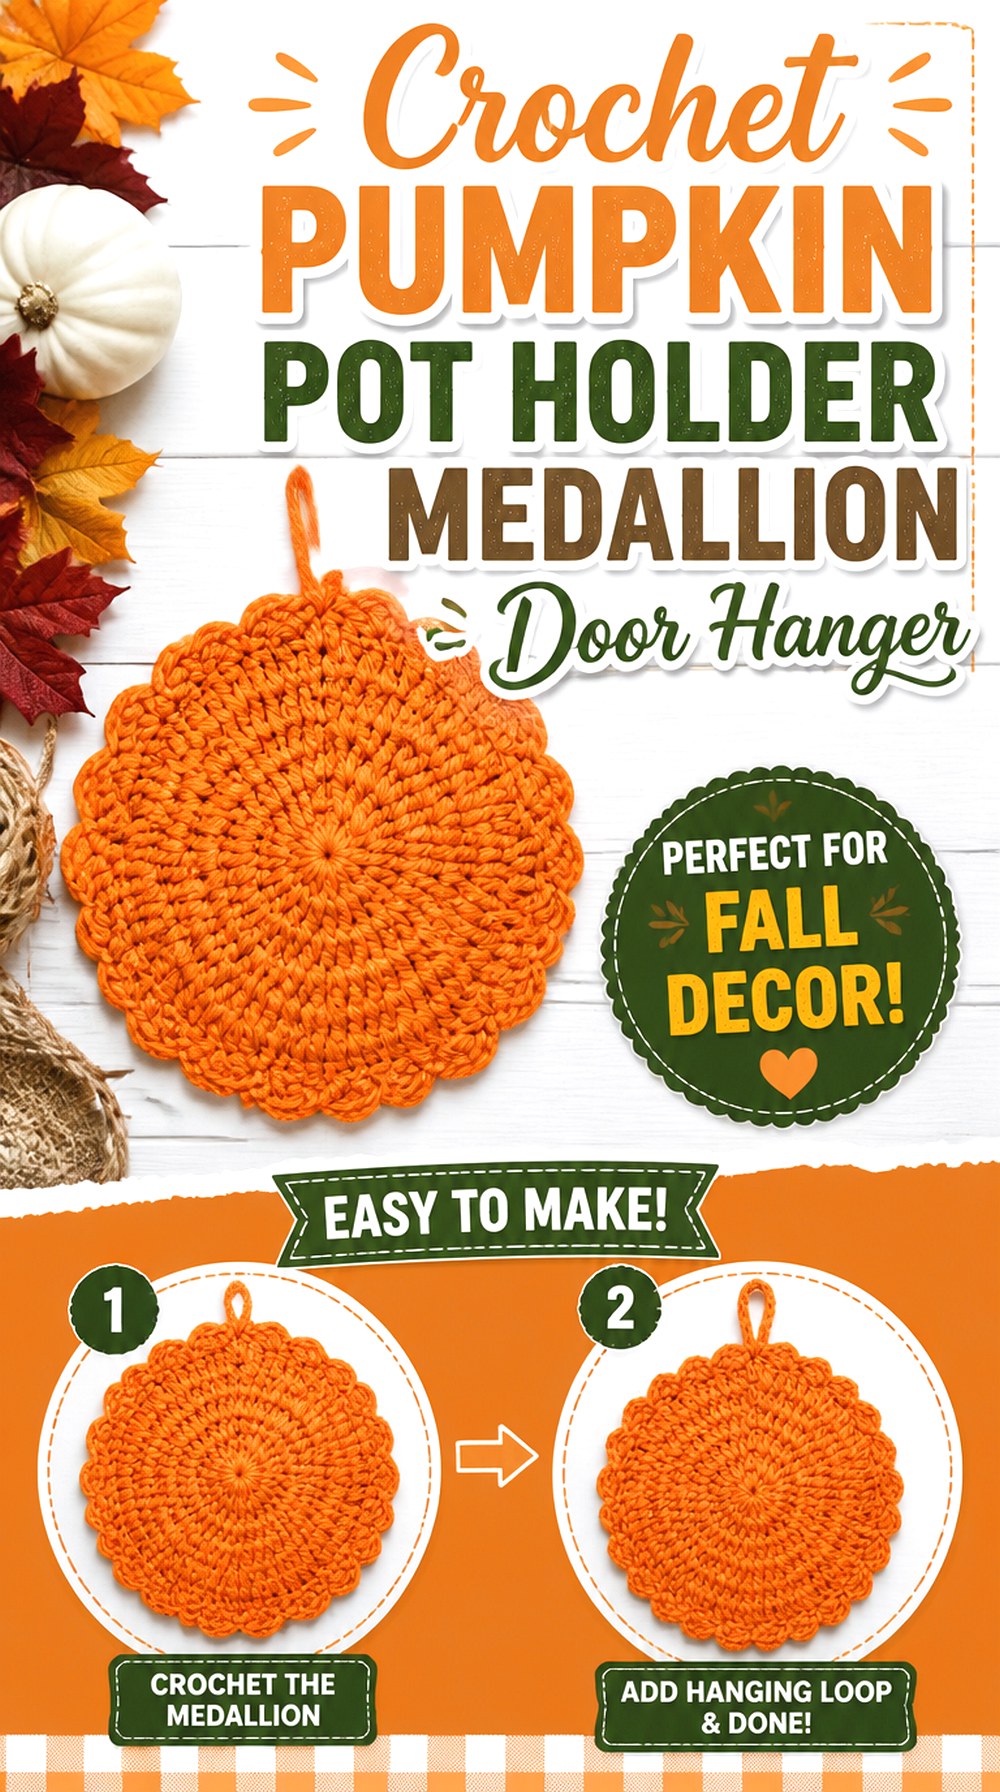
Raji’s Craft Hobby demonstrates a flat pumpkin potholder with its own hanging loop and notes that the finished piece can also serve as autumn wall decor. That makes it an unusually straightforward candidate for a door-hanging adaptation: you are starting with a self-contained, recognizable pumpkin shape rather than assembling multiple components.
Use this style when you want one simple focal point and do not need the depth of a wreath. A flat medallion also stores easily between seasons. For a door, however, judge it as decor rather than assuming the potholder’s original functional properties translate to another use. The important features here are the silhouette, flat construction, border, and hanging loop.
The Outer Edge Determines How Crisp the Pumpkin Looks
On a single flat piece, there is no wreath base or backing to hide uneven edges. Let the completed medallion rest on a flat surface and look at the shape from a few feet away. If the outer edge waves noticeably, check the creator’s finishing guidance before adding any extra decorations or a heavier hanging cord.
One Focal Piece Benefits From Strong Contrast
Because there is only one main shape, the stem and pumpkin body need enough visual separation to remain recognizable at door-viewing distance. You do not need a traditional orange-and-green palette, but nearby values should not be so similar that the top detail disappears. Test your yarn choices by placing them together before committing to the full piece.
Original Tutorial and Creator Credit
Creator: Raji’s Craft Hobby
6. Crochet Pumpkin Granny Square Pennant Door Hanger
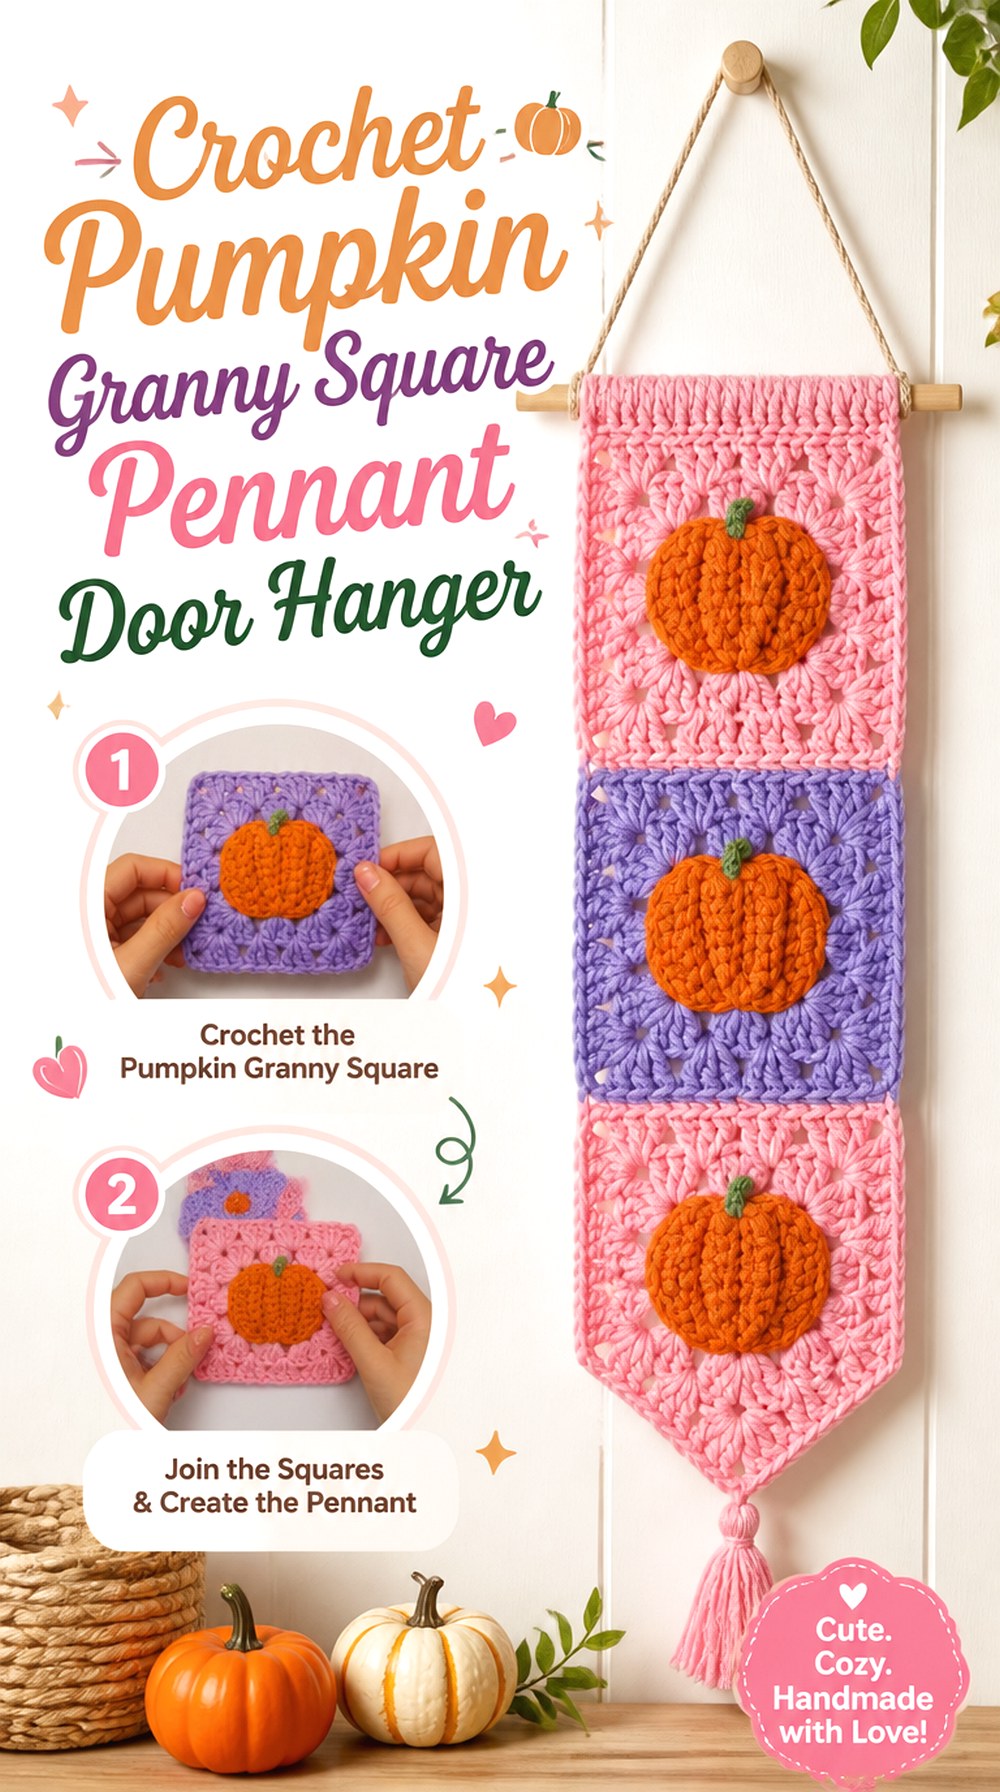
Vivi Crochet’s tutorial produces a pumpkin granny square with the seasonal motif enclosed inside a square border. The source is not a finished door hanging, so the door version here is an adaptation: use one completed square as the focal panel of a small pennant or mount it from a dowel rather than reconstructing the tutorial into a different pattern.
The square format offers a cleaner geometric look than a shaped pumpkin medallion. It also provides straight top and side edges, which can simplify alignment when you want a centered entry decoration. Choose it if your fall decor leans more patchwork, cottage, or granny-square focused than sculptural.
Block the Square Before Planning the Hanger
A square that looks slightly uneven on the hook may settle after appropriate finishing. Follow the yarn’s care information and the creator’s guidance, then judge the actual finished dimensions before choosing a dowel, ring, or backing. Planning from an unblocked motif can leave you with a support that is either too wide or visibly cramped.
Decide Whether the Border Should Blend or Frame
The background around the pumpkin changes the visual effect. A quiet neutral lets the pumpkin dominate, while a stronger contrasting border makes the square itself part of the design. Hold the completed motif against the actual door color if possible. A border that looks distinct on a worktable can disappear against a similarly colored door.
Keep Added Fringe From Competing With the Motif
If you turn the square into a pennant with tassels or fringe, keep those additions secondary. Long fringe increases movement every time the door opens, and visually heavy tassels can pull attention away from the pumpkin. Start shorter than you think you need and evaluate the hanging vertically before adding more.
Original Tutorial and Creator Credit
Creator: Vivi Crochet 🌷
7. Crochet Pumpkin Patch Square Door Panel

Yarnspirations, with Repeat Crafter Me, demonstrates pumpkin-inspired granny squares as part of a larger afghan project. For this door idea, the useful source element is the square construction—not the blanket size or assembly. Several compatible pumpkin squares can instead inspire a narrow vertical panel or compact grid suitable for a door.
This is the most patchwork-oriented idea in the collection. Unlike the previous single-square pennant, the visual effect comes from repetition. That makes layout planning important: two, three, or four motifs arranged carefully can look intentional, while an arbitrary number may create a panel that is too long or wide for the actual door.
Make and Measure One Finished Square First
Do not estimate the final panel from a photograph. Complete and finish one square, measure its actual dimensions, then use that measurement as the basis for planning. For example, if your own finished motif measured 6 inches across, two placed side by side would span about 12 inches before joining and outer finishing are considered. That is planning math, not a replacement for the creator’s pattern.
Repetition Makes Small Size Differences More Obvious
A single slightly distorted square may be easy to overlook. Place several next to one another, however, and mismatched edges become much more noticeable. Compare finished motifs before joining. If one differs significantly, investigate tension, yarn, hook choice, or finishing rather than forcing unequal edges together and hoping the border will hide the difference.
A Narrow Grid Usually Suits a Door Better Than a Blanket-Like Layout
Door decor benefits from leaving usable space around handles and locks. A tall, narrow arrangement often fits more naturally than a broad block of motifs. Mock up the squares on the floor or tape paper templates to the door first. This gives you a realistic sense of scale without committing your completed crochet pieces to a layout too early.
Original Tutorial and Creator Credit
Creator: Yarnspirations
8. Crochet Pumpkin Appliqué Hoop Door Hanger
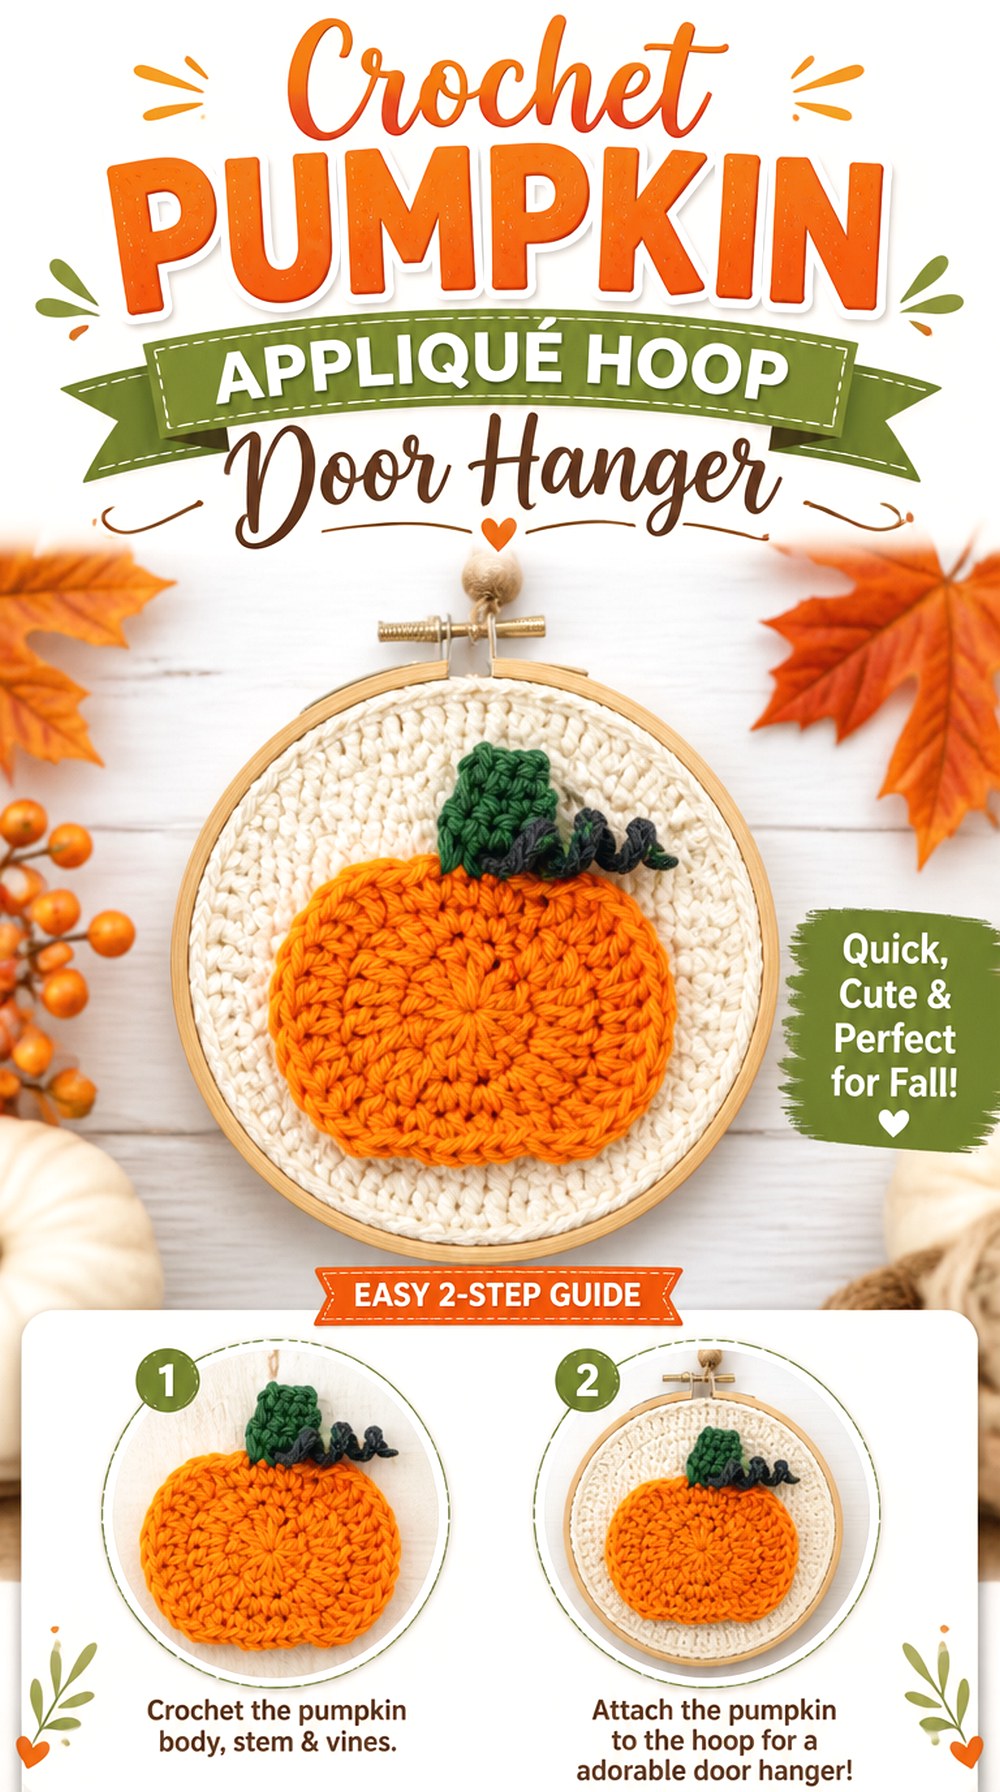
Naztazia’s tutorial teaches a small flat pumpkin appliqué intended to be attached to other crochet items. That makes it a flexible building block rather than a finished door decoration. For a hanging version, place one or several completed appliqués on a separate crocheted or fabric-backed hoop, ring, or panel without altering the creator’s pumpkin instructions.
This approach is useful when you want more open background around the motif. Instead of making the pumpkin itself fill the entire display, the mounting surface becomes part of the composition. It also lets you experiment with asymmetrical placement, such as grouping two pumpkins near one side while leaving the opposite area intentionally open.
Choose the Backing Before Making a Large Motif Collection
The available space on the hoop or panel should determine how many appliqués you need. Make one pumpkin, position it on the proposed background, and evaluate the scale. Several motifs that look small individually can quickly overwhelm a compact ring once leaves, lettering, bows, or other seasonal details are added.
Attachment Should Preserve the Pumpkin Silhouette
An appliqué can distort if only a few points are secured and the remaining edges curl forward. Before final assembly, compare the flat pumpkin with the mounted version. If the shape changes noticeably, review how evenly it is supported. The goal is to keep the recognizable outline without pulling the crochet so tightly that the background puckers.
Original Tutorial and Creator Credit
Creator: naztazia
9. Crochet Pumpkin Doily Medallion Door Hanger

Sirin’s Crochet demonstrates a pumpkin-shaped placemat/doily with a more open, decorative surface than a dense solid medallion. For door use, the completed shape can inspire a flat hanging centerpiece rather than serving as table decor.
This format suits readers who want the pumpkin silhouette to feel lighter and more ornamental. Open spaces in the stitchwork create shadow and contrast against the door, particularly when the door color differs clearly from the yarn. Because the source item was designed to lie flat, first evaluate how well your finished piece maintains its shape when suspended vertically before deciding whether it needs a discreet backing or support.
Door Color Becomes Part of an Openwork Design
With open stitches, the surface behind the crochet remains visible. Hold yarn against the actual door before choosing a shade. A pumpkin worked in a color very close to the door may lose much of its stitch definition from several feet away, while stronger contrast lets the lace-like areas read more clearly.
Test the Medallion Vertically Before Adding a Hanger
A piece that lies beautifully on a table may stretch differently under its own weight. Pin or clip the top temporarily and observe the lower edge. If the silhouette changes, consider a lightweight backing or another support method rather than compensating by pulling the hanging cord tighter.
Original Tutorial and Creator Credit
Creator: Sirin’s Crochet
10. Crochet Jack O’ Lantern Pennant Door Hanger

For a more Halloween-specific entry, Molly’s source project is already a jack-o’-lantern wall-hanging pennant rather than a general pumpkin component. The face makes it immediately different from the harvest wreaths and neutral pumpkin motifs elsewhere in the list.
This idea works particularly well on an interior door, apartment entry, craft-room door, or party backdrop where you want a graphic October focal point rather than decor intended to stretch through Thanksgiving. Because the facial features are essential to the design, give the pennant enough surrounding space for those details to remain readable. Crowding it with additional signs or garlands can make the face less effective.
Facial Contrast Matters More Than Extra Embellishment
A jack-o’-lantern depends on its expression. Before adding bows, leaves, fringe, or surrounding decor, hang the finished panel and check whether the eyes and mouth remain clear at normal viewing distance. Strong pumpkin-to-face contrast generally does more for recognition than adding another layer of seasonal decoration around the edge.
Pennant Corners Can Curl When the Hanging Tension Is Uneven
Flat wall pieces look cleaner when their top support does not pull harder on one side. Check that the hanging points are evenly positioned and that the piece is fully finished according to the creator’s guidance before displaying it. If a lower corner rolls forward, deal with the fabric shape first rather than trying to hide the problem behind extra trim.
Halloween Styling Has a Shorter Seasonal Window
A carved-face motif reads more specifically as Halloween than an undecorated pumpkin. That is useful if you want a strong October theme, but less flexible if you keep fall decor up into November. If seasonal longevity matters, compare this idea with the plain pumpkin square, medallion, or wreath options before deciding which project deserves the most prominent door.
Original Tutorial and Creator Credit
Creator: Molly
11. Crochet Mini Pumpkin Keychain Cluster Door Charm
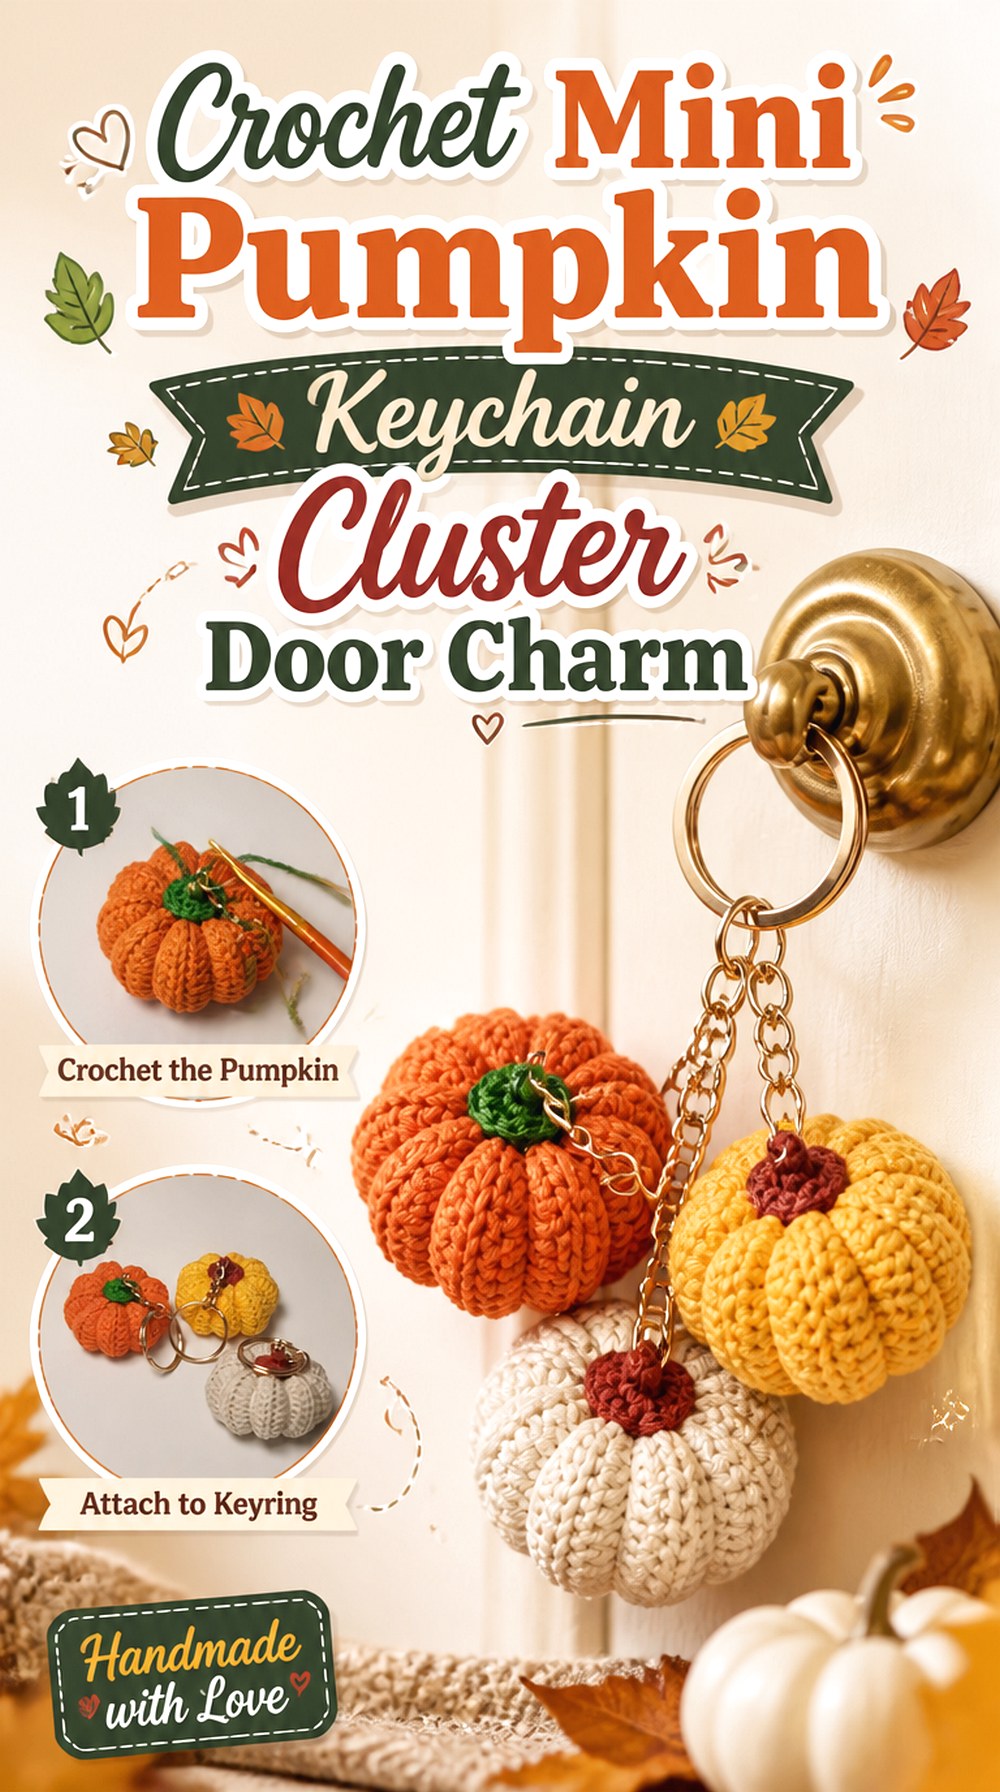
Crochet Craftsman demonstrates a small stuffed pumpkin keychain and shows the attachment of a keychain ring. Instead of using one on keys, several finished pumpkins can inspire a compact cluster suspended from a stronger central hanging point on an interior door or cabinet.
The key difference here is scale. These pumpkins are meant to remain small enough to function as charms, so a cluster provides dimensional texture without becoming as bulky as a full-size stuffed pumpkin swag. Keep the arrangement short near door hardware; several dangling pieces can swing noticeably when the door moves, especially if they hang from long cords.
Multiple Small Pumpkins Need a Clear Focal Length
Randomly staggered cords can make a cluster look tangled. Arrange the pumpkins on a table first and decide which will sit highest, lowest, and in the center. Small differences in hanging length are enough to reveal separate shapes. Excessive variation can make the bottom pumpkin swing into the door or neighboring hardware.
Hardware Adds Weight to Tiny Crochet Pieces
A keychain ring is part of the source project, but a door cluster may contain several metal attachments if every pumpkin is left unchanged. Consider the combined weight and how the pieces will connect before making a large set. You may prefer fewer finished charms rather than creating a dense bundle whose hardware outweighs the visual benefit.
Original Tutorial and Creator Credit
Creator: Crochet Craftsman
12. Crochet Mini Stuffed Pumpkin Cascade Door Swag

VivCrochets demonstrates a small three-dimensional crochet pumpkin finished with a stem. The source project is freestanding fall decor rather than a door hanging, so this idea uses several completed pumpkins as components in a vertical swag.
A cascade differs from the keychain cluster because the pumpkins can be arranged along one central line rather than gathered at the same point. That creates a taller, more deliberate silhouette. It can work on an interior door, protected hook, or wall beside an entry. The main planning question is weight: every stuffed pumpkin adds more pull to the top attachment, so build the arrangement gradually and test it after each addition.
Use Spacing to Keep the Pumpkins From Compressing One Another
If stuffed pumpkins sit directly on top of one another, their forms can flatten and the individual stems may disappear. Leave enough space for each silhouette to read independently. Before permanently connecting the cascade, hang the pumpkins temporarily and view them straight on rather than judging the arrangement only while it lies on a table.
Stuffing Level Changes More Than Softness
A very firm pumpkin and a softer pumpkin can have noticeably different silhouettes even when crocheted from the same instructions. Follow the creator’s shaping guidance and aim for consistency if several pumpkins will appear in one vertical display. Large variations in firmness can make one shape look out of scale with its neighbors.
Keep the Lowest Element Away From Handles
Vertical decor naturally moves toward the center of a door. Before fixing the finished length, open and close the door several times with a temporary mock-up. The bottom pumpkin should not land directly against a knob, lever, lock, or mail slot where repeated contact could distort the crochet or interfere with normal door use.
Original Tutorial and Creator Credit
Creator: VivCrochets
13. Crochet Smiling Pumpkin Plush Door Charm
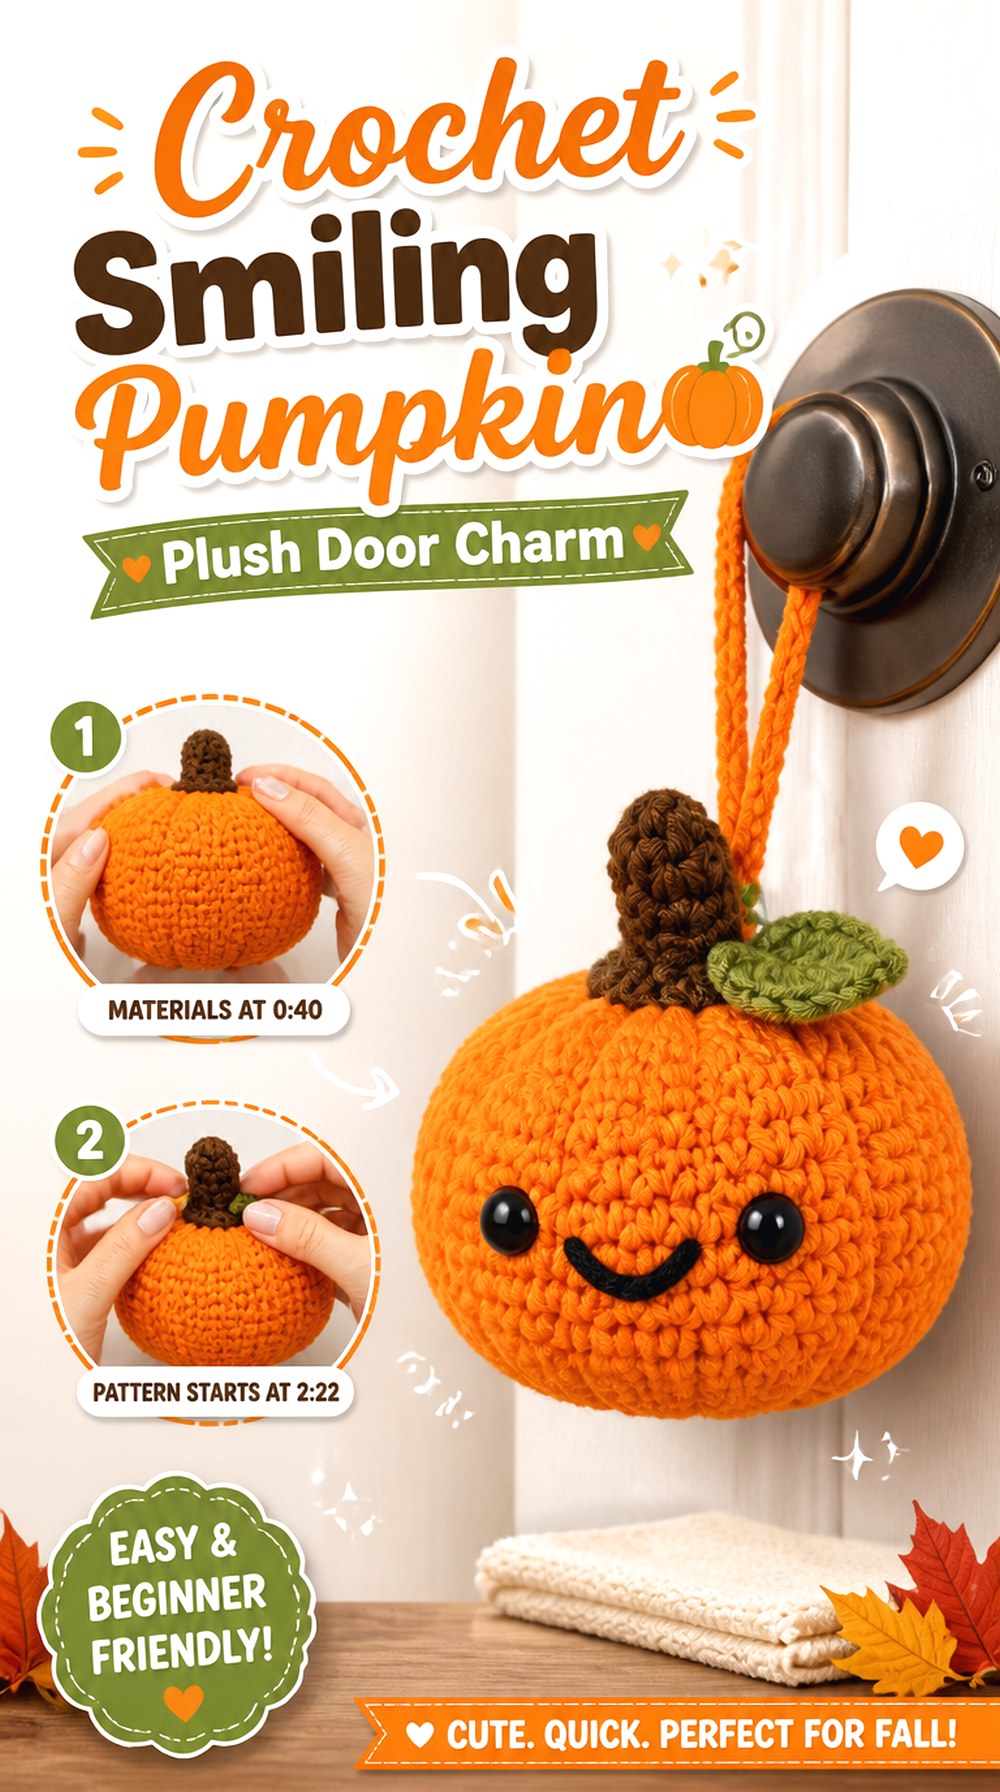
Hooked by Robin’s amigurumi pumpkin includes a cheerful face as well as the dimensional pumpkin shape. That gives this door charm a character-focused look rather than the botanical or farmhouse feeling of the other stuffed pumpkin ideas.
A single smiling pumpkin can become a soft focal charm beneath a short hanger or small decorative sign. It is particularly suited to playful Halloween decorating, craft-room doors, or family spaces. The source uses safety eyes, so placement matters if the finished item will be accessible to small children or pets. For those settings, consider keeping it out of reach or choosing an alternative facial treatment appropriate to the intended use.
Let the Expression Remain the Main Detail
Once a pumpkin has a face, additional bows, lettering, ribbons, and leaves can compete with it. Hang the finished pumpkin alone first and decide whether it actually needs more decoration. A simple cord or compact topper may be enough, especially if the eyes and mouth already create a strong focal point.
Small Hard Parts Need Thoughtful Placement
The source project uses safety eyes. A decorative door charm is not automatically a toy, but small detachable components still deserve consideration in homes with young children or pets. Place the hanging out of reach or use another suitable facial solution rather than assuming the original component choice is appropriate for every environment.
Dimensional Faces Can Rotate Away From View
A plush suspended from one narrow point may slowly turn sideways. Before finishing the door attachment, test how the pumpkin hangs naturally. A wider connection or two balanced attachment points can help orient a decorative face forward, provided they can be added without damaging or distorting the completed crochet.
Original Tutorial and Creator Credit
Creator: Hooked by Robin
14. Crochet No Sew Pumpkin and Vine Door Swag
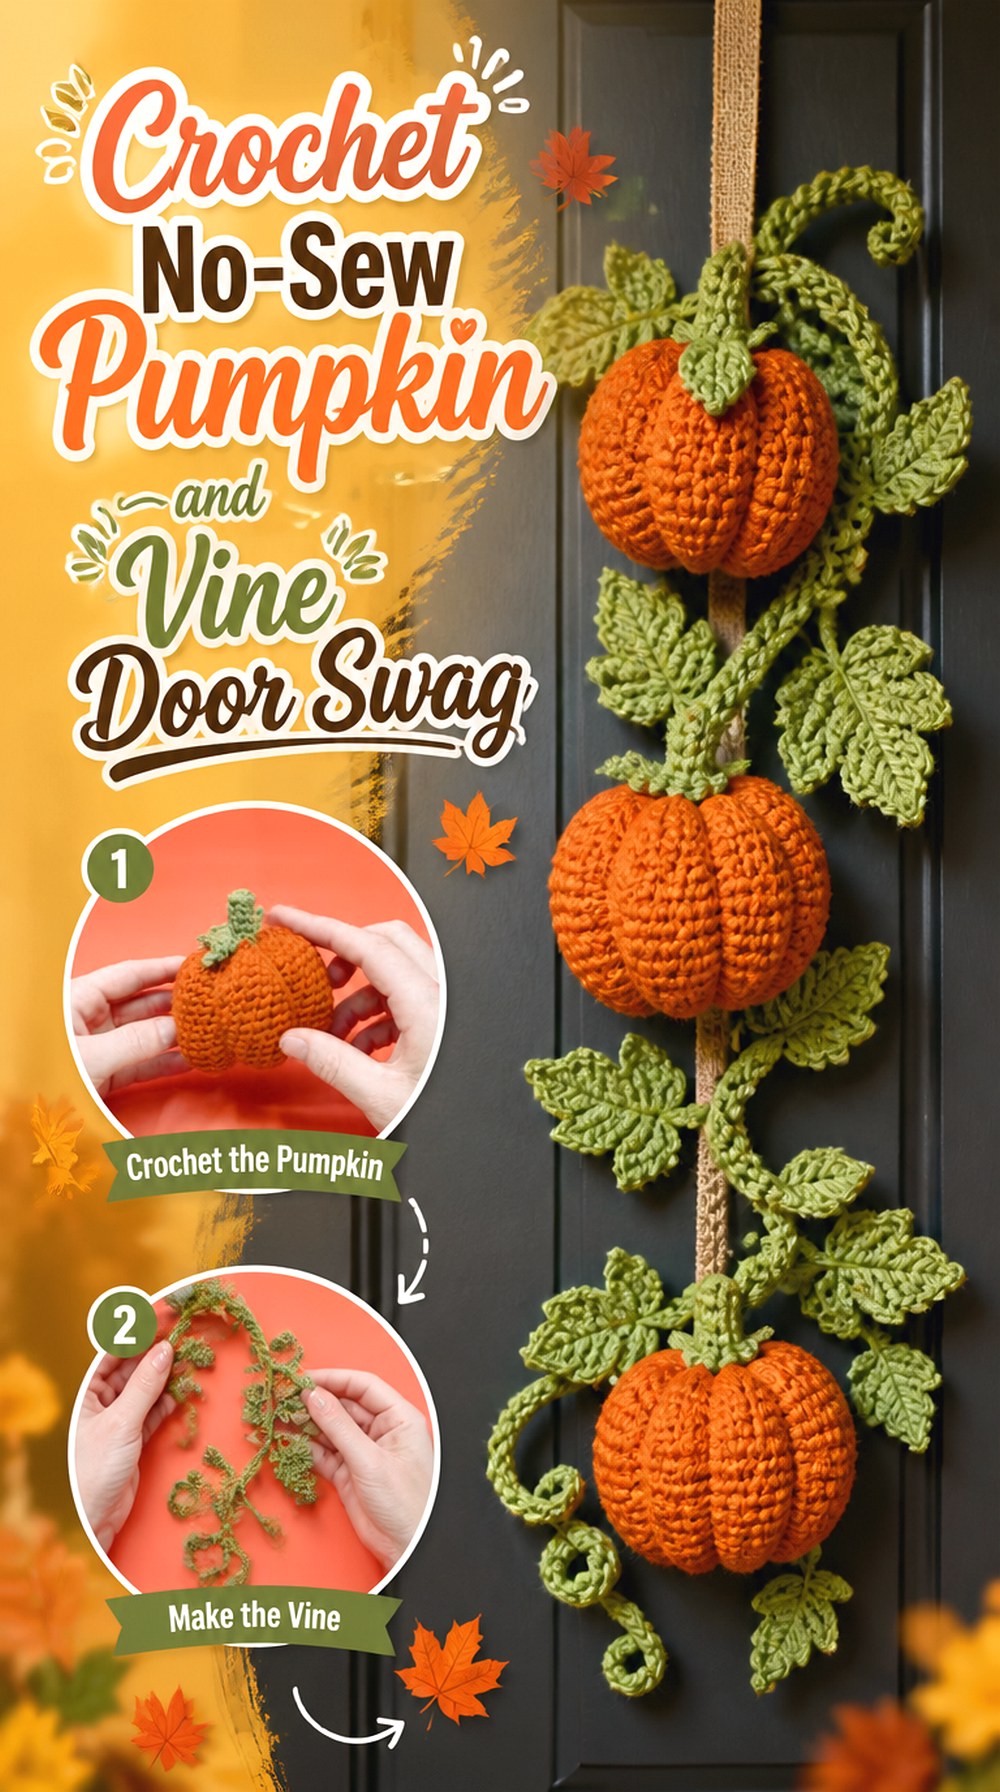
Club Crochet demonstrates a customizable pumpkin construction that incorporates a stem, curling vine, and leaf, with the pumpkin itself designed around a no-sew approach. Those botanical details make one completed pumpkin visually complete enough to serve as the centerpiece of a simple swag.
Instead of grouping several pumpkins, this idea emphasizes one larger dimensional form. Suspend it beneath a short topper, bow, or compatible crocheted hanger and let the vine and leaf provide the surrounding movement. Because the tutorial’s finished pumpkin is three-dimensional, compare its depth with your available door clearance before deciding that a single large focal piece is more practical than several flatter motifs.
A Vine Already Creates Movement Around the Pumpkin
The curling vine reduces the need for extra hanging strands. Let it remain visible rather than burying it beneath ribbon or artificial greenery. When positioning the swag, check that the vine does not catch on the door frame or swing into a handle. Its shape should function as a decorative accent rather than an obstruction.
One Large Pumpkin Concentrates the Weight
A single central pumpkin may be simpler to arrange, but all of its weight pulls from the same top connection. Test the finished piece from the exact hanger you plan to use before adding extra decoration. If the attachment stretches or the pumpkin tilts, solve that structural issue first instead of relying on more embellishments to stabilize it.
Scale the Swag to the Empty Area of the Door
A central stuffed pumpkin looks strongest when it occupies the available visual space without interfering with normal use. Make a paper template based on your intended overall dimensions and tape it temporarily to the door. This gives you a quick sense of whether the design should stay compact or whether the surrounding topper can extend farther.
Original Tutorial and Creator Credit
Creator: Club Crochet
15. Crochet Ribbed Pumpkin Trio Door Hanger
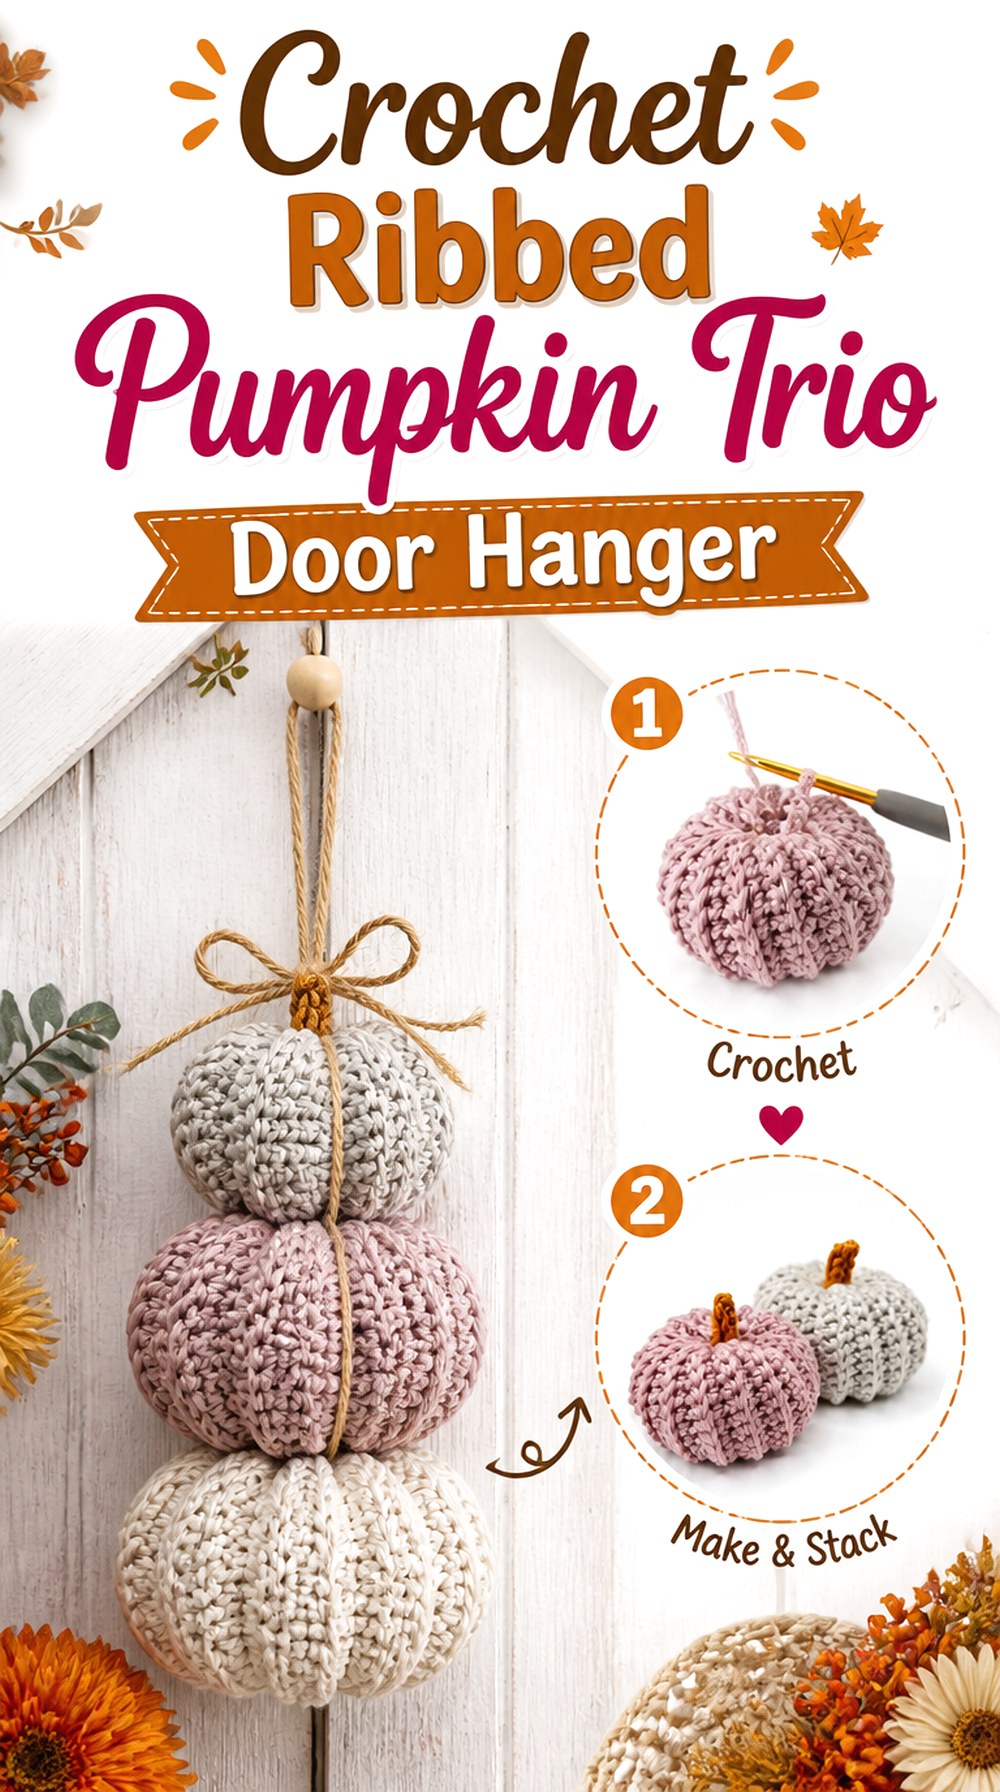
Bella Coco’s tutorial creates a ribbed stuffed pumpkin from a flat crocheted piece that is assembled and shaped afterward. The pronounced vertical texture makes this construction visually different from the round-worked amigurumi pumpkins in the previous ideas.
For a door hanger, make a coordinated trio and arrange them at three different vertical positions or in a compact triangular cluster. The source construction is intended as standalone pumpkin decor, so the hanging arrangement is an adaptation. This format works particularly well when you want texture to be visible from a distance without using facial details, square motifs, or a rigid wreath base.
Ribbing Creates Its Own Decorative Pattern
The raised vertical lines already give the pumpkin a strong surface design, so complicated multicolor embellishment is not necessary. When choosing yarn for a trio, consider whether the stitch definition remains visible in your lighting. Very fuzzy fibers can soften pronounced ridges, while smoother yarns may show them more clearly.
Group Different Sizes Only After Checking Their Combined Weight
A trio feels more dynamic when the pumpkins are not visually identical, but changing yarn or hook size also changes weight and density. Build the hanging arrangement after the pumpkins are complete rather than guessing from the intended sizes. The heaviest pumpkin will often sit more securely closer to the main support than at the end of a long dangling cord.
Original Tutorial and Creator Credit
Creator: Bella Coco
16. Crochet Pumpkin Coaster Cascade Door Hanger

Knitting Love demonstrates a flat pumpkin coaster with a clearly shaped seasonal silhouette. Instead of using the finished pieces on a table, this door idea arranges several flat pumpkins down a vertical cord or narrow backing.
The effect is lighter than the stuffed cascade and more playful than a single medallion. Because each pumpkin remains separate, you can vary the space between motifs to suit a tall door without needing to enlarge the source project. The flat construction also makes storage straightforward. Keep in mind that this is an adaptation of a coaster tutorial, so any hanging method or arrangement should be treated as your separate display decision rather than part of the creator’s original instructions.
Flat Motifs Still Need Anti-Twist Planning
Lightweight pumpkins can rotate more readily than heavier stuffed shapes. Lay out the cascade and decide whether each motif will attach at one point or be stabilized against a narrow backing. If the front of the pumpkin needs to remain visible at all times, test the hanging in moving air or while gently opening the door.
Repetition Works Better With Deliberate Gaps
Equal spacing gives the cascade a clean graphic rhythm, while graduated spacing can make the design feel more informal. Choose one approach before final assembly. When the pumpkins are too close, stems and edges overlap; when they are too far apart, the strand may feel disconnected. Mock up the full length before securing anything permanently.
Which Crochet Pumpkin Door Hanging Format Fits Your Door?
Choose a wreath when you have enough depth and want the strongest single statement. The MJ’s and Simply Made by Erin options both use rigid bases, but the former creates a fuller harvest arrangement while the grapevine version benefits from more visible negative space.
For limited clearance, look first at the potholder medallion, granny-square pennant, pumpkin panel, appliqué hoop, doily medallion, jack-o’-lantern pennant, or flat coaster cascade. Bunting and garlands are useful when you would rather spread the fall theme across the top or edges of an entry.
Dimensional pumpkin swags create the most texture but demand more attention to weight and movement. The keychain cluster stays compact, while the ribbed trio and larger no-sew pumpkin make stronger three-dimensional focal points.
Conclusion
The most suitable crochet pumpkin door hanging depends less on color and more on how the finished piece occupies the door. Choose a wreath for structure and visual impact, bunting or garland for a wider lightweight display, a square or medallion when door clearance is tight, or dimensional pumpkins when texture matters more than a flat profile.
For distinctly Halloween decor, the jack-o’-lantern pennant and smiling pumpkin charm stand apart. For a longer fall season, plain pumpkins, granny squares, wreaths, and botanical swags transition more easily beyond October. Once you choose the format, use the original tutorials for their exact crochet construction details and keep your separate door-hanging adaptation focused on secure support, sensible scale, and clear spacing.
Frequently Asked Questions
Can a crochet pumpkin door hanging stay outside all fall?
Do not assume ordinary crochet decor is weather-resistant. Yarn can be affected by moisture, direct sun, dust, and repeated exposure, and the tutorials in this roundup do not establish one universal outdoor-care rule. Check the fiber manufacturer’s care information and any creator guidance for the specific project. When that information is absent, an interior door or sheltered entry is the more cautious display location.
Which pumpkin door hanging works best behind a storm door?
Flat designs are generally the easiest place to start because they occupy less depth. Consider a granny-square pennant, patchwork panel, appliqué display, doily medallion, jack-o’-lantern pennant, potholder-style medallion, or flat pumpkin cascade. Measure the actual gap between the primary door and storm door before making the project, because hinges, handles, and trim can reduce usable clearance.
Can I combine pumpkin motifs from different tutorials?
You can create your own display using separately made motifs, but do not assume different patterns will produce matching dimensions or compatible edges. Complete and finish one motif from each source first, then compare their actual measurements, thickness, and visual scale. For joined panels, mismatched edges matter much more than they do on a wreath where separate pumpkins can simply be spaced independently.
How can I stop a crochet door hanging from twisting?
First identify whether the twisting comes from an off-center attachment or from a very light hanging element. Test the piece from its final top point before permanently finishing it. Wider or two-point support can stabilize some flat panels, while a rigid backing may help light motifs. For wreaths and swags, redistribute heavy elements until the arrangement hangs naturally in the intended orientation.
What yarn characteristics are useful for flat pumpkin door decor?
Look for the qualities the particular design needs rather than one universal fiber recommendation. A defined square, appliqué, or medallion benefits from fabric that holds its outline, while a softer yarn may create more drape in bunting. Very fuzzy yarn can obscure small facial or stitch details. Always compare your yarn with the source requirements and check its care instructions before substituting.
How should crochet pumpkin door hangings be stored after fall?
Clean the piece only according to the relevant yarn and project-care information, then make sure it is fully dry before storage. Flat banners and motifs can usually be stored without sharp folds that distort their shape. Wreaths and stuffed pumpkin swags need more space so they are not compressed. Keep long garlands and bunting organized rather than tightly tangled around other decorations.