14 Crochet Sweater Vest Ideas for Layering, Texture, and Fit
Crochet sweater vests can look surprisingly different once neckline, length, fabric density, color placement, and construction are taken into account. A fitted cropped vest behaves differently from a boxy pullover, while a granny square or patchwork design brings joining and motif placement decisions that do not apply to a plain ribbed garment.
The 14 ideas below range from understated crewnecks and V-necks to checkerboard, argyle, mesh, floral, and turtleneck designs. Along with showing different finished styles, this guide focuses on the decisions that affect whether a vest actually works in your wardrobe: armhole room, shoulder width, garment weight, drape, motif alignment, neckline finishing, and the amount of clothing you want to layer underneath.
Quick List
- Crochet Side-to-Side Ribbed Crewneck Sweater Vest
- Crochet Clean-Line V-Neck Sweater Vest
- Crochet Cropped Stripe-Trim Sweater Vest
- Crochet Modular Granny Square Sweater Vest
- Crochet Two-Tone Checkerboard Sweater Vest
- Crochet Preppy Argyle Sweater Vest
- Crochet Scallop-Edged Button-Up Sweater Vest
- Crochet Contrast-Trim Everyday Sweater Vest
- Crochet Boxy Pullover Sweater Vest
- Crochet High-Neck Turtleneck Sweater Vest
- Crochet Open Mesh Unisex Sweater Vest
- Crochet Color-Block Patchwork Sweater Vest
- Crochet Floral Motif Sweater Vest Top
- Crochet Chunky Knit-Look Sweater Vest
Decide How You Want the Vest to Fit Before Choosing the Surface Design
Sweater-vest fit is not determined by bust width alone. Shoulder coverage, armhole depth, body length, neckline opening, and intended layering all affect the result. A vest worn over a fitted tee can sit closer to the body, while one intended for button-down shirts or thicker tops generally needs enough room to prevent the underlayer from bunching around the armholes and side seams.
Instead of assuming your usual ready-to-wear size will translate directly, compare the tutorial’s finished measurements or sizing notes with a vest or sweater you already like. Also decide whether you want a close, standard, boxy, or intentionally oversized silhouette. Changing width without reconsidering shoulders and armholes can leave a vest roomy through the body but uncomfortable at the upper chest.
Neckline and Armhole Shape Control How the Vest Layers
The neckline is one of the quickest ways to narrow these ideas down. A V-neck exposes more of a blouse, tee, or shirt collar, while a crewneck creates a more continuous crochet surface across the upper chest. A turtleneck adds considerably more visual and physical coverage, and button-front designs allow the vest to be styled open as well as closed.
Armholes deserve the same attention. Extra-deep openings can accommodate fuller sleeves but may expose more of the garment underneath. Smaller openings can create a cleaner outline but may pull if the base layer is bulky. Before finishing armhole edging, check the developing garment over the type of clothing you actually intend to wear with it rather than evaluating it only over a thin top.
Yarn Weight, Drape, and Texture Can Change the Same Silhouette
A thick, dense crochet fabric usually creates a more substantial vest than an open mesh or lighter motif construction. That difference affects more than warmth. Heavier fabric can make shoulders feel wider, increase the weight hanging from seams, and give a cropped vest more structure. A lighter fabric may drape closer to the body but can stretch differently around openings.
When substituting yarn, compare more than the label’s weight category. Make a swatch, wash or block it as appropriate for the fiber, and evaluate its dimensions, flexibility, thickness, and recovery. For granny squares, checkerboard panels, and other designs where alignment matters, small gauge differences can accumulate across the garment. Confirm the fabric first rather than trying to correct a major size difference during assembly.
1. Crochet Side to Side Ribbed Crewneck Sweater Vest

This sweater vest takes a texture-first approach. VivCrochets’ tutorial creates a ribbed crewneck vest with shaping incorporated into a side-to-side construction rather than relying on a flat, uninterrupted rectangular body. The higher neckline gives it more upper-chest coverage than the V-neck projects below, while the pronounced vertical-looking ribbed surface keeps a single-color version visually interesting. It is a useful direction for someone who wants a sweater-like finish without introducing motifs or complicated color placement. Because the fabric itself is the main feature, consistent shaping and clean edging become especially noticeable in the finished garment.
Side-to-Side Construction Changes Where You Check Length
When fabric is worked in an orientation different from a conventional bottom-up panel, it is important to understand which developing dimension controls garment length and which controls width. Do that before making substantial size changes. Compare the work against the tutorial’s construction diagram or finished measurements instead of assuming that adding more repetitions will change the same dimension it would in a bottom-up vest.
A Crewneck Needs to Suit the Intended Underlayer
This neckline gives relatively full coverage, so think about what will sit beneath it. A fitted tee or slim long-sleeved top creates less competition around the neck than a bulky shirt collar. Before completing the final neckline treatment, confirm that the opening sits comfortably and that the edge does not pull inward enough to distort the shoulders.
Ribbing Makes Small Asymmetries Easier to See
Strong directional texture naturally draws the eye along the garment. If the two armholes or shoulder areas develop differently, the ribbed lines can make that imbalance more obvious. Lay the vest flat during construction and compare corresponding edges before finishing. Correcting an alignment issue before attached ribbing or final seaming is usually cleaner than trying to disguise it afterward.
2. Crochet Clean Line V Neck Sweater Vest

A V-neck shifts the focus away from all-over surface detail and toward proportion. Krafty Station’s tutorial shows a straightforward V-neck crochet vest made with DK-weight acrylic yarn, giving readers a clear reference for a more traditional sleeveless sweater shape. Compared with the crewneck above, this style leaves substantially more of an underlayer visible at the center front. That makes the garment especially relevant for shirt layering, but it also means neckline symmetry becomes one of the most important visual checkpoints. The uncluttered body makes color, hem length, and neckline depth easy areas to personalize without changing the fundamental sweater-vest identity.
Let the V-Neck Frame What You Plan to Wear Under It
Think of the neckline and underlayer as one composition. If you want a shirt collar to remain visible, compare the V with that shirt before committing to final edging. If the vest will mostly be worn over plain tees, a different neckline depth may feel balanced. Avoid changing the V casually without considering how that adjustment also affects the length and width of the shoulder sections.
Check Both Neckline Slopes Before Joining the Shoulders
Even minor differences between the two sides of a V can become obvious once edging outlines the opening. Lay the front flat and compare the slopes, shoulder widths, and transition into the armholes. This is a more useful checkpoint than waiting until the entire garment is assembled, when correcting one side can require disturbing several finished areas.
Armhole Room Should Match the Layer, Not Just the Body
The vest may fit correctly around the torso yet still feel restrictive over a shirt if the armhole opening is too close. Test the developing shape over the thickest type of top you realistically expect to wear beneath it. Look for pulling toward the side seam or shoulder rather than judging comfort only while standing still.
Original Tutorial and Creator Credit
Creator: Krafty Station
3. Crochet Cropped Stripe Trim Sweater Vest

Yarnalina’s cropped sweater vest introduces two changes at once: a shorter body and deliberate stripe detail. The finished shape is more compact than a standard-length sweater vest, so the hem becomes part of the styling rather than simply the lower boundary of the garment. Simple ribbing helps define the edges, while the color changes give the body a graphic element without turning it into full checkerboard or argyle colorwork. This is a practical option to compare if you like sweater vests with high-waisted bottoms, dresses, or longer underlayers where the contrast between two hem lengths becomes part of the outfit.
Choose the Cropped Hem Position Before Adjusting Width
A vest can appear cropped on one wearer and almost standard length on another, so use your own preferred hem position rather than copying the appearance on a thumbnail. Compare the intended length against the clothing you will pair with it. If you alter the body length, also check where the stripe sequence ends so the final color placement still feels intentional.
Let the Stripe Pattern Support the Shorter Shape
A compact garment has less vertical space for repeated design elements. Adding too many extra color bands can visually divide an already short body into small sections. Before changing the palette, sketch or lay out the intended sequence and decide whether the stripes are the focal point or merely an accent around a largely solid vest.
Original Tutorial and Creator Credit
Creator: Yarnalina
4. Crochet Modular Granny Square Sweater Vest

This project replaces continuous panels with joined crochet motifs. The tutorial from crochetwithprachi shows a vest assembled from granny squares, creating clear blocks across the surface and making color arrangement part of the garment’s construction. That modular format is very different from a plain V-neck or ribbed vest because the size of every completed square influences the eventual panel dimensions. It also makes the project well suited to planned palettes or scrap-style color combinations. The major decision is not simply which square looks attractive by itself, but whether the blocked motifs form a balanced wearable when repeated around the neckline, shoulders, armholes, and side seams.
Block One Reference Square Before Planning the Full Layout
A motif that changes size after blocking can throw off a complete vest grid. Finish and block a representative square first, then use that actual measurement for layout planning. As a simple example, four blocked squares measuring 5 inches across would span about 20 inches before joins, edging, and garment ease are considered. That is planning math, not a substitute for the tutorial’s sizing instructions.
Treat the Neckline and Armholes as Missing Pieces in the Grid
Motif layouts become more complicated around openings because a wearable is not a solid rectangle. Lay out the proposed front and back at full scale and mark the neckline and armholes before joining. This helps reveal whether a square corner will land awkwardly at an opening or whether the shoulder area will become narrower than intended.
Joining Adds Both Structure and Visual Lines
The join is not invisible simply because the motifs match in size. Its thickness, flexibility, and color can change the surface and the way the vest hangs. If you adapt the palette, decide whether the joining yarn should blend into the squares or deliberately outline them. Either choice works better when made before assembly rather than halfway through the garment.
Original Tutorial and Creator Credit
Creator: crochetwithprachi
5. Crochet Two Tone Checkerboard Sweater Vest

A checkerboard vest creates its pattern through repeated blocks rather than separately crocheted motifs. HayHay Crochet’s tutorial uses contrasting color sections across a boxy sweater-vest body, producing a strong graphic effect while keeping the garment itself relatively straightforward. The source also provides written sizing support, which is particularly useful for colorwork because body shaping and color placement have to be tracked at the same time. Compared with granny-square patchwork, the checks read as one continuous panel, so an interrupted or shifted block near the neckline can be more noticeable.
Decide How Much Contrast You Want Before Buying Yarn
Checkerboard does not require maximum contrast. Two strongly different colors create crisp, obvious blocks, while colors closer in value produce a quieter pattern. Look at the pair together from several feet away. If the squares disappear into each other, that may be exactly the subtle effect you want—but it is better to decide deliberately than discover it after completing a panel.
Neckline Shaping Can Interrupt the Checker Rhythm
The straight body gives the pattern regularity, while decreases and shoulder shaping naturally remove portions of the grid. Study where the checks meet those shaped edges before changing block size or stripe width. Enlarging the color blocks may look attractive through the torso but leave too little room for a balanced transition near the shoulders.
Treat Front and Back Alignment as a Design Choice
The checks do not necessarily have to form one uninterrupted pattern around the side seams, but the relationship should look deliberate. Before assembly, place the panels beside each other and compare the color sequence at corresponding edges. If the pattern begins and ends differently, decide whether that contrast is acceptable before permanently joining the sides.
Original Tutorial and Creator Credit
Creator: HayHay Crochet
6. Crochet Preppy Argyle Sweater Vest
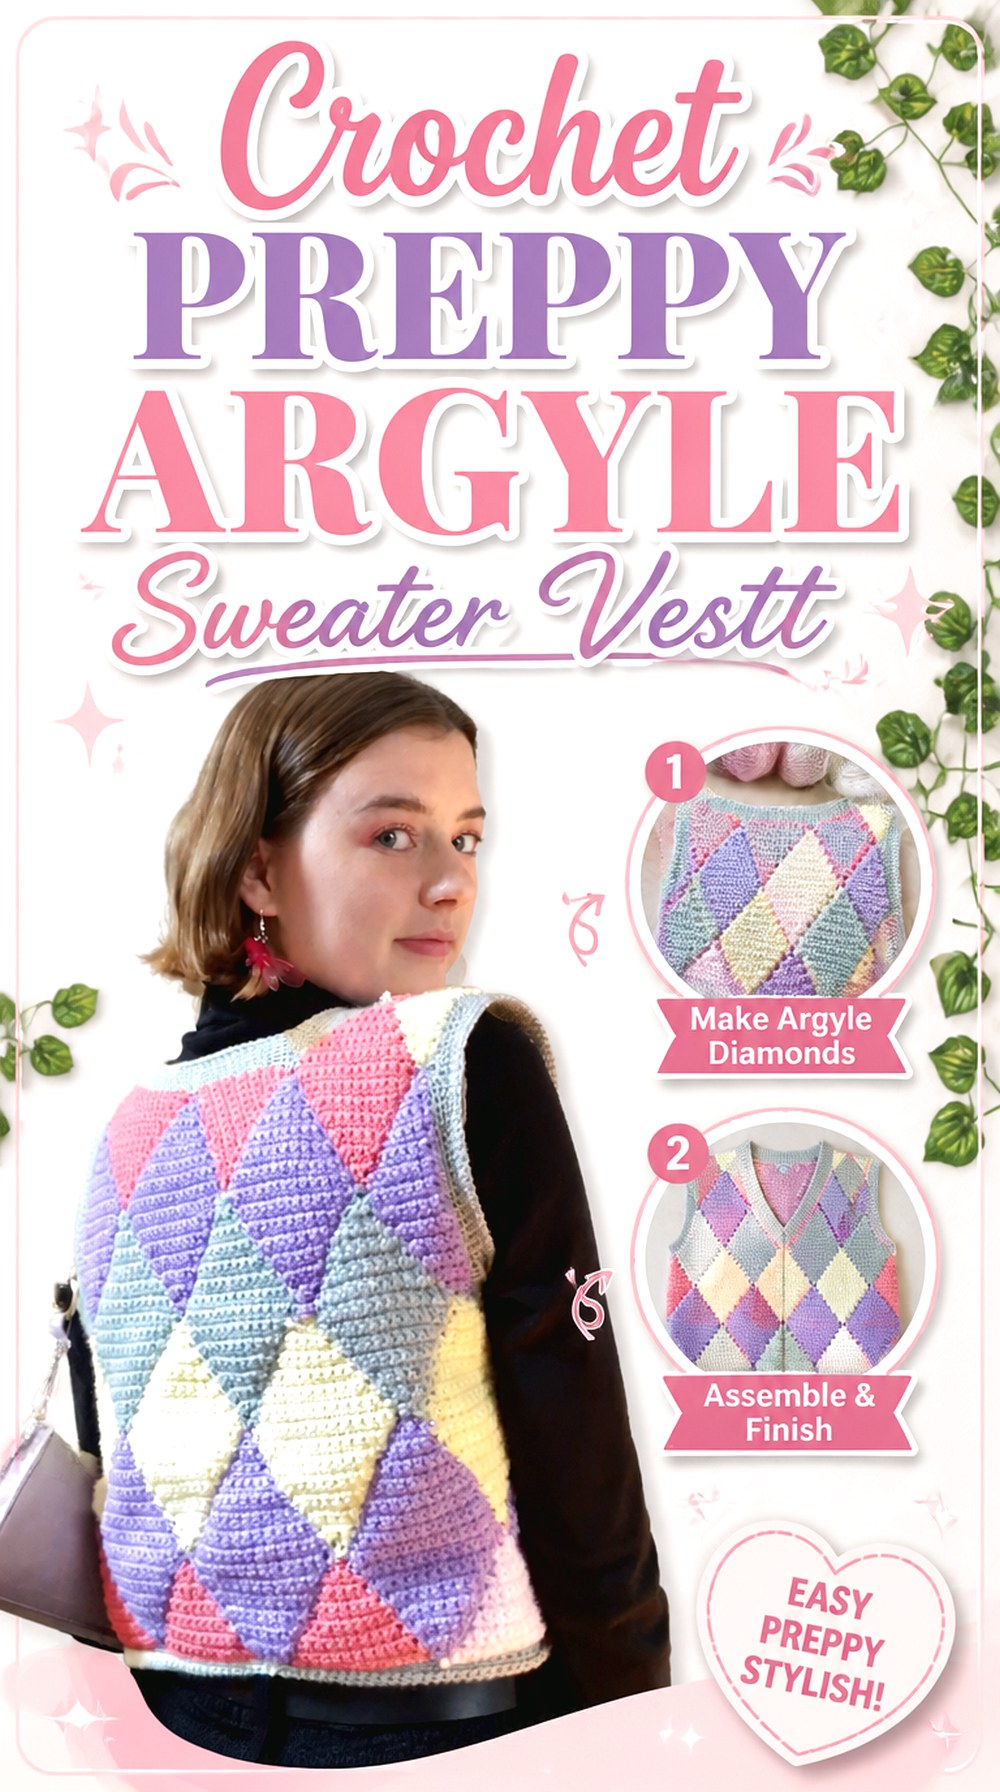
Argyle introduces diagonal movement that checkerboard does not. flotjetops’ tutorial focuses specifically on a crochet argyle sweater vest, using the familiar diamond-based front treatment to create a vintage, preppy look. Because the front graphic has a recognizable geometry, placement becomes central to the finished appearance. A vest can fit well and still look unbalanced if the diamond arrangement appears shifted relative to the neckline. This option therefore suits readers who enjoy planned colorwork and are willing to treat the motif layout as seriously as the garment dimensions.
Center the Diamond Layout Against the Neckline
Before judging the design from the lower hem, check where the main diamond arrangement sits relative to the center front and V-neck. The eye tends to compare those shapes automatically. If you adapt the width or length of the vest, reassess the motif placement rather than assuming the original repeat will remain centered after the garment proportions change.
Color Changes Create More Than a Visual Challenge
Multiple color sections can produce extra ends, localized thickness, and tension differences if one yarn is pulled more tightly than another. Keep checking the panel dimensions as the colorwork develops. A technically correct graphic is not enough if one area contracts and causes the front to pull differently from the back.
Keep the Back in the Same Visual Conversation
A highly patterned front paired with a quiet back can work well, but it creates a distinct front-focused garment. If you want greater visual continuity, carry one or more front colors into the trim or back without necessarily repeating the full argyle. Decide this early so the final edging does not look like an unrelated addition.
Original Tutorial and Creator Credit
Creator: flotjetops
7. Crochet Scallop Edged Button Up Sweater Vest

Ler Crochet’s button-up vest changes the way a sweater vest functions because the front can open instead of being pulled over the head. The design combines a V-shaped neckline, front buttons, lace-oriented fabric, and scalloped edging, giving it a softer outline than the ribbed pullovers. That makes the edges much more visible: the two fronts need to relate cleanly when closed, while the decorative border needs to remain consistent when the vest is worn open. It is a useful choice for anyone who wants a sweater vest to behave more like a light layering waistcoat.
Check Front Alignment Before Committing to Buttons
Button placement cannot compensate for two fronts that are different lengths or widths. Lay the vest flat and bring the front edges together before attaching closures. Check the hem, V-neck transitions, and overall overlap first. If the garment will mostly be worn closed, also test it over the intended underlayer so the closure is evaluated under realistic tension.
Scalloped Edging Makes Tension Visible
A decorative border attracts attention to the garment outline. If the edge is worked too tightly, the front may draw inward; if it is too loose, scallops can flare or lose definition. Work enough of the border to assess how it behaves before completing the entire perimeter, especially if you substituted a yarn with different elasticity.
An Open Front Gives You More Styling Flexibility
Unlike a pullover, this vest does not need to fit the same way in every outfit. Worn open, it can accommodate more variation in underlayers; worn buttoned, the bust and waist relationship becomes more important. Decide which mode matters most before altering width so you do not over-size a vest intended primarily to be worn closed.
Original Tutorial and Creator Credit
Creator: Ler Crochet
8. Crochet Contrast Trim Everyday Sweater Vest
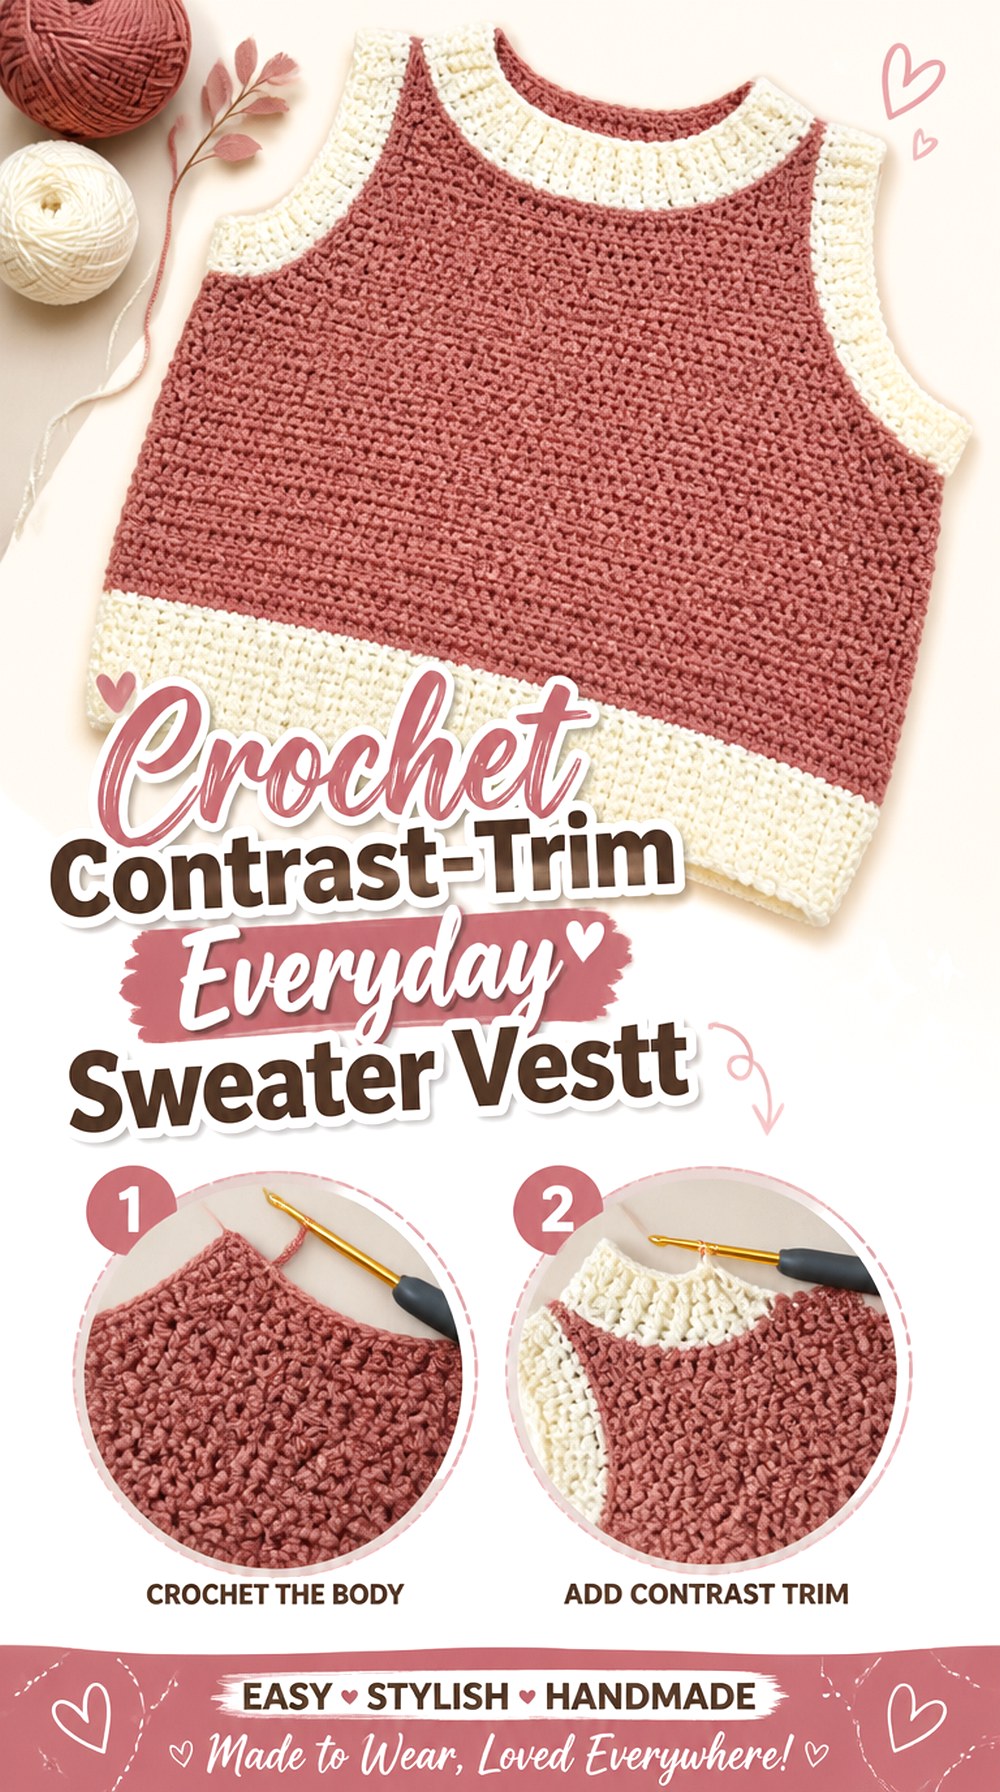
This Crochet By Bev tutorial provides a comparatively uncomplicated sweater-vest direction with a main color and a smaller amount of a second color, making contrast trim an easy way to give the finished piece definition without covering the body in motifs. The simpler surface keeps attention on the vest silhouette and edging. That can be an advantage if you want a wardrobe layer rather than a graphic statement piece, but it also means inconsistencies in the armholes, neckline, or side seams have fewer decorative elements to hide behind.
Use the Second Color as a Frame
Contrast color has the strongest effect when its purpose is clear. Repeating it around selected edges can visually connect the neckline, armholes, and lower hem. Before adding additional stripes or motifs, look at whether the trim already gives the vest enough definition. Keeping the body quieter can make the silhouette appear cleaner.
A Simple Surface Puts More Pressure on Fit
When there is no checkerboard, floral motif, or patchwork arrangement competing for attention, the garment outline becomes the main visual feature. Check side-seam length, shoulder symmetry, and armhole shape carefully before finishing. A plain vest often rewards extra attention to these basic proportions more than adding another decorative detail.
Original Tutorial and Creator Credit
Creator: CROCHET BY BEV
9. Crochet Boxy Pullover Sweater Vest
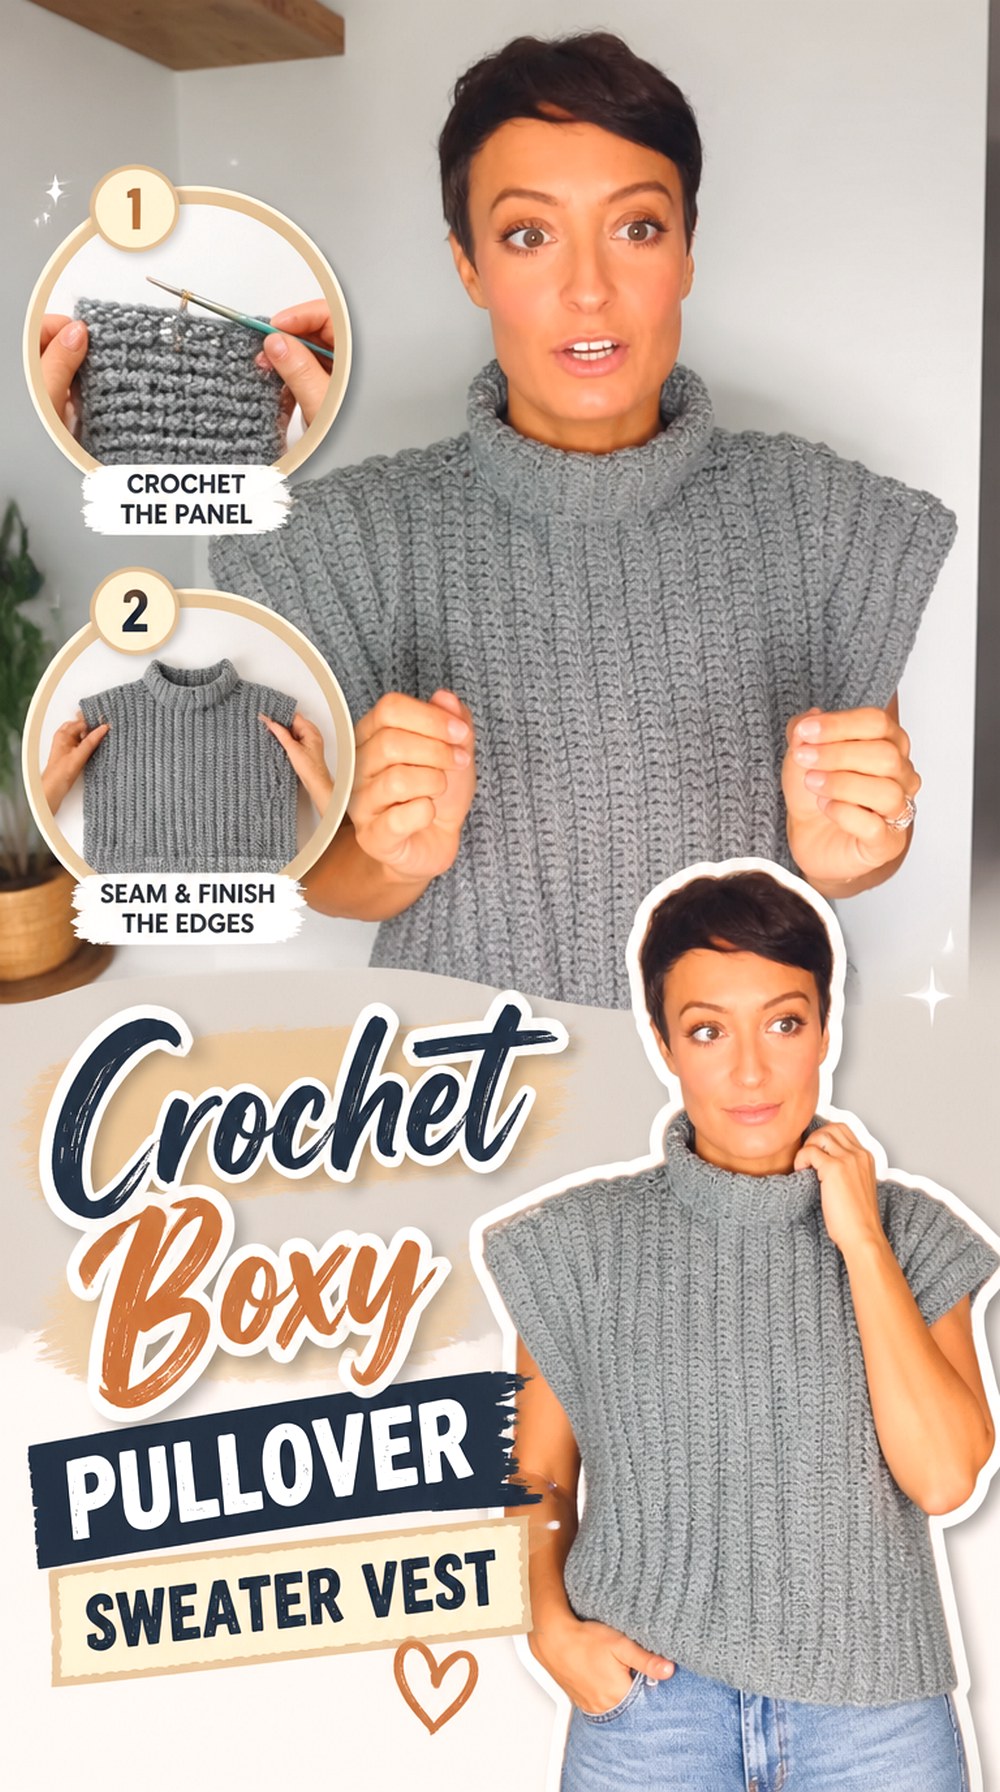
JeggoCrochet’s tutorial produces a boxy sweater vest intended as a straightforward pullover. The less fitted silhouette makes width a deliberate style feature rather than something that necessarily follows the body closely. This is a useful direction for layering over shirts because a straighter torso can leave more room underneath, but extra width needs to be balanced with shoulder placement and garment length. Simply making every dimension larger can turn a relaxed vest into one that slips outward at the shoulders or overwhelms a smaller frame.
Boxy Width Works Best When the Shoulders Still Feel Intentional
A relaxed body does not require the shoulder line to be uncontrolled. Compare the developing upper width with a garment you already like, especially if you plan to add ease through the torso. If the shoulders extend much farther than intended, the armhole position can drop and alter how the entire vest sits over the base layer.
Length Determines Whether the Shape Feels Balanced
A wide, short rectangle gives a very different effect from a wide, longer vest. Before adding extra body width, decide where the lower edge should land. More width can visually shorten the garment, so evaluate the two dimensions together rather than making separate changes without trying on or measuring the work.
Original Tutorial and Creator Credit
Creator: JeggoCrochet
10. Crochet High Neck Turtleneck Sweater Vest
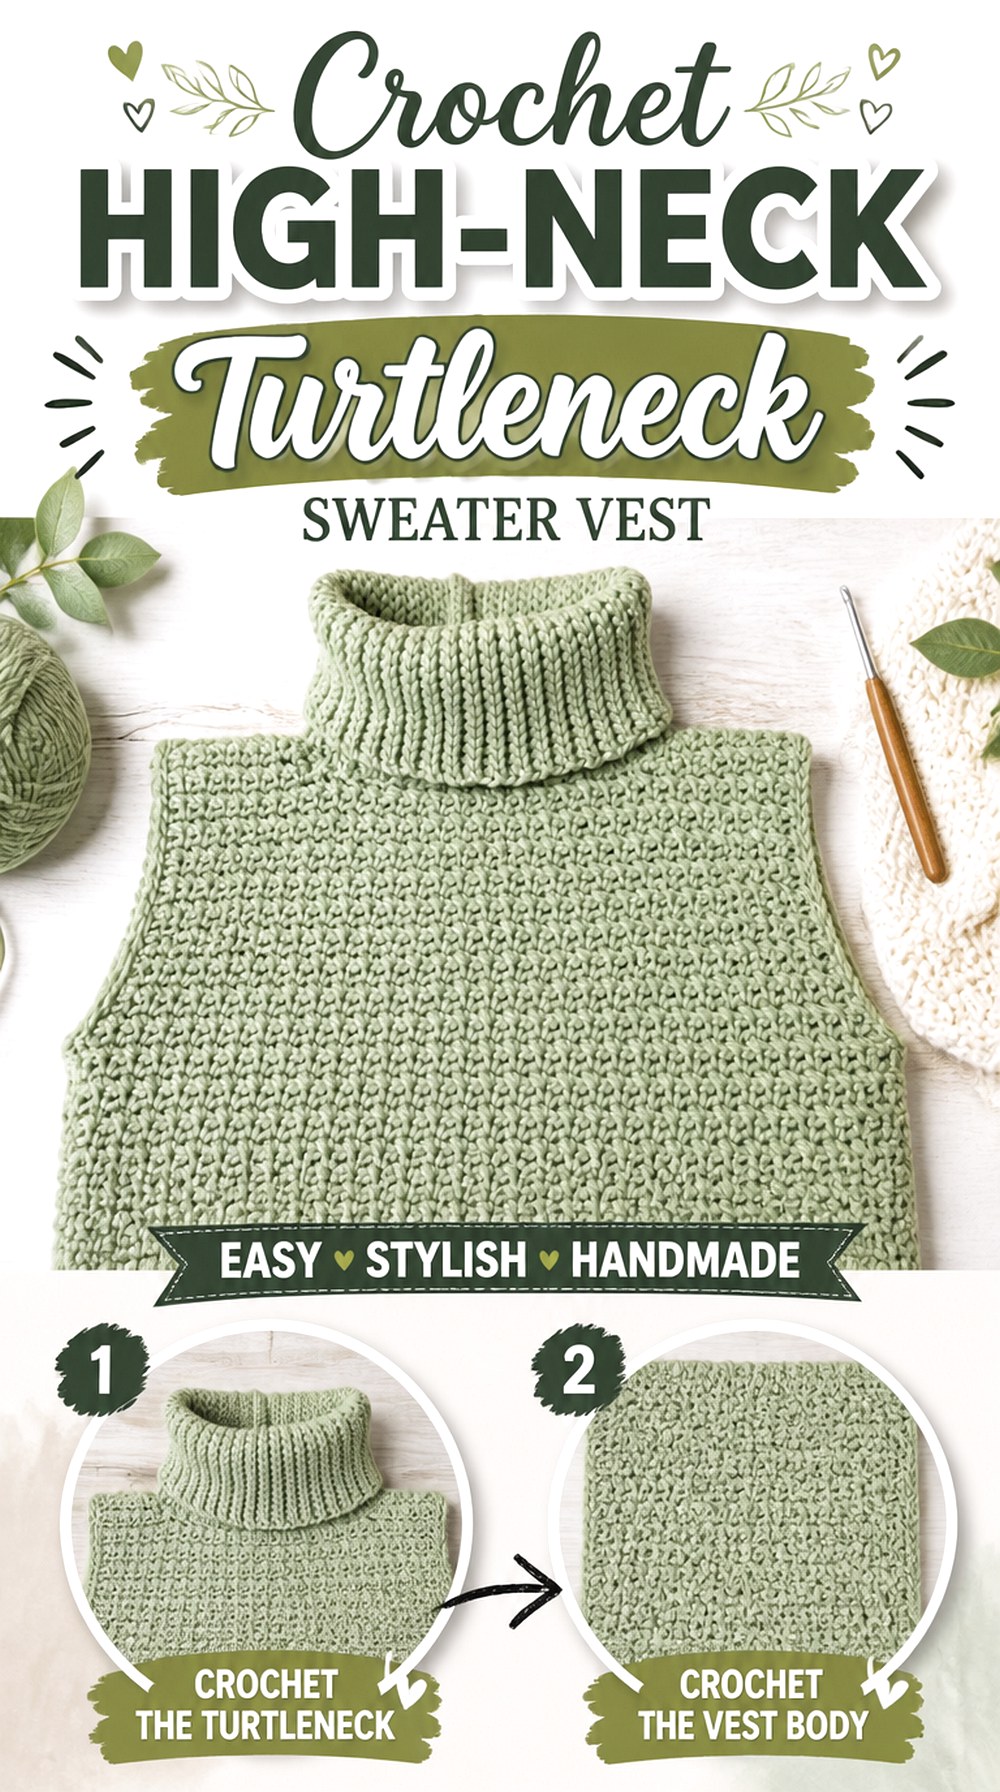
Hey Carrie’s design pushes sweater-vest coverage in the opposite direction from a V-neck. The tall turtleneck creates a strong feature around the face and turns the vest into a more substantial cool-weather layer even though the arms remain open. The tutorial uses a weight-5 yarn, reinforcing the visibly cozy direction of the project. Because the neck adds both material and height above the shoulder line, the upper body deserves more attention than it would on a simple scoop or V-neck vest.
Test the Neck Opening Before Building More Height
A turtleneck can look roomy from the outside while still feeling restrictive when pulled over the head. Check the opening at the earliest practical stage before committing to additional collar height or finishing. The goal is not merely to make the circumference larger; the edge also needs enough flexibility to move comfortably while returning to shape.
Collar Weight Changes How the Shoulders Behave
The additional crochet around the neck adds more material directly above the shoulder area. A yarn substitution that creates a much heavier fabric can therefore affect how the vest hangs. Compare the blocked swatch with the original fabric characteristics and watch for shoulders being pulled inward or the neckline collapsing instead of standing as intended.
Keep the Rest of the Outfit Visually Lighter
A high neckline already creates a strong upper-body focal point. If you customize the vest with extra colorwork, heavy borders, or dense motifs, consider whether those additions compete with the turtleneck. A simpler body can allow the collar shape and crochet texture to remain the defining details.
Original Tutorial and Creator Credit
Creator: Hey Carrie
11. Crochet Open Mesh Unisex Sweater Vest
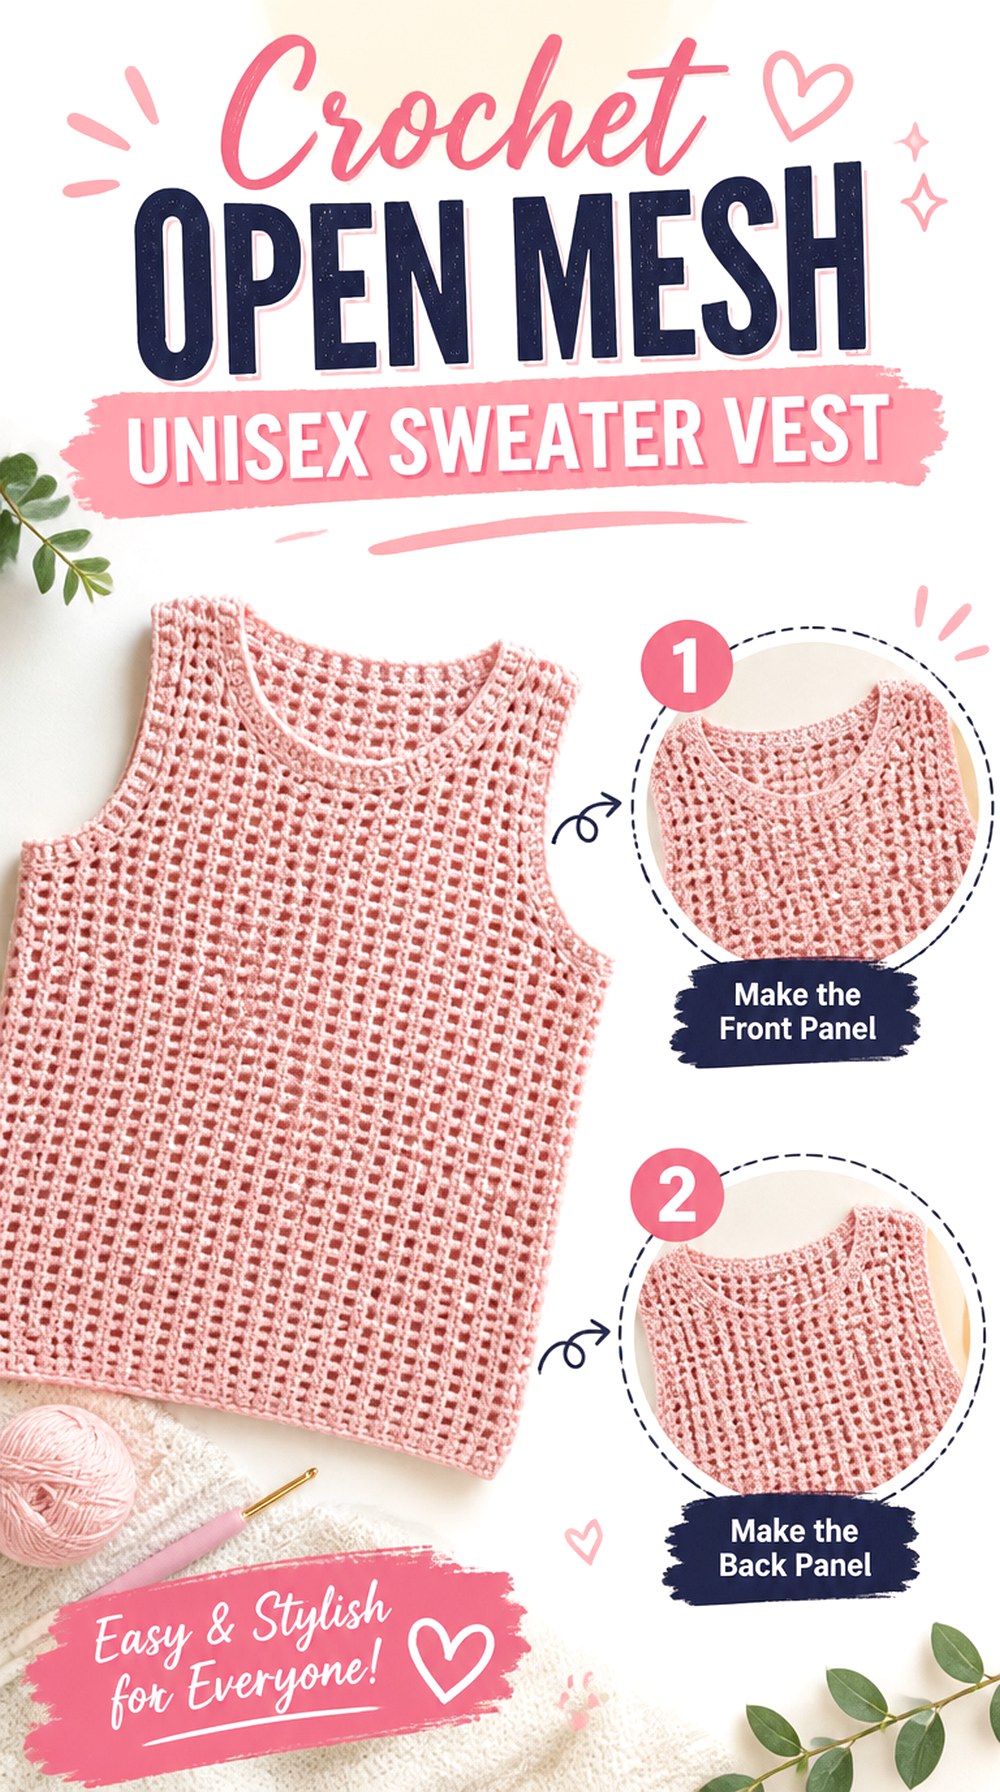
Mihankushea’s sweater vest moves toward a more breathable, open fabric. The tutorial is presented as a unisex design and asks makers to work from body measurements such as bust, desired vest length, and armhole size. The open mesh gives it a lighter visual presence than the ribbed, chunky, or color-blocked garments here, making the underlayer much more visible. That transparency turns styling into part of the design: the color and shape of the shirt or top beneath the vest can substantially change how the finished crochet pattern reads.
Treat the Underlayer as Part of the Finished Look
Mesh does not completely separate the vest from the clothing beneath it. A high-contrast base layer emphasizes every opening, while a similar color creates a quieter surface. Before choosing yarn, think about whether you want the stitch pattern to stand out clearly or blend into the outfit. This can be more influential than adding extra decorative edging.
Open Fabric Can Stretch Differently at the Openings
A mesh fabric may respond to weight differently from a dense solid stitch. Check the armholes and shoulders after the developing fabric has enough length to hang naturally. If the openings grow more than expected, address the fit before final edging rather than assuming the border alone will restore the intended shape.
Finishing Should Stabilize Without Erasing the Mesh Character
A very dense or tight border can create a visible contrast with a soft open body. That may be desirable, but it can also pull the edge inward. When adapting the finish, compare how the edging stretches relative to the main fabric and make sure the armholes and neckline remain comfortable rather than becoming rigid frames around flexible mesh.
Original Tutorial and Creator Credit
Creator: 🧶Mihankushea🧶
12. Crochet Color Block Patchwork Sweater Vest
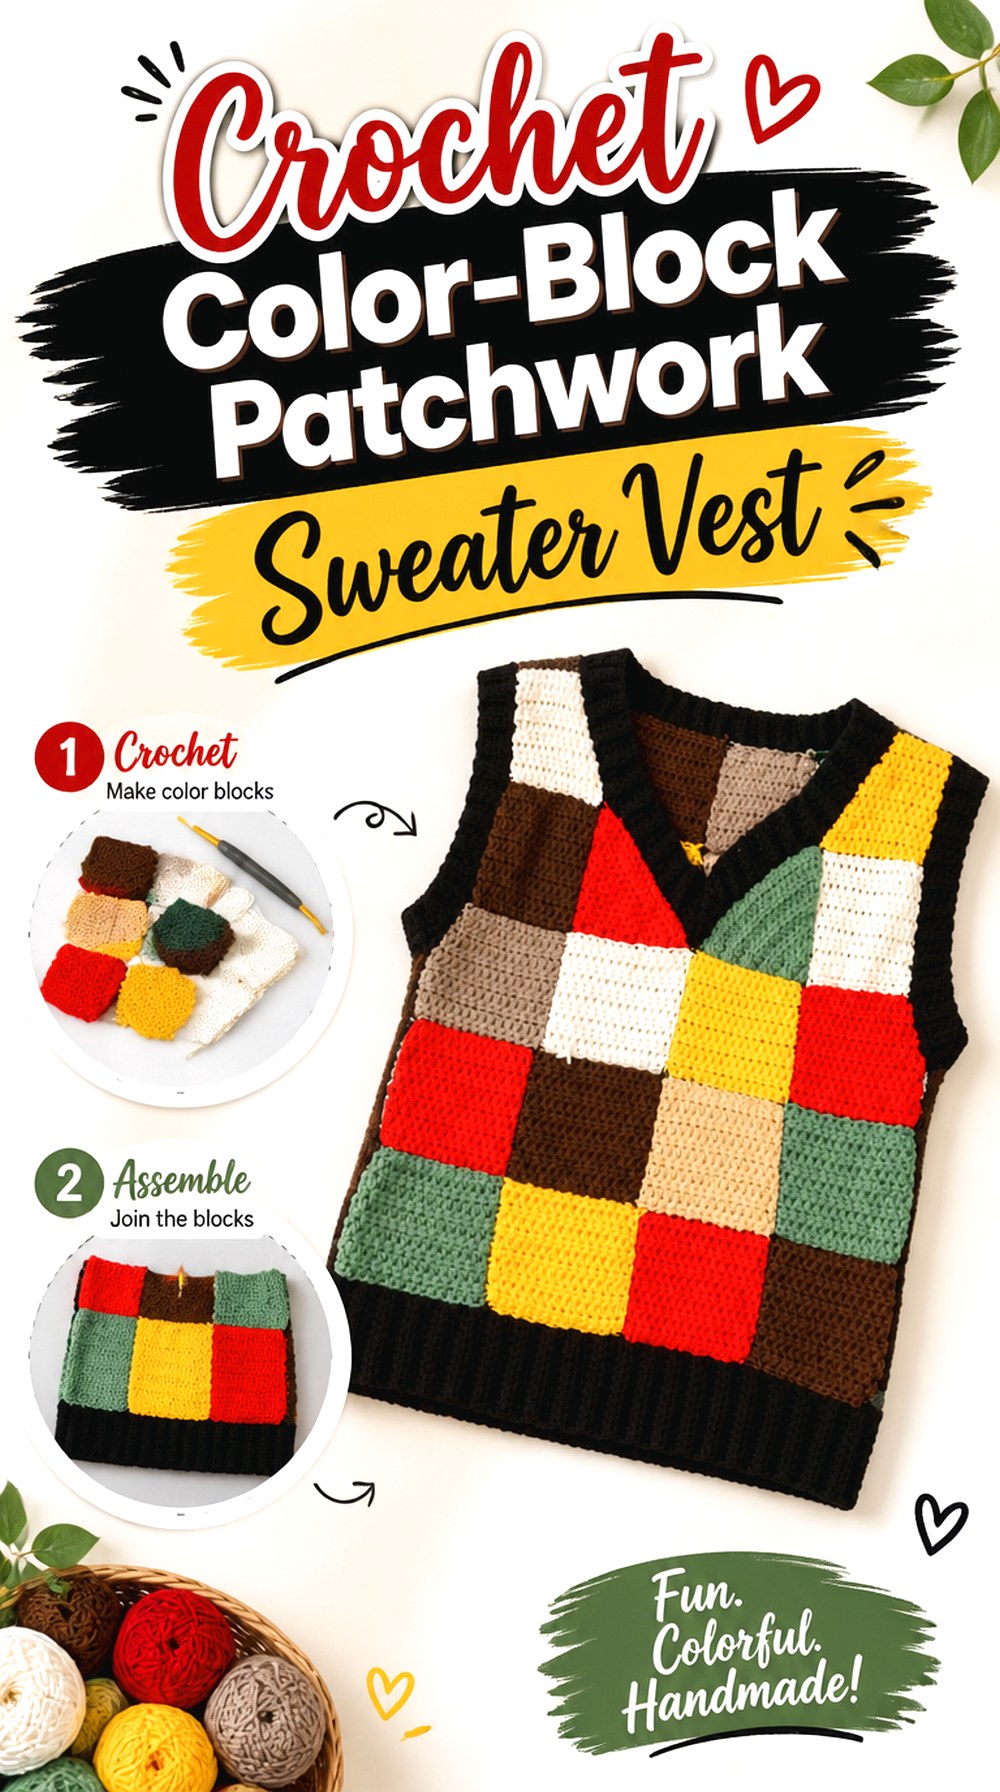
Süris Vlogs’ patchwork sweater vest uses multiple colored sections to build a deliberately mixed surface. Unlike granny-square construction, the visual effect is broader color blocking rather than a repeated set of identical motifs. That makes it possible to create a patchwork appearance without every section reading as a separate traditional square. The design is particularly useful for readers who enjoy combining several colors but want a vest whose overall shape still reads clearly from a distance. Because each block competes for attention, palette balance matters almost as much as construction.
Lay Out the Color Story Before Joining Anything
Patchwork can become visually lopsided when every favorite color is added without considering the whole garment. Arrange the completed or planned sections in the approximate vest shape before assembly. If one very dark, bright, or saturated block dominates the front, either repeat that visual weight elsewhere or move it to a place where the asymmetry feels intentional.
Seams Can Become Part of the Graphic Design
Where sections meet, the joining lines influence how the patchwork is perceived. Visible joins can strengthen the block effect, while quieter seams allow colors to blend into a larger composition. Whichever treatment you use, keep the joining tension consistent so neighboring blocks remain the same effective size instead of puckering at individual seams.
Check the V-Neck Against the Patchwork Grid
The neckline cuts into the color composition, so do not plan the body as if it were a complete rectangle. Look at which sections will actually remain near the upper front after shaping. A strong color block that seems centered during early planning can become visually off-center once the neckline removes part of the surrounding fabric.
Original Tutorial and Creator Credit
Creator: Süris Vlogs
13. Crochet Floral Motif Sweater Vest Top
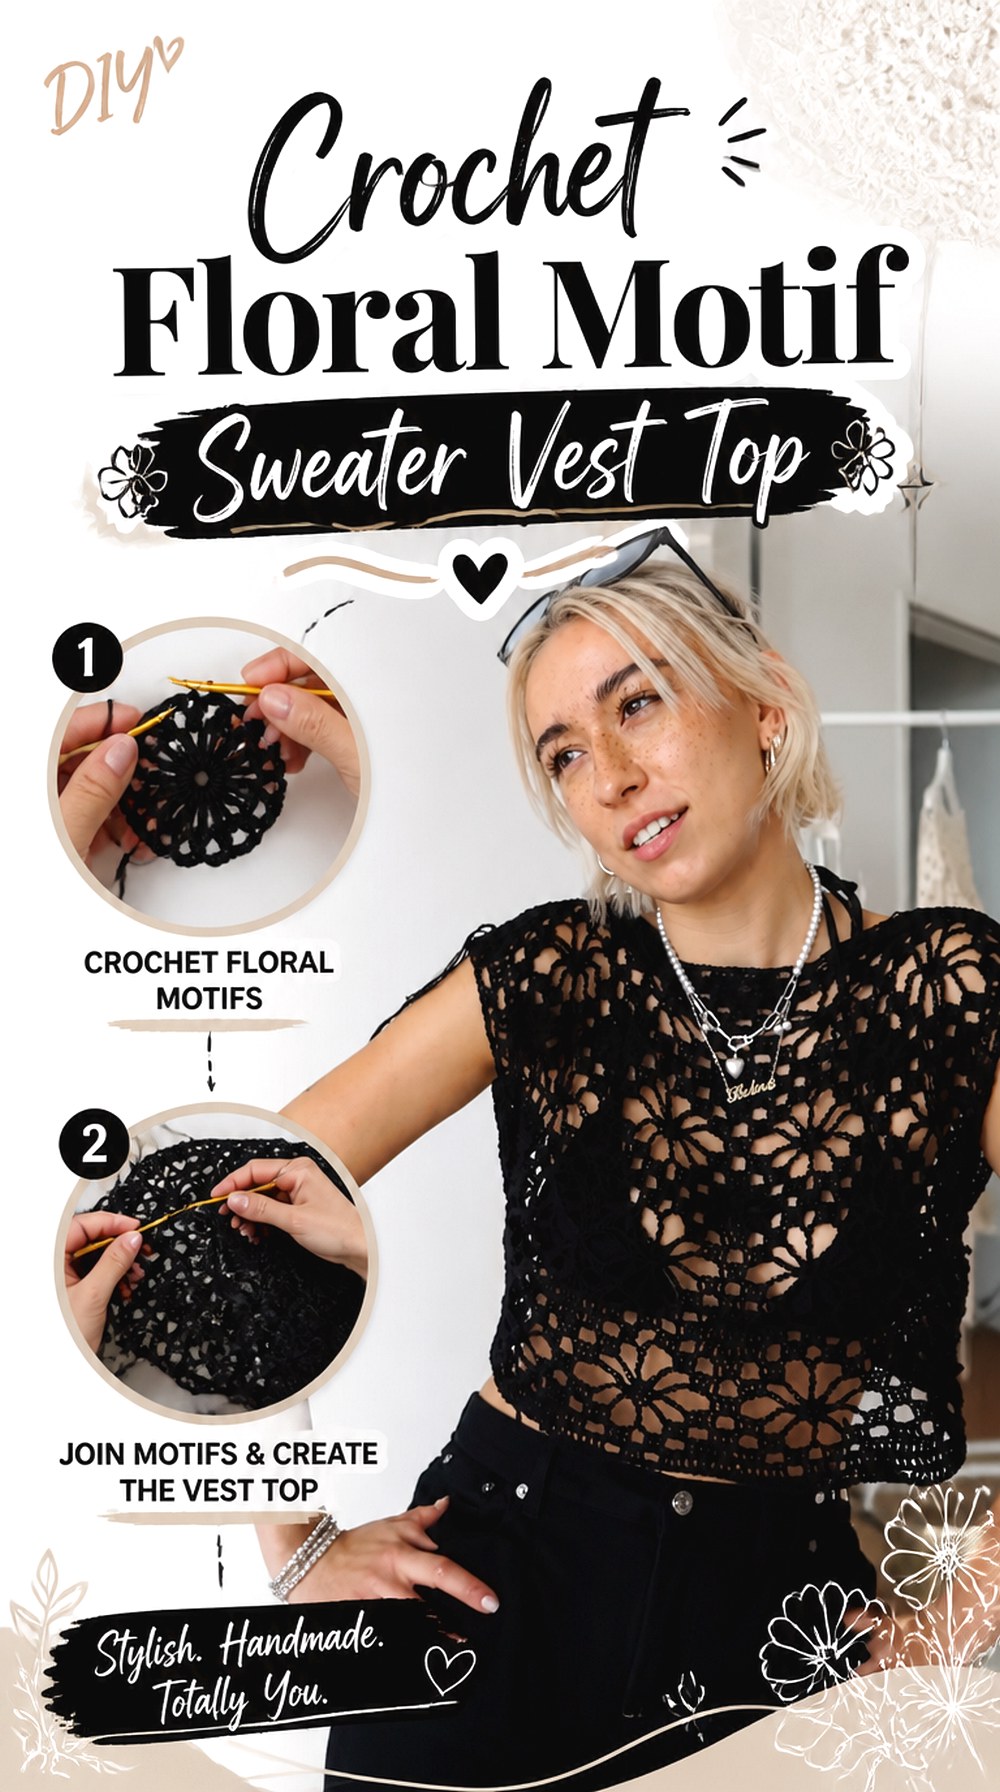
BELINA BELLWOOD’s floral sweater-vest tutorial makes the motif itself the dominant feature. Repeated flower-based crochet sections are connected into a sleeveless top or vest, creating a much more open and decorative garment than a conventional solid pullover. The creator recommends cotton yarn in the video description, reinforcing the lighter direction of the design. Because the flowers establish both texture and negative space, changing motif size affects coverage, garment scale, and where the pattern falls around the body all at once.
Motif Size Determines More Than the Flower’s Appearance
Before repeating the first flower across the full project, measure it after the finishing treatment you intend to use. A slightly larger motif multiplied across a panel can shift the armholes, neckline, and overall width. If you substitute yarn or hook size, treat the first completed motif as a gauge sample for the garment rather than assuming the original layout will still fit.
Plan Coverage With the Actual Underlayer in Mind
Open floral sections reveal considerably more clothing or skin beneath them than a solid vest. Decide whether the finished piece will be worn over a tank, tee, dress, or another layer before adjusting openings. The underlayer can also change which motif colors appear most prominent, so test the palette against likely wardrobe colors instead of viewing the flowers only on a worktable.
Symmetry Matters Most Around the Upper Body
A floral grid can tolerate playful color variation, but the neckline and shoulder areas still need to read as a garment rather than an accidental gap between motifs. Lay the upper sections flat before final joining and compare left and right coverage, shoulder width, and the way motif edges frame the neck.
Original Tutorial and Creator Credit
Creator: BELINA BELLWOOD
14. Crochet Chunky Knit Look Sweater Vest
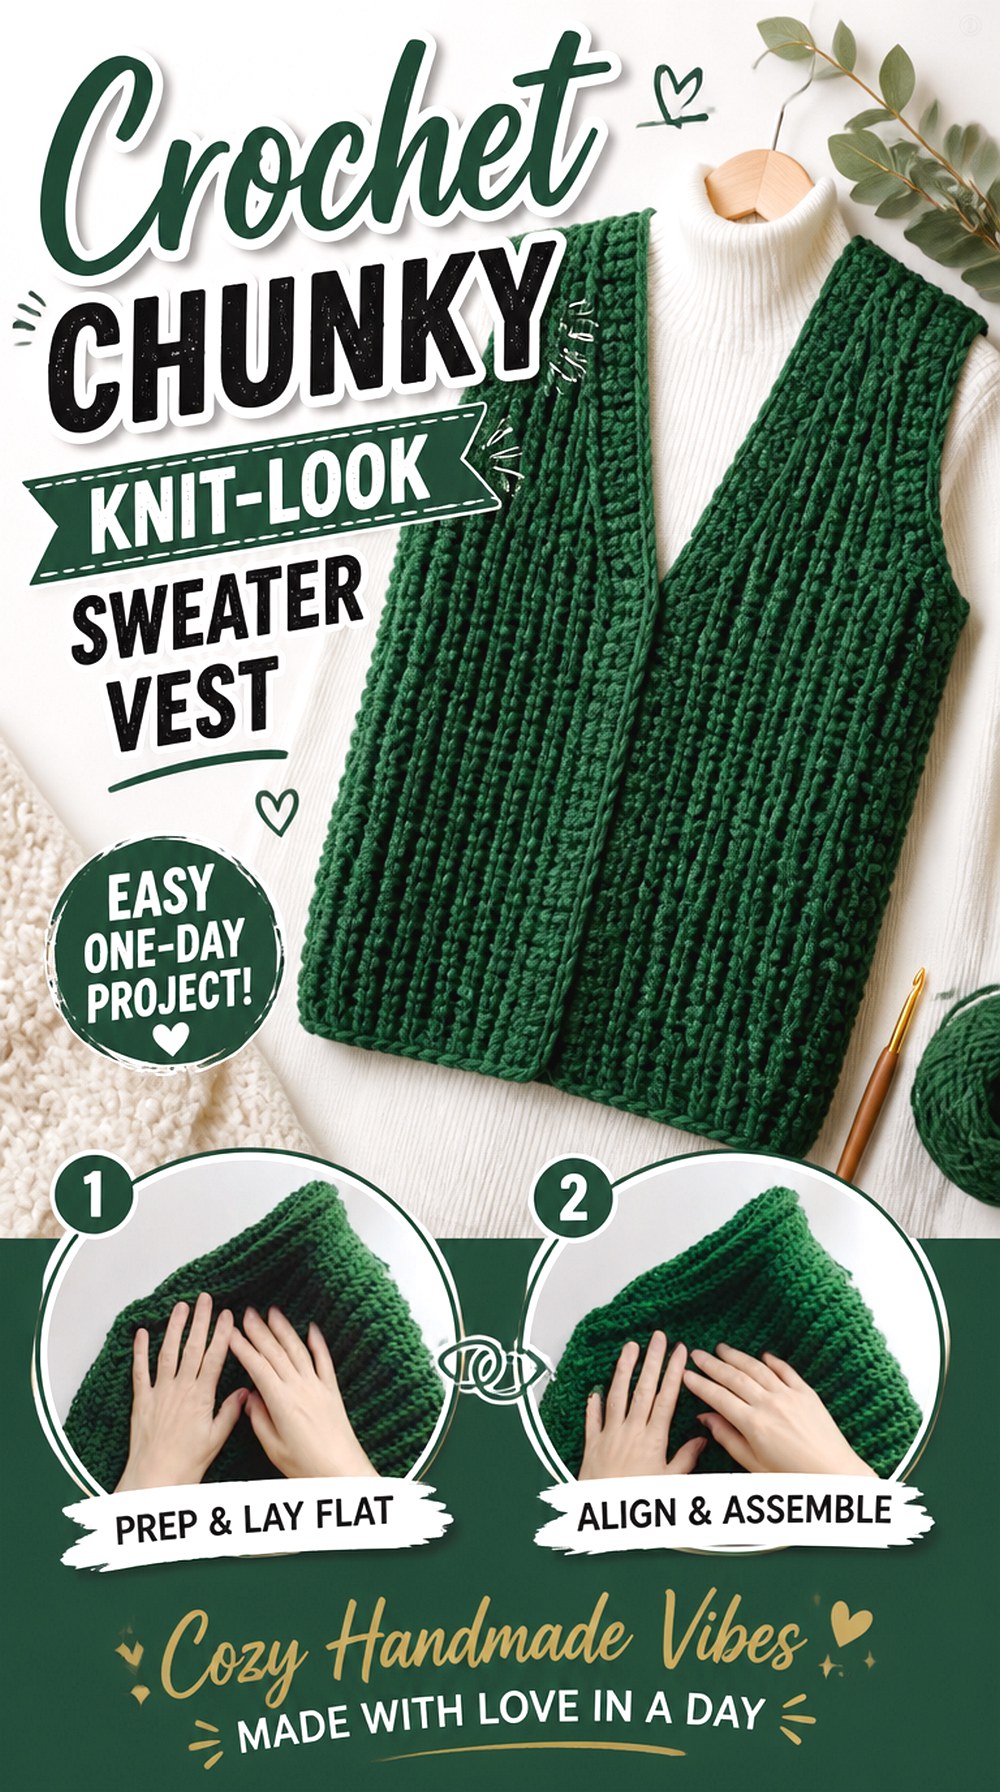
By StellaM’s sweater vest emphasizes a thick, ribbed surface designed to resemble knitted fabric. The creator describes the project as chunky and uses chunky acrylic yarn with a large hook, giving the finished vest a more substantial appearance than the mesh, floral, or DK-weight options in this roundup. This is a useful choice for readers who want crochet to produce a dense sweater-like layer with strong texture. The visual simplicity also makes the fabric itself the statement, so proportion and bulk need to be considered together rather than treating heavier yarn as a direct substitute for a lighter vest pattern.
Chunky Fabric Changes the Amount of Visual Ease
Two garments with the same outside width can look quite different when one is made from substantially thicker fabric. A bulky vest takes up more visual space around the shoulders, neckline, and side seams. When deciding how relaxed you want the fit, judge the swatch thickness as well as the numerical garment width.
Preserve the Direction of the Knit-Look Texture
Strong ribbing creates a clear visual line across the garment. When adapting length or width, make sure your changes preserve the intended orientation and do not produce an awkward interruption at the shoulders or neckline. Keep the finishing edges consistent enough that they support the ribbed effect instead of competing with it.
Conclusion
The most useful way to choose among these crochet sweater vest ideas is to start with the feature that affects how you will actually wear the garment. Pick the clean V-neck or contrast-trim versions for straightforward layering, the cropped or boxy styles when proportion matters most, and the turtleneck or chunky ribbed designs when you want more visual substance. Granny squares, checkerboard, argyle, patchwork, and floral motifs make color or layout part of the construction, while mesh creates the lightest-looking option.
Once you have chosen the silhouette, compare measurements, yarn behavior, armhole room, and neckline treatment before customizing it. Use the original tutorials linked above for each creator’s exact construction and finishing details.
Frequently Asked Questions
How much ease should a crochet sweater vest have?
There is no single amount of ease that works for every sweater vest. A fitted vest worn over a thin top needs different room from a boxy vest designed for button-down shirts. Instead of choosing by clothing size alone, compare the tutorial’s finished measurements with a sweater or vest whose fit you already like. Pay particular attention to chest width, shoulder width, armhole depth, and the intended underlayer.
Can I use a different yarn than the sweater vest tutorial recommends?
Often you can, but matching the yarn’s labeled weight is only the beginning. Crochet fabrics made from different fibers can vary in thickness, stretch, drape, recovery, and behavior after washing. Make and finish a swatch before committing to a garment. If its dimensions or flexibility differ from the tutorial’s fabric, expect the vest’s fit and openings to change unless the construction is adjusted accordingly.
How can I tell if the armholes will fit before finishing the vest?
Check them while adjustment is still possible. Temporarily position or join the relevant garment sections and try the vest over the type of shirt or top you plan to wear underneath. Raise and move your arms and look for pulling at the shoulders, chest, or side seam. Also check whether an excessively deep opening exposes more of the underlayer than you want before adding final edging.
Can I combine granny squares from different crochet designs in one sweater vest?
Yes, but visual compatibility is not enough. The squares need compatible blocked dimensions and edges if they are expected to join into the same garment grid. Make and block sample motifs first, then compare their width, height, density, and flexibility. If one design is substantially denser or larger, repeating it beside a lighter square can distort the panel even when the individual motifs look attractive together.
Is a cropped crochet sweater vest easier to fit than a longer one?
Not automatically. A cropped design has less body length to complete, but the exact hem position becomes more noticeable and can change significantly between wearers. It also needs to work with the rise of pants, skirts, dresses, or the length of the underlayer. Measure where you want the finished hem to sit instead of relying on how cropped the sample appears on another person.
Should crochet sweater vest pieces be blocked before assembly?
It can be useful when the yarn and project are suitable for blocking, particularly for motifs or panels that must align accurately. Blocking can reveal the fabric’s more realistic dimensions before seams lock several pieces together. Follow appropriate care guidance for the chosen fiber rather than assuming every yarn should be treated identically. For motif vests, consistent finished square dimensions are especially important before permanent joining.