14 Crochet Bonnet Ideas for Baby, Pixie, Lace, and Adult Styles
Crochet bonnets can be much more varied than the traditional tied baby hat. A bonnet can be built from granny squares, shaped into a pointed pixie silhouette, given a loose bonnet-beanie profile, framed with ruffles, or worked with lace, bobbles, clusters, ribbing, and other textures. The projects below include both adult-focused accessories and baby or child-sized designs.
The differences matter when choosing a tutorial. A heavy ribbed bonnet behaves differently from a light lacy one, while a granny-square construction creates different seams and fit considerations than a rounded crown. This collection highlights those distinctions so you can compare shape, texture, face opening, ties, sizing information, and realistic ways each idea could be adapted without replacing the original creator’s instructions.
Quick List
- Crochet Granny Square Tie Bonnet
- Crochet Ribbed Cold-Weather Bonnet
- Crochet Slouchy Bonnet Beanie
- Crochet Newborn Cat-Ear Bonnet
- Crochet Ruffle-Edge Bonnet
- Crochet Lace Baby-and-Child Bonnet
- Crochet Shell-Texture Baby Bonnet
- Crochet Chunky Bobble Baby Bonnet
- Crochet Belle-Style Lacy Baby Bonnet
- Crochet Parisian-Style Vintage Baby Bonnet
- Crochet Alpine-Stitch Shell-Edge Bonnet
- Crochet Cluster-Stitch Newborn Bonnet
- Crochet Matching-Set Baby Bonnet
- Crochet Lacy Pixie-Puff Baby Bonnet
Choose the Bonnet Shape Before Choosing the Color
Start with construction and silhouette rather than yarn color. A granny-square bonnet has visible joins and a more geometric profile, while a traditional crown-based baby bonnet curves around the back of the head. A folded or seamed bonnet can create a sharper back profile, and a slouchy bonnet-beanie deliberately leaves more room behind the crown.
Think about how much of the face you want framed, whether the back should sit close or project outward, and whether the finished piece needs to work over hair. Decorative additions such as ears, ruffles, shell borders, and puff stitches should come after those decisions. They change the look, but they cannot correct a basic shape that is unsuitable for the intended wearer.
Fit, Face Openings, and Ties Need Separate Checks
Age labels are useful starting points for baby bonnets, but they are not interchangeable with an actual fit check. Yarn thickness, hook choice, stitch pattern, and personal tension can all change the finished dimensions. When adapting a tutorial, compare the creator’s stated sizing or measurements with the intended wearer rather than assuming that simply changing the hook will produce the right result.
Pay particular attention to the face opening. A bonnet should not slip forward over the eyes or feel excessively tight around the jaw and neck. Ties also require extra care on baby designs. Daisy Farm Crafts specifically cautions that long bonnet ties can create a strangulation risk and recommends extra care outside a supervised photo setting. Baby projects with cords, ties, or embellishments should always be planned with their actual use in mind.
Yarn Weight Changes More Than Warmth
The tutorials in this collection range from fine or DK yarns to considerably heavier materials. That difference affects stitch definition, thickness around the face, drape, and how bulky seams or decorative textures become.
Fine and lighter yarns generally give lace, shells, and small textural details more room to show without creating excessive bulk. Heavier yarn emphasizes ribbing and bobbles and produces a more substantial silhouette. Granny squares introduce another consideration: every join contributes structure, so consistent blocked motif dimensions matter before assembly. When substituting yarn, check the creator’s sizing or gauge information where provided instead of assuming that two yarns labeled with the same general weight will behave identically.
1. Crochet Granny Square Tie Bonnet
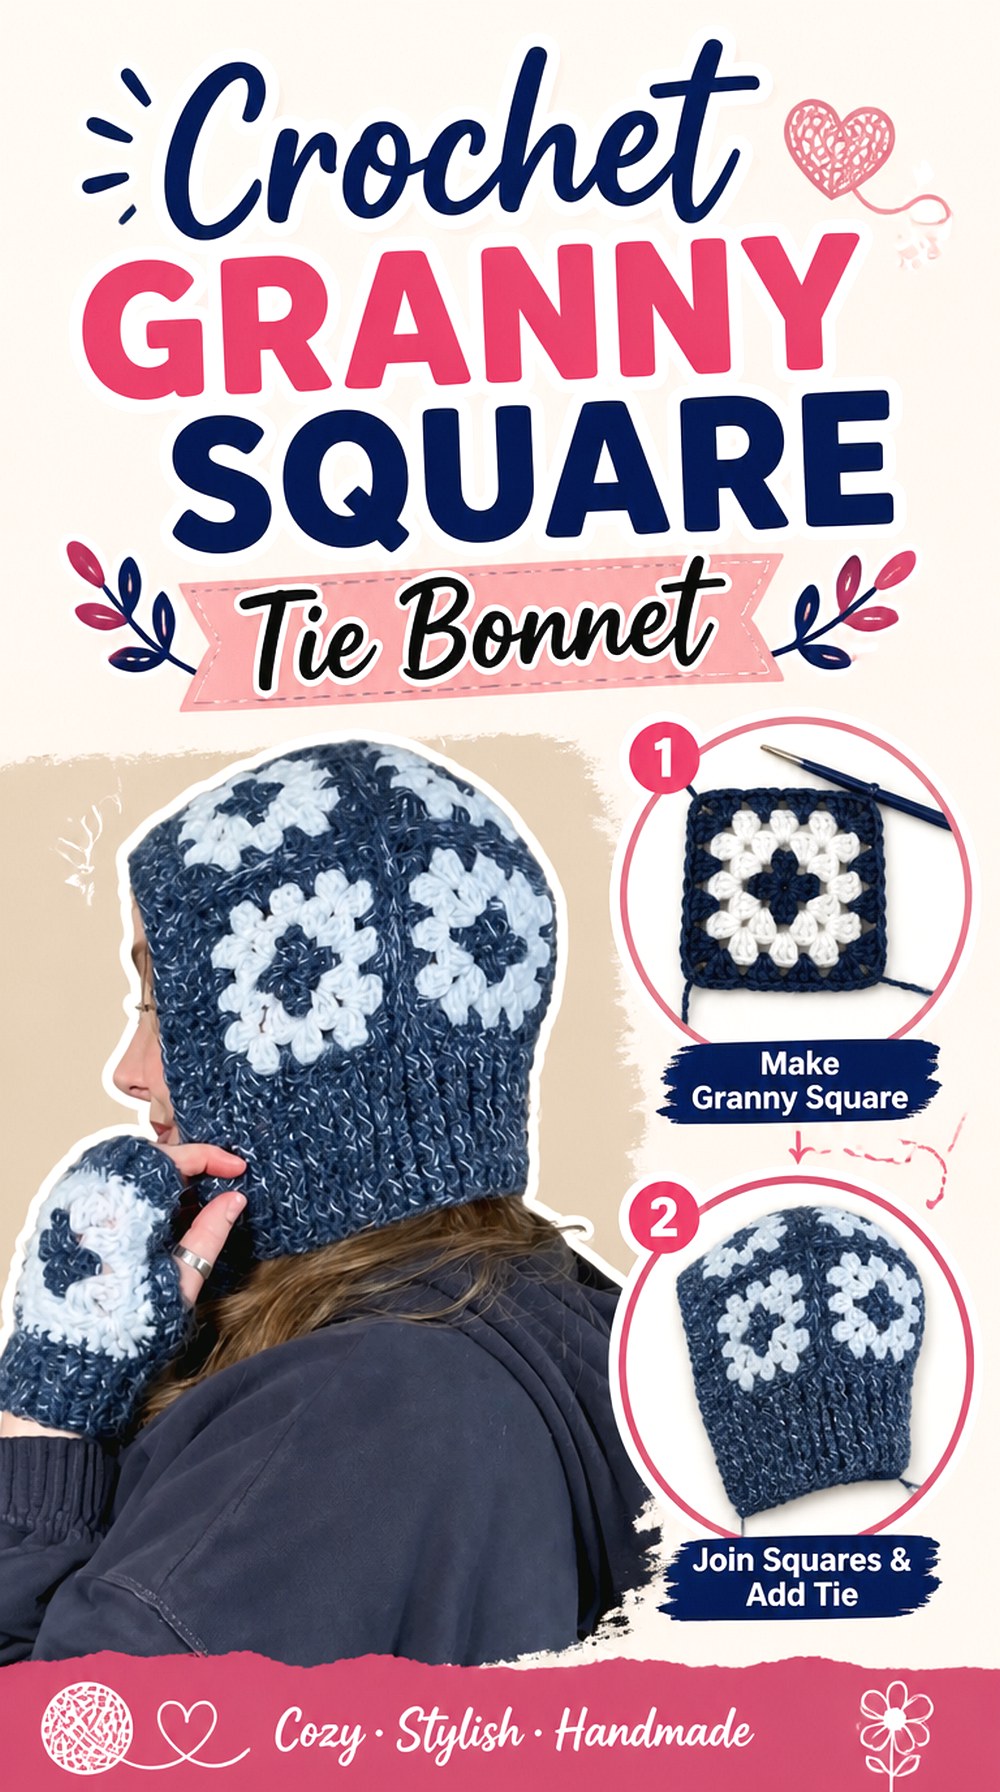
A granny-square bonnet brings modular crochet into a headwear shape, making it one of the clearest departures from the traditional rounded baby bonnet. DIYGuru’s tutorial shows a finished bonnet assembled from classic granny squares and finished with ribbing and adjustable ties. The geometric panels make color placement and joins part of the design rather than hiding the construction.
This direction is especially interesting for crocheters who enjoy motifs or want a bonnet that coordinates with granny-square cardigans, bags, or scarves. Because the squares determine much of the finished shape, size planning should happen before they are permanently joined.
Square Size Controls the Finished Geometry
Measure completed, relaxed or blocked squares before treating them as interchangeable modules. Small differences that are barely noticeable in an individual square can become obvious once several edges meet around the crown and face.
If you substitute a favorite granny-square design, compare its finished dimensions with the squares used in the tutorial. A denser flower square, for example, may have a different stretch profile even when its outside measurement initially looks similar.
Let the Joins Become Part of the Design
Unlike a smooth bonnet worked in continuous rows, joined motifs naturally create visible structural lines. Decide whether you want those seams to blend into the main colors or intentionally contrast with them.
The most useful checkpoint is the bonnet shape after the squares are joined but before every finishing detail is committed. Look for twisting, uneven corners, or one motif pulling more strongly than another. Correcting inconsistent square dimensions early is easier than trying to disguise the problem with edging.
Ribbing Can Visually Settle a Busy Motif Layout
The tutorial adds ribbing around the granny-square construction, which creates a visually calmer boundary around the more graphic center panels.
That makes color planning easier: the squares can carry several colors while the ribbing and ties use a quieter shade to unify the piece. If you use a significantly different yarn for the ribbing, however, compare its stretch with the motif fabric so the edge does not pull the squares inward.
2. Crochet Ribbed Cold Weather Bonnet

This bonnet takes a heavier, more winter-focused approach. The tutorial from イザのあみもの uses thick yarn and gives the finished piece a substantial appearance, with a clearly defined ribbed section framing the construction. The creator also notes that row requirements can change with yarn thickness and recommends using the demonstrated measurements as a guide when changing hook size.
Compared with the granny-square version, the visual interest comes primarily from texture rather than color placement or joins. It is a useful direction when you want a bonnet to read more like practical cold-weather headwear and less like a delicate vintage accessory.
Heavy Yarn Magnifies the Face Border
A thick ribbed edge can create a strong frame around the face, which is part of this bonnet’s appeal. The same thickness can become bulky if the substituted yarn produces firmer fabric than the original.
Before adding every finishing detail, check how the front edge bends around the forehead and cheeks. If it stands away from the face more than intended, changing tension or yarn behavior may be more useful than simply shortening the piece.
Follow Measurements When Yarn Thickness Changes
The creator explicitly notes that the number of rows may vary with yarn thickness and points viewers toward measurements when using another hook. That is an important distinction: row count is not automatically portable between yarn substitutions.
For an adaptation, compare physical dimensions and the actual face-to-crown coverage instead of trying to preserve the tutorial’s numerical construction with a very different material.
Contrast Ribbing Without Changing the Shape
The tutorial mentions the option of using a different yarn color for the ribbed section. This is a low-risk visual customization because it does not require redesigning the bonnet.
A contrast edge can sharpen the face opening, while a tonal edge keeps the silhouette quieter. Fiber and thickness should still remain compatible so the contrasting section stretches and recovers similarly to the body.
Original Tutorial and Creator Credit
Creator: イザのあみもの
3. Crochet Slouchy Bonnet Beanie
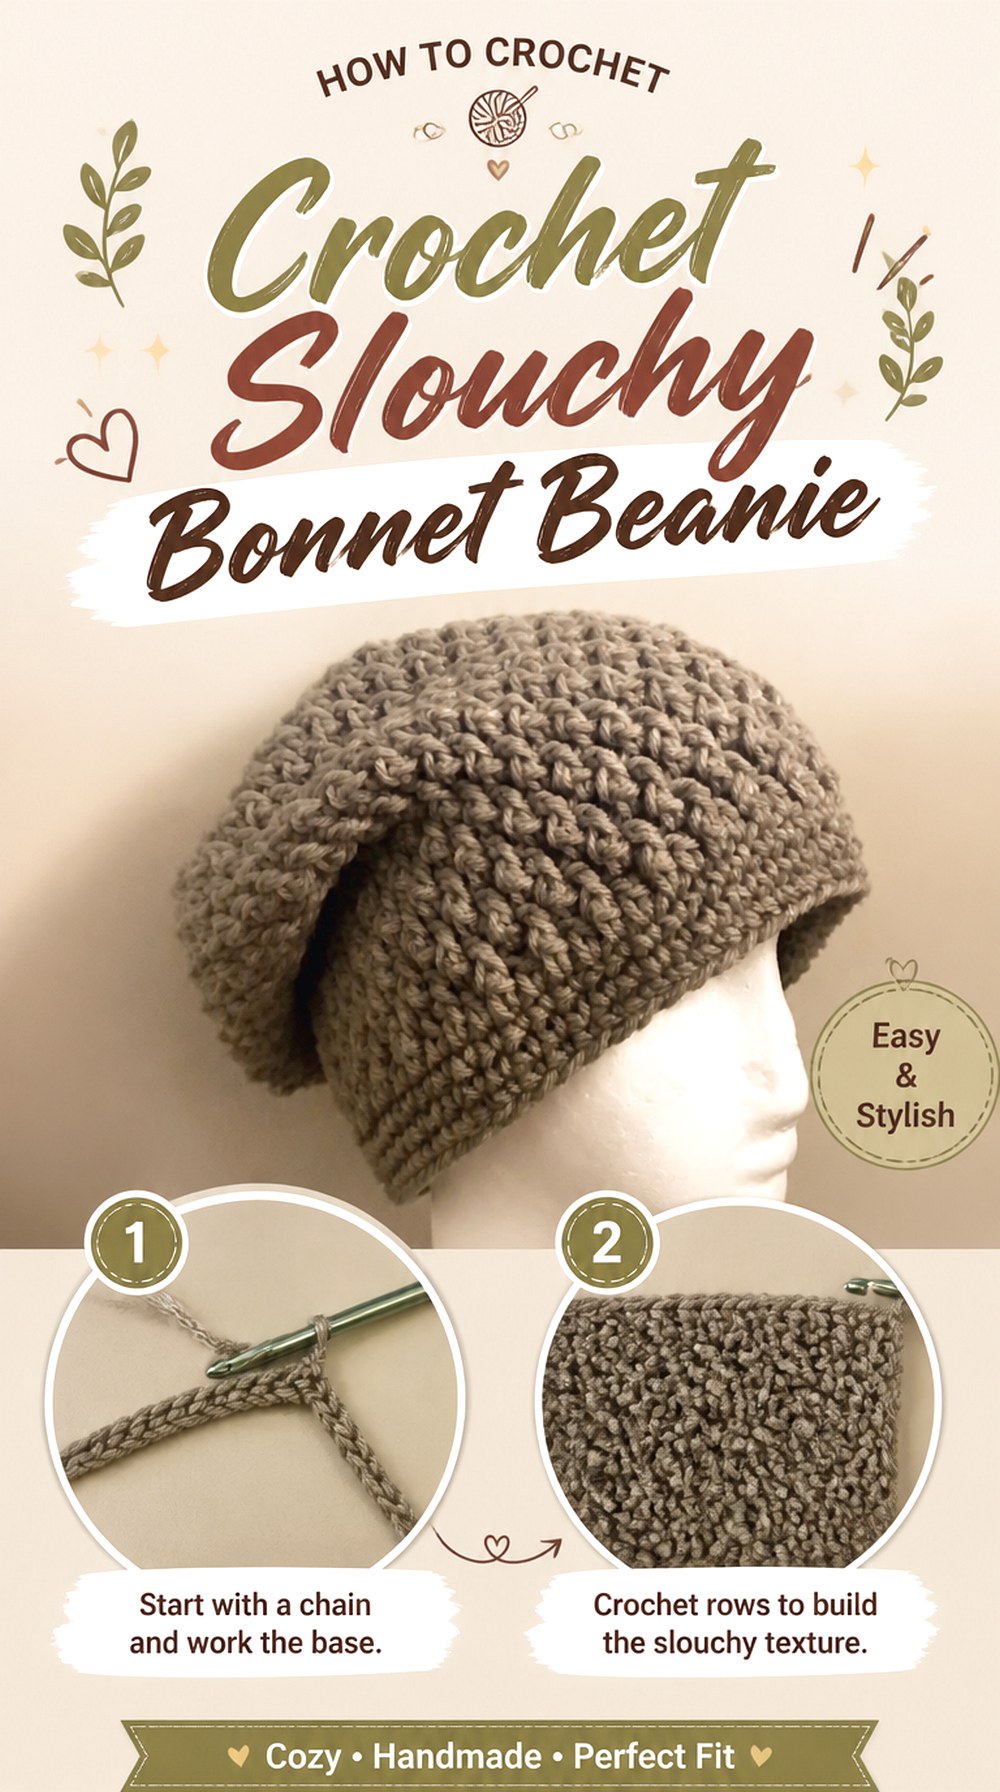
A bonnet does not have to sit closely against the back of the head. DIY FROM HOME CROCHET’s design crosses a bonnet with a slouchy beanie, creating a softer profile with extra room toward the back. The creator describes the design as a slouchy hat and notes the use of front-post double crochet, which contributes to the textured fabric.
This is a strong option for readers seeking an adult or older-wearer accessory rather than traditional babywear. It also provides a different styling direction: instead of emphasizing chin ties or a decorative face ruffle, the silhouette itself becomes the main feature.
Extra Crown Room Changes the Styling
The back of a slouchy bonnet should be evaluated differently from a fitted crown. Excess fabric is intentional, but its placement affects whether the result looks relaxed or simply oversized.
When checking fit, pay attention to the front edge first. If that area sits correctly, the extra room can remain concentrated toward the back. Enlarging every dimension equally may make the face opening too loose even though the intended goal was only more slouch.
Post Stitches Add Structure to Soft Drape
The tutorial uses front-post double crochet, and the creator notes that familiarity with identifying the correct posts is useful for the stitch pattern.
That raised structure gives the fabric definition without requiring separate motifs or embellishments. If you want a very fluid result, compare your yarn’s drape before committing; an especially stiff yarn may preserve the stitch texture but reduce the relaxed bonnet-beanie effect.
This Style Makes a Good Bridge to Adult Headwear
The accompanying project information describes the pattern as customizable for kids, teens, or adults. That makes it particularly useful in a mixed-age roundup because it is not visually dependent on baby styling.
For resizing, use the creator’s instructions and compare the face opening and overall depth separately. Adult hair volume and preferred slouch can change how much room feels comfortable even at the same general head circumference.
Original Tutorial and Creator Credit
Creator: DIY FROM HOME CROCHET
4. Crochet Newborn Cat Ear Bonnet
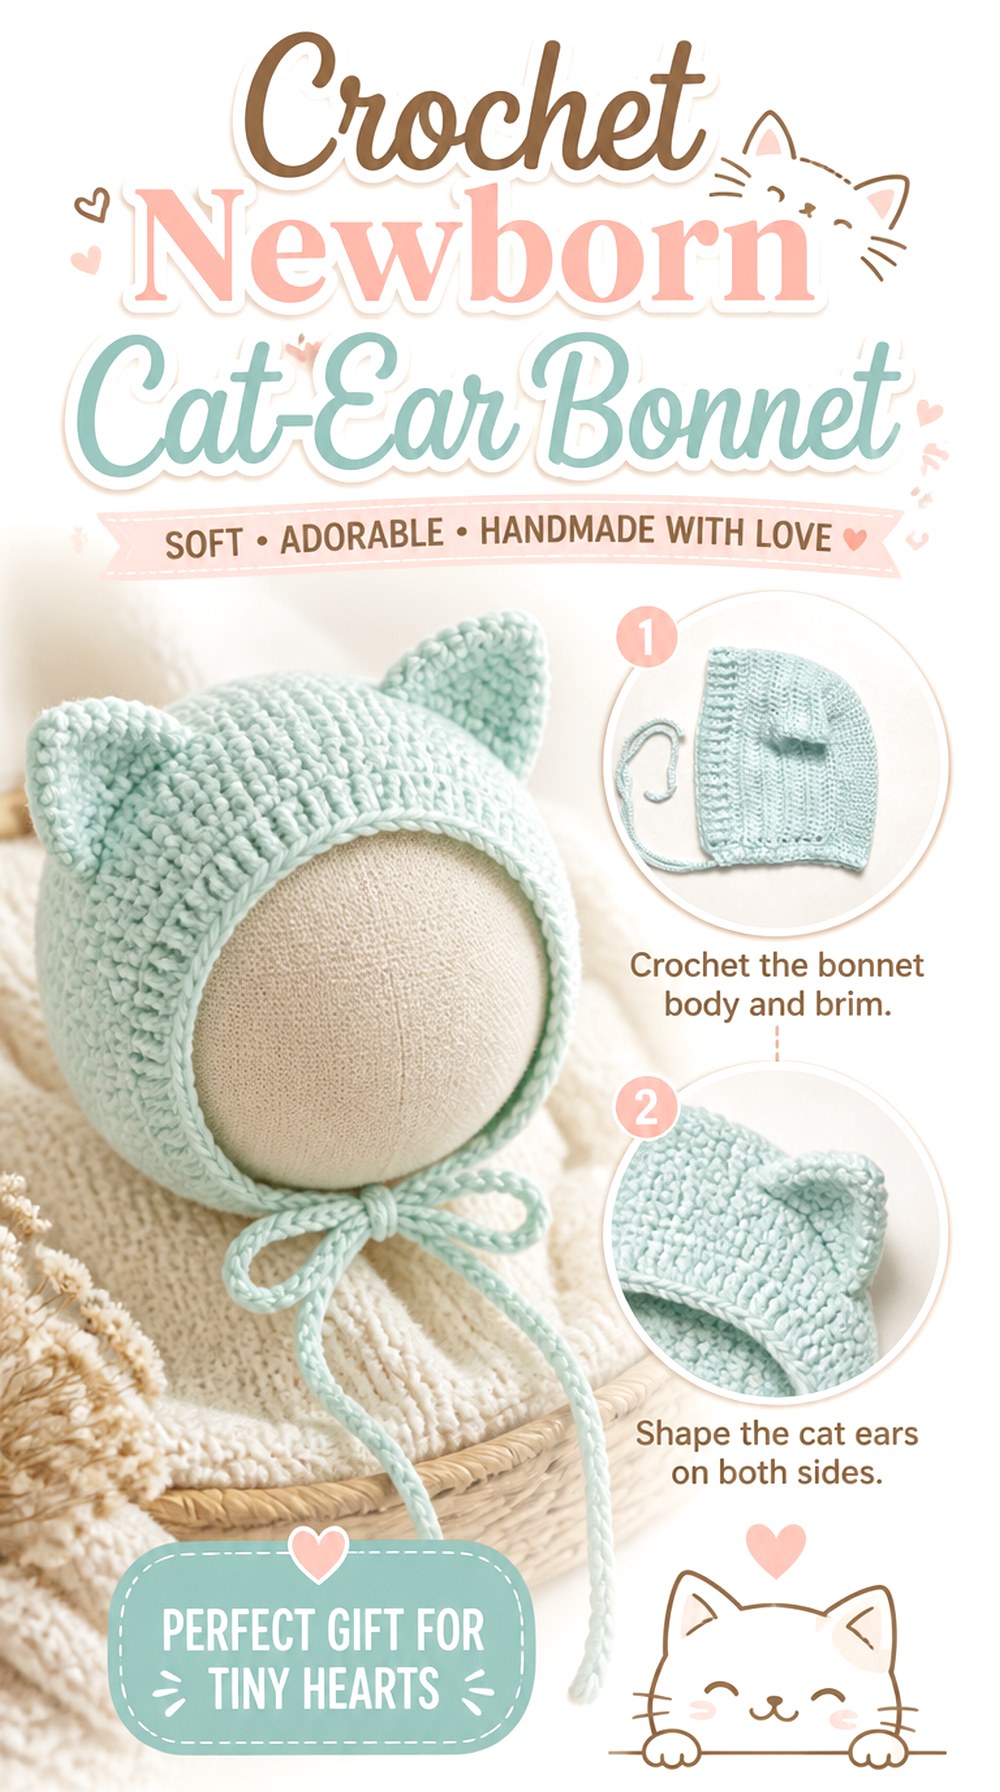
Onndiary’s newborn bonnet adds small cat ears to an otherwise close-fitting tied shape. The tutorial is labeled for 0–3 months and works through the face opening, back of the head, and tie strings, making the ears a decorative addition rather than the only defining feature.
That makes this project useful for a themed photo accessory or playful handmade gift. The scale of the ears matters: they need to remain visually proportional to a very small bonnet. This is also a project where the decorative concept should never distract from checking the baby’s face opening, tie placement, and supervised use.
Keep the Ears Secondary to the Bonnet Fit
Novelty ears are most successful when the underlying bonnet already sits correctly. Do not use the ear placement to compensate for a crown that is too deep, too shallow, or pulling to one side.
Before judging the decorative effect, look at the plain silhouette. The front should frame the face cleanly and the back should cover the intended area without forcing the bonnet forward.
Symmetry Matters More on Small Animal Details
Two ears placed only slightly differently can appear noticeably uneven because the bonnet itself is small. Compare their angle from the front, side, and top rather than judging each attachment independently.
If substituting a yarn with less stitch definition, consider how well it holds a small ear shape. A very fuzzy or floppy material may soften the feature considerably compared with the tutorial’s visible result.
Treat Newborn Ties as a Supervised Detail
The tutorial includes tie strings as part of the bonnet construction. For an infant project, cords should be considered a safety-sensitive feature rather than purely decorative.
Use the bonnet only in an age-appropriate, supervised context, and check for loose ends or attachments before each use. The same caution applies if additional whiskers, bows, buttons, or other embellishments are considered.
Original Tutorial and Creator Credit
Creator: Onndiary
5. Crochet Ruffle Edge Bonnet

Princess handmade’s bonnet puts the decorative emphasis around the edge, using a pronounced ruffle to transform the outline of the finished piece. The tutorial covers bonnet shaping and the ruffle effect rather than presenting the trim as a separate accessory added afterward.
This style creates more visual volume around the face than a plain ribbed or shell edge, so it works well when the goal is a romantic, costume-inspired, or statement bonnet. It also shows why border choice matters: two bonnets can share a similar basic crown yet look completely different once their face openings are finished.
Ruffle Fullness Changes the Face Frame
More ruffle does not automatically mean a better result. A very full trim can visually overwhelm a small bonnet or turn inward toward the cheeks depending on the yarn and tension.
Evaluate the first section of finished ruffle before completing the entire edge. You are checking whether it projects outward, lies flatter, or curls more strongly than expected from the tutorial.
A Crisp Edge and a Soft Edge Give Different Results
Fiber behavior has a noticeable effect on a ruffle. A yarn with stronger body can make each wave stand out, while a softer yarn may produce a more fluid, overlapping border.
Choose according to the intended look rather than selecting yarn only for softness or color. If the bonnet is for a child, comfort against the forehead and cheeks should remain part of that decision.
Keep Added Decoration Away From a Busy Border
Because the ruffle already creates repeated movement around the face, extra bows, flowers, beads, or appliqués can quickly make the design visually crowded.
If you want another accent, place it deliberately rather than distributing decoration everywhere. A restrained color change or a single secure motif can preserve the ruffle as the dominant feature.
Original Tutorial and Creator Credit
Creator: Princess handmade
6. Crochet Lace Baby and Child Bonnet
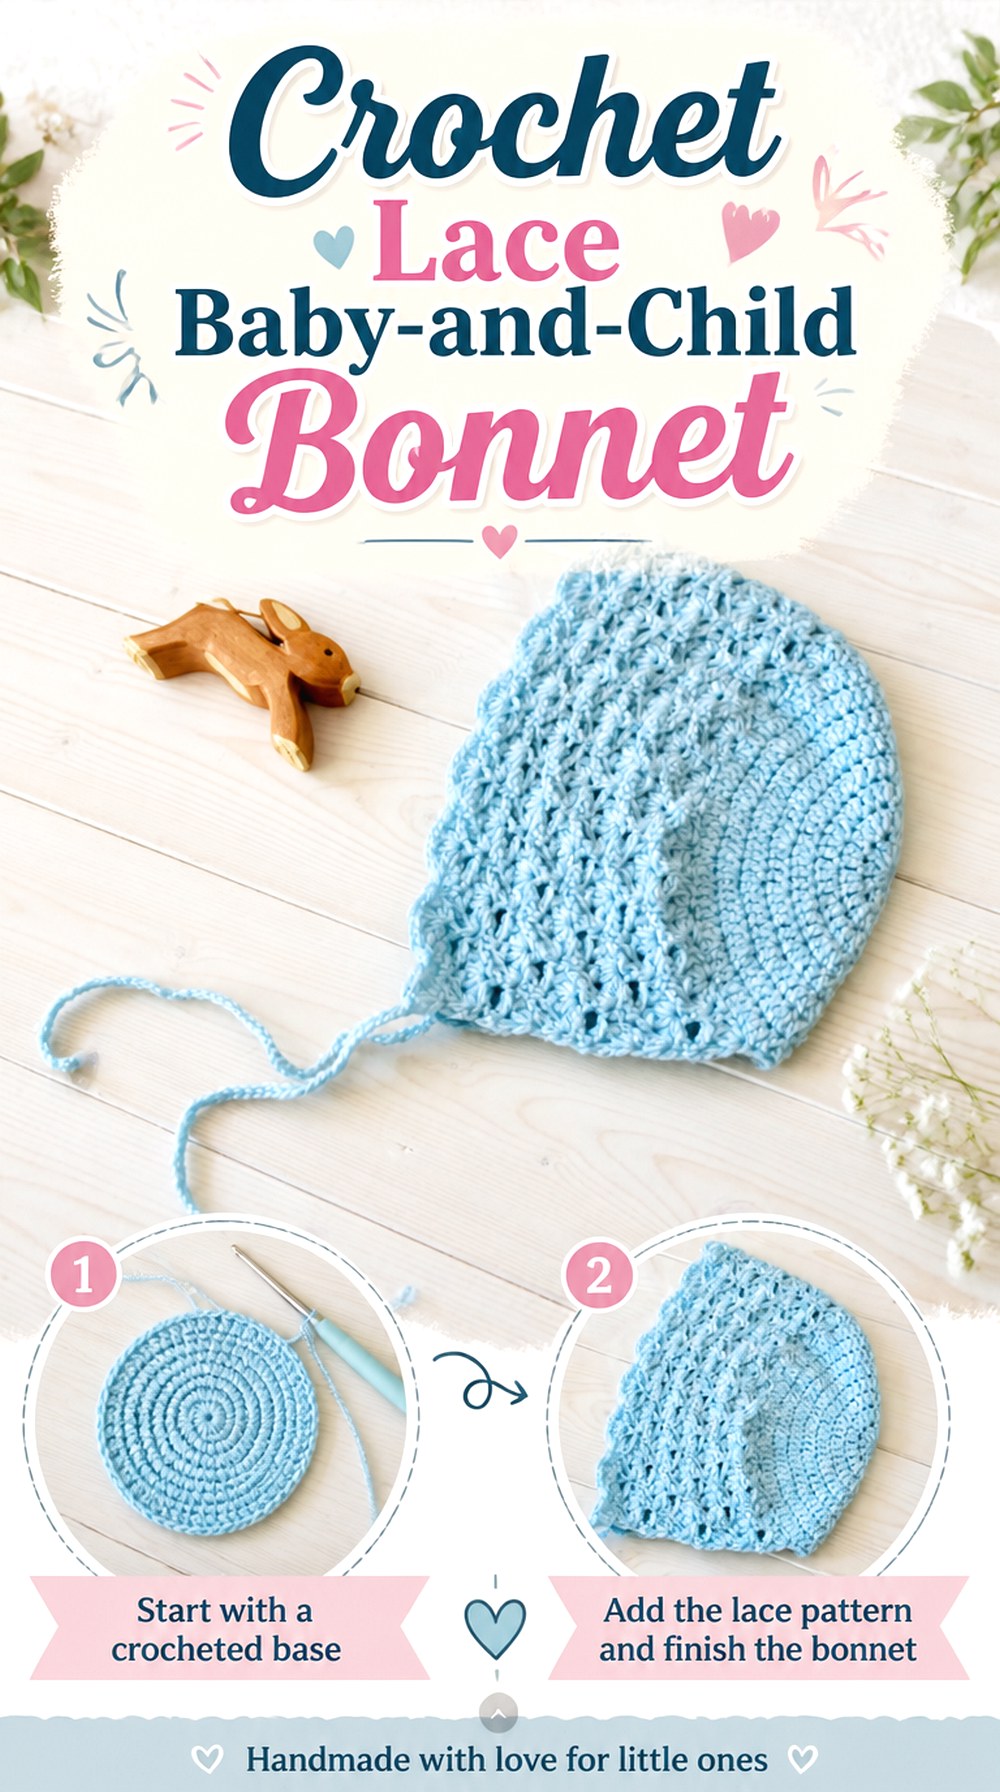
WoolyWondersCrochet’s bonnet uses an open, lace-like texture and is demonstrated for baby, toddler, and child sizes. The tutorial specifies DK yarn and includes sizing guidance for the three age groups.
Compared with thick ribbed and bobble bonnets, this design looks lighter and puts more emphasis on negative space between stitches. That makes it useful for dressier outfits or situations where the visual goal is delicate texture rather than maximum bulk. Because openwork can stretch differently from dense crochet, finished dimensions and face-opening stability deserve attention during fitting.
Openwork Makes Tension Differences More Visible
A small change in tension can noticeably alter the size of lace openings. This affects not only appearance but also the overall width and flexibility of the bonnet.
Before relying on the size label alone, compare your fabric with the tutorial’s visible density. If your openings are much larger or tighter, the finished dimensions may differ even when you have followed the same general construction.
Child Sizing Gives This Design a Longer Useful Range
The tutorial covers baby, toddler, and child versions rather than stopping at newborn sizing. That makes it a useful choice for sibling sets or for repeating the same visual style as a child grows.
Do not assume that scaling is simply proportional in every direction. Follow the creator’s specific size guidance because crown depth, face opening, and neck edge may change differently.
Let the Lace Be the Main Ornament
An open stitch pattern already supplies visual detail. Keeping ties and edging comparatively simple helps the lace remain readable.
If you use a multicolored yarn, first consider whether frequent color changes will compete with the holes and stitch pattern. Solid or gently changing yarn can make structural details easier to see, although the final aesthetic choice is personal.
Original Tutorial and Creator Credit
Creator: WoolyWondersCrochet
7. Crochet Shell Texture Baby Bonnet
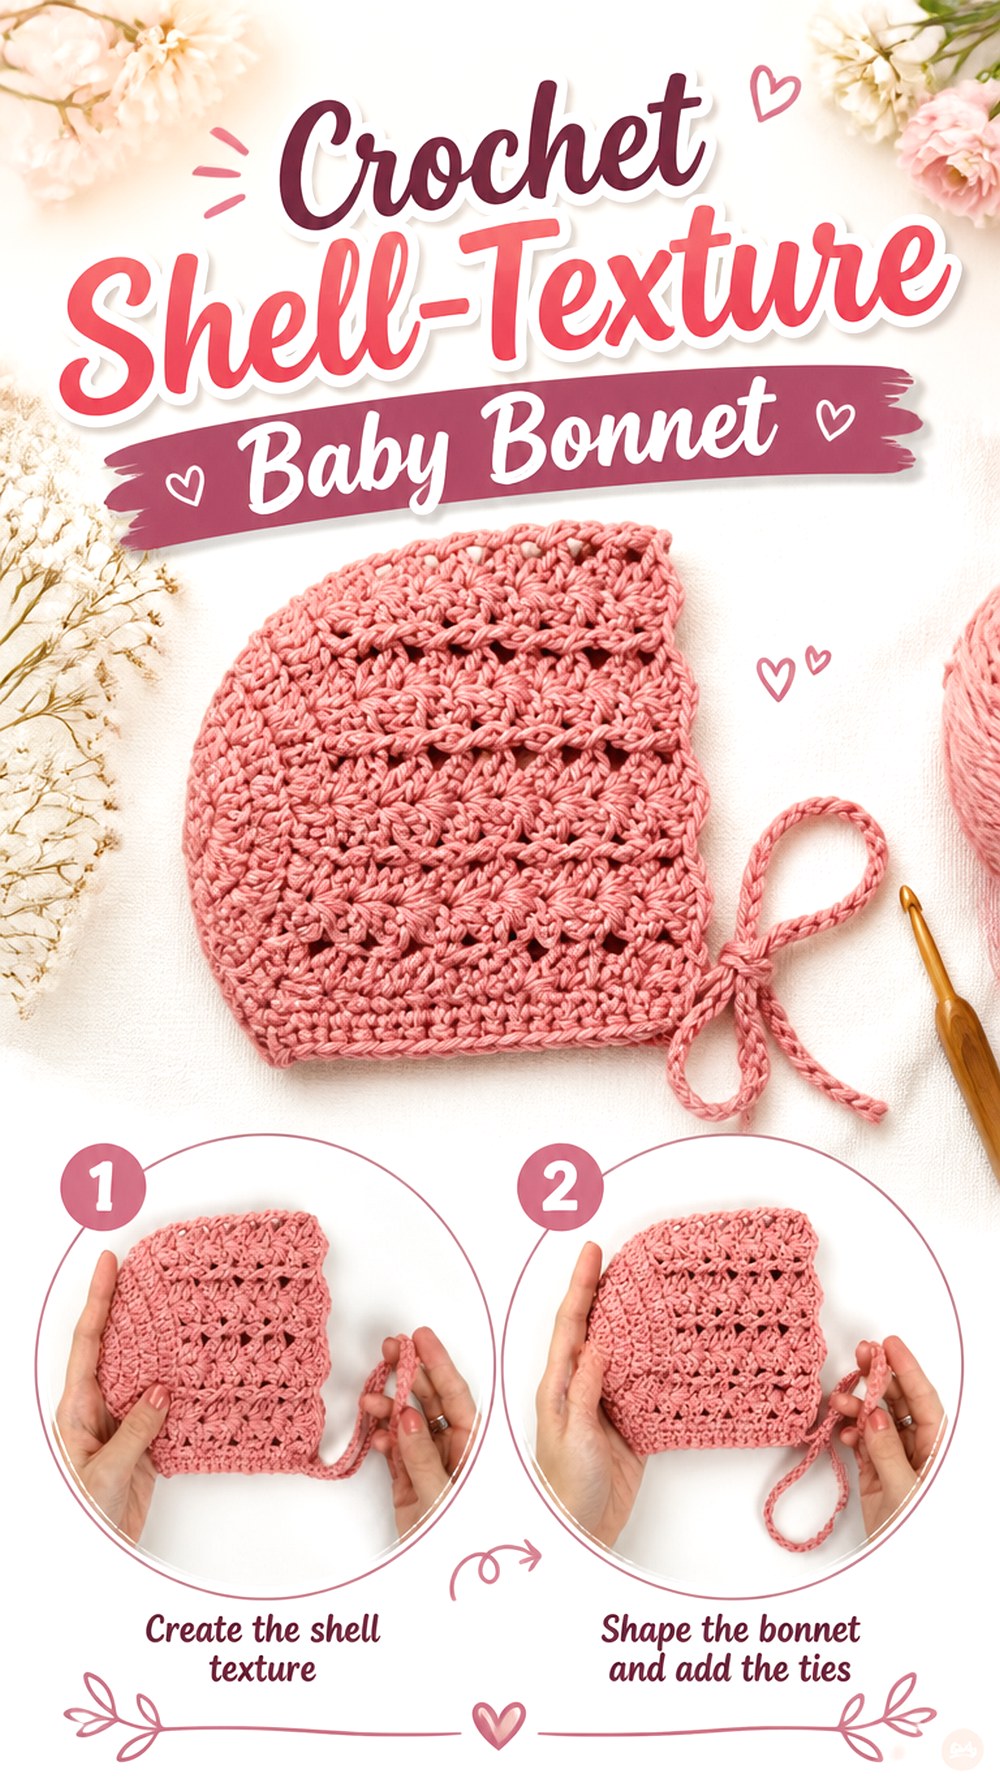
Croby Patterns’ tutorial produces a baby bonnet with more sculptural surface detail than a plain double-crochet cap. The accompanying pattern information identifies it as the Crochet Shell Bonnet and gives the video version for the 0–6 month size.
The shell-inspired texture creates a clearly defined face edge while keeping the overall shape recognizably traditional. It suits readers who want decorative stitch work without adding separate ears, appliqués, or a dramatic ruffle. Compared with open lace, the fabric also reads as more substantial, which changes both the visual weight and how strongly the bonnet holds its shape.
Shell Texture Benefits From Clear Stitch Definition
Repeated shell or cluster-like sections can lose their visual rhythm if the yarn is extremely fuzzy. A smoother yarn makes the changes in height and relief easier to distinguish.
When substituting materials, look at a small sample under normal lighting. If the texture disappears from a few feet away, decide whether softness or stitch visibility matters more for your intended version.
Check the Transition Around the Face
Decorative edging attracts attention to any unevenness along the face opening. Before finishing, confirm that both sides of the bonnet reach a similar point and that the edge does not wave unexpectedly.
Small differences can become more obvious once a repeated shell treatment is added. Correcting the base edge first usually produces a cleaner final frame.
Additional Sizes May Not Be in the Video
Croby Patterns states that the tutorial and free written version cover the 0–6 month size, while another size is associated with the PDF pattern.
That distinction matters if you are planning for an older baby. Do not simply extrapolate the video’s counts or dimensions. Check the creator’s currently available sizing information before changing the construction.
Original Tutorial and Creator Credit
Creator: Croby Patterns
8. Crochet Chunky Bobble Baby Bonnet
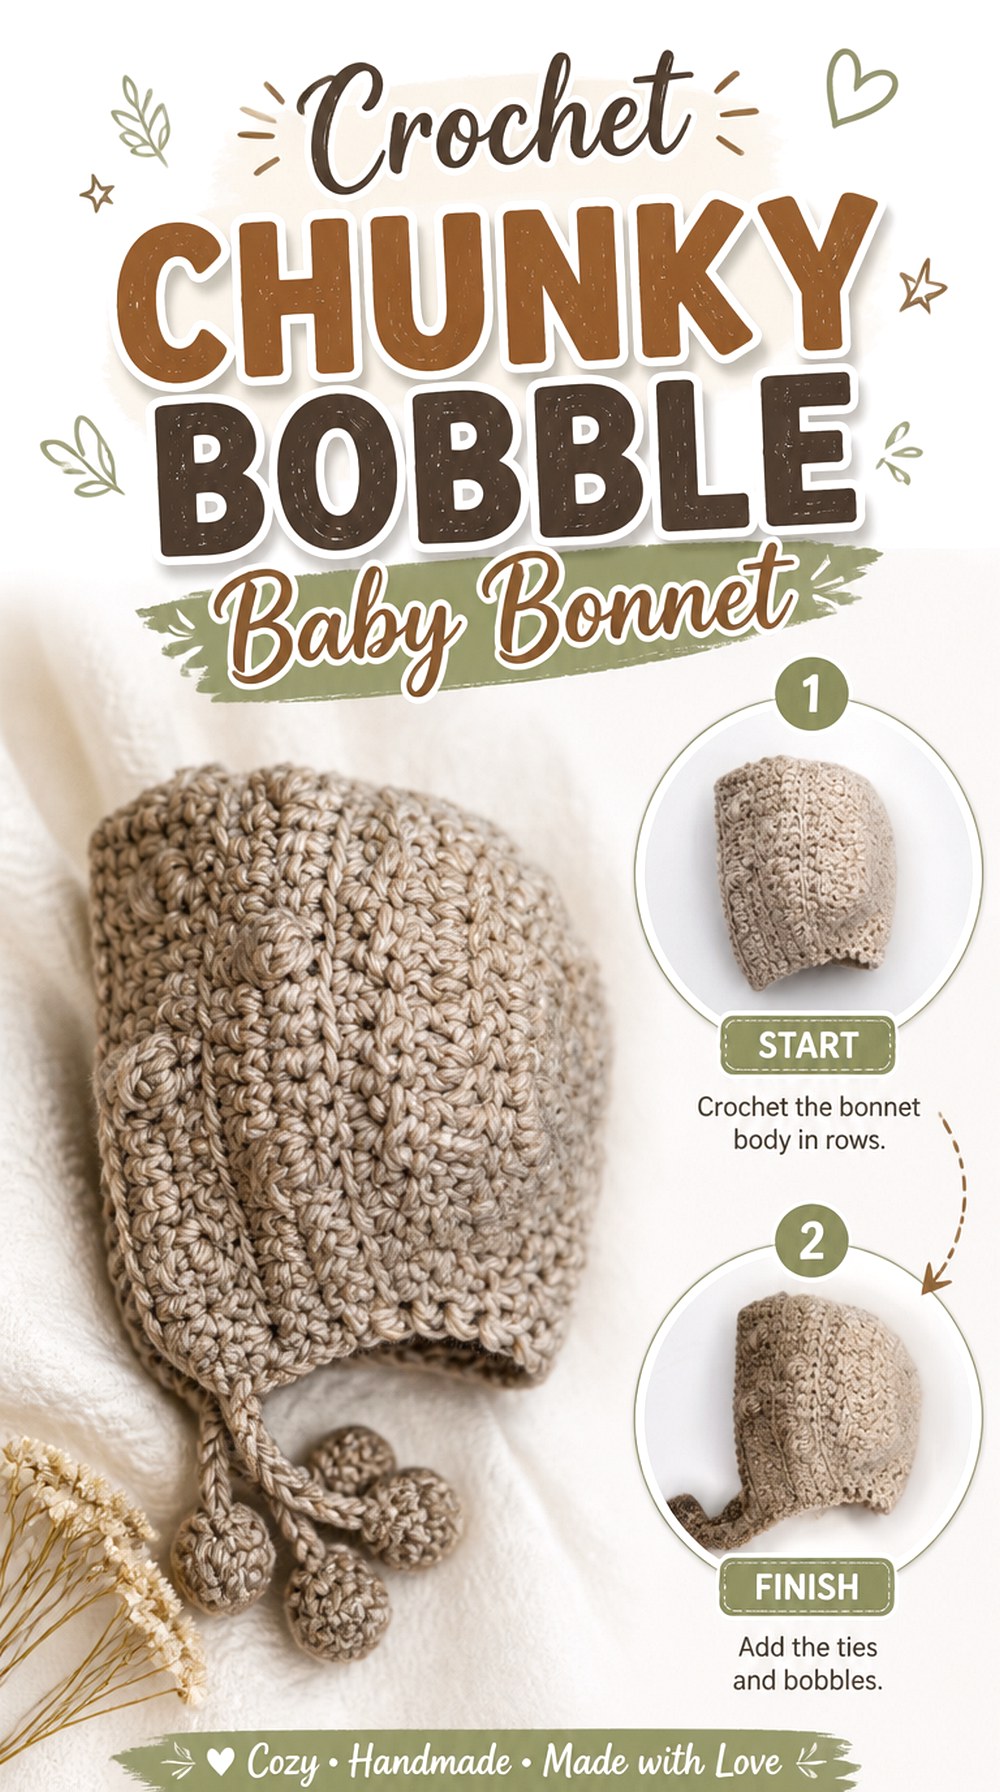
Humble Hus takes the opposite direction from delicate lace by using pronounced puff or bobble texture with a thicker-looking fabric. The tutorial is specifically presented as a newborn 0–3 month bonnet, and the supporting listing identifies bulky yarn and puff stitch as defining features.
The raised texture makes the bonnet feel visually substantial even at newborn scale. This project is a good comparison point for anyone deciding between a smooth photographic prop and a more tactile cold-weather look. Because bobbles add thickness, you should pay attention to where the texture lands around the face and underneath any edge finishing.
Bobbles Add Thickness as Well as Decoration
A bobble or puff is not simply a printed-looking motif on the surface. It uses more yarn and projects outward from the fabric.
That means a substitute yarn can make a large difference. With a heavier or stiffer material, the texture can become much more pronounced. Compare a small section before committing if you want the bonnet to retain the source video’s proportions.
Newborn Scale Makes Texture Placement Important
On an adult hat, a raised stitch may occupy a relatively small portion of the total surface. On a newborn bonnet, the same type of feature takes up much more visual space.
Check that the texture does not crowd the face opening or create uncomfortable bulk where the head rests. Decorative impact should be concentrated where it can be seen without interfering with wear.
Use the Published Size Instead of Guessing Downward
The tutorial is identified for newborn to 0–3 month sizing. If you need a larger bonnet, look for creator-supported adjustments rather than assuming a bigger hook will solve every dimension.
A hook change alters stitch size and fabric firmness simultaneously, which can change both fit and the appearance of the bobbles.
Original Tutorial and Creator Credit
Creator: Humble Hus
9. Crochet Belle Style Lacy Baby Bonnet

Loopy Mabel Crochet’s Belle Bonnet has a vintage, lacy presentation that differs from both the openwork WoolyWonders option and the thicker shell bonnet. The tutorial uses DK yarn and is presented as a baby-bonnet project with a decorative, heirloom-like look.
This direction works well when the bonnet itself is meant to be a prominent part of an outfit rather than simply warm headwear. The key planning question is not only whether you like lace, but how much ornamental detail you want concentrated around a very small accessory.
Vintage Detail Looks Strongest With an Even Edge
A refined lace bonnet exposes inconsistencies more readily than a highly textured chunky design. Uneven tension at the face opening can interrupt the decorative rhythm.
Periodically lay the work flat and compare both sides rather than waiting until finishing. A balanced underlying shape will make the final lace treatment look much more intentional.
DK Yarn Keeps the Detail Visible Without Extreme Bulk
The creator lists DK yarn and a 4 mm hook among the tools used for the tutorial. Those specifications help explain the relatively fine visual scale of the finished detail.
If substituting much heavier yarn, expect the decorative elements to enlarge as well as the overall bonnet. Use the creator’s measurements or pattern support rather than assuming the original stitch arrangement will retain the same proportions.
This Style Suits Dressier Pairings
The tutorial description positions the bonnet as suitable for occasions such as baby showers, christenings, and gifts. Its ornamental finish also makes it easier to pair with a simple garment rather than another heavily textured piece.
If making a coordinated set, repeat one yarn color or small stitch detail instead of duplicating every decorative feature across every item.
Original Tutorial and Creator Credit
Creator: Loopy Mabel Crochet
10. Crochet Parisian Style Vintage Baby Bonnet

Adore Crea Crochet’s tutorial presents a vintage-style baby bonnet identified by the creator as the Parisian Crochet Baby Bonnet. The video uses a cotton-merino yarn and includes a defined neckline, straps, and face edge as part of the finished design.
This option is less exaggerated than the ruffled, cat-ear, or chunky bobble versions. Its appeal comes from a balanced classic silhouette and restrained texture, making it easier to coordinate with cardigans, dresses, rompers, or simple blankets without competing with them visually.
A Quiet Silhouette Makes Yarn Choice More Noticeable
When a bonnet has no large ears, oversized ruffle, or strongly contrasting motifs, the fabric itself becomes easier to notice. Texture, halo, color variation, and stitch definition therefore have greater influence on the finished character.
A smoother yarn creates a cleaner classic outline, while a more textured fiber can make the same overall silhouette feel softer and more rustic. Keep the intended outfit in mind when substituting.
Check Neckline and Face Opening Independently
A bonnet can fit correctly around the crown yet still feel wrong at the lower opening. When evaluating this style, look separately at forehead coverage, cheek framing, and the way the bottom edge sits near the neck.
Avoid tightening ties simply to compensate for a face opening that is fundamentally too large. The size and shape should do most of the fitting work.
Confirm Which Size Support You Are Following
The creator’s description links both a free pattern and additional size information. Make sure the size you intend to make is actually covered by the tutorial or accompanying instructions you are using.
This is especially important when translating a baby pattern upward, because added crown depth and added face-opening length are not necessarily identical adjustments.
Original Tutorial and Creator Credit
Creator: Adore Crea Crochet
11. Crochet Alpine Stitch Shell Edge Bonnet

Toyslab Creations’ bonnet combines a textured body with a decorative shell-style edge, giving it two different visual layers rather than relying on one repeated stitch treatment. The tutorial linked for this version is a standard public YouTube watch video, and the accompanying pattern information identifies the bonnet’s alpine texture and shell edging.
That combination makes this project useful for crocheters who want a classic baby-bonnet shape but more contrast between the main fabric and the front border. The body reads as structured while the scalloped edge softens the outline around the face.
Separate Body Texture From Border Texture
When two stitch families are used in one small project, they should not compete equally. The alpine-style body provides the background texture, while the shell edge gives the eye a clear finish point.
If you introduce contrasting colors, decide which section should dominate. A high-contrast shell border will draw attention directly to the face; a tonal border makes the stitch change subtler.
Watch for Edge Flare
A decorative shell border naturally uses a different stitch rhythm from the body. If your tension or yarn behaves differently from the tutorial, the finished edge may flare more or less.
Check the first few repeats before completing the entire face opening. You want decorative movement without an edge so loose that it no longer follows the bonnet’s intended contour.
DK-Weight Construction Keeps the Two Textures Manageable
The supporting pattern information specifies DK-weight yarn for the bonnet. A much thicker substitute would enlarge both the raised body texture and the shells at once.
If using another yarn, compare the finished fabric rather than relying only on the weight number printed on the label. Different fibers can still create noticeably different density.
Original Tutorial and Creator Credit
Creator: Toyslab Creations
12. Crochet Cluster Stitch Newborn Bonnet
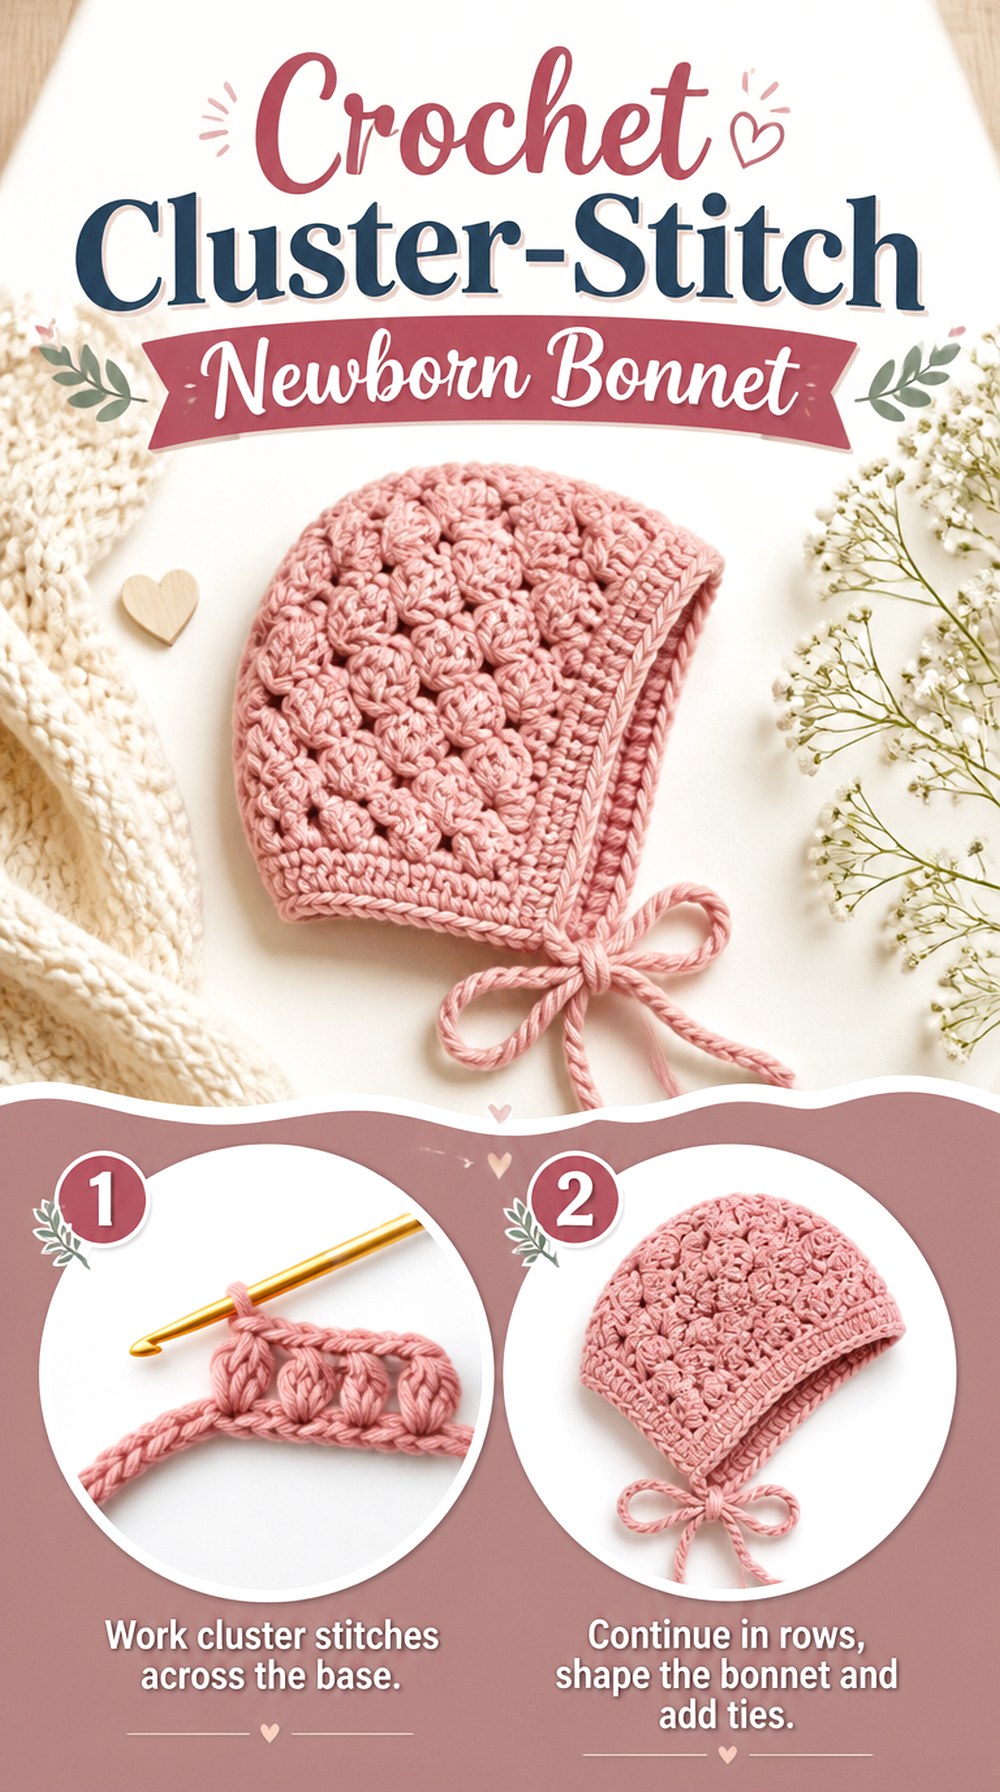
Daisy Farm Crafts’ Cluster Stitch Baby Bonnet uses a worked-flat, seamed approach with a ribbed-looking brim and repeated cluster texture across the body. The published pattern is written for newborn to 3 months and includes an optional video tutorial.
This construction offers a useful alternative to bonnets that begin at a circular crown. The fabric starts from a face-framing brim and grows into a panel that is later shaped into the bonnet. That makes the front measurement especially important, because it establishes the span over the head before the back seam is completed.
Measure the Brim After It Has Started to Relax
Daisy Farm Crafts notes that the brim can stretch and recommends checking measurements as the fabric develops. That is valuable because ribbed or slip-stitch-heavy sections often behave differently once adjacent rows are added.
For your own version, do not judge the brim only while it is being held under tension. Place it naturally and compare the real dimension with the intended use.
Cluster Rows Create a Different Kind of Density
Cluster stitches create visible texture but distribute that texture differently from isolated bobbles. Instead of individual raised dots dominating the surface, the fabric develops a more continuous repeating pattern.
This is useful when you want depth without the extremely chunky look of a puff-heavy bonnet. Still, test how the chosen yarn feels against the head because texture can become firmer in a dense substitute.
The Flat Construction Makes the Back Seam Important
A seamed bonnet can look very clean when both sides meet evenly. Before joining, align the face edge, neckline, and top corners so one half is not being stretched to reach the other.
If the two sides differ, resolve the dimensional problem first. Forcing a seam together can cause the bonnet to twist and shift the face opening off center.
Original Tutorial and Creator Credit
Creator: Daisy Farm Crafts
13. Crochet Matching Set Baby Bonnet

Crochet for Baby’s tutorial is useful for readers who like making coordinated baby garments rather than a standalone accessory. The bonnet is demonstrated for a 0–3 month size, and the creator links it with a matching sweater and pants-and-booties project. The channel also provides its content in English and Spanish.
The design itself stays within the traditional baby-bonnet family, so its strongest difference in this roundup is planning: it can form part of a complete handmade outfit. That means color, yarn family, and visual weight can be considered in relation to several pieces instead of optimizing the bonnet alone.
Coordinate Texture Before Matching Every Color
A matching set does not require every piece to be visually identical. Repeating the same yarn family or one accent shade can create enough connection without turning the whole outfit into one uninterrupted texture.
If the sweater is already highly detailed, keeping the bonnet comparatively restrained can give the set more balance. Conversely, a simple garment can support a slightly more decorative bonnet.
Use the Creator’s Size Notes for Rescaling
The description gives the demonstrated 0–3 month size and also discusses adjustments involving yarn and hook choices for other baby sizes. Use those creator-provided notes rather than inventing your own universal conversion.
Changing hook size changes more than circumference; it can affect fabric density and how the bonnet frames the face. Check the resulting dimensions rather than relying exclusively on an age label.
Think About the Whole Outfit’s Bulk
A bonnet, sweater, pants, and booties made from the same yarn can create a very cohesive set, but the combined visual and physical weight matters.
For indoor photos or gifting, you might prioritize coordinated appearance. For actual wear, choose pieces based on environment and comfort rather than assuming the full set must always be worn together.
Original Tutorial and Creator Credit
Creator: Crochet for Baby
14. Crochet Lacy Pixie Puff Baby Bonnet

The Pixie Puff Baby Bonnet from Fuad Azmat / YARNutopia by Nadia combines raised puff texture with a distinct pointed pixie silhouette. The accompanying project page identifies it as an elfin, conical bonnet for the demonstrated 3–6 month size and notes that the video works from measurements when discussing size changes.
That shape sets it apart from almost every other baby bonnet in the list. Instead of trying to smooth the back of the crown into a rounded profile, the design intentionally preserves a point. It is therefore useful for fairy-tale styling, seasonal photos, or anyone who prefers a visibly whimsical construction.
Preserve the Point When Changing Size
The defining feature is the pixie profile, so resizing should not accidentally convert it into an ordinary rounded bonnet. Width, depth, and the final back shape need to remain visually related.
The creator’s supporting page notes that measurements are used for adapting the design. Follow that approach rather than enlarging one direction independently and hoping the point remains proportional.
Puff Texture Makes the Silhouette More Dimensional
Raised puffs give this bonnet surface depth in addition to its pointed outline. That means the design already has two strong visual features.
A highly variegated yarn could introduce a third competing element. If the goal is to emphasize both texture and shape, a more controlled color treatment can keep those structural features readable.
Fantasy Styling Still Needs Practical Baby Checks
The pixie shape may be playful, but the same fit considerations apply as with a conventional baby bonnet. Check that the face opening remains clear and that any lower cords or ties are used safely and under supervision.
For a photo-oriented adaptation, decorative additions can be tempting. Avoid unsecured small parts and make sure extra embellishments do not create loose pieces around an infant.
Original Tutorial and Creator Credit
Creator: Fuad Azmat / YARNutopia by Nadia
Which Crochet Bonnet Direction Fits Your Goal?
For modern or older-wearer styling, the Granny Square Tie Bonnet, Ribbed Cold-Weather Bonnet, and Slouchy Bonnet Beanie move furthest away from traditional babywear. The granny-square version emphasizes modular colorwork, the ribbed option emphasizes substantial texture, and the slouchy design prioritizes extra crown depth.
For decorative baby photos or statement outfits, the Cat-Ear, Ruffle-Edge, Chunky Bobble, Belle-Style Lace, and Pixie-Puff projects create the most obvious visual character. If you prefer a quieter traditional bonnet, the Shell-Texture, Parisian-Style, Alpine-Stitch, Cluster-Stitch, and Matching-Set versions provide detail without completely changing the classic shape.
Conclusion
The most useful way to choose among these 14 crochet bonnet ideas is to start with silhouette. Pick granny squares or a slouchy bonnet-beanie for a more modern accessory, ribbing or bobbles for stronger texture, lace or shell edging for a delicate look, and the pixie or cat-ear styles when the shape itself should feel playful.
For baby bonnets, sizing and safe use should take priority over decorative details, especially when ties or added embellishments are involved. Once the basic fit and construction suit your purpose, color and finishing become much easier decisions. Use the original tutorials linked with each project for the creators’ exact construction details, measurements, and supported adjustments.
Frequently Asked Questions
Are crochet bonnets only for babies?
No. This collection includes adult-appropriate and adaptable directions such as the granny-square bonnet, ribbed cold-weather bonnet, and slouchy bonnet-beanie alongside baby and child projects. The important distinction is sizing support. Do not take a newborn tutorial and assume it can become an adult bonnet by using thicker yarn. Choose a tutorial that already addresses an appropriate size range or provides a measurement-based method for adapting the shape.
How should I choose a crochet bonnet size when age labels differ?
Treat age as a reference rather than an exact measurement. Compare the tutorial’s stated dimensions, gauge, or measurement guidance with the intended wearer’s head and the way the bonnet is designed to sit. Check crown depth and face opening separately. If you change yarn or hook size, recheck the fabric because those substitutions can affect stretch and density as well as the overall dimensions.
Are chin ties appropriate on crochet baby bonnets?
They require caution and direct supervision. Long cords can present a strangulation hazard, and Daisy Farm Crafts specifically warns readers to be careful with bonnet ties outside a supervised newborn-photo context. If a baby bonnet includes ties, consider the intended use, keep them secure, inspect them regularly, and never treat a decorative tie as a reason to leave a bonnet on an infant unattended.
Can I use a different yarn than the tutorial recommends?
Often, but the finished result may change substantially. A heavier yarn can enlarge shells, puffs, seams, and ribbing, while a finer yarn may make the bonnet lighter and less structured. Fiber also affects stretch and drape. When substituting, make a small fabric sample and compare it with any gauge or measurement information supplied by the creator rather than matching only the yarn-weight category.
Can any granny square be used for a crochet bonnet?
Not automatically. A substitute square needs compatible finished dimensions and appropriate fabric density. A very open lace square may stretch differently from a dense traditional granny square, while a dimensional flower motif can add bulk at the crown. Measure completed squares before joining and compare them with the tutorial’s layout. If the motifs vary in size, correct that difference before final assembly rather than relying on the edging to hide it.
What is the practical difference between a pixie bonnet and a regular bonnet?
A regular bonnet typically follows a rounded or softly seamed crown, while a pixie bonnet intentionally creates a pointed back profile. That changes the silhouette even when the face opening and ties are otherwise similar. When resizing a pixie design, preserve the relationship between width, depth, and the point. Enlarging only one dimension can make the characteristic shape look distorted.
Can I add ruffles, ears, or puff stitches to another bonnet tutorial?
They can inspire an adaptation, but adding decorative features may change weight, stretch, and edge behavior. A ruffle can make a face opening flare, ears need balanced attachment points, and dense puffs add thickness. First complete or assess the underlying bonnet shape. Then add decoration only where it will not interfere with fit, visibility, comfort, or—especially for baby projects—safe supervised use.