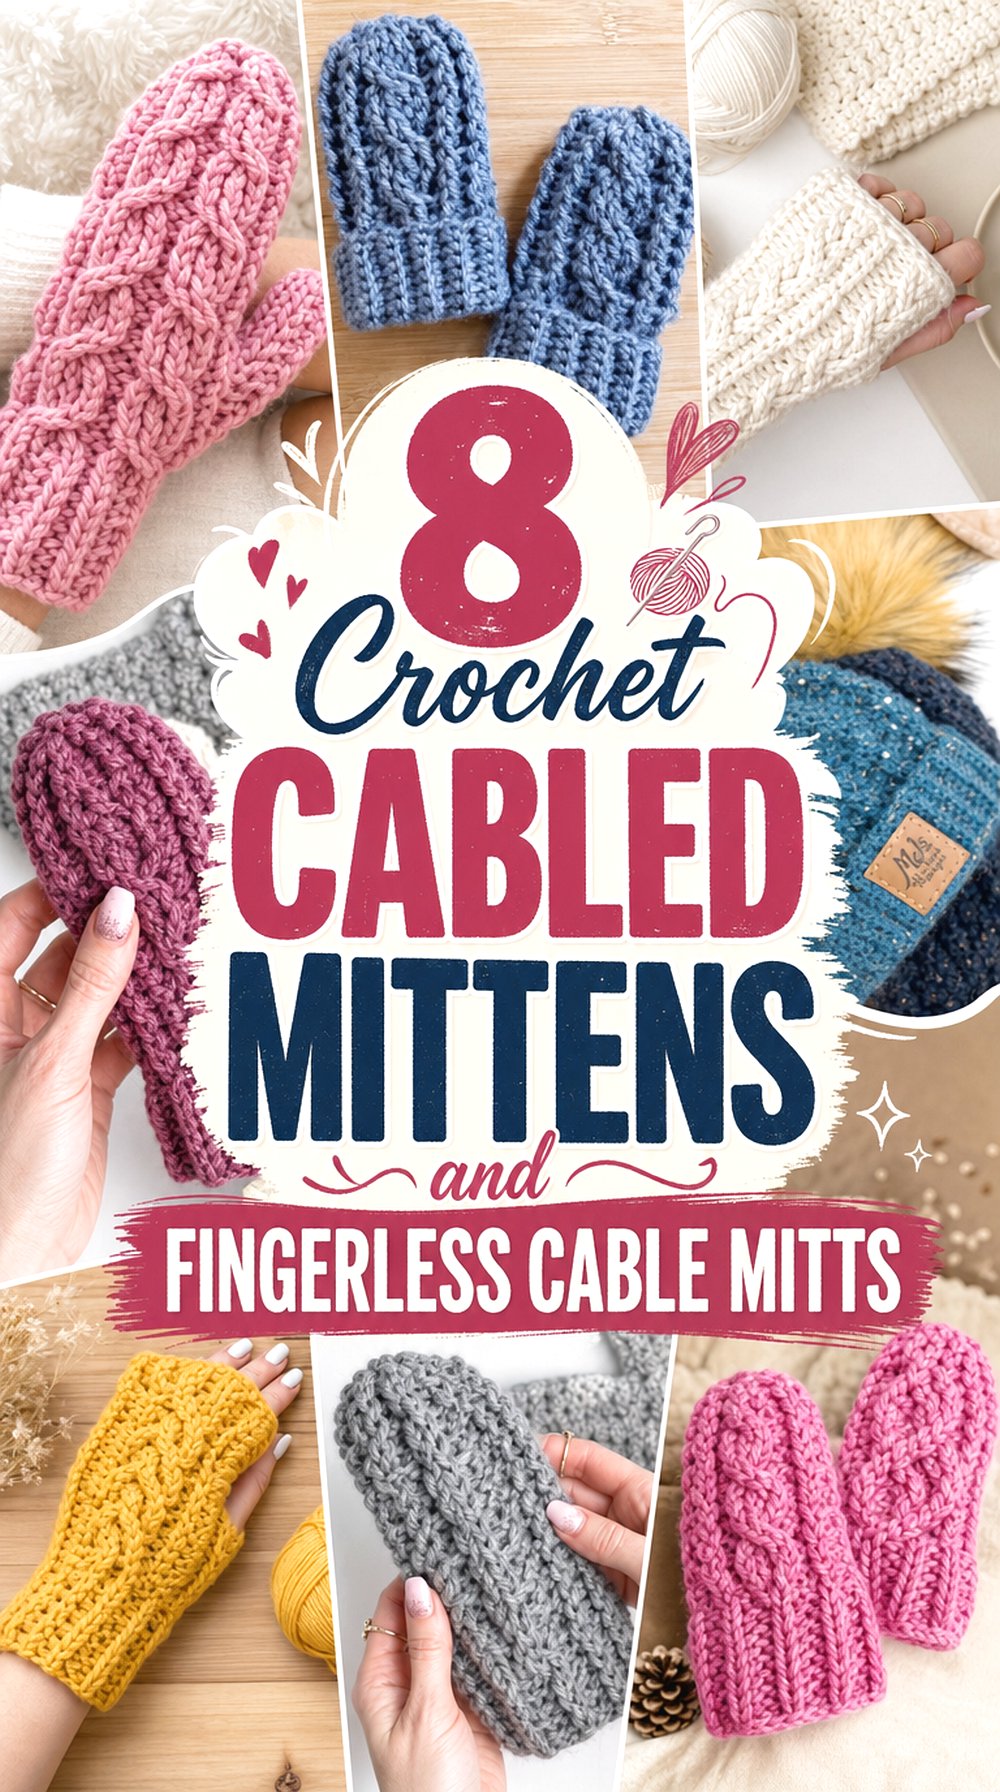
8 Crochet Cabled Mittens and Fingerless Cable Mitts
Crochet cables can change a small handwear project dramatically. A narrow raised cable adds just a little texture, while a broad braid can become the main feature of the entire mitten. This collection includes full-coverage winter mittens, baby mittens, and fingerless mitts so you can compare not only cable styles but also cuffs, coverage, bulk, and how much attention the textured panel demands.
Several crochet creators use the words mitts, mittens, and fingerless gloves differently, so each idea below identifies the actual finished style as clearly as possible. You will also find practical checkpoints for fit, cable definition, thumb placement, and yarn substitution rather than eight descriptions of similar-looking projects. Each project points back to a different original YouTube creator for the exact construction.
Quick List
- Crochet Winter Wonder Full-Cover Cable Mittens
- Crochet Baby Post-Stitch Cable Mittens
- Crochet Braided Cable Mittens
- Crochet Braided Fingerless Mittens
- Crochet Owl Cable Fingerless Mittens
- Crochet Twistwood Ribbed Cable Fingerless Mitts
- Crochet Mirrored Cable Fingerless Gloves
- Crochet Pacific Chunky Cabled Mitts
Choose by Coverage and Cable Placement
Before comparing colors, decide how much of the hand needs coverage. Full mittens protect the fingertips but require additional shaping around the top and thumb. Fingerless mitts leave the fingers available for tasks while concentrating most of the design around the wrist and back of the hand. That difference can matter more than the cable itself when choosing a tutorial.
Cable placement also affects the visual balance. A centered braid makes the back of the hand the focal point, while a narrow repeating cable reads more like an all-over texture. An owl-shaped cable functions almost like a motif. Compare the finished form first, then decide whether you want the cable to dominate the project or simply add surface detail.
Fit, Yarn, and Cuff Decisions That Matter
Cable fabric deserves a fit check before you commit to an entire pair. Raised post stitches and crossed sections can behave differently from the surrounding fabric, so copying dimensions from a completely different stitch pattern may not produce the same fit. When substituting yarn, compare your actual fabric with the creator’s intended result rather than relying only on the yarn-weight name.
Pay particular attention to the wrist, thumb opening, and widest part of the hand. A decorative cable is not very useful if the mitten cannot slide comfortably over the hand, while an overly loose cuff may allow the whole piece to shift. Yarn with clear stitch definition also makes complex braids easier to see; fuzzier fibers can soften the cable visually. These are planning considerations rather than replacements for each creator’s sizing instructions.
1. Crochet Winter Wonder Full Cover Cable Mittens
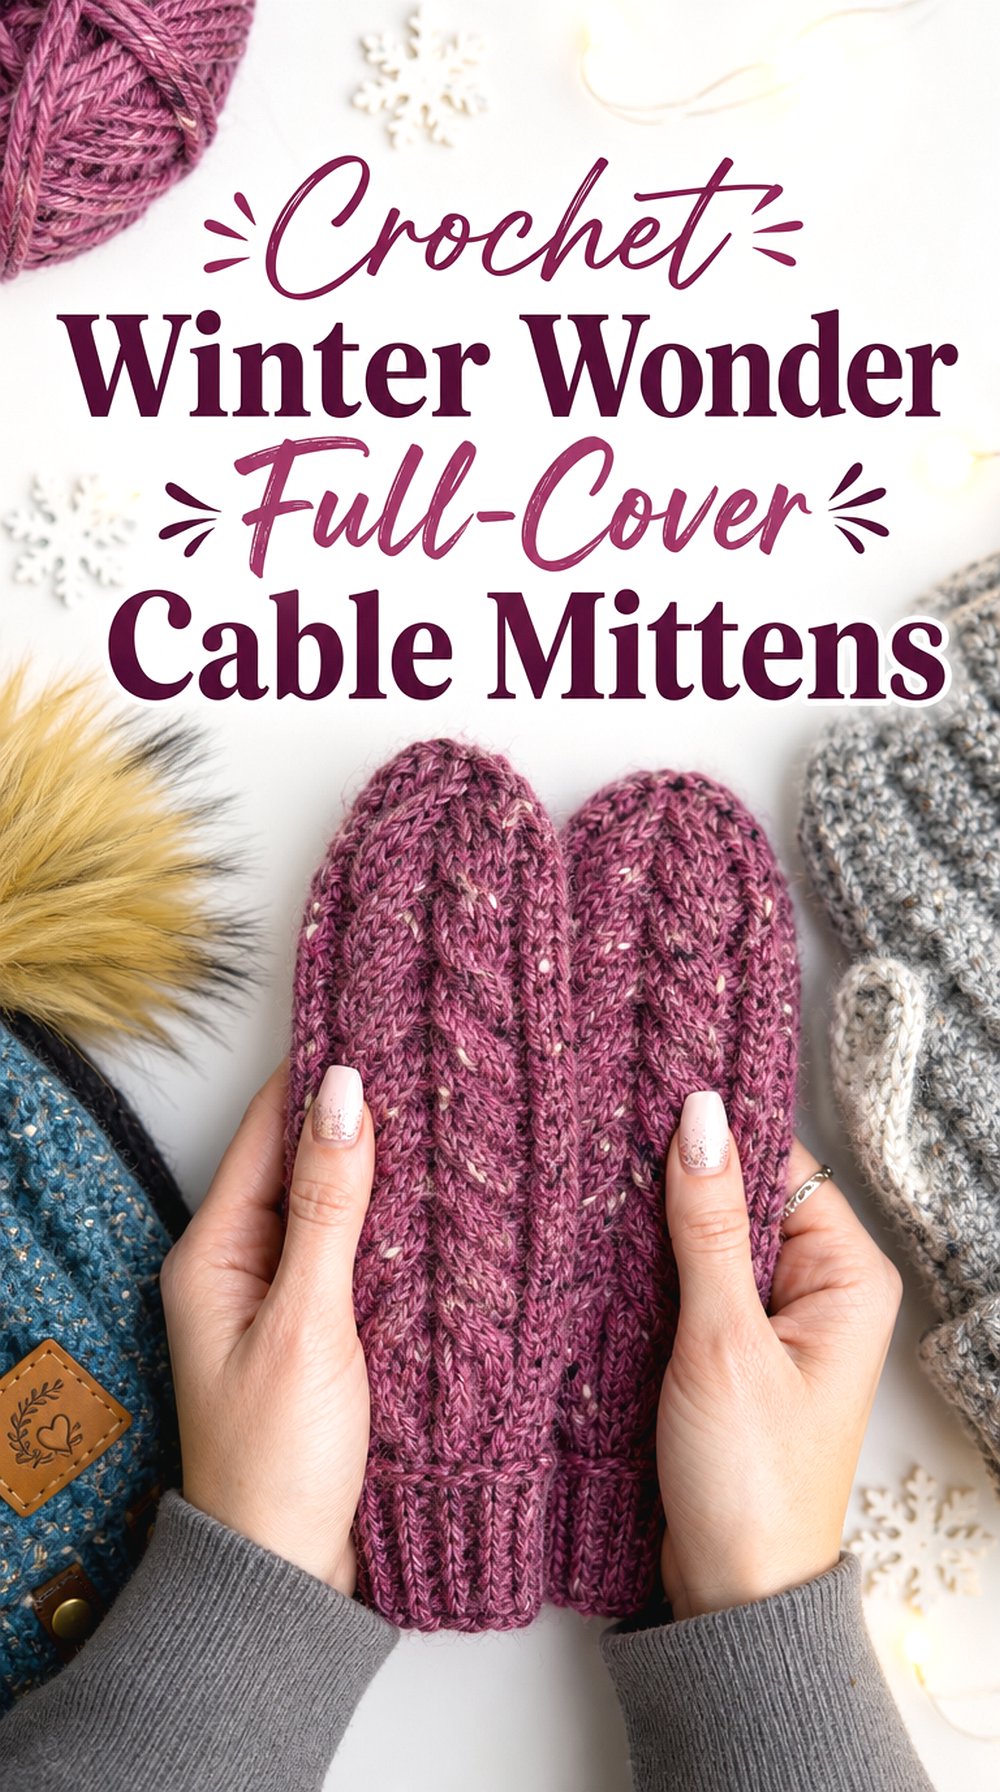
These full-coverage mittens use a repeating cable texture rather than placing one oversized braid down the center. MJ’s Off The Hook Designs describes the Winter Wonder design as a top-down mitten worked in the round with double crochet and front-post stitches, finishing with a ribbed cuff. The source pattern covers multiple sizes, while the accompanying video specifically demonstrates the large-child version.
That makes this option particularly useful when you want a traditional closed mitten with texture continuing across much of the hand. Compared with the larger braided designs later in the list, the cable effect is finer and more repetitive, so the surface feels detailed without one motif taking over the entire piece.
The Smaller Cable Repeat Creates an Even Texture
The source describes this design as using a simple two-stitch cable pattern. Because the cable repeats around the mitten instead of forming one large central braid, the texture reads more evenly across the finished hand.
If you prefer a quieter cable look, this approach may suit you better than a deep Celtic-style braid. When changing yarn, make a small sample of the textured fabric first; a yarn that hides individual post stitches can make a subtle cable look flatter than intended.
Top-Down Construction Gives You a Useful Length Check
This mitten begins at the top and progresses toward the wrist, according to the designer’s construction notes. The thumb opening is incorporated later and the ribbed cuff is added at the end.
For adaptation, use the recipient’s hand as a checkpoint rather than assuming hand length from age alone. The video demonstrates one specific size, so anyone making another listed size should use the creator’s corresponding written information instead of scaling the video by guesswork.
Keep the Cuff Snug Without Making the Opening Restrictive
A ribbed cuff helps visually separate the cable-textured hand from the wrist and gives the mitten a more finished edge. The designer uses a join-as-you-go ribbed cuff with a smaller hook in the source construction.
If substituting materials, test whether the cuff stretches comfortably over the widest part of the hand and then recovers at the wrist. A cuff that looks attractive while lying flat can still be inconvenient if the opening lacks enough usable stretch.
Creator: MJ’s Off The Hook Designs
2. Crochet Baby Post Stitch Cable Mittens
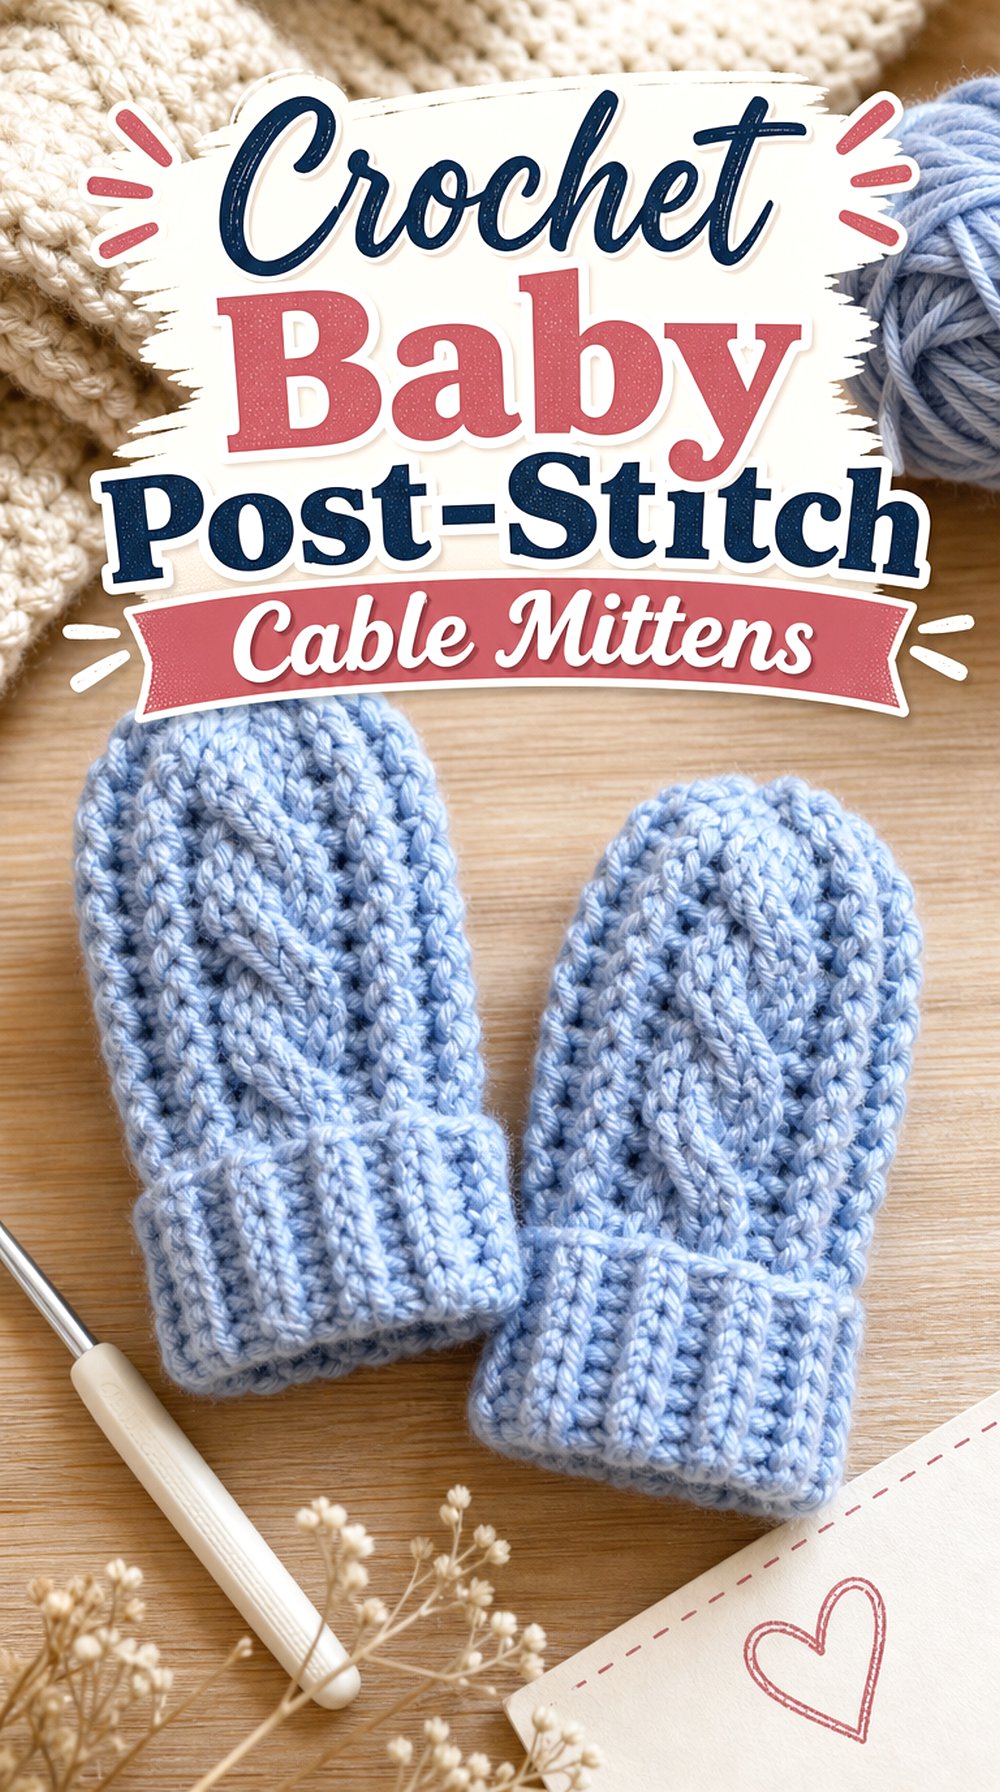
This baby-sized option changes the scale completely. Happy Crochet Club’s tutorial is specifically presented as a crochet baby mitten project for approximately 0–6 months, and the video description identifies front-post and back-post double crochet as part of the cable design.
A baby mitten is not simply a shortened adult mitten. The proportions, opening, and intended use are different, so this idea earns a separate place in the collection. The compact scale also means the raised texture needs to stay visually controlled; an oversized cable that works on an adult hand could overwhelm a much smaller mitten.
Small Scale Makes Cable Proportion More Important
With a tiny finished surface, the cable occupies a much larger percentage of the visible mitten than it would on adult handwear. The Happy Crochet Club tutorial visibly uses post-stitch texture to create the cable effect on a baby-scale project.
If adapting the idea rather than following the source exactly, do not simply insert an adult-sized cable repeat into a smaller mitten. Compare how much plain fabric remains around the raised section so the mitten does not become disproportionately thick or stiff.
Check the Wrist Opening Before Decorative Changes
Baby mittens need to pass over the hand without relying on adult-style finger flexibility. For that reason, any change to yarn, hook, or edging should be evaluated at the opening before you make the second mitten. This is general fit-planning advice rather than a replacement for the tutorial’s construction.
Also avoid adding loose decorative pieces simply to make the cable more elaborate. For items intended for babies, secure finishing and the absence of unnecessary detachable embellishments deserve priority over extra decoration.
Creator: Happy Crochet Club
3. Crochet Braided Cable Mittens

DIYmoda conEmíl’s project centers the visual interest on a pronounced braided treatment. The public tutorial is titled “Crochet braided mittens step by step,” making it one of the most direct braid-focused mitten matches in this collection.
Choose this direction when you want the raised braid to read as the primary design feature rather than an all-over background texture. A strong central braid also makes solid or lightly heathered yarns attractive choices when the goal is to show the crossing structure clearly, although any substitution should still be checked against the fabric and fit shown by the creator.
A Dominant Braid Needs Enough Visual Space
Large braided cables need surrounding fabric to keep the design legible. If the braid sits too close to the thumb area or side edge after a size modification, the mitten can appear crowded even when the stitch work itself is accurate.
Before changing the project width, look at how the tutorial positions the braid relative to the rest of the hand. Treat that spacing as part of the design rather than assuming the decorative panel can be moved anywhere without affecting the finished balance.
Use the First Mitten as Your Real Fit Sample
For paired accessories, the first finished piece gives you much better information than an unworked yarn label. Check whether the cable changes the usable width over the back of the hand and whether the thumb placement sits naturally before repeating the second mitten.
If your substitution creates substantially denser fabric than the tutorial shows, changing only the length will not solve a width problem. Compare the actual crocheted fabric and adjust only within the guidance supported by the source or an appropriate sizing method.
Keep the Raised Crossings Clear During Finishing
A braid can lose definition if finishing pulls the fabric unevenly or if the surrounding fabric is distorted. After completing the first piece, lay it flat without stretching and look at whether each section of the braid follows the same visual line.
Blocking may help settle some yarns, but fiber care varies. Follow the care guidance for the yarn you actually use rather than assuming every crocheted mitten can be treated with the same heat, water, or washing method.
Creator: DIYmoda conEmíl
4. Crochet Braided Fingerless Mittens
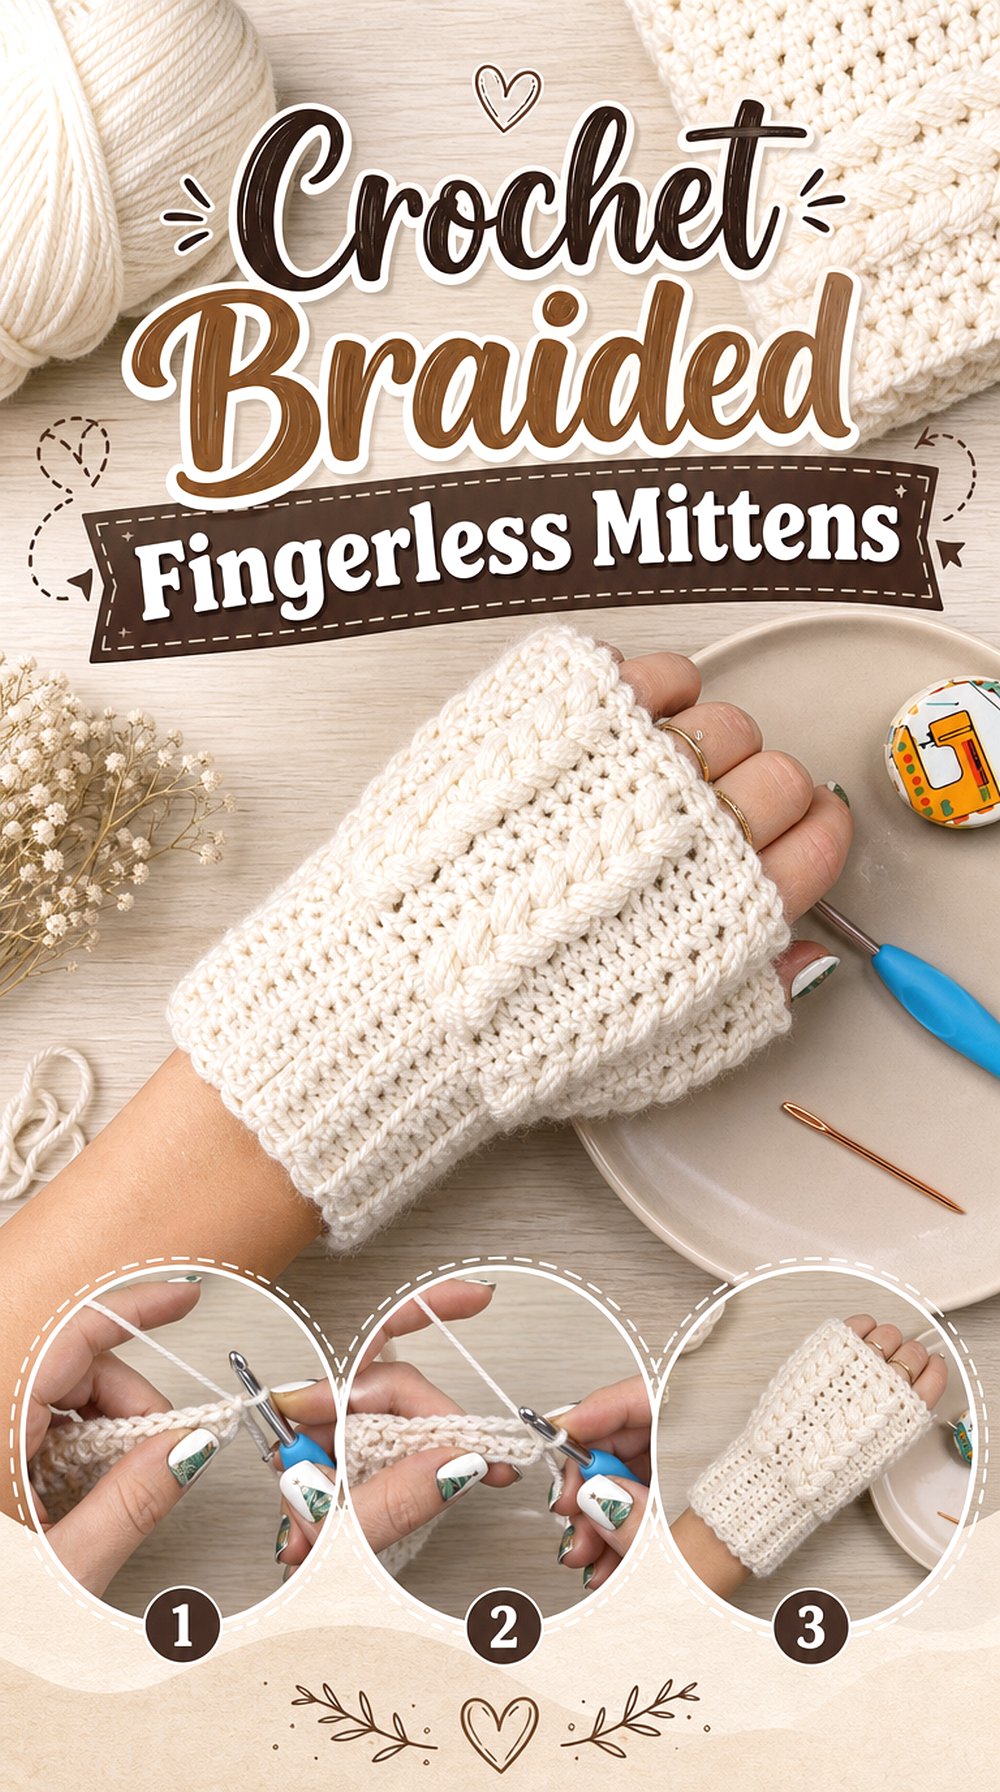
Le crochet d’Elsa offers another braid-centered interpretation, but the finished object is presented as mitaines—fingerless handwear—rather than a conventional closed-tip mitten. The public video “Crochet Braided Mittens” shows a crochet tutorial for this open-finger form.
This is a useful alternative when you like the visual weight of a cable but do not need fingertip coverage. Because there is no closed mitten top competing for attention, the decorative braid and wrist-to-hand transition become the primary design features.
Fingerless Coverage Changes the Most Important Fit Point
On full mittens, overall hand length and fingertip shaping are major concerns. On a fingerless design, the upper opening becomes more important because it needs to stay comfortably in place without restricting the base of the fingers.
When adapting this concept, check the hand opening while wearing the first mitt. Adding decorative edging or changing yarn may alter how firmly that edge sits, even when the wrist measurement remains unchanged.
Let the Braided Surface Be the Main Detail
This design already carries noticeable raised texture, so extra embellishment is not necessary to make the back of the hand visually interesting.
For customization, color is the lowest-risk change because it does not automatically alter construction. Structural changes—such as extending the fingerless section or changing the width of the cable panel—deserve more caution because they can affect fit and how the braid aligns on the hand.
Creator: Le crochet d’Elsa
5. Crochet Owl Cable Fingerless Mittens
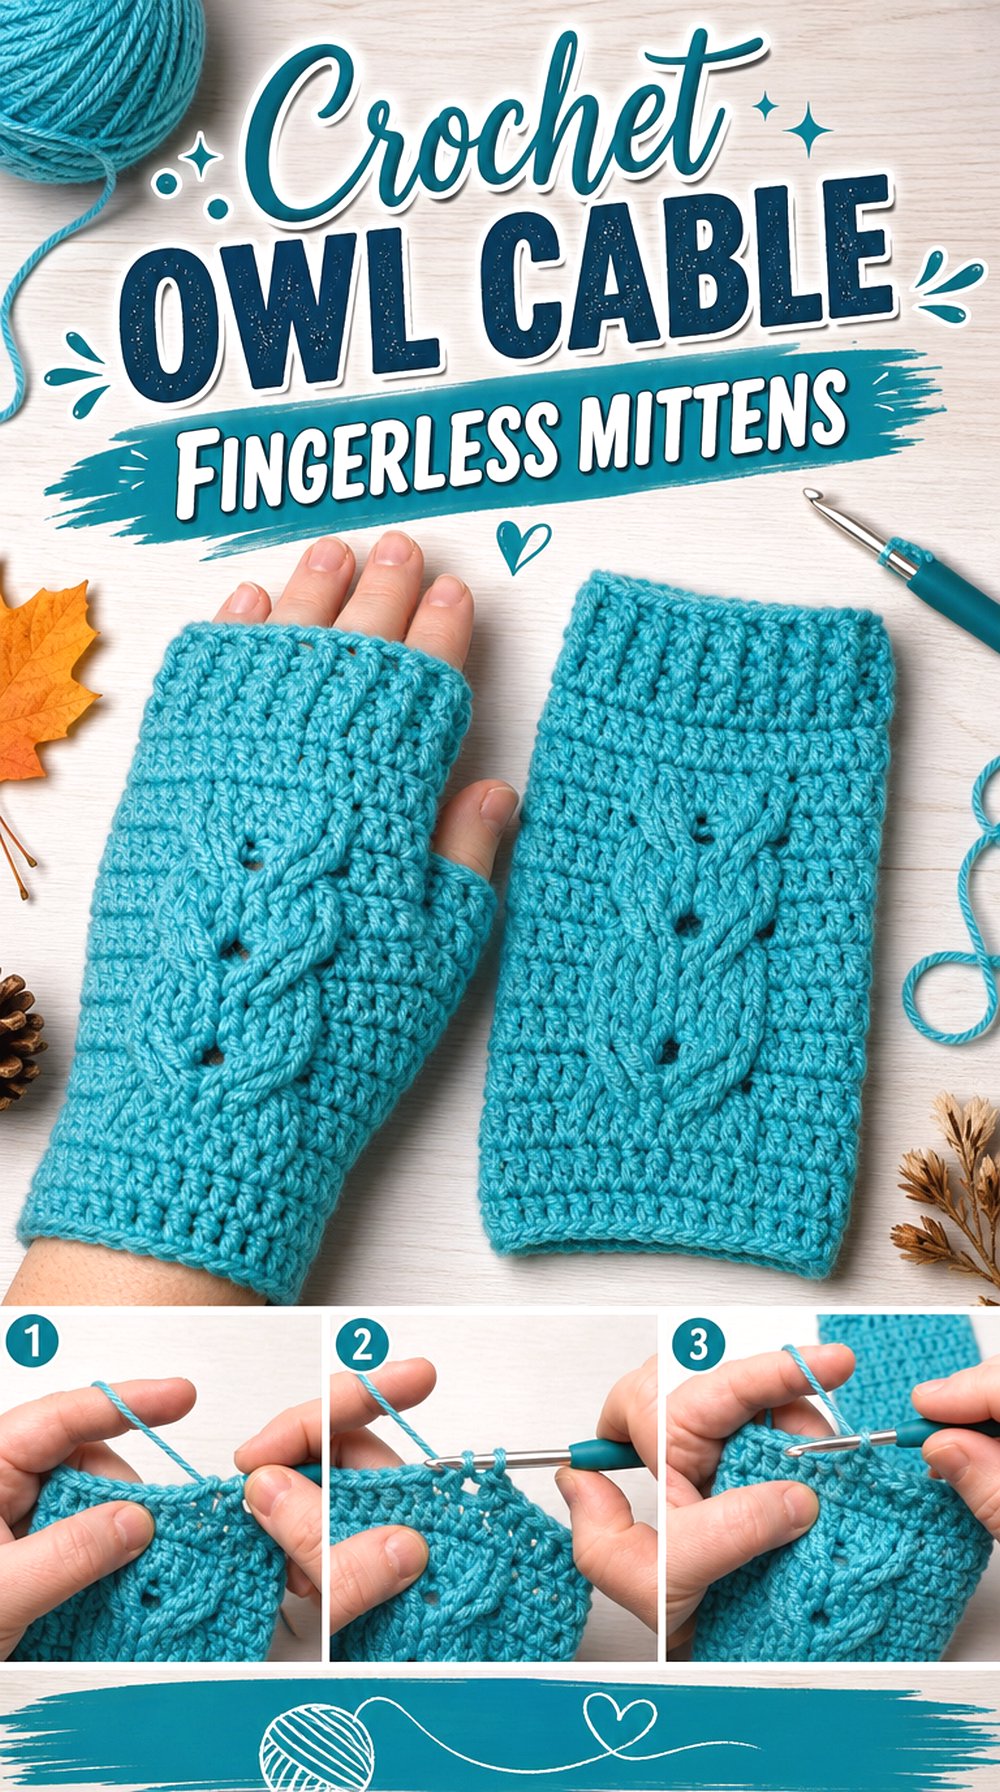
The owl cable is the most motif-like option in the collection. Bizzy Crochet’s tutorial is specifically titled “Owl Cable Crochet Fingerless Mittens,” and the creator also identifies it as a scrap- or stash-friendly fingerless-mitten project.
Unlike a continuous braid, this cable is meant to be read as a recognizable shape. That changes the planning priority: symmetry and motif placement matter as much as texture. This pair suits someone who wants playful surface detail while keeping the fingers uncovered.
Center the Owl Before Judging the Overall Fit
A recognizable cable motif looks most intentional when it sits where the viewer expects it on the back of the hand. If you modify circumference, check whether the owl still lands centrally instead of drifting toward the thumb or outer edge.
Do this check on the first mitten before repeating the pair. Changing the amount of surrounding fabric without reconsidering motif position can make two otherwise well-made mitts look mismatched.
Motif Definition Matters More Than Extra Texture
The owl already depends on raised cable lines to communicate its shape. A highly busy yarn may compete with those lines, especially if frequent color changes cross the motif.
That does not mean variegated yarn cannot work, but compare a small sample visually before committing. If the owl becomes difficult to recognize from a normal viewing distance, a calmer yarn may serve the design better. This is an editorial yarn-choice consideration based on the motif structure.
Match Left and Right Placement Deliberately
Paired motif handwear makes alignment differences more noticeable than plain mitts. Before finishing the second piece, place both mitts side by side and compare the owl height, cuff transition, and upper opening.
Small differences in overall length may be less distracting than one owl sitting visibly higher than the other. Using repeatable visual checkpoints is particularly helpful when the decorative element has a recognizable face-like orientation.
Creator: Bizzy Crochet
6. Crochet Twistwood Ribbed Cable Fingerless Mitts
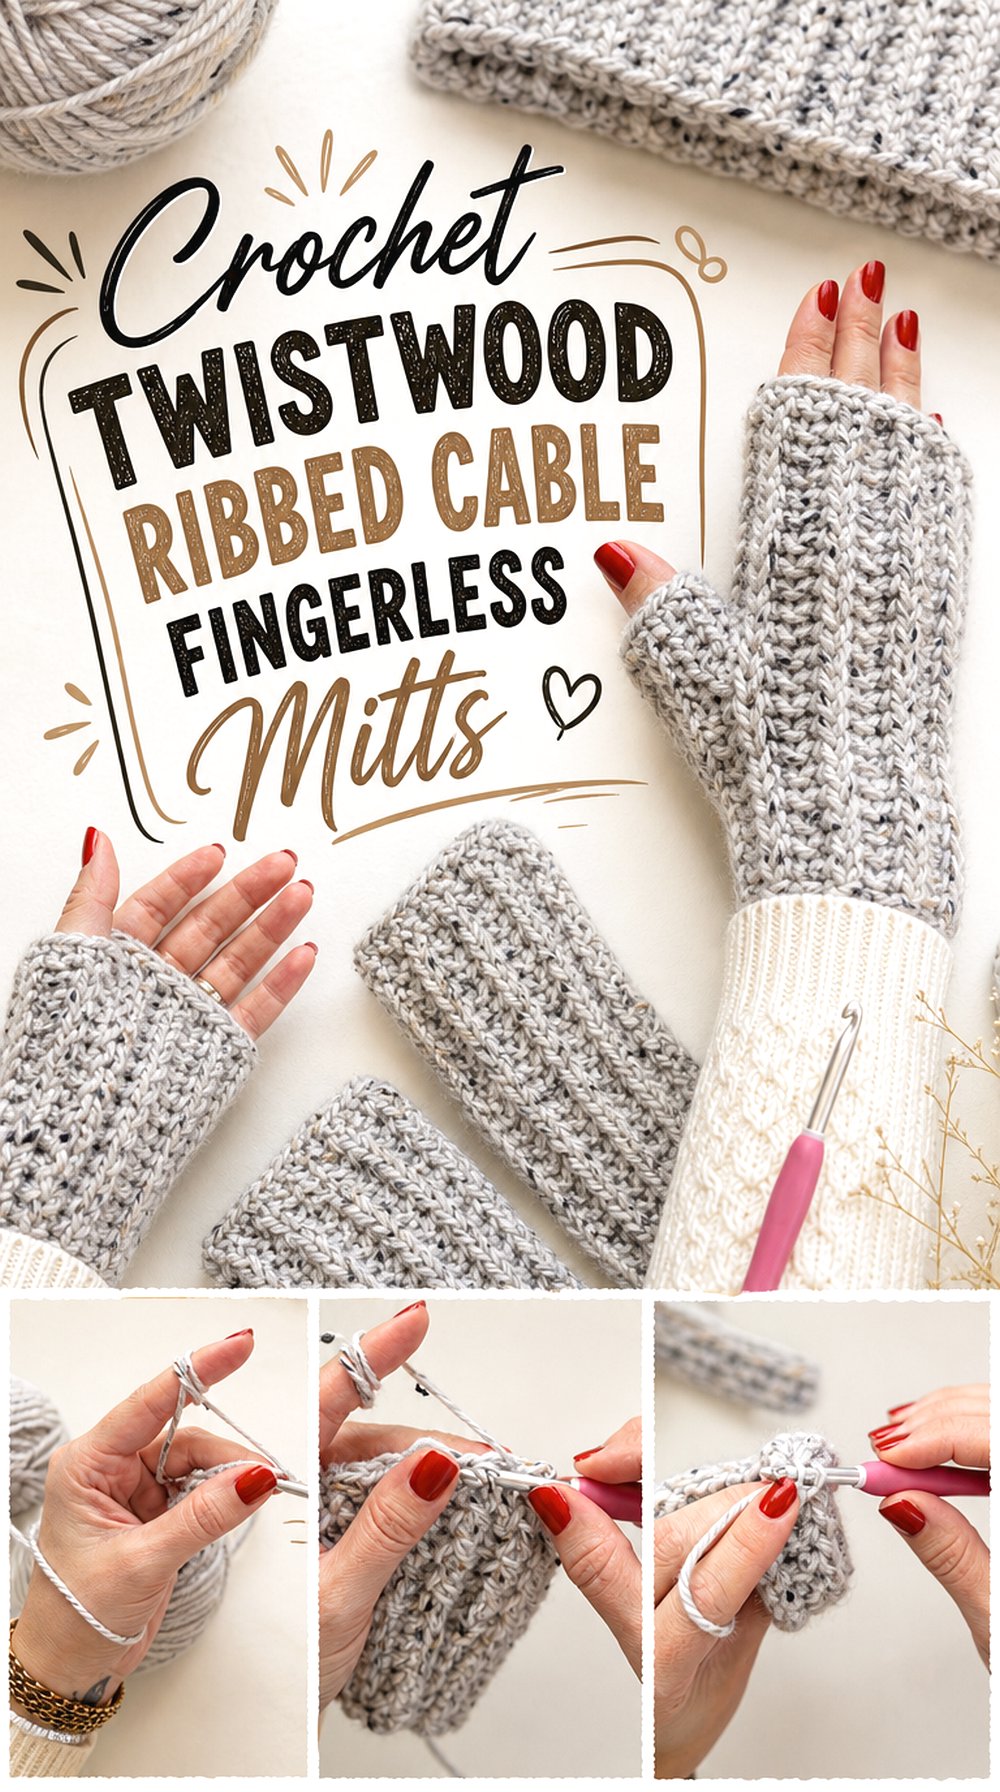
Blue Star Crochet | Veronika Cromwell’s Twistwood design combines a fingerless form with a distinct cable and ribbed construction. The YouTube tutorial is titled “The easiest cable crochet fingerless gloves – Twistwood Gloves Tutorial,” and the available tutorial description indicates that it walks through the project beginning with its ribbed section.
This option works well if you like strong vertical organization: the ribbing establishes a structured-looking foundation while the cable provides the decorative focus. It feels less novelty-driven than the owl design and more streamlined than an oversized multi-strand braid.
Ribbing and Cable Should Feel Like One Design
When two prominent textures meet in a small accessory, an abrupt tension change can be easy to see. As you move from ribbing into the decorative portion, compare the width of the fabric rather than assuming both stitch treatments will behave identically.
If one area flares or pulls inward after a yarn substitution, correct the fit issue before finishing the first mitt. Do not depend on the second piece somehow matching a problem that is already visible in the first.
A Cleaner Yarn Can Highlight the Twistwood Detail
The purpose of a cable is partly visual: the crossed texture needs enough definition to be readable. The Twistwood tutorial is specifically built around a cable-style fingerless glove, so preserving that visual separation is worth considering when choosing a substitute.
Compare a smooth, clearly plied yarn with a very fuzzy option if you are unsure. The softer yarn may still be comfortable, but it can visually soften the edges of the raised cable.
Check Thumb Comfort Before Repeating the Pair
Fingerless mitts often stay on the hand partly through the relationship among wrist fit, palm width, and thumb opening. If the thumb area feels tight, adding length above it will not correct the underlying issue.
Try on the first mitt during construction whenever the tutorial permits. A comfortable thumb opening should not force the entire cable panel to twist out of position when the hand moves.
Creator: Blue Star Crochet | Veronika Cromwell
7. Crochet Mirrored Cable Fingerless Gloves

Sierra Fontaine’s fingerless gloves use a clearly defined cable panel running along the back of the hand. Her written companion information says the gloves are worked in the round and uses both right- and left-crossing cable elements to build the design.
That mirrored movement gives this project a more architectural cable than a simple twist. It is a good choice when you want the cable itself to be the skill-building focus while keeping the finished accessory practical for uncovered fingers.
Opposing Cable Directions Need Consistent Attention
Because the design uses cable crossings in different directions, it is worth learning to identify what the finished crossing should look like rather than relying only on counting.
After each major cable section, compare the new crossing with the earlier motif. If the line unexpectedly travels in the wrong direction, catching the problem immediately is much easier than discovering it after the glove is nearly complete.
Thumb Placement Differentiates the Two Hands
Sierra’s published pattern treats the left and right thumb openings separately while maintaining the cable panel on the back.
That is an important reminder when adapting any hand-specific cable mitt. Do not assume the second glove is always an identical duplicate. Confirm how the creator distinguishes the two hands so the decorative panel remains on the intended side after the glove is worn.
Use the Cable Panel as a Fit Reference
A centered decorative panel gives you an easy visual checkpoint. Put on the first glove and see whether the cable sits naturally on the back of the hand rather than rotating toward either side.
Rotation can indicate that the glove is being pulled by the thumb opening, overall circumference, or uneven tension. Solve the cause instead of merely twisting the finished glove back into position for photographs.
Creator: Sierra Fontaine
8. Crochet Pacific Chunky Cabled Mitts
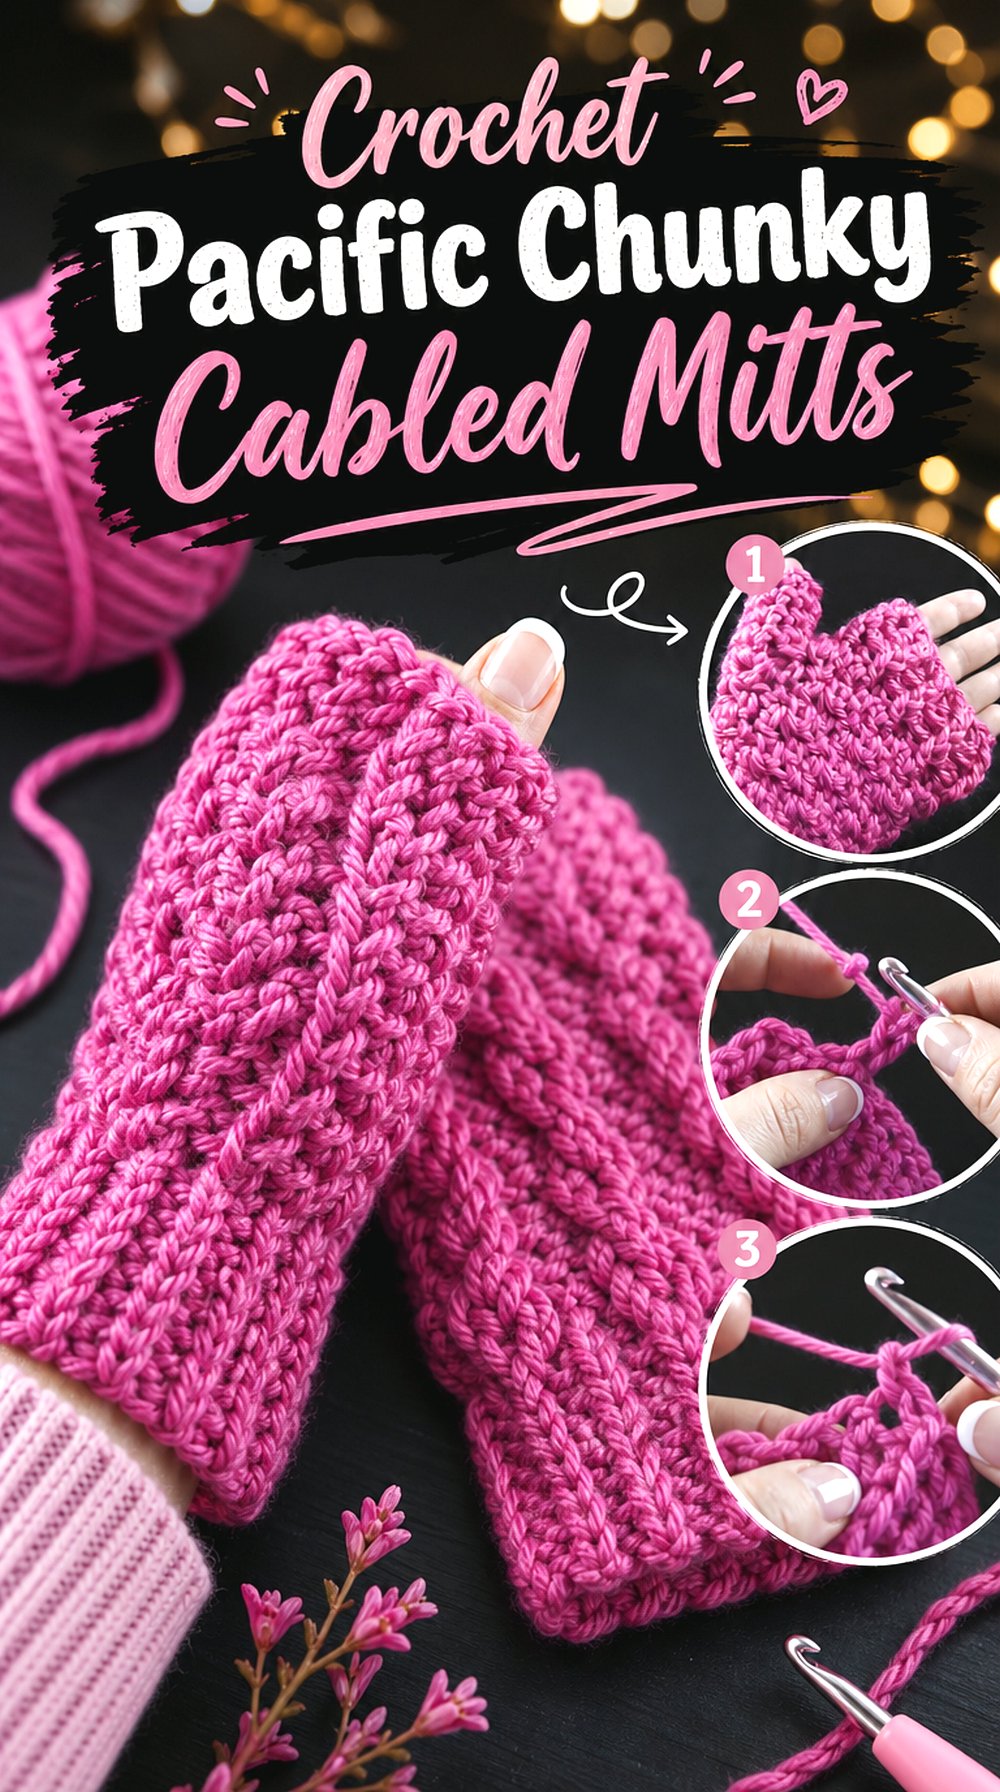
Bonnie Barker’s Pacific Chunky Cabled Mitts bring a heavier, more Celtic-inspired look to the collection. BonnieBayCrochet lists a dedicated tutorial for “Pacific Chunky Cabled Mitts” in its gloves and mitts library, where it sits alongside several other cabled handwear designs.
The chunkier scale makes this project noticeably different from the narrower Twistwood and Sierra cable panels. Instead of delicate texture, the cable has more visual mass. That can be attractive when you want the handwear to coordinate with similarly bold winter accessories.
Chunky Cables Increase the Visual Weight
A large raised cable can make even a small accessory feel substantial. Bonnie Barker’s Pacific design is explicitly presented as a chunky cabled mitt, so the thicker-looking texture is part of the project’s identity rather than a minor embellishment.
If substituting yarn, look at the finished fabric rather than selecting the thickest yarn available. A substitution that becomes excessively rigid can change hand movement and make the cable difficult to manipulate cleanly.
Give Raised Stitches Enough Room to Open
Complex cables can look compressed while they are being worked. Before deciding that the motif is too narrow or the crossings are wrong, compare the relaxed fabric with the tutorial’s finished appearance.
At the same time, do not aggressively stretch the mitt simply to make the motif wider. The useful target is a cable that reads clearly while the handwear still fits as intended.
Pair the Bold Texture With a Simple Finish
Because the cable is already visually strong, a restrained finish can keep the mitt from feeling overcrowded. This is particularly useful if you plan to coordinate the mitts with a cabled hat, scarf, or cowl.
Rather than adding unrelated surface motifs, consider changing color or cuff length only when the tutorial’s construction allows it. That keeps the cable as the design anchor instead of forcing several competing details into a small area.
Creator: BonnieBayCrochet
Which Crochet Cabled Mitten Style Should You Choose?
For full fingertip coverage, start with the Winter Wonder design or one of the full braided mitten options. The baby post-stitch mittens are the clearly child-specific choice and should not be treated as an automatically scalable adult design.
For fingerless handwear with a recognizable motif, the Bizzy Crochet owl stands apart. For a cleaner cable panel, the Twistwood or Sierra Fontaine versions keep the design more linear.
If your priority is bold texture, compare DIYmoda conEmíl’s braid with Bonnie Barker’s chunky cabled mitts. The main decision is not which has “more” texture, but how much raised cable you want relative to the size of the finished accessory.
Conclusion
These eight designs show why crochet cabled mittens do not need to look alike. The Winter Wonder and baby options suit readers who specifically need closed-hand coverage, while the fingerless projects shift more attention to cable placement, cuffs, and thumb comfort. The owl design works as a recognizable motif, Sierra’s version emphasizes directional cable movement, and Bonnie Barker’s Pacific mitts make the cable substantially bolder.
Choose first by coverage and fit, then by the amount of texture you actually want on the back of the hand. Once you have selected the right shape, use the original creator’s tutorial for the exact construction details rather than trying to transfer stitch instructions between unrelated mitten designs.
Frequently Asked Questions
Do crochet cables make mittens fit tighter?
They can change how the fabric behaves compared with an uncabled section, so you should not assume that two fabrics with the same flat width will feel identical on the hand. The effect depends on the particular cable, surrounding stitches, yarn, hook, and tension. Check the actual fabric and the creator’s sizing guidance instead of automatically adding stitches to compensate.
Should I choose full mittens or fingerless cable mitts?
Choose full mittens when fingertip coverage is the priority. Fingerless designs make more sense when you need your fingers available while still covering the wrist and much of the hand. This roundup includes both because crochet creators frequently use mitts, mittens, and fingerless gloves for closely related forms, but each project above identifies its actual coverage.
What yarn shows crochet cables most clearly?
Start by looking for yarn that allows the raised crossings to remain visually distinct. Smooth, clearly defined strands often make detailed cable shapes easier to read than very fuzzy yarns, although the appropriate choice still depends on the specific tutorial and intended fabric. Make a small sample if you are substituting rather than assuming that every yarn in the same weight category will produce the same appearance.
How do I know whether a mitten cable is centered correctly?
Use the back of the hand as a visual checkpoint while trying on the first mitten or mitt. The decorative panel should sit where the design intends without the thumb pulling it noticeably toward one side. For motif projects such as the owl mitts, centering becomes even more noticeable because the cable forms a recognizable image rather than an abstract texture.
Can I use an adult cable design on baby mittens?
Not safely by simply shrinking the overall mitten. Cable scale, mitten proportions, wrist opening, and the amount of surrounding fabric all change on a baby-sized project. A dedicated baby tutorial such as Happy Crochet Club’s gives you a more relevant starting point than guessing how much of an adult cable repeat to remove.
Should I make both crochet mittens before checking the fit?
No. Finish or substantially complete the first mitten far enough to evaluate the wrist, hand width, thumb position, length, and cable alignment before duplicating it. If the first one needs adjustment, discovering that before making an identical second piece saves unnecessary reworking. For hand-specific designs, also verify whether the creator changes thumb placement between the left and right pieces.