12 Medieval Crochet Accessories Ideas for Fantasy and Faire Styling
Medieval-inspired crochet accessories can do much more than add rustic color to an outfit. A deep hood changes the whole silhouette, an open hair snood creates a courtly head-covering effect, and a small drawstring pouch gives a belt practical purpose. Lace gloves, wrist cuffs, capelets, kerchiefs, and braided headpieces can push the same wardrobe toward traveler, woodland, noble, healer, or fantasy-market styling.
The projects below use modern crochet tutorials as construction references rather than claiming to reproduce historical textiles. That distinction leaves plenty of room to personalize the finished pieces while still making thoughtful choices about drape, structure, closures, fit, and everyday wear. Use the list to compare which accessory creates the strongest visual change, which needs careful sizing, and which can carry the most decorative detail without becoming impractical.
Quick List
- Crochet Traveler Hooded Cowl
- Crochet Court Hair-Net Snood
- Crochet Lace Gauntlet Fingerless Gloves
- Crochet Scalloped Court Choker
- Crochet Drawstring Coin Pouch
- Crochet Lace Boot Cuffs
- Crochet Braided Circlet Headband
- Crochet Floral Wrist Cuff
- Crochet Basketweave Shoulder Capelet
- Crochet Motif Tie Waist Belt
- Crochet Lace Kerchief Headscarf
- Crochet Flap Belt Pouch
Choose the Silhouette Before Choosing the Color
For medieval-inspired styling, shape usually contributes more than color alone. A generously framed hood immediately suggests a traveler or woodland character, while a fitted lace choker gives a more ornamental court or festival look. Hair nets and kerchiefs change the head silhouette, whereas belts and pouches make the strongest difference around the waist.
Think about the rest of the outfit before starting. Long hair may benefit from a snood or kerchief, while a dress with a loose waist can take a wide tie belt. A capelet works best when you want shoulder coverage without committing to a full cloak. Smaller accessories such as cuffs and headbands are easier to combine with ordinary clothing when the finished piece needs to work beyond a costume event.
These projects are modern crochet designs, so the medieval character comes from thoughtful styling, proportion, texture, and placement rather than from presenting them as exact historical reconstructions.
Balance Drape, Structure, and Decorative Detail
Not every accessory benefits from the same fabric. A hood or capelet needs enough movement to sit comfortably around the head and shoulders, but a pouch or waist belt generally benefits from greater stability. An airy stitch pattern can look beautifully ornamental in gloves, chokers, kerchiefs, and hair nets, yet that same openness may be inconvenient for carrying coins or other small objects.
Yarn substitution can also change an accessory more than expected. A thicker yarn may make braids and raised textures more dramatic but can add bulk around the neck, wrist, or waist. A finer yarn can sharpen lace detail while producing less structure.
Before replacing the yarn specified by a tutorial, compare yarn weight, fiber behavior, and the intended fit. For pieces with buttons, magnetic clasps, ties, or bag closures, also consider how the chosen fabric will behave around those stress points.
Check Fit Where the Accessory Anchors to the Body
The most useful measurement is usually where the accessory actually stays in place. For a hood, check head and face opening dimensions. For a choker, leave enough comfortable ease at the neck. Gloves and cuffs should move with the wrist rather than cutting into it, while boot cuffs need to cooperate with both the leg and the footwear underneath.
Belts deserve special attention because crochet can stretch under tension. Try the belt over the type of dress, tunic, or skirt you expect to wear instead of judging it only while laid flat. Pouch straps and closures should also be checked after the bag contains something.
Avoid unnecessarily long dangling cords where they could snag during active wear. If an accessory uses a closure or embellishment, secure it appropriately for the intended wearer and follow the original creator’s construction guidance.
1. Crochet Traveler Hooded Cowl
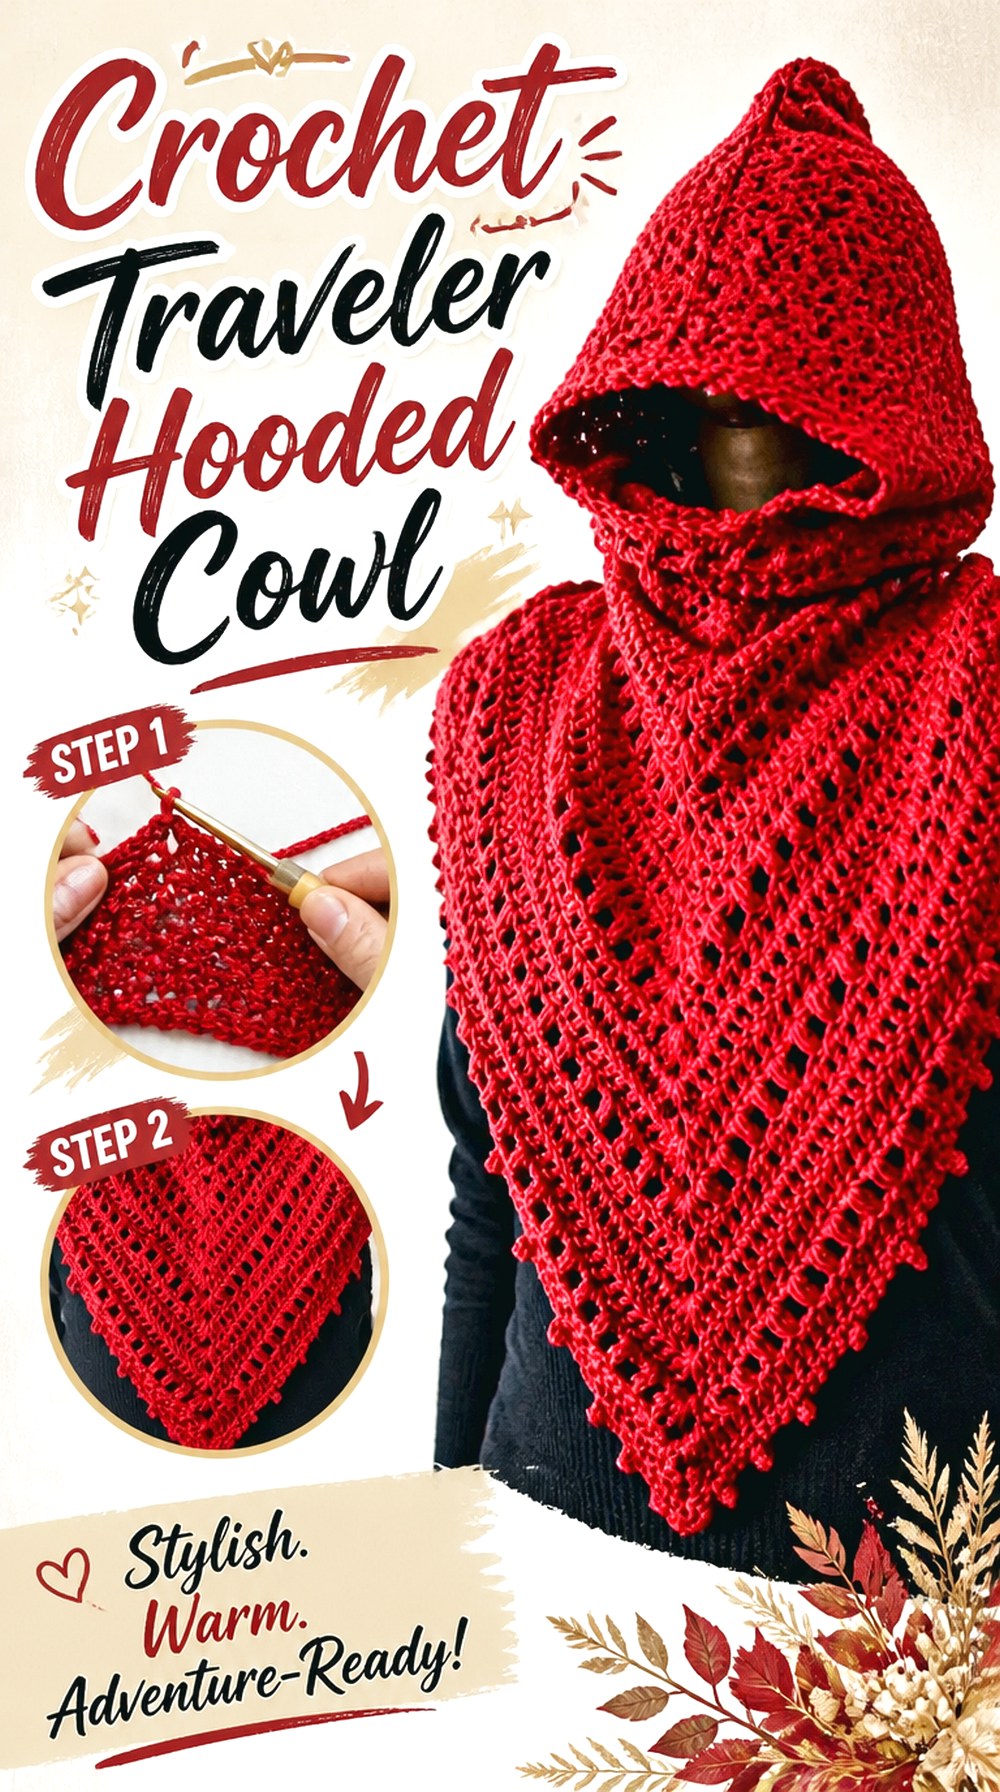
A broad hood flowing into a neck-and-shoulder section creates one of the strongest medieval-inspired silhouettes in this collection. The Knotty Lace design combines a hood with a cowl and decorative puff and picot details, while the pattern also discusses adjusting the hood and overall measurements. That gives the project useful flexibility for transforming a modern hooded accessory into a woodland traveler, village cloak, or fantasy-market layer.
The biggest choice is proportion. A close hood reads more practical and understated, while extra depth around the face creates a more dramatic silhouette. Keep the shoulder area balanced with the hood so the finished piece looks intentional rather than top-heavy.
Frame the Face Before Extending the Hood
A dramatic hood needs enough depth to sit forward without constantly falling across the eyes. Before adding decorative edging, check how the unfinished hood frames the face with the wearer looking forward and turning side to side.
If you want more of a storybook look, increase room only in ways compatible with the original construction. Simply making every dimension larger can also enlarge the neckline and alter how the cowl sits. Follow the tutorial’s adjustment logic rather than guessing at stitch additions.
Let Texture Support the Character
Raised stitches can make a solid-color hood look more substantial without requiring stripes or multiple decorative colors. That works especially well for a traveler-inspired piece because the texture remains visible even in earthy or muted yarn.
A highly fuzzy yarn, however, can soften the definition of puff stitches and edging. If the textured surface is one of the reasons you chose the project, swatch enough fabric to see whether the details remain distinct before committing to the whole accessory.
Keep the Shoulder Section in Proportion
A deeper hood can visually overpower a very small neck covering. If you modify the project for a larger or more dramatic hood, check the lower section at the same time.
The goal is not necessarily more length everywhere. Instead, look at how the shoulder portion lies when the hood is both raised and lowered. A balanced lower edge can help the piece look like a deliberate hooded mantle rather than a winter hood with an oversized top.
Original Tutorial and Creator Credit
Creator/Site: The Knotty Lace
2. Crochet Court Hair Net Snood
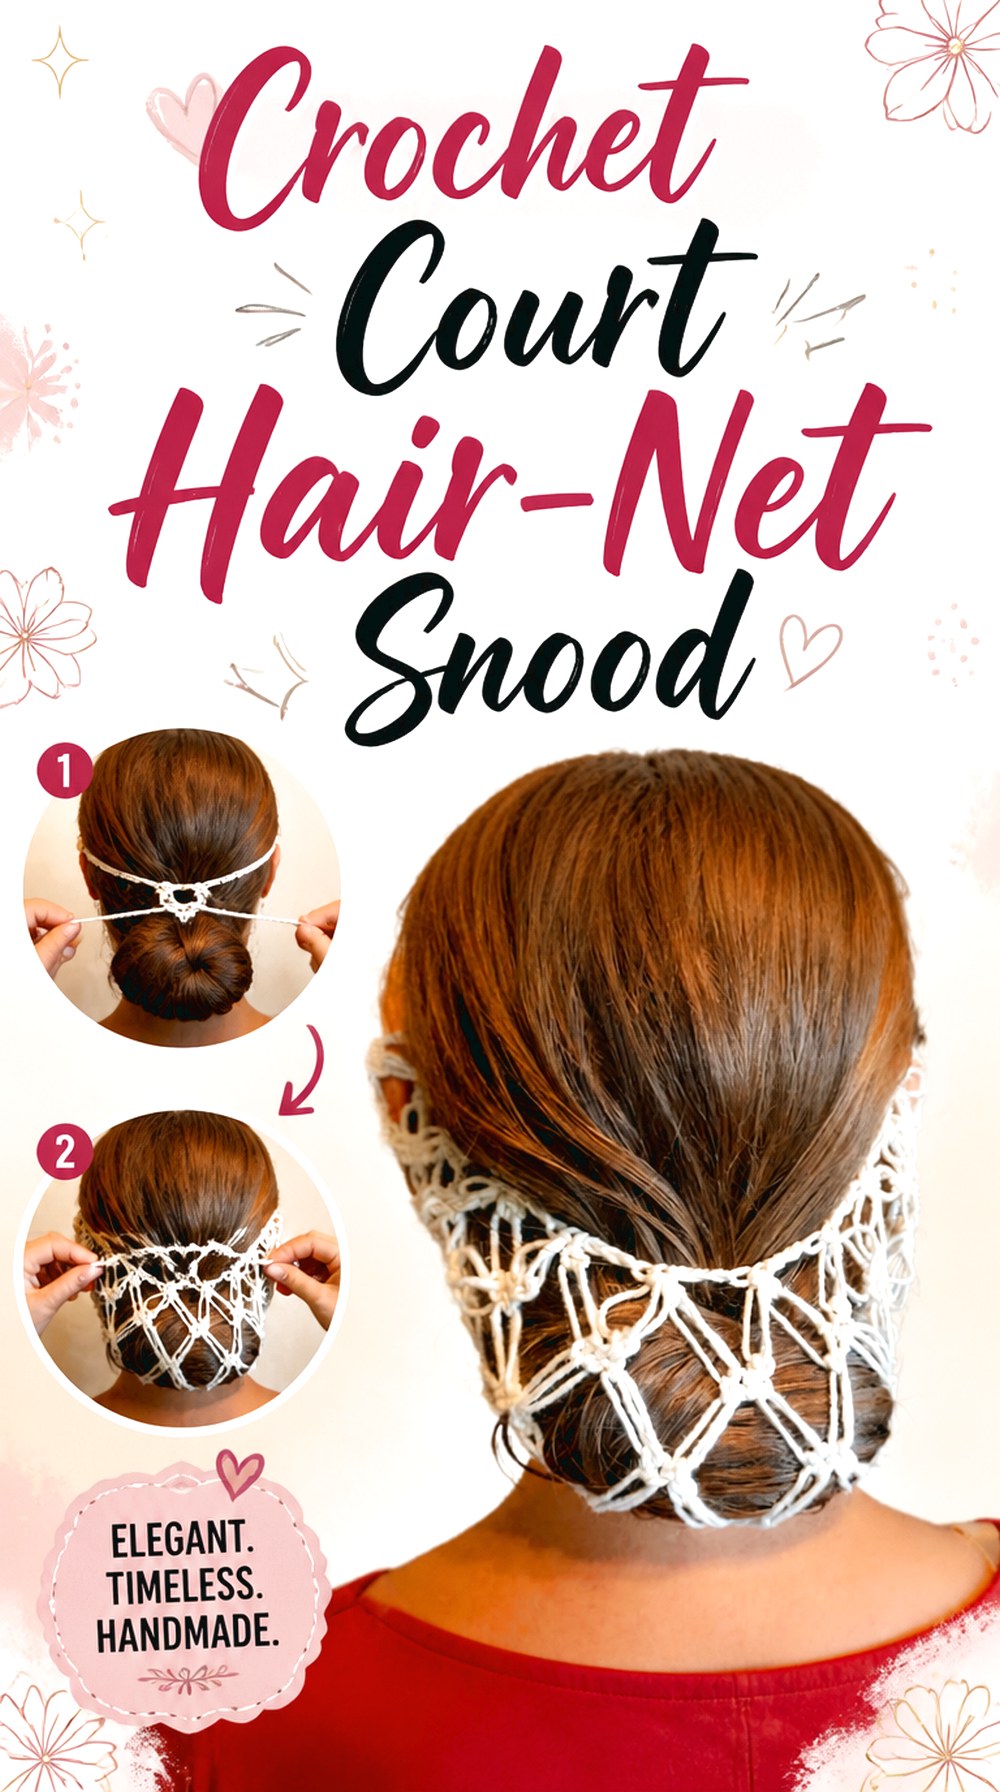
An open crochet hair net changes the hairstyle rather than covering the entire head, making it a good option for a courtly, merchant, or Renaissance-fantasy direction. Heart Hook Home’s Solomon’s Hair Net uses open Solomon’s Knot fabric and provides two versions: one incorporating a headband and button and another using ties.
That choice of anchoring system matters more than decorative color. A headband creates a defined front edge, while ties can produce a softer and more adjustable presentation. Because the fabric is intentionally open, the hairstyle underneath remains part of the finished look. Plan the net for the amount and placement of hair it needs to contain rather than treating it like a conventional fitted hat.
Match Net Volume to the Hairstyle
A snood that comfortably contains a low bun may not have enough volume for very long or thick hair gathered farther back. Style the hair first, then judge how much depth the net needs.
Adding excess volume can create the opposite problem: the net may sag rather than cradle the hairstyle. If adapting the size, maintain the source construction while checking the finished depth against the intended hair arrangement rather than relying only on head circumference.
Choose the Front Anchor Deliberately
A buttoned headband creates a more visible structure across the crown, while ties can be easier to conceal beneath hair or other headwear. That makes the two source versions useful for different costumes.
If you plan to wear a circlet, veil, or decorative band over the snood, test the layers together. Multiple accessories competing for the same place behind the ears can become uncomfortable even when each piece fits correctly on its own.
Preserve the Openwork
The net effect depends on visible negative space. A yarn that is substantially thicker than the source material can turn delicate openings into heavier loops and add weight at the back of the head.
If you want a more ornate result, consider changing color or adding a compatible removable decoration rather than automatically increasing yarn thickness. Any beads or added ornaments should be secured appropriately and kept light enough that they do not drag the net out of shape.
Original Tutorial and Creator Credit
Creator/Site: Heart Hook Home
3. Crochet Lace Gauntlet Fingerless Gloves

Lace fingerless gloves bring detail to the hands without hiding the fingers, which makes them particularly useful for fantasy-market outfits where you still need to handle a phone, purse, cup, or craft supplies. Mucie Studio’s video combines a defined cuff with an open lace hand section and demonstrates the project from the cuff through finishing.
For medieval-inspired styling, the design can function like a soft textile gauntlet rather than protective armor. The openwork creates a lighter courtly or healer aesthetic, while deeper colors can shift the same silhouette toward a more dramatic fantasy look. Fit is more important than adding extra ornament: lace that twists or pulls around the thumb will quickly become distracting during wear.
Check the Cuff Before Building the Hand
The cuff acts as the anchor, so assess its fit before investing time in the lace section. It should remain in position without feeling restrictive when the wrist bends.
If you substitute yarn, remember that a change in stretch can affect both circumference and comfort. Compare your fabric with the source gauge or sizing information where provided, and use the tutorial’s adjustment guidance rather than assuming a larger hook automatically creates a better fit.
Watch the Thumb Opening in Motion
A glove can look correctly sized while the hand is relaxed yet pull uncomfortably when gripping something. Test the thumb opening by flexing the hand, spreading the fingers, and holding a small object.
If the fabric distorts strongly around the opening, revisit the fit before finishing the second glove. Making a matching pair is much easier when the first piece has already been checked during actual hand movement.
Keep Added Decoration Away From Grip Areas
Small beads, charms, or embroidery can intensify a noble or fantasy look, but the palm side is a poor location for bulky decoration. It can catch on objects and affect comfort.
If embellishment is desired, the back of the hand or cuff is generally the more practical visual area. Added materials may also change washing and storage requirements, so follow the yarn label and account for every added component when caring for the finished pair.
Original Tutorial and Creator Credit
Creator: Mucie Studio
4. Crochet Scalloped Court Choker
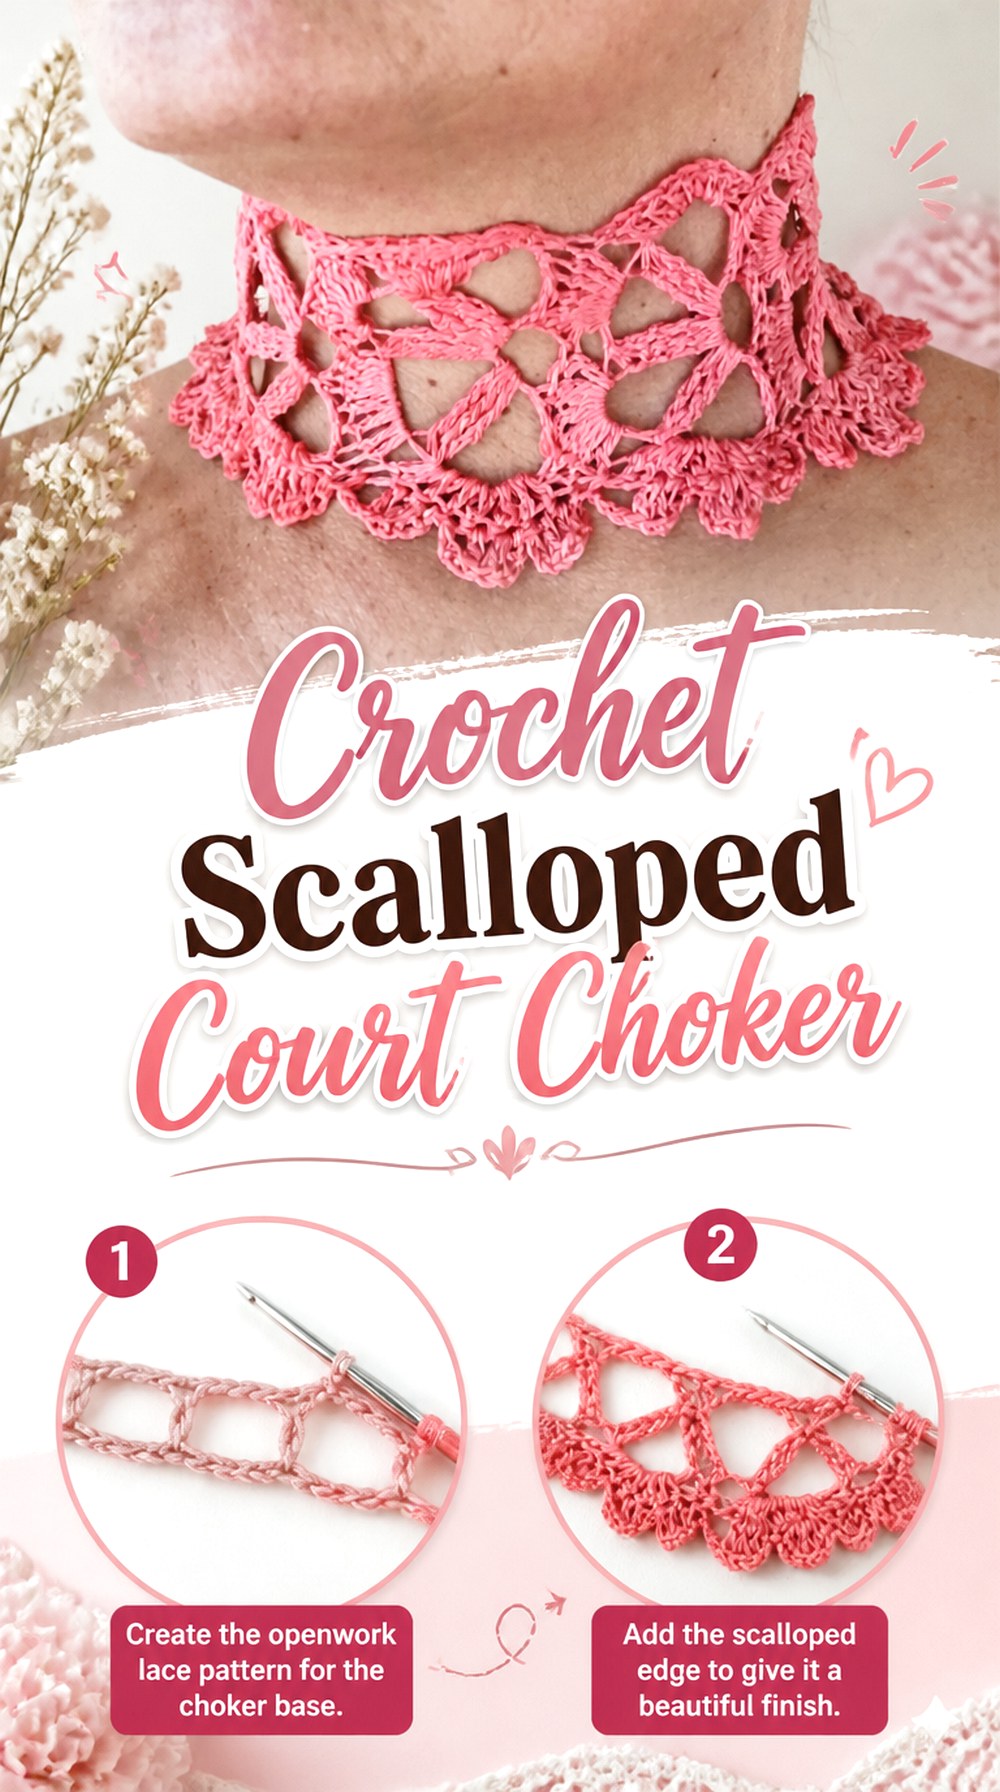
A narrow lace choker can add medieval-inspired ornament without adding much physical bulk to an outfit. Kristin Omdahl’s Be So Fine Crochet Lace Choker is built around overlapping lace motifs and uses a magnetic clasp in the original design, producing a decorative band with much finer visual detail than a winter neck accessory.
That makes it useful for court, bard, woodland-noble, or fantasy-dress styling where the neckline is intentionally visible. Because a choker sits directly against the neck, however, comfort and finished circumference deserve more attention than simply reproducing the decorative appearance.
Treat Neck Fit as the First Checkpoint
Do not rely solely on the length of an existing necklace unless it fits the intended wearer comfortably in the same position. The finished crochet fabric and chosen closure both affect how the choker sits.
Before attaching permanent hardware, hold the piece at the intended neckline and check normal head movement and swallowing. If resizing is required, use the original pattern’s motif logic rather than squeezing a too-short piece into place with a longer closure.
Fine Yarn Preserves the Motif Effect
The source design uses delicate lace construction. Moving to a much heavier yarn would not simply make the same choker larger; it could make the overlapping motifs thicker and significantly change the proportion against the neck.
If you want a more rustic medieval-inspired version, a muted color or matte fiber may be a better adaptation than drastically increasing yarn weight. Swatching one motif can reveal whether the decorative edges remain crisp enough for the intended look.
Plan the Closure With the Outfit
A visible metal clasp can become part of the jewelry effect, while a concealed closure keeps attention on the crochet. Consider hairstyle, neckline, and any cape or hood that will sit nearby.
If replacing the source clasp, ensure the alternative is compatible with the fabric and comfortable against skin. Closure substitutions should be secure but not create a rigid or sharp area at the back of the neck.
Original Tutorial and Creator Credit
Creator/Site: Kristin Omdahl
5. Crochet Drawstring Coin Pouch
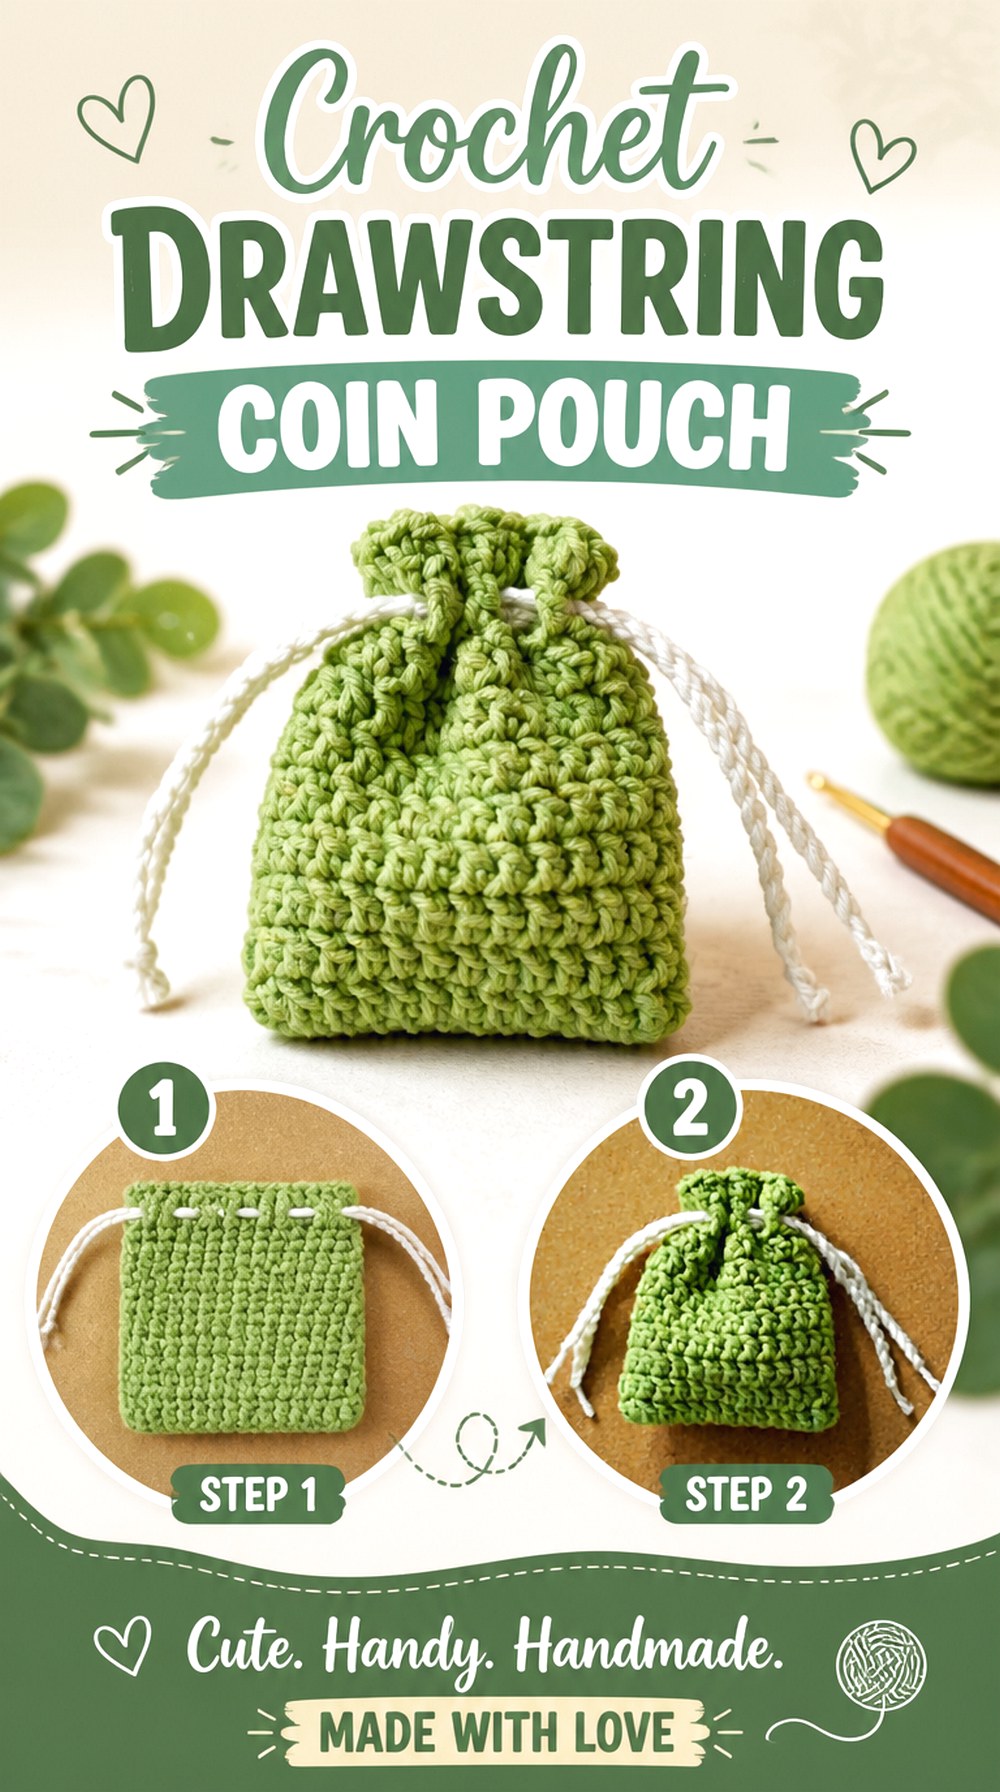
A compact drawstring pouch is one of the easiest accessories to integrate into a traveler, merchant, herbalist, or adventurer outfit because it has an obvious practical role. VivCrochets’ basic pouch forms a small bag with a cinching top and two drawstrings, giving you a clean foundation that can be styled more rustic without changing the underlying project.
For a medieval-inspired version, the most important decision is what the pouch will actually carry. Yarn scraps or tokens place little stress on the fabric, while coins, keys, or other dense contents demand more attention to stitch openness, base stability, and the drawstring channel.
Check Whether Small Contents Can Escape
A pouch intended for coins should not have openings large enough for its smallest contents to work through the fabric. Crochet stretches under load, so inspect the gaps while the pouch contains something rather than only when it is empty.
If the source fabric is more open than your intended use allows, consider a compatible fabric lining rather than altering the entire stitch pattern without guidance. A lining can also reduce friction on the crochet when carrying keys or metal objects.
Keep the Drawstring Channel Moving Freely
Decorative cords can look appealing, but an overly thick cord may be difficult to pull through the existing openings. Before finishing decorative cord ends, test whether the bag opens and closes smoothly.
Long hanging ties can also snag when the pouch is worn from a belt. Keep the finished cord length appropriate to the way the accessory will be carried rather than making it exaggerated solely for appearance.
Reinforce the Carrying Point Separately
The source pouch is designed as a drawstring container, not automatically as a belt-hanging bag. If you plan to attach it to a belt, do not assume the drawstring itself is an ideal load-bearing loop.
Any added belt tab or hanging point should be designed so the weight is distributed into stable fabric. For heavier contents, a purpose-designed belt pouch such as Idea 12 may be a better starting point.
Original Tutorial and Creator Credit
Creator/Site: VivCrochets
6. Crochet Lace Boot Cuffs

Boot cuffs offer a subtle way to extend crochet texture into the lower half of an outfit without making full leg warmers. Beautiful Crochet Stuff’s design combines open lace, V-stitches, puff texture, and picot detail, producing a decorative band that can show above a boot shaft.
For medieval-inspired styling, that layered edge can suggest a decorative stocking or leg trim while remaining a separate modern accessory. The important practical question is where the cuff sits. A design that fits the bare leg may become too tight once fabric trousers, leggings, or a boot opening are added beneath it.
Measure With the Actual Boot
Boot circumference and leg circumference are not the same thing. Decide whether the cuff will sit inside the boot, directly above it, or partly over the upper edge, then measure in that position.
Try the cuff with the intended footwear before making the second one. A small adjustment made at this stage can prevent a pair that slides downward or feels compressed after several hours of wear.
Use Texture Where It Can Be Seen
The source design includes several decorative stitch effects. If most of the cuff will disappear inside a tall boot, there is little reason to hide the most intricate section.
Plan the visible height before altering the source repeat. With shorter boots, additional visible texture may be useful; with high boots, a smaller exposed band can create a cleaner and less bulky transition.
Consider Friction and Snagging
Open picots and lace can catch more readily than a plain ribbed cuff, particularly around buckles, hooks, rough boot leather, or costume trim.
Move around in the finished combination before committing to extra embellishment. If the lace repeatedly catches hardware, reposition the cuff or choose a simpler edge rather than relying on delicate loops in a high-friction area.
Original Tutorial and Creator Credit
Creator/Site: Beautiful Crochet Stuff
7. Crochet Braided Circlet Headband
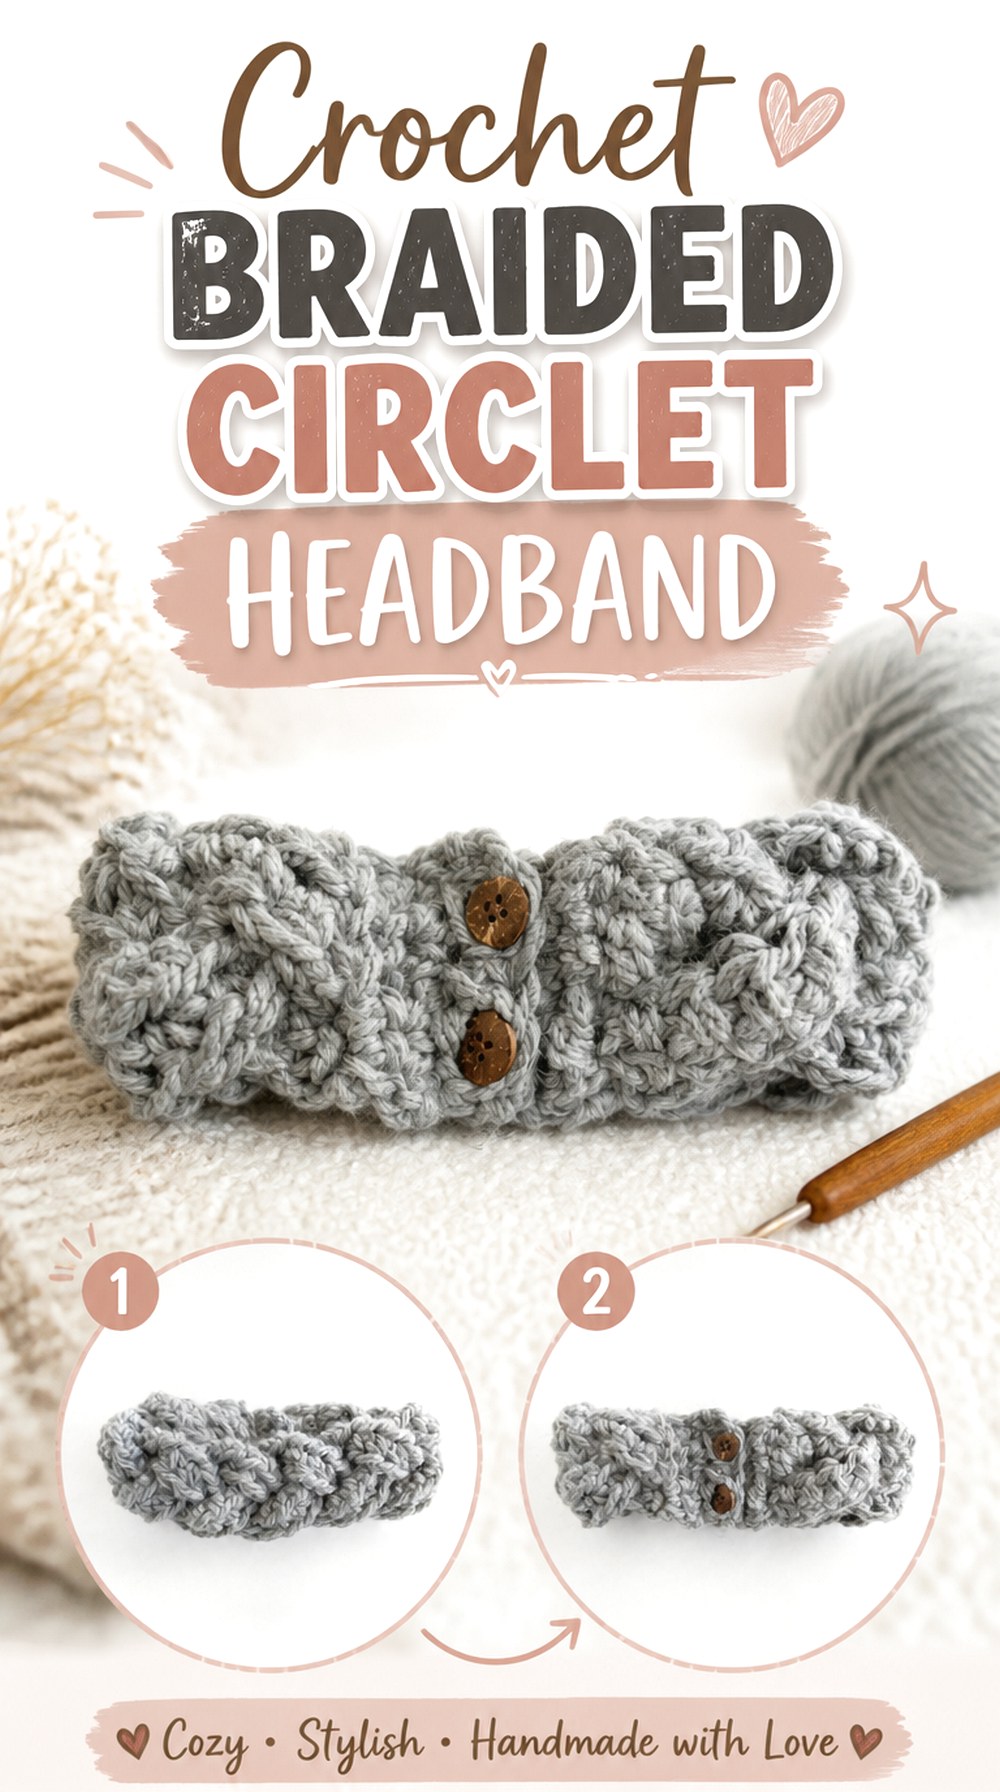
A braided headband can create the visual suggestion of a soft circlet without introducing metal jewelry. The Jewels and Jones tutorial uses crocheted sections arranged into a prominent braid and includes optional buttons for closure. The original sample is worked in a bulky yarn, making the braid itself the dominant decorative feature.
For medieval-inspired use, consider how bold you want that crown-like line to appear. A thick braid works well with loose hair, heavy braids, or a rustic traveler outfit, while a less bulky interpretation may integrate more easily with a snood or veil-like layer.
Place the Braid Before Finalizing Length
The headband can sit across the forehead, at the hairline, or farther back over the crown, and each position requires a slightly different practical fit.
Choose the intended placement before determining the final closure position. A band that feels comfortable at the crown may be too loose when worn lower. Also check whether the braid twists when the band is fastened.
Decide Whether the Buttons Should Show
Buttons can function purely as closure hardware or become visible decorative elements. For a fantasy look, wood-, horn-, or metal-like visual finishes may complement the braid, but the size still needs to work with the source buttonholes.
If you replace the original button style, verify that the new buttons pass through securely without stretching the openings excessively. Heavy buttons can also pull a soft band downward.
Avoid Overcrowding Other Headpieces
A wide braided band already provides strong texture. Pairing it with a large snood, ornate veil, flowers, chains, and additional circlets can quickly create visual and physical clutter.
When layering, assign each accessory a role. The braid might frame the face while a simple hair net contains the back, for example. Test the pressure points behind the ears and at the temples before planning all-day wear.
Original Tutorial and Creator Credit
Creator/Site: Jewels and Jones
8. Crochet Floral Wrist Cuff

A crochet cuff bracelet provides concentrated ornament in a very small project. Sara McFall’s design for My Merry Messy Life uses V-stitch fabric, a button-loop closure, and a small crochet rosette option, giving the finished cuff an open decorative surface rather than the coverage of a glove or wrist warmer.
That makes it useful when you want a hint of noble, woodland, or festival styling but need completely free hands. It can also balance another small accessory, such as a choker, without repeating the exact same shape.
Size the Cuff for Movement, Not Flat Appearance
The wrist changes shape as the hand bends, so a bracelet-style cuff should be checked while moving rather than measured only against a straight wrist.
Before securing the final button, flex the hand backward and forward. If the cuff digs into the wrist crease or rotates constantly, change the closure placement using a method compatible with the pattern instead of relying on a very tight fit.
Let One Ornament Be the Focal Point
The source offers a dimensional flower detail. If you retain it, additional beads, charms, embroidery, and multiple flowers may compete with the open V-stitch fabric.
For a more medieval-inspired palette, a single contrasting rosette or decorative button can provide enough visual interest. Keeping the surface restrained also reduces the number of elements likely to snag against sleeves or bag straps.
Account for Sleeve Overlap
A wrist cuff looks very different with a short sleeve than with a wide bell sleeve, fitted underlayer, or long tunic cuff. Try the accessory with the intended clothing.
If fabric repeatedly covers the crochet, place the cuff over the sleeve only if the fit and closure still work comfortably. Avoid forcing a bracelet designed for bare skin over thick fabric without adjusting the circumference appropriately.
Original Tutorial and Creator Credit
Creator/Site: Sara McFall, My Merry Messy Life
9. Crochet Basketweave Shoulder Capelet

A short capelet gives noticeably more costume presence than jewelry or hand accessories while remaining less cumbersome than a full cloak. Hannah Cross’s Woodland capelet design for HanJan Crochet uses chunky yarn, prominent basketweave texture, bottom-up construction, and neckline shaping. The source provides multiple sizes and discusses adjusting length.
The raised woven texture is particularly useful for medieval-inspired styling because it creates visual weight even in one color. The result can sit over a dress, tunic, or fitted top and provide a broad shoulder silhouette without hiding the whole outfit underneath.
Check Shoulder Mobility Before Adding Length
A capelet should move with the upper body rather than becoming a rigid ring around the shoulders. Once the piece is large enough to try on, reach forward and raise the arms enough to mimic normal movement.
If you plan to extend the length beyond the source sample, remember that extra fabric can change both weight and movement. Follow the designer’s adjustment guidance and keep checking how the lower edge behaves as the garment grows.
Basketweave Needs Stitch Definition
The appeal of this project depends heavily on raised texture. A very fuzzy yarn can obscure the woven appearance, while an overly stiff substitution may make the capelet stand away from the shoulders.
Make a meaningful swatch before replacing the specified yarn category. Look at the fabric from several feet away as well as close up; for costume styling, the texture should remain visible at normal viewing distance.
Plan What Sits Under the Neckline
A capelet, choker, hood, and high-neck tunic can all compete for the same small area. Decide which accessory deserves emphasis.
If the basketweave capelet is the primary piece, a simpler neckline underneath may let its texture read more clearly. If you want to pair it with a separate hood, check the combined bulk at the back of the neck before committing to both.
Original Tutorial and Creator Credit
Creator/Site: Hannah Cross, HanJan Crochet
10. Crochet Motif Tie Waist Belt
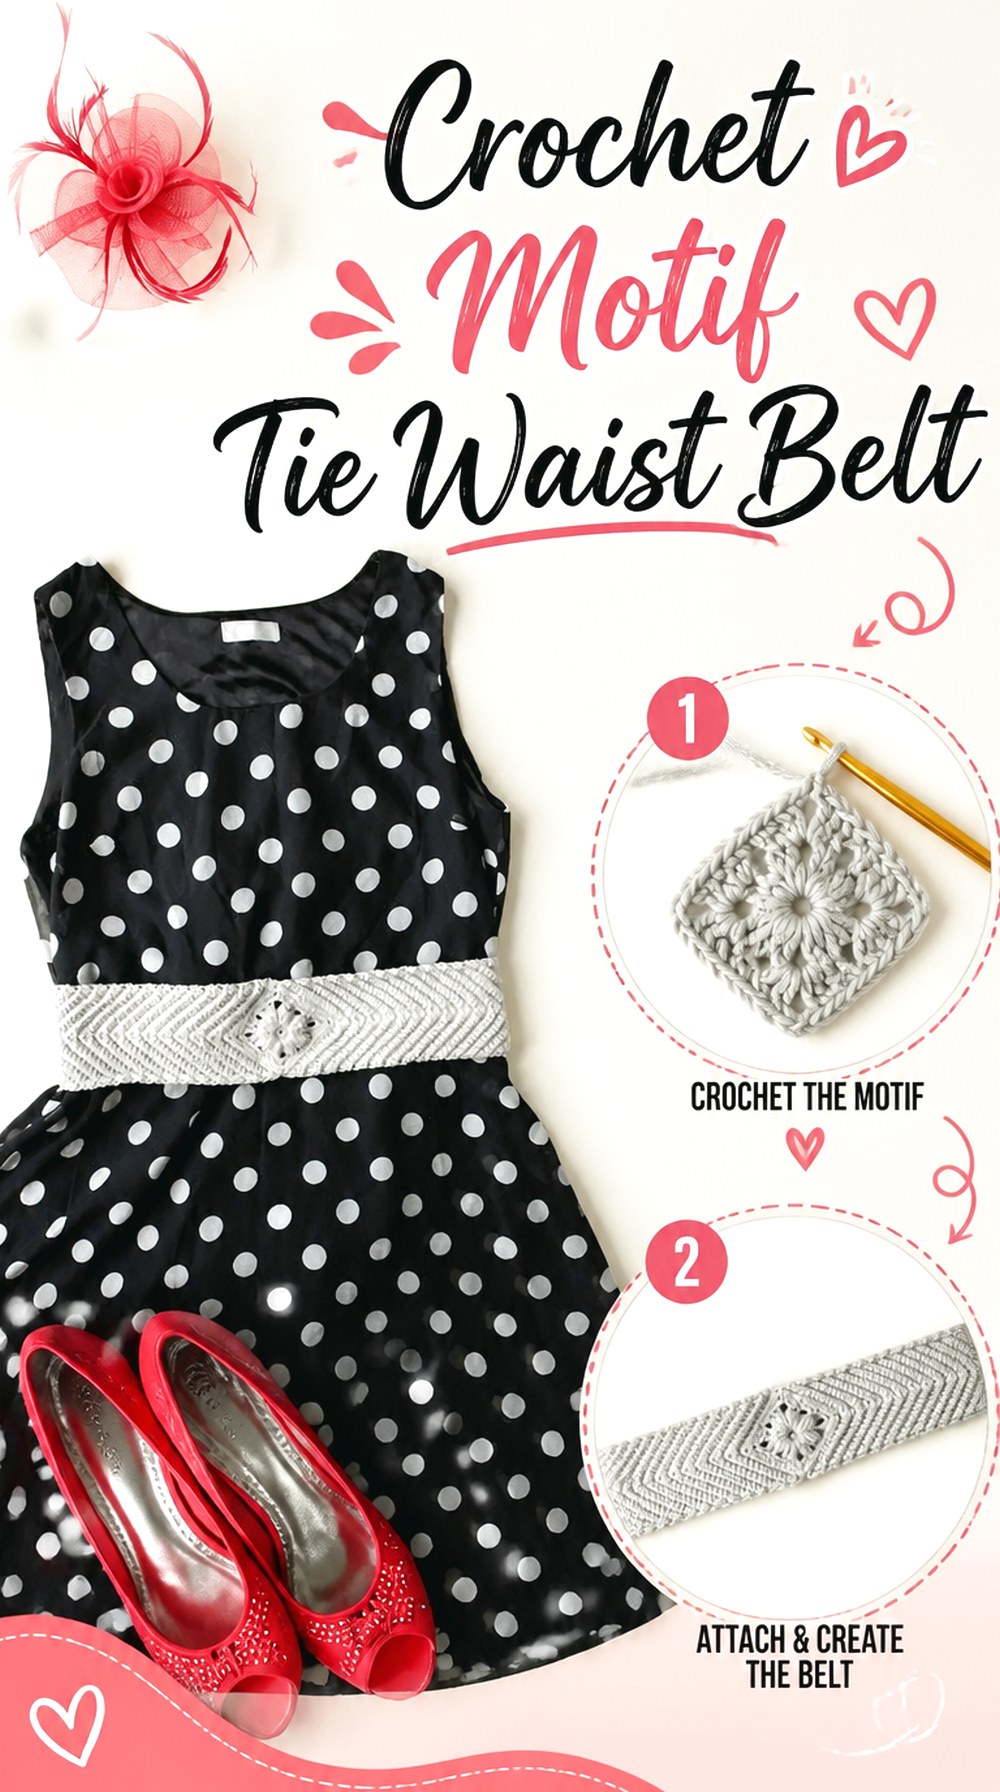
A textile waist belt can transform an otherwise loose dress or tunic while keeping the entire accessory soft and packable. Veronika Cromwell’s Charleston Belt begins with a central square motif, builds the belt outward, narrows toward pointed ends, and finishes with crocheted ties.
Those features translate well to medieval-inspired styling because the decorative center creates a focal point similar to an ornamental buckle without requiring rigid hardware. The long tie format also gives more flexibility than a fixed buckle when the same belt may be worn over garments of different thicknesses.
Fit the Belt Over the Full Outfit
A waist measurement taken over a thin shirt may not work once the belt is wrapped around a layered dress, tunic, apron, or overskirt.
Measure where the belt will actually sit and with the intended clothing underneath. If you want to move it between the natural waist and a lower hip position, confirm that the tie length and shaped section can accommodate both placements without leaving excessively long loose ends.
Keep the Center Motif Centered
Because the belt has a strong decorative center, an off-center fit becomes visually obvious. Mark the body’s center front when trying the belt on and check where the motif settles after the ties are tightened.
If the belt creeps sideways while walking, the issue may be garment fabric or insufficient stability rather than motif placement alone. Test it over the actual clothing rather than a smooth mannequin or flat surface.
Consider Stretch Before Hanging Anything From It
A decorative crochet belt should not automatically be treated as a load-bearing utility belt. Attaching a heavy pouch, bottle, or prop can stretch the fabric and pull the central motif out of position.
If you want a belt carrying accessories, use separate hidden support or choose a construction specifically designed for the load. A lightweight empty decorative pouch may behave very differently from the same pouch filled with coins or keys.
Original Tutorial and Creator Credit
Creator/Site: Veronika Cromwell, Blue Star Crochet
11. Crochet Lace Kerchief Headscarf
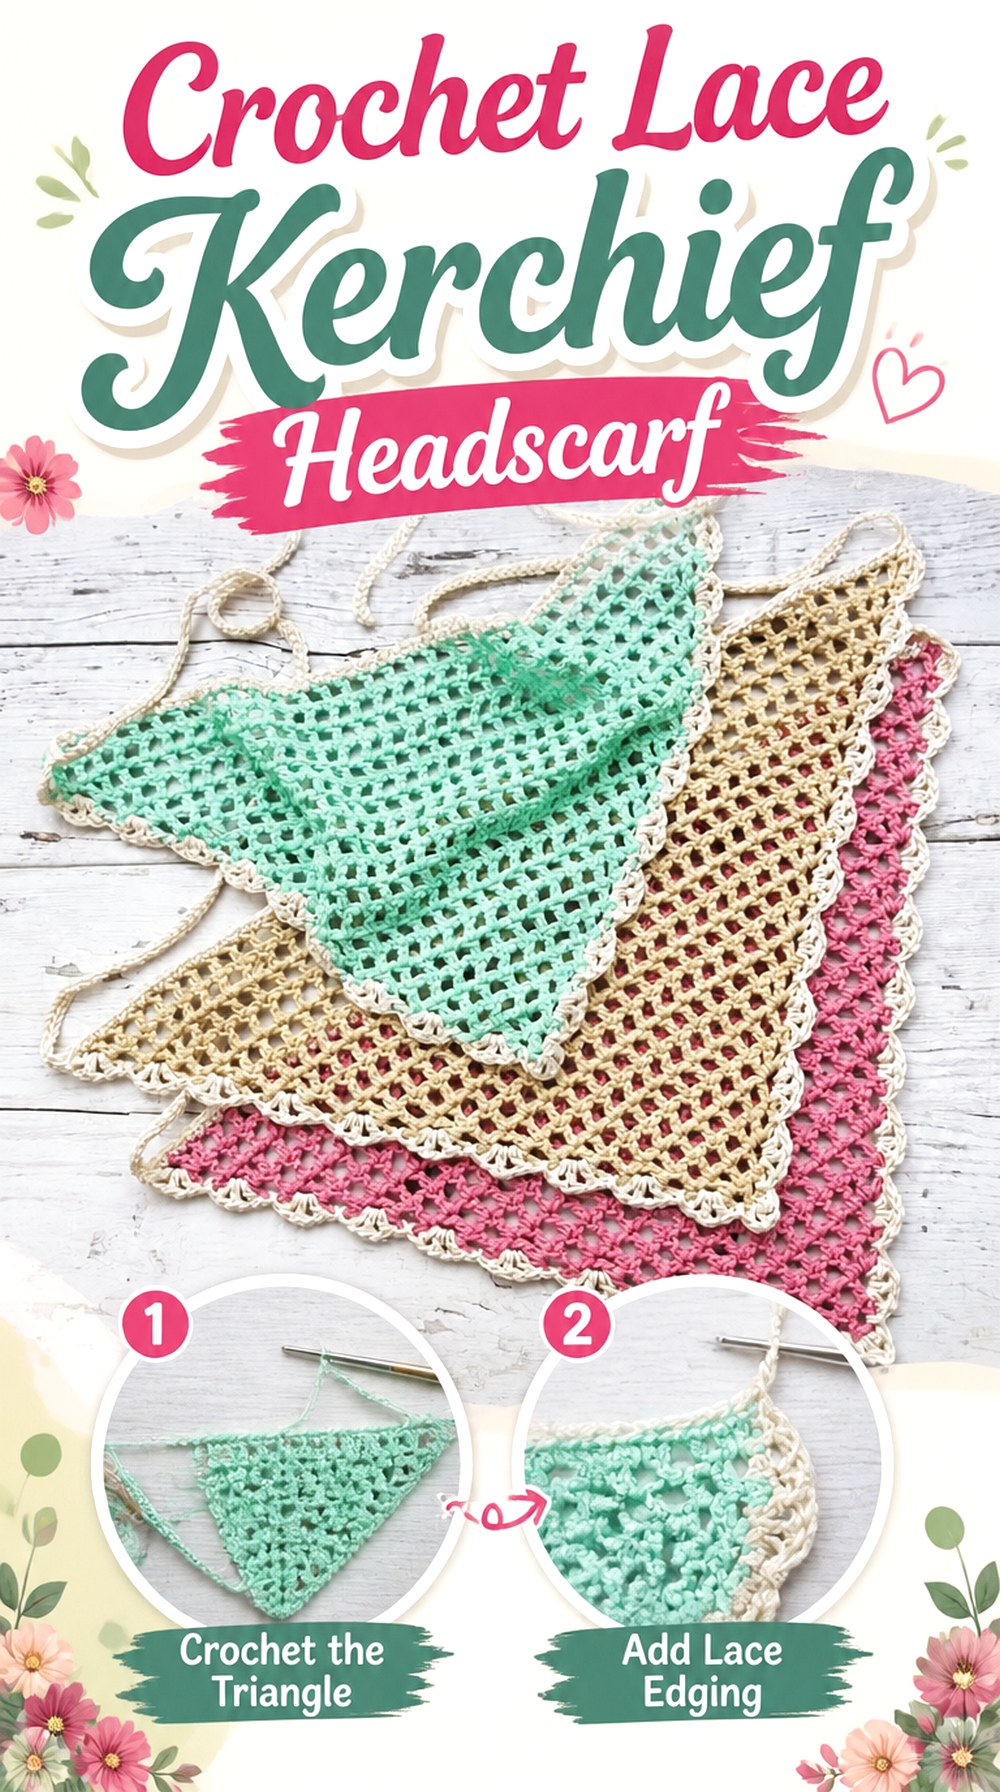
A triangular kerchief gives more scalp coverage than a narrow headband but less containment than a full snood. Carmen’s Summer Lace Crochet Bandana for Annie Design Crochet uses an airy triangular structure, scalloped edging, and ties, with the pattern noting that the size can be adjusted by changing the number of repeated rows.
For medieval-inspired styling, the same shape can work as a village kerchief, market-day head covering, woodland headscarf, or soft layer beneath another accessory. Because much of the visual impact comes from the triangular outline, it does not need heavy embellishment to look intentional.
Decide How Much Hair Should Remain Visible
A shallow triangle acts mostly as decoration, while a deeper kerchief covers more of the crown and hair. Choose the role before changing the size.
If the accessory will be worn with braids, arrange those first and then test the triangle. You may find that a smaller kerchief keeps the hairstyle visible, while a larger version works better over loose hair.
Keep the Scalloped Edge Crisp
Open lace and scallops benefit from controlled finishing. If your chosen fiber responds appropriately to blocking, shaping the finished piece can help clarify the triangular outline and decorative edge.
Care methods depend on the yarn used, so follow the fiber label and the creator’s guidance rather than assuming every kerchief should be treated the same way. Added beads or mixed materials may further change how it should be washed or blocked.
Watch Tie Length Around Other Accessories
The kerchief already uses ties to stay in place. If a hood, necklace, apron strap, or snood is worn at the same time, multiple cords near the neck can become awkward.
Tie the piece securely without making the ends unnecessarily long, especially for active events. If you are adding decorative tassels, test whether they remain clear of backpack straps, costume fastenings, and hair.
Original Tutorial and Creator Credit
Creator/Site: Carmen, Annie Design Crochet
12. Crochet Flap Belt Pouch
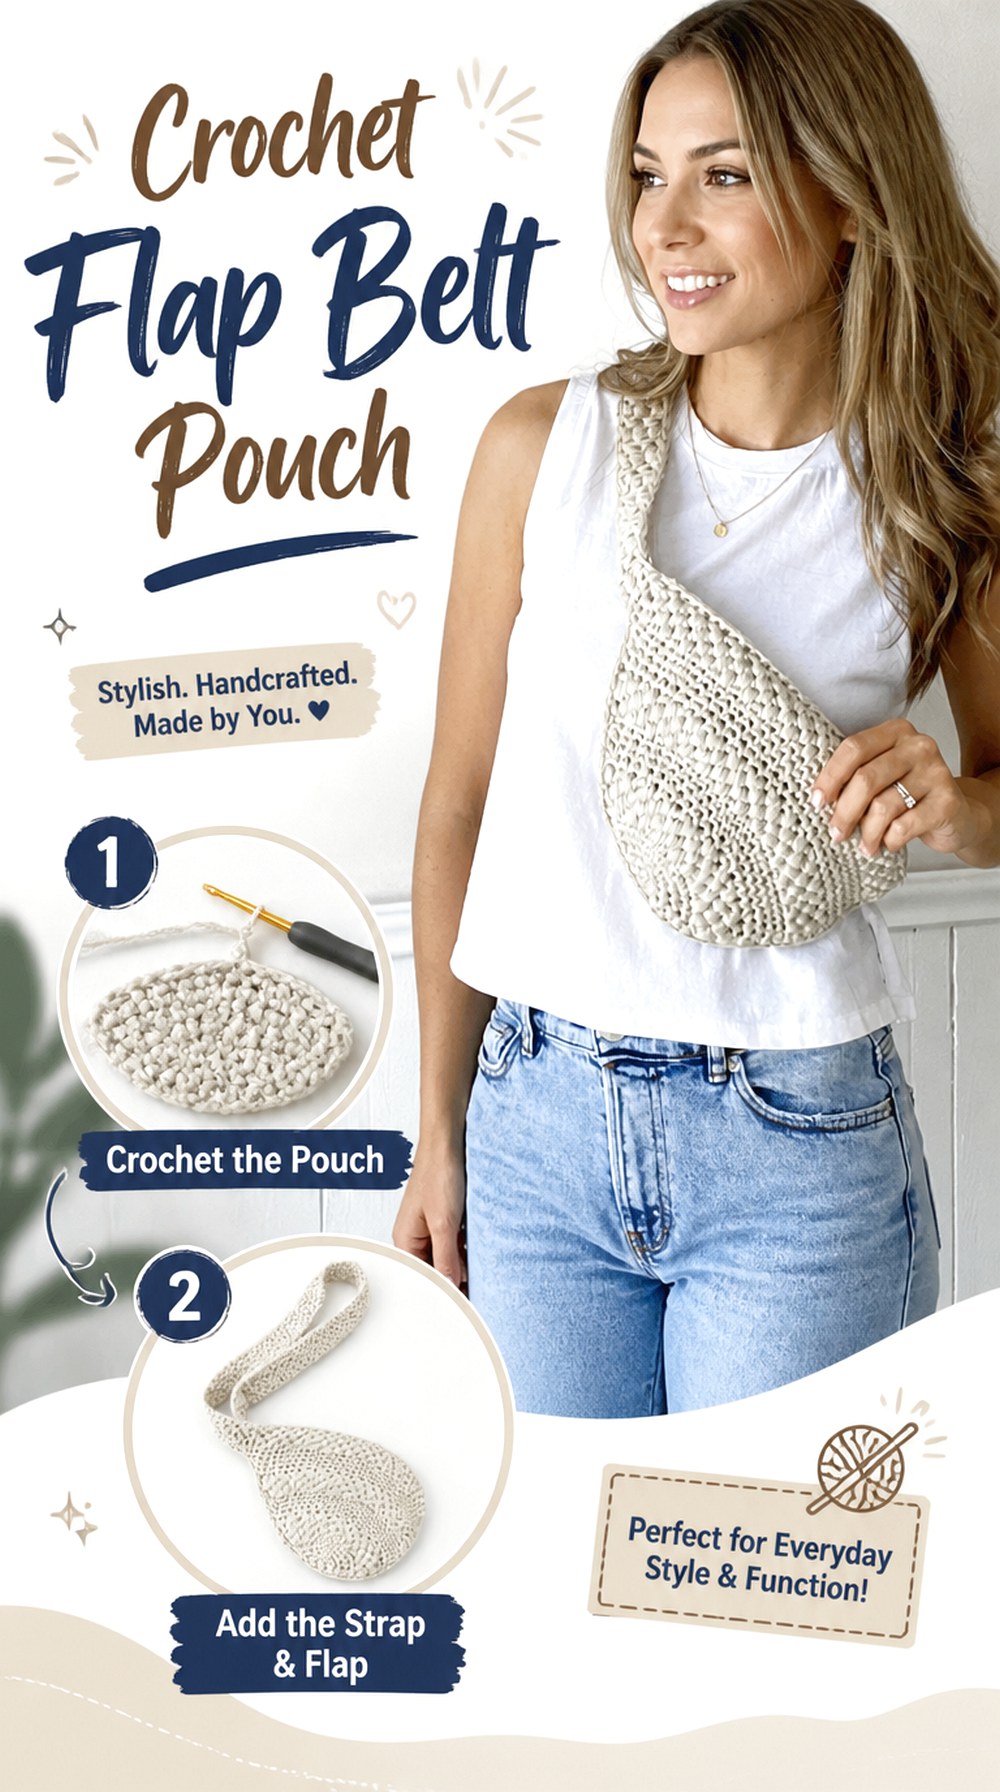
A structured belt pouch is a better choice than a simple drawstring bag when you want an accessory designed around hands-free carrying. Lakeside Loops’ Ulla Belt Bag uses a broad bag body, a flap closure, and a crocheted strap with multiple sizing options in the source pattern. The designer also discusses an optional zipper alternative, although the photographed version uses the flap.
For medieval-inspired styling, the modern belt-bag foundation can be simplified visually with earthy colors, restrained stripes, or a decorative closure. Its defining difference from the coin pouch in Idea 5 is structure: this is intended as a wearable bag rather than merely a small container.
Choose Flap Security for the Contents
A flap can make the bag look cleaner and more rustic than a visible modern zipper, but the right closure depends on what you intend to carry.
For a crowded event, consider how easily the flap could lift as you move. If you modify the closure, keep the hardware compatible with the crochet fabric and avoid placing excessive stress on a small number of stitches.
Test the Strap Under Real Weight
Crochet straps can behave differently once the bag is loaded. Put the expected contents inside and wear the pouch around the waist or across the body before deciding the strap length is final.
If noticeable stretching develops, additional reinforcement may be worth considering. Do not assume that changing to a thicker yarn alone will solve stretch, since added yarn weight can create a different set of problems.
Keep the Pouch Clear of Movement
A pouch worn directly at the side of the hip can swing against the leg, while one placed too far forward may interfere with bending or sitting.
Try several positions with the actual outfit. Wide skirts, armor-inspired accessories, overskirts, and long tunics can all change where the bag sits best. The most convincing costume placement is still the one that lets the wearer walk comfortably.
Original Tutorial and Creator Credit
Creator/Site: Lakeside Loops
Comparing the 12 Medieval-Inspired Crochet Accessories
| Project | Strongest Visual Effect | Main Fit Check | Structure |
|---|---|---|---|
| Traveler Hooded Cowl | Dramatic head-and-shoulder silhouette | Hood depth and neckline | Drapey to moderately structured |
| Court Hair-Net Snood | Contained period-inspired hairstyle | Hair volume and front anchor | Open and flexible |
| Lace Gauntlet Gloves | Ornamental hands and wrists | Cuff and thumb opening | Flexible lace |
| Scalloped Court Choker | Decorative neckline | Neck circumference | Fine, lightweight lace |
| Drawstring Coin Pouch | Small traveler or merchant detail | Opening and cord function | Soft pouch |
| Lace Boot Cuffs | Decorative lower-leg layering | Boot and calf position | Flexible textured band |
| Braided Circlet Headband | Strong crown-like braid | Head placement and closure | Thick and textured |
| Floral Wrist Cuff | Small jewelry-like accent | Wrist movement | Lightweight open fabric |
| Basketweave Capelet | Broad shoulder transformation | Shoulder mobility | Thick, dimensional texture |
| Motif Tie Waist Belt | Defined waist and center motif | Fit over clothing | Flexible with shaped ends |
| Lace Kerchief Headscarf | Soft triangular head covering | Coverage and tie placement | Light and drapey |
| Flap Belt Pouch | Functional utility-belt effect | Strap under load | More bag-like and structured |
For the biggest transformation with one piece, start with the hooded cowl or basketweave capelet. The hair snood and kerchief are better choices when hairstyle is part of the overall character, while the choker and wrist cuff add detail without much bulk. For practical event wear, the two pouch options serve different purposes: the drawstring pouch is compact and simple, while the flap belt pouch is better suited to carrying everyday essentials.
Conclusion
The most convincing medieval-inspired crochet accessories rely on shape and placement more than costume colors. A deep hood creates a traveler silhouette, a snood or kerchief reshapes the hairstyle, and a motif belt or belt pouch makes the waist part of the design. Lace gloves, boot cuffs, chokers, and wrist pieces are useful when you want smaller details that can also work outside a themed outfit.
Choose according to how the accessory will actually be worn, then check the points that bear tension: necklines, cuffs, ties, straps, and closures. Yarn changes can affect drape, stretch, and stitch definition, so treat substitutions thoughtfully. Once you have selected a project, use the credited original tutorials for the creator’s exact construction details rather than trying to recreate the design from a roundup description.
Frequently Asked Questions
Are these medieval crochet accessories historically accurate?
They should be treated as medieval-inspired modern crochet projects, not exact historical reproductions. The tutorials were selected because their silhouettes, textures, closures, or accessory roles can work well in fantasy, faire, costume, or storybook styling. If historical accuracy is essential for reenactment, research the specific period, region, social setting, and documented textile techniques separately before choosing materials or presenting an accessory as authentic.
Which project creates the strongest medieval-inspired look?
The hooded cowl usually creates the largest immediate change because it alters both the head and shoulder silhouette. A capelet has a similarly strong effect across the upper body. If you do not want a large piece, combine one strong head accessory—such as the snood or kerchief—with a waist detail like the motif belt or pouch. That changes multiple parts of the silhouette without requiring a full costume garment.
What yarn colors work well for medieval-inspired accessories?
Color can support the look, but it should come after construction and texture. Natural-looking neutrals, muted greens, deep reds, golds, browns, creams, and darker jewel tones can all work, but there is no need to restrict the palette to brown. Consider the character and outfit as a whole. Strong stitch definition may matter more than color for braided, basketweave, lace, or motif-heavy projects.
Can I substitute yarn in these tutorials?
Often, but the consequences vary. A different yarn weight can change finished dimensions, while fiber choice may change stretch, drape, softness, and stitch definition. Fit-sensitive pieces such as gloves, chokers, headbands, boot cuffs, and belts deserve particular care. Compare the tutorial’s recommended yarn category and gauge information before substituting, and make a swatch when the finished size or texture matters.
Should a crochet medieval-style pouch be lined?
Not automatically. A lining becomes more useful when the crochet fabric has gaps, when the pouch will hold very small objects, or when hard contents such as keys could repeatedly rub against the stitches. A decorative pouch carrying light fabric items may not require one. If adding a lining to a sourced project, make sure it does not prevent the drawstring, flap, or other closure from operating normally.
Can several of these accessories be worn together?
Yes, but avoid concentrating too much bulk in one area. A snood and narrow headband can work together more easily than a snood, large braided band, deep hood, and heavy necklace all competing around the head and neck. Build the outfit around one dominant accessory, then add smaller supporting pieces. Try the full combination while walking, sitting, turning the head, and using the hands so comfort problems appear before an event.
How should embellished crochet accessories be cared for?
Care depends on the yarn fiber and every added component. Buttons, magnetic clasps, beads, linings, decorative cords, and mixed fibers can all change what is appropriate. Follow the yarn label and any care guidance provided by the original creator. When you add your own embellishments, consider whether they tolerate the same washing, drying, blocking, and storage method as the crochet fabric before attaching them permanently.