10 Crochet Mini Christmas Tree Ideas for Ornaments, Gifts, and Holiday Decor
A crochet mini Christmas tree can be much more than a tiny version of a tabletop tree. Some designs are dimensional enough to stand as holiday decor, while others stay flat for ornaments, gift tags, coasters, garlands, jewelry, or accessories. Those differences affect the yarn, finishing, embellishments, and amount of structure that matter most.
This collection focuses on ten noticeably different ways to use the Christmas tree shape. You can compare compact standing trees with lightweight hanging pieces, textured motifs with practical table decor, and decorative trees with pieces designed to travel on a keychain or gift. Each idea also includes an original YouTube tutorial so you can check the creator’s exact construction before starting.
Quick List
- Crochet Compact Tabletop Mini Christmas Tree
- Crochet Puff-Stitch Mini Christmas Tree Ornament
- Crochet Textured Mini Christmas Tree Coaster
- Crochet Christmas Tree Granny Square Motif
- Crochet Two-Piece Mini Christmas Tree Keychain
- Crochet Mini Christmas Tree Garland
- Crochet Cotton Mini Christmas Tree Ornament
- Crochet Mini Christmas Tree Earrings
- Crochet Mini Christmas Tree Gift Tag
- Crochet Mini Christmas Tree Brooch or Hair Clip
Choose the Tree by How You Want to Display It
Start with the finished use rather than choosing only by the tree’s appearance. A tabletop tree needs enough shape and balance to look intentional from several angles. An ornament should stay light enough to hang without pulling a branch downward, while a garland tree needs a reasonably flat profile so multiple pieces sit neatly along the cord.
Flat motifs are especially flexible. They can become tags, appliqués, coasters, or accessories depending on their scale and finishing. Dimensional versions create more presence on a shelf but may require more careful storage after Christmas. Before choosing a tutorial, decide whether the finished tree will stand, hang, lie flat, or attach to another object. That single decision can narrow the options quickly.
Yarn, Texture, and Structure Change the Finished Tree
Small crochet projects make yarn differences very noticeable. A thicker yarn can make a mini tree look plush and substantial, while finer yarn can produce cleaner small details for jewelry, ornaments, and appliqués. Dense fabric usually holds a defined silhouette better; softer or more open fabric can create more movement but may need blocking to keep points and edges tidy.
Texture also changes the visual scale. Puff, popcorn, or raised stitches can suggest ornaments without requiring many separate decorations. Smooth stitches make embroidered details or contrasting trim easier to see. If you change yarn from the tutorial, compare the resulting scale before committing to a whole set. A yarn substitution can affect not only size but also weight, stiffness, drape, and how clearly the tree shape reads.
Plan Embellishments Around the Tree’s Real Use
Mini trees invite beads, buttons, charms, stars, bows, and embroidered ornaments, but decoration should support the intended use. A hanging ornament can handle different details than a coaster that needs a reasonably level surface. Jewelry needs very light additions, while a gift tag benefits from embellishments that will not catch on wrapping or fall off while the package is handled.
For reusable holiday decor, think about storage as well. Bulky or rigid additions can make several pieces harder to stack without crushing the crochet. Sewn or embroidered decorations often pack flatter than dimensional craft pieces. When making items for young children or pets, avoid treating glued beads, buttons, charms, or other small removable pieces as safe play features.
1. Crochet Compact Tabletop Mini Christmas Tree
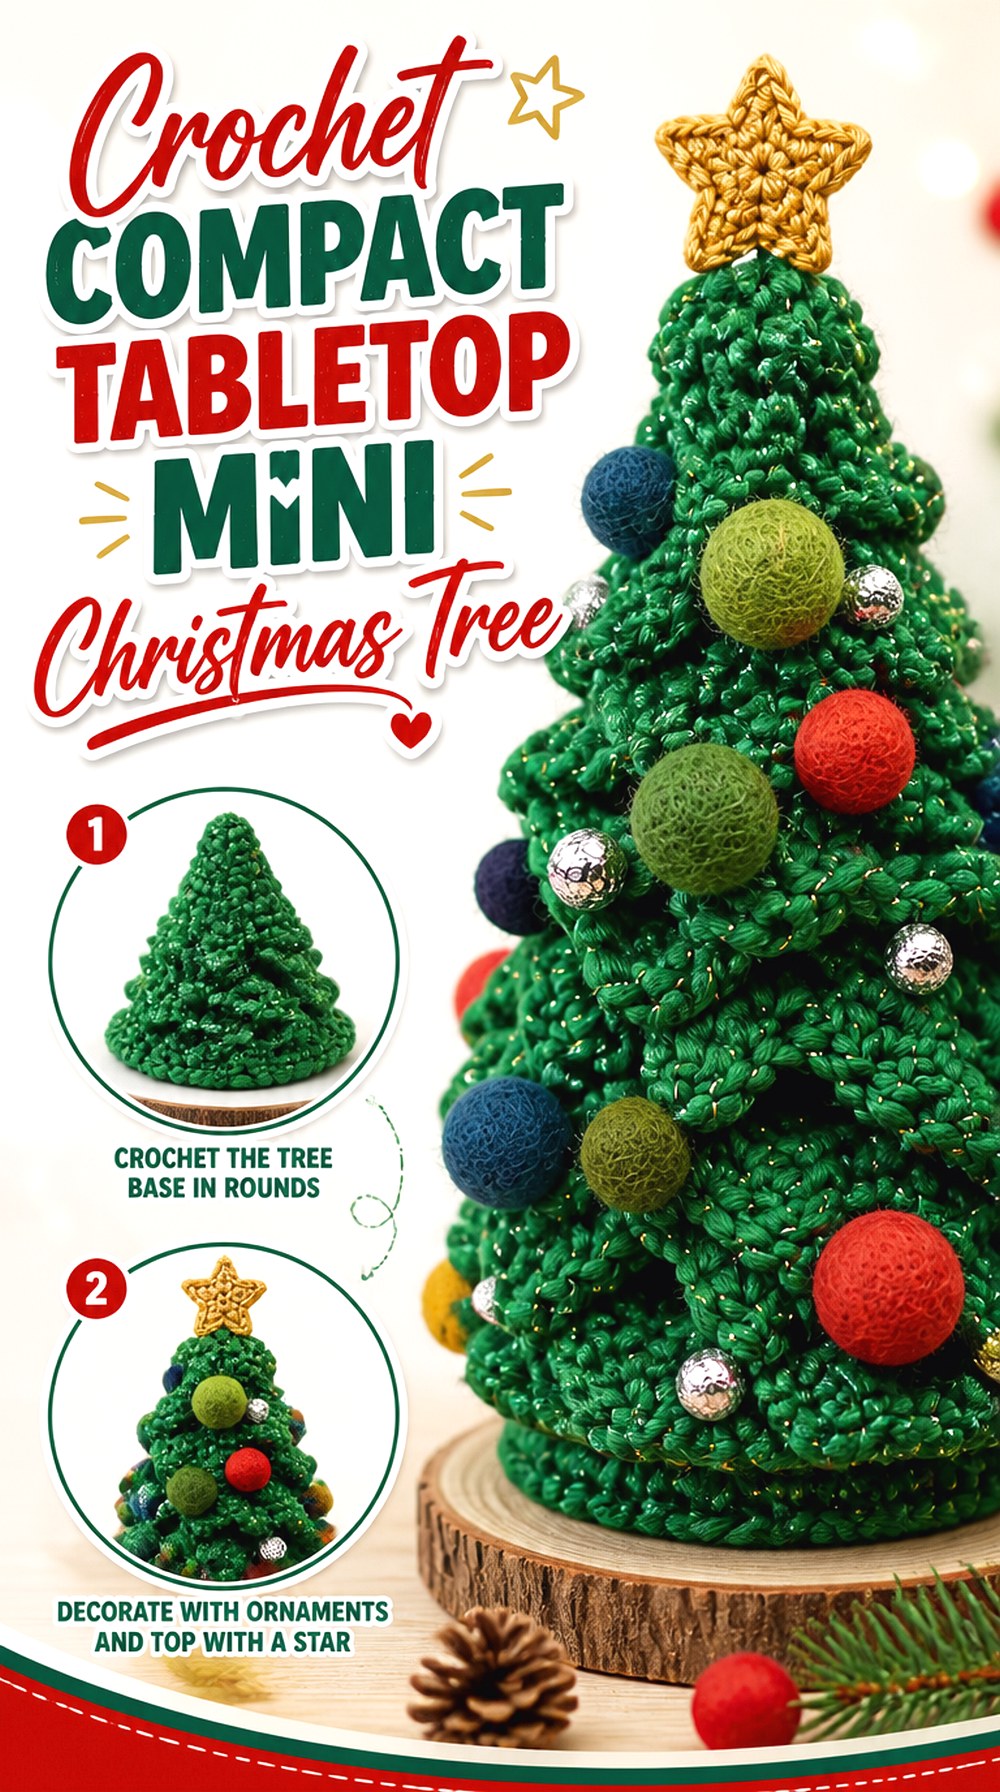
This version is the closest to a miniature traditional Christmas tree meant to become its own piece of decor. Instead of functioning primarily as an appliqué or tag, the finished form has enough presence for a desk, shelf, small-space holiday display, or grouped miniature tree arrangement. The Crochet Crowd specifically presents its tree as an option for places where a full-size Christmas tree may not be practical.
Its three-dimensional character makes it a useful starting point if your main goal is a recognizable standalone tree rather than something that hangs flat. Pay particular attention to the lower portion of the tree and how comfortably the finished piece sits in its intended display location.
A Small Footprint Still Needs Visual Balance
For tabletop decor, width matters almost as much as height. A very narrow tree can feel top-heavy, particularly after you add a topper or heavier decorations. Before embellishing, place the undecorated tree where you plan to display it and check whether the silhouette feels balanced from the front and sides. If you change yarn thickness, remember that the footprint may change along with the height.
Keep Decorations in Scale With the Tree
Large beads, bows, or pompoms can overpower a compact tree even when they look appropriately festive on their own. Lay possible decorations beside the finished crochet before attaching them. Smaller embroidered details may preserve the tree’s silhouette better, while dimensional ornaments create a fuller display. If the tree needs to be stored in a small box, flatter decorations are also less likely to become crushed between seasons.
Grouped Trees Work Better With Intentional Size Differences
A tabletop tree can become part of a small crochet forest rather than standing alone. If you plan a group, meaningful variation comes from scale and silhouette instead of simply changing colors. One taller tree beside shorter versions gives the arrangement hierarchy. Make a sample first if you are changing yarn or hook size, because those substitutions affect more than the final height.
2. Crochet Puff Stitch Mini Christmas Tree Ornament
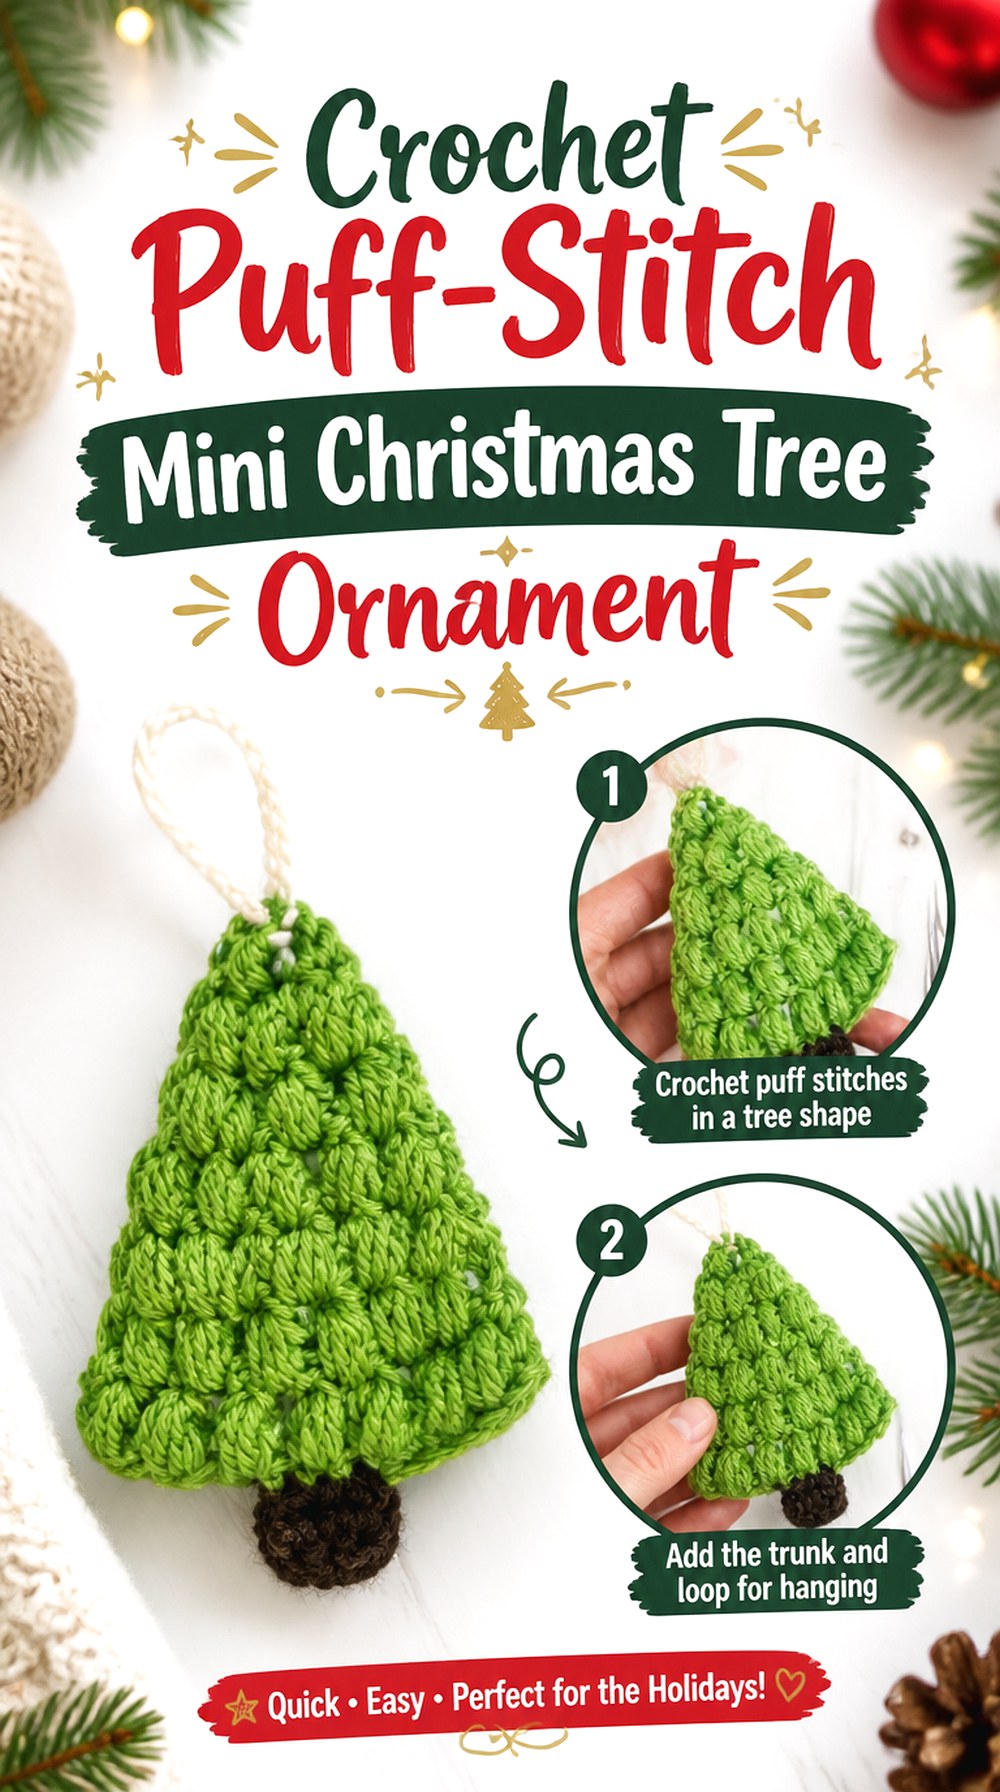
A flat ornament is a very different project from a freestanding tree because it depends on silhouette and surface texture instead of volume. Desert Blossom Crafts uses puff stitches in this Christmas tree design, giving the tree visible texture while allowing it to remain suitable for hanging. The creator also identifies the finished piece as adaptable to an appliqué or garland component.
That versatility makes this option useful when you want one tree motif that can appear in several parts of your holiday decorating. The puff texture gives the surface interest without requiring a large collection of separate ornaments, while the flat format simplifies storage compared with stuffed or heavily dimensional trees.
Puff Texture Can Replace Extra Embellishment
Raised stitches already create small areas of shadow and dimension. Before adding beads or buttons, view the tree from normal decorating distance and decide whether extra details actually improve it. A heavily decorated puff-stitch surface can become visually crowded. If you prefer a quieter tree, contrasting yarn for the trunk or hanger may be enough to separate the main shapes.
Check the Hanger Before Making a Whole Ornament Set
Hanging orientation becomes important when a project is small. Make one complete ornament, including its loop, and hang it from a branch or hook before repeating it. Check whether the tree faces forward or twists sideways and whether the loop feels proportionate to the piece. Making this test early is more useful than discovering after a full batch that every loop needs adjustment.
Flat Construction Makes This Tree Easier to Repurpose
Because the design does not rely on a stuffed body, the same basic finished tree can be considered for gift wrapping, garlands, or appliqué-style decorating. The important checkpoint is the destination surface. A tree that hangs freely may tolerate a thicker back, while an appliqué works better when the finishing remains neat and reasonably flat.
Original Tutorial and Creator Credit
Creator: Desert Blossom Crafts
3. Crochet Textured Mini Christmas Tree Coaster

This mini tree moves away from purely decorative ornaments and gives the Christmas tree silhouette a practical tabletop role. Cosy Rosie Crochet’s tutorial is specifically for a textured Christmas tree coaster, so the finished object is intended to sit flat rather than hang or stand. The tutorial uses chunky yarn in the demonstrated version, which contributes to the visible texture and substantial shape.
A tree-shaped coaster can work well as seasonal place-setting detail or under everyday drinkware. Because it has a functional surface, decoration decisions are different here: anything raised in the main contact area can interfere with a cup sitting securely.
Keep the Cup Area More Important Than the Decorations
A coaster does not need to become a miniature decorated tree in every detail. Before adding beads, buttons, or other dimensional pieces, put a mug on the finished crochet and see which areas actually sit underneath it. Embroidery or color changes are generally easier to keep low-profile. Dimensional embellishment is better reserved for sections that do not affect the coaster’s intended function.
Edges Matter More on an Irregular Silhouette
Unlike a round or square coaster, a Christmas tree has points and changes in width. Uneven tension can make those edges curl or pull the tree off-center. Check the piece on a flat surface after finishing. If the yarn and care instructions allow appropriate blocking, shaping the outline before use can help the tree read more clearly and sit more evenly.
Treat It as a Coaster, Not Automatically as a Hot Pad
A coaster tutorial does not by itself establish that a project is suitable for hot cookware. Fiber choice and heat exposure matter. Use this design for its stated coaster purpose unless you separately verify that your materials and construction are appropriate for another application. That distinction is especially important when decorating a holiday table.
Original Tutorial and Creator Credit
Creator: Cosy Rosie Crochet
4. Crochet Christmas Tree Granny Square Motif
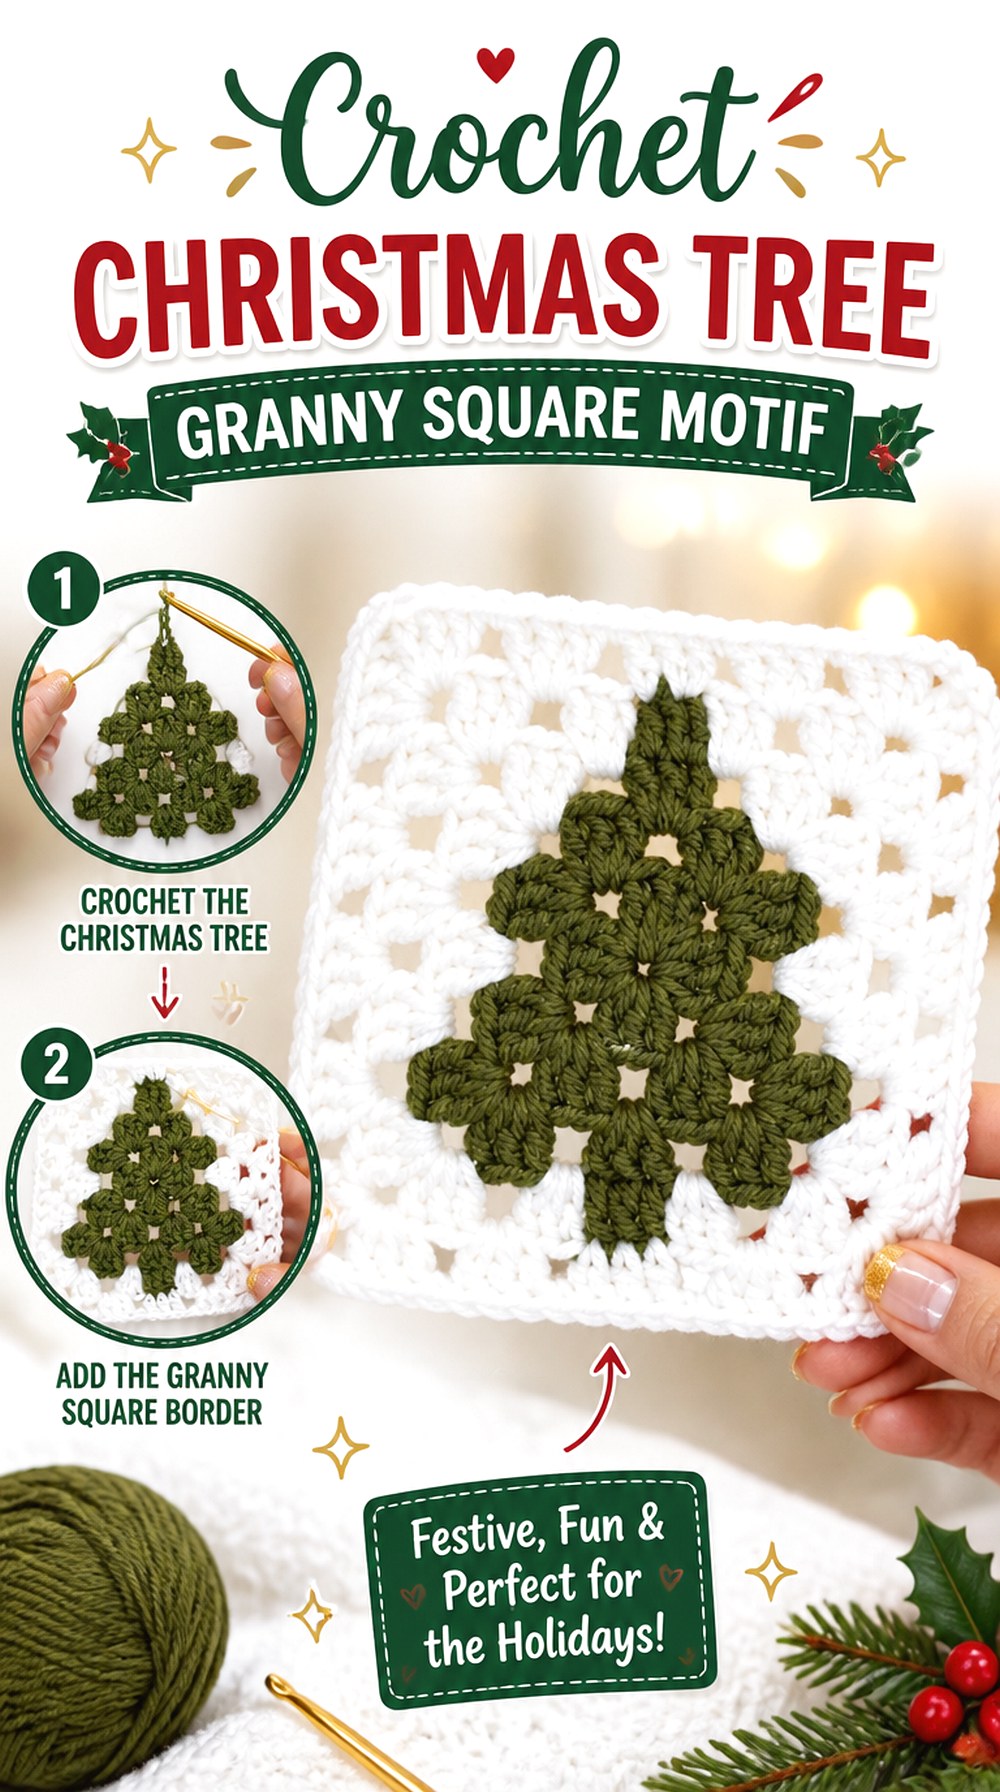
A Christmas tree contained inside a granny-square-style motif offers a modular route to mini tree decor. Wb crochet’s tutorial focuses on a Christmas tree motif/granny square rather than a freestanding tree, which means the surrounding square becomes just as important as the tree itself.
This format is useful when you want the tree to become part of a larger crochet surface. A single square can serve as a small decorative panel, while repeated compatible squares could be planned for a cushion, runner, wall hanging, or other motif-based project. The critical issue is not simply whether you like the tree; it is whether the finished square dimensions and border construction fit whatever you intend to combine it with.
Measure the Blocked Square Before Planning a Larger Project
Do not assume two granny-square designs will match because they use the same yarn weight or number of rounds. Crochet density, stitch height, and border structure can all change the finished dimensions. Block one tree square using your chosen materials, measure it, and compare it with any companion motif before deciding how many squares you need.
The Background Color Changes How Clearly the Tree Reads
A central holiday motif depends on contrast. If the tree and background are too close in value, the silhouette may disappear from normal viewing distance even though the stitch work looks detailed up close. Place possible yarn colors beside each other before starting. You can also photograph them together and check whether the tree remains recognizable when viewed smaller.
Think About Tree Direction Before Joining Multiple Squares
An individual square has a clear top and bottom because the tree points in one direction. In a larger layout, orientation becomes an editorial choice. You might keep every tree upright for a structured grid or deliberately rotate motifs for another effect. Arrange completed squares on a flat surface before joining so the final project does not end up with an accidental directional pattern.
Original Tutorial and Creator Credit
Creator: Wb crochet
5. Crochet Two Piece Mini Christmas Tree Keychain

A keychain puts a mini crochet tree into a much higher-contact setting than shelf decor. Vicky Crochet’s tutorial creates a Christmas tree keychain from two tree pieces that are joined together, then adds decorative dots and a snowflake charm. That construction makes the piece visually fuller than a single flat appliqué while keeping it portable.
This version is worth considering for a bag charm, stocking stuffer, or seasonal key accessory. Because the piece will move and rub against other objects, secure finishing matters more than it does on a tree that simply hangs on a wall.
Reinforce the Hanging Point for Everyday Movement
The top connection takes repeated stress whenever the keychain swings or catches against a bag. Inspect the completed attachment before putting the piece into everyday use. If you adapt the design with different hardware, make sure the crochet itself is not being pulled through one loose loop or a delicate decorative stitch that was never intended to carry repeated movement.
Two Layers Give You More Finishing Decisions
Joining two matching tree pieces changes the edge from a decorative outline into part of the assembly. Before closing the pieces, check that both shapes align without one side stretching farther than the other. If your tension varies between pieces, light shaping before assembly may make the final edge cleaner than trying to force mismatched outlines together.
Small Decorations Need to Survive Handling
Colorful dots and charms can be attractive on a keychain, but portable accessories are frequently touched, dropped, and packed against other items. Consider sewn or embroidered decoration when you want fewer projecting pieces. If you add charms or other hardware, check connections periodically rather than assuming an attachment that looks secure on display will behave the same way in daily use.
Original Tutorial and Creator Credit
Creator: Vicky Crochet
6. Crochet Mini Christmas Tree Garland

A garland turns one small tree into a repeated decorating system. Heather Corinne Crochets demonstrates flat Christmas tree pieces intended for bunting, while also noting that the individual motifs can work for uses such as appliqués, gift tags, or coasters. The repeated flat form makes this idea noticeably different from a single ornament.
Garlands work especially well when you need horizontal holiday decoration across a mantel, shelf, doorway, buffet, or work area. The main planning challenge is not crocheting one tree; it is deciding how a whole line of trees will hang, space, and stay visually balanced.
Test the Garland in Its Real Location Before Finalizing Spacing
Trees that look evenly spaced on a table can behave differently once the strand curves between two attachment points. Make the motifs first, place them temporarily along the cord, and hang the garland where it will actually be used. Adjust spacing while you can still move individual pieces. This is especially helpful when the center of the garland is meant to drape.
Repetition Makes Small Tension Differences More Visible
A single slightly wider tree may not seem important, but repeated motifs make inconsistencies easier to notice. If uniformity matters, compare each finished tree with the first one before attaching it to the strand. For a deliberately handmade mixed look, vary colors or textures intentionally so natural differences look like part of the design rather than accidental changes.
Flat Trees Simplify Seasonal Storage
Garlands can become awkward to store when every motif is heavily stuffed or decorated with protruding pieces. A flatter tree can usually layer more efficiently. Before adding dimensional ornaments to every motif, consider how the finished strand will be packed. Embroidery, colorwork, or low-profile decoration can preserve the festive look while reducing tangles and crushed embellishments.
Original Tutorial and Creator Credit
Creator: Heather Corinne Crochets
7. Crochet Cotton Mini Christmas Tree Ornament

Kane Crochet’s mini Christmas tree ornament offers a smaller-scale cotton approach with separate finishing elements for the trunk and star. The creator lists 4-ply cotton yarn, a 3 mm hook, and a finished example about 11 cm high by 6 cm wide, providing a useful verified reference for the demonstrated version.
That scale places the project firmly in ornament territory rather than larger tabletop decor. It is a useful choice when you want a more defined, compact tree and prefer the stitch clarity that finer cotton can provide. If you substitute a substantially different yarn, expect the proportions, firmness, and hanging weight to change.
Cotton Can Give Small Details a Clearer Outline
Smooth cotton often shows small stitch features distinctly, which can suit ornaments where the viewer is close enough to notice the shape of a trunk, star, or edging. The trade-off is that cotton behaves differently from springier fibers. If you substitute yarn, make one complete tree first and evaluate whether the new fabric still holds the intended outline.
Check the Finished Weight Before Choosing the Hanger
Even a small ornament can become noticeably heavier after a topper, trim, or additional decorations are added. Complete one tree and test it on the kind of branch or hook you expect to use. A light-looking ornament that pulls a flexible branch downward may be better displayed from a sturdier hook, garland, or wall peg.
Scale Down Decorations Along With the Tree
The demonstrated tree is compact, so an oversized topper or thick hanging cord can dominate the crochet. Place embellishments against the tree before attaching them and judge the whole silhouette from a short distance. When you want more sparkle without extra bulk, a small amount of contrasting thread or embroidery can preserve the tree’s proportions.
Original Tutorial and Creator Credit
Creator: Kane Crochet
8. Crochet Mini Christmas Tree Earrings
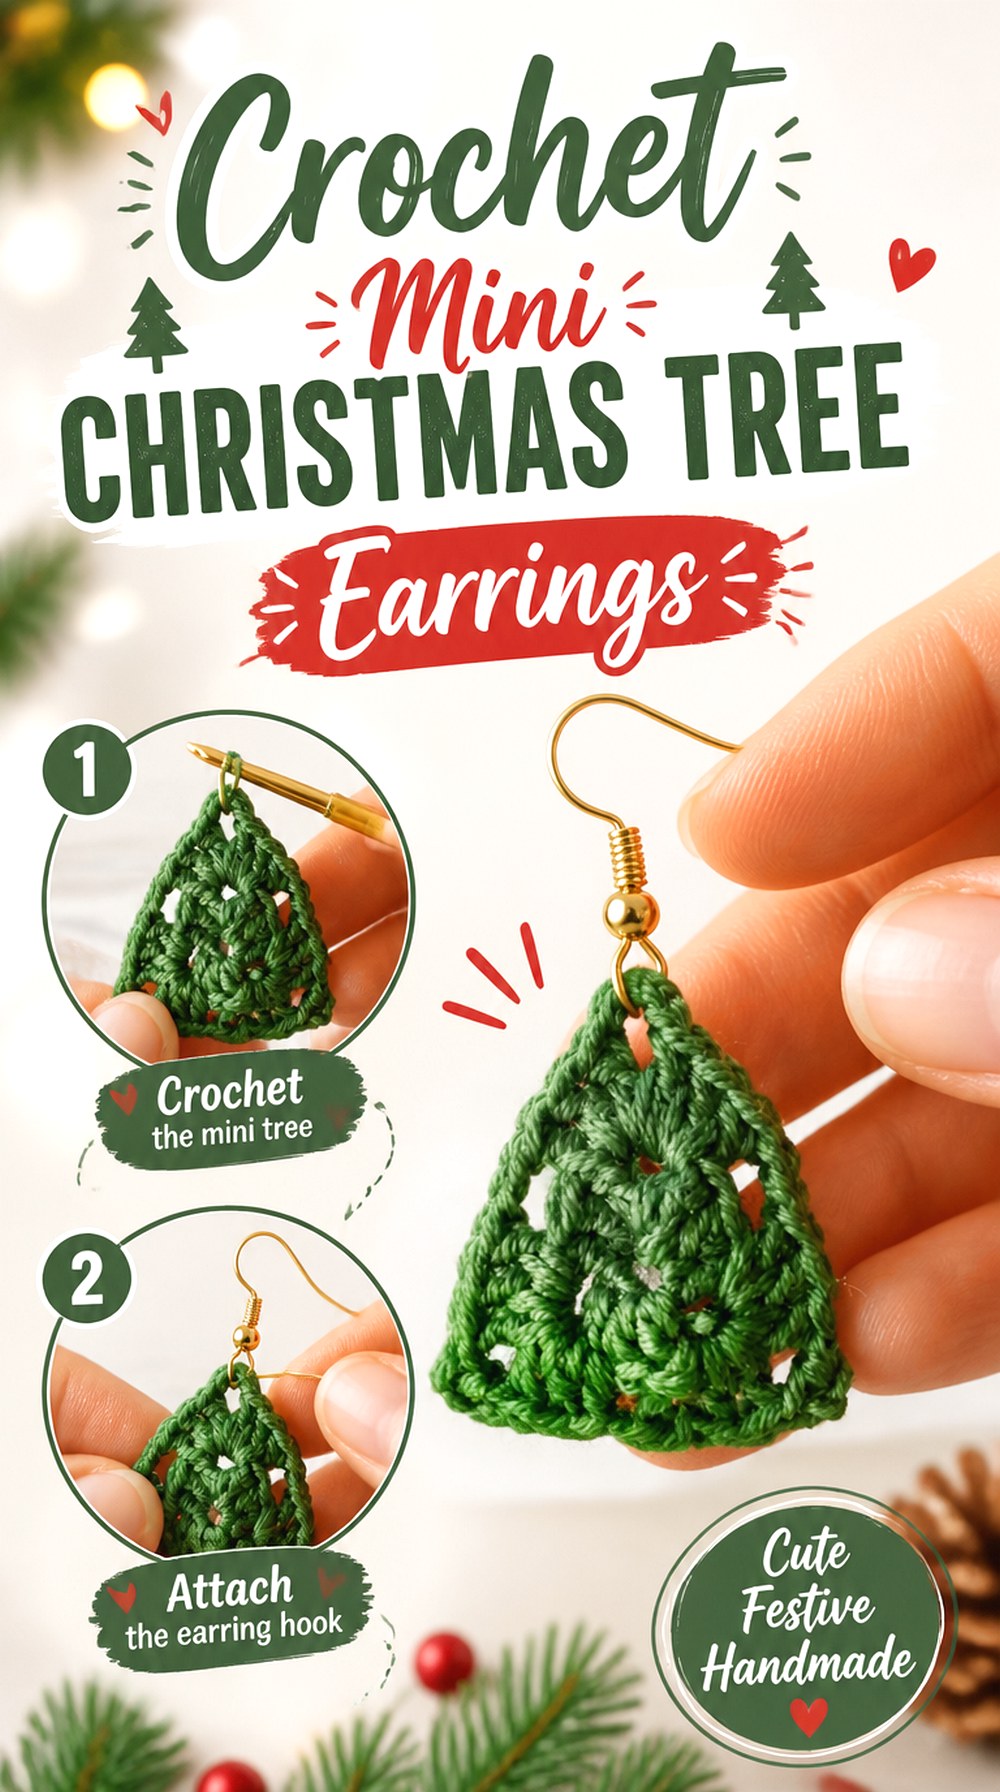
HappyBerry Crochet takes the mini-tree idea into wearable jewelry with a Christmas tree earring tutorial. The demonstrated project uses lace/fingering-weight yarn and a 2.5 mm crochet hook, which makes sense for an object that needs much finer proportions than a coaster or tabletop tree.
This is a strong option when you want the tree shape to feel delicate rather than plush. Earrings also create a different kind of matching challenge: the two finished trees should appear consistent when worn together, so tension and final shaping matter more than they might for two unrelated ornaments.
Make the Pair Before Attaching Jewelry Findings
Crochet the two tree motifs first and place them side by side. Small differences in width or point placement become much easier to see when the pieces are viewed as a pair. If one motif needs reshaping or remaking, it is simpler to correct before findings are attached and the earrings become more difficult to handle.
Weight Matters More Than Maximum Detail
Every additional bead, charm, or heavy component changes how an earring feels. Keep decoration proportional to the tiny crochet rather than treating the motif like a full-size ornament. If you modify the creator’s materials, compare the weight and stiffness of the finished pair before wearing them for an extended period.
Choose Findings Separately From the Crochet Design
The crochet tutorial demonstrates the textile portion, but jewelry hardware introduces additional considerations. Select findings appropriate for your intended wearer and do not assume a particular metal is suitable for sensitive skin unless the product information specifically supports that claim. Check that the connection between the crochet and hardware closes securely.
Original Tutorial and Creator Credit
Creator: HappyBerry Crochet
9. Crochet Mini Christmas Tree Gift Tag
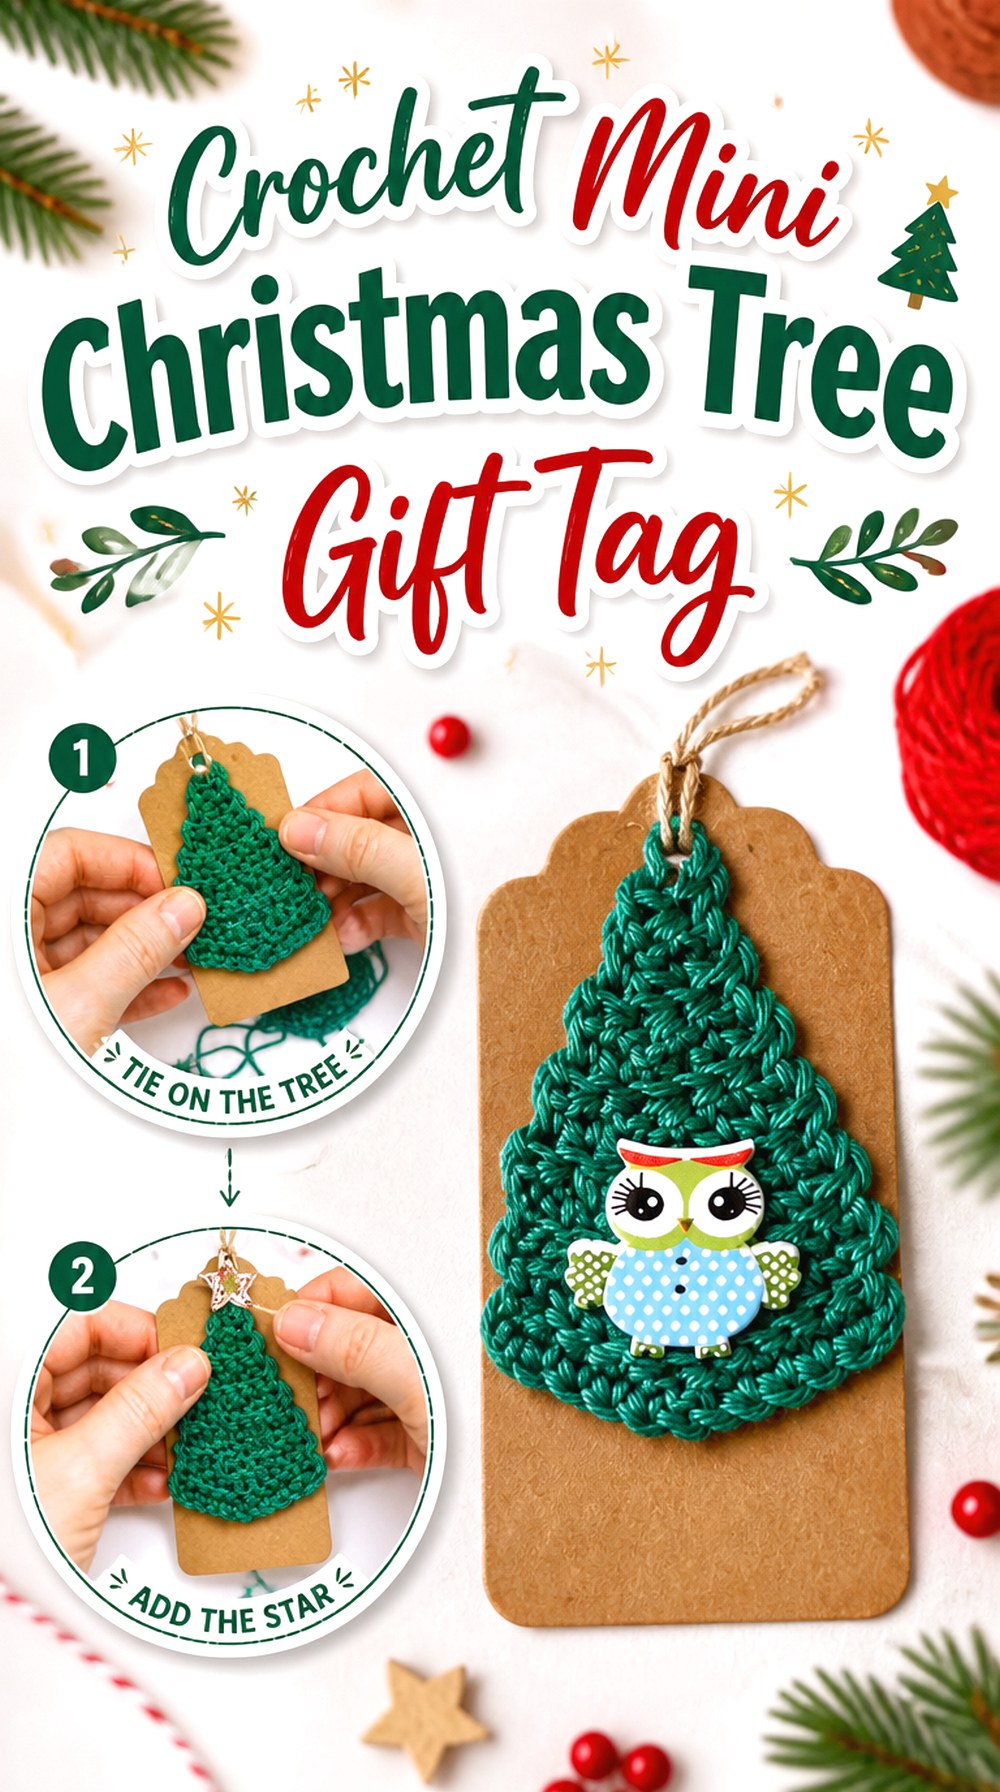
A crochet tree gift tag has a job that lasts beyond the wrapping process: it decorates the package first, then can potentially be kept as a small handmade memento. Lullaby Lodge’s tutorial specifically demonstrates Christmas tree gift tags and shows the crochet tree being combined with a tag and decorative additions.
This idea works well when you want handmade crochet to be part of the presentation without committing to a larger gift. Compared with a hanging ornament, the tree should be planned around ribbon, twine, wrapping paper, and the amount of handling the package will receive.
Make Sure the Tree Does Not Hide the Actual Label
It is easy for the crochet decoration to become the visual focus and leave too little room for the recipient’s name. Assemble one complete sample before making a batch. Check that the tag still has a readable writing area and that the crochet tree does not have to be moved aside every time someone wants to identify the present.
Low-Profile Decoration Packs More Cleanly
Gift tags often sit under other packages, travel in bags, or brush against ribbons. Thick buttons and projecting embellishments can catch or press into the wrapping. Embroidery, small knots, or flatter decoration may be more practical when packages need to travel. Save more dimensional embellishments for gifts that will remain relatively undisturbed under the tree.
Consider What Happens After the Gift Is Opened
A removable crochet tree can become an ornament or keepsake if its finishing supports reuse. If that is your plan, make the attachment easy to remove without cutting the crochet. For gifts to small children, also consider whether separate buttons or other small removable embellishments should be omitted from anything that may later be handled as a toy.
Original Tutorial and Creator Credit
Creator: Lullaby Lodge
10. Crochet Mini Christmas Tree Brooch or Hair Clip
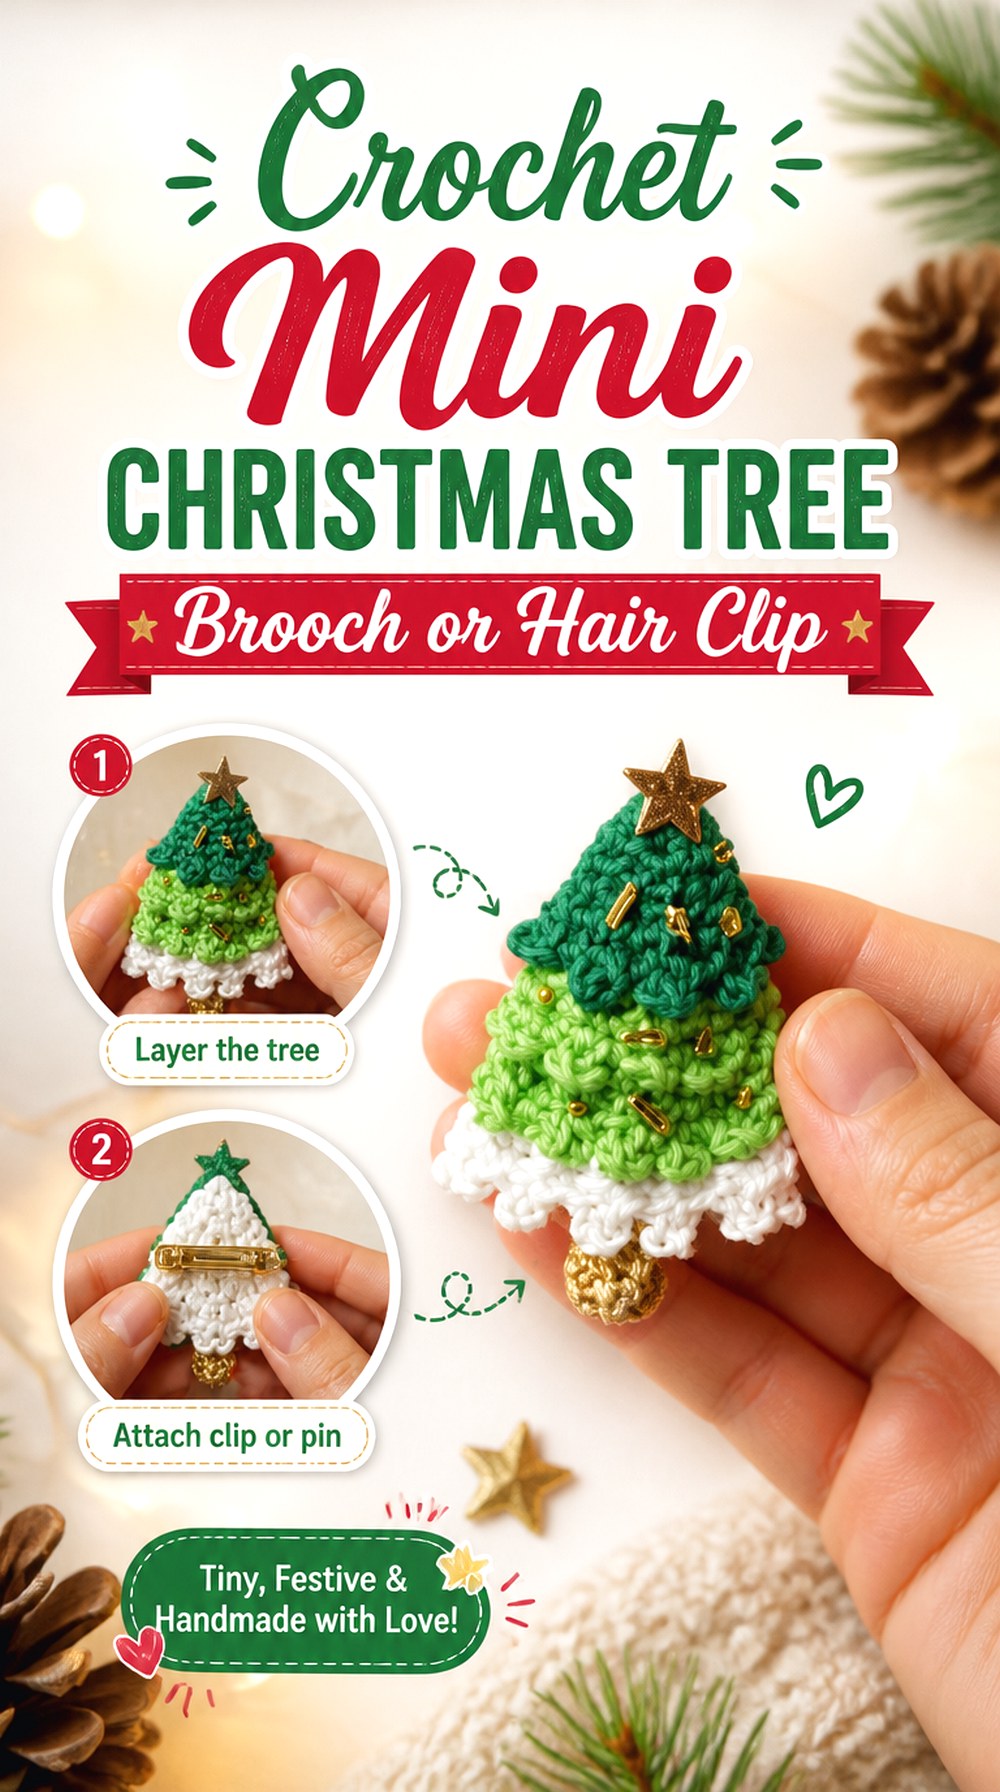
Macy loves Crochet demonstrates one Christmas tree motif as both a hair clip and a brooch, turning the small seasonal shape into a wearable accessory rather than home decor. The tutorial uses a 2.5 mm hook in the demonstrated project and specifically identifies both accessory formats in the video title.
This idea is useful when you want a mini tree that can decorate clothing, a bag, or hair without becoming a dangling piece of jewelry. The backing hardware is just as important as the front of the crochet because it determines whether the finished piece sits flat, tilts, or pulls on the surface where it is attached.
Match the Backing to the Crochet Footprint
Before sewing or gluing on a clip or brooch finding, place the hardware behind the tree and look at the project from the front. The backing should remain reasonably hidden while still supporting enough of the motif to stop it folding around one narrow attachment point. A very small clip on a comparatively wide crochet tree may allow the edges to flop.
Decide Between Hair Accessory and Brooch Before Finishing
The same tree motif can support two uses, but the final attachment should reflect the destination. A hair clip needs to open and close without catching loose yarn tails, while a brooch should lie neatly against fabric. Finish and secure the back of the crochet first so the hardware does not cover ends that still need attention.
Wearable Pieces Benefit From Fewer Snag Points
Loose loops, projecting beads, and long decorative tails can catch on hair, scarves, or textured clothing. Run a finger gently around the finished edge and identify anything likely to snag before wearing it. Secure decoration carefully and remember that a decorative hair clip or brooch is an accessory, not a toy for small children.
Which Mini Christmas Tree Style Fits Your Plan?
| Idea | Finished Form | Useful When You Want | Main Checkpoint |
|---|---|---|---|
| Compact tabletop tree | Dimensional decor | A shelf or desk display | Balance and footprint |
| Puff-stitch ornament | Flat textured hanger | A lightweight tree ornament | Hanger orientation |
| Tree coaster | Flat functional piece | Seasonal table decor | Level cup surface |
| Granny-square tree | Modular square motif | A larger joined project | Blocked square dimensions |
| Tree keychain | Two-piece portable accessory | A bag or key charm | Strong attachment point |
| Tree garland | Repeated flat motifs | Mantel or doorway decor | Spacing after hanging |
| Cotton ornament | Compact hanging tree | Defined small-scale detail | Finished hanging weight |
| Tree earrings | Tiny matching pair | Seasonal jewelry | Pair consistency and weight |
| Tree gift tag | Package decoration | Handmade gift presentation | Readable label space |
| Tree brooch/hair clip | Backed wearable motif | Clothing, bags, or hair | Hardware placement |
Conclusion
The right crochet mini Christmas tree depends less on one perfect tree shape and more on what you want the finished piece to do. Choose the tabletop version when you want dimensional decor, the puff ornament or cotton tree for hanging, the granny-square motif for a larger modular project, or the garland when repetition is part of the display. Coasters, tags, keychains, earrings, and brooches take the same seasonal symbol into more practical or wearable directions.
Once you choose the use, yarn weight, embellishment, structure, and finishing decisions become much easier. Follow the credited original tutorials for the creators’ exact construction details, then make your color and display choices around the finished function.
Frequently Asked Questions
What yarn works well for crochet mini Christmas trees?
There is no single yarn that suits every mini tree because the intended use changes the priorities. Fine yarn can give earrings and small ornaments sharper proportions, while thicker yarn can make tabletop trees or coasters feel more substantial. Before substituting yarn, consider how the change may affect size, stiffness, surface texture, and hanging weight rather than matching color alone.
Can I make the same crochet tree design smaller?
Changing to finer yarn and an appropriately compatible hook can reduce the scale of many crochet projects, but the result is not guaranteed to behave exactly like the original. Small trunks, toppers, loops, and decorations may need reevaluation once the tree changes size. Make one sample and check its proportions instead of assuming every component will shrink visually at the same rate.
How do I keep a flat crochet Christmas tree from curling?
Curling can come from tension differences, edging, yarn behavior, or the structure of the particular design. First check that your stitch tension is not pulling one section tighter than another. If the yarn and project are suitable for blocking, shaping the finished motif can help settle the outline. For functional pieces such as coasters, confirm that the finished object lies flat before using it.
Should I use beads or buttons to decorate mini crochet Christmas trees?
They can work well on decorative trees, but the project’s use should guide the choice. Beads and buttons may be inconvenient on coasters, delicate jewelry, or items that need compact storage. They can also create small detachable parts. Embroidery, contrasting stitches, or yarn knots offer flatter alternatives when you want ornament-like color without adding rigid pieces.
Can I turn a flat crochet mini tree into a garland?
Often, yes, provided the finished tree has a suitable point for attachment and hangs without twisting excessively. Make several matching motifs, then arrange them along your cord before permanently fixing the spacing. Test the strand in its intended location because the curve of a hanging garland can change how evenly spaced motifs appear compared with a flat tabletop layout.
How should I store crochet mini Christmas trees after the holidays?
Flat motifs can usually be layered with clean tissue or another protective material so decorations do not snag. Dimensional trees need enough room to avoid being compressed out of shape, especially if they have stiff toppers or projecting embellishments. Make sure every item is clean and fully dry before storage, and keep delicate jewelry hardware or small charms from tangling with larger crochet decorations.