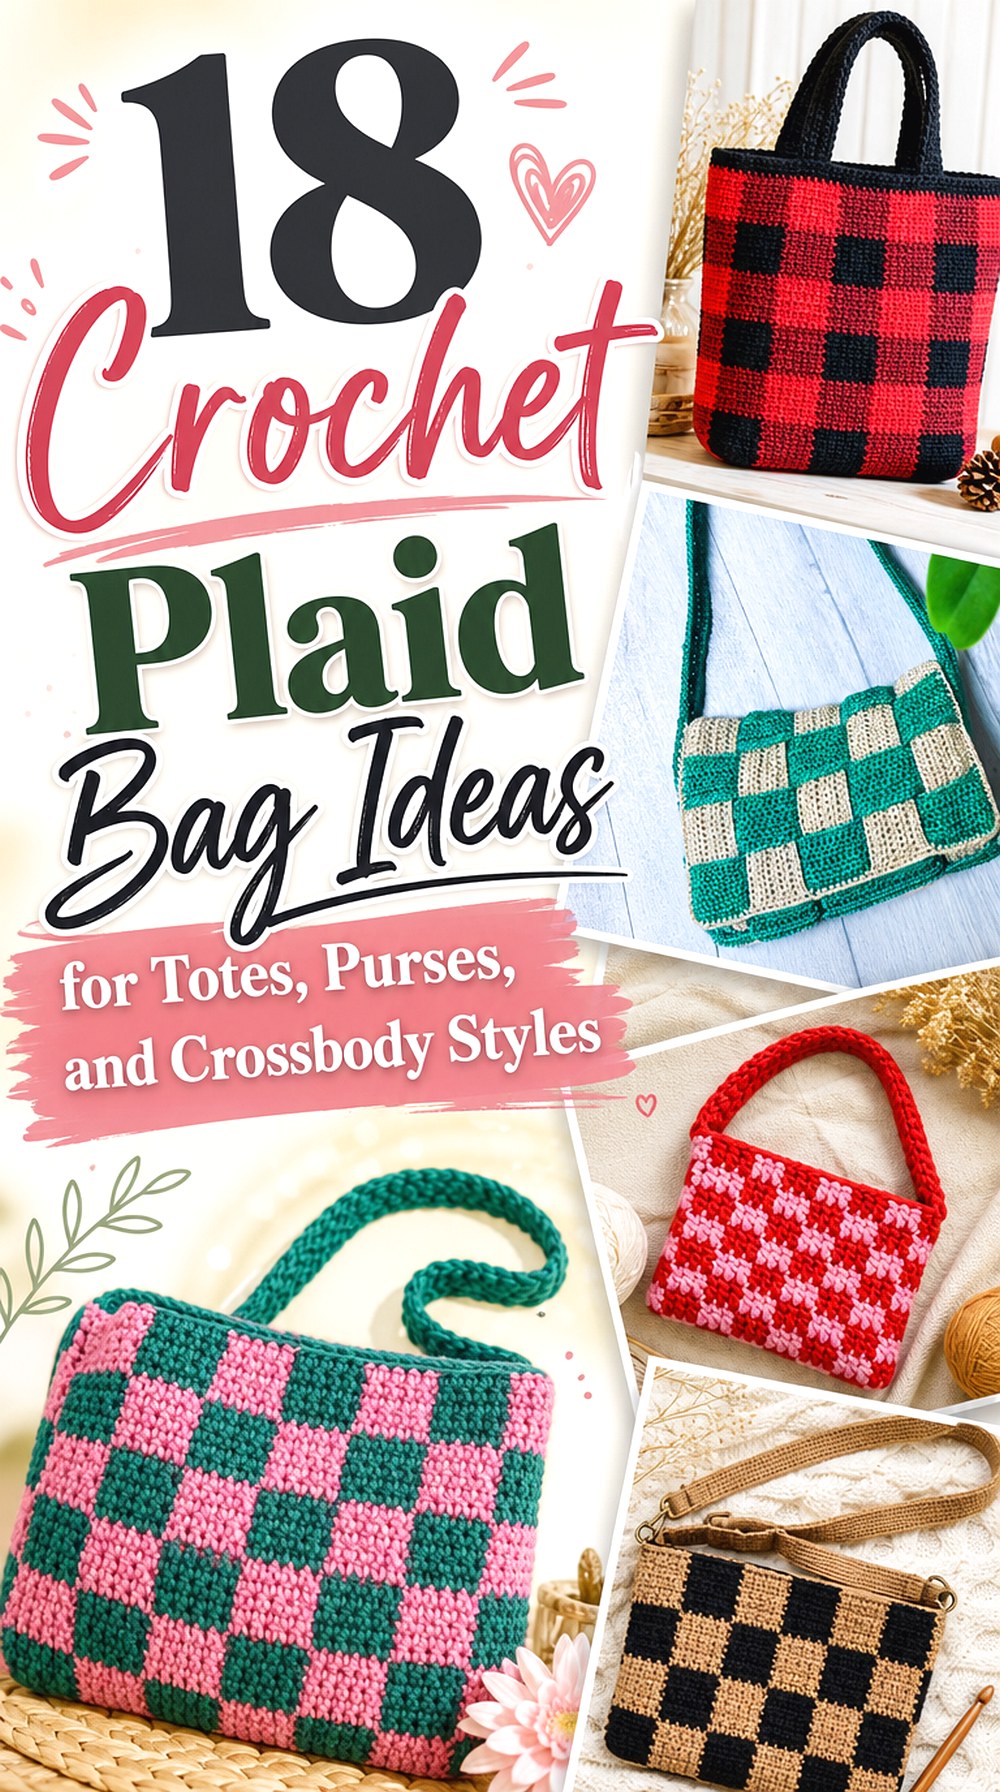
18 Crochet Plaid Bag Ideas for Totes, Purses, and Crossbody Styles
Plaid can take several forms in crochet. Some bags create a traditional gingham effect with three related colors, others use crisp two-color checkerboards, and a few interpret plaid through layered color blocking or texture. Those differences matter because the same grid-inspired look can produce very different fabric, silhouettes, and finishing needs.
These 18 crochet plaid bag ideas range from roomy totes and compact shoulder purses to a baguette bag, mini crossbody, reversible purse, chunky carry bag, and zippered Tunisian belt bag. Each project is paired with an original YouTube tutorial from a different creator. The focus here is choosing, comparing, and planning the right bag rather than replacing the creator’s exact construction instructions.
Quick List
- Crochet Seamless Gingham Market Tote
- Crochet Tapered-Strap Checkerboard Tote
- Crochet Panel-Built Checkered Shoulder Bag
- Crochet Reversible Interlocking Checkered Shoulder Bag
- Crochet Long-Strap Checkered Shoulder Bag
- Crochet Checkerboard Side Bag with Long Strap
- Crochet Textured Plaid-Style Tote Bag
- Crochet Compact Checkered Handbag
- Crochet Mini Checkered Crossbody Sling Bag
- Crochet Three-Color Gingham Picnic Tote
- Crochet Small Checkerboard Shoulder Purse
- Crochet Two-Color Cotton Checkered Carry Bag
- Crochet Mini Gingham Handbag
- Crochet Checkered Baguette Bag
- Crochet Tunisian Checkered Belt Crossbody Bag
- Crochet Chunky Checkerboard Carry Bag
- Crochet Three-Tone Checked Tote Bag
- Crochet Row-Worked Checkerboard Tote
Plaid, Gingham, and Checkerboard Give Different Results
“Plaid” is often used broadly when people search for crochet bags, but gingham and checkerboard are not identical patterns. Checkerboard usually emphasizes alternating blocks in two contrasting colors. Gingham generally uses three values—a neutral plus lighter and darker versions of another color—to create an overlapping woven appearance. Plaid-style crochet can add further lines, textures, or layered color relationships.
That distinction is useful when choosing a tutorial. Pick gingham when you want a softer, more traditional textile look. Choose checkerboard when bold graphic squares are the priority. If you want something closer to tartan, preview the finished tutorial carefully rather than assuming every checked bag will create intersecting plaid lines.
Choose Yarn and Fabric Density Around the Bag’s Job
A plaid bag needs the colorwork to stay readable, but the fabric also has to behave like a bag. A very soft or stretchy fabric can make square color blocks distort once the bag is filled, while a firmer fabric can hold a cleaner silhouette. Fiber, yarn construction, hook choice, stitch pattern, and tension all contribute, so yarn weight alone does not determine structure.
Before substituting yarn, make a small colorwork sample and look at both the fabric and the transitions between colors. Check whether the light color allows carried strands to show through. Also consider the finished fabric’s thickness: carrying unused colors can add body, but it can also create extra bulk. Follow the selected tutorial’s color-management approach when consistency matters.
Plan Straps, Closures, and Lining Before the Colorwork Is Finished
A good plaid surface does not automatically make a practical bag. Strap construction, opening style, seams, and lining can change how the finished piece behaves much more than the color palette does. Long unsupported crochet straps may stretch differently from short handles, while a zipper requires more deliberate opening preparation than an open tote.
Decide early whether you need shoulder carry, crossbody use, hand carry, or several options. If you intend to add fabric lining, check the shape of the finished body before cutting anything. For a zipper or reinforced strap, preview that portion of the tutorial first so you know whether your planned modifications will interfere with the original construction.
1. Crochet Seamless Gingham Market Tote
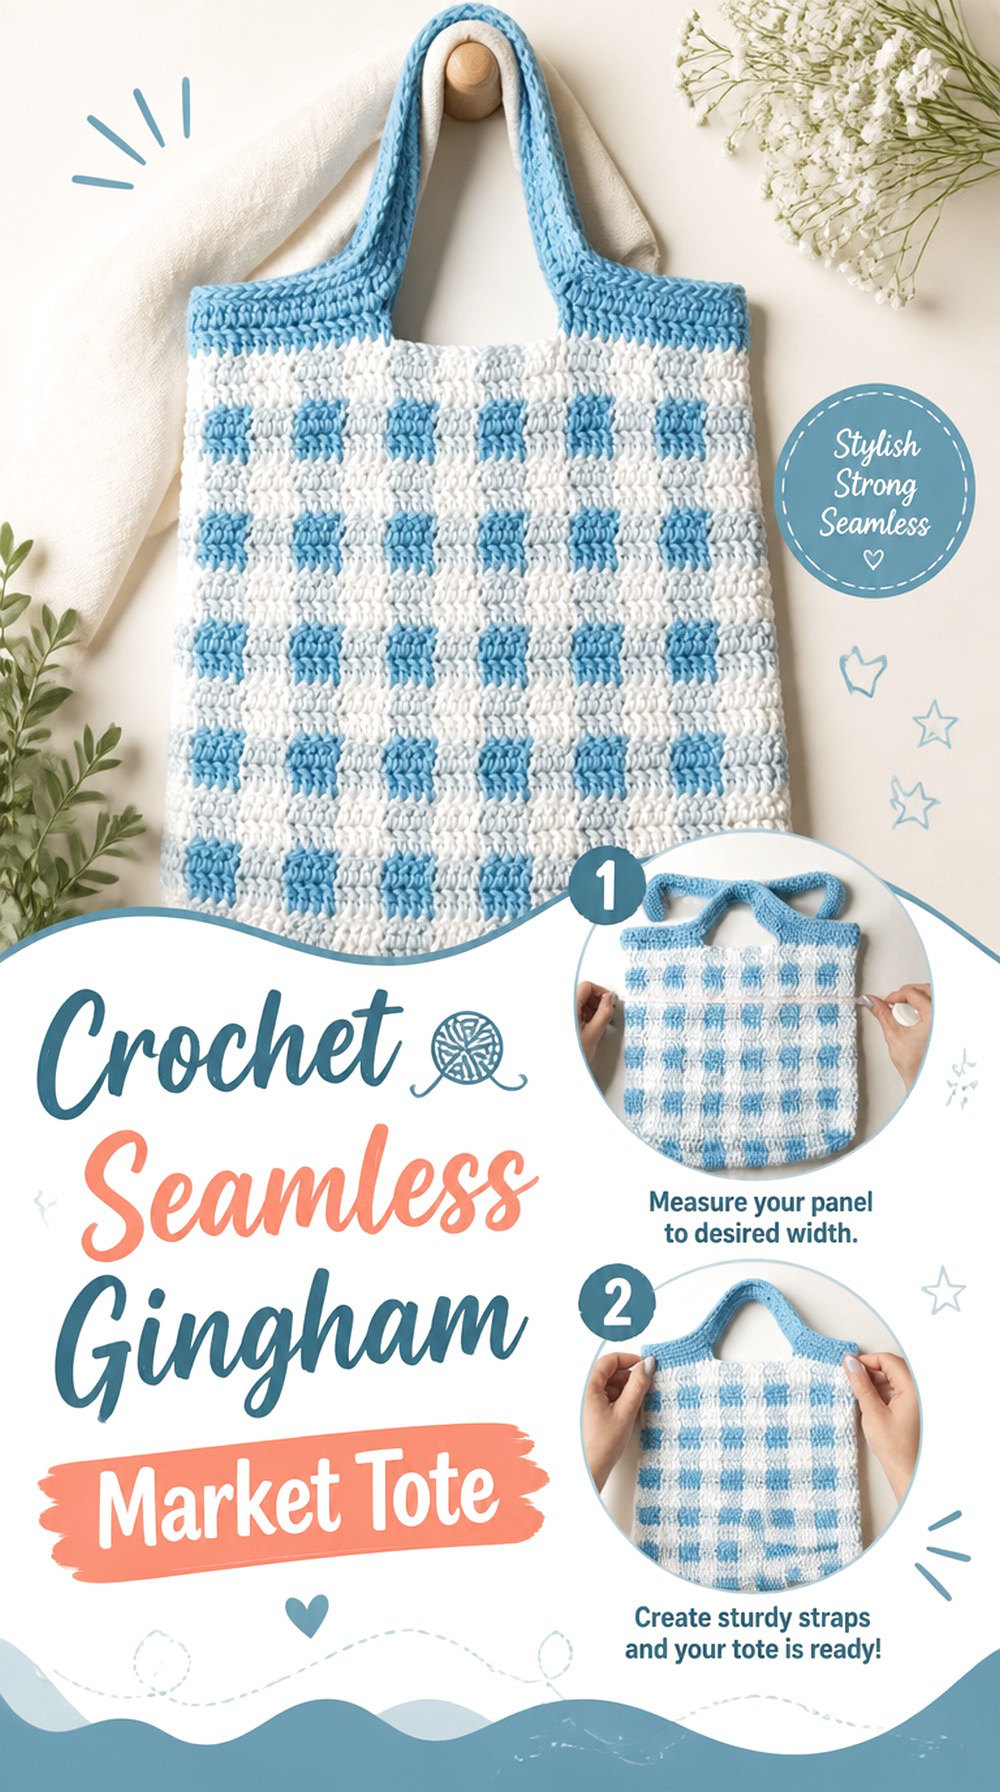
This gingham tote is a strong choice for crocheters who like the appearance of a pieced colorwork bag but would rather minimize assembly. VivCrochets presents the tote as a one-piece construction with no sewing and relatively few loose ends. The finished design uses a recognizable grid while keeping the silhouette straightforward enough for everyday tote use.
The construction also makes this idea meaningfully different from panel-based bags later in the list. Instead of treating plaid as decoration added to separate pieces, the body, base, and handle planning work together as one continuous bag concept.
One-Piece Construction Reduces an Important Failure Point
Plaid panels can look tidy individually but become visually uneven if their blocks shift at a side seam. A more continuous construction reduces the number of places where separate checked sections have to be aligned. That does not eliminate the need for consistent tension, but it changes what you need to monitor: pay closer attention to the beginning of each color section and whether the grid remains visually level as the body grows.
Decide How Much Contrast You Want Before Starting
Gingham depends on color relationships rather than simply choosing three unrelated shades. A light, medium, and dark relationship usually makes the overlapping effect easier to read. Before committing to the full tote, place your yarns together in daylight and photograph them in grayscale if you are unsure about value contrast. If two shades merge visually, the gingham effect may look flatter than expected.
2. Crochet Tapered Strap Checkerboard Tote
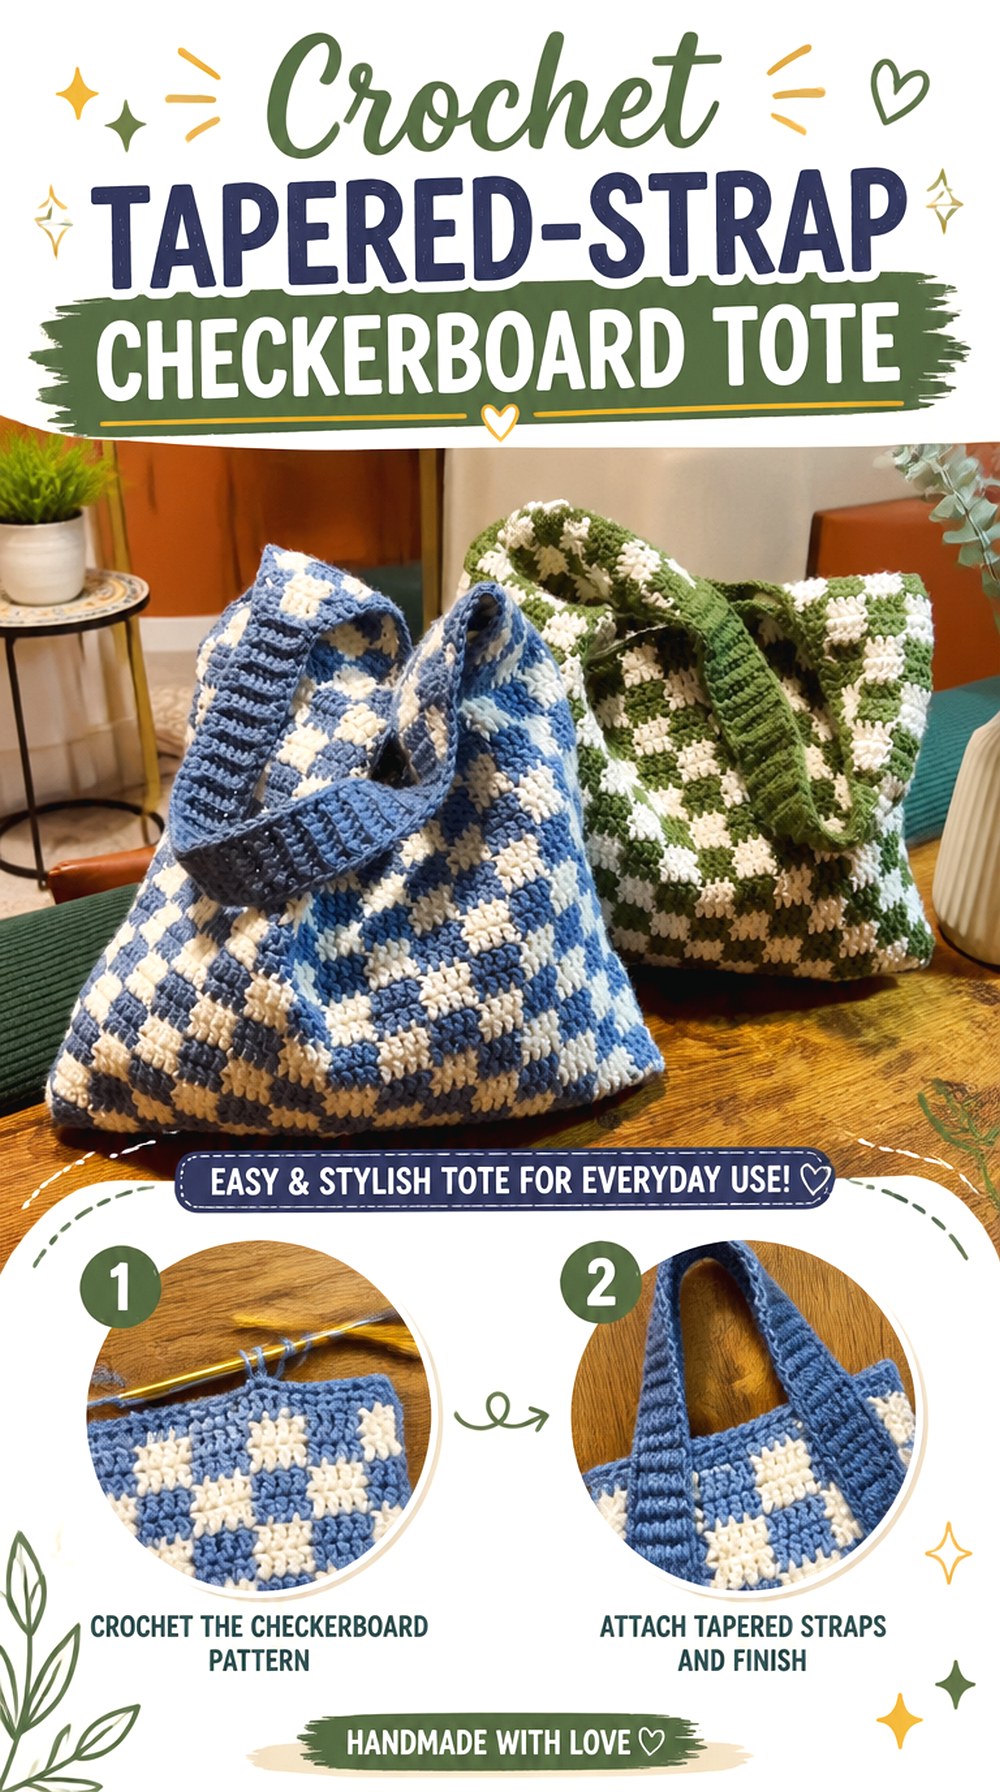
This tote uses a bold checkerboard surface but gives extra attention to the transition into the handles. MitchesGetStitches demonstrates the body in continuous rounds and includes tapered strap shaping, making the handle treatment part of the design rather than an afterthought. That creates a different visual line from a tote with two narrow straps sewn on later.
It suits readers who want the checker pattern to dominate the body while the upper edge becomes more streamlined. Because the pattern continues around a three-dimensional bag, keeping the color-change rhythm consistent around corners and round joins deserves as much attention as the squares themselves.
Tapered Handles Change the Load Transition
A narrow strap attached abruptly to a wider body concentrates the visual transition into a small area. A tapered connection spreads that transition more gradually. If you adapt the bag’s dimensions, do not think only about making the body wider or taller; preview where the tutorial begins its strap shaping and make sure your altered checker layout still leaves the handles positioned symmetrically.
Continuous Rounds Need a Clear Visual Checkpoint
When a checker pattern travels around the entire body, an unnoticed offset can keep repeating. Periodically lay the bag flat and compare the vertical lines of the blocks on both sides. You are not looking for a universal stitch count; you are checking that the design remains intentionally staggered where it should and aligned where the tutorial shows alignment.
Original Tutorial and Creator Credit
Creator: MitchesGetStitches
3. Crochet Panel Built Checkered Shoulder Bag
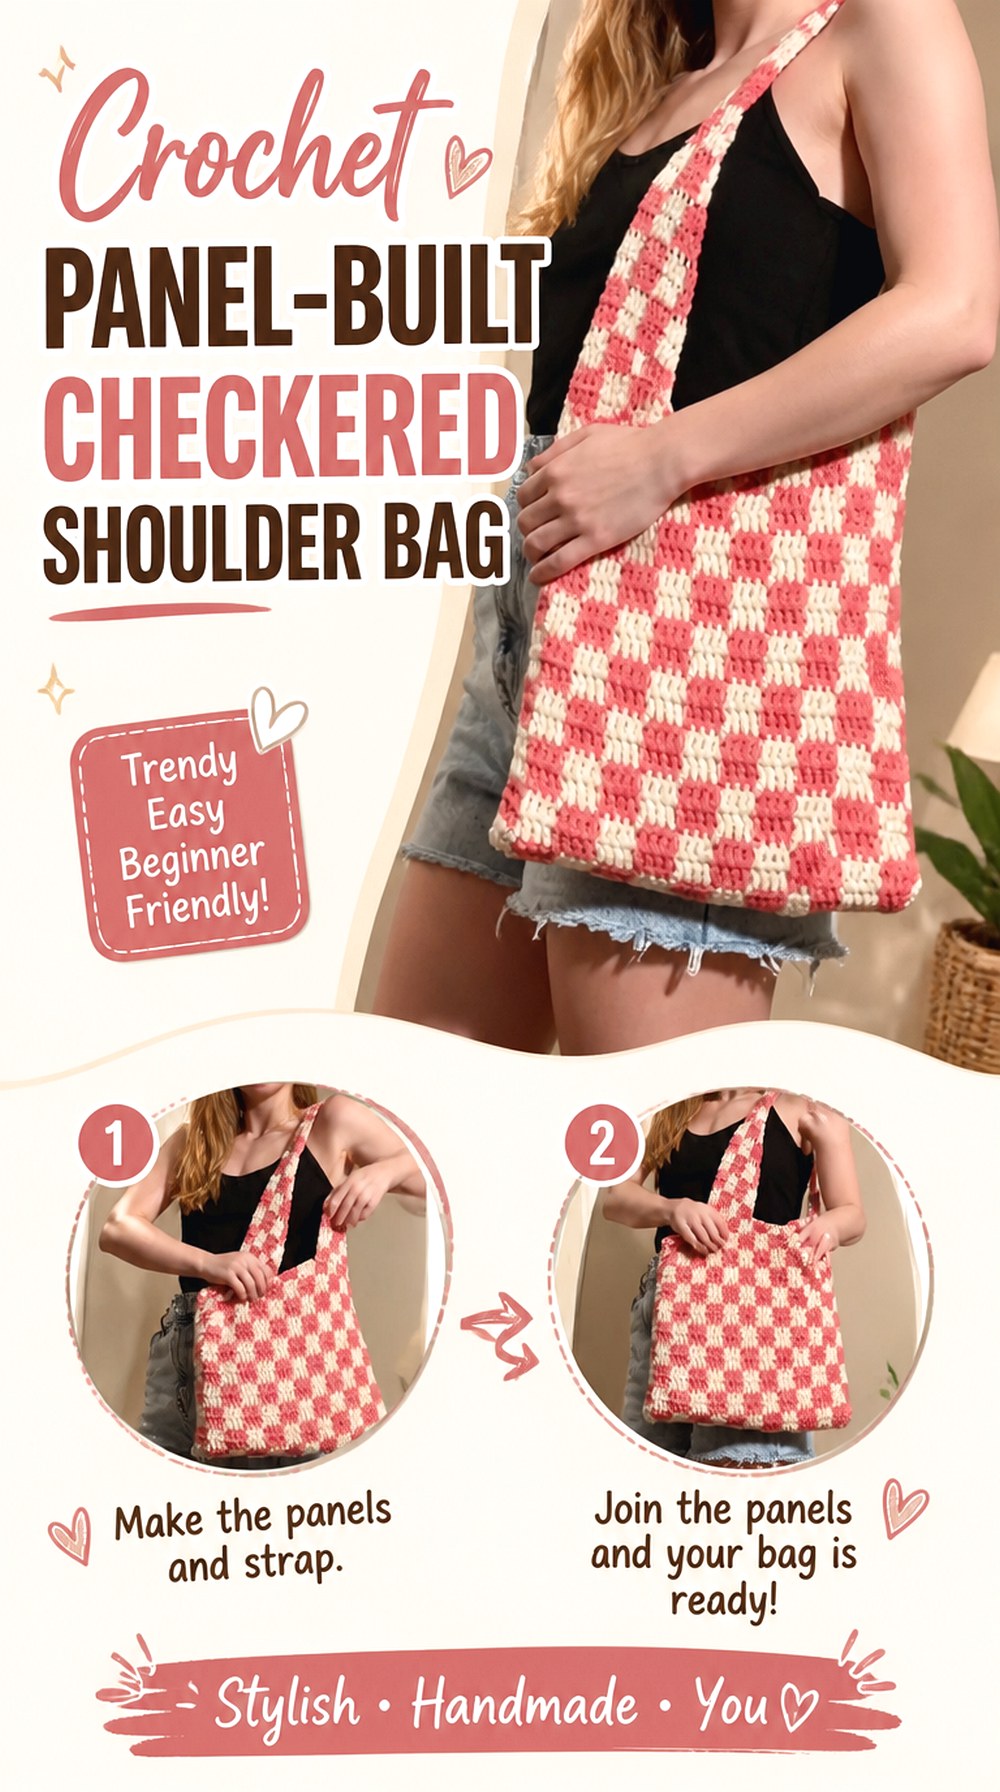
Anna Greene’s checkered shoulder bag takes a more modular route. The tutorial separates the front and back sections before bringing the pieces together, so the checked fabric can be treated as flat panels during much of the work. That can make the grid easier to inspect because each face of the bag is visible without working around a tube.
The trade-off is assembly. A panel-built bag puts more emphasis on matching edges and keeping the checker pattern visually balanced once the two faces meet. This is a useful option if you prefer flat colorwork and do not mind spending more attention on joining and finishing.
Flat Panels Make Block Proportions Easier to Judge
With the work lying flat, it is easier to spot whether individual checks are becoming noticeably taller, shorter, wider, or narrower. Before joining, compare the finished dimensions of both panels rather than assuming identical row counts automatically produced identical pieces. Small tension differences can matter once the edges have to meet.
Treat the Side Seam as Part of the Plaid Design
A seam is especially visible when two geometric patterns meet. Pin or clip the panels temporarily before committing to the final join and inspect how the blocks relate around the sides and lower corners. If alignment is important to you, this checkpoint is much easier to address before the bag has been completely assembled.
Original Tutorial and Creator Credit
Creator: Anna Greene
4. Crochet Reversible Interlocking Checkered Shoulder Bag
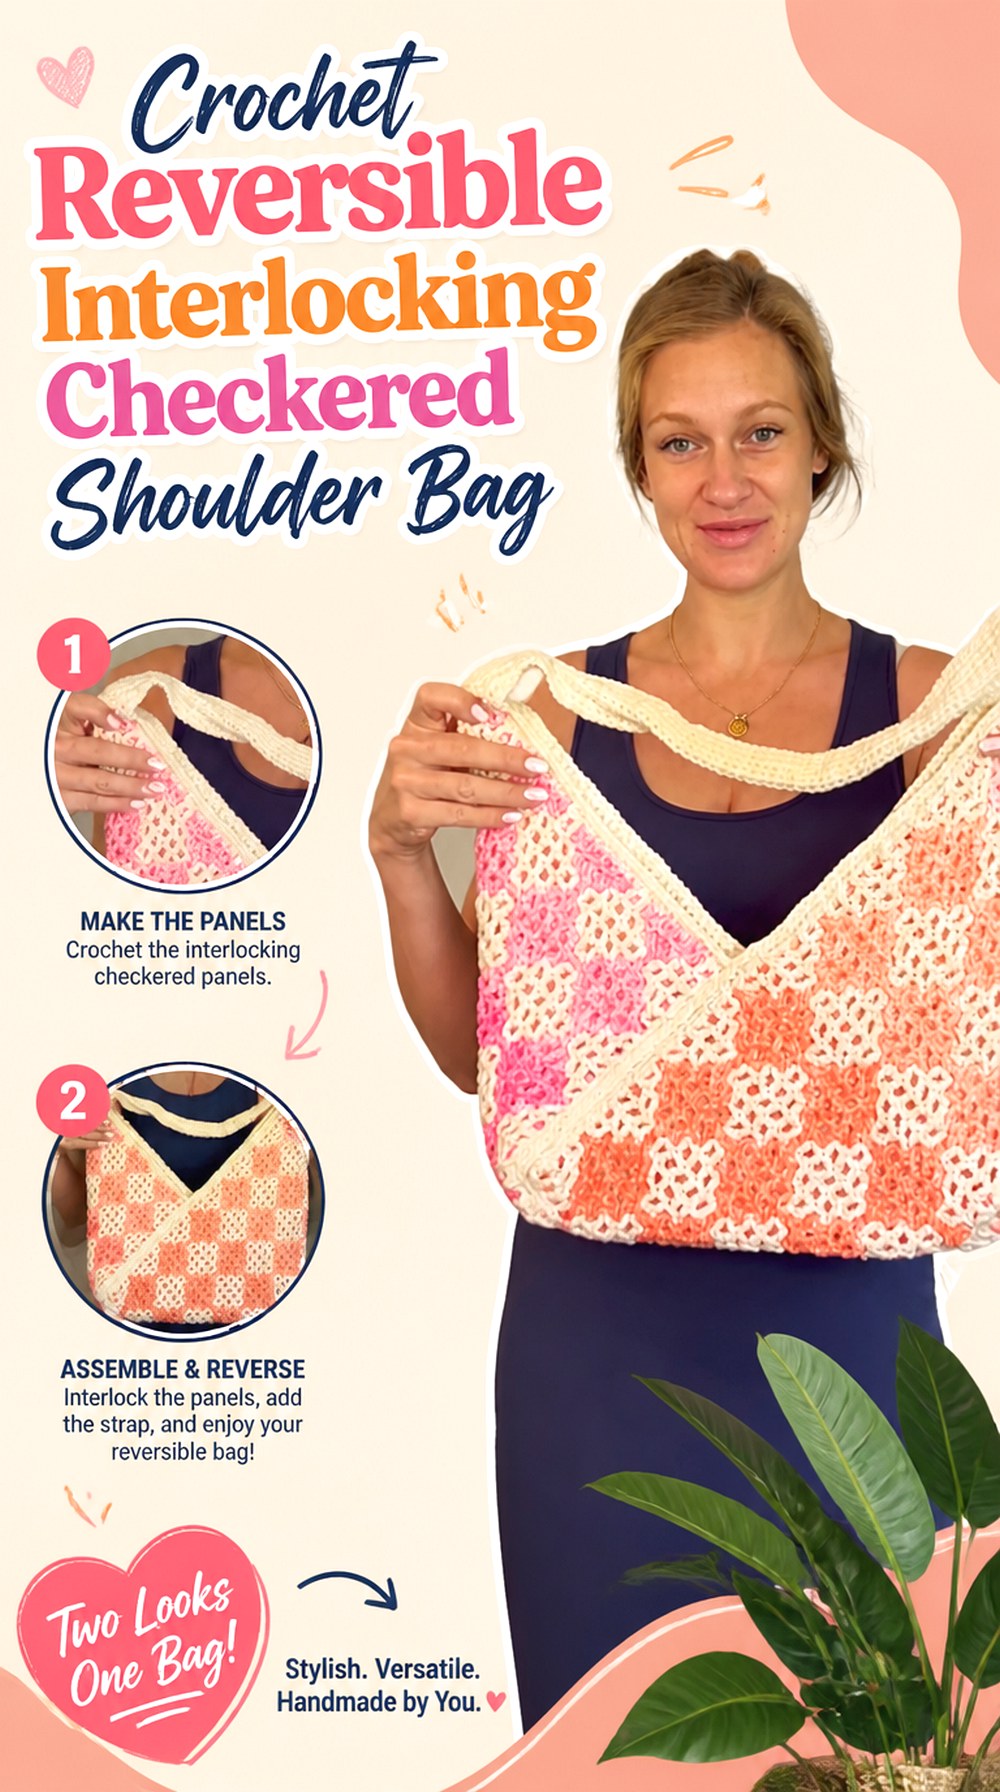
This project from Life and Yarn stands apart because the checked fabric is created with interlocking crochet and designed to be reversible. Instead of treating the back of the colorwork as something to hide, the technique creates two usable-looking faces. The tutorial also covers assembly, corner shaping, the opening, and a strap, making it a more construction-focused alternative to a simple open-top checkerboard tote.
A reversible fabric can be appealing even if you ultimately add a lining, because it demonstrates a different way to manage two-color crochet without a conventional “wrong side” dominating the interior.
Reversible Colorwork Changes What Counts as a Clean Finish
If both faces of the crochet can be displayed, color management becomes part of the visible design on either side. That makes neat transitions particularly important. Swatch the interlocking technique before sizing up to a full bag if it is new to you; the goal is to understand the resulting fabric thickness and appearance, not simply to match a familiar checker stitch.
Corner Folds Give the Bag More Shape
The tutorial includes folding and assembly around the bag’s lower corners. That structural detail can create more depth than two perfectly flat rectangles joined only around their perimeter. Before adding a lining or modifying the height, form the completed crochet shell into its intended three-dimensional shape so any insert or closure is planned for the actual interior.
A More Finished Opening Deserves Early Planning
The tutorial addresses the opening and a flat zipper seam. If a secure closure is one of your priorities, preview that segment before changing the upper edge. Extra borders or altered dimensions can affect how neatly a zipper sits, so closure plans are easier to accommodate before the top edge is completely finalized.
Original Tutorial and Creator Credit
Creator: Life and Yarn
5. Crochet Long Strap Checkered Shoulder Bag
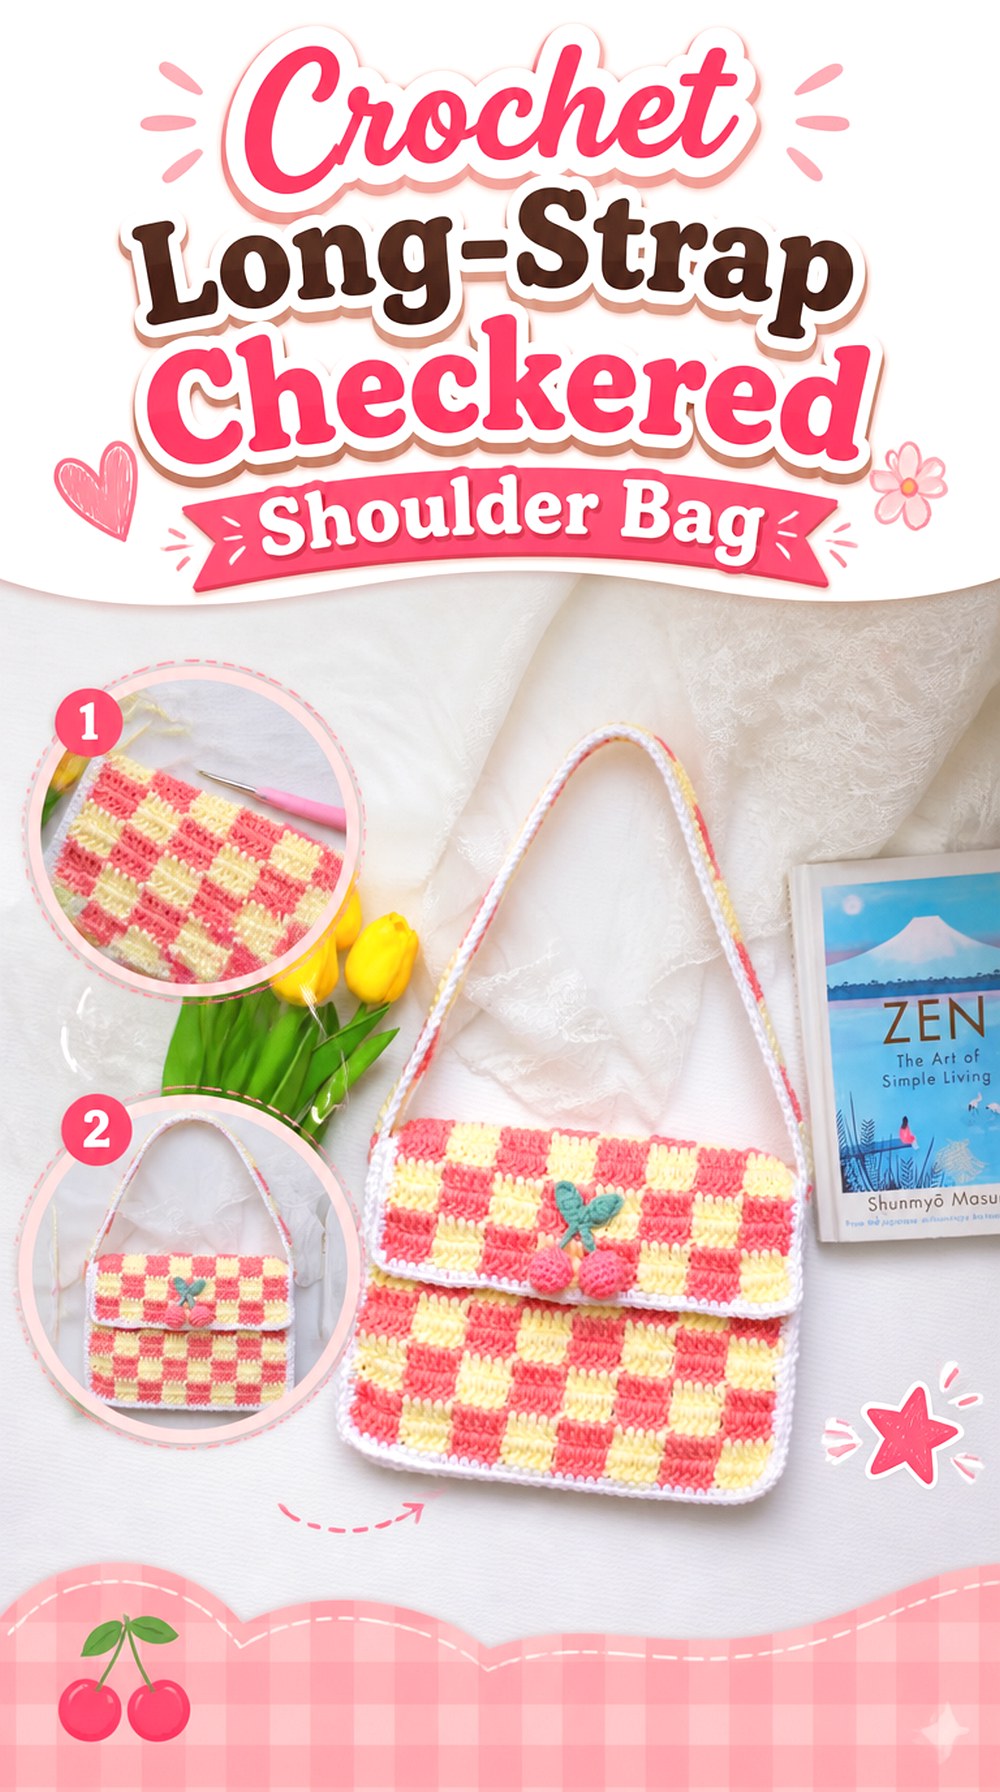
Vivi Crochet 🌷 uses a separate front, back, and long strap approach for this checkered shoulder bag. That creates a compact purse-style construction rather than the open market-tote proportions seen in several other ideas. The long strap also shifts the practical question from “How do I carry a full tote?” to “Where should a smaller bag sit against the body?”
This type of bag works well when the checkerboard itself is meant to be a graphic accessory. Because the strap is visually prominent and connects separate body sections, its width, stretch, and attachment points deserve attention rather than being treated as a finishing detail.
Strap Length Changes Both Styling and Stretch
A long crochet strap has more opportunity to lengthen under use than a short handle. Before assuming the demonstrated length will suit you, compare it with a bag you already like carrying. If you adapt it, remember that changing the strap length may also change how much the bag swings and where its checked front panel sits against the body.
Separate Front and Back Pieces Invite Custom Color Placement
Flat front and back sections let you decide whether both faces should match exactly or whether one side can use a quieter arrangement. If you change colors, lay the finished panels beside each other before joining. That gives you a chance to decide which panel should become the front and whether the color balance feels intentional.
Original Tutorial and Creator Credit
Creator: Vivi Crochet 🌷
6. Crochet Checkerboard Side Bag with Long Strap
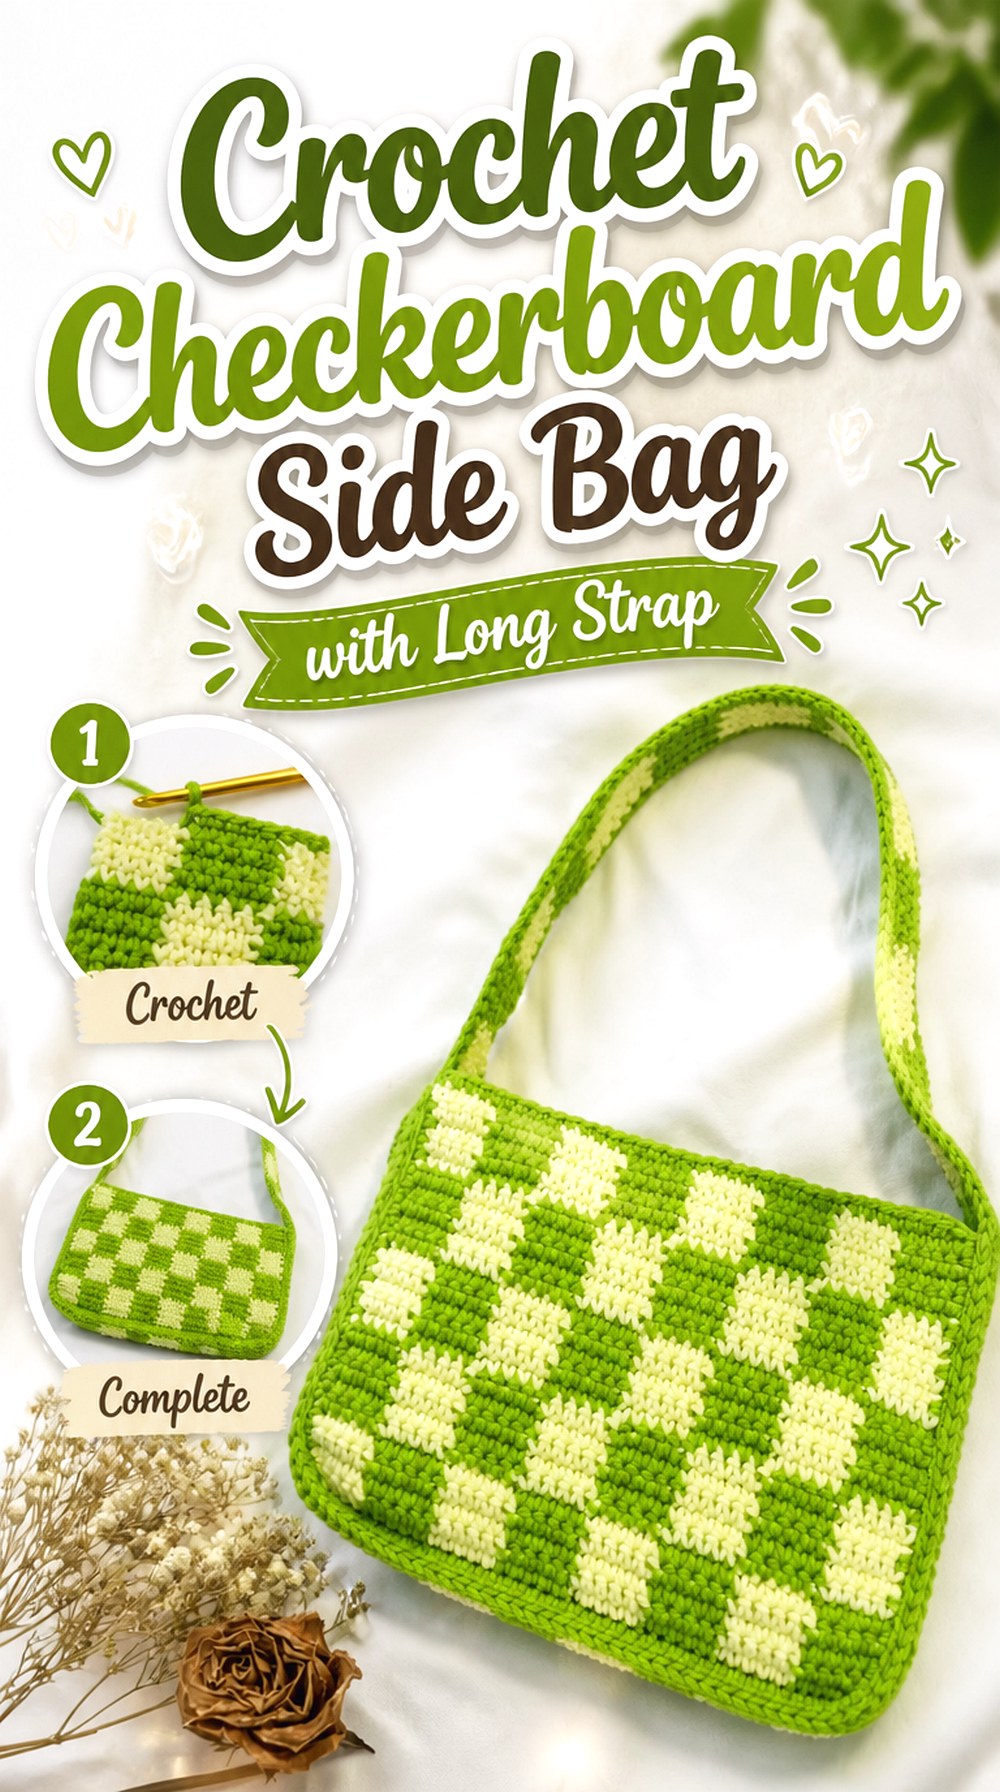
Chenda DIY’s checkerboard shoulder bag emphasizes a separate bag body and strap before the components are connected. The resulting format is closer to a casual side bag than a pair of short-handled shopping totes. That makes it useful for anyone comparing hands-free carrying with traditional tote handles.
The visual grid remains the main decorative element, so the bag does not rely on extra motifs to create interest. If you want to personalize it, changing the proportion of the checks or choosing a lower-contrast palette can alter the mood without changing the basic shoulder-bag purpose.
Check the Strap Connection Before Adding Extra Weight to the Design
Where a long strap meets a crochet body is an important stress area. If you plan to add lining, hardware, or decorative edging, inspect the creator’s strap connection first so your modifications do not crowd that area. A lining can also be planned to support the interior without interfering with the visible checker pattern.
Softer Contrast Makes a Graphic Grid Less Dominant
High-contrast combinations make every square visually assertive. For a shoulder bag you intend to wear with patterned clothing, two closer-value shades can create a quieter result. Make a small swatch and view it from several feet away; this reveals whether the checkerboard reads as a bold graphic or a subtler woven-like texture.
Original Tutorial and Creator Credit
Creator: Chenda DIY
7. Crochet Textured Plaid Style Tote Bag

Vicky Crochet’s tutorial is titled as a plaid tote, but its finished approach leans toward textured color blocking and a diamond-like surface rather than the strict gingham squares used elsewhere in this list. That makes it an important alternative for readers using “plaid” as a broader search term but wanting something less literal than a standard checker grid.
The tutorial also includes a structured base, color changes, textured body work, and attached straps. Preview the finished result before choosing it if your goal is specifically tartan or classic gingham; this option is better understood as a textured plaid-style interpretation.
Texture Can Compete With Complex Color Palettes
When the stitch surface already creates strong visual movement, adding too many similar color changes may make the design difficult to read. Compare your colors against the texture in a sample rather than judging the skeins alone. A simpler palette can allow the raised or patterned surface to remain visible.
A Structured Base Helps Define the Tote Silhouette
The bottom of a bag influences how the body hangs once objects are placed inside. If you change yarn or hook size, compare the base’s firmness with the creator’s visible result before continuing. A much softer base may change the silhouette even if the colorwork itself looks correct.
Preview This One if You Want “True Plaid”
Because this project interprets plaid differently from the gingham and checkerboard tutorials, it is worth watching the finished-bag portion first. If your priority is crisp square checks, another option in this roundup will be a closer match. Choose this version when texture and blocked color are part of the appeal.
Original Tutorial and Creator Credit
Creator: Vicky Crochet
8. Crochet Compact Checkered Handbag
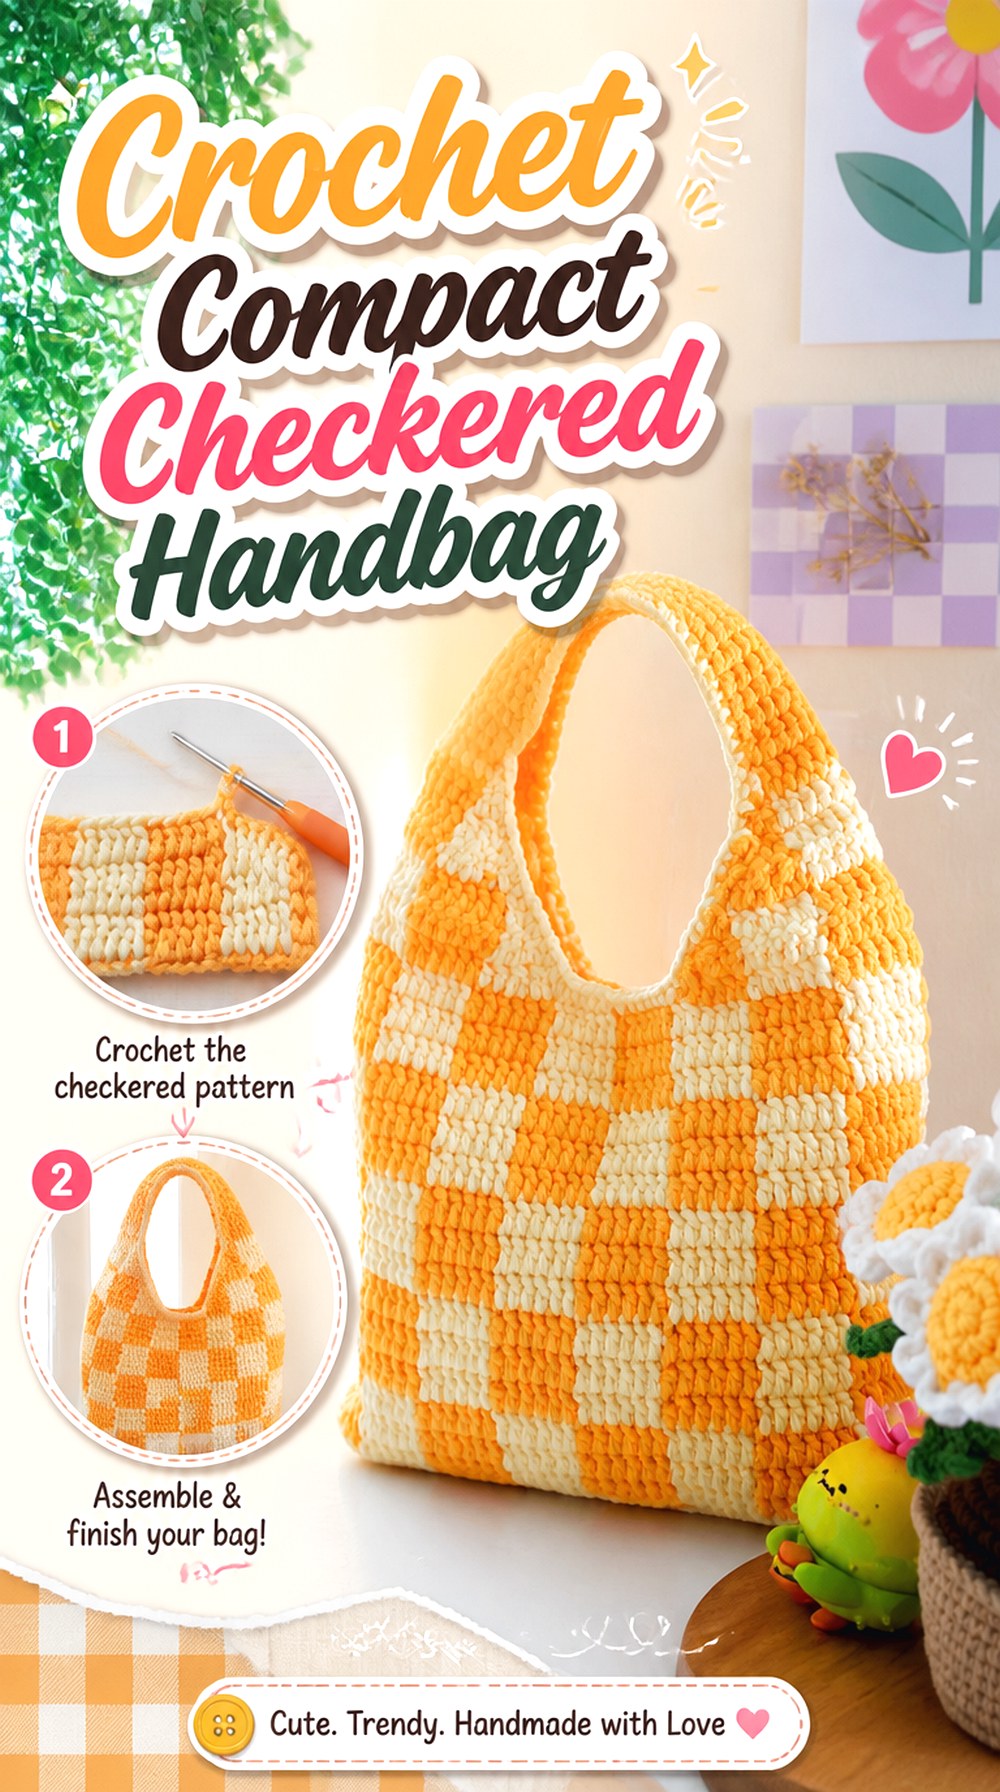
Jefferson Arts x Crafts focuses on a checkered handbag rather than an oversized shopper. The smaller handbag format allows the color blocks to become a concentrated design feature, and it offers a different use case for anyone who wants plaid styling without carrying a large tote.
A compact body also makes proportion especially important. Enlarging every square can quickly change how many checks fit across the front, while shrinking them creates more color changes and a busier surface. If you plan to adapt the scale, judge the checker grid and overall handbag dimensions together instead of altering one independently.
Smaller Bags Magnify Checker Proportion
On a compact handbag, one extra-wide block can occupy a large part of the front. Before committing to a different yarn, make a sample block and compare its width with the approximate finished bag width you want. This is planning rather than a replacement stitch formula; the tutorial should still guide the actual construction.
Double-Stranded or Firm Fabric Can Feel Different in Hand
The creator’s materials information uses yarn held together for the project. If you substitute a single strand or a substantially different yarn, the resulting fabric may not have the same body. Check thickness and flexibility in a swatch before deciding whether an additional lining or support layer would benefit your version.
Original Tutorial and Creator Credit
Creator: Jefferson Arts x Crafts
9. Crochet Mini Checkered Crossbody Sling Bag
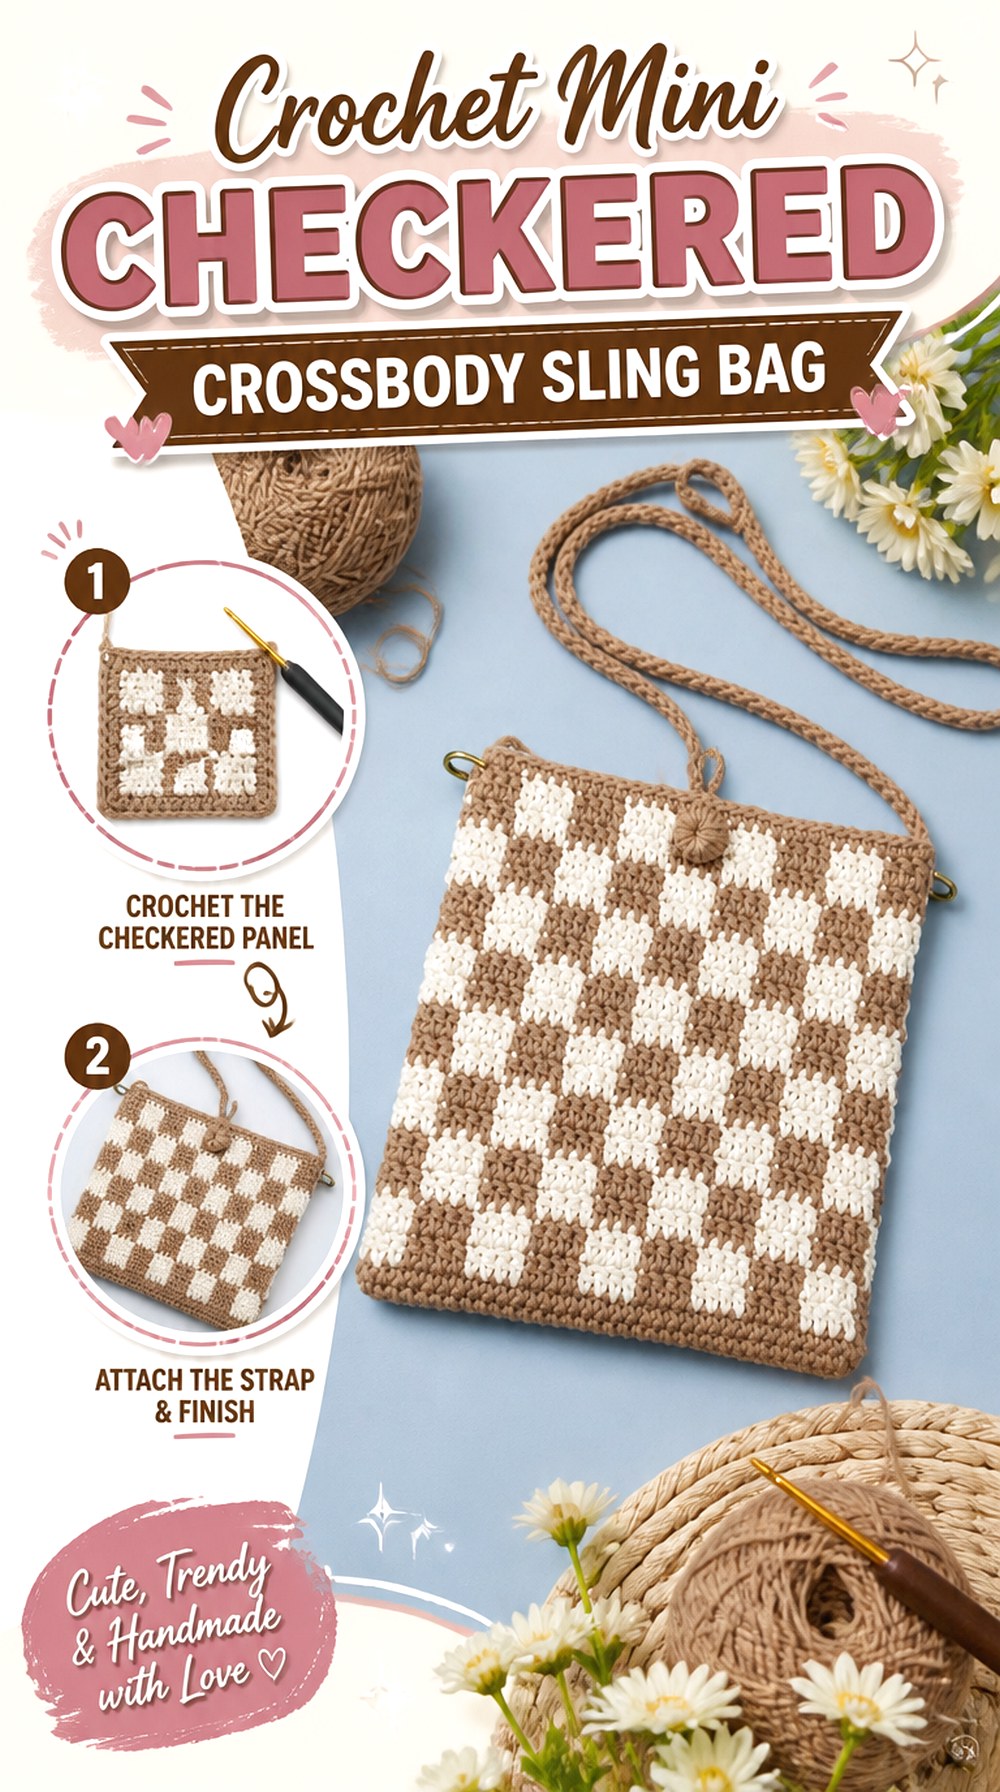
ViVi Berry Crochet turns the checkerboard idea into a mini crossbody bag. The smaller body and sling-style carry make it one of the clearest alternatives to the tote-heavy options in this collection. The tutorial identifies the project specifically as a mini cross bag, crossbody, and sling bag, so the carrying style is central to the finished piece rather than an optional strap added to a tote.
For readers who need only a small everyday accessory, this format also helps keep a bold checker pattern from dominating an outfit. The grid becomes a compact accent while the long strap supplies the functional difference.
Crossbody Fit Should Be Checked on the Wearer
A crossbody strap that suits one person may sit too high or too low on another. Before final attachment, compare the intended drop with a crossbody bag you already use comfortably. If the tutorial’s construction permits adjustment, decide where you want the bag body to rest before permanently finishing the strap.
Mini Scale Rewards Simple Color Pairings
Because less surface area is available, complicated palettes can make a small bag look visually crowded. Two clearly separated colors keep the check pattern easy to recognize. If you want three or more shades, arrange them in a small sample first and make sure the color sequence is still readable at the finished bag’s smaller scale.
Original Tutorial and Creator Credit
Creator: ViVi Berry Crochet
10. Crochet Three Color Gingham Picnic Tote
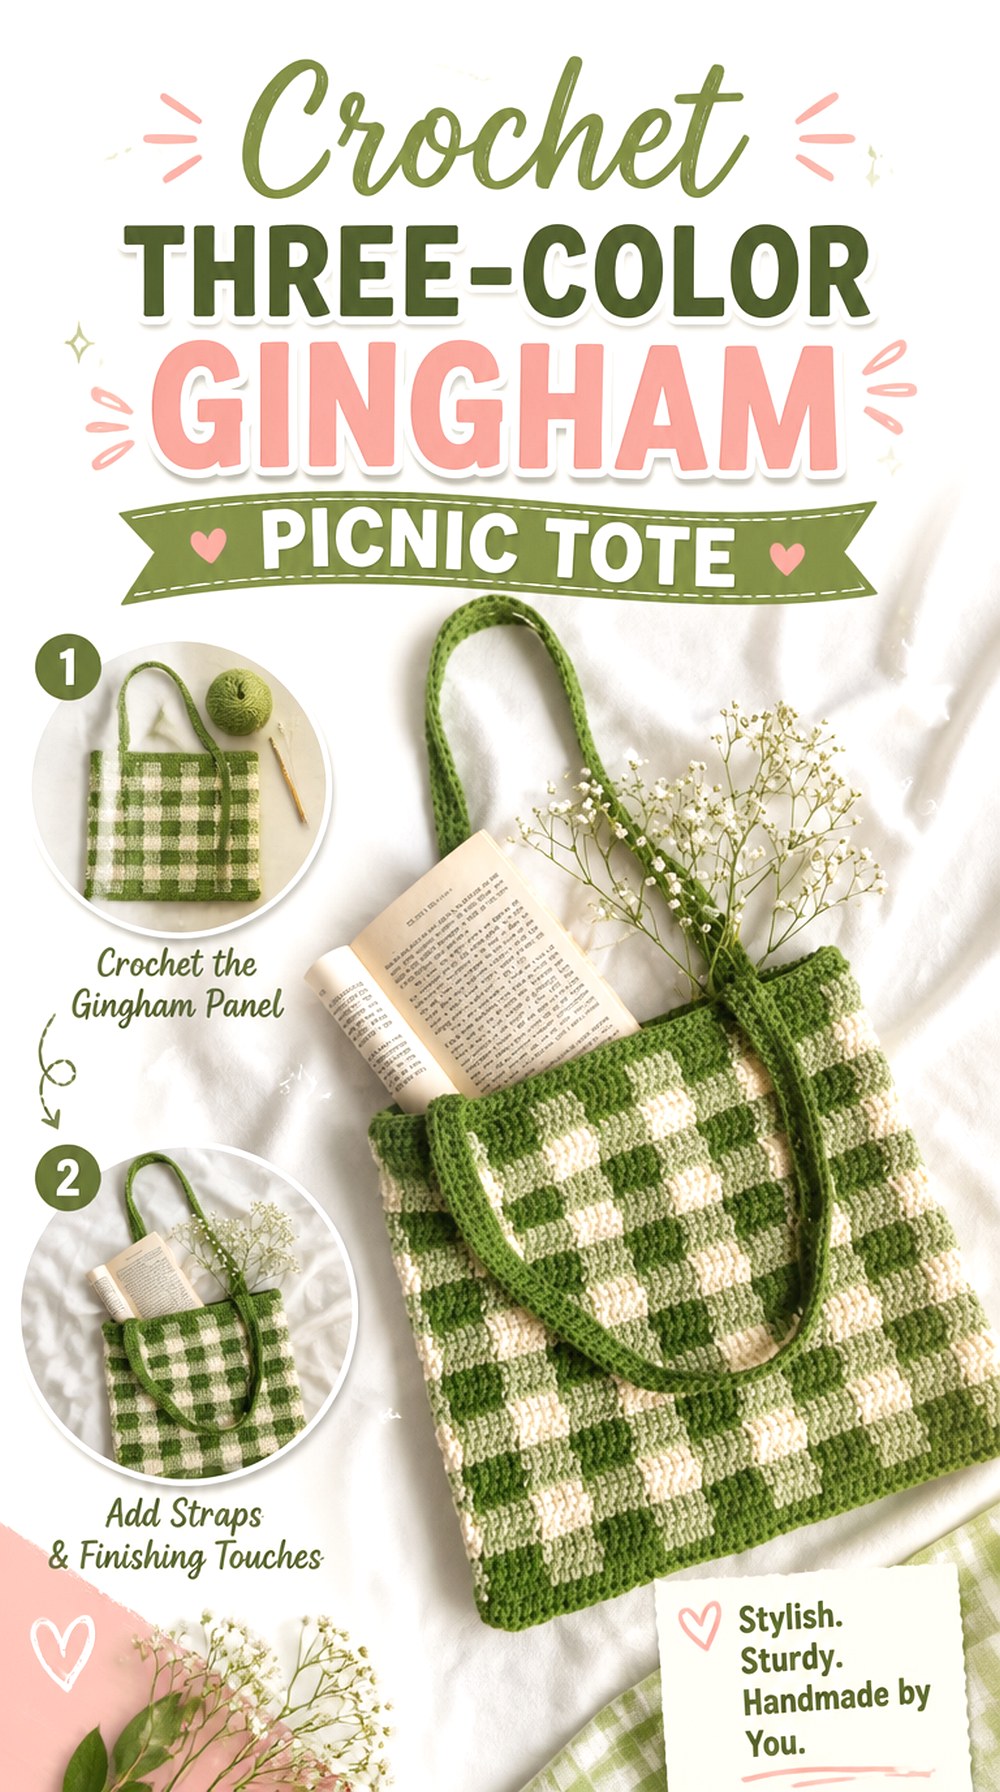
HayHay Crochet’s tote uses the classic three-color logic associated with gingham: two related shades plus a contrasting neutral. The result has more tonal depth than a straightforward two-color checkerboard. The tutorial pairs the gingham body with separate straps that are attached afterward, giving readers a different construction route from the one-piece gingham tote at the beginning of this list.
This is a useful choice if the woven-looking gingham effect matters more than having the fewest seams. Because the color changes create the pattern across the body, yarn value relationships are an especially important planning decision.
Three Values Create the Gingham Illusion
Choose the palette by lightness and darkness as well as hue. A pale green, deeper green, and cream, for example, separate more clearly than three colors with nearly identical value. Before starting, place your three yarns next to each other and check that the middle shade looks distinct from both the lightest and darkest colors.
Sewn-On Straps Give You a Placement Checkpoint
Separate straps mean you can evaluate the completed body before fixing the handles permanently. Lay the tote flat, mark matching attachment points on both sides, and compare their spacing visually. If you modify the body width, do not automatically reuse an unchanged strap position; recenter it for the new proportions.
Color Carrying Can Affect the Interior
Gingham often requires frequent color changes. Depending on the method used, carried yarn can add thickness or become visible inside the bag. If the interior appearance matters to you, preview the creator’s color-management technique and then decide whether you want the crochet exposed or prefer to plan a fabric lining.
Original Tutorial and Creator Credit
Creator: HayHay Crochet
11. Crochet Small Checkerboard Shoulder Purse

Rajutan Whita’s tutorial offers a smaller checkerboard bag with a separate strap and joining stage. Its compact proportions make it closer to a purse than a large carryall, which gives the grid a tidy, concentrated appearance. This is a useful middle ground between the mini sling bag and the roomier shoulder or tote designs.
Because a smaller body has less room to absorb proportion changes, yarn substitutions can noticeably alter the final silhouette. Rather than relying on an assumed universal size, compare your developing fabric against the creator’s visible shape and against the dimensions you actually want for your own use.
Depth Matters as Much as Front Width
A small purse can look wide enough from the front but still feel too flat for its intended contents. When previewing the tutorial, notice how the side or joining treatment contributes depth. If you plan to alter the shape, think in three dimensions instead of only increasing the width of the checker panel.
Use the Strap as a Scale Reference
On a compact bag, an extremely wide or bulky strap can overpower the body. Conversely, a very narrow strap may look visually disconnected from chunky checks. Compare strap width with the finished checker size and bag body before final assembly so the three elements feel proportionate.
Original Tutorial and Creator Credit
Creator: Rajutan Whita
12. Crochet Two Color Cotton Checkered Carry Bag
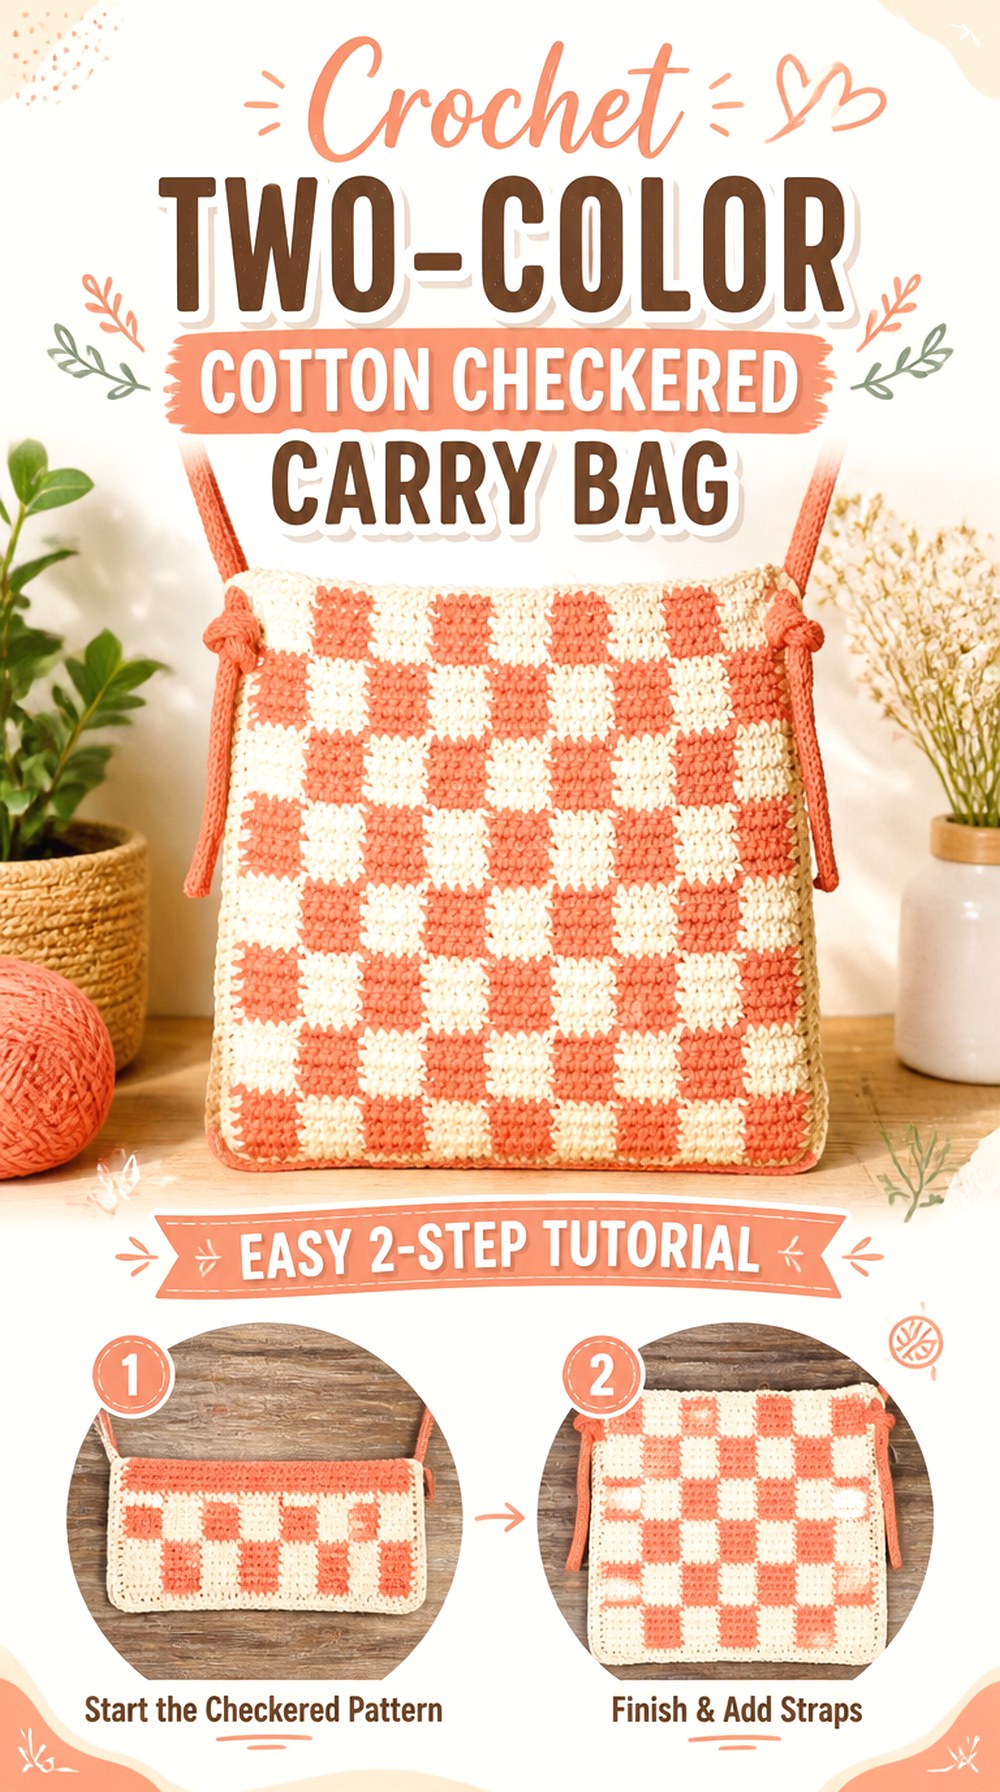
sewsam’s tutorial centers on a straightforward two-color checkered bag and lists cotton yarn among the project materials. Compared with three-tone gingham, the visual effect is direct: one color alternates with the other, making the geometry the main feature.
This approach is useful when you want to experiment with an unusual pair of colors rather than manage light, medium, and dark gingham values. The tutorial also lists an optional French knitter among its tools, giving the finishing approach a point of difference from the more conventional strap constructions elsewhere in the roundup.
Cotton Can Make Stitch Definition More Noticeable
Many cotton yarns show individual stitches and color boundaries clearly, which can suit a geometric bag. They can also behave differently from springier fibers. If substituting, compare your swatch for flexibility, thickness, and how sharply the color transitions appear rather than assuming any yarn labeled the same weight will produce the same fabric.
Inspect Unusual Finishing Tools Before Substituting Them
Because the materials list includes an optional French knitter, preview the relevant finishing portion before deciding you can omit or replace it. You may prefer a conventional crochet solution, but understanding how the creator uses optional equipment first will help you preserve the intended proportions and appearance.
Original Tutorial and Creator Credit
Creator: sewsam
13. Crochet Mini Gingham Handbag
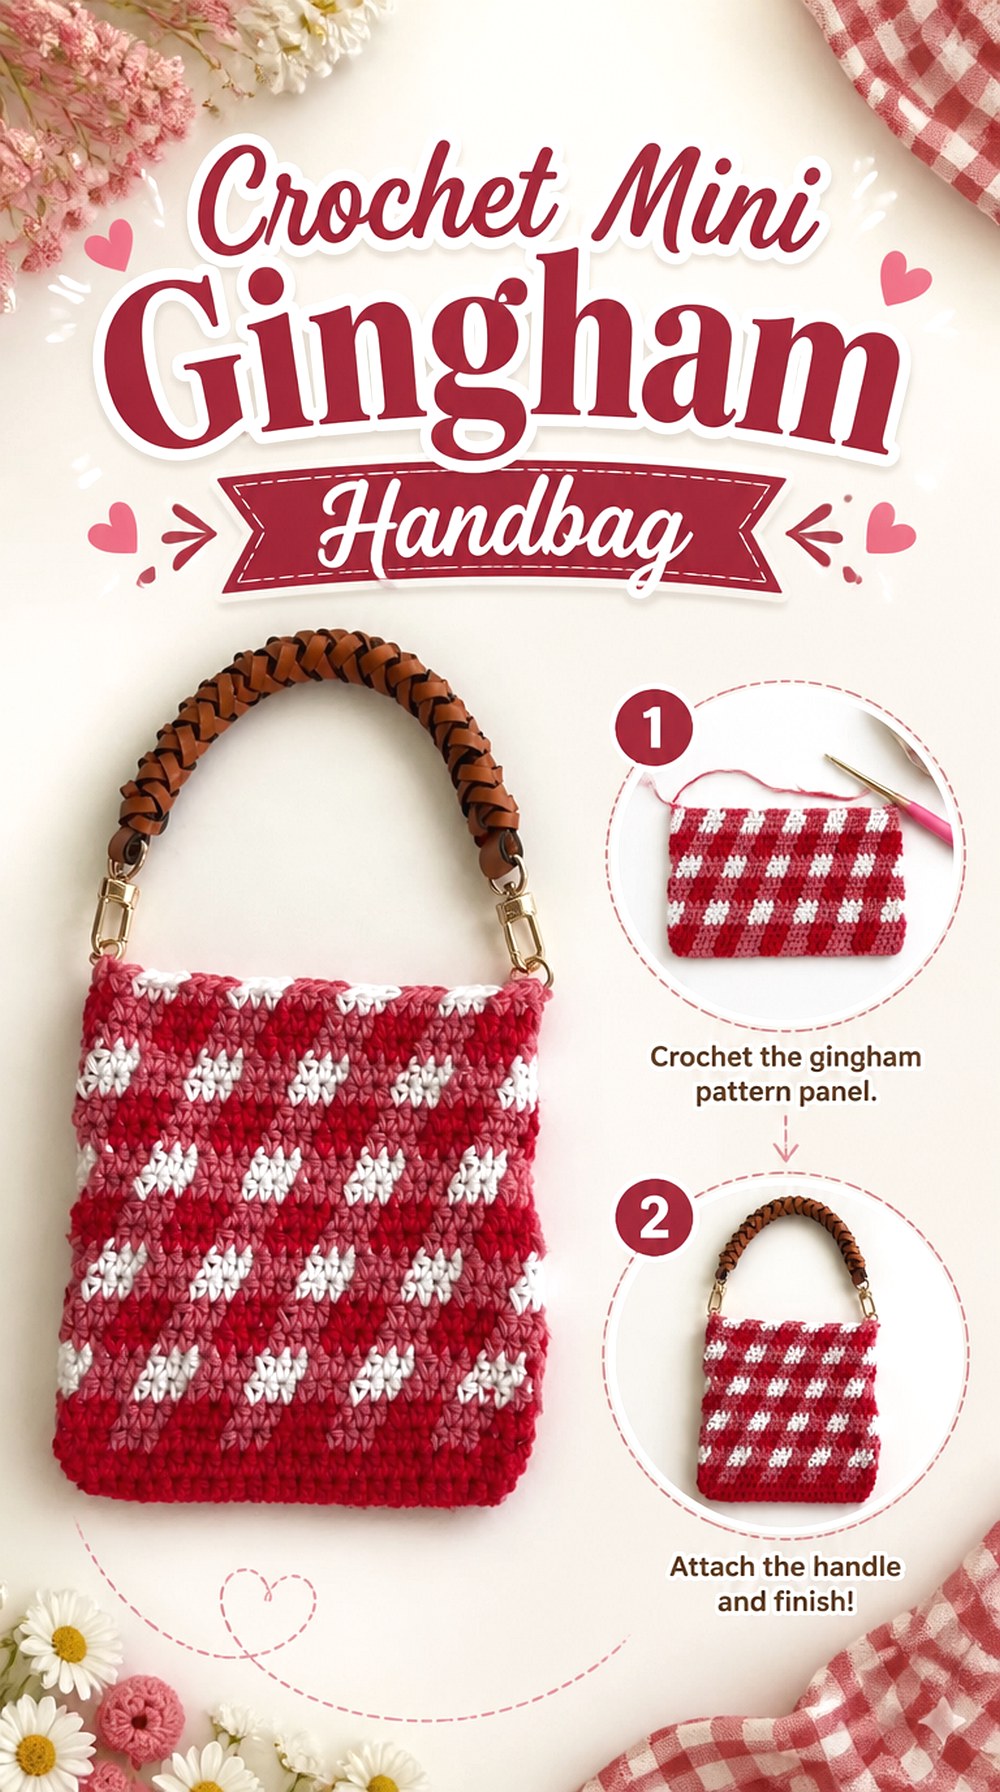
Crochet by Colleen scales the gingham look down into a mini bag. That changes the effect considerably: instead of a large repeated grid across a shopping tote, the gingham becomes a small accessory where every color block occupies a larger percentage of the visible surface.
This project makes sense for readers who like traditional three-tone checks but do not need tote capacity. It can also be a useful way to test whether you enjoy frequent gingham color changes before committing to a larger project. The mini scale should not be treated as automatically quick, however; color management and finishing still require care.
Keep the Pattern Legible at Mini Scale
If you substitute thicker yarn, the same visual repeat can become too large for a mini handbag. If you go much finer, the pattern may become busier than intended. Compare the size of one completed gingham section against the planned front of the bag before deciding whether your substitution preserves the same balance.
Small Bags Still Benefit From Interior Planning
A mini bag may carry small objects that can catch on loose interior strands or find their way through a more open fabric. Inspect the finished crochet density and inside surface before deciding whether to leave it unlined. If you add a lining, fit it to the completed bag rather than estimating from an unfinished flat piece.
Original Tutorial and Creator Credit
Creator: Crochet by Colleen
14. Crochet Checkered Baguette Bag
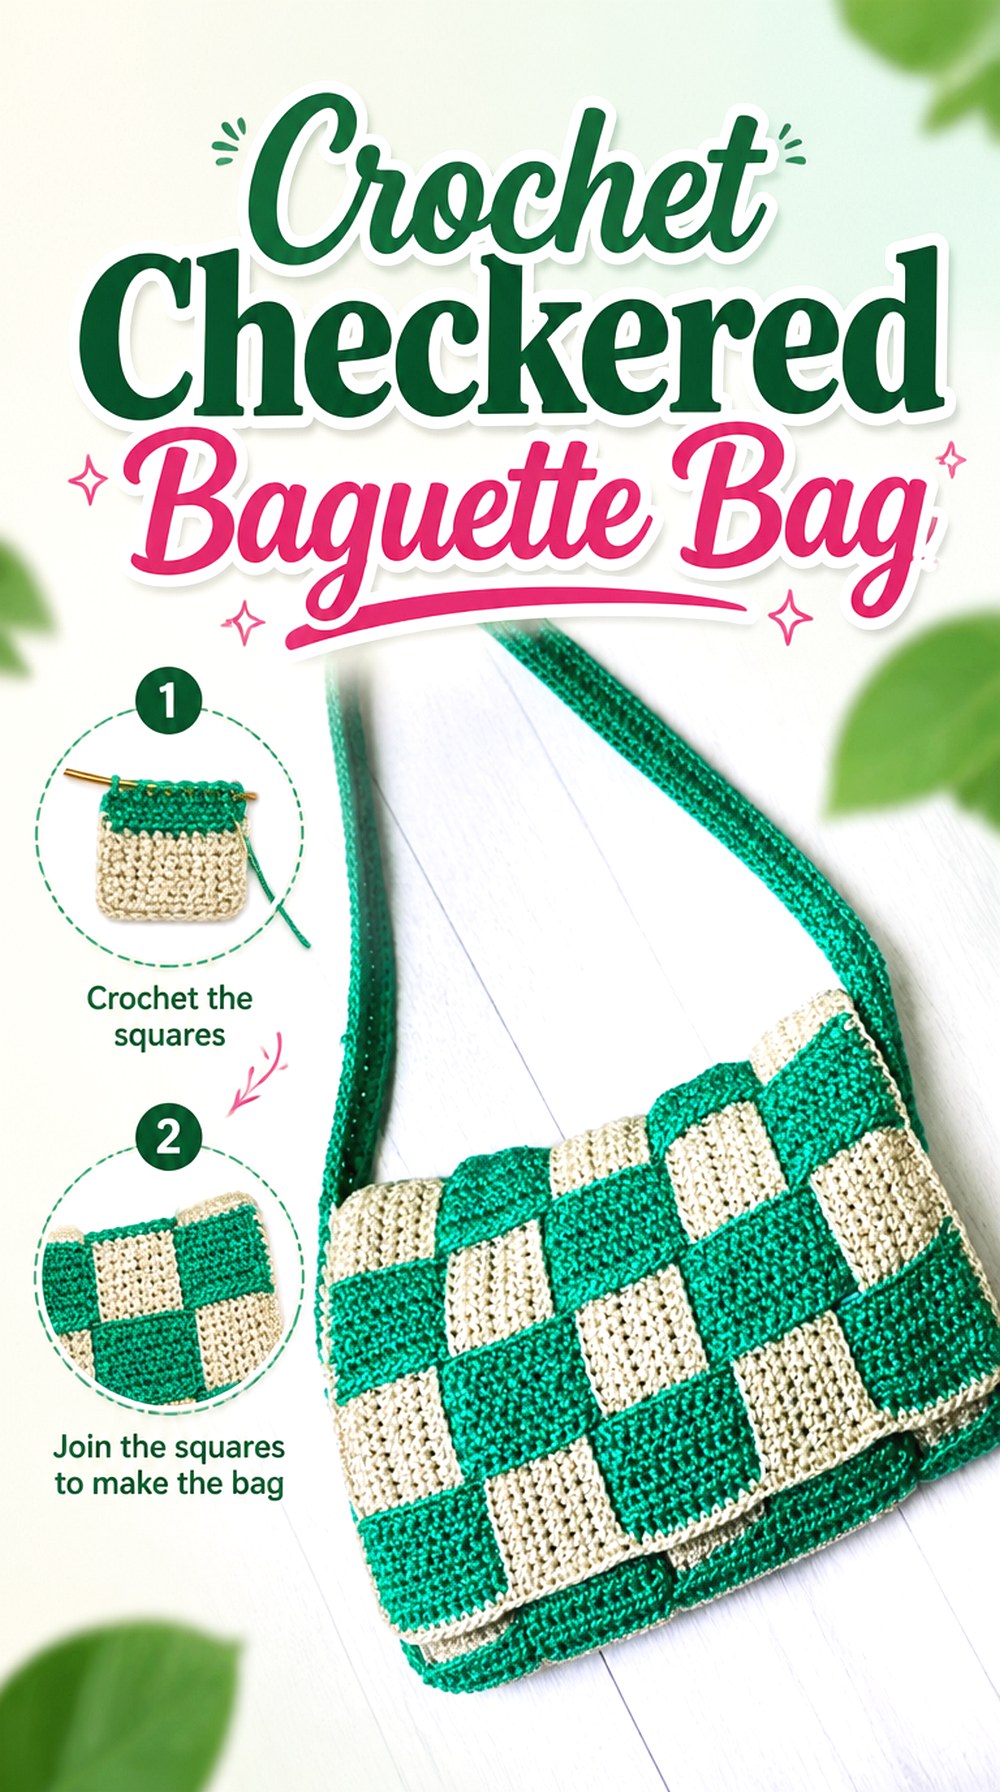
By StellaM combines checkerboard colorwork with the elongated proportions of a baguette bag. This silhouette immediately separates it from square totes and upright crossbody purses: the body is designed to read horizontally, making the checker arrangement part of a longer, lower visual line.
A baguette shape also changes strap expectations. Instead of a long crossbody drop, this style is generally about a closer shoulder carry, so the relationship between bag width and strap placement becomes prominent. The tutorial’s combination of shape and check pattern is useful if you want a plaid-inspired accessory that feels more purse-like than utilitarian.
Horizontal Proportions Change the Checker Layout
A wide, shallow bag can fit more blocks across than it does vertically. That naturally makes the eye travel sideways. If you change checker size, preview a paper sketch or simple block grid first so you can see whether the final arrangement still suits an elongated baguette silhouette.
Keep the Shoulder Opening Practical
When adapting the strap, remember that the usable opening between the bag body and strap matters as much as the strap’s total length. Compare the finished drop with a shoulder bag you already find comfortable, especially if you expect to wear it over thicker clothing.
Original Tutorial and Creator Credit
Creator: By StellaM
15. Crochet Tunisian Checkered Belt Crossbody Bag

Kismet Crochet provides one of the most functionally distinct projects in this collection: a Tunisian crochet checkerboard bag with a zipper and adjustable strap. The creator demonstrates it as a multi-position design that can be worn crossbody, around the waist, on the hip, or as a sling. The tutorial also covers a fabric lining option and hardware for the adjustable strap.
This is a stronger fit for readers who care about closure and carrying flexibility as much as the check pattern. It also introduces Tunisian simple stitch, so the fabric-building method differs substantially from standard crochet checkerboard totes.
A Zipper Makes Opening Accuracy More Important
An open tote can tolerate some variation around its upper edge; a zipper is less forgiving. Before installing the closure, compare both sides of the opening and make sure the fabric lies evenly without obvious twisting. If you alter the bag width, confirm your planned zipper and opening are compatible before finishing the surrounding edge.
Adjustable Hardware Gives This Bag Several Carry Modes
The strap system is part of the project’s function, not merely decoration. Decide which wearing positions matter most to you before changing strap dimensions or hardware. A length that works as a waist bag is not automatically ideal as a crossbody, so follow the creator’s adjustment guidance rather than treating one fixed measurement as universal.
Tunisian Fabric Is Worth Sampling First
If you normally crochet with a standard hook, make a small Tunisian sample before committing to the bag. This lets you assess the fabric’s thickness, curl, color transitions, and your own tension. The tutorial uses Tunisian simple stitch, so switching to an unrelated fabric structure could change both the checker appearance and assembly behavior.
Original Tutorial and Creator Credit
Creator: Kismet Crochet
16. Crochet Chunky Checkerboard Carry Bag

Craft Folk takes the checkerboard concept in a noticeably chunkier direction. Larger-looking stitches and a bold graphic grid give the finished bag a very different personality from the compact gingham handbags and finer checkered shoulder bags. The tutorial covers the base, joined rounds, color changes, and strap, keeping the overall design centered on a simple, oversized visual statement.
This is worth considering if you want the checked pattern to read from a distance. Chunkier fabric can also change how the bag folds, stretches, and feels at seams, so a yarn substitution should be judged by the resulting fabric rather than appearance alone.
Large Checks Need Clean Color Boundaries
When the blocks are visually big, an inconsistent transition becomes easier to notice. Pay attention to where the new color appears at each boundary and periodically inspect the bag from a distance. Small irregularities that disappear in a fine gingham repeat may become a major part of an oversized checker.
Chunky Fabric Can Change Strap Behavior
A thick strap can feel substantial but can also create more bulk where it joins the body. Before making the attachment permanent, check whether the strap folds comfortably and whether the connection lies the way you want. If you plan to line the bag, avoid adding unnecessary bulk to the same attachment area.
Original Tutorial and Creator Credit
Creator: Craft Folk
17. Crochet Three Tone Checked Tote Bag
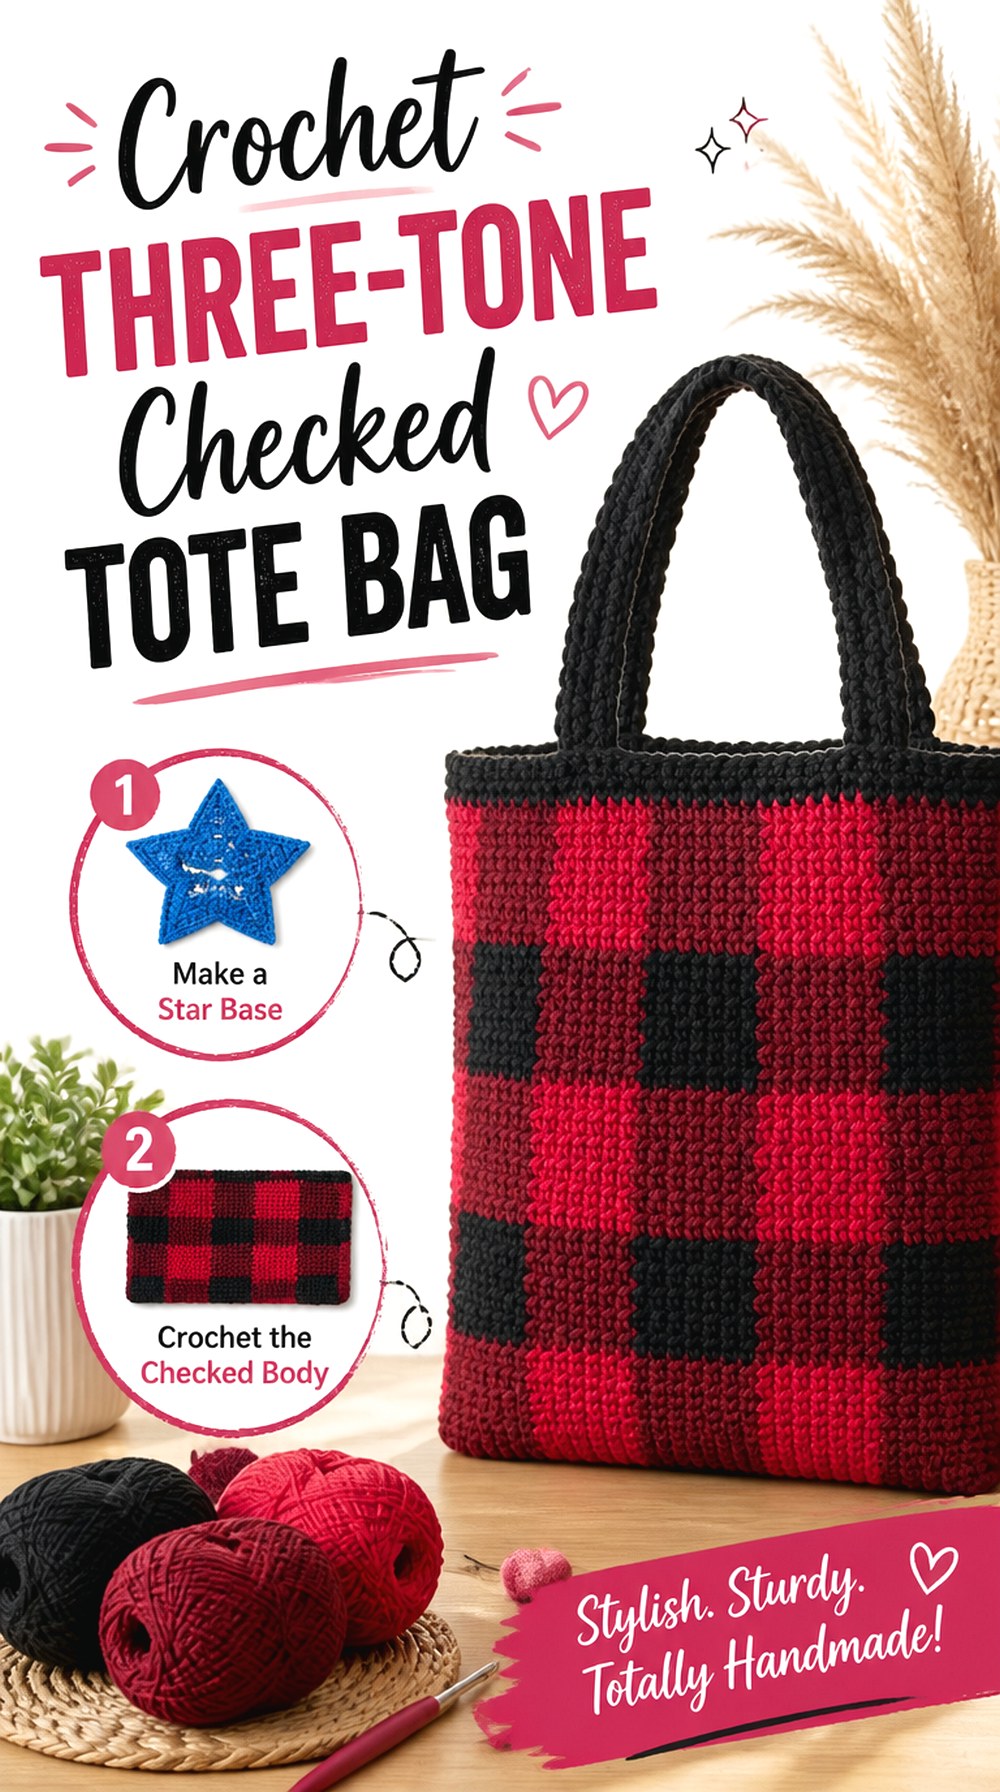
LiLi nana* uses three yarn colors in a checked tote, including closely related red tones with black in the creator’s example. That palette creates a deeper, more layered check than a simple two-color checkerboard and can visually edge closer to a buffalo-plaid mood.
This makes the project useful for anyone who wants a darker, higher-impact plaid-inspired bag without relying on a traditional cream-based gingham palette. The main planning lesson is that two related colors still need enough separation to remain visible once crocheted together. What looks distinct in skeins can blend more than expected in small stitched blocks.
Related Shades Can Create a Buffalo-Plaid Effect
A medium red, deeper red, and dark neutral can produce more visual layering than one red paired only with black. You can apply the same idea to blues, greens, browns, or other color families. The important checkpoint is value separation: swatch the three together before assuming neighboring shades will stay distinct.
Dark Colors Need Good Stitch Visibility While You Work
Deep shades can make stitch tops and color transitions harder to see, particularly in low light. Work in strong, neutral lighting and periodically inspect the grid rather than relying only on touch. This is especially helpful when two dark yarns are close enough in value that their boundaries are subtle.
Original Tutorial and Creator Credit
Creator: LiLi nana*
18. Crochet Row Worked Checkerboard Tote
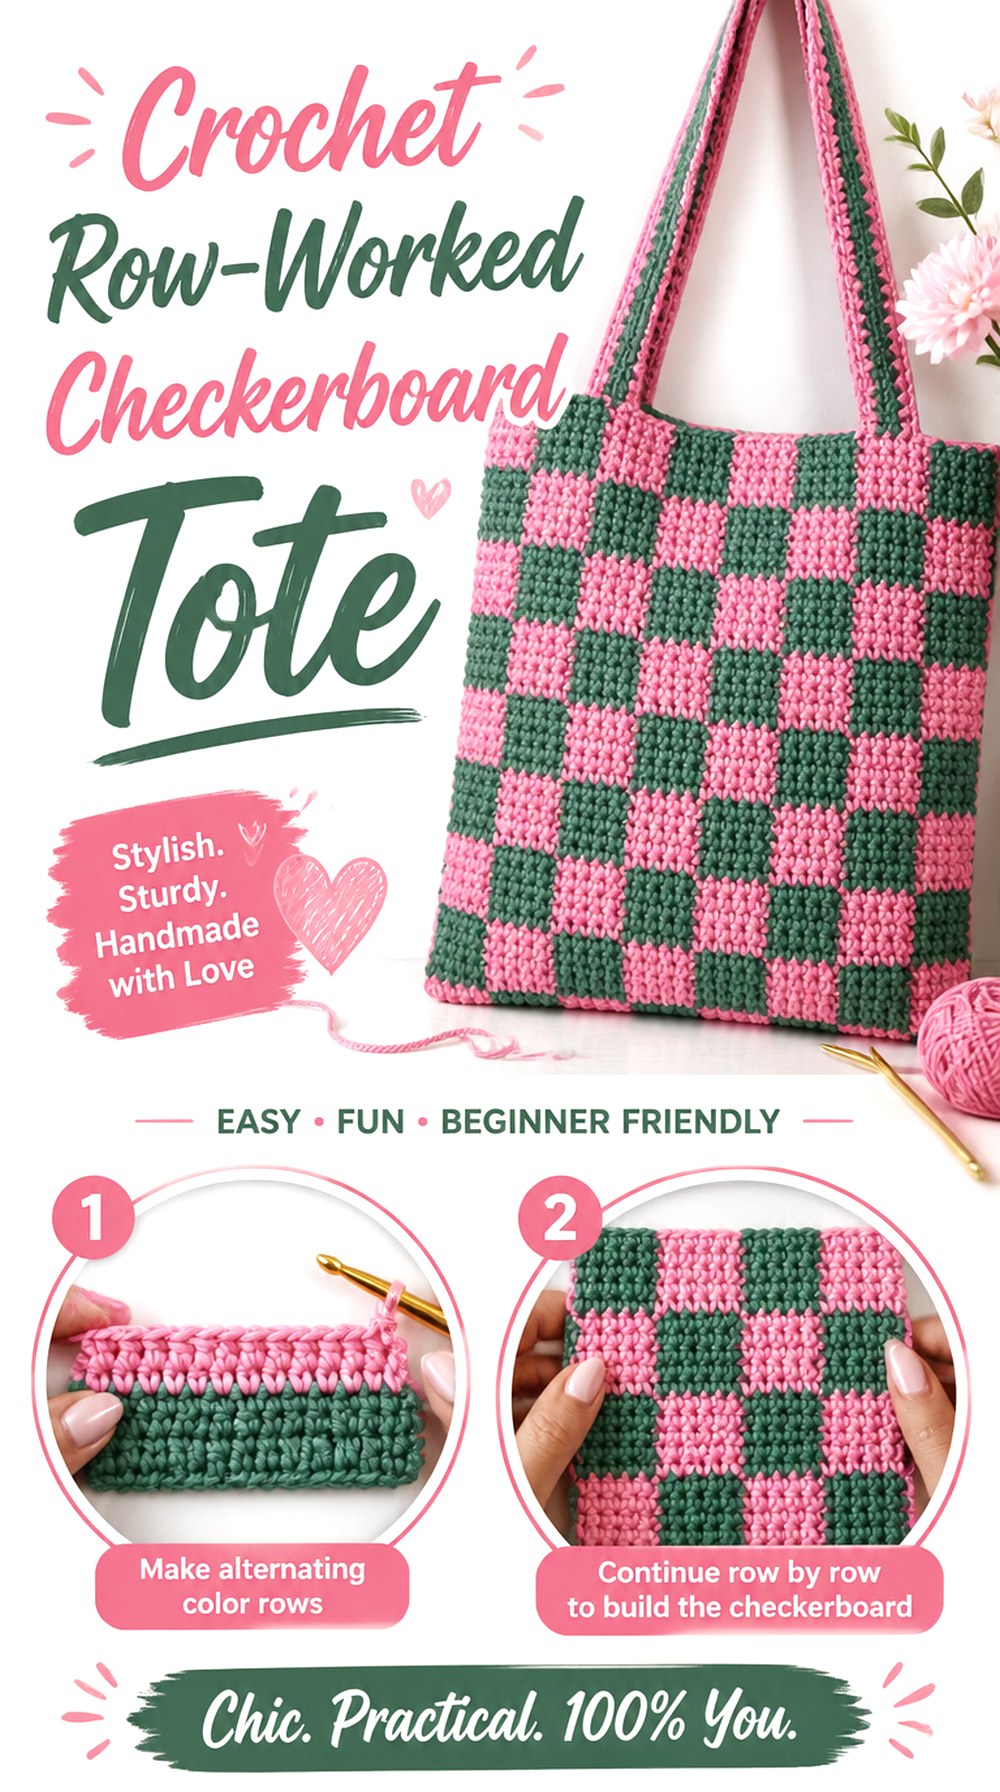
Kenikse Crochet’s checkered tote uses a defined base panel before developing the main checked bag and handles. The tutorial breaks out color changing, the main panel, and handle construction, giving the project a clear structural progression rather than treating the check pattern as an isolated swatch that later becomes a bag.
This is a useful final option for readers who want a classic checkerboard tote but also want to pay close attention to how the base, body, and handles relate. The creator uses DK cotton in the demonstrated version, although any substitution should be sampled for gauge and fabric behavior rather than matched by label alone.
The Base Sets the Width Before the Checks Take Over
A defined base provides an early checkpoint for the overall bag proportions. Before moving deeply into the checkerboard body, compare the base with the width you actually expect from the finished tote. Catching a major size discrepancy here is more useful than discovering it after completing most of the colorwork.
Handle Placement Should Echo the Grid
Geometric fabric makes asymmetry easier to notice. When you reach the handles, compare their positions against both the bag edges and the checker columns. Even if the construction follows the tutorial correctly, this visual check helps make sure your own tension or yarn substitution has not shifted the apparent center.
Carrying Yarn Can Change the Feel of the Fabric
The tutorial specifically addresses carrying yarn under stitches. That technique avoids cutting at every change but puts additional yarn inside the crocheted fabric. Make a short sample if you are substituting high-contrast colors so you can check for show-through, thickness, and whether the unused strand remains adequately concealed.
Original Tutorial and Creator Credit
Creator: Kenikse Crochet
Which Crochet Plaid Bag Style Should You Choose?
| If your priority is… | Consider | Main reason |
|---|---|---|
| Minimal assembly | Crochet Seamless Gingham Market Tote | The bag is designed around a one-piece approach |
| Traditional gingham | Crochet Three-Color Gingham Picnic Tote | Three-color value shifts create the woven gingham effect |
| Reversible colorwork | Crochet Reversible Interlocking Checkered Shoulder Bag | Interlocking crochet makes both fabric faces relevant |
| A small hands-free bag | Crochet Mini Checkered Crossbody Sling Bag | The mini body is paired with crossbody/sling carry |
| Secure multiway carry | Crochet Tunisian Checkered Belt Crossbody Bag | It includes a zipper and adjustable multi-position strap |
| A horizontal purse | Crochet Checkered Baguette Bag | The elongated body changes the usual tote proportions |
| Oversized graphic checks | Crochet Chunky Checkerboard Carry Bag | Chunkier fabric makes the grid visually dominant |
| A darker plaid mood | Crochet Three-Tone Checked Tote Bag | Related shades plus a dark neutral create layered checks |
Conclusion
The right crochet plaid bag depends on more than the color combination. For traditional gingham, start with the seamless or three-color tote options. Choose the baguette, mini crossbody, or compact handbag when you want a smaller accessory, while the chunky tote makes the checker pattern much more graphic. The reversible interlocking bag is a strong choice for technique-focused colorwork, and the Tunisian belt bag stands out when a zipper and adjustable carry matter.
Before choosing yarn, compare structure, strap style, closure, and the size of the color repeat. Then use the original tutorials for the creators’ exact construction details and finishing sequence.
Frequently Asked Questions
Are plaid, gingham, and checkerboard the same thing in crochet bags?
No. Checkerboard generally uses alternating blocks, often in two colors. Gingham usually creates a three-value arrangement that imitates overlapping woven bands. Plaid can include more complex intersecting lines or be used more broadly to describe grid-based colorwork. If you want a specific tartan-like result, preview the finished tutorial rather than relying on the word “plaid” alone.
What yarn qualities help a crochet plaid bag keep its shape?
Look at the fabric the yarn produces rather than relying only on fiber name or yarn weight. A bag usually benefits from fabric that is sufficiently cohesive for its intended use, while very loose or open fabric may stretch and distort the checks more readily. Swatch your chosen stitch and colorwork, then evaluate thickness, drape, stretch, stitch definition, and whether carried colors show through.
Is it better to carry yarn or cut it at every plaid color change?
There is no single best method. Carrying unused yarn can reduce the number of ends but may add thickness or become visible through lighter stitches. Cutting yarn creates more ends to secure but may avoid carrying long strands through the fabric. Follow the tutorial’s method first, especially when the creator has designed the fabric around a particular color-change technique.
Does a crochet plaid bag need a fabric lining?
Not automatically. A lining can help conceal carried strands, reduce direct abrasion on the crochet interior, and keep small objects from catching in the fabric. It can also add extra finishing work and must fit the completed bag correctly. Decide after considering the fabric density, intended contents, closure, and stretch rather than assuming every checked tote needs one.
How can I keep the checker blocks looking even?
Consistent tension and clear color-change boundaries matter. Periodically lay the fabric flat and compare several blocks rather than judging only the newest one. If the project uses separate panels, compare their dimensions before joining. Blocking may improve presentation where appropriate, but it should not be used to disguise major size differences caused by inconsistent tension or incompatible yarn substitutions.
Can I make a crochet plaid bag larger or smaller?
Often, but changing size can affect more than the body dimensions. The color repeat, number of visible checks, base proportions, strap placement, closure, and lining may all need reconsideration. Rather than applying a universal scaling formula, first identify how the selected tutorial repeats its colorwork and shapes the bag. Make a swatch, establish your resulting fabric dimensions, and adapt only where the construction allows it.


