15 Crochet Parandi Ideas for Flowers, Tassels, and Traditional Braid Styling
A crochet parandi can take several very different forms. Some designs rely on long laccha-dori strands and swinging tassels, while others turn flowers, leaves, pearls, roses, or metallic accents into the main feature. That difference affects more than appearance: motif density changes flexibility, long cords can emphasize uneven tension, and added embellishments can influence weight, movement, and how comfortably the upper section sits inside a braid.
The 15 ideas below cover restrained strand-based designs, botanical versions, wedding-focused accessories, dimensional flowers, ghungroo accents, and an integrated no-sew approach. Each project is paired with an original creator tutorial rather than a roundup or copied pattern. Use the comparisons and checkpoints to decide which silhouette suits your hairstyle, outfit, preferred amount of decoration, and willingness to manage extra finishing details.
Quick List
- Crochet Adjustable Open-Flower Strand Parandi
- Crochet Flowing Laccha-Dori Parandi
- Crochet Lotus-Focal Laccha Dori Parandi
- Crochet Leafy Bloom-and-Tassel Paranda
- Crochet Color-Rhythm Flower Paranda
- Crochet Pearl-Centered Leaf Parandi
- Crochet Classic Cord-and-Tassel Parandi
- Crochet Mini-Flower Braid Tassel Paranda
- Crochet Rose-Cluster Paranda
- Crochet Spaced Flower Braid-String Parandi
- Crochet Slim Laccha-Dori Parandi
- Crochet Longline Punjabi Braid-Extension Parandi
- Crochet Wedding Flower-and-Pearl Parandi
- Crochet Ghungroo-Accent Parandi
- Crochet No-Sew Flower-Vine Parandi
Plan the Braid Attachment and Finished Drop First
Parandi length is easiest to judge from the point where the accessory will actually enter the braid. A piece held against loose hair may appear shorter or longer once several inches are incorporated into the hairstyle. Before committing to a final drop, it is useful to mock up the intended braid and check where the flowers, tassels, or lower strands will fall from the back.
The upper section also deserves restraint. Dense flowers, beads, or bulky knots close to the attachment area may compete with the braid itself, while a cleaner flexible section is usually easier to position. For heavily decorated styles, decide whether the focal detail should begin near the upper braid, around mid-length, or mainly toward the ends. That choice can make two parandi with similar motifs look entirely different.
Choose Yarn for Flexibility, Definition, and Hanging Behavior
Flowers and cords ask different things from yarn. A firmer fabric can help a rose, lotus, or leaf hold a recognizable outline, but the same yarn and tension may make long hanging strands feel stiffer than expected. Softer fabric can create more fluid movement, although extended crochet cords may lengthen somewhat under their own weight depending on fiber, stitch structure, and tension.
When substituting materials, sample more than a single flower. Include a representative section of cord or vine and let it hang vertically before deciding whether the result suits the project. Compare motif definition, strand flexibility, and the amount of stretch you see when the sample is relaxed versus hanging. If a tutorial specifies its own yarn and hook combination, check the creator’s recommendations before assuming a substitute will produce the same scale or behavior.
Treat Pearls, Beads, and Ghungroos as Functional Details
Hard embellishments are not only decorative. Pearls, beads, bells, and similar components introduce extra weight and additional attachment points, so their placement can change the way a parandi hangs and moves. Keeping the upper braid connection relatively clear can also reduce bulk where the accessory meets the hair.
Before finalizing an embellished version, gently move the completed section against the fabrics and accessories you expect to wear with it. Raised components can potentially catch on delicate embroidery, jewelry, lace, or loose yarn ends. Check each attachment rather than relying on appearance alone. Small detachable components may also be inappropriate around young children or anyone likely to pull at them. Care requirements can change when yarn is combined with metal, beads, or other materials, so follow the yarn label and creator guidance rather than assuming the entire piece is machine washable.
1. Crochet Adjustable Open Flower Strand Parandi
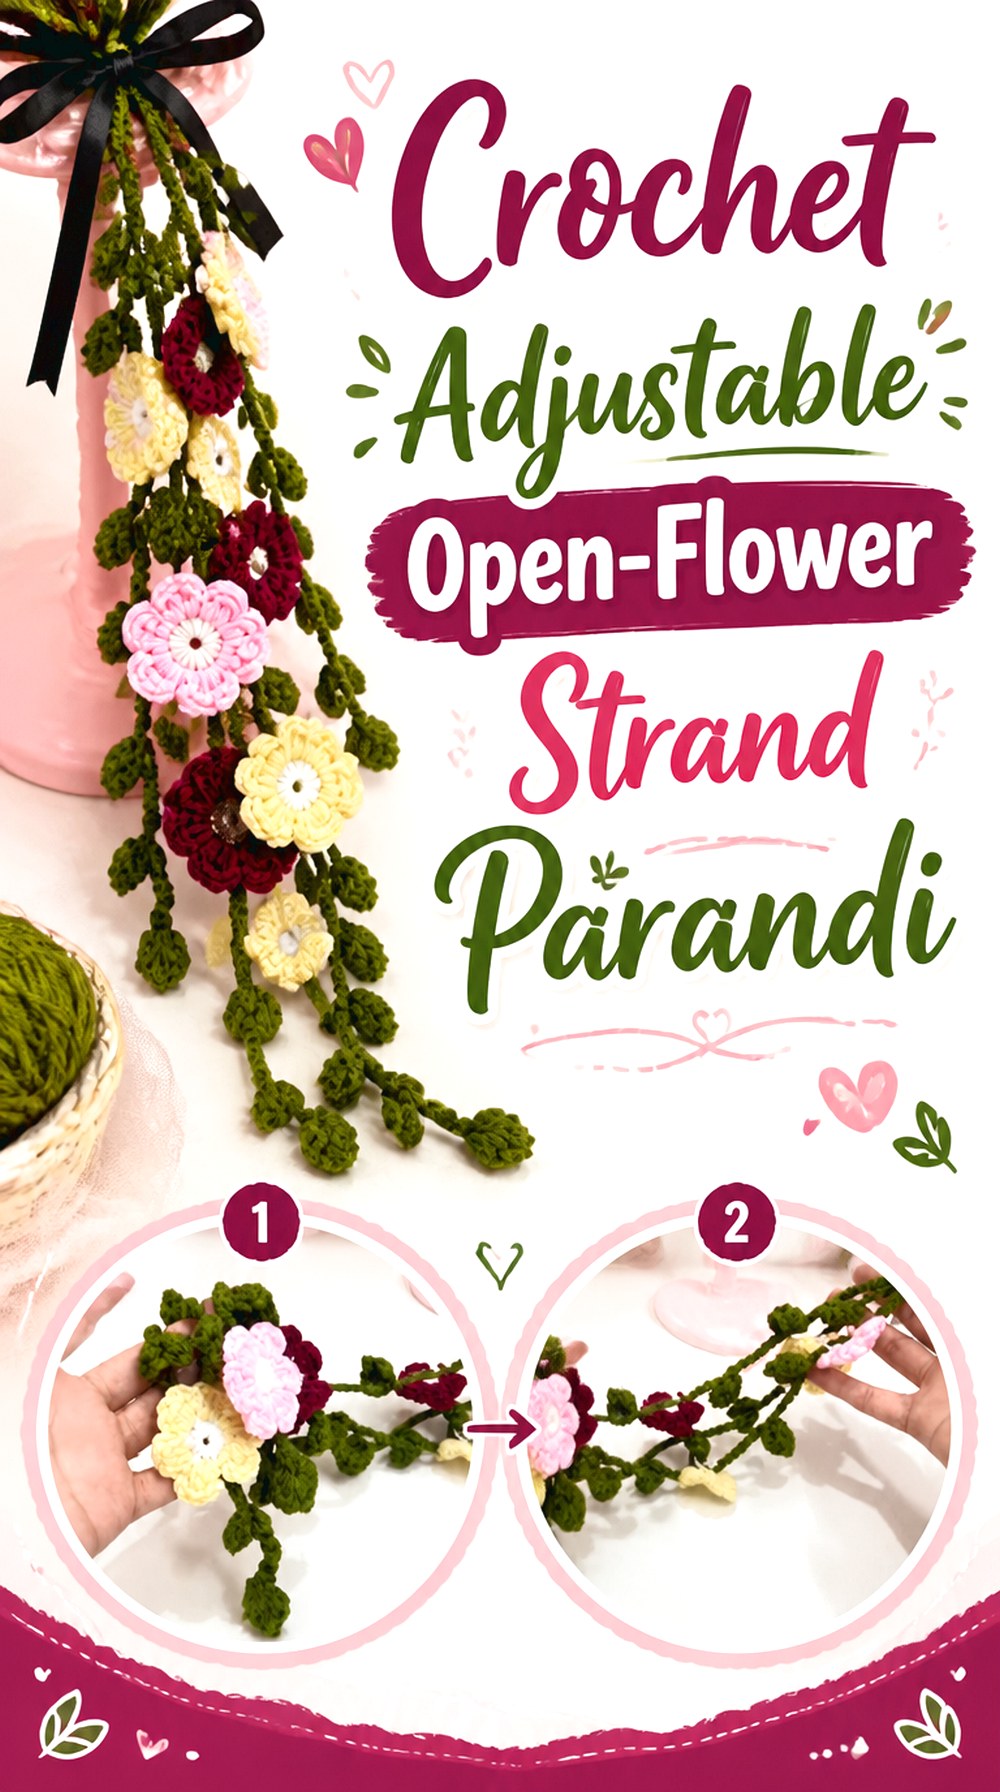
This floral parandi is a useful choice when you want recognizable crochet decoration without covering the entire hanging length in dense motifs. The open spacing lets individual flowers stand out while leaving enough visual room for the strands themselves to remain part of the design. Crochet Diaries presents a dedicated parandi tutorial and notes that the length can be customized, which makes this source particularly relevant when the finished drop needs to suit different hair lengths or styling preferences.
Compared with heavily embellished wedding versions later in this list, this approach feels lighter visually. It is especially worth considering when you want the braid, crochet cord, and flowers to contribute more evenly rather than having one oversized focal element dominate the accessory.
Size the Drop From the Braid, Not Loose Hair
Decide where the parandi will enter the finished hairstyle, then judge its length from that point. Part of the upper section may disappear inside the braid, so measuring only against loose hair can give a misleading impression. A temporary braid lets you check whether the lowest flowers finish above, at, or below the natural hair ends. Length is a styling choice rather than a fixed rule, and the creator’s customizable approach makes this a sensible project for experimenting with proportion before committing.
Keep Open Flower Spacing Intentional
When flowers are separated rather than densely clustered, inconsistent gaps become more noticeable. Lay the hanging section straight and compare the spacing from a normal viewing distance rather than inspecting one flower at a time. Wider gaps create more movement and negative space; closer placement creates a fuller floral effect. Neither is automatically better, but the spacing should look deliberate across the entire strand. Also check the piece while hanging vertically, since motifs can rotate differently than they do when laid flat.
Sample Vertical Stretch Before Committing
Long crochet components may behave differently once gravity acts on them for several hours. A useful general checkpoint is to make a small representative cord-and-flower sample, measure or visually note its relaxed length, then hang it before deciding on the full-scale proportion. If the yarn stretches noticeably, adjust your planning rather than assuming the finished strand will remain exactly as it looked on the work surface. Fiber, stitch density, and embellishment weight can all affect that result.
Original Tutorial and Creator Credit
Creator: Crochet Diaries
2. Crochet Flowing Laccha Dori Parandi
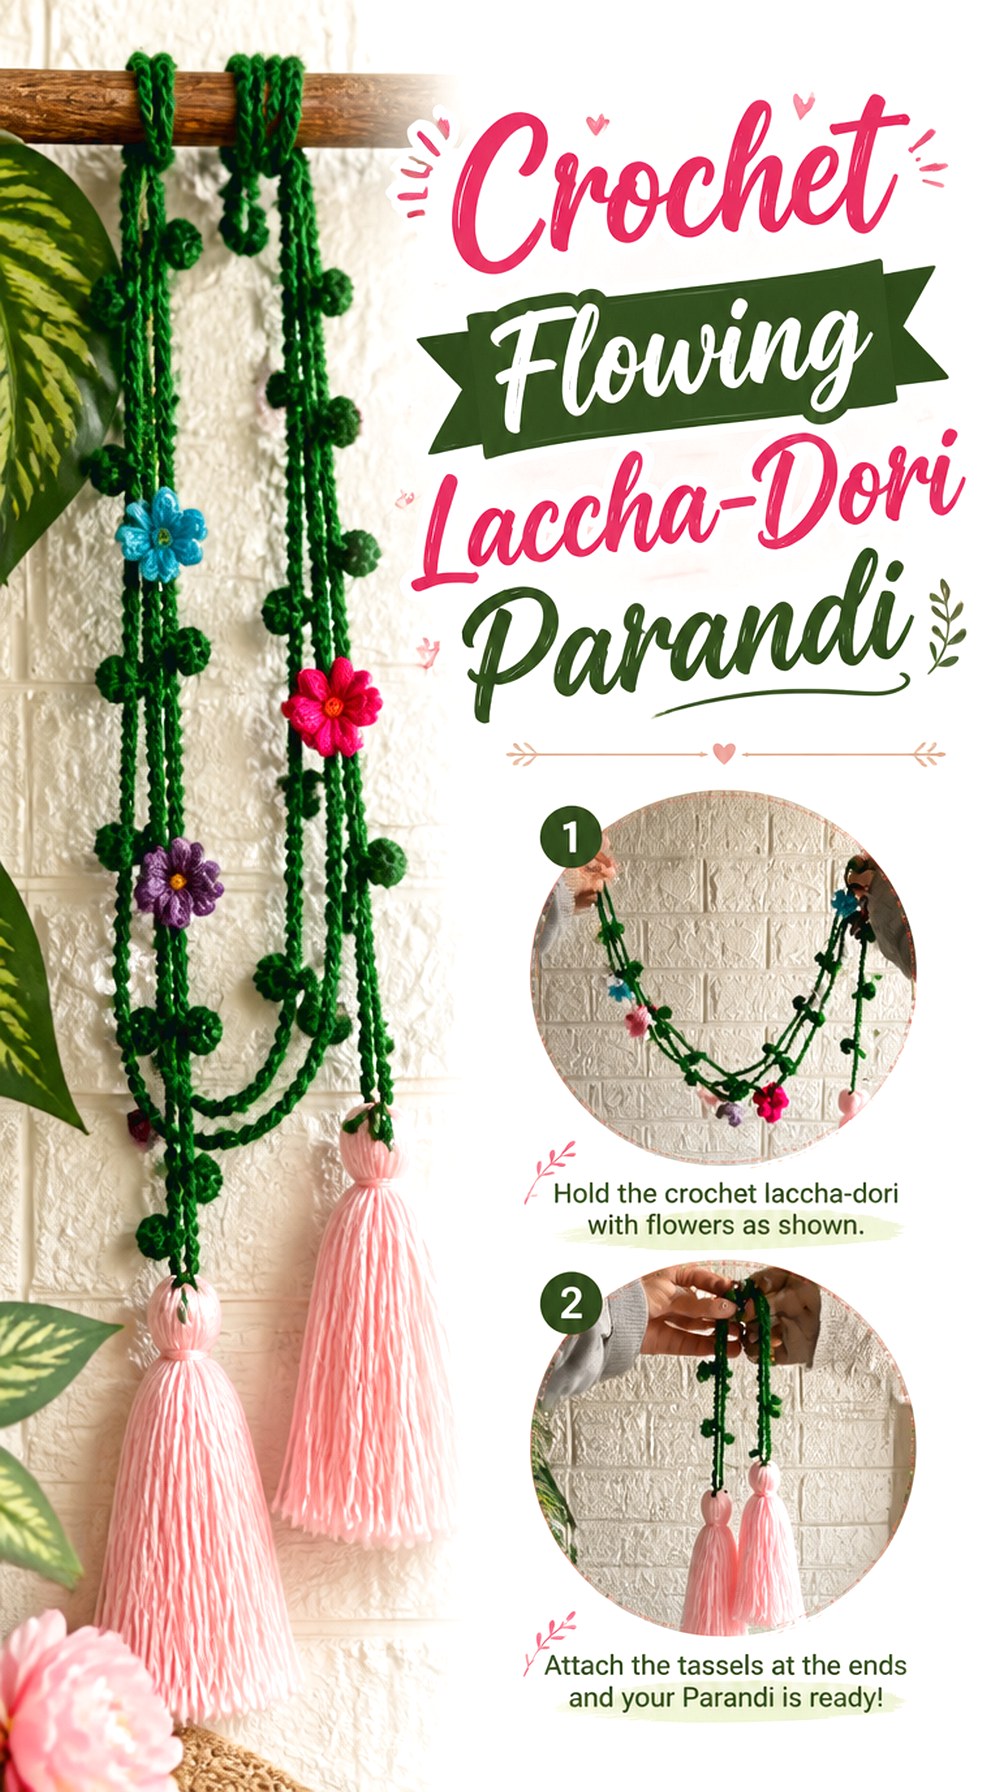
This version shifts attention away from dense floral decoration and toward the long, narrow lines of a laccha-dori style parandi. The source from Crochet with Khalida is specifically presented as a crochet parandi/laccha dori tutorial, making it a strong reference for readers who prefer a cleaner strand-led silhouette.
A flowing design can work well when the goal is to extend the vertical line of a braid rather than surround it with many dimensional motifs. Because the strands are exposed, however, their consistency becomes part of the finish. Uneven twist, differing lengths, or an unexpectedly stiff yarn may stand out more here than in a densely decorated design. This makes the project particularly useful for readers who enjoy a restrained look and are willing to pay attention to the behavior of the cords themselves.
Let the Cords Carry the Silhouette
With fewer large motifs competing for attention, strand alignment becomes an important visual feature. Before adding any finishing decoration, let the cords hang freely and view them from several feet away. This reveals whether the overall line looks balanced and whether one strand is noticeably longer or more twisted. If your chosen yarn produces a very firm cord, consider how that will affect movement before completing the full accessory rather than expecting the weight of the finished piece to soften it automatically.
Watch for Uneven Twist
Crocheted cords can rotate as they are handled, particularly when several long strands are worked separately. That does not necessarily mean there is a construction problem, but it is worth checking how the strands settle naturally instead of forcing them straight for photographs or assembly. If one section consistently corkscrews while the others hang smoothly, compare your tension and yarn handling. Correcting the inconsistency earlier usually produces a more polished vertical profile.
Reserve a Clear Attachment Zone
A laccha-dori parandi often benefits visually and practically from a less crowded upper section. Before decorating the full length, identify which portion will be braided into the hair and keep that area flexible enough for the hairstyle you intend to use. Decorative elements placed too close to the attachment point can become hidden inside the braid or create unnecessary bulk. The exact amount of clear space should follow the selected tutorial and your hairstyle rather than a universal measurement.
Original Tutorial and Creator Credit
Creator: Crochet with Khalida
3. Crochet Lotus Focal Laccha Dori Parandi

A lotus motif gives this parandi a clear focal identity. Instead of relying on repeated generic flowers along the entire length, the recognizable floral form becomes the detail that viewers notice first. Stuck In Loops pairs the lotus idea directly with a laccha-dori parandi in the original tutorial, so the source strongly matches this combination of a traditional hanging form and a more distinctive flower motif.
This style works particularly well when you want the crochet itself to resemble a statement ornament. The important design question is scale: a dimensional lotus needs enough room to be recognizable without making the surrounding strands feel secondary or visually overloaded. Its position along the hanging length also matters more than it would with tiny repeated flowers.
Give the Lotus Room to Read
A detailed motif becomes harder to recognize when it is crowded by equally strong neighboring elements. Once the lotus is finished, view it against the intended strands before adding more decoration around it. If adjacent motifs compete with its outline, increasing negative space may create a clearer result than adding more embellishment. This is an aesthetic adjustment rather than a pattern change; use the original tutorial for construction while treating final arrangement and color planning as separate styling decisions.
Keep Supporting Motifs Smaller
When adapting colors or adding your own compatible embellishments, decide which element should be visually dominant. A large lotus paired with equally large flowers, oversized tassels, and numerous beads can dilute the focal effect. Smaller supporting details generally allow the main motif to remain identifiable. If you do alter motif scale, remember that changing yarn or hook choice can also affect stiffness and weight, so confirm the tutorial’s construction guidance before making substantial substitutions.
Test the Flower at Finished Scale
Dimensional crochet flowers can look compact while they are being made but much larger once opened, shaped, and attached. Before committing to several motifs, complete one representative lotus and hold it where it will sit in the final hairstyle. Check its width against the braid and its depth from the side. That simple scale check helps prevent an attractive motif from becoming disproportionately bulky when worn, especially if the accessory is intended to accompany jewelry or embroidered clothing.
Original Tutorial and Creator Credit
Creator: Stuck In Loops
4. Crochet Leafy Bloom and Tassel Paranda
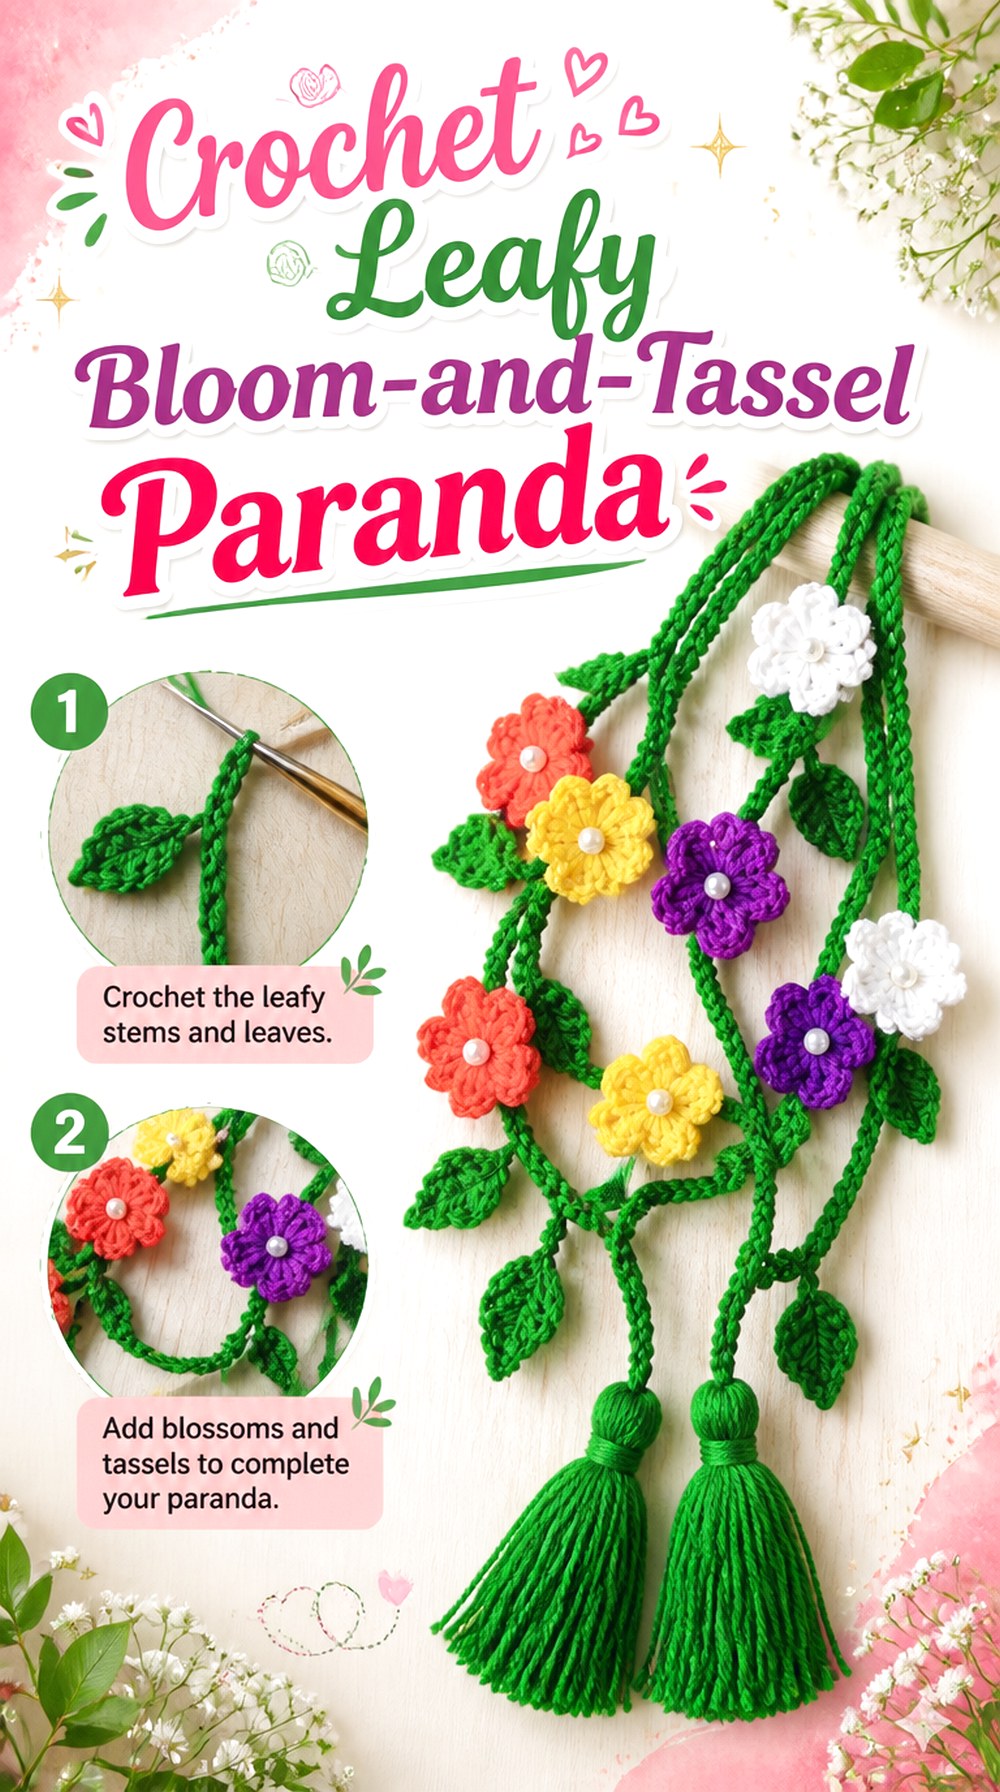
Nitya Uphaar’s paranda combines several botanical and hanging details rather than relying on one repeated component. The tutorial description identifies flowers, leaves, tassels, and braid placement, giving this project a layered character from the upper decorative area through to the lower finish.
That combination makes it a useful choice for someone who wants a fuller handcrafted look without depending on beads or metallic embellishments. Leaves can act as transitions between stronger flower shapes, while tassels create movement at the bottom. Because the design contains several visual elements, planning their hierarchy matters. A clear sequence—braid connection, botanical decoration, then tassel ending—can keep the accessory readable rather than making every inch compete equally for attention.
Use Leaves as Visual Connectors
Leaves are quieter than dimensional flowers, which makes them useful for bridging space between stronger focal motifs. When selecting colors, consider whether the leaves should contrast clearly with the flowers or sit closer to the strand color for a subtler transition. Lay the components together before final placement so you can see whether the foliage improves the flow or merely adds density. General crochet guidance applies here: more layers can also mean more weight and more opportunities for motifs to flip while worn.
Make the Tassel Ending Feel Deliberate
The tassels form the visual endpoint of this design, so compare their fullness and length as a group rather than judging each one individually. Hold the piece vertically and see whether the transition from flowers and leaves into the tassels looks balanced. A very dense lower finish can pull attention away from the botanical section, while an extremely sparse one may feel disconnected. Follow the tutorial for construction details, then assess proportion in the context of your chosen yarn and finished length.
Check the Botanical Section While Hanging
Flowers and leaves that lie perfectly on a table can rotate once the paranda is suspended. Before securing any optional arrangement changes, hang the piece and check which surfaces naturally face outward. If a motif consistently turns sideways, consider whether its attachment or surrounding strand tension is influencing it. Do not assume blocking alone will solve orientation. The final hairstyle introduces movement, so a hanging check gives a more useful picture than flat styling alone.
Original Tutorial and Creator Credit
Creator: Nitya Uphaar
5. Crochet Color Rhythm Flower Paranda
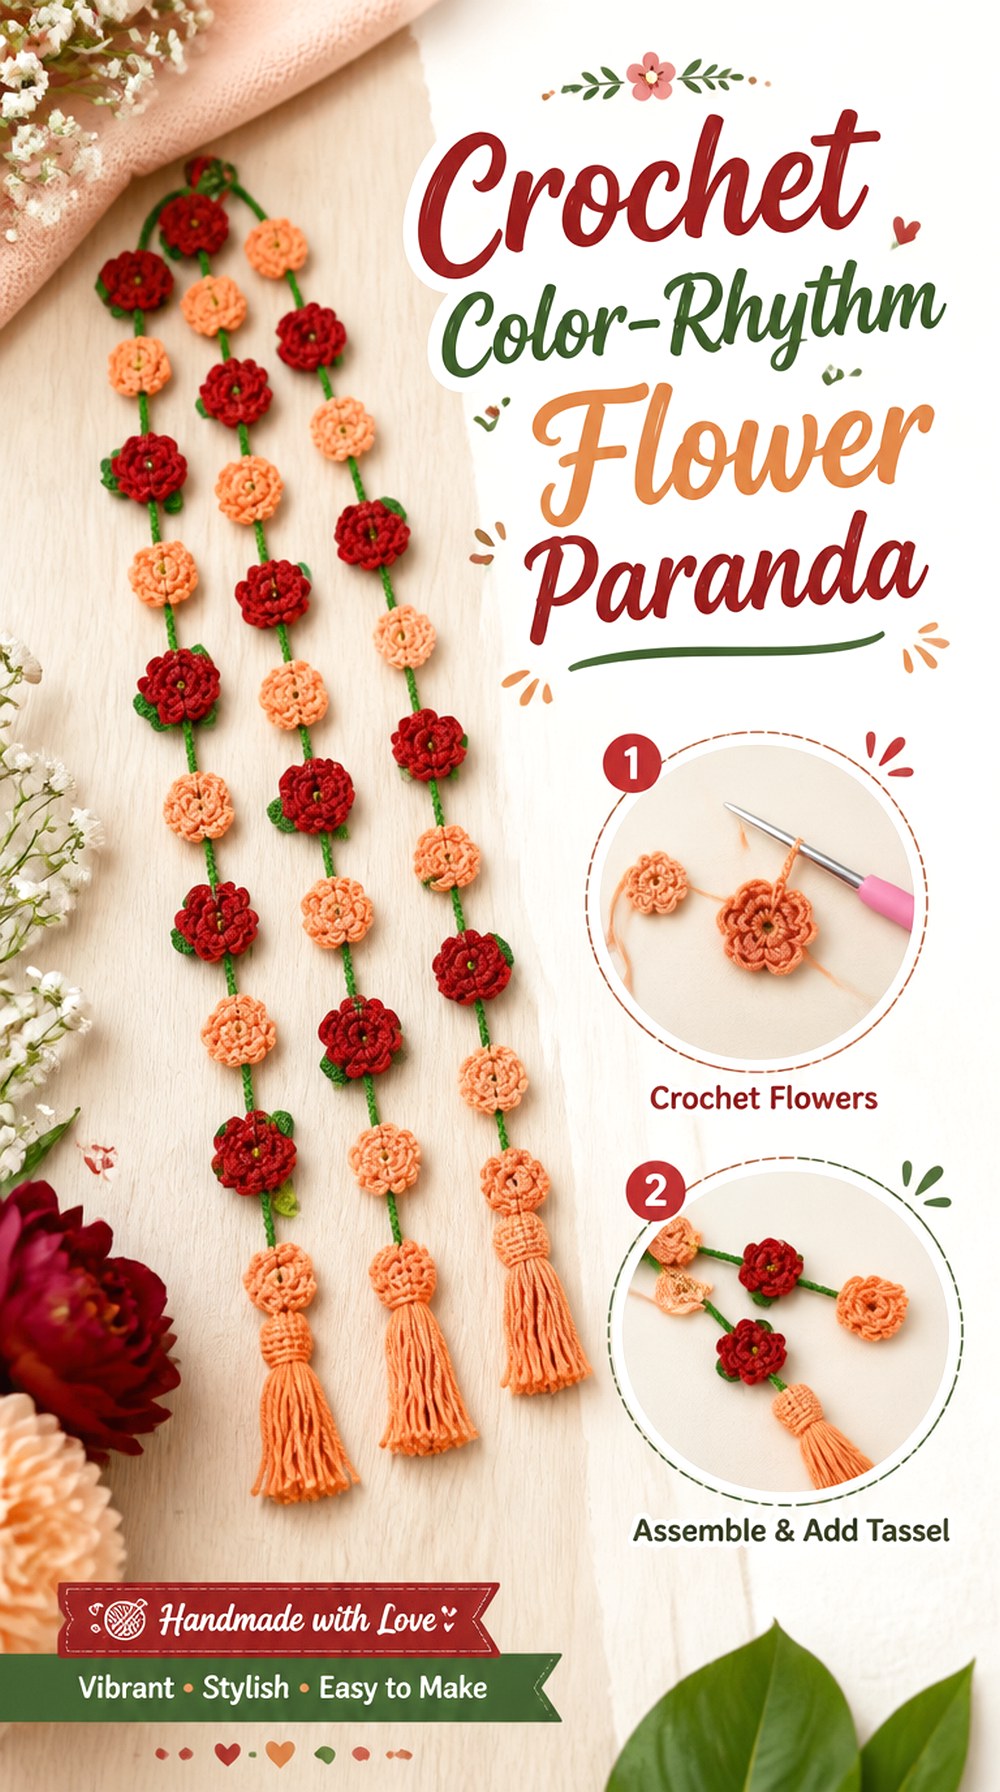
Repeated flowers make color sequencing the main opportunity in this paranda. Sonia’s wool world presents a dedicated crochet flower paranda/hair-accessory tutorial, giving readers a direct source for a floral design rather than a general flower pattern repurposed later.
The distinguishing idea here is rhythm. Instead of one statement flower, several smaller blooms can create a repeated path down the hanging section. That makes the order of colors and spacing just as important as the individual motif. A controlled palette can produce a coordinated accessory, while alternating brighter shades can make each flower read separately. This approach is especially useful when you want to echo multiple colors from an outfit without adding hard embellishments such as pearls or bells.
Build the Color Order Before Assembly
When several flower colors are involved, arrange the completed motifs in a proposed sequence before joining them to the paranda. Looking at loose yarn balls rarely gives the same impression as seeing finished crochet surfaces together. Try repeating, alternating, or gradually shifting the colors and photograph the layouts if helpful. The goal is not to follow a universal color rule; it is to avoid discovering after assembly that two dominant shades unintentionally cluster in one area.
Compare Repeated Blooms Side by Side
Repetition makes small differences in motif scale more noticeable. If the flowers are intended to look related, place them side by side before attachment and compare their overall diameter and shape. Variation can come from tension even when the same instructions are followed. Slight differences may be completely acceptable in handmade work, but checking them early lets you decide whether to distribute the variations intentionally instead of placing the largest motifs together by accident.
Use Empty Strand as Visual Space
Not every section needs a flower. Leaving visible cord between motifs can help each bloom retain its outline and allows the paranda to flex more freely. Dense decoration creates a richer floral band; wider spacing creates a lighter, more mobile look. If you customize placement, check the arrangement while the strands hang rather than only on a flat surface. Gravity changes both spacing and orientation, especially when motifs have noticeable thickness.
Original Tutorial and Creator Credit
Creator: sonia’s wool world
6. Crochet Pearl Centered Leaf Parandi

This design moves closer to jewelry-inspired hair styling by combining crochet flowers and leaves with pearl accents. Amna’s Creations specifically references attaching flowers, making leaves, and adding pearls to crochet flowers in the tutorial information, so the source supports the combination rather than requiring those details to be guessed from an unrelated project.
Pearl centers change the visual emphasis of a flower without requiring an entire strand of beads. That can be useful when you want a little shine while preserving crochet texture as the dominant material. The leaves add softer connecting shapes around the flowers, helping the embellishments read as a botanical composition rather than isolated ornaments. Because the design introduces small hard components, attachment security and snagging deserve more attention than they would in an all-yarn parandi.
Balance Pearls With Crochet Texture
A pearl center works best when it highlights the flower rather than hiding the stitches around it. Before attaching several, place the selected embellishment on one completed motif and look at it from normal viewing distance. If the pearl visually overwhelms the flower, a smaller or more restrained accent may preserve the crochet detail more effectively. Substituting embellishment size can also change weight, so treat visual proportion and structural load as connected decisions.
Let the Leaves Quietly Link the Flowers
Leaves can prevent the design from becoming a row of disconnected circular motifs. Their narrower shape introduces directional movement and can visually guide the eye between flowers. When planning an adaptation, alternate orientation rather than automatically pointing every leaf the same way; then hang the piece and judge the result. If the foliage begins to hide the braid string or causes too much bulk, reducing density may improve both flexibility and clarity.
Check Every Small Attachment
Pearls and similar pieces deserve an individual security check, particularly on a moving hair accessory. Gently tug each finished attachment according to what the construction can tolerate and inspect the yarn around it for looseness. This is not a guarantee of safety, and small detachable pieces are not appropriate for every wearer. If the parandi is intended for a child, assess whether any bead-like component could present a hazard and consider an all-crochet alternative.
Original Tutorial and Creator Credit
Creator: Amna’s Creations
7. Crochet Classic Cord and Tassel Parandi

The crochet bliss tutorial centers on a traditional Punjabi parandi construction with a base cord, long strands, and tassel finishing, while also mentioning optional decorative additions. That makes it a useful source for a more classic silhouette in which the long hanging section and tassels do most of the visual work.
Compared with flower-heavy ideas, this version can keep the central line cleaner and put more emphasis on movement. The lower tassels become especially important because they define the ending of the accessory. It is a strong direction if you want a recognizable parandi shape without filling the full length with motifs. It also gives you a clear place to evaluate practical issues such as strand stretch, lower weight, and braid attachment.
Make the Tassels the Ending
Treat the tassels as the final punctuation rather than an afterthought. Once the main strands are complete, hold the parandi vertically and judge how much visual weight the lower section needs. Very full tassels can create dramatic movement but may also make the bottom appear heavier. A lighter finish leaves more attention on the long cords. Follow the tutorial’s construction method, then evaluate whether your chosen yarn gives the same proportional impression.
Check the Lower Weight Before Finalizing
Tassels, optional beads, and other lower embellishments can change how strongly the strands are pulled downward. Before adding every planned extra, test the parandi with a partial lower finish and see how it hangs. If the cords visibly elongate under the added weight, factor that into the finished drop. This is especially relevant after yarn substitution because two fibers that look similar in a skein may behave differently once worked into long vertical components.
Keep the Upper Cord Easy to Braid
The upper attachment area performs a different job from the decorative bottom. It needs to integrate with the hairstyle rather than simply look ornate on its own. Avoid adding optional bulky elements exactly where the cord must be braided into the hair unless the original design calls for them. A quick hairstyle trial before final finishing can show whether the attachment disappears neatly or creates a visible lump.
Original Tutorial and Creator Credit
Creator: crochet bliss
8. Crochet Mini Flower Braid Tassel Paranda
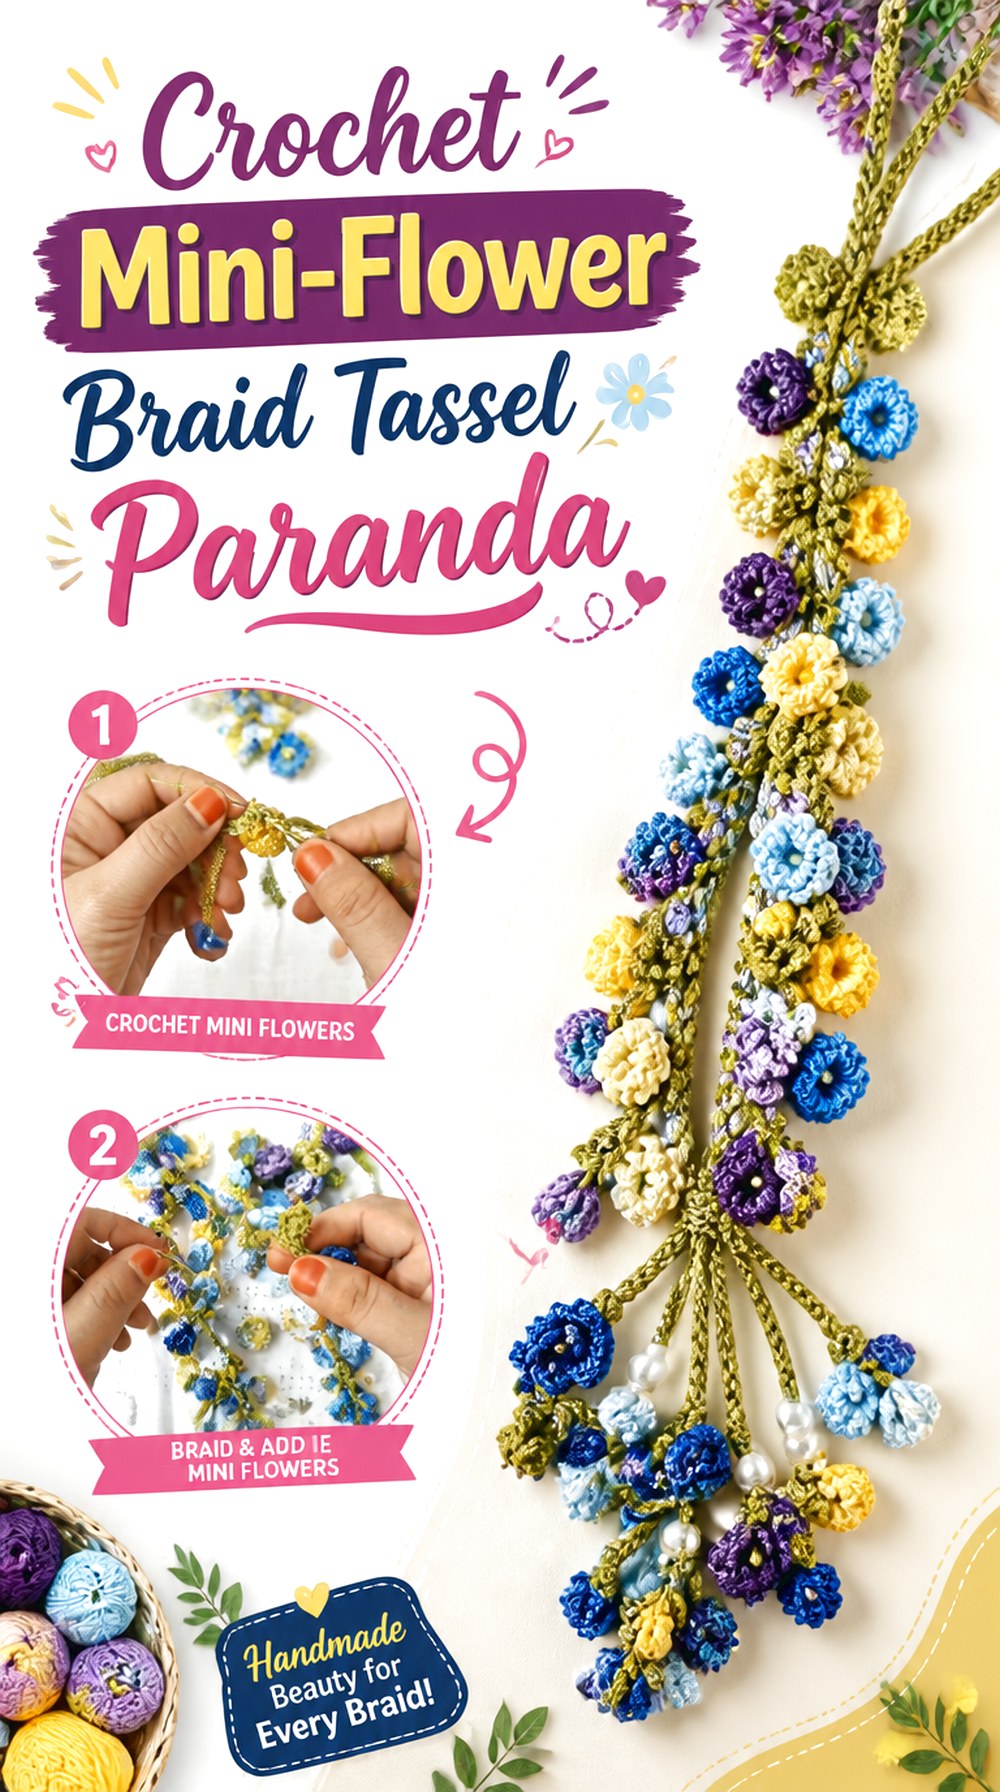
Crochet Forever’s tutorial combines small crochet flowers with hanging tassels and then shows the accessory in relation to braid styling. The result offers a different balance from a large lotus or rose parandi: instead of one dimensional focal flower, multiple compact blooms contribute detail without taking over the entire silhouette.
This scale makes the design useful for readers who like floral decoration but still want the lower hanging movement of a tassel accessory. Small motifs can also be distributed more flexibly along the strands. The trade-off is that a collection of little flowers requires careful spacing and orientation; when they are close together, they can visually merge or turn in different directions once the paranda is worn.
Separate the Hanging Flower Tassels
If several flower-tassel units sit close together, make sure each one has enough space to move without constantly overlapping its neighbor. Hold the piece from the actual attachment end and gently shift it as it would move during wear. Overlapping is not automatically a flaw, but persistent tangling can hide the small motifs that make this version distinctive. Wider spacing may also reduce the appearance of bulk without reducing the number of decorative elements.
Check Which Side Faces Outward
Small flowers may have a more defined front and back once they are attached to a strand. Lay the paranda flat to inspect the finish, then repeat the check while it is hanging. If several flowers naturally flip backward, investigate their attachment orientation before adding more. A motif that faces correctly on a table may rotate once its cord carries weight, so the vertical test gives a more realistic view.
Avoid Crowding Mini Blooms
Because small flowers feel individually lightweight, it can be tempting to add many of them. More is not always clearer. Group the finished motifs temporarily along the intended length and step back before securing any optional extras. If the flower shapes become difficult to distinguish, introduce more open cord between them or reduce the number. This preserves the visual advantage of using miniature rather than oversized blooms.
Original Tutorial and Creator Credit
Creator: Crochet Forever
9. Crochet Rose Cluster Paranda
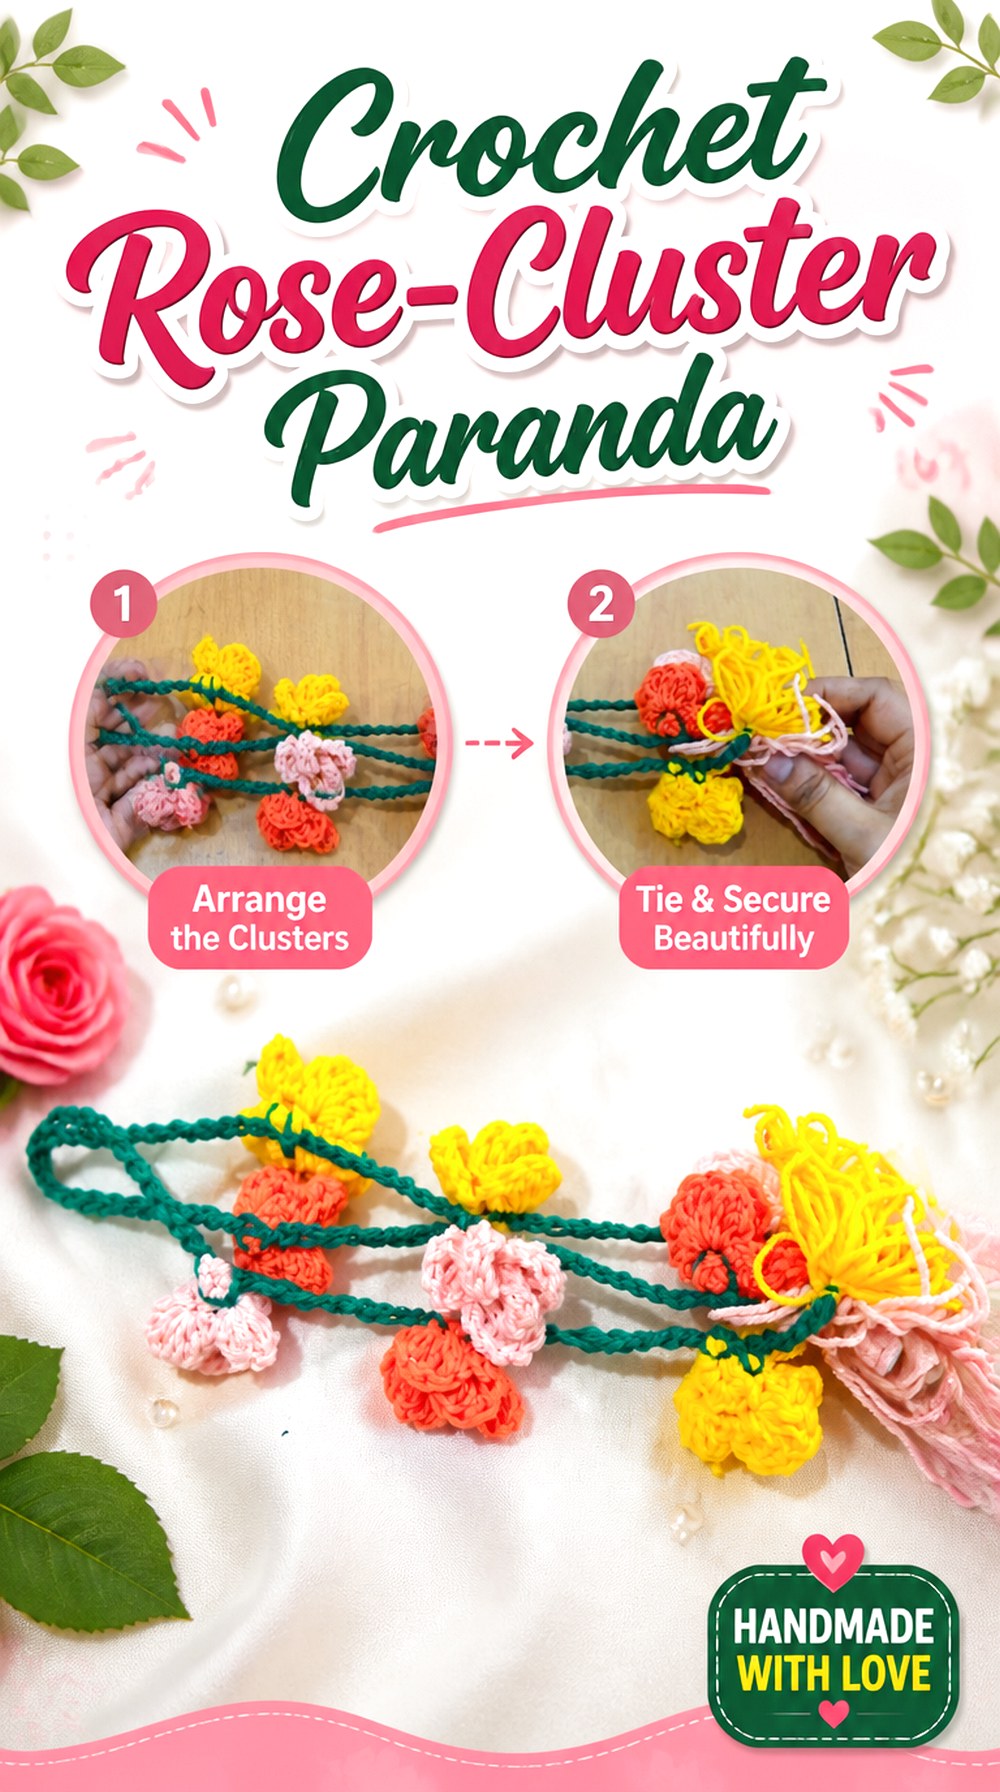
Roses create a noticeably more dimensional surface than flat or lightly shaped flowers. Vanya world kannada’s tutorial is specifically for a crochet rose paranda, giving this idea a clear source match and separating it from generic floral accessories.
A rose-cluster treatment works when the flower itself is meant to be the decorative centerpiece. Curled or layered petals can create depth, which also means the motifs occupy more physical space around the braid. The main decision is whether to use the roses as a concentrated focal grouping or distribute them farther along the hanging section. Either way, their orientation deserves attention: a dimensional flower seen from the side can look very different from the same motif facing outward.
Give Dimensional Roses Breathing Room
A rose has more visual depth than a simple flat bloom, so leaving some space around it can help the layered shape remain recognizable. Before attaching multiple roses closely together, arrange the finished motifs around the intended strand or braid section and view the group from the front and side. If the flowers compress one another, increasing the gap may improve both shape visibility and flexibility.
Orient the Rose Faces While Hanging
Do not decide orientation solely with the paranda laid on a table. Suspend it from the attachment point and see where each rose naturally turns. If a focal flower repeatedly faces inward, consider whether the connection point or neighboring motif is influencing it. The goal is not to eliminate all movement—hair accessories move—but to avoid securing the most prominent roses in positions where their shape is usually hidden.
Use Fewer Focal Blooms for Clarity
A rose can provide more visual impact than a small flat flower, so you may not need the same motif density. If adapting the overall styling, compare a concentrated cluster with a more heavily covered layout before deciding. Reducing the number of large dimensional motifs can preserve negative space and reduce weight. Any changes to the actual pattern construction, however, should be guided by the original tutorial rather than inferred from the finished appearance.
Original Tutorial and Creator Credit
Creator: Vanya world kannada
10. Crochet Spaced Flower Braid String Parandi
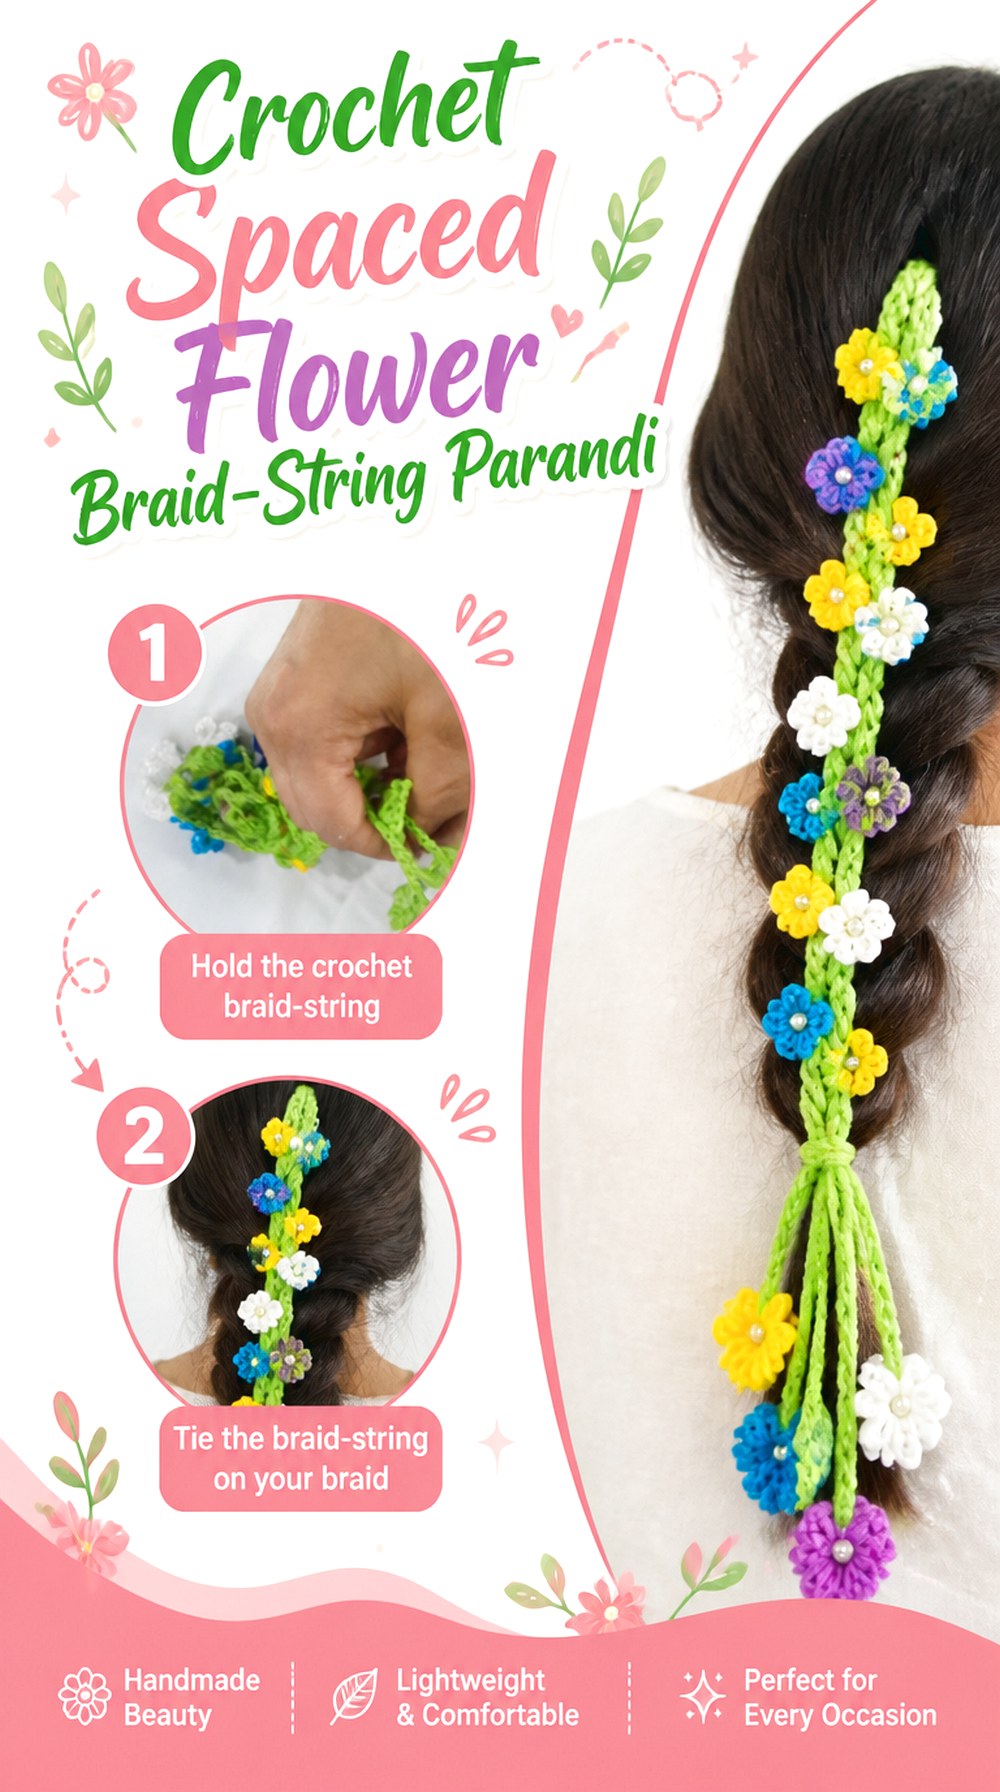
The tutorial from kro -shey by Sunita presents a colorful crochet paranda with flowers joined along a braid string and describes the result as lightweight. That makes this project a useful contrast to the denser botanical and rose-cluster ideas: the string remains visually present, and the flowers can act as spaced accents instead of forming a continuous floral mass.
This design direction works particularly well when you want the accessory to complement a braid rather than obscure it. The negative space between flowers can also make multicolor choices easier to read. Since the braid string is integral to the appearance, its tension, straightness, and color relationship to the motifs deserve as much planning as the flowers themselves.
Treat the Braid String as Part of the Design
The connecting string is not merely hidden structure in a spaced floral parandi. Its color and thickness remain visible between motifs, so consider whether you want it to blend into the hair, echo one flower shade, or deliberately contrast. Test that relationship with the finished motifs rather than deciding from yarn skeins alone. A visible string can create a clean continuous line that ties otherwise varied flower colors together.
Space Flowers for Flexibility
Open intervals between flowers can make the accessory easier to bend with the hairstyle and prevent every motif from touching its neighbor. If you customize spacing, temporarily position the flowers first and bend the strand into a gentle curve similar to the intended braid. Very tight clustering may reduce flexibility; extremely wide gaps may make the flowers look disconnected. The best balance depends on motif scale and finished parandi length.
Check the Whole Look Against the Outfit
A colorful flower parandi can interact strongly with embroidered or patterned clothing. Before finalizing optional color placement, view the complete accessory next to the outfit rather than matching individual yarns to isolated fabric details. If both pieces contain many strong colors, repeating only a few shades may create a clearer relationship. For a simpler garment, a broader flower palette can become the intentional focal point.
Original Tutorial and Creator Credit
Creator: kro -shey by Sunita
11. Crochet Slim Laccha Dori Parandi

Crochetnook’s source is explicitly a crochet parandi/laccha-dori tutorial, making it a useful foundation for a narrow, restrained interpretation of the style. Here the design idea is to preserve a relatively slim vertical profile rather than build up a heavy band of flowers, leaves, or hard embellishments.
Minimal construction does not mean there is nothing to evaluate. In fact, exposed strands make differences in tension and length easier to see. The lower finish also needs to feel proportionate to the narrow body. This is a strong direction for readers who want the crochet accessory to extend a braid without becoming the most ornate element of an outfit, especially when the clothing or jewelry already carries substantial visual detail.
Slim Strands Reveal Tension Changes
In a narrow design, each strand contributes noticeably to the silhouette. Compare them while hanging freely rather than aligning them by hand on a table. A strand that twists or lengthens differently can interrupt an otherwise clean vertical line. If you are still early in the project, use that difference as a cue to check tension and yarn handling before producing more length.
Keep the Ending Proportional
A very large tassel or oversized motif can make a slim laccha-dori body look top-light and bottom-heavy. Before completing the final decoration, mock up the lower section and compare its width with the main strands. You may prefer a restrained ending that maintains the narrow profile or a fuller tassel that creates a deliberate contrast. Either can work when the difference looks intentional.
Let Negative Space Stay Visible
A minimalist parandi gains much of its character from what is not covered. Adding extra flowers simply because the strand appears “empty” can shift the project into a different visual category. If you want a clean laccha-dori effect, view the negative space as part of the design. It allows the braid and strands to remain visible and can keep a highly decorated outfit from feeling visually crowded.
Original Tutorial and Creator Credit
Creator: Crochetnook
12. Crochet Longline Punjabi Braid Extension Parandi

This idea emphasizes length and the classic visual continuation of a Punjabi braid. Crocheter priyanka W🧶ऊN’s tutorial is specifically presented as a handmade crochet Punjabi parandi/paranda hair accessory, providing a direct source for that traditional styling context.
A longline version is most effective when its total proportion is considered with the full hairstyle rather than as a standalone craft piece. The upper section may visually merge into the braid, while the lower strands and tassel area become the visible extension. Because more length creates more opportunity for strands to twist or become uneven, this project rewards periodic hanging checks. It also differs from motif-heavy versions by allowing the strong vertical silhouette to do most of the decorative work.
Judge the Full Length From the Back
A long parandi should be evaluated from the same angle from which most of the accessory will be seen. Create the intended braid or a temporary approximation, attach the work at the correct point, and check the drop from behind. This helps reveal whether the transition between natural hair and crochet extension looks balanced and whether the lower finish lands where you intended.
Keep a Clear Vertical Line
When length is the main feature, sideways bulk can weaken the longline effect. If you introduce optional decoration, check whether it supports the downward line or interrupts it. Repeated small accents may preserve the silhouette more easily than a very wide central cluster. That is a styling consideration rather than an instruction to alter the creator’s construction; use the source tutorial for the actual making method.
Compare All Tassel Ends Together
Lower strands rarely behave identically while they are being handled. Before trimming or completing any finishing decisions allowed by the tutorial, suspend the whole piece and let it settle. Compare the tassel ends as a group from normal viewing distance. Avoid making corrections while individual strands are stretched or twisted by hand, because they may change position once released.
Original Tutorial and Creator Credit
Creator: Crocheter priyanka W🧶ऊN
13. Crochet Wedding Flower and Pearl Parandi
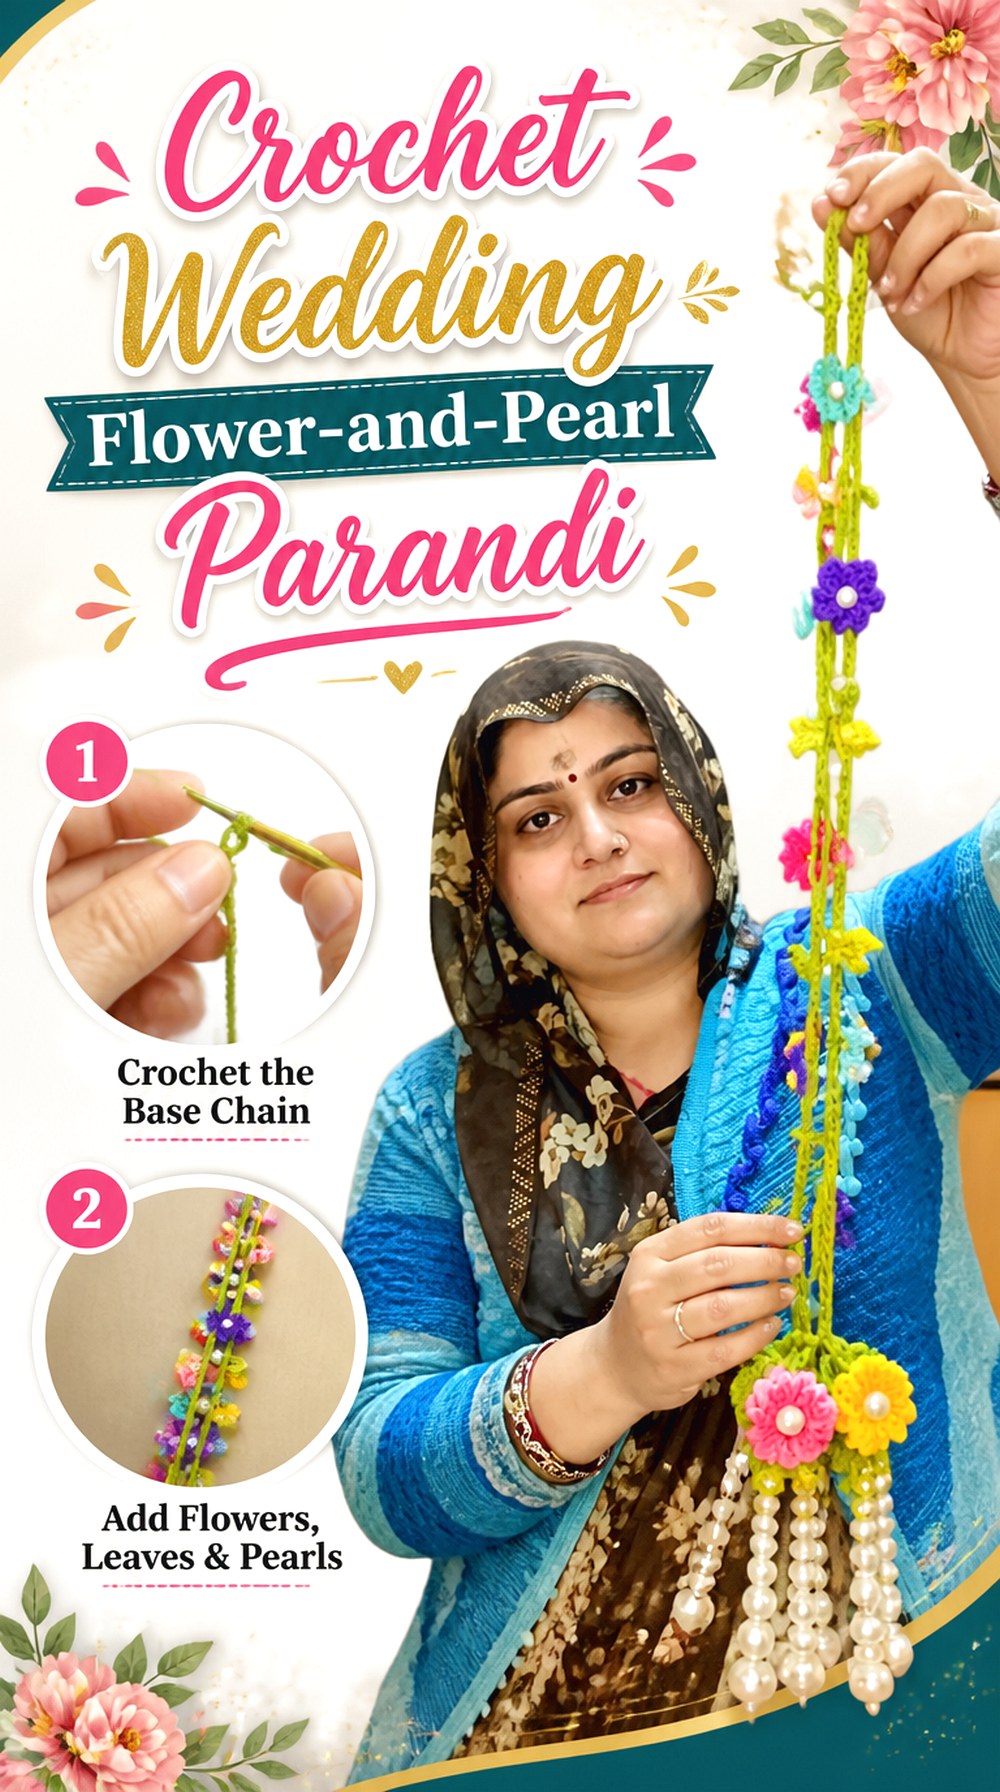
Gharwalikahani’s tutorial presents a crochet flower parandi specifically in a wedding-hair-accessory context and includes beads or pearls among the decorative materials discussed. That makes this idea less about everyday restraint and more about coordinating crochet with dressier styling.
The combination of soft yarn flowers and reflective pearl-like details can bridge handcrafted texture with jewelry. For a formal look, however, coordination matters more than simply increasing decoration. Consider how the parandi will sit beside earrings, hair jewelry, embroidery, and a dupatta. A design that looks balanced alone can feel crowded once all accessories are worn together. This project therefore rewards a full hairstyle-and-outfit trial before the final decorative arrangement is treated as complete.
Plan Around Jewelry and Dupatta Texture
Formal clothing often introduces more surfaces that can catch raised crochet or beadwork. Once you have a representative embellished section, gently bring it near the jewelry and fabric you plan to wear—not to pull against them, but to identify obvious snag points. Pay particular attention to loose embroidery, chains, lace edges, or beadwork near the shoulder and back where a long parandi may move.
Use Pearls as Highlights, Not Automatic Fillers
Pearls can draw the eye quickly because their surface contrasts with yarn. Place a few temporarily before deciding whether every flower needs one. Concentrated highlights may look more intentional than distributing identical shine across the entire accessory. If you change embellishment size or quantity, also consider the added weight; a decorative decision can influence how the lower section hangs.
Test the Wedding Hairstyle Before Final Joining
A formal braid may include padding, hair extensions, flowers, jewelry, or a different attachment point from an everyday style. Create a hairstyle trial before finalizing optional parandi placement so you know which crochet details remain visible. This is also the time to check whether the upper attachment becomes too bulky when combined with other accessories. Preserve access to the original tutorial for exact construction rather than improvising structural changes.
Original Tutorial and Creator Credit
Creator: Gharwalikahani
14. Crochet Ghungroo Accent Parandi

Metallic ghungroos create a different experience from yarn-only tassels or pearl-centered flowers. Plakshi Jain | Crochet’s tutorial specifically covers a crochet ghungroo parandi and includes attaching the ghungroos as part of the project. Their presence introduces both visual shine and movement, making this one of the most distinct options in the collection.
Because ghungroos are hard and heavier than crochet petals, placement needs to consider more than appearance. A lower concentration can preserve a softer braid connection while letting the metallic details move at the decorative end. This style can suit festive, cultural, or dance-oriented styling, but the final accessory should be checked in motion so you understand how the embellishments behave against hair, clothing, and one another.
Add Ghungroos After the Crochet Hangs Well
Before judging metallic placement, make sure the crochet base already hangs in a balanced way. Hard embellishments can exaggerate any existing unevenness because they add localized weight. If one side sits lower before the ghungroos are added, investigate the crochet tension or strand length first. Decorative hardware should enhance the finished structure rather than being expected to correct it.
Watch and Listen During a Movement Check
Hold or wear the parandi in a controlled setting and move gently enough to see how the ghungroos interact. Notice whether they strike one another constantly, tangle with neighboring strands, or swing into clothing more than expected. Sound and movement are part of this design, but excessive collision may indicate that the spacing or quantity feels crowded for your intended use.
Keep Hard Details Away From the Braid Join
The section braided into the hair generally benefits from staying softer than the decorative lower area. If you are considering any placement adaptations, avoid concentrating hard components exactly where the accessory must bend and sit against the head unless that treatment is specifically part of the source construction. This can make the attachment easier to manage and keeps the metallic detail where it remains visible.
Original Tutorial and Creator Credit
Creator: Plakshi Jain | Crochet
15. Crochet No Sew Flower Vine Parandi
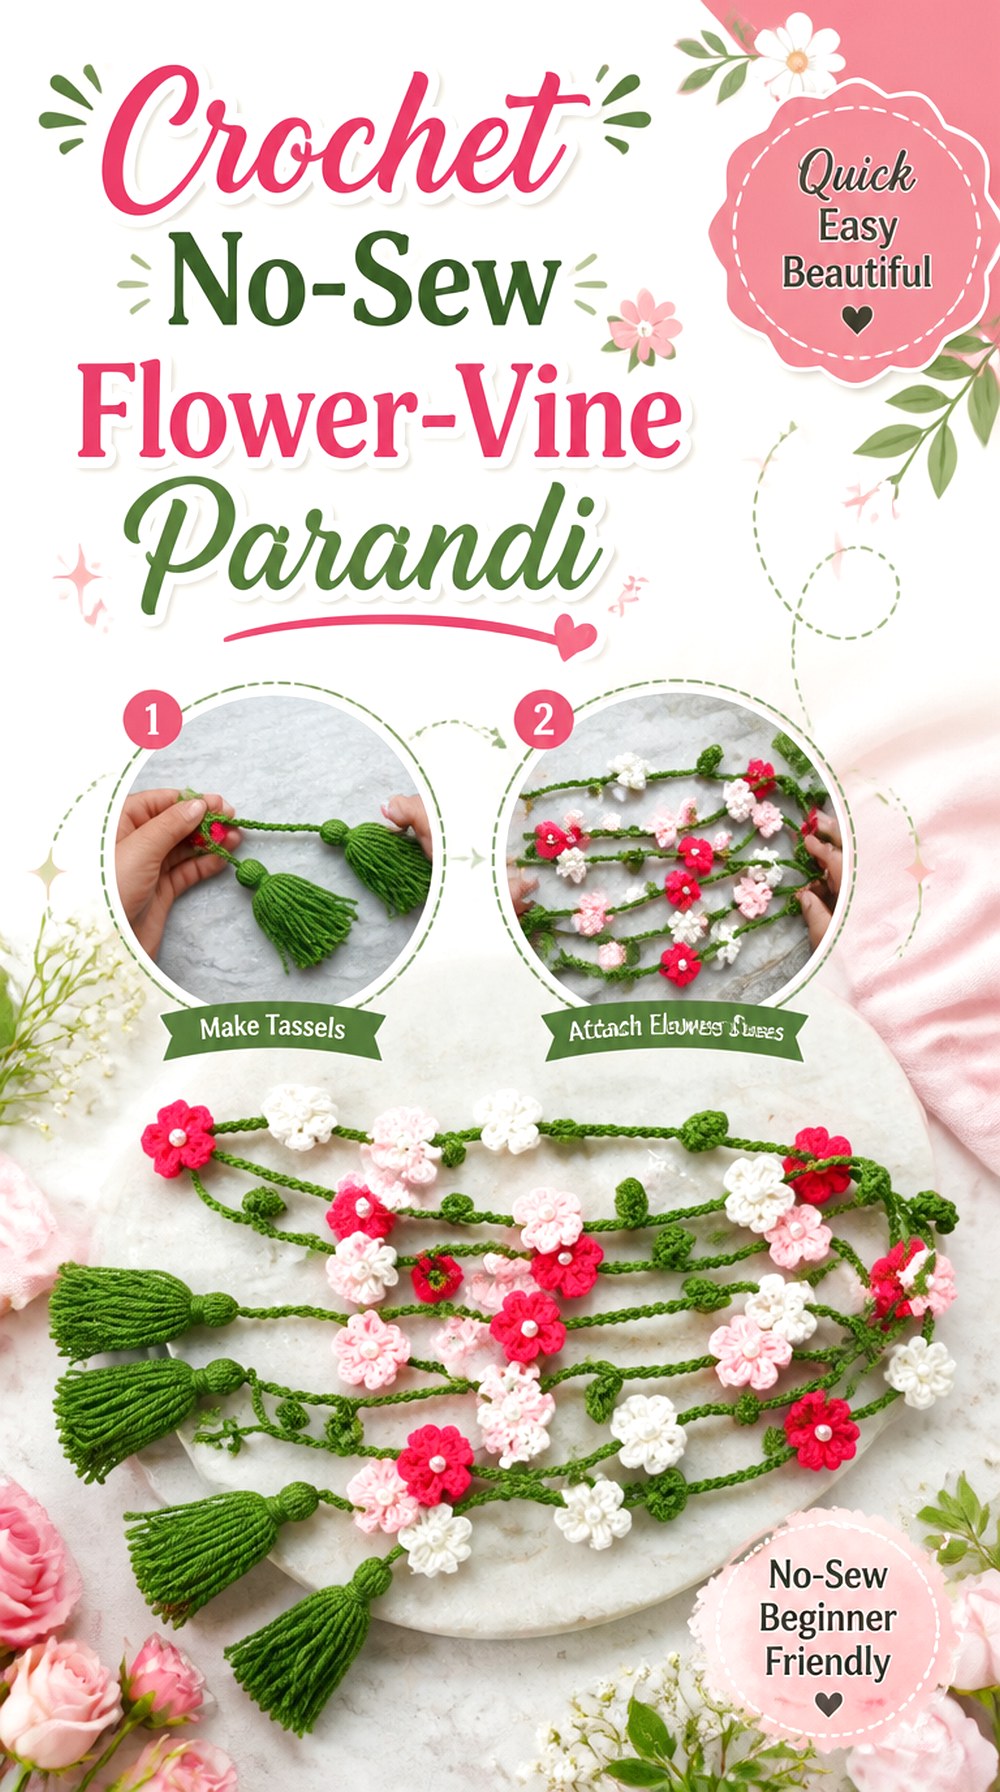
Cute Crochet’s parandi tutorial is explicitly described as a no-sew laccha-dori project, and its published structure includes flowers, vines, assembly, and tassels. That integrated approach gives this final idea a meaningful construction difference from projects where separate floral motifs are later sewn or tied into place.
A no-sew approach does not remove the need for planning; it changes when the decisions happen. Flower spacing, vine length, and orientation may need to be considered while the interconnected structure develops because there may be fewer opportunities to reposition independent pieces afterward. This makes the design appealing if you prefer minimizing separate sewing stages, while still wanting the visual complexity of flowers, vines, and a tassel finish.
No-Sew Construction Changes the Planning
When motifs and connecting sections are integrated, placement decisions can become harder to reverse than with individually sewn flowers. Before working far beyond a decorative section, hold the developing piece vertically and check its rhythm. If the flowers are becoming too crowded or too sparse for your intended length, consult the creator’s method before making changes rather than trying to restructure the finished accessory later.
Check Vine Flexibility as You Work
A vine needs enough flexibility to follow the hanging line and braid styling. After completing a representative section, bend it gently into the curve it may take when worn. If the yarn substitution has produced an unexpectedly stiff strip, that is useful information to catch early. Changing to a substantially different yarn or hook can alter motif size and structure, so compare any substitution with the tutorial’s original recommendations.
Reassess After Tassels Add Weight
The addition of tassels can change the way an integrated flower-and-vine structure hangs. Once the lower finish is present, repeat your vertical check instead of relying on how the vine looked earlier in construction. Notice whether the flowers still face outward and whether the lower weight pulls the piece into a more stretched shape. If the behavior changes significantly, use the source tutorial to confirm the intended final arrangement.
Original Tutorial and Creator Credit
Creator: Cute Crochet
How to Choose Among These 15 Crochet Parandi Ideas
The easiest way to narrow the list is to decide what should dominate the finished hairstyle. For a clean vertical effect, the Crochet Flowing Laccha-Dori Parandi or Crochet Slim Laccha-Dori Parandi keeps attention on the strands. If you want one recognizable flower, the Crochet Lotus-Focal Laccha Dori Parandi or Crochet Rose-Cluster Paranda gives the motif more visual authority.
For stronger lower movement, compare the Crochet Classic Cord-and-Tassel Parandi with the Crochet Longline Punjabi Braid-Extension Parandi. Pearl and ghungroo versions suit a more embellished direction, but they also introduce extra attachment and snag checks. The Crochet No-Sew Flower-Vine Parandi stands apart when minimizing separate motif sewing is a priority.
Conclusion
These 15 crochet parandi ideas range from slim laccha-dori strands and traditional tassel endings to roses, lotus flowers, leaves, pearls, wedding embellishment, ghungroos, and integrated flower vines. The best choice depends less on how many decorative elements a design contains and more on what you want to emphasize: a long braid extension, a recognizable floral focal point, fluid tassel movement, or a more ornate festive finish.
Before committing, check the accessory at its actual braid position, observe how the strands hang vertically, and consider how embellishments affect weight and snagging. For exact construction, materials, motif methods, and assembly details, follow the original tutorials credited with each project rather than reconstructing them from the finished descriptions here.
Frequently Asked Questions
How long should a crochet parandi be?
There is no single correct finished length because the visible drop depends on where the parandi enters the braid, the wearer’s hair length, and the intended styling effect. Make a temporary braid first and judge the accessory from its actual attachment point. Remember that some of the upper section may be incorporated into the hairstyle. If the selected tutorial gives a specific length or adjustment method, use that guidance as the primary reference.
Can a crochet parandi work with shorter hair?
Potentially, provided there is a hairstyle that can hold the attachment securely and comfortably. A longer crochet section can visually extend the braid, but the attachment should not rely on excessive pulling or heavy embellishment. Test the intended hairstyle before making a very long or heavily decorated version. The most suitable construction depends on the wearer’s hair, braid method, accessory weight, and the attachment approach shown by the original creator.
What yarn is suitable for crochet parandi projects?
The best choice depends on whether the project needs flexible strands, crisp dimensional flowers, soft tassels, or a combination of these qualities. A firm yarn can improve motif definition but may make long cords stiffer, while a softer yarn may drape more fluidly and potentially stretch differently. Check the yarn used by the original tutorial before substituting, then sample both a motif and a hanging strand rather than judging the replacement from gauge or appearance alone.
How can I reduce twisting or uneven stretching in long crochet strands?
Work consistently, then let the developing strands hang freely at intervals instead of assessing them only on a flat surface. This makes differences in twist, length, and tension easier to notice. Yarn choice can also change vertical behavior, especially once tassels or embellishments add weight. If one strand behaves very differently from the others, investigate tension and construction early rather than trimming or forcing everything into alignment before the piece has naturally settled.
Are pearls, beads, or ghungroos appropriate for every crochet parandi?
No. These components add weight, hard surfaces, and additional attachment points. They may also catch on delicate fabrics, embroidery, jewelry, or loose hair depending on placement. Check each attachment and test how the accessory behaves with the intended outfit. Small detachable pieces may be inappropriate for young children or other wearers who could pull them loose. An all-yarn flower or tassel design is a reasonable alternative when hard embellishments are unsuitable.
How should a crochet parandi be stored and cared for?
Care depends on the yarn fiber and any mixed materials, so follow the yarn label and the original creator’s guidance rather than assuming one washing method fits every parandi. Pearls, beads, metal bells, or other embellishments may require different handling from the crochet itself. For storage, arrange the strands so they are not tightly crushed or tangled, and reshape flowers or tassels gently if needed before the next use.